
 100% Security Verified | No Subscription Required | No Malware


 ChatGPT
 Perplexity
 Gemini
 Claude
 Grok
Grok
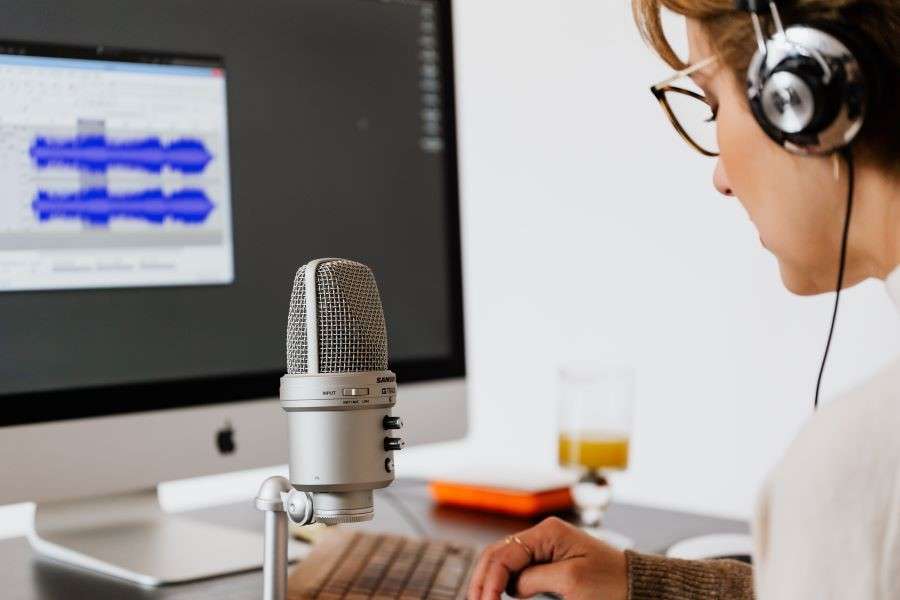
What’s the easiest way to record engaging discussions with guests or friends? If this is your query, then Discord might be your new best friend. This popular app, known for connecting communities through voice, video, and text, is perfect for capturing those spontaneous podcast moments. Next, you might get a thought in your mind: how to record a podcast on Discord. Don’t worry, we have a solution for that too.

In this guide, we will introduce how to record a podcast over Discord in the easiest and best way.
Without further delay, let’s start creating some great content!
In this article
Part 1: Why Record Podcasts Over Discord: Key Benefits of Using Discord for Podcast Recording
Before we jump to the steps, let’s take a moment to check out the key benefits that Discord offers if you record podcasts over it. Below are the benefits that justify why Discord is best for podcasters:
Real-time Interaction with Audience: With Discord’s voice and text channels, you can engage in live discussions, host Q&A sessions, or even provide behind-the-scenes glimpses. This instant interaction creates a stronger connection between you as the host and your audience.
Ability to Manage Larger Groups: Managing large groups can be tricky, but not with Discord. Its channel system ensures you can easily organize listeners or collaborators. This saves you the hassle of dealing with chaos while you’re trying to focus on content creation.
Easy Upload and Share Audio: Once you’ve recorded your awesome episode, uploading and sharing audio clips on Discord is just as easy as ABC. This makes it super simple to share interesting moments or podcast excerpts with your audience.
Remote Collaboration: Got co-hosts or guests in different locations? No problem! Discord allows perfect collaboration, so you can record together regardless of where everyone is. This flexibility is perfect for today’s remote podcasting world.
With these fantastic benefits in mind, you are all ready to record a podcast over Discord. Let’s move to the steps now.
Part 2: How to Record Podcast with Discord: Easy Steps
So, let’s start recording a podcast with Discord now, with the below easy steps:
First, you need to launch Discord. Locate the Discord icon on your desktop and give it a click. If you prefer, you can also access Discord directly through your web browser.

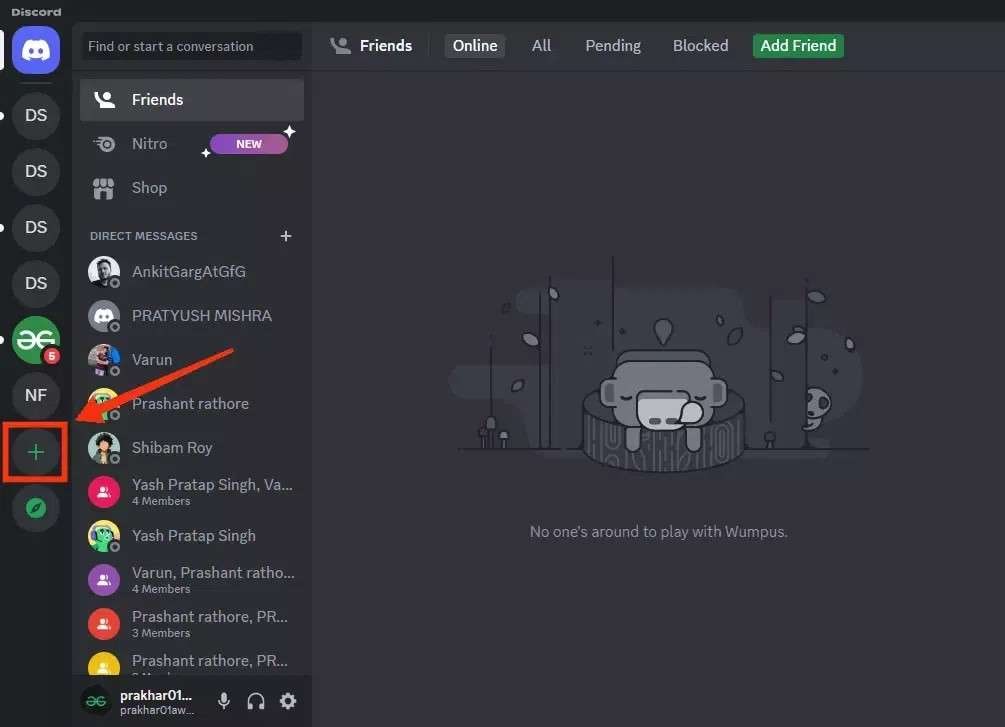
Find the “+” Icon at the bottom of your server list and click it.
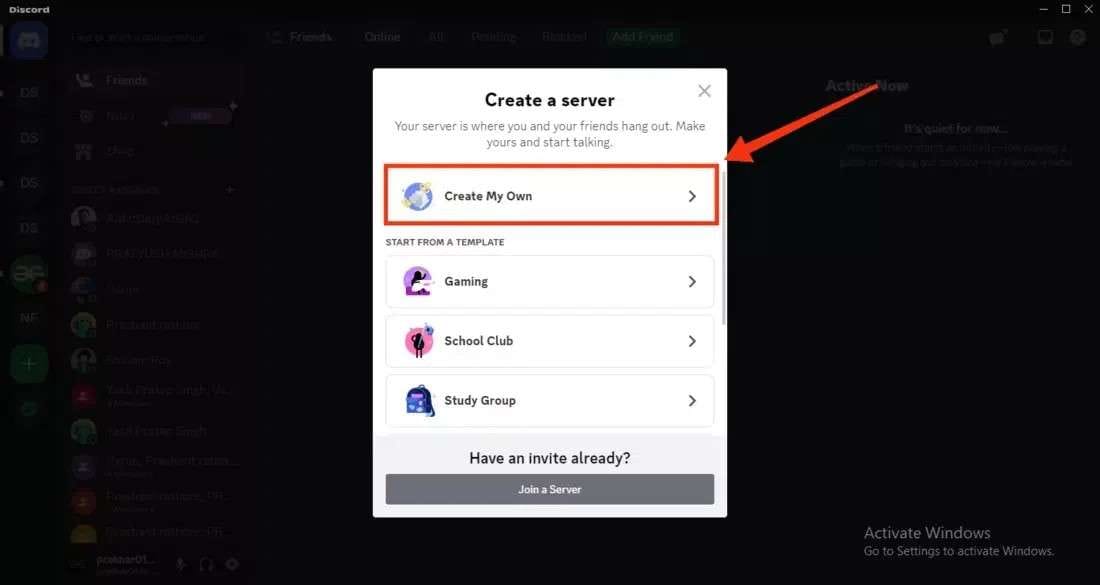
Choose “Create My Own” to start building your podcast server.
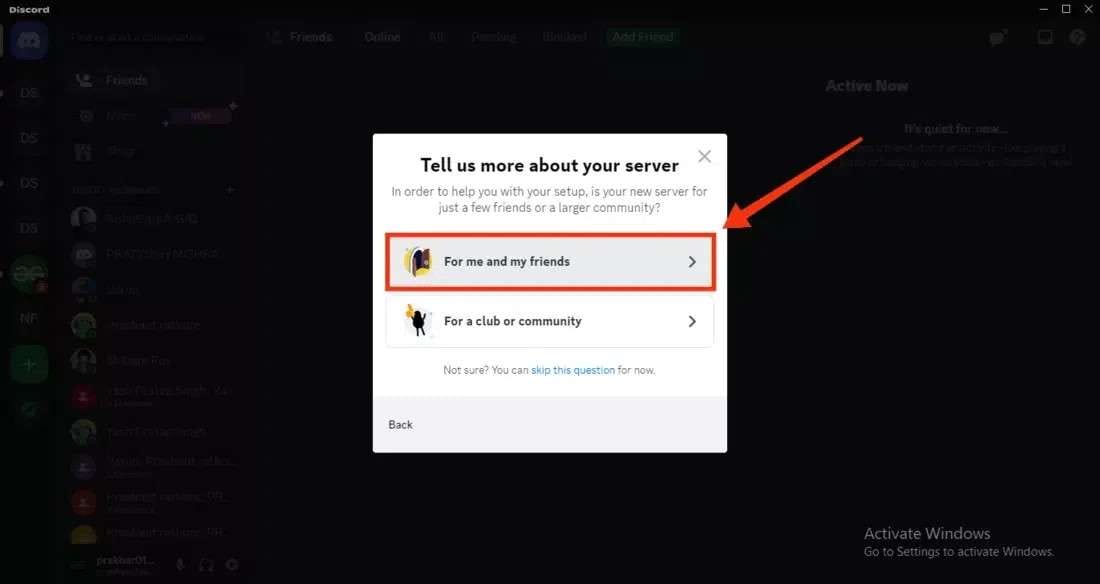
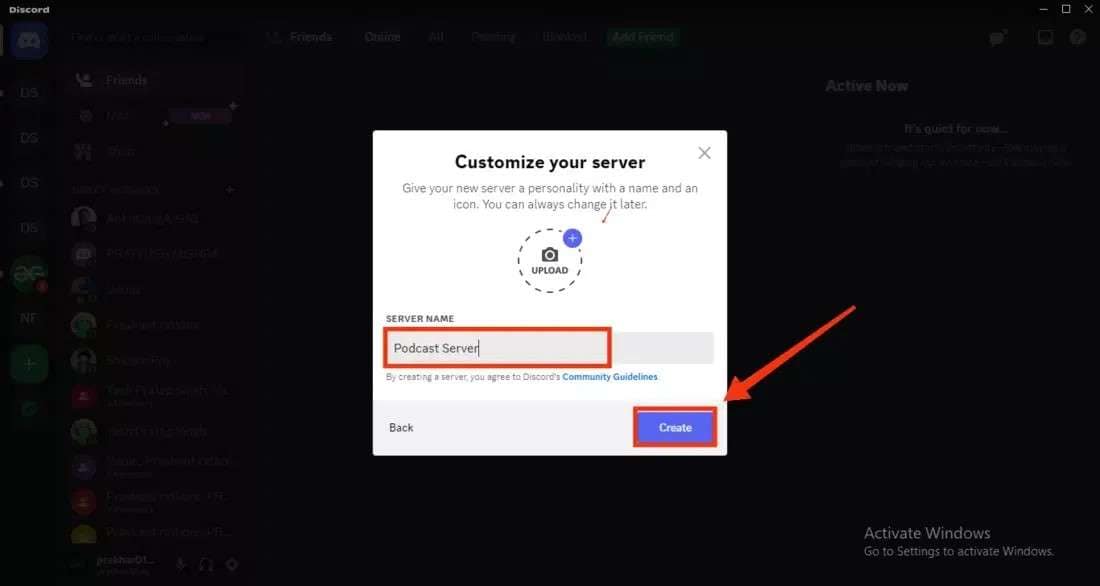
Pick “Me and My Friends” from the available options.
Name your server something catchy and click the "Create" button to finalize it.
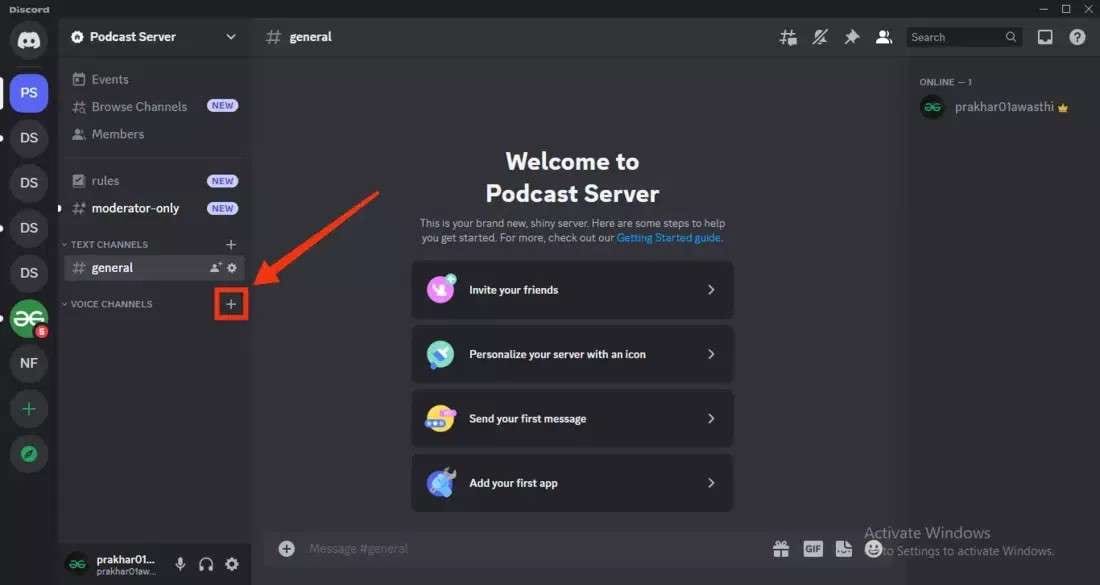
Now, you need to create a voice-stage channel for your main discussions. For that, click on the "+" icon that is next to the “Voice Channel” heading.
Choose “Stage” as your channel type.
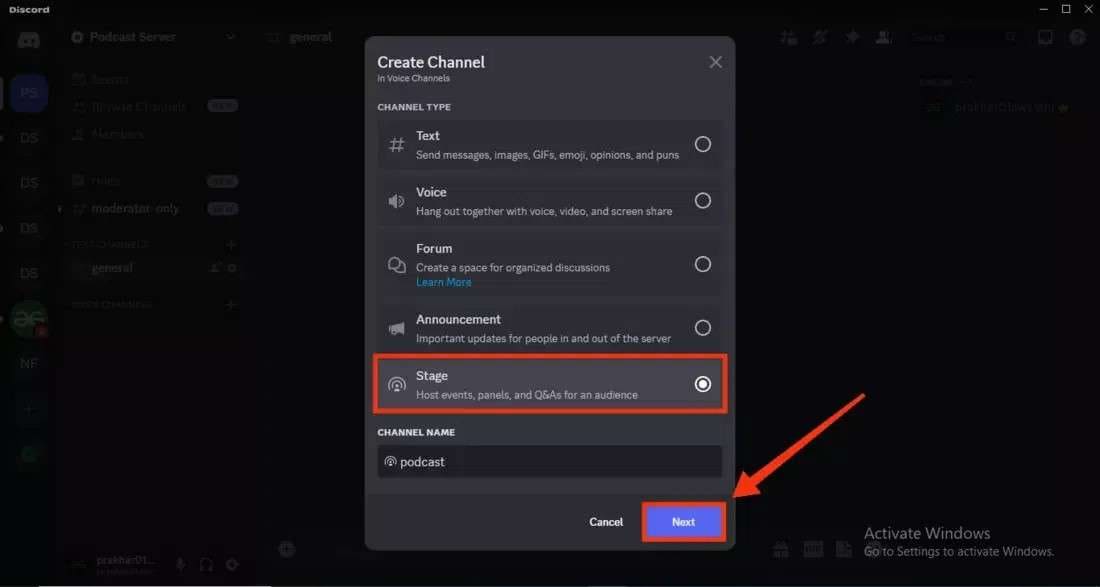
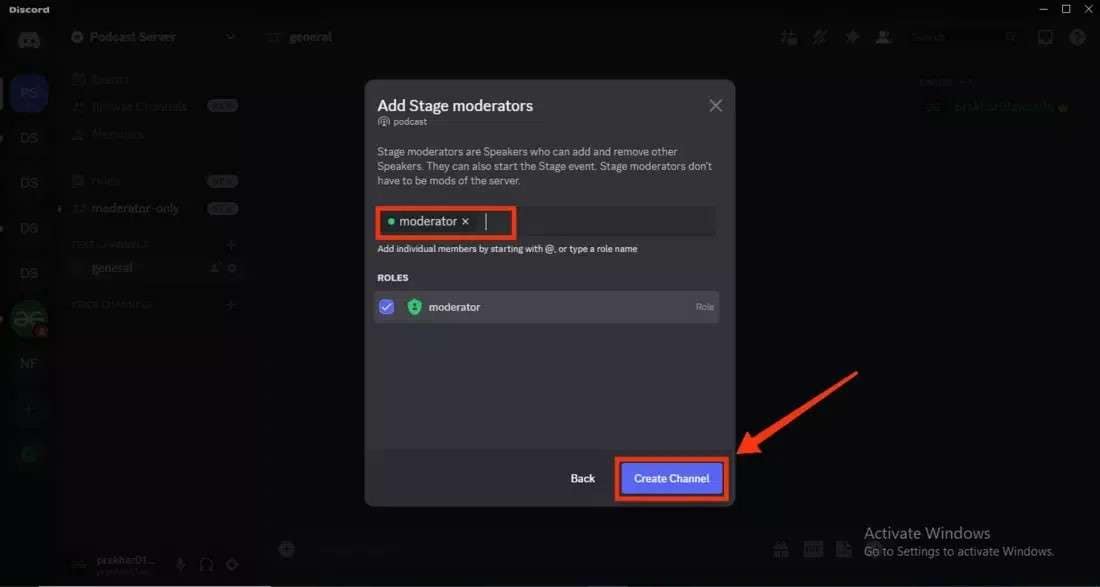
Give your channel a creative name and click “Create.”
No podcast is complete without an audience! It's time to invite your friends and listeners. For that, click the "Invite" button after setting up your stage voice channel.
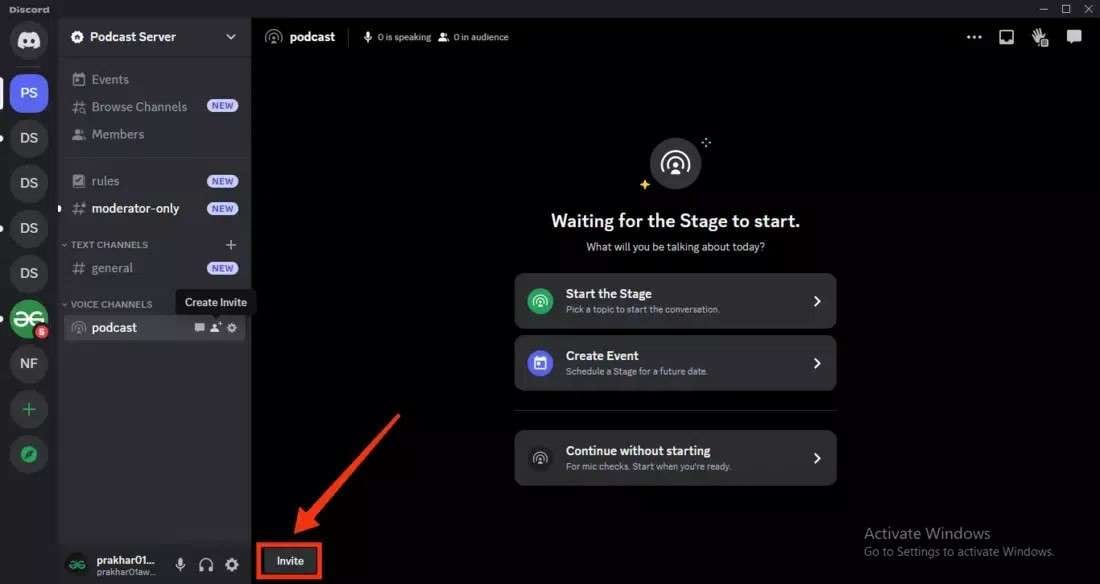
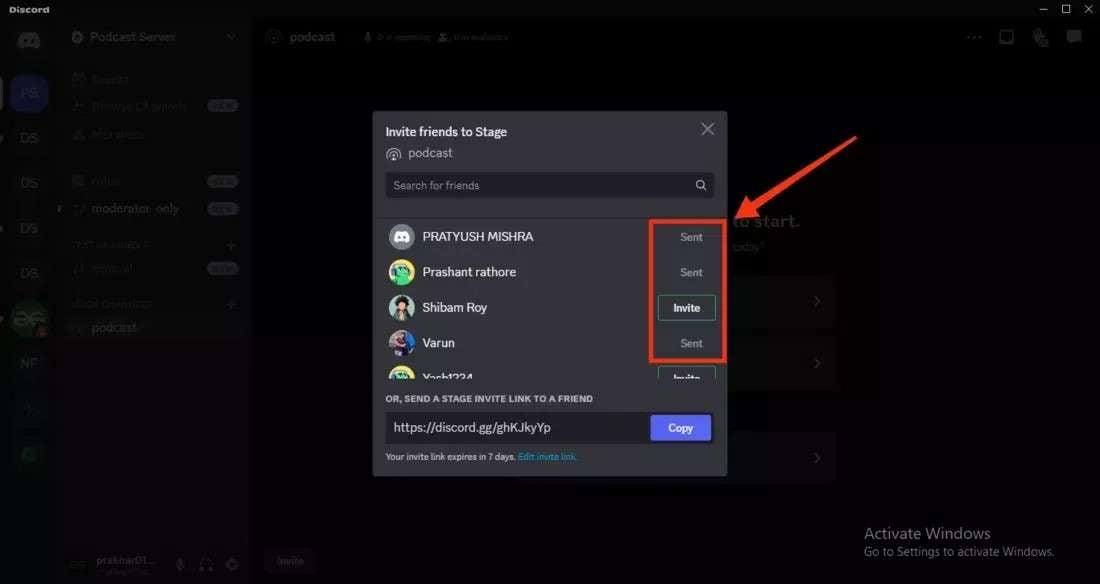
Choose whom you want to join and click "Invite" next to their names.
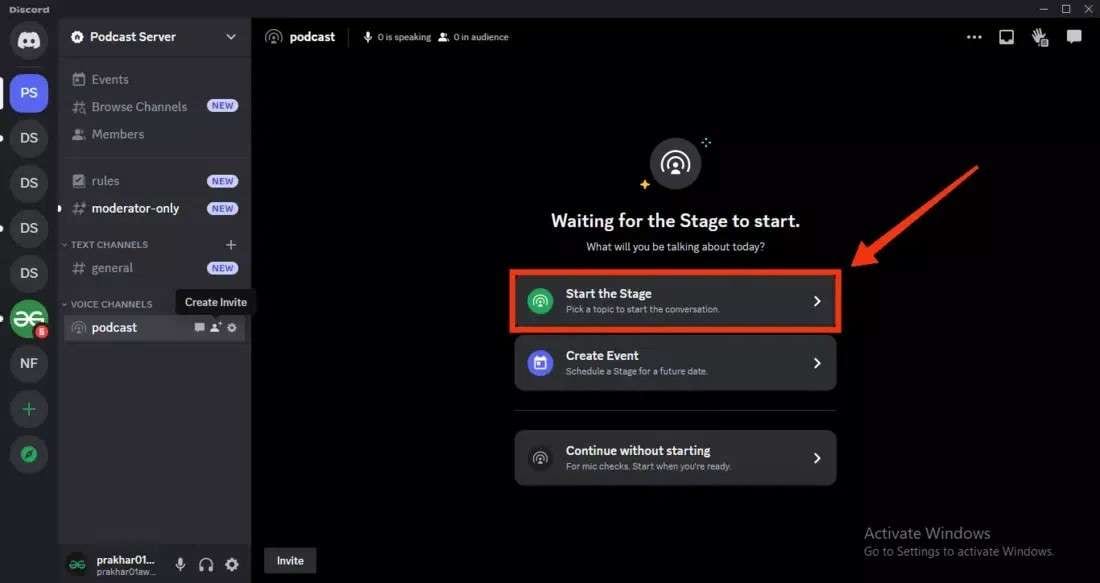
You’re ready to begin. Click the “Start the Stage” button to start your podcast.
When you complete recording your first podcast with Discord, it's required to polish your audio, remove awkward pauses, and improve overall sound quality for a better listener experience. But how to do so? Let’s see in the next part!
Part 3: Edit and Publish Your Podcasts Like a Pro using Wondershare Filmora
Do you know how professional podcasters make their episodes sound so smooth and captivating? Tools like Wondershare Filmora spells the magic here. It is a perfect video and audio editing tool that can turn your raw footage into something really amazing.

 secure download

Filmora has wonderful key features that will make your podcasts engaging. Some of them are:
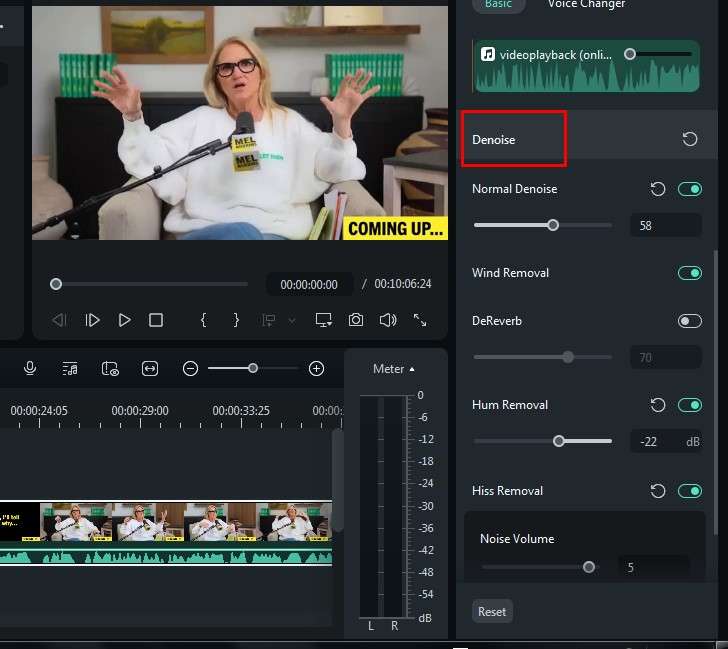
AI Audio Denoise: What if you have recorded the interview but the background noise is ruining the whole vibe? To get rid of such situations, the AI Audio Denoise feature works well by ensuring your audience hears only what matters—your amazing content.
Audio Ducking: The Audio Ducking feature of Filmora automatically lowers the volume of the music when you’re speaking and brings it back up during pauses. This keeps your audience focused on your words while still maintaining that engaging soundtrack. It’s like having a personal audio assistant.
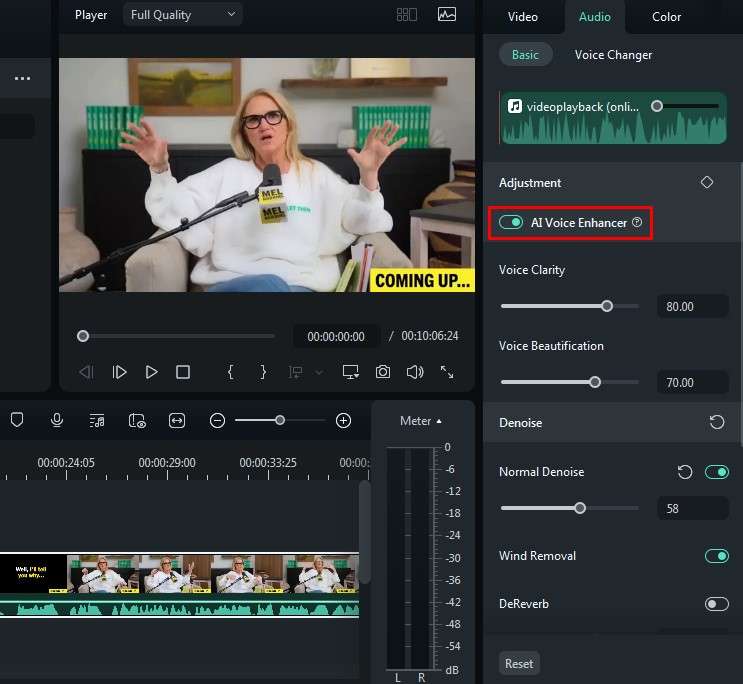
AI Voice Enhancer: This amazing feature of Filmora analyzes your vocal tracks and makes adjustments to enhance clarity and warmth.
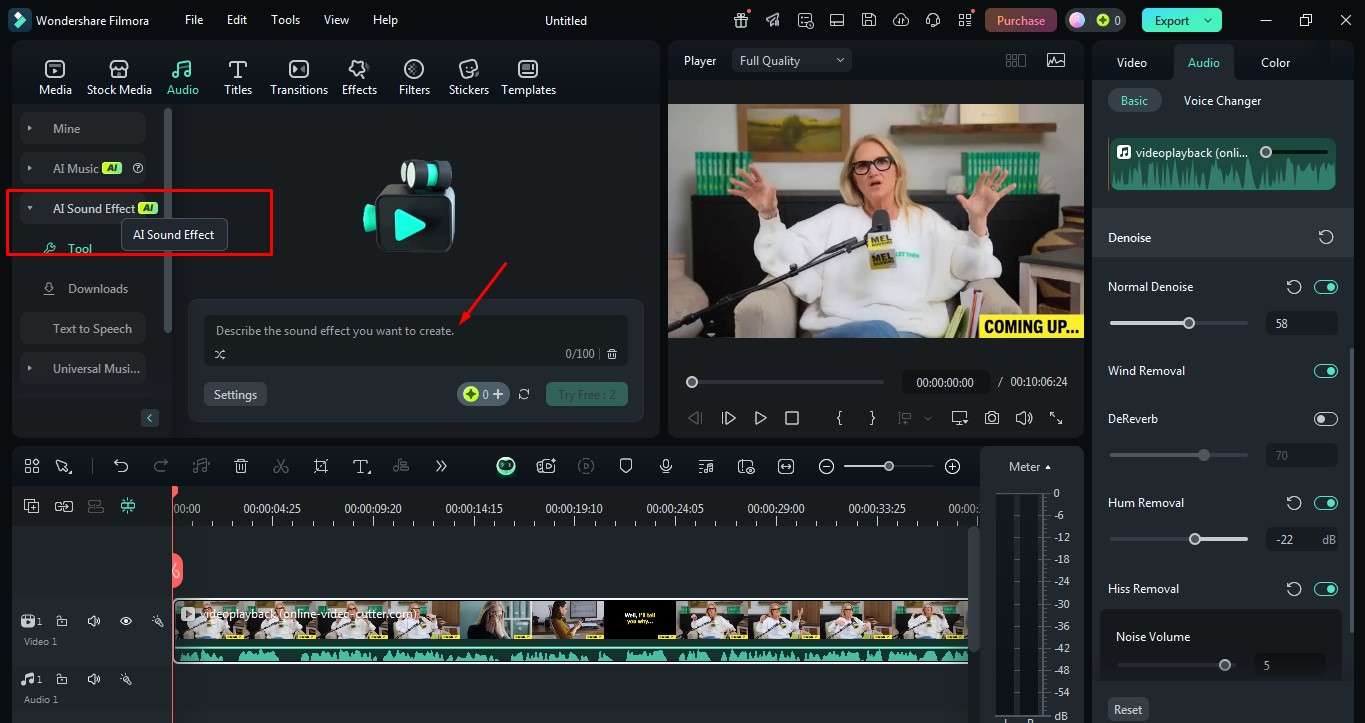
AI sound Effects: Want to add a fun background sound to punctuate a joke? Or maybe an atmospheric sound to match the mood of your topic? With the AI sound Effects generator, you can do this with just a few clicks.
Edit Your Podcast Using Wondershare Filmora:
secure download
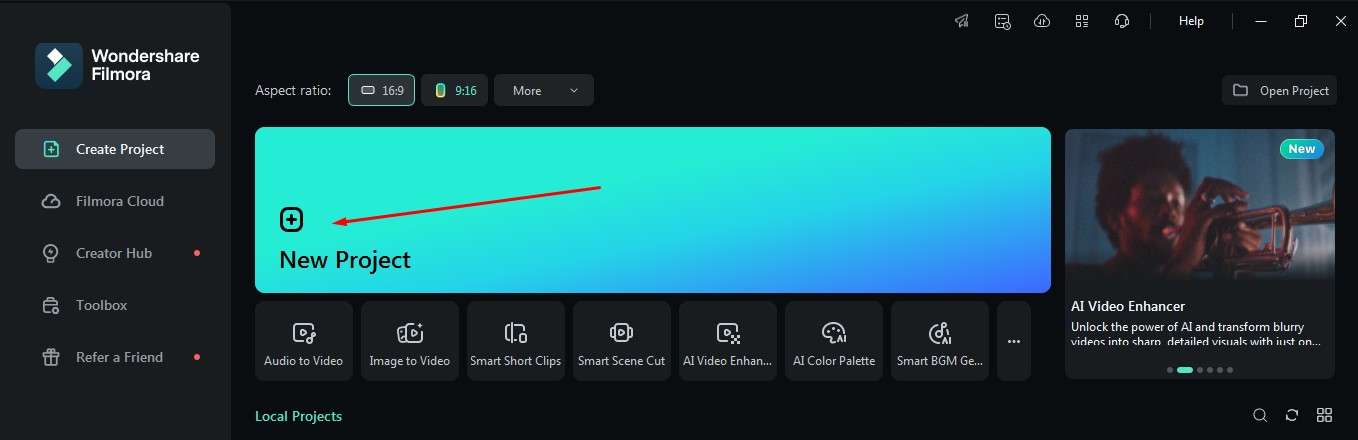
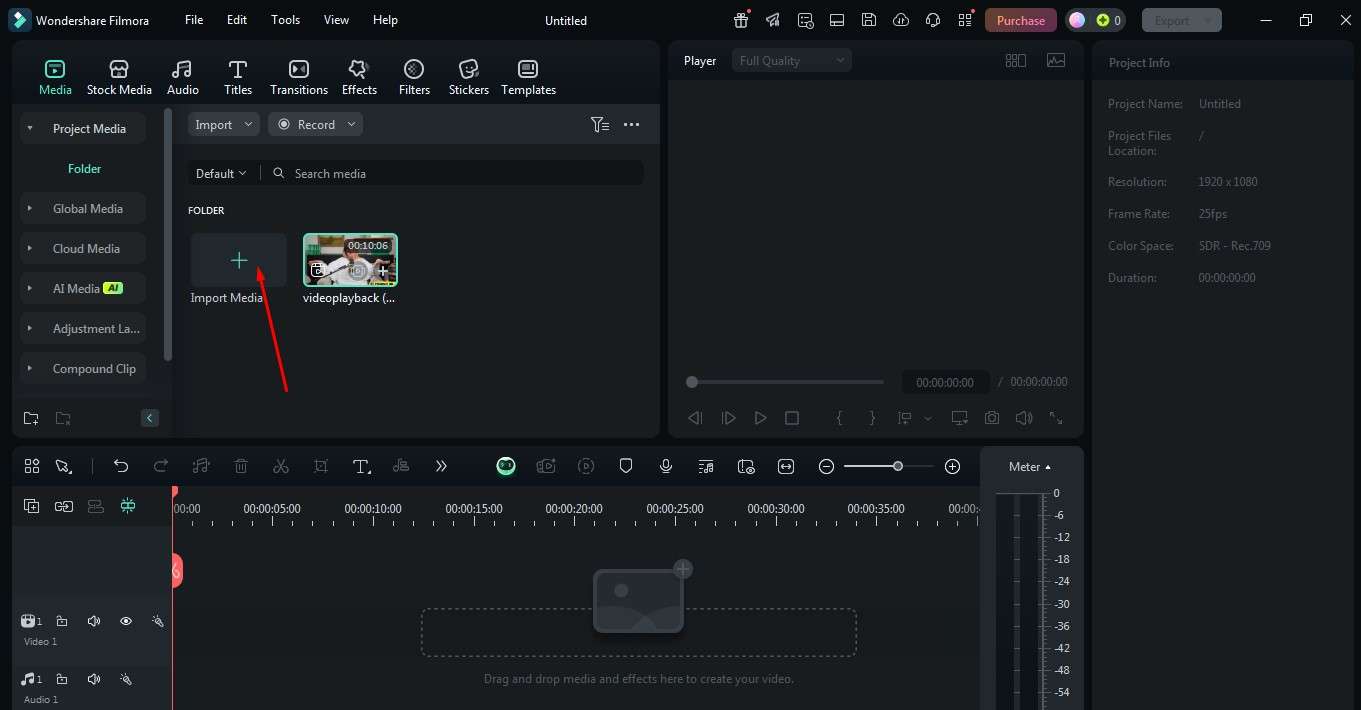
Step 1: First of all, launch Wondershare Filmora and you will see the New Project option on the homepage. Tap on it to start a new project.
Step 2: To bring your podcast recording into the software, click Import.
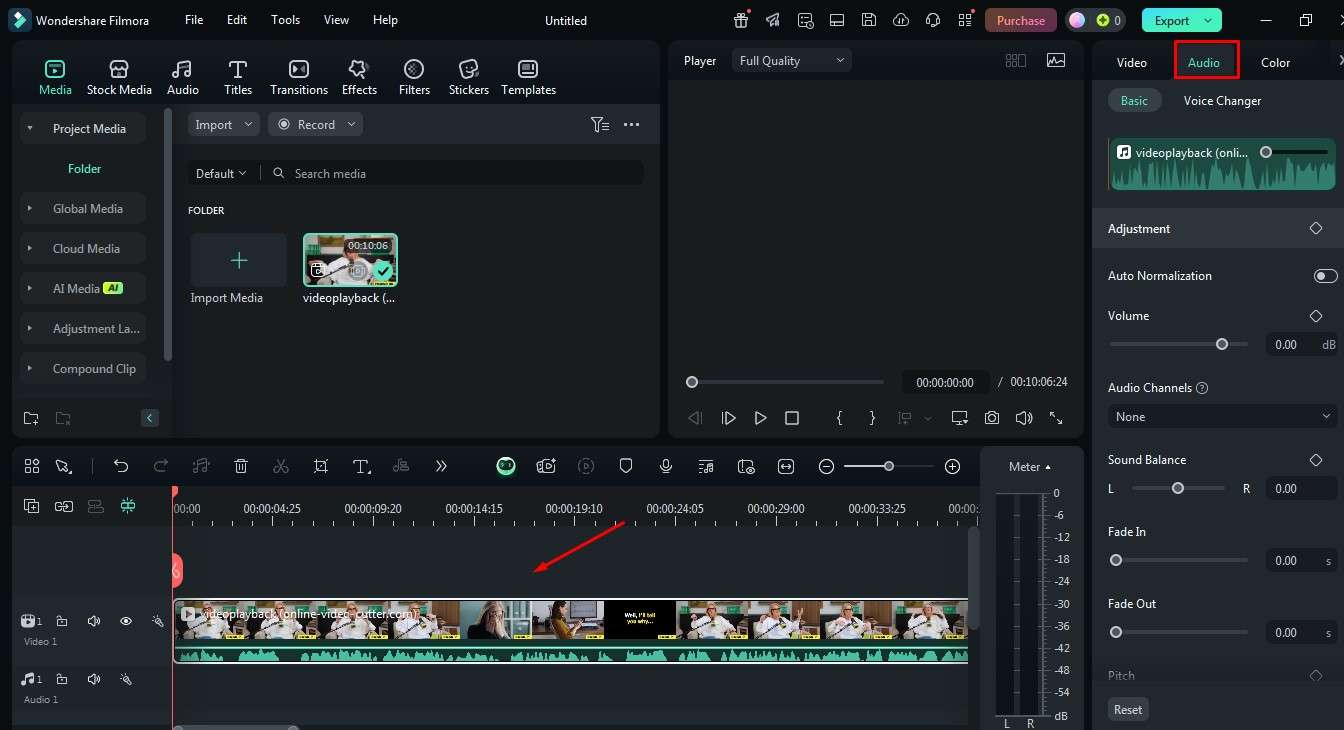
Step 3: Drag your audio or video file onto the timeline. Now, select the audio clip and head up to the Audio tab.
Step 4: Scroll to the Denoise section—this is where the magic happens. Toggle on Normal Denoise and change the settings for wind noise, reverb, and hiss removal.
Step 5: Still in the Audio tab, activate the AI Voice Enhancer. Adjust the vocal clarity, richness, and beauty settings. Your voice will sound studio-quality.
Step 6: Now, head to the Audio section in the top left corner. Here you will see the AI sound effect feature. Tap on it to generate your desired sound effect by typing in the box. After generating, drag and drop these effects onto specific sections of your audio track.
Step 7: Use fade-in/fade-out effects for smooth transitions between clips. Your audience will love the perfect flow.

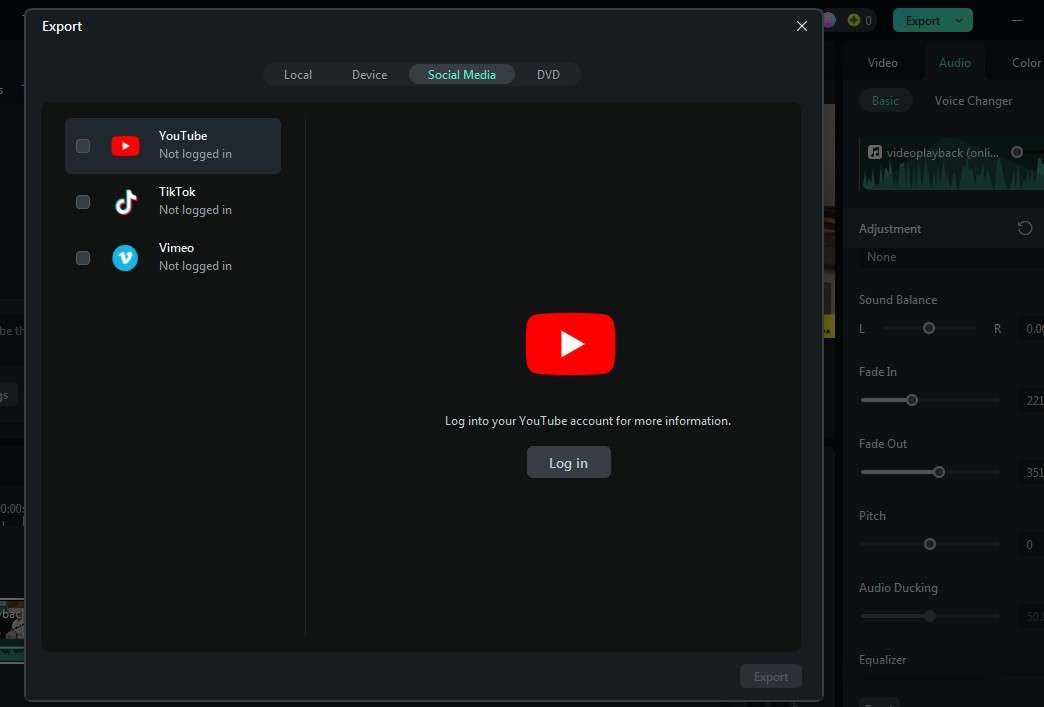
Step 8: Preview your edited podcast and make sure everything sounds perfect. When you’re happy, click Export. Choose your file format and save it offline, or upload it directly to platforms like YouTube or Vimeo. Finally, you did it!
By following the above steps, you will easily edit your podcast audio without any hassle. So, why delay? Start recording podcasts over Discord and edit them on Filmora for polished and professional results.
Conclusion
Now that you have all the steps to record your podcast over Discord and edit it like a pro, you’re ready to shine! Remember, Discord makes it easy to connect and collaborate, while Wondershare Filmora ensures your audio sounds fantastic. Don't overlook the power of AI features to enhance your voice and clean up background noise.
Whether you're chatting with friends or interviewing guests, you’re equipped to create engaging content. So, fire up Discord, bring your ideas to life, and let Filmora polish your audio. Your listeners are waiting—let's impress them with your podcasting skills!
