Vlog editing can be as exciting as recording your footage. You only need advanced software to polish your content and help you tell a captivating story. The key is to ensure it streamlines the process instead of making you jump through hoops to navigate the interface.
Here's one vlog video editing software that ticks all the boxes (according to your fellow vloggers and other industry experts). Whether you're a seasoned vlogger or a beginner in this thrilling sphere, its features will undoubtedly exceed your expectations.
Table of Content
The Best Vlog Editing Software: Wondershare Filmora
Wondershare Filmora is an AI-based video editor for novices and professionals across industries. It's perfect for vloggers because of its abundant features for spicing up videos, including transcribing and translating them. It also lets you edit images and audio materials and enrich your content with a treasure trove of creative assets.
It's available for both PC and mobile phones, allowing you to edit a vlog at your convenience.
Filmora is intuitive, making vlog editing a walk in the park. Besides revolutionary AI, it has dozens of standard and advanced tools for turning videos into share-worthy vlogs and making your audience fall in love with them. Here's how it can help you achieve that.
How Filmora Helps Bring Out the Best in Your Vlogs
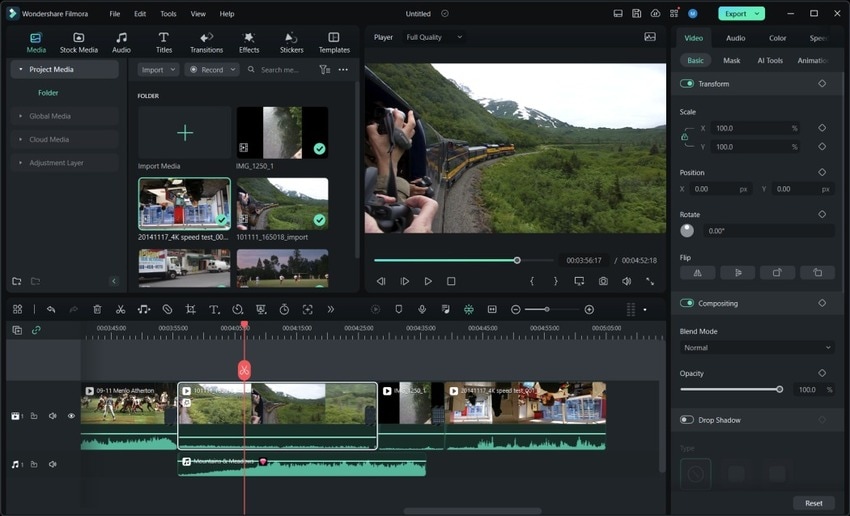
These are only some features that make Filmora the best editing software for vlogging professionals:
- A drag-and-drop interface - import media, add elements, and adjust applied effects and tracks by dragging and dropping them onto the timeline;
- Non-destructive editing - add an adjustment layer (and save it as a preset) for multi-track editing without affecting the original footage;
- Vlog templates - use a preset design, replace the stock footage, and customize the tracks and elements;
- Comprehensive vlog editing tools - start with standard editing (e.g., trimming, splitting, cropping, panning, zooming, rotating, flipping, repositioning, and scaling) before leveraging speed ramping, keyframing, and overlay effects;
- Audio editing - adjust the audio (e.g., detach, mute, trim, and normalize it), change the pitch and volume, add fade-ins and fade-outs, and use audio ducking;
- AI-powered features - create vlogs from text prompts, interpolate frames, generate scenes, music, captions, and subtitles, leverage text-based editing, use motion tracking, stretch and denoise the audio, remove silent fragments, clone or change your voice, and match music to your vlog;
- Creative assets - browse a library of 2.9M+ animated titles, transitions, filters, LUTs, dynamic stickers, background music (including music from Universal Music for Creator), sound effects, and other elements.
Are you ready to experiment with these features and create an attention-grabbing vlog? Let's dive into vlog editing with Filmora.
How to Edit a Vlog in Filmora
You can edit a vlog in Filmora using two methods. We'll walk you through both to help you master the software.
Create a Vlog Using a Template
Templates in Filmora are handy because they already have all the elements for an eye-catching vlog. You only need to customize them and replace the stock footage. They come in various styles, including vlogging, fashion & beauty, unboxing, sports & fitness, etc. Here are some examples of vlog templates. To explore more, download and install this vlog video editor.
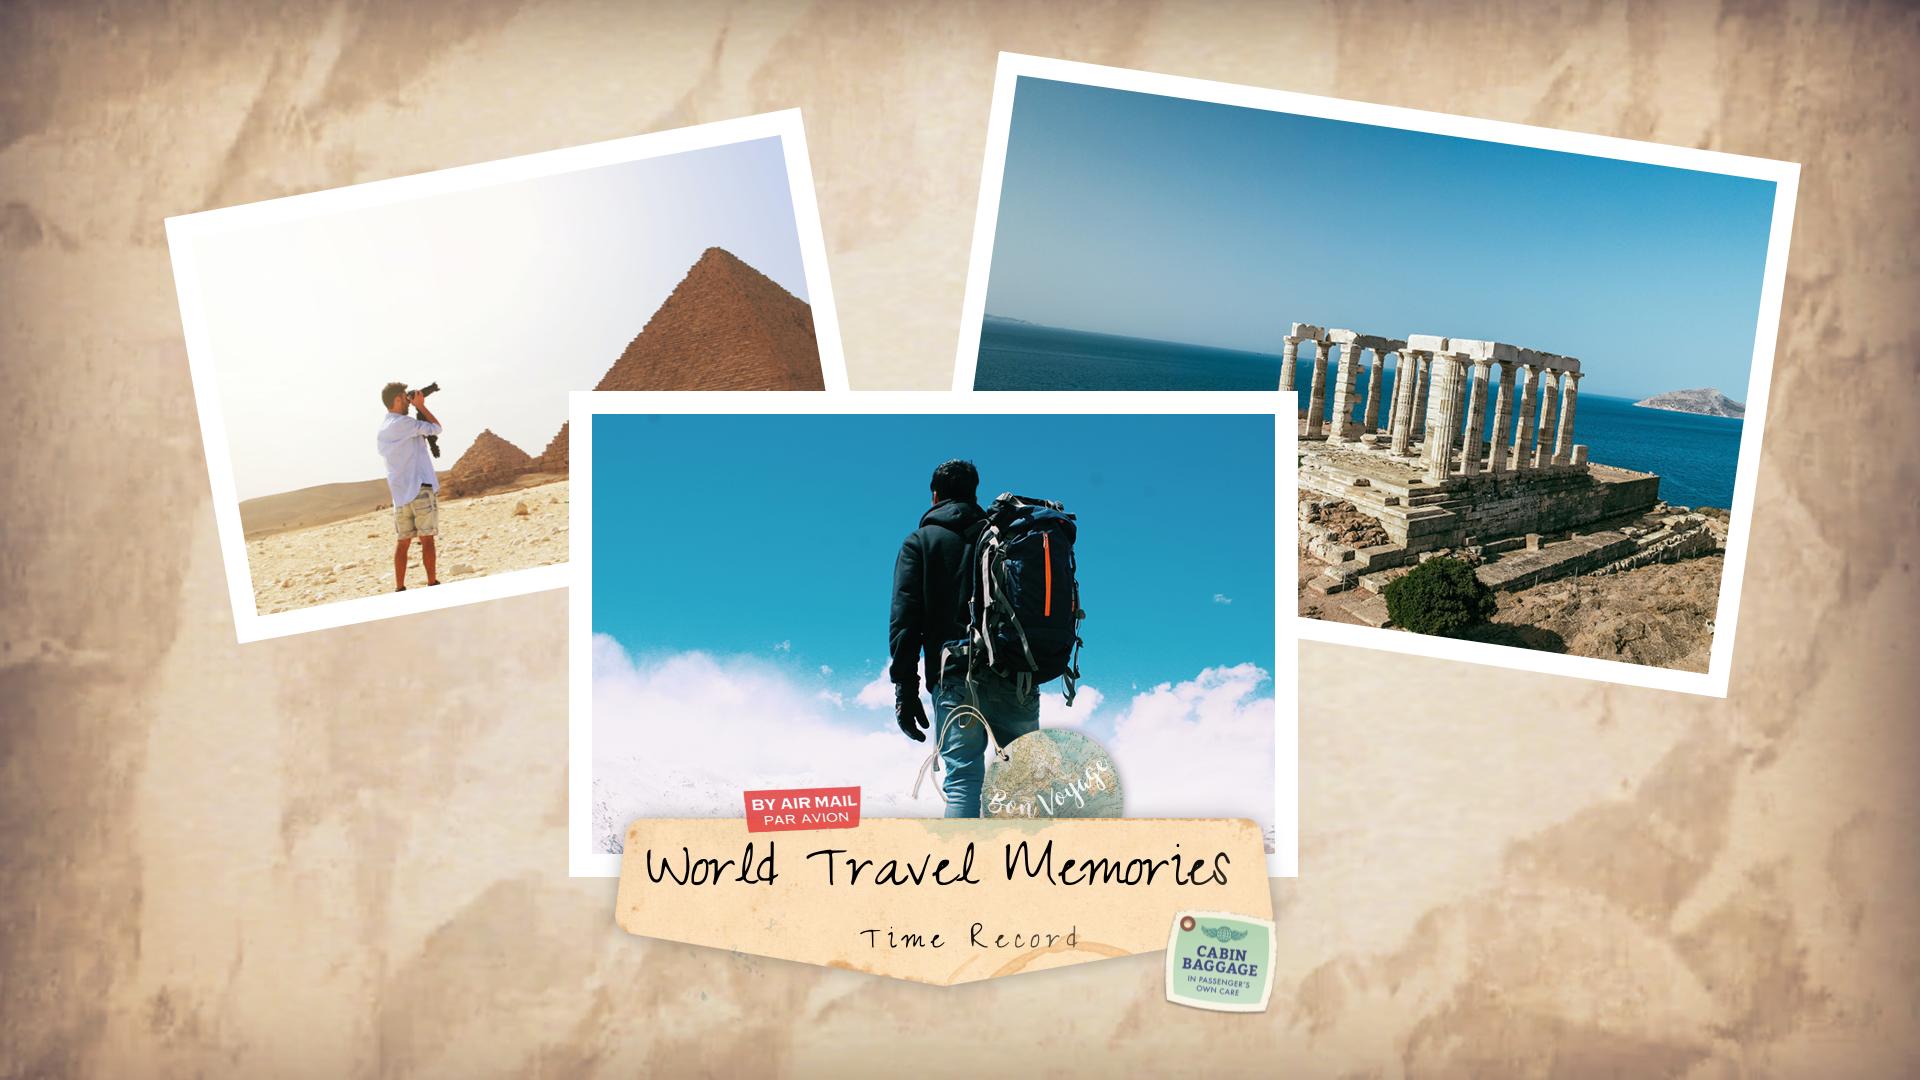
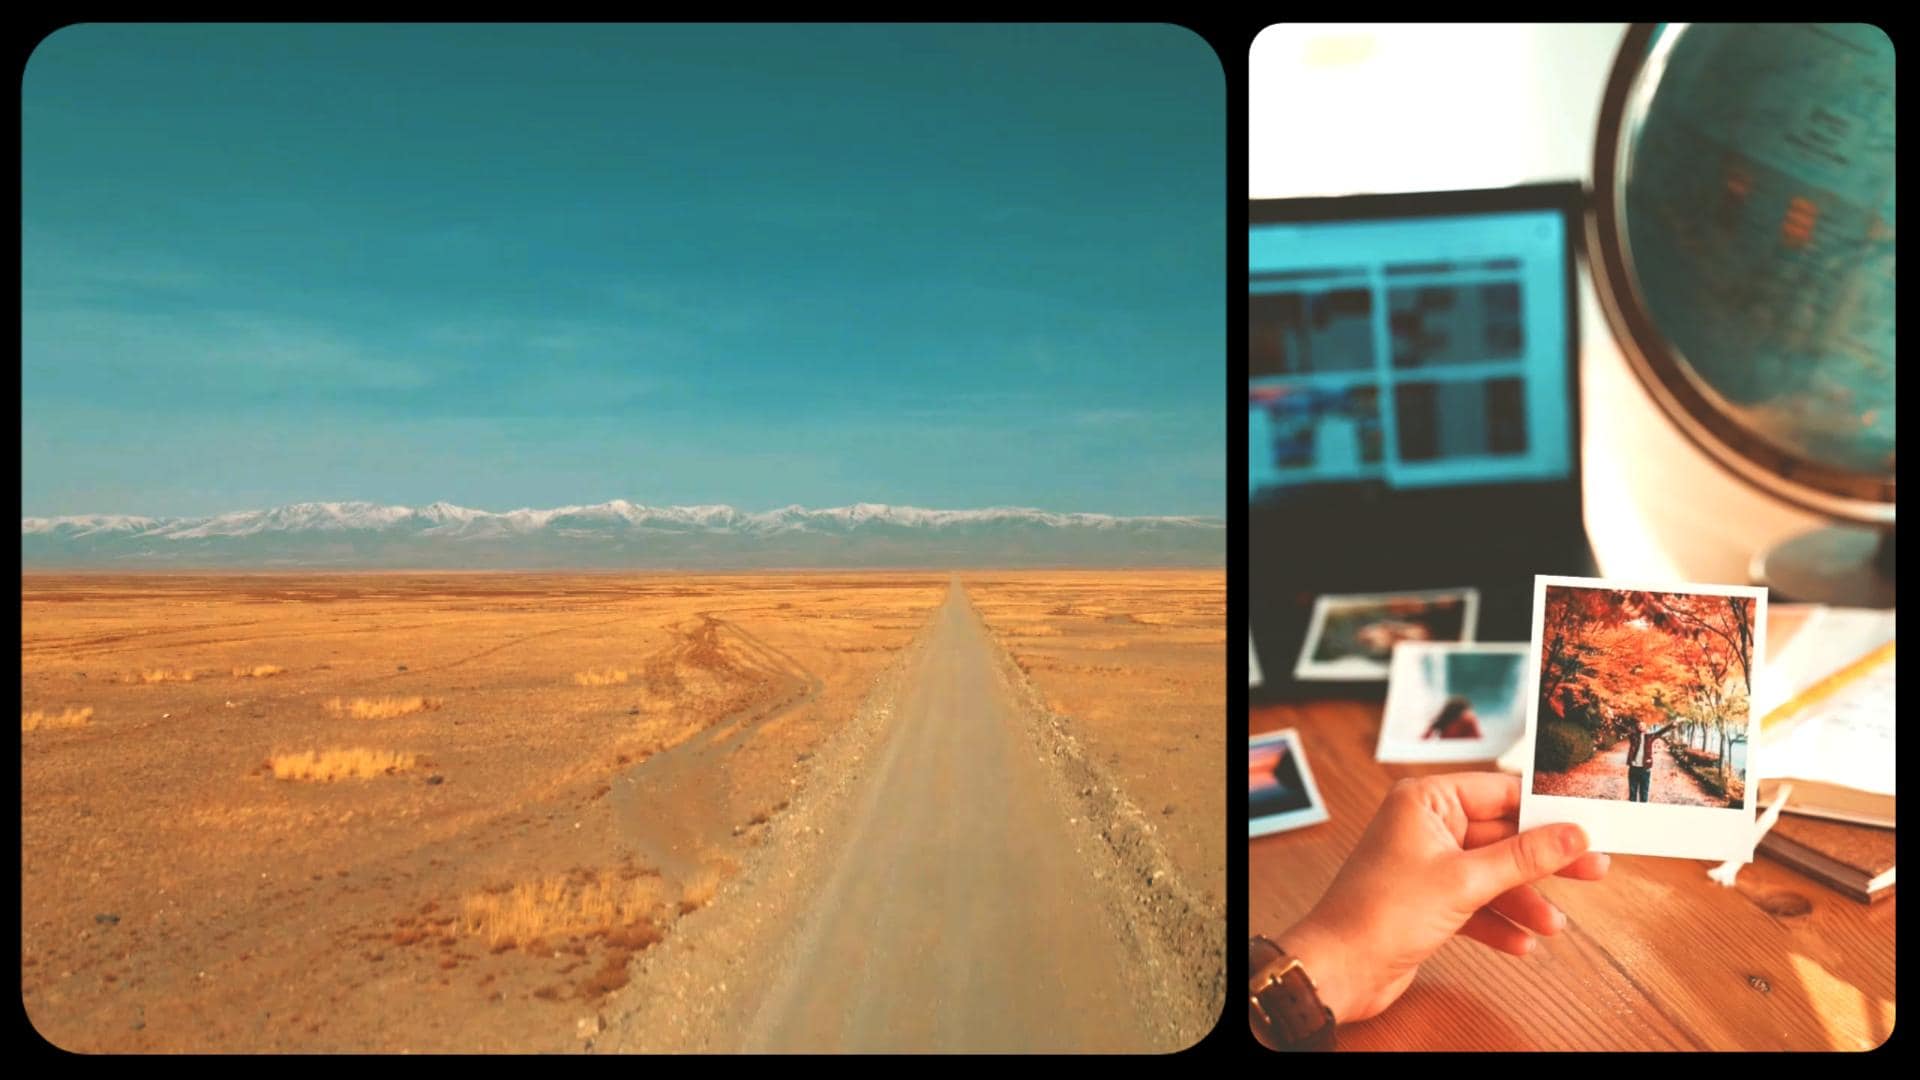
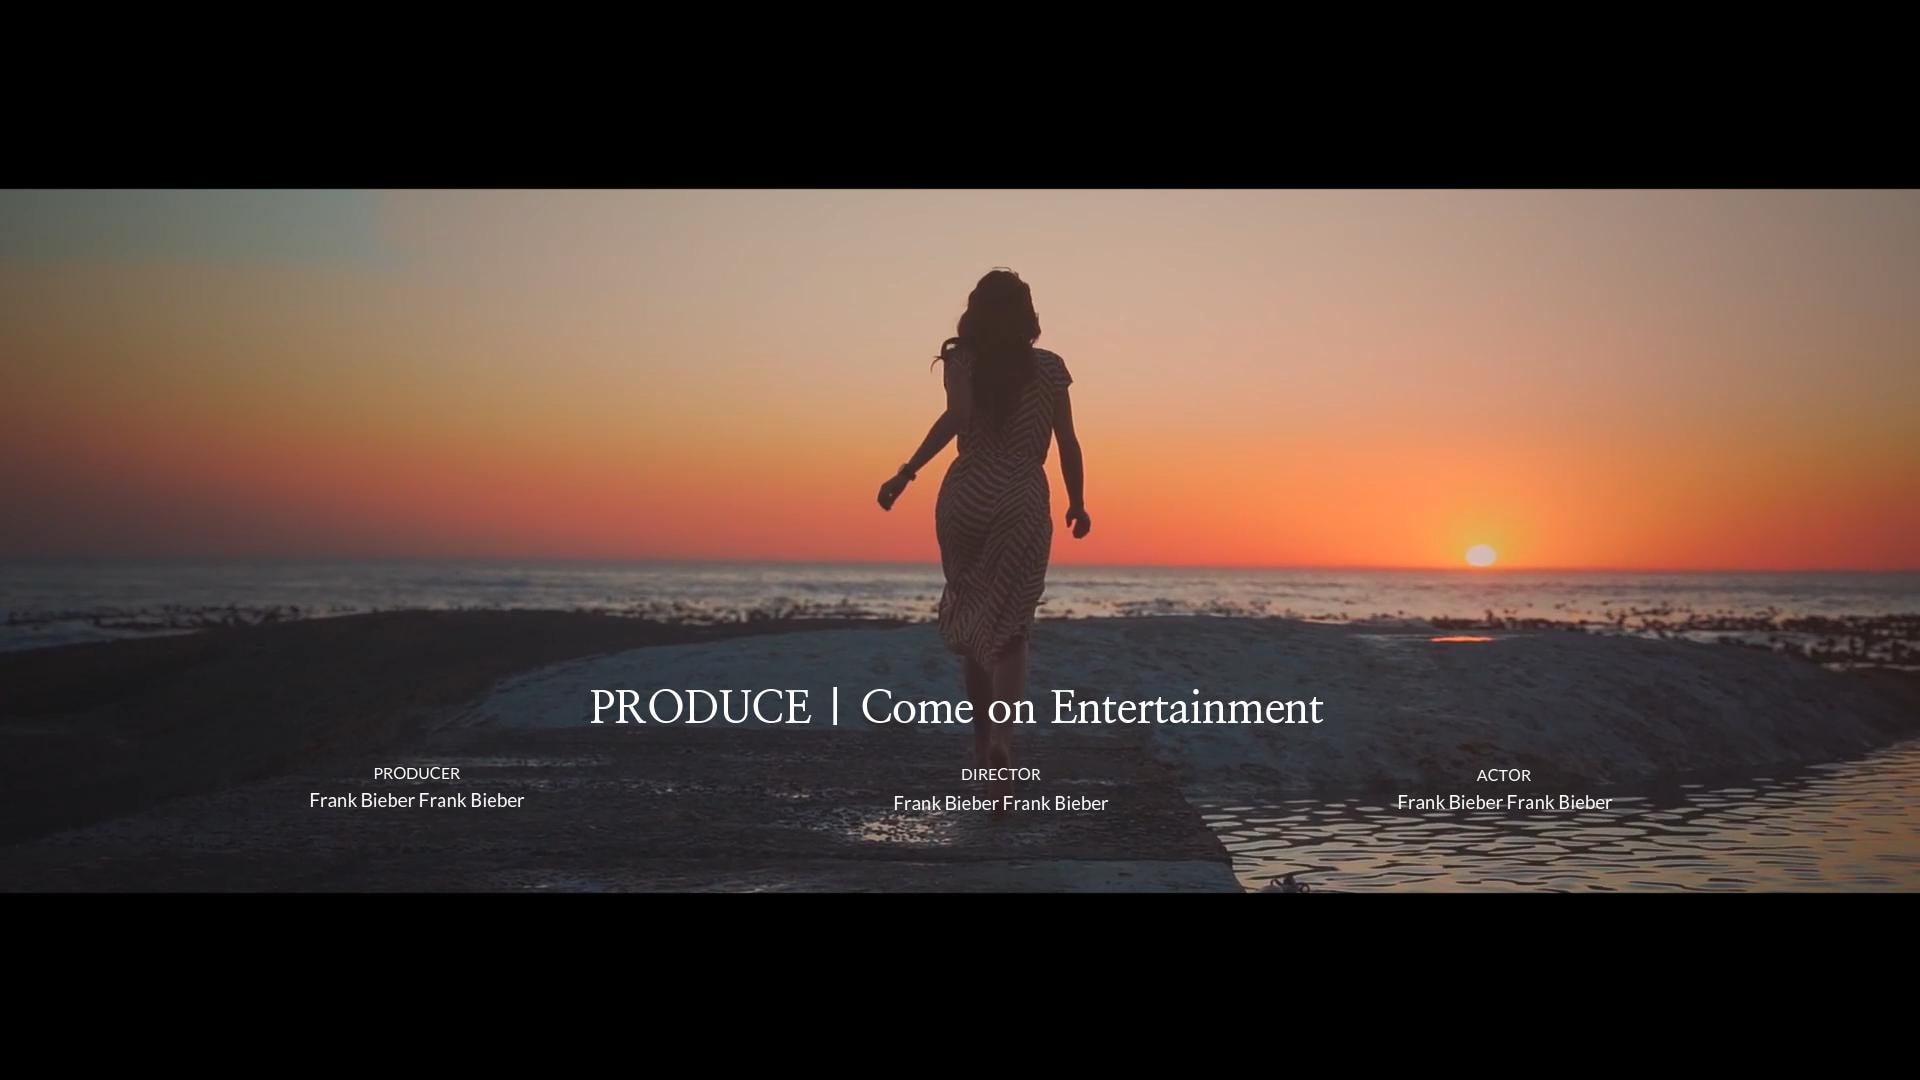
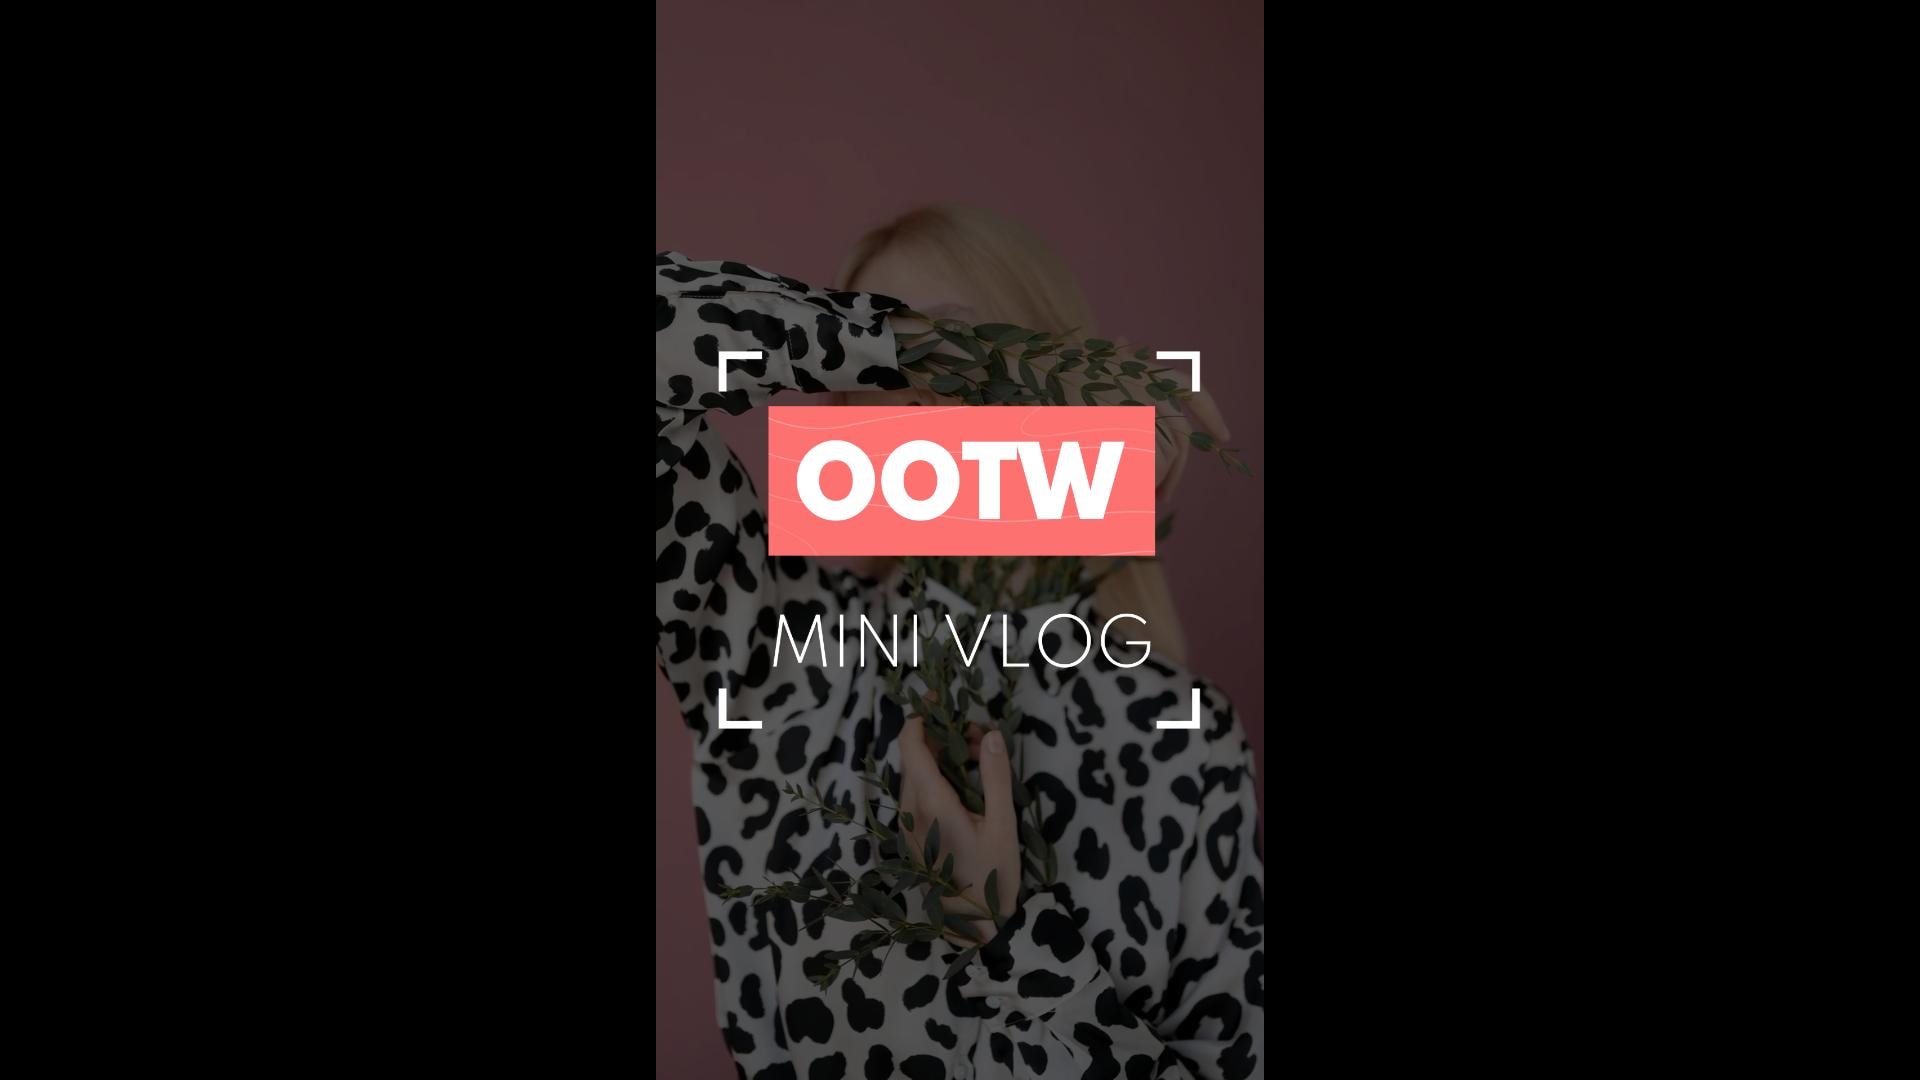
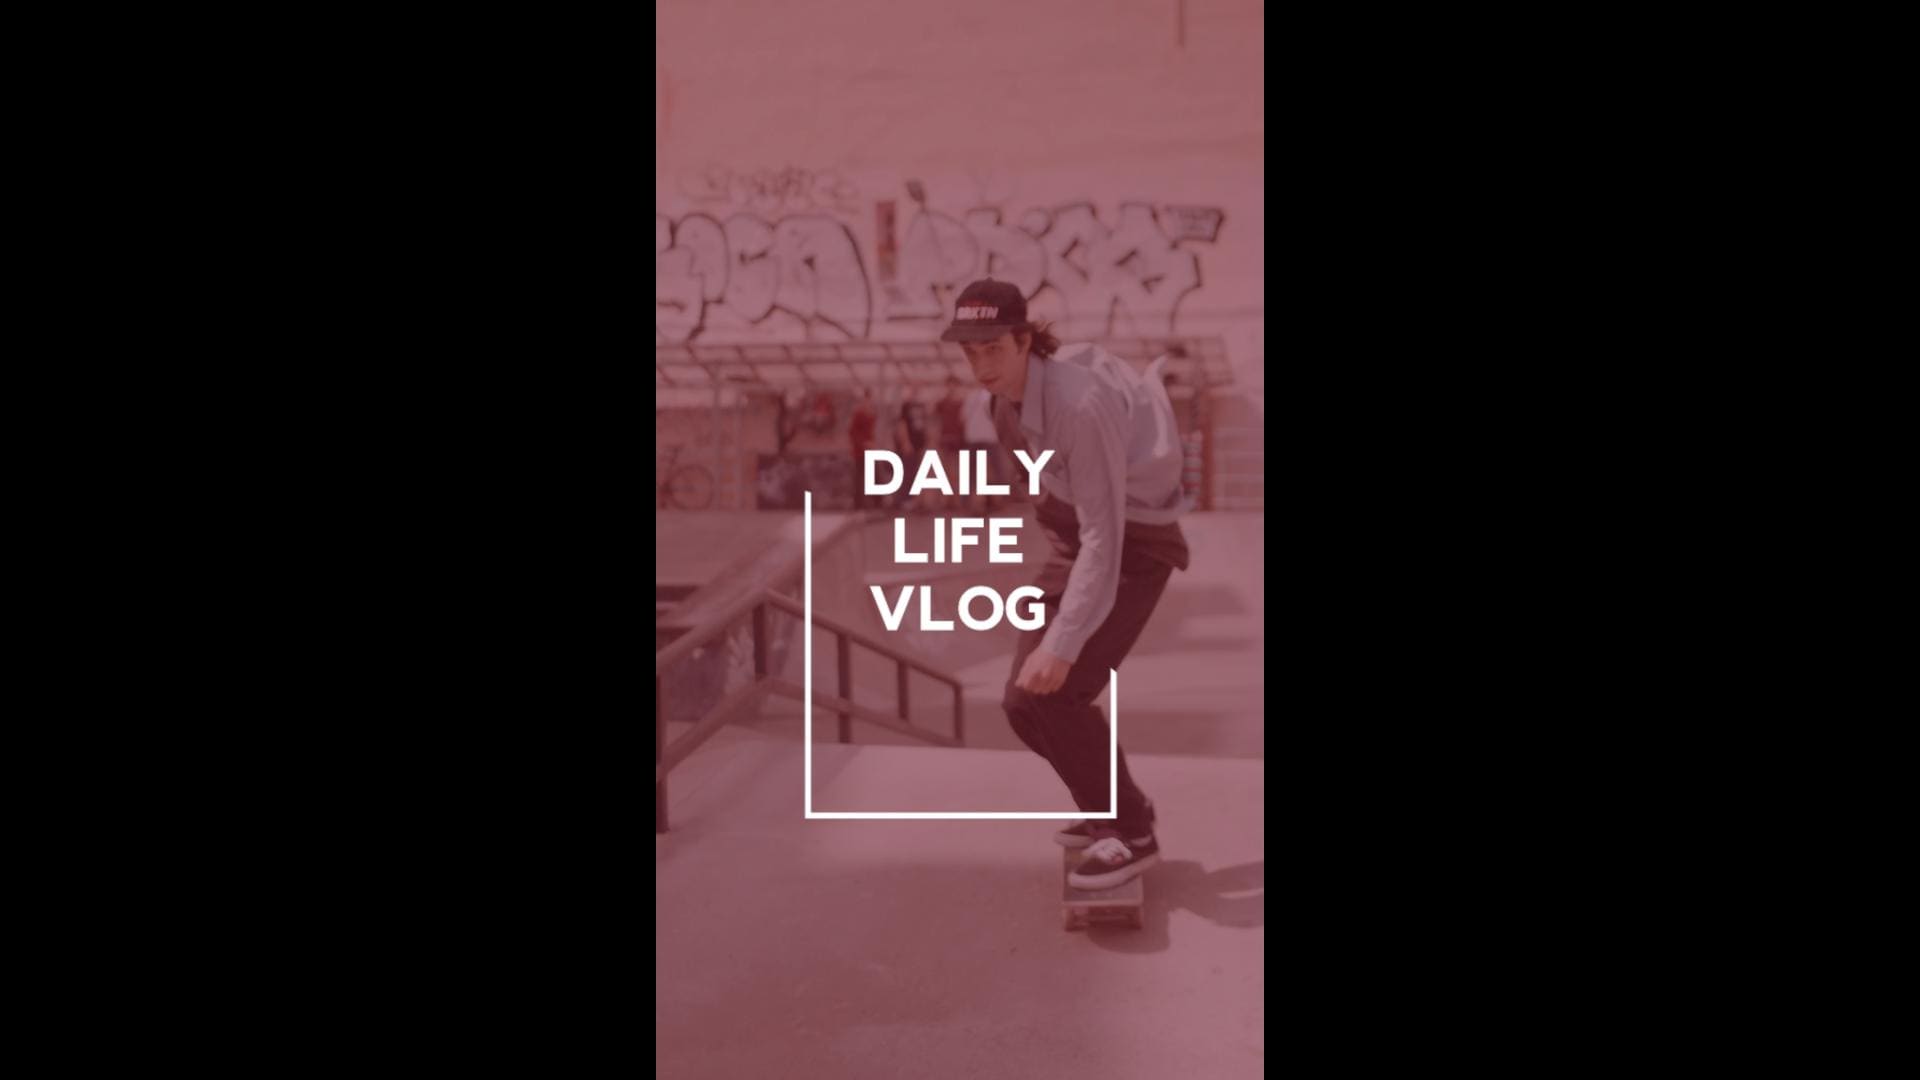


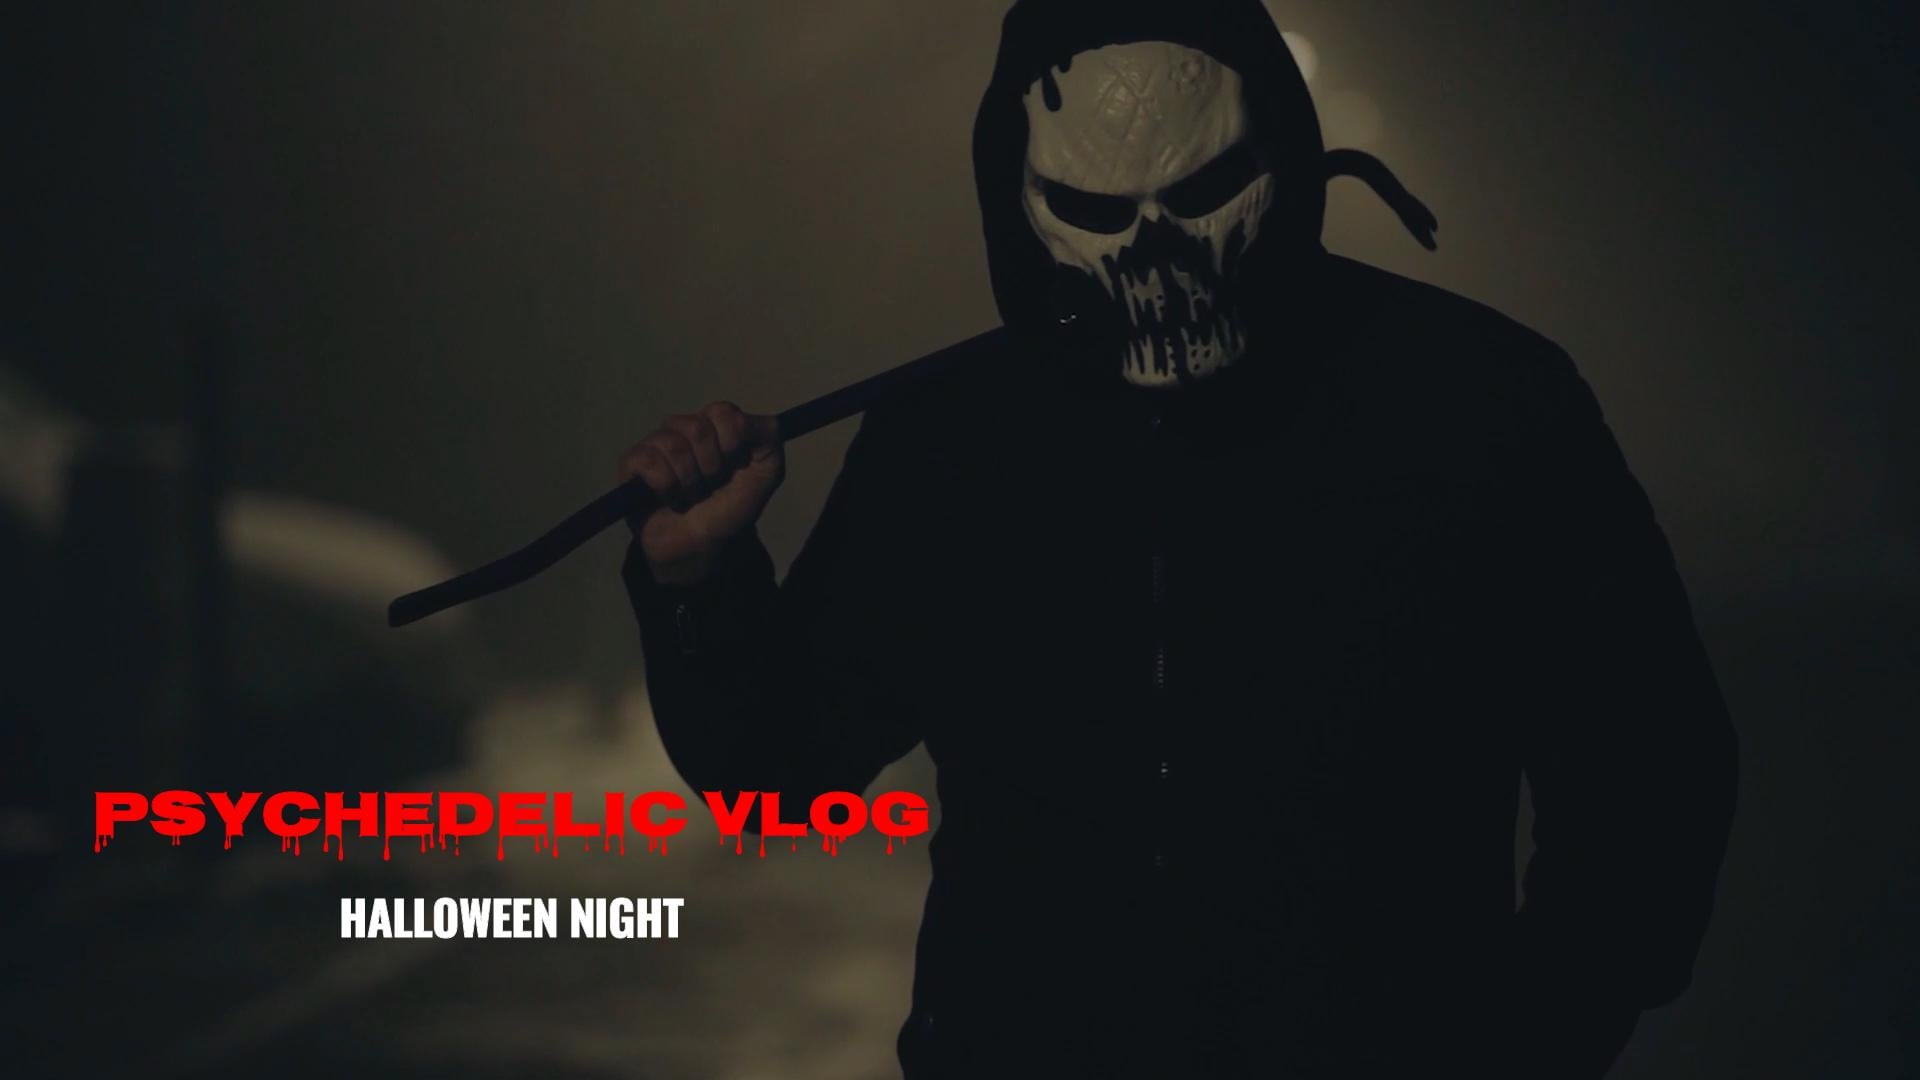
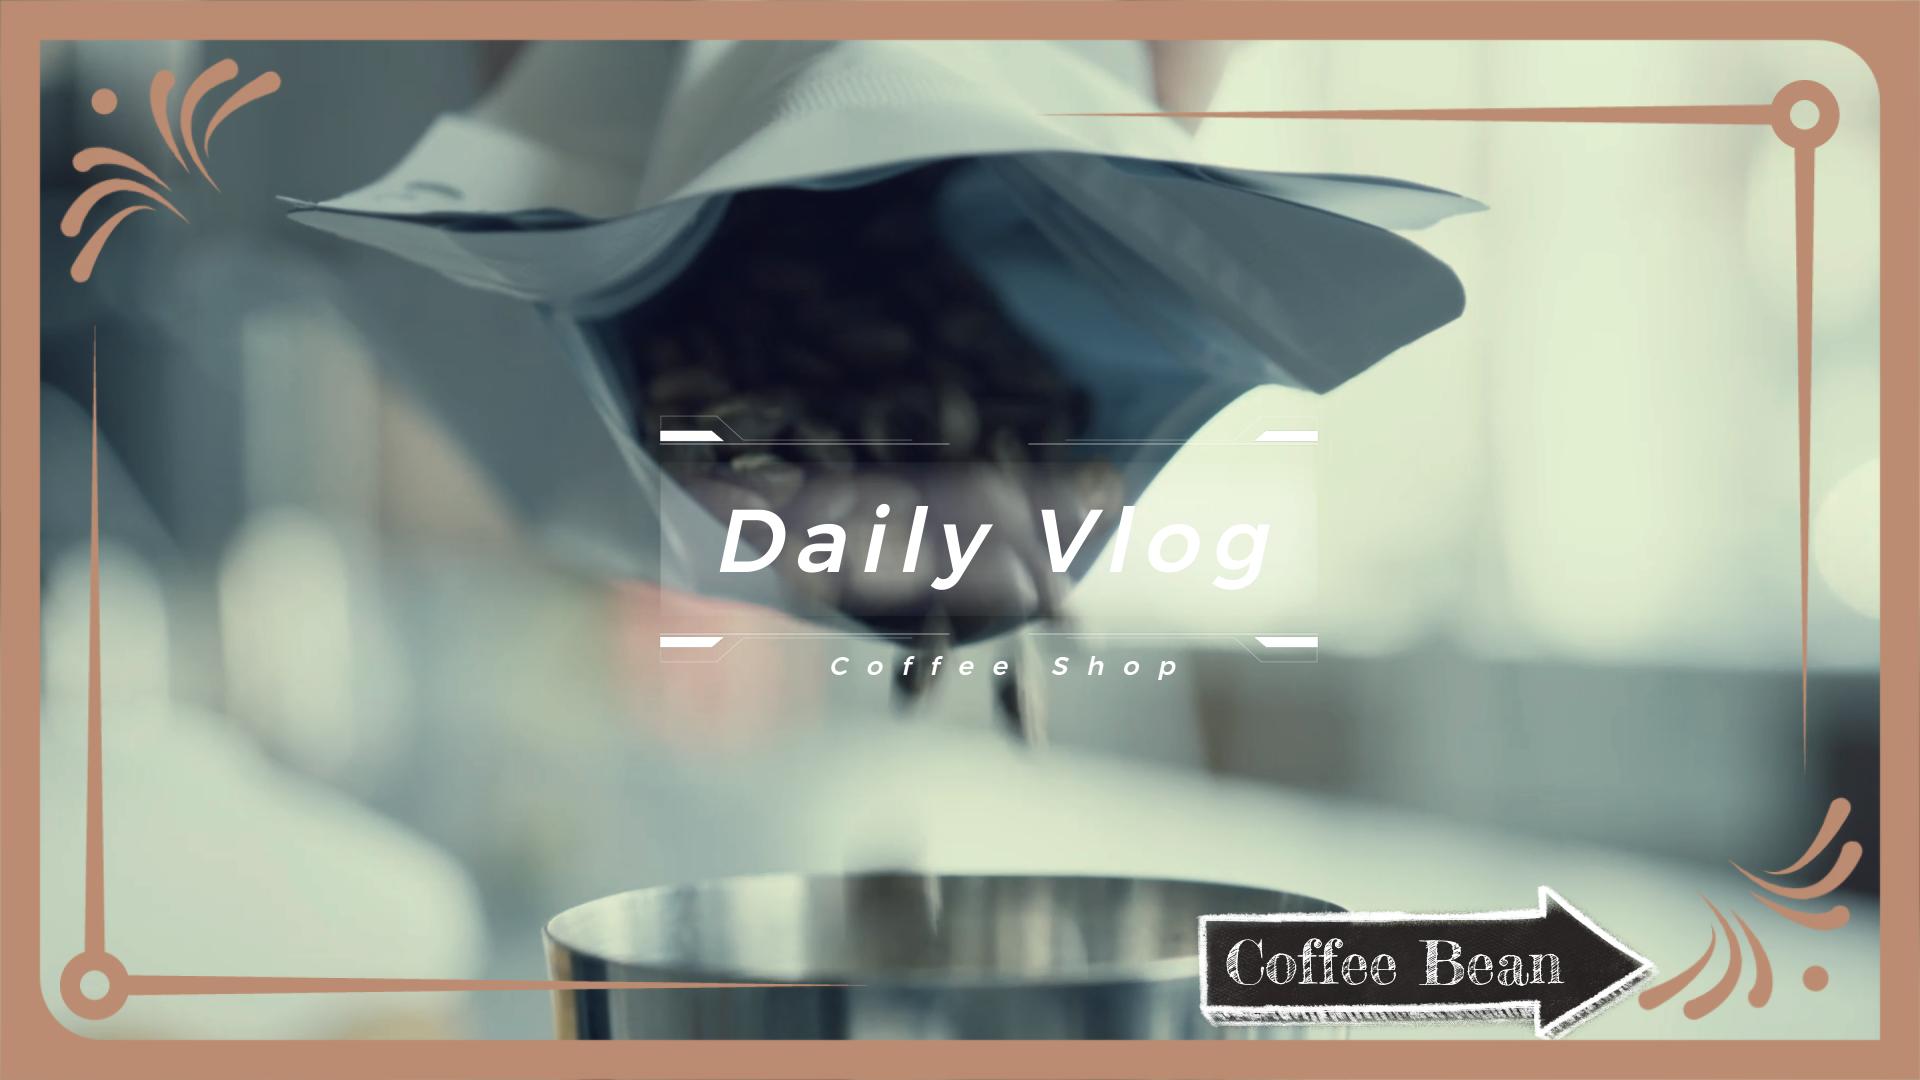
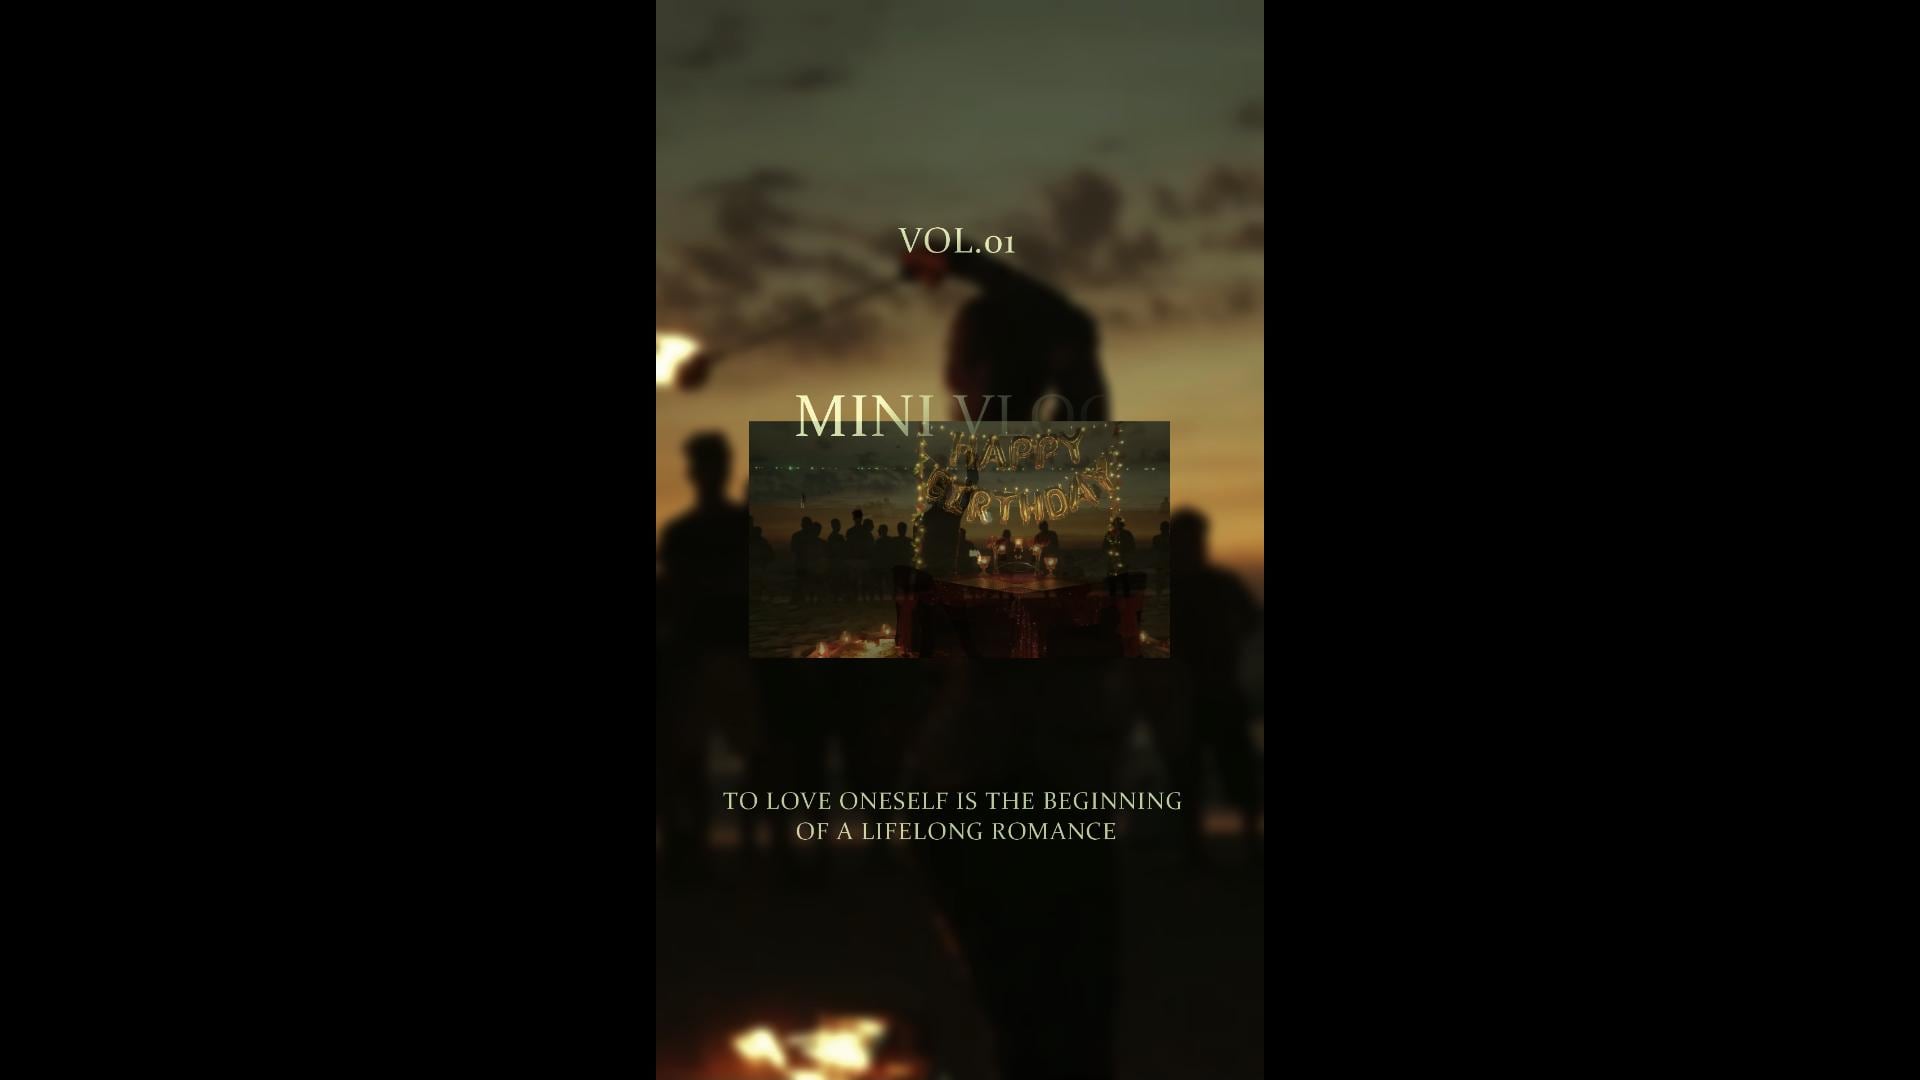
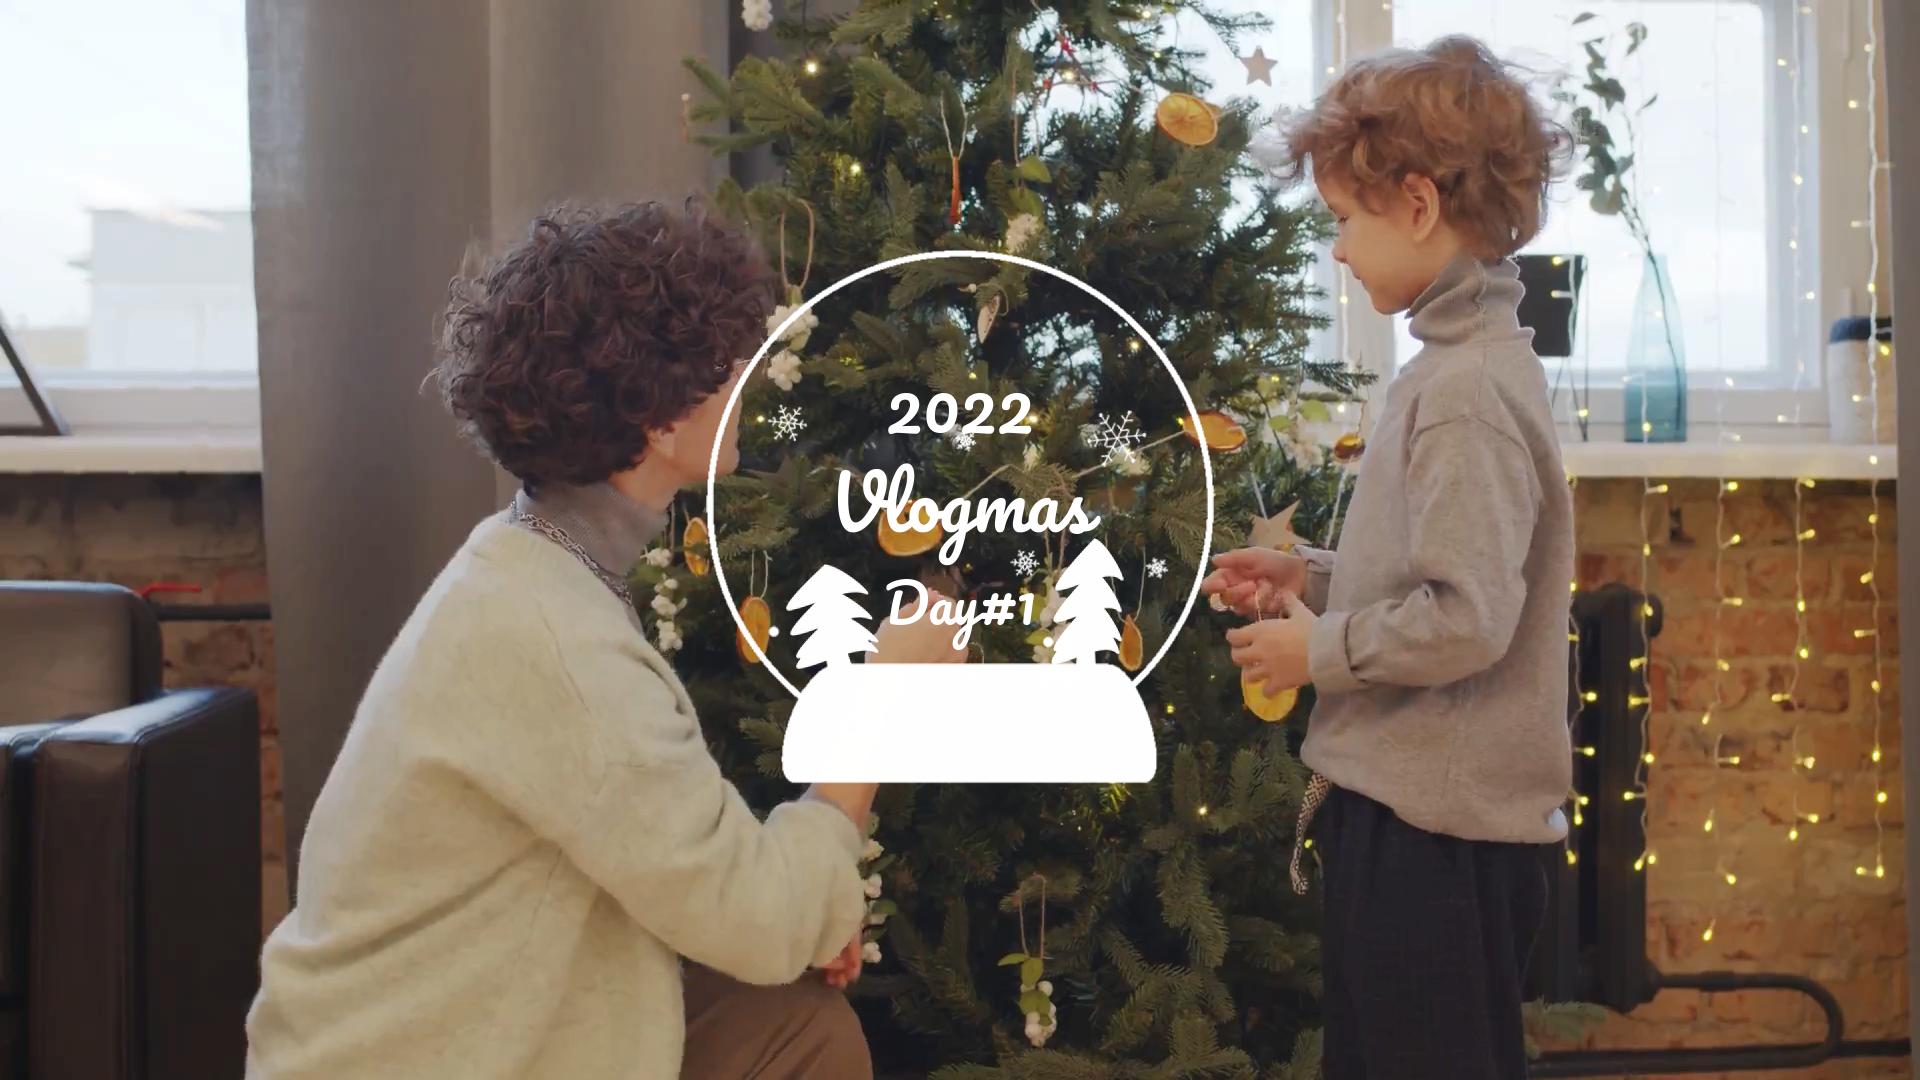
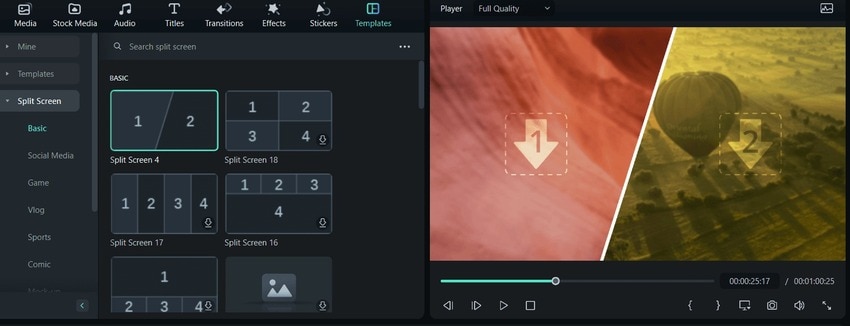
There are also split-screen templates, ideal for combining several shots. For instance, you can showcase multiple photos or videos (or both) for a travel vlog or introduce a morning routine for a beauty vlog.
Here's how to use the Vlog templates in Filmora:
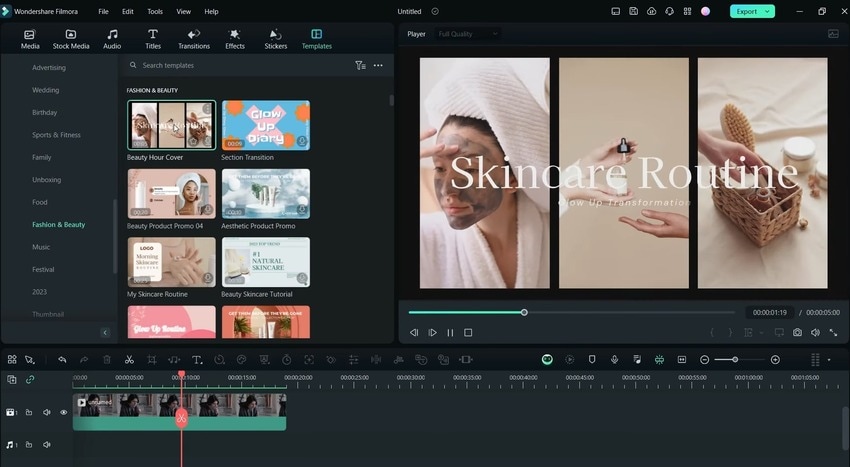
- Hit New Project on the main interface, go to Templates, browse the Vlog category, and drag and drop your favorite design onto the timeline. Filmora will populate the tracks with customizable elements and stock footage. Go to Media > Import to add your vlog to the library and drag and drop it onto the Replace Your Video track while holding the Alt key.
- If you don't want to use a component template, go to Templates > Split Screen and choose a layout. Then, drag and drop your files into designated slots in the Player panel. Proceed to the following section to see how to edit your vlog.
Create a Vlog From Scratch
Creating a vlog from scratch is a breeze with Filmora vlog editing app. You can start with the Smart Scene Cut feature to let AI analyze faces, bodies, and content and automatically identify notable moments featuring people and tagged objects. That allows you to compile highlights or trim less engaging parts. Here's how to create and edit your vlog:
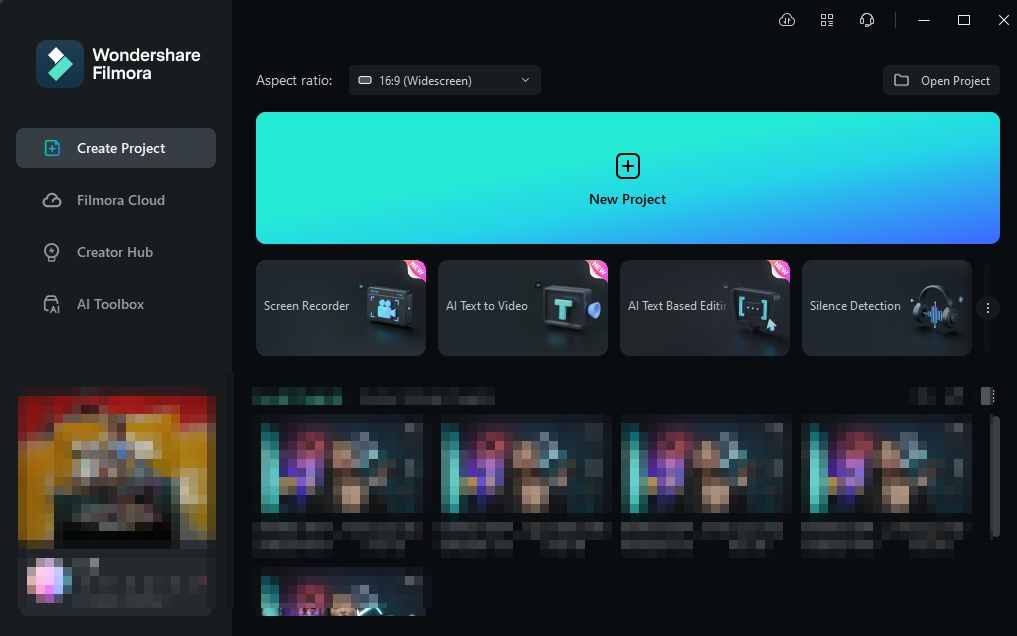
- Click Create Project > New Project on the main interface.
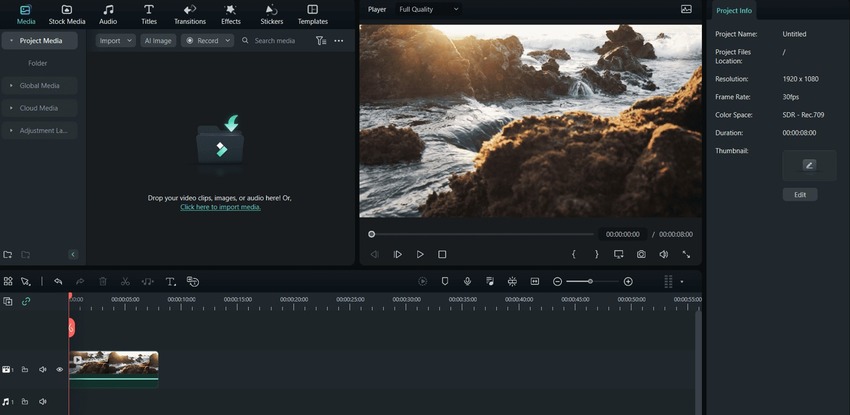
- Go to Media > Import Media, choose a file, and drag and drop it onto the timeline. Then, right-click the video and select Scene Detection.
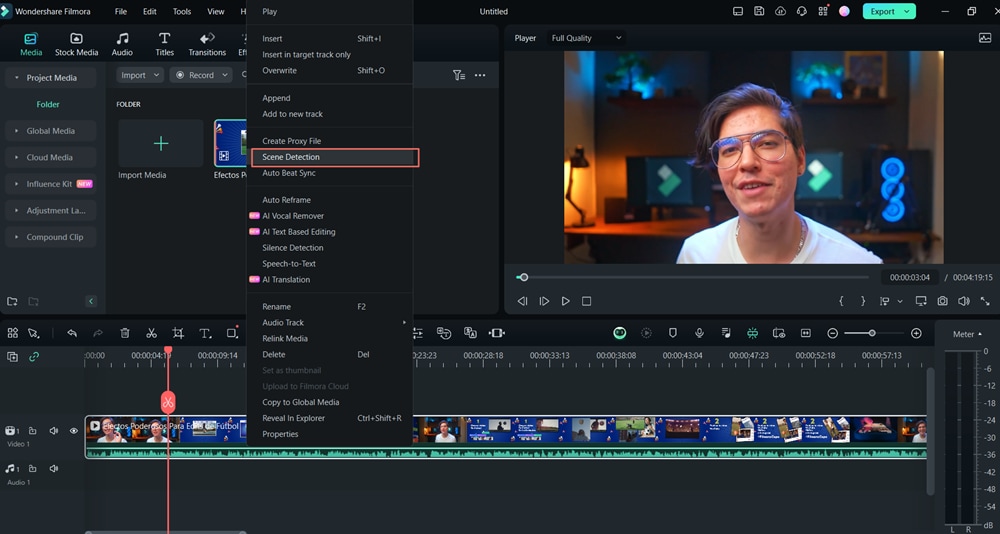
- Right-click the video and select Smart Scene Cut to compile highlights and trim unnecessary sections or Scene Detection to split your footage into multiple clips.
- If you wish to split your video into two or more segments (to edit them separately), move the playhead to the desired frame and click the Scissors button. Explore other tools in the Timeline bar, including Crop, Audio Stretch, Quick Text, AI Matting, Duration, Motion Tracking, Keyframing, AI Speech-to-Text, AI Translation, Auto Synchronization, AI Copilot, etc.

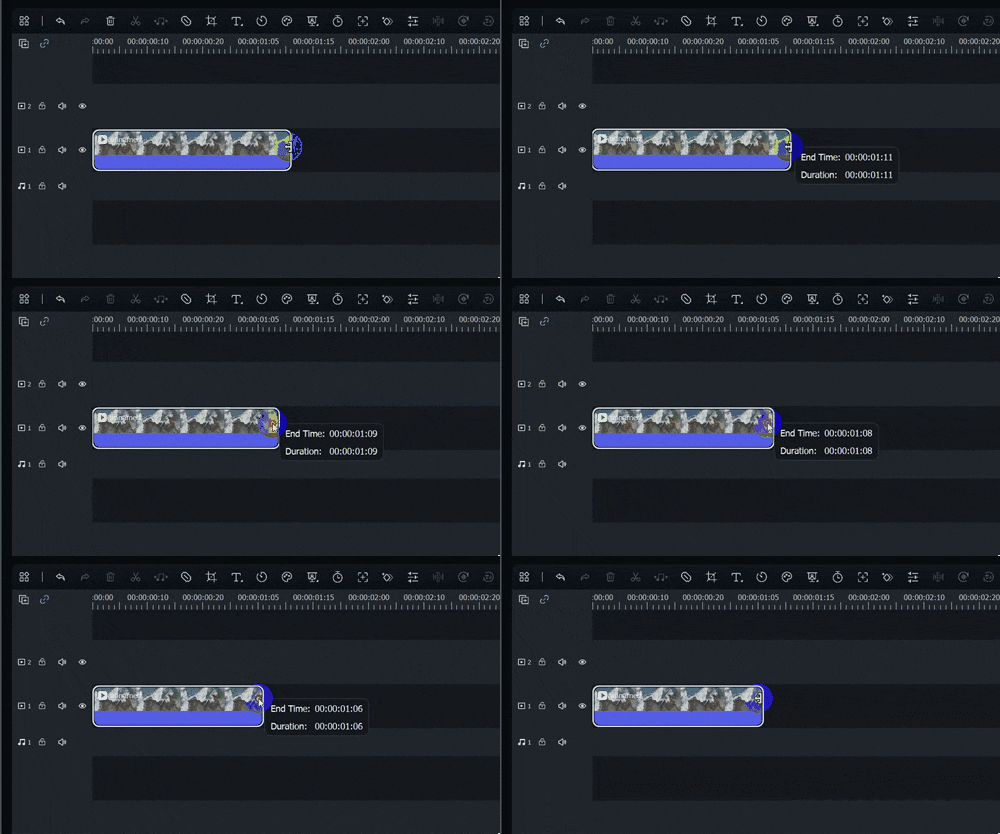
- To trim your video, click and drag either edge to the left or right (you'll see the Trim tool once you hover your mouse cursor over the edges).
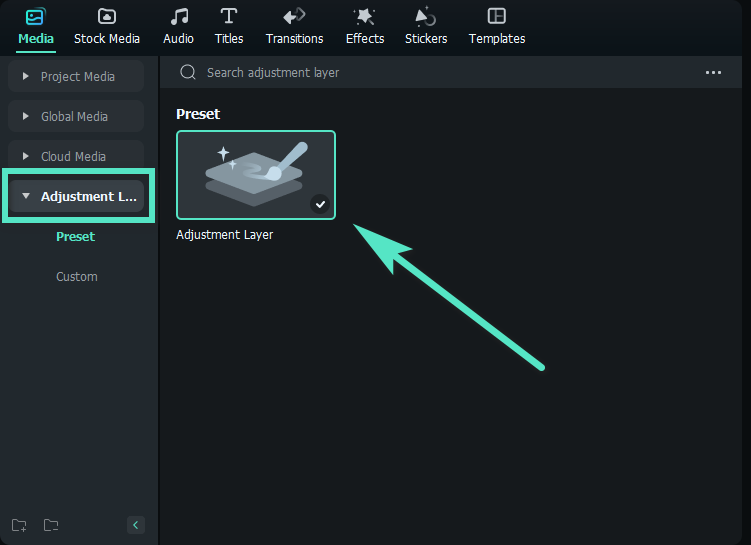
- Add another video track above your vlog, go to Media > Adjustment Layer > Preset, and drag and drop the layer onto the new track (you can add many layers). That can save you significant time because you can apply changes to multiple tracks without altering the original clips. You can also save layers as presets to maintain consistency across projects.
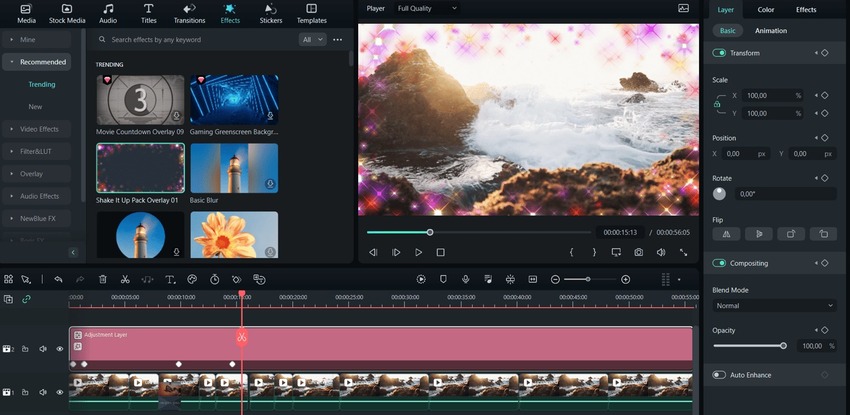
- Click the adjustment layer to select it and go to Layer in the Properties panel to edit it. For instance, add an animation or keyframes to make a clip transparent at a specific point. You can also adjust the color and drag and drop filters, LUTs, overlays, and VFX from Effects onto the layer to apply them to your vlog.
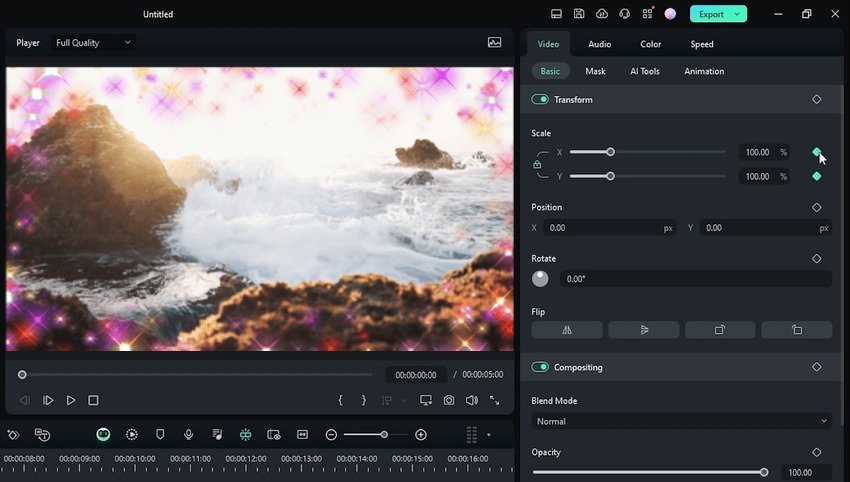
- Click your video (or a clip) on the timeline to access all customization tools. For instance, add Scale and Position keyframes.
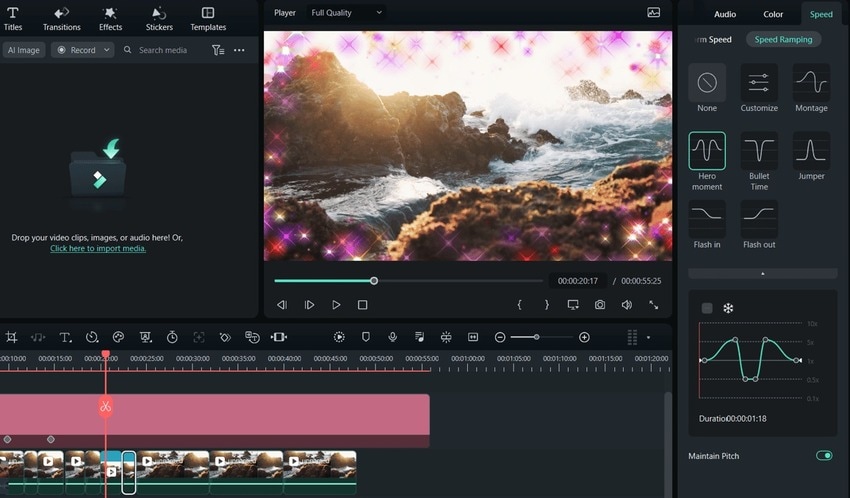
- Accelerate or slow down a particular clip (after selecting it) in the Speed tab. You can use Uniform Speed or Speed Ramping to highlight specific segments.
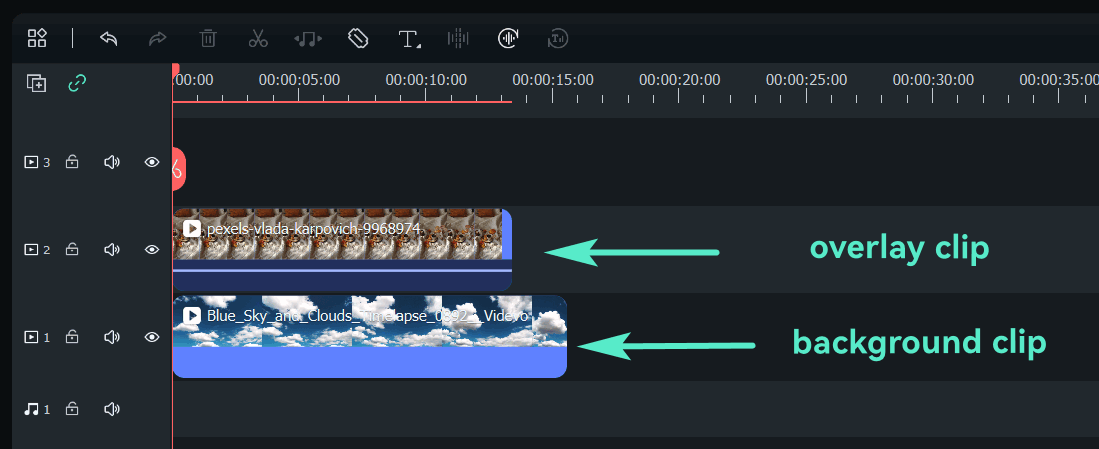
- If you need a picture-in-picture (PiP) effect, import an overlay video and place it on the track above the background clip.
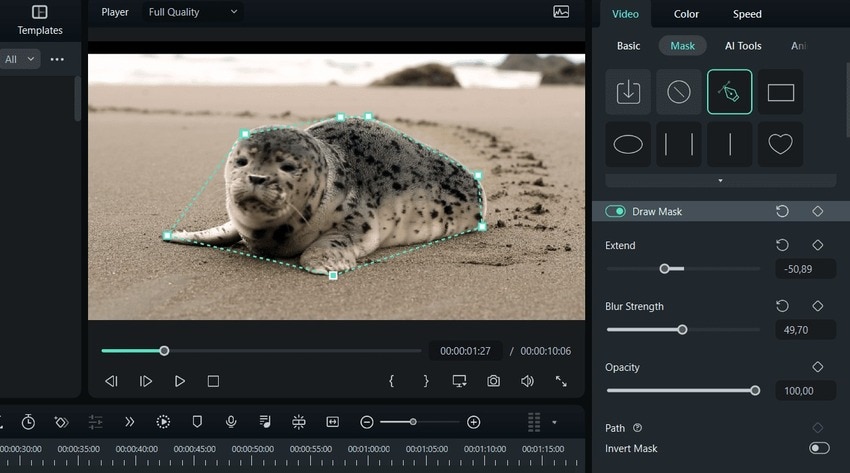
- Click the overlay video and go to Video > Mask in the Properties panel. You can draw or import one or use a preset before customizing its blur and opacity levels.
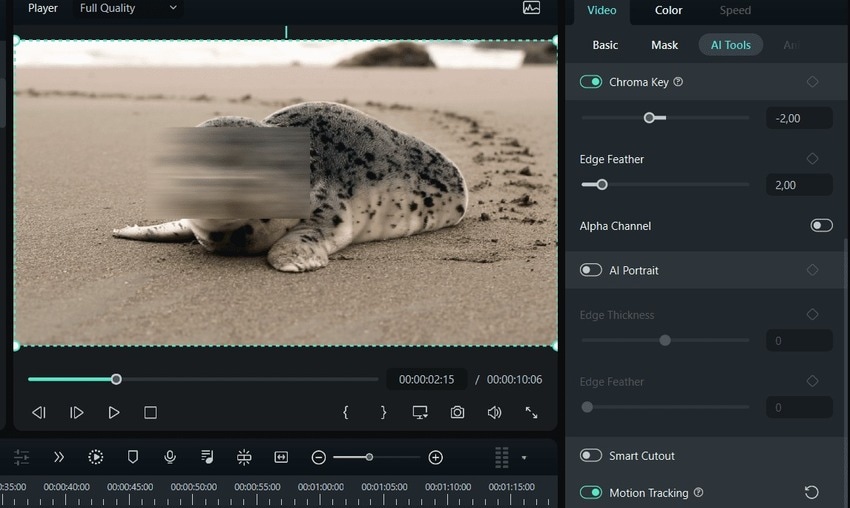
- Go to Video > AI Tools for Chroma Key, AI Portrait, Smart Cutout, Motion Tracking, and Stabilization features. The last one is perfect for reducing the camera shake. It automatically analyzes and stabilizes your video, letting you adjust the smoothness level and the edges.
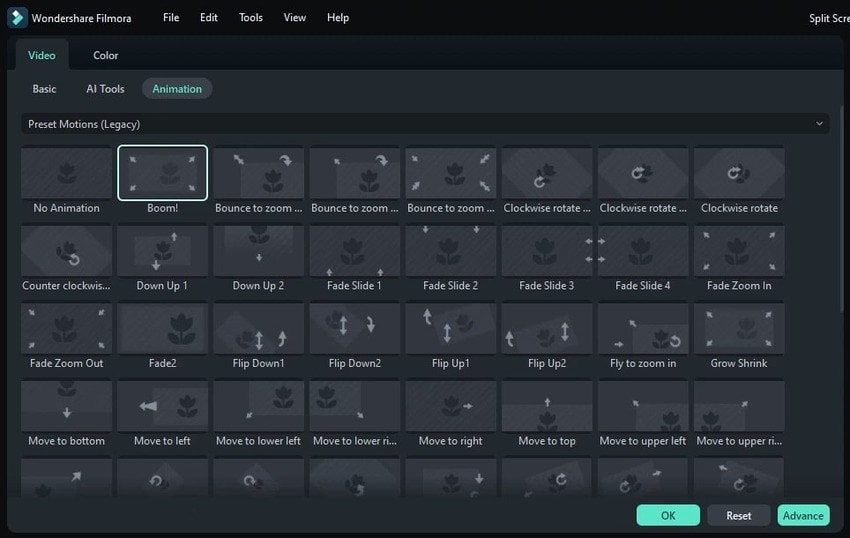
- Head to Video > Animation and choose a preset to animate your clips.
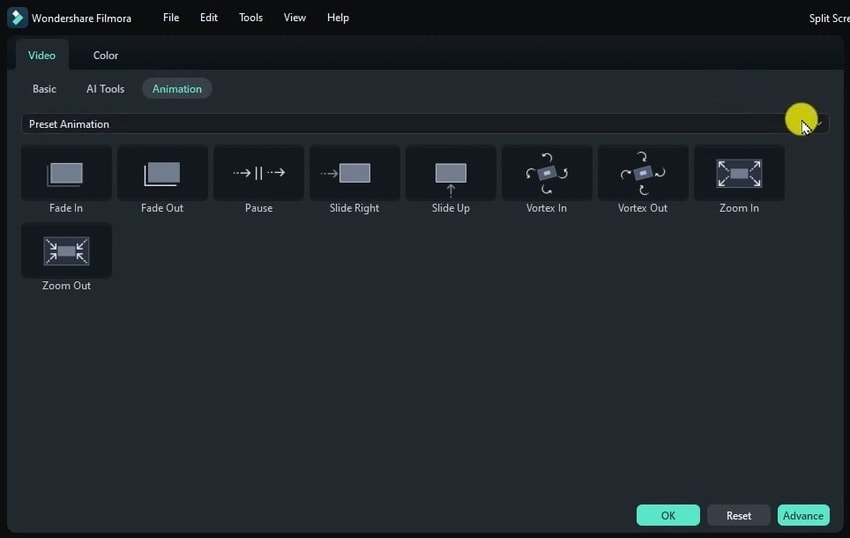
- Switch to Preset Motions in the drop-down list for more options.
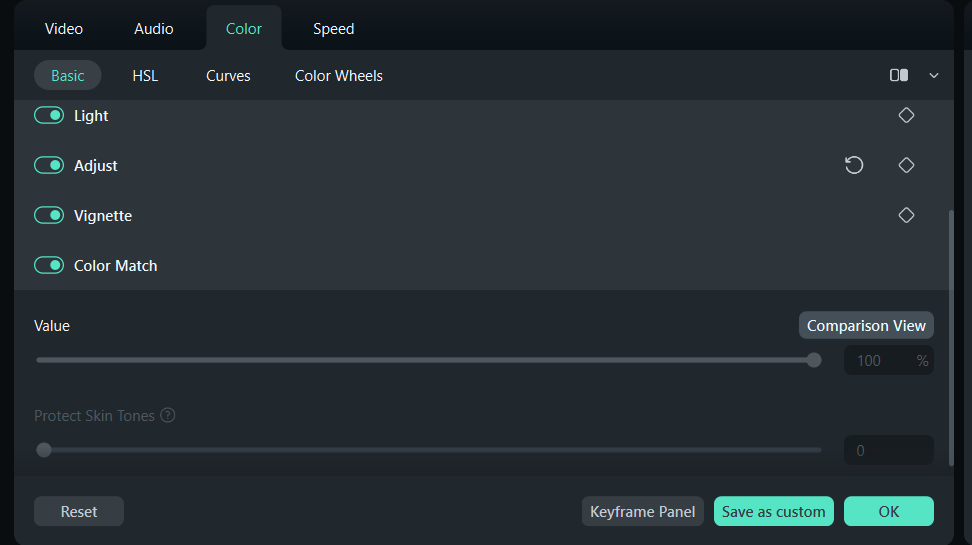
- Move to the Color tab for advanced color correction and grading. You can modify the temperature, tint, exposure, brightness, contrast, saturation, vibrance, HSL, and other parameters. You can also match the desired color palette, activate Skin Tone Protection, and save the adjustments as custom presets.
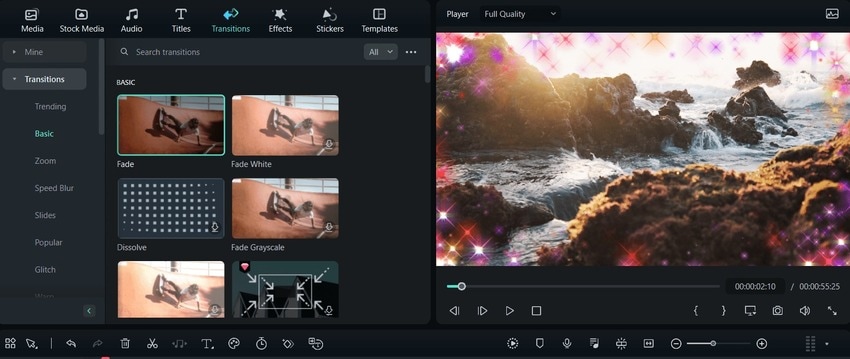
- Go to Transitions and drag and drop one between two clips for a smoother viewing experience.
- Click Titles and drag and drop one onto the timeline. Move the track to the desired frame and drag its edges to adjust the duration.
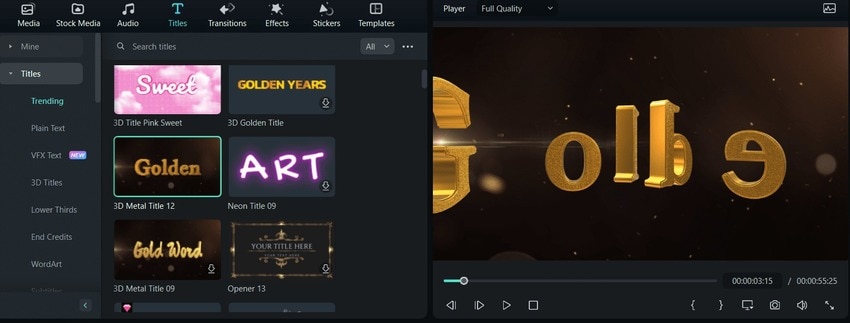
- Double-click the title to change the text, font, size, alignment, scale, etc. Click Advanced for further customization.
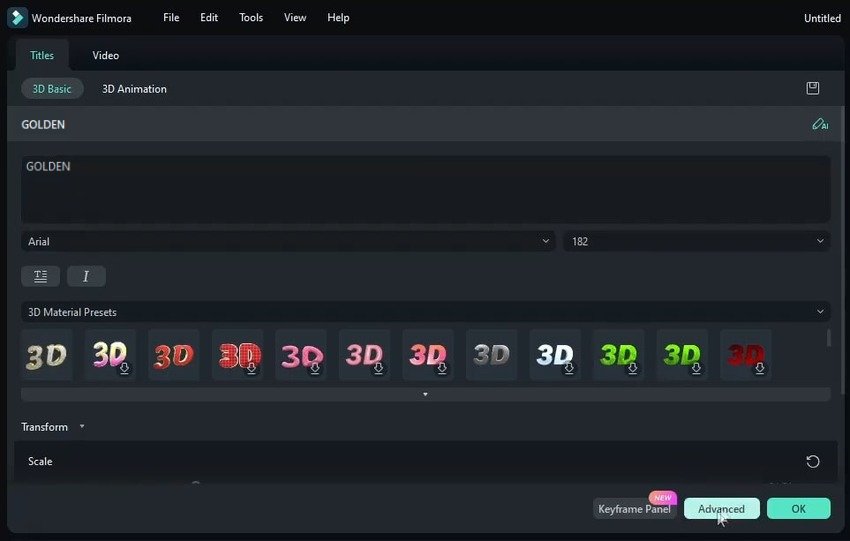
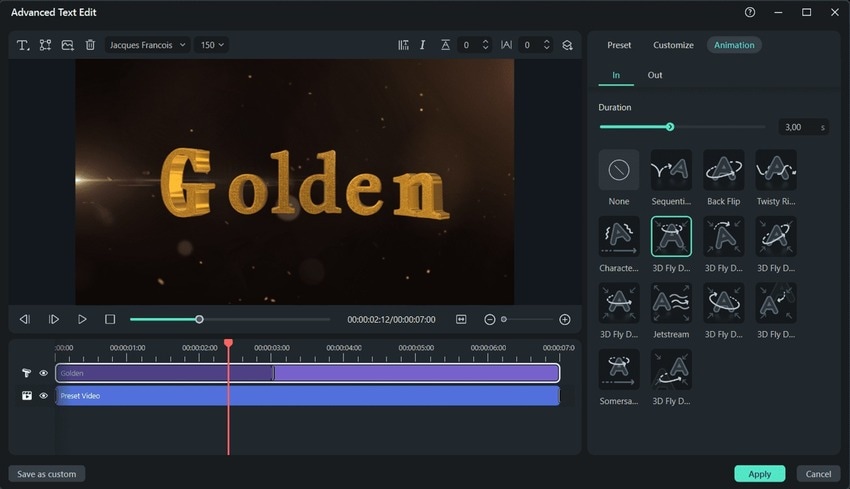
- Animate your text, specify the effect's duration, and hit Apply > OK.
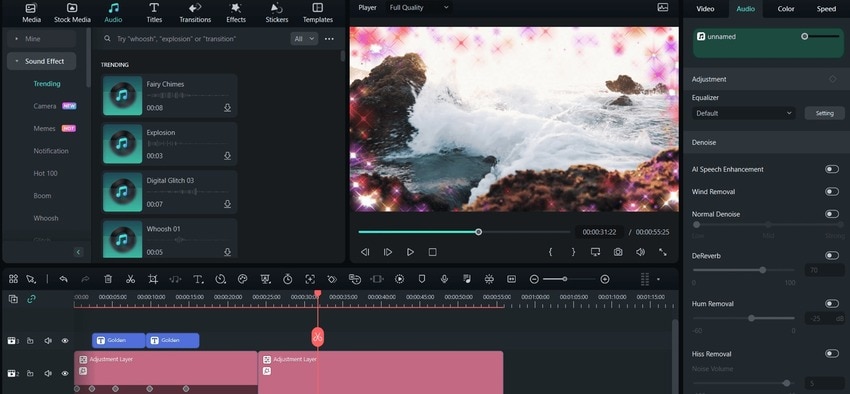
- Go to Audio and pick background music or sound effects for specific clips. Also, check the Audio tab in the Properties panel for AI Denoise, AI Speech Enhancement, etc.
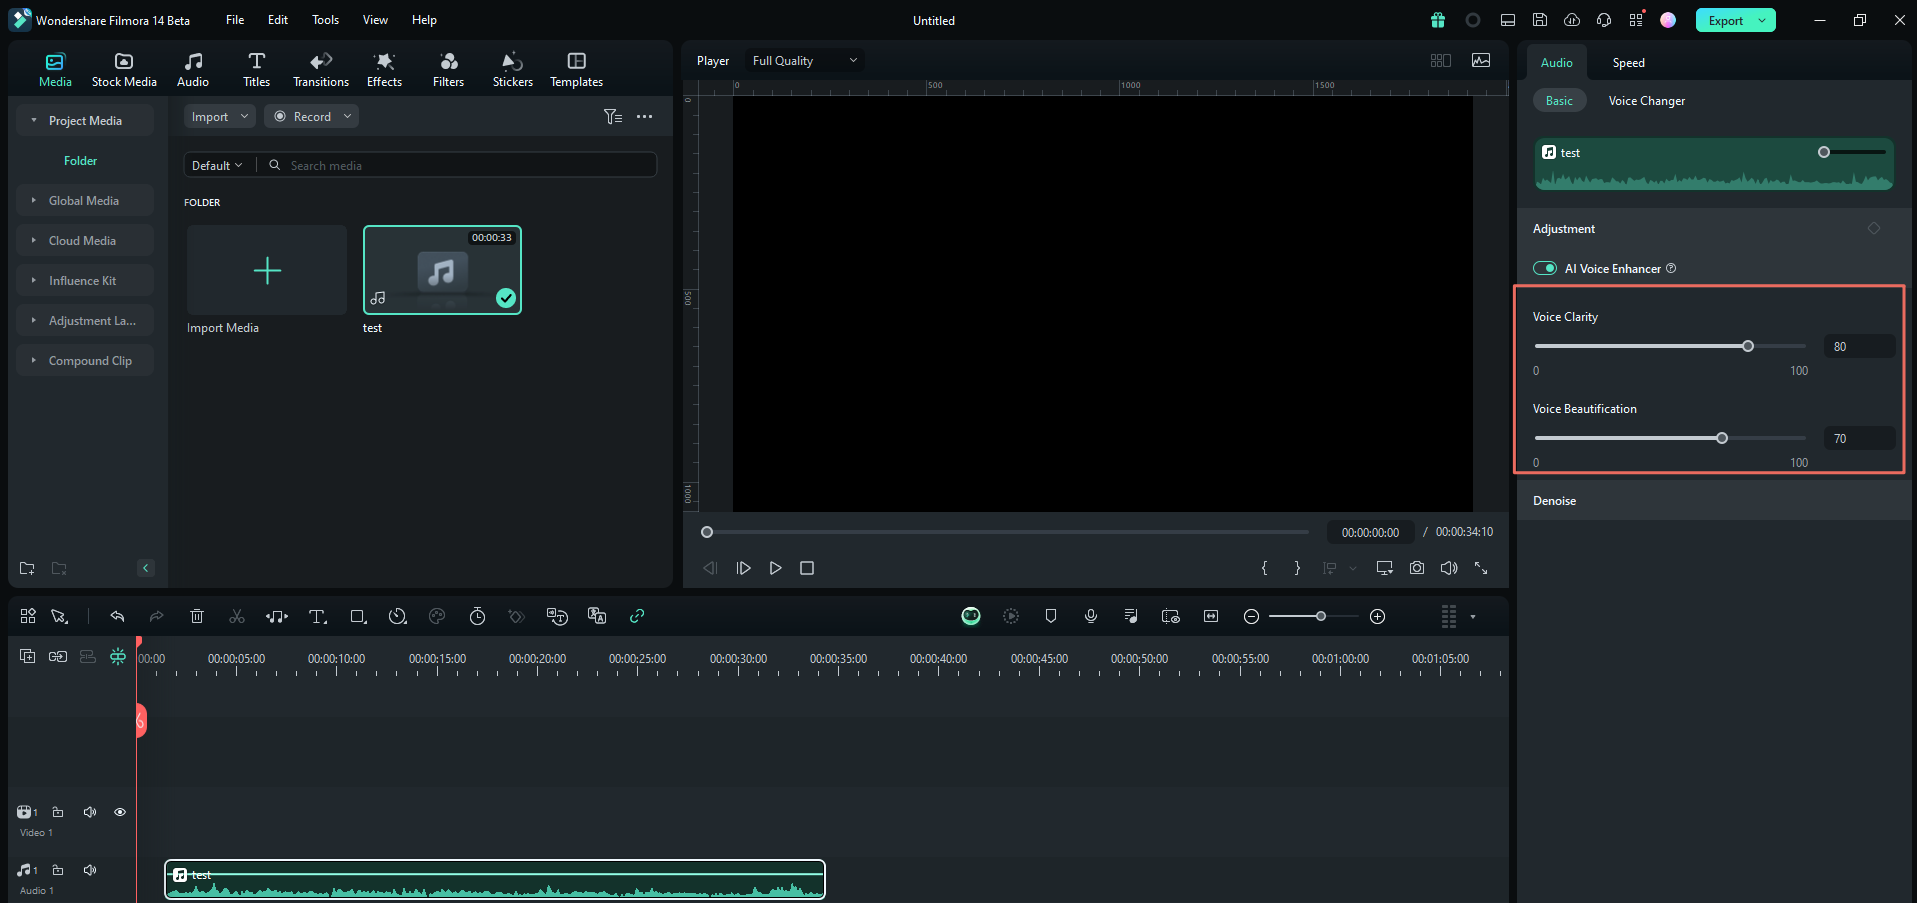
- To add a voiceover or another audio file, import it into Filmora, drop it onto the timeline, and go to Audio > Basic > AI Voice Enhancer. Then, drag the Voice Clarity slider to reduce background noise and make your voice more resonant under Voice Beautification. You can also modify the playback speed and change your voice.
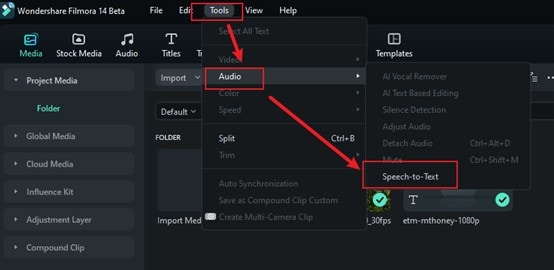
- To transcribe your voiceover, select your audio file on the timeline and go to Tools > Audio > Speech-to-Text.
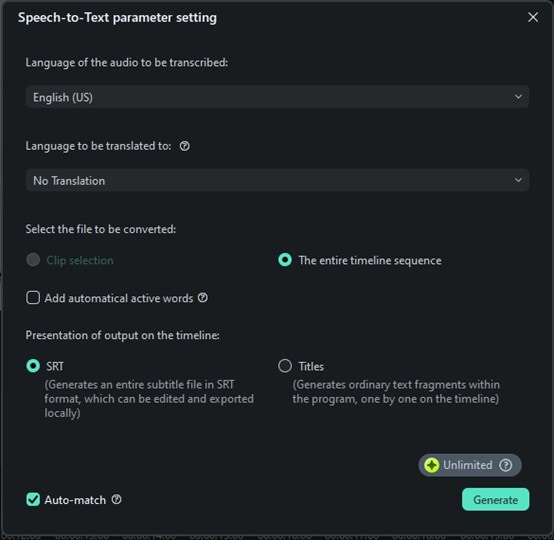
- Specify the language, enable translation (optional), select clips or the entire sequence, choose between an editable SRT file or Title, and click Generate.
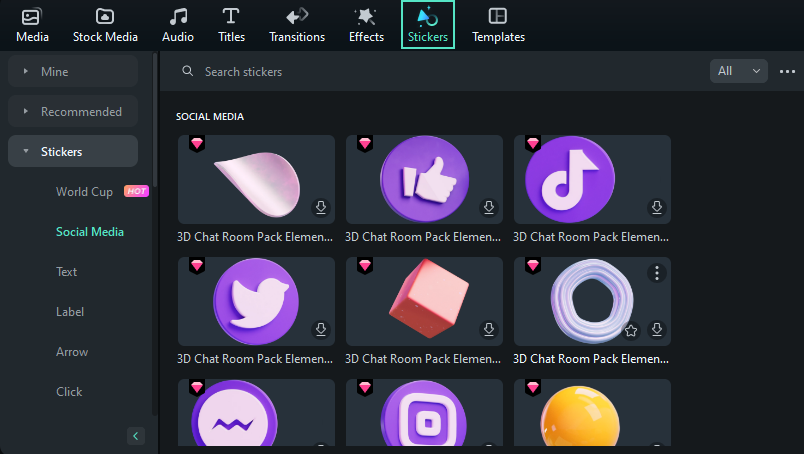
- Go to Stickers, browse the categories, and drag and drop your favorites at desired frames.
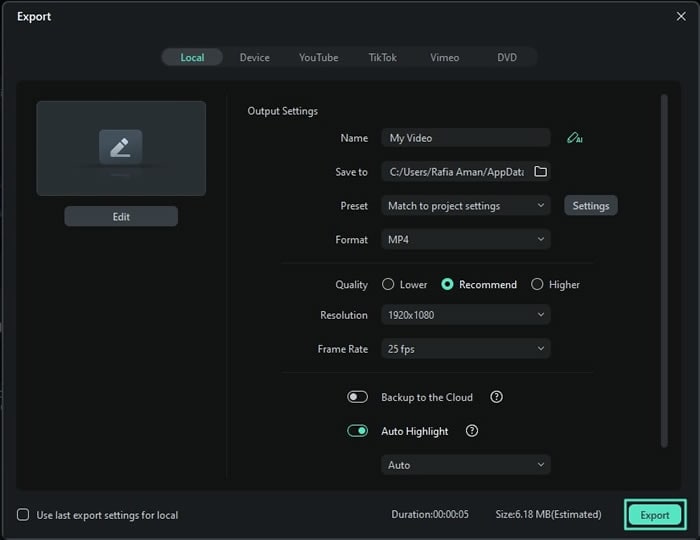
- Click Export to save your edited vlog to your device or share it directly on social media. Specify the output settings and hit Export.
Tips and Tricks for Creating and Editing a Vlog
Regardless of your chosen vlog editing software, follow these tips and tricks to make every vlog more engaging:
- Create intros and outros - Intros are perfect for introducing yourself and your topic, while outros are ideal for calls to action (e.g., encouraging viewers to subscribe to your channel). For instance, you can make a video collage for the intro (with exciting music) for branding consistency.
- Make jump cuts - Breaking continuous shots into two or more parts will make your vlogs seem more action-packed, gluing your viewers to the screen.
- Add B-rolls - Video overlays are perfect narrative features for illustrating a point or adding a dramatic effect.
- Keep the audio crystal clear - Adjust the pitch and volume levels and reduce background noise to provide a smooth, consistent listening experience.
- Make your vlogs inclusive with captions - Besides helping the DHH (Deaf and Hard of Hearing) community, captions help viewers digest your content better. You'll also engage those who prefer watching vlogs on mute.
You've seen in the tutorial above that you can add many tweaks to your vlog. However, these tips are crucial for compelling viewers to watch through and return for more.
Conclusion
Mastering vlog editing skills takes time, but Filmora can streamline the process. Now that you know how to use the best software for vlog editing, it's time to try its features to see them in action. Download Filmora to your computer and take your vlogs to the next level.
FAQs
-
What vlog editing software do most vloggers use?
Wondershare Filmora, Adobe Premiere Pro, DaVinci Resolve, Final Cut Pro, and CyberLink PowerDirector are the most prominent options. However, Filmora stands out as the most intuitive and feature-rich software available at a fraction of the price. -
Can I edit a vlog for free with Filmora?
Absolutely! Filmora is available as a free and premium vlog video editor. However, non-subscribers have limited creative assets and fewer credits for some AI features. Also, their exported videos have a watermark. -
Does Filmora have a vlog editing app for Android and iOS?
Of course! You can download Filmora for Android or Filmora for iOS and enjoy seamless vlog editing on the go. Filmora for mobile is the best vlog editing app for beginners and veteran vloggers, providing nearly all the features of its desktop counterpart.


