
 100% Security Verified | No Subscription Required | No Malware


 ChatGPT
 Perplexity
 Gemini
 Claude
 Grok
Grok
What is the CapCut Video Editing Timeline?
The CapCut timeline is the central non-linear editing workspace located at the bottom of the interface. It allows users to arrange, layer, and synchronize video clips, audio tracks, and visual effects chronologically to create a final video production.
If you want to step up your game while learning CapCut on Desktop, you need to start with the most important part: the timeline. This is where all your editing happens.
The CapCut timeline is basically your creative workspace, where you bring every part of your video together. Once you understand how it works and how to adjust its settings, you’ll be able to edit faster, stay organized, and create videos more efficiently every time.
This guide breaks down how the CapCut timeline on Desktop works, the settings you can adjust, key editing techniques, plus a recommended beginner-friendly alternative similar to CapCut.
In this article
- Part 1. Get to Know the CapCut Timeline Interface
- Part 2. Timeline Settings in CapCut
- Part 3. How to Edit on the CapCut Timeline
- Part 4. How to Fix Common CapCut Timeline Problems
- Bonus: Edit Videos Faster and Smarter with Dual-Timeline
- Conclusion
Key Takeaways:
- The CapCut timeline interface includes a toolbar, multi-track editor, and preview axis.
- Essential settings include Hide, Lock, and Mute track functions to organize clips.
- Compound clips and grouping are the best ways to simplify a cluttered CapCut workspace.
- Keyboard shortcuts like Ctrl+B (Split) and Ctrl+G (Group) significantly increase editing speed.
Part 1. Get to Know the CapCut Timeline Interface
Answer: How to use the CapCut timeline?
- Import media from the top-left assets panel.
- Drag and drop clips directly into the bottom timeline track.
- Use the Playhead to navigate and the Split tool (Ctrl+B) to cut footage.
- Adjust track settings like Hide or Lock to prevent accidental changes.
CapCut now comes as a full desktop version for creators who want more control. Before editing, you should understand how the interface works.
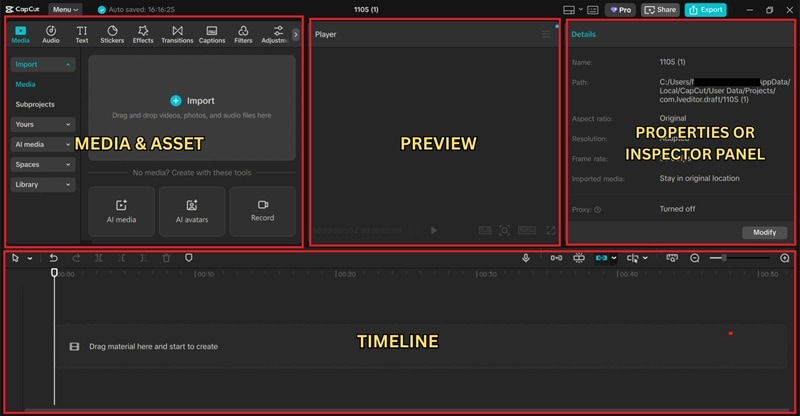
- Media & Assets Panel (Top Left): Import videos, music, images, and access text, stickers, filters, and transitions.
- Preview Window (Top Center): Shows real-time video output.
- Properties Panel (Top Right): Adjust clip settings like scale, position, rotation, color, opacity, etc.
- Timeline (Bottom): Main workspace where all layers, clips, audio, and effects are arranged.
The Cursor
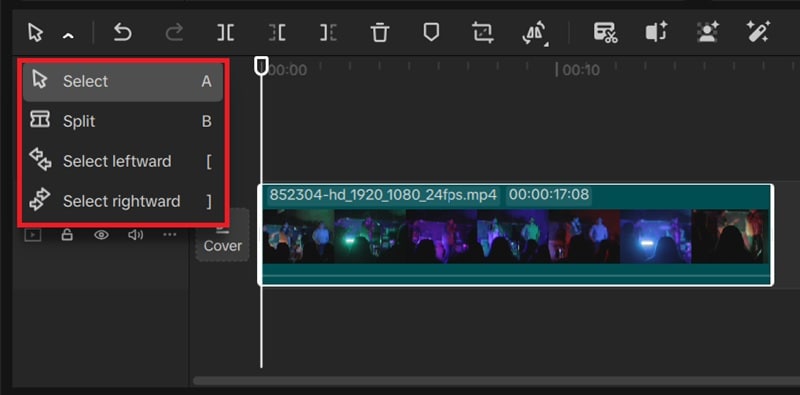
- Select: Move or highlight clips.
- Split: Cut footage at cursor position.
- Select Leftward: Select all clips on the left of the playhead.
- Select Rightward: Select all clips on the right of the playhead.
The Toolbar Menu
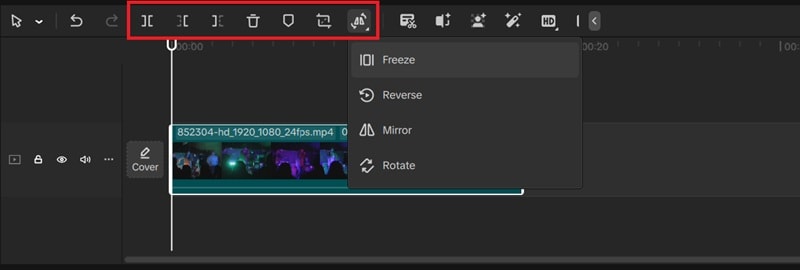
- Split
- Delete Left / Delete Right
- Delete Clip
- Add Marker
- Crop
- Freeze / Reverse / Mirror / Rotate
More quick-access tools:
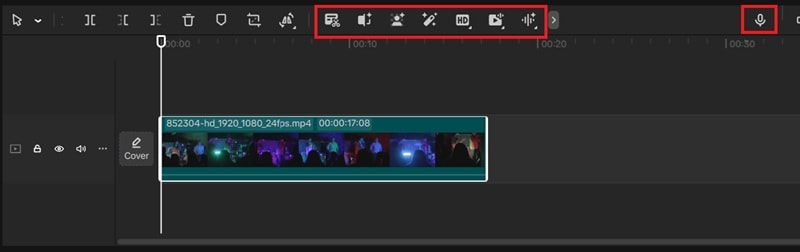
- Transcript
- Split Scenes
- Remove Background
- Auto Adjust
- Enhance Visual
- Extract Audio
- Enhance Audio
- Voiceover
How to Navigate the Timeline View in CapCut
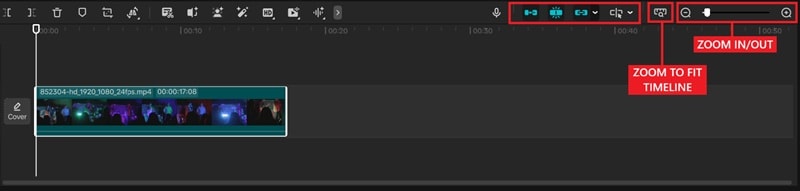
- Zoom In/Out
- Zoom to Fit Timeline
- Main Track Magnet
- Auto Snapping
- Linkage
- Preview Axis
Part 2. Timeline Settings in CapCut
Hide / Lock / Mute Track
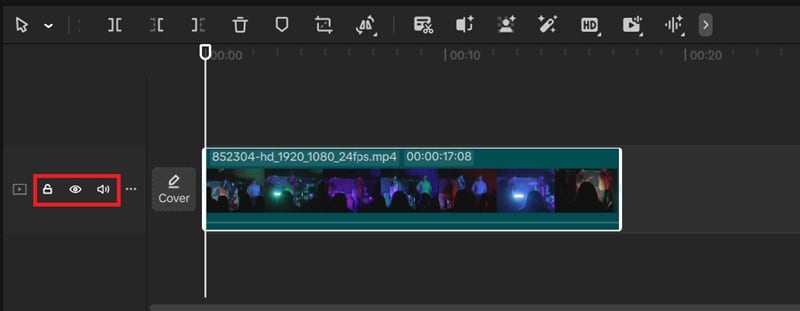
- Hide Track — temporarily hides video/audio layers.
- Lock Track — prevents unwanted changes.
- Mute Track — turns off audio for selected track.
Multi-Track vs Compound Clip

CapCut supports multi-track editing, but also offers Compound Clips to simplify complex timelines.
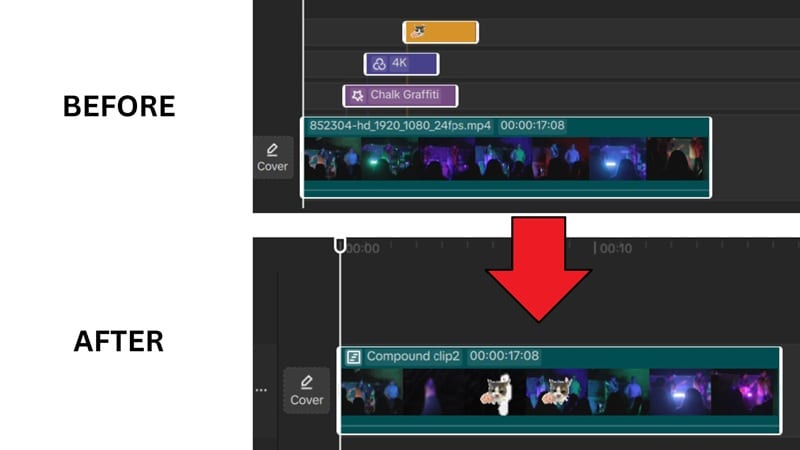
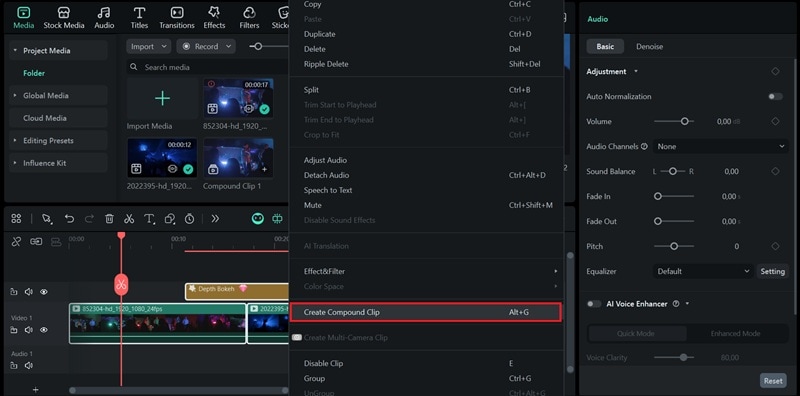
How to Create a Compound Clip
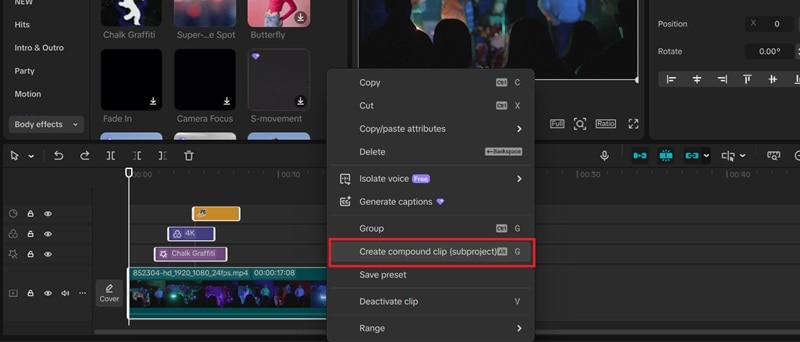
- Select multiple clips
- Right-click → Create Compound Clip
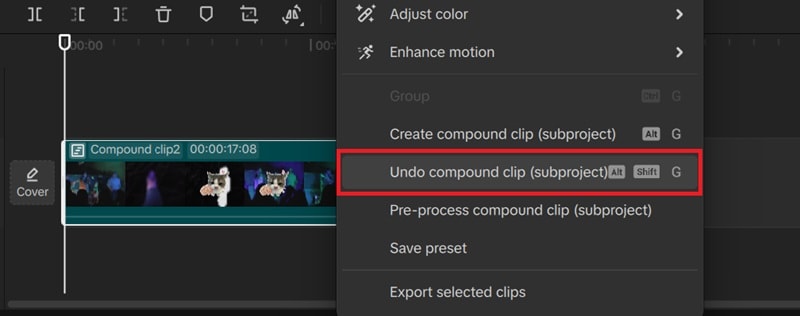
You can still open or undo a compound clip at any time:
How to Organize Clips in CapCut Timeline
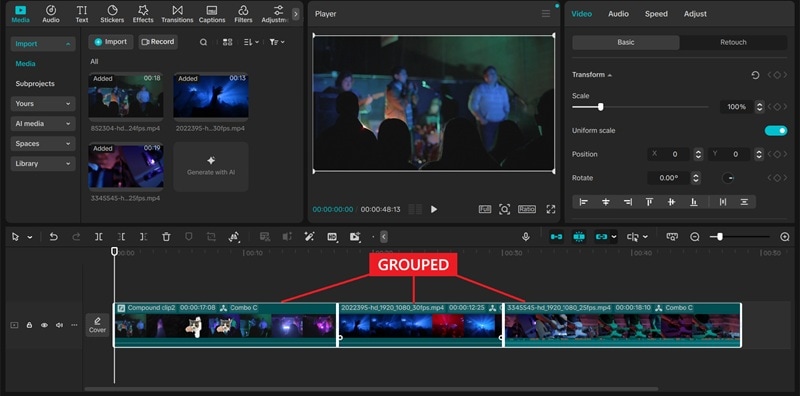
How to Group Clips
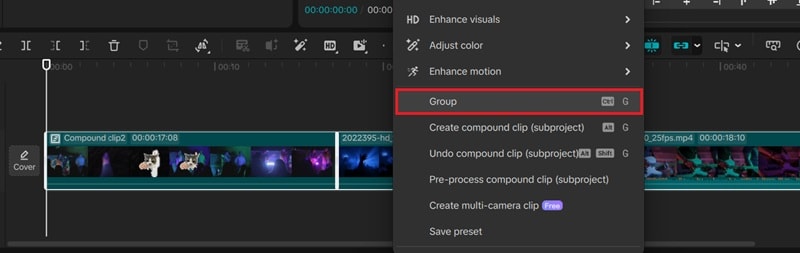
- Select clips → Hold Shift
- Right-click → Group
Part 3. How to Edit on the CapCut Timeline
1. Importing & Positioning Media
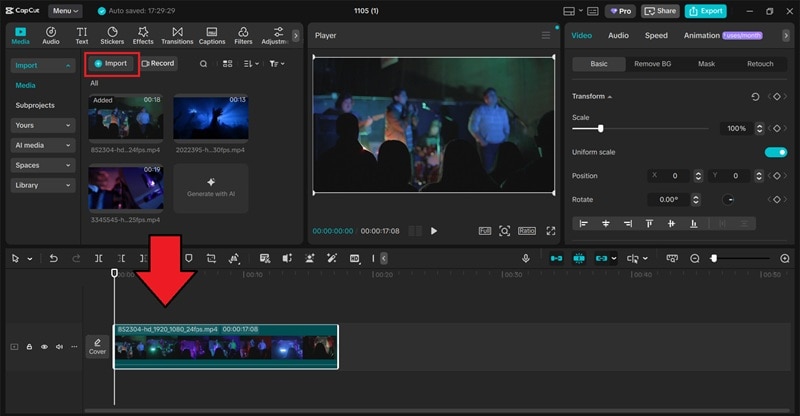
- Import media
- Drag clips to the timeline
- Reposition and layer clips
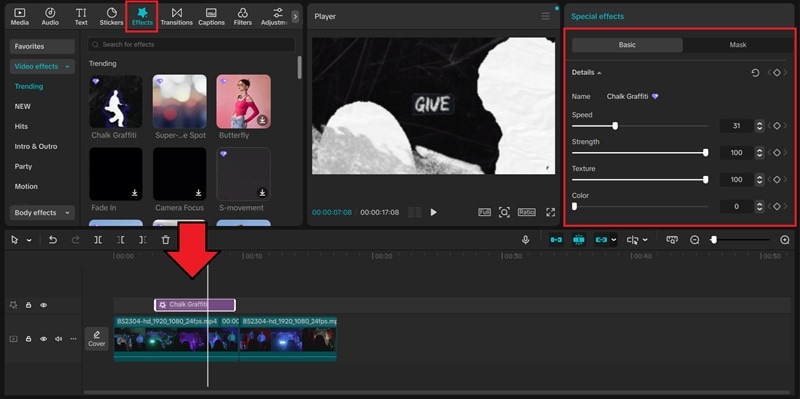
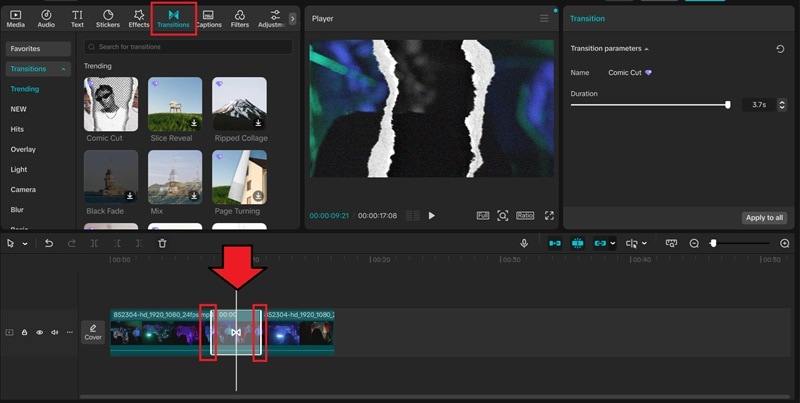
2. Adding Effects & Transitions
Effects
Transitions
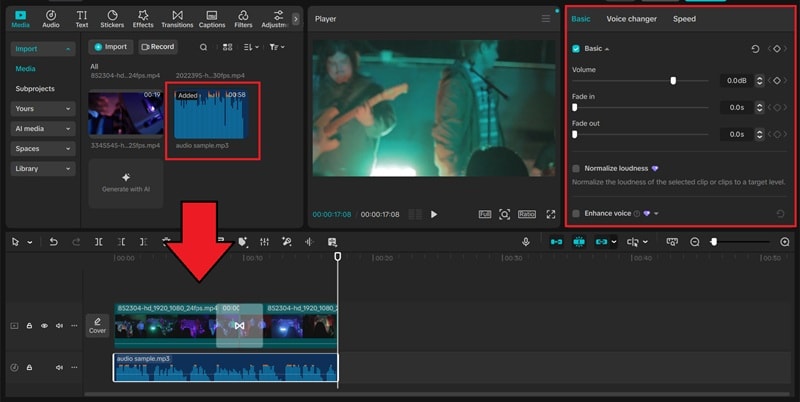
3. Audio Editing
Essential CapCut Timeline Shortcuts
Efficiency Tip: Using timeline keyboard shortcuts can reduce your video editing time by up to 40% compared to manual mouse clicks.
| Shortcut | Function |
|---|---|
| Ctrl + I | Import Media |
| Ctrl + B | Split Clip |
| M | Add Marker |
| Ctrl + + / - | Zoom In/Out |
| Ctrl + G | Group Clips |
| Alt + G | Create Compound Clip |
| Spacebar | Play/Pause |
Part 4. How to Fix Common CapCut Timeline Problems
1. Timeline Has Too Many Tracks
Use Compound Clips to simplify the workspace or delete unused layers.
2. Audio Doesn't Match Video
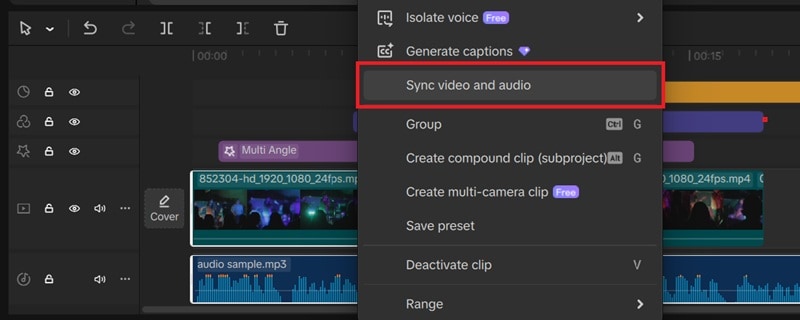
- Select video + audio
- Right-click → Sync Video and Audio
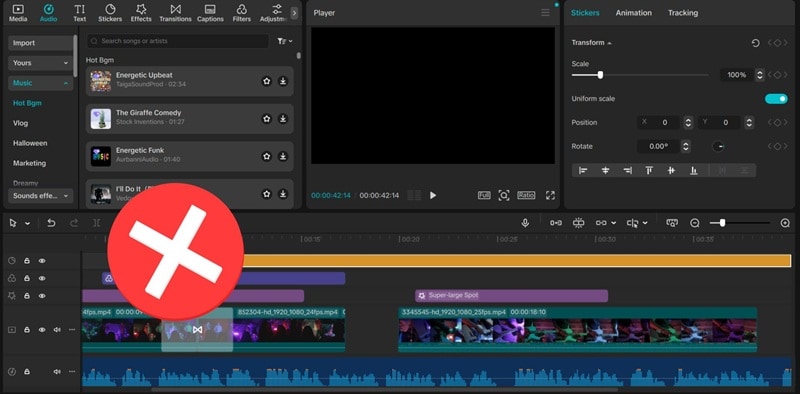
3. Timeline Preview Not Working
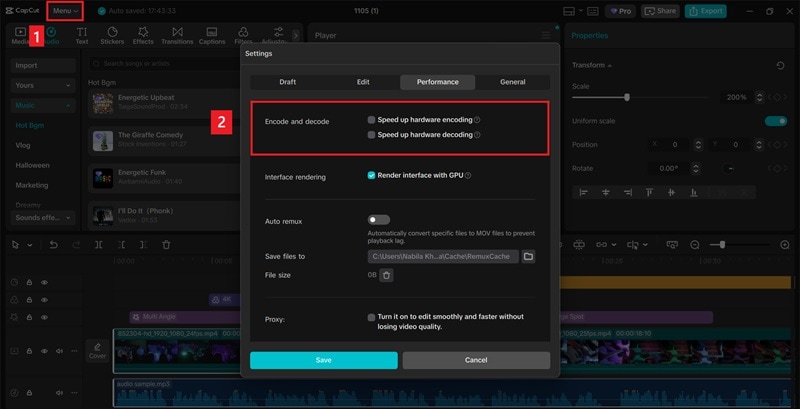
Disable Hardware Encoding/Decoding in Settings → Performance.
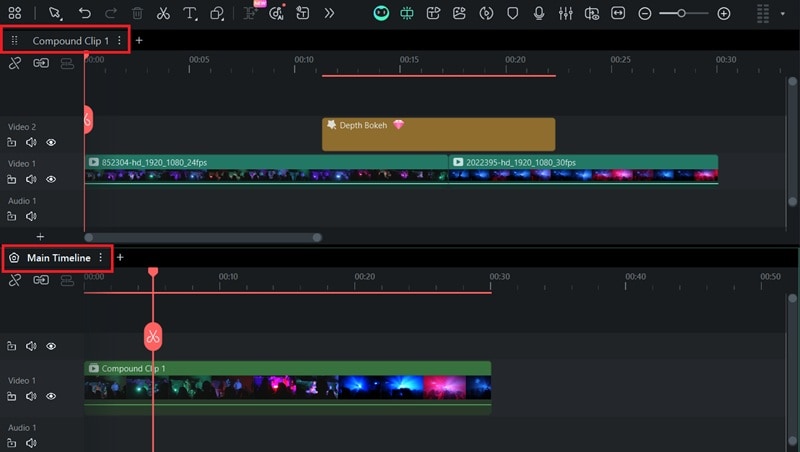
Bonus: Edit Videos Faster and Smarter with Dual-Timeline
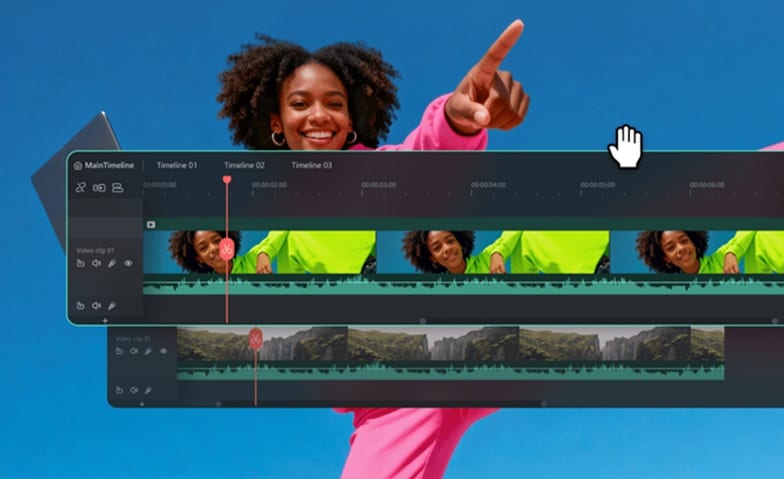
Wondershare Filmora includes the powerful Dual-Timeline workspace that allows precise editing and better project organization — something not available in CapCut.
How to Enable Dual-Timeline in Filmora
 secure download

Step 1. Start a New Project

Step 2. Import Media

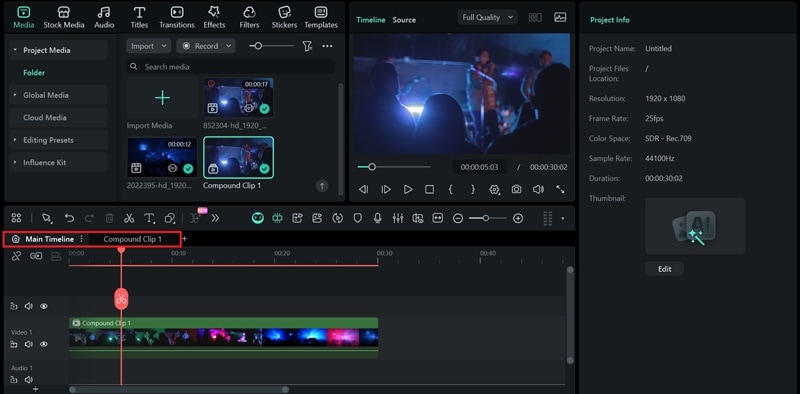
Step 3. Create Compound Clip
Step 4. Enable Dual-Timeline View
This guide is authored by our video production experts who have tested over 50 video editors in 2026 to provide accurate and objective workflow comparisons.
Conclusion
Now that you understand how the CapCut timeline works, you can edit much faster and more efficiently. Once the basics become second nature, you can explore advanced editing workflows like Filmora’s Dual-Timeline to gain even more control and speed in your projects.
Frequently Asked Questions
Where is the timeline in CapCut Desktop?
The timeline is located at the bottom of the CapCut screen. It is the large horizontal area where you drag and arrange your video and audio tracks.
How do I add a new video to the timeline?
You can add a video by clicking 'Import' in the media panel and then dragging the clip from the assets window directly onto the timeline area.
Can I edit CapCut timeline on mobile?
Yes, CapCut mobile offers a simplified timeline at the bottom of the app interface, optimized for vertical screens and touch interactions.
secure download 