

 TL;DR:
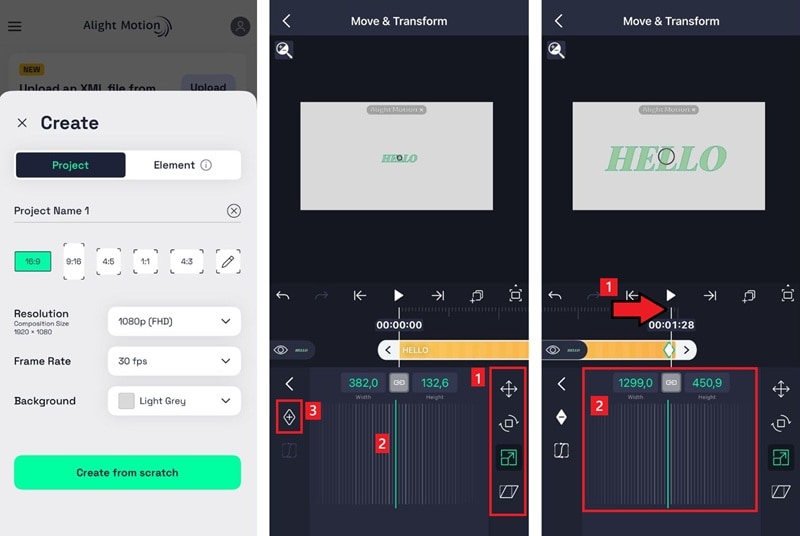
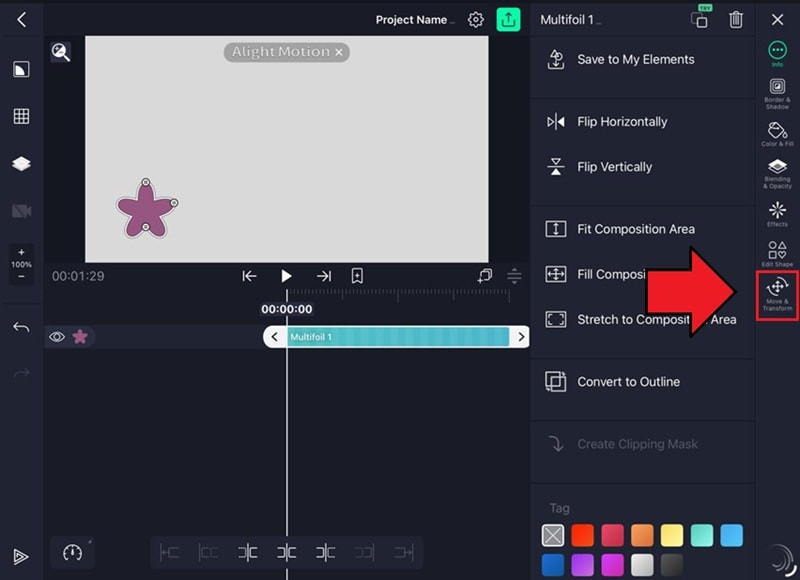
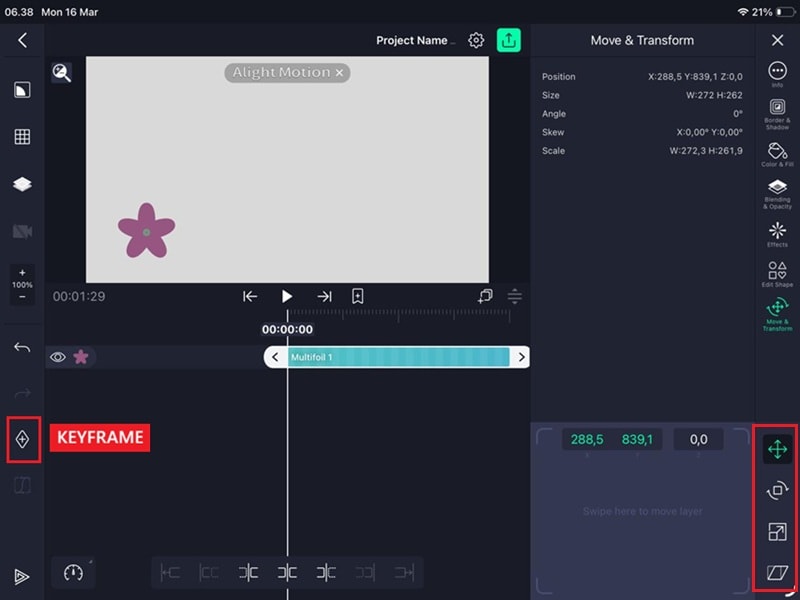
You can animate layers in Alight Motion across Android, iOS, and iPad by opening a property like Move & Transform, tapping the diamond icon to set a starting keyframe, moving the playhead forward, and adjusting the value to automatically generate the endpoint.
● Apply Ease In, Ease Out, or Ease In-Out presets within the Keyframe Graph Editor to fix the app's default linear movement and achieve fluid, natural motion.
● Keep keyframes to a minimum to avoid jittery playback, and duplicate identical movements across different layers by using the "Copy Layer" and "Paste Style" commands.
● Switch to Wondershare Filmora if you require desktop support, automated motion tracking, and ad-free exports, though its free version applies a watermark to the final video.
Ask AI for a summary
 ChatGPT
 Perplexity
 Gemini
 Claude
 Grok
Grok
Keyframes are the secret to professional mobile video editing. If you want objects to move, change scale, or fade smoothly, learning how to add keyframes in Alight Motion is the essential first step. Whether you are using Android, iOS, or iPad, mastering keyframe animation will transform your static edits into dynamic, cinematic masterpieces.
In this guide, we'll cover how keyframes work and walk you through how to add keyframes in Alight Motion, step by step.
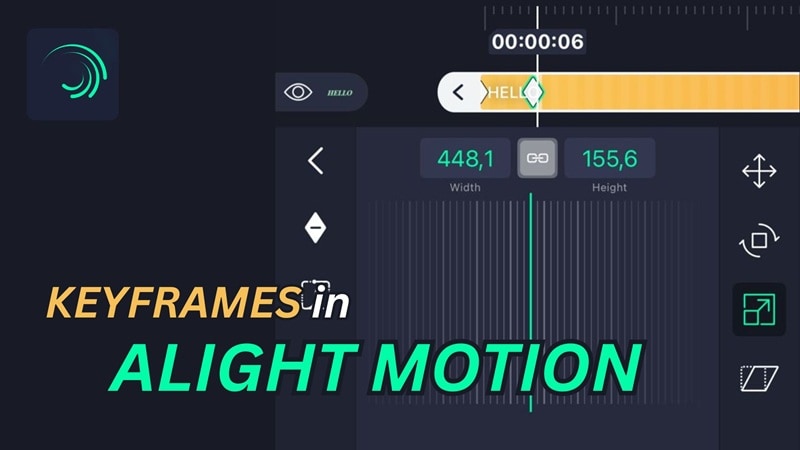
Part 1. What Are Keyframes in Alight Motion?
Keyframes are coordinate points on the timeline that store the value of a property at a specific moment in time. That property could be anything: position, scale, rotation, opacity, color, etc.
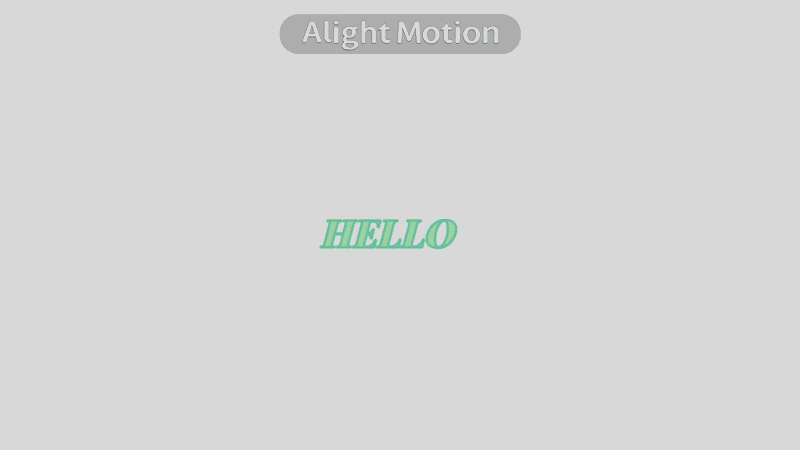
To make an animation, you need at least two keyframes: one for where the animation starts and one for where it ends. Alight Motion automatically fills in everything in between and plays it back as a continuous motion.

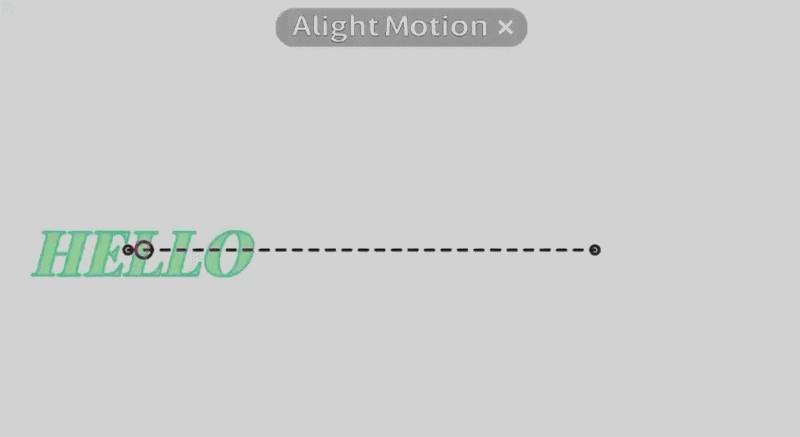
For example, if you want a text layer to slide from Point A to Point B, start by placing the playhead at the beginning of the movement and setting a keyframe with the text at Point A. Then, move the playhead forward and create a second keyframe after repositioning the text to Point B.
Alight Motion then animates the movement between the two—moving the text across the screen until it lands on the center position.
Part 2. Step-by-Step: How to Add and Edit Keyframes in Alight Motion (Android & iOS)
Alight Motion is a mobile video and animation editor available on Android and iOS. If you are currently using it to create animations or motion graphics on your phone, here's exactly how to add keyframes in Alight Motion.
Tap the play button to preview. If the layer animates smoothly between the two keyframes, you've successfully added keyframes in Alight Motion!
Part 3. How to Add Keyframes in Alight Motion iPad
Besides Android and iPhone, you can also use Alight Motion on iPad. The steps to add keyframes are exactly the same across all devices, but it does feel different in practice:
- More screen space to work with. The timeline, layer panel, and properties panel are all easier to read and navigate on a larger display. You'll spend less time zooming in to tap the right element.
- More precise playhead control. Positioning the playhead at the exact right frame is significantly easier on iPad since the timeline is physically wider. This matters when you're placing keyframes close together.
- Apple Pencil support. Alight Motion is fully optimized for iPad Pro, iPad Air, and iPad Mini, and using it with an Apple Pencil can enhance precision when manipulating keyframes.
How to Add Keyframes in Alight Motion for iPad

Alight Motion saves this as a second keyframe on its own, and you're done!
Part 4. How to Make Smooth Keyframe Animations with Alight Motion Graph Editor
If the animation result you just did using Alight Motion keyframes looks a bit stiff, it's likely because the app defaults to linear motion. This means your object moves from point A to point B at a perfectly constant speed, which rarely happens in real life.
You can easily fix this by using the Keyframe Graph Editor to add easing and make your movement feel more fluid.
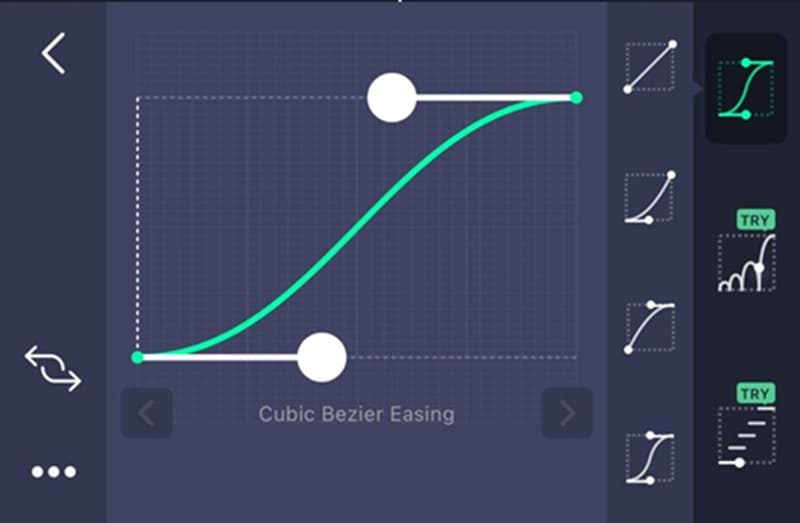
The graph editor gives you control over how the motion behaves between two keyframes. Instead of a constant-speed movement, you can make an object start slow and speed up, slow down before it stops, or do both.
How to Open the Graph Editor in Alight Motion
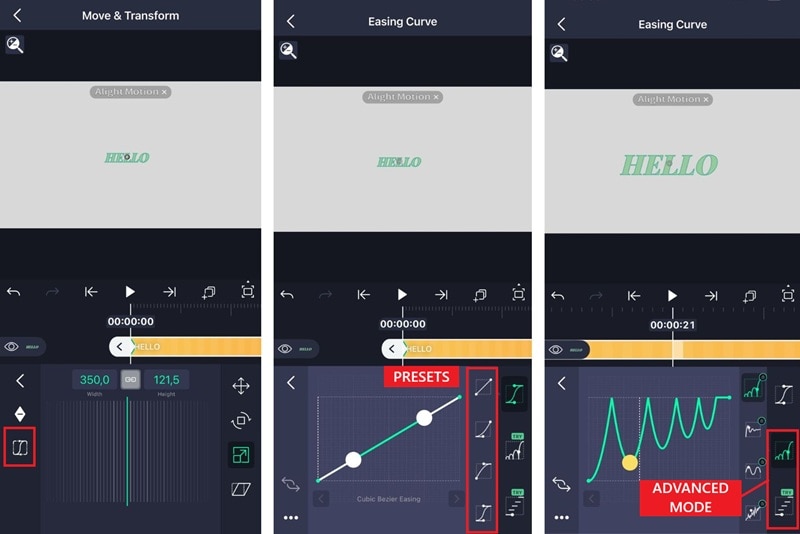
Alight Motion Keyframe Graph Presets
If you want to skip adjusting the curve manually, there are three built-in presets that get the job done in one tap:
- Ease In: Builds from slow to fast.
- Ease Out: Drops from fast to slow.
- Ease In-Out: Slow at both ends, fast in the middle.
Other Video Editing Apps That Support Keyframe Animation
If you want more editing options, Wondershare Filmora is one of the most popular alternatives to Alight Motion that you can also use to create animations and motion graphics using keyframes. And unlike Alight Motion, it's available on both mobile and desktop.
The steps for using keyframes in Filmora to create custom animations are also straightforward and follow a similar logic to Alight Motion. However, Filmora gives a wider range of editing tools and AI-powered features on top of keyframes, which can be a good option to consider when you wish to do more than just animation or produce polished videos faster without ads.
Some features that you can find on Filmora are:
- Speed Ramping — gives you control over video speed with customizable and preset curves, which is similar to keyframe easing but applied to playback speed.
- Animation Presets — Filmora includes a library of preset animation effects, including fade-in/out, slide up or down, zoom-in/out, so you don't have to animate from scratch.
- Motion Tracking — automatically tracks any moving subject in your footage and attaches text, graphics, or effects to it.
- Pen Tool & Trim Path — the Pen Tool lets you draw custom motion paths using Bezier handles, while Trim Path creates animated strokes and line reveal effects.
The keyframe feature in Filmora is available to try for free. When you are ready to save your work, you aren't required to watch an ad to export, unlike in Alight Motion. Though, the free version will include a watermark on the final video. You can upgrade to a paid subscription (Pro or Perpetual plan) to remove the watermark and access premium features.
Looking for a more robust desktop solution? While Alight Motion is great for mobile, Wondershare Filmora offers advanced keyframing features like motion tracking and AI-powered speed ramping on a larger screen. It's an excellent professional alternative for those who find mobile editing limiting.
Part 5. Pro Tips for Alight Motion Keyframe Animation
Now that you have the basics down, we are going to share some practical tips and secrets to help you work faster and get cleaner results with keyframes in Alight Motion.
1. Copy and Paste Keyframes to Save Time
If you're animating multiple layers with the same motion, you don't have to recreate keyframes every time. You can copy and paste them directly in the timeline. To do it:
- Tap the Layer icon and select “Copy Layer.”
- Select the layer you want to apply the copied keyframes to.
- Tap the layers icon, hit the arrow, and choose “Paste Style.”
- A pop-up will appear listing all available properties — select only the ones you need and tap “Paste.”
- The selected styles will be applied to the new layer instantly.
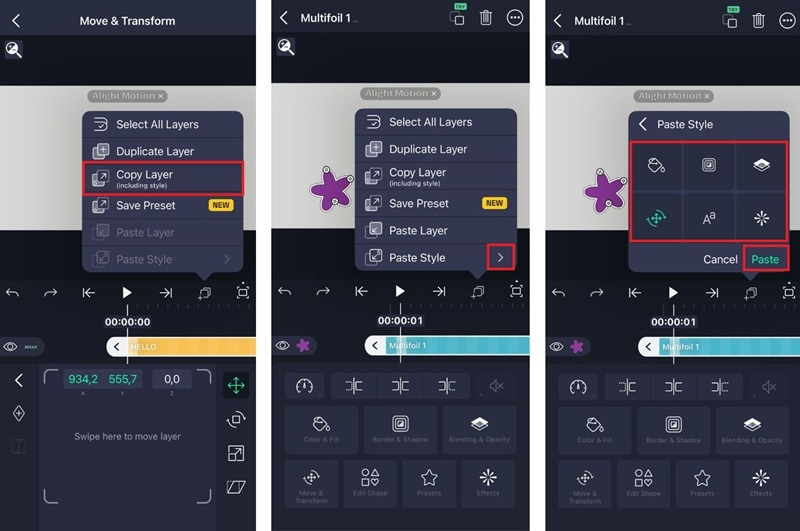
The keyframe lands with the same property values intact. It's useful for repeating animations across different layers.
2. Don't Skip Easing If You Want to Make the Animations Smooth
If you are wondering how to make smooth animations in Alight Motion, one of the easiest ways is by applying easing to your keyframes.
Linear motion may be the default, but it's also the reason most beginner animations look stiff. When applying easing, it modifies a property at an increasing or decreasing rate instead of a constant one. This small tweak will make the motion feel more natural.
3. Keep Keyframes to a Minimum
We know that adding more keyframes feels like more control, but it can actually work against you. Too many keyframes in a short span creates jittery, unpredictable motion that's harder to fix than it sounds. It usually starts with just two (a beginning and an endpoint) and then only adds more if the motion genuinely needs it.
Conclusion
With the new skill you learned today, you can start experimenting and making animations using Alight Motion keyframes. You only need to set two points on the timeline to define a start and an end, and the app handles the movement in between.
If you ever find yourself wanting more tools beyond what Alight Motion offers, apps like Filmora are worth exploring for their broader feature set and desktop support.
FAQs
-
How do I delete a keyframe in Alight Motion?
Tap and hold the keyframe diamond on the timeline until a menu appears, then select Delete. It will remove only that keyframe without affecting the others in your animation. -
Can I animate effects and filters using keyframes?
Yes. Alight Motion lets you keyframe most effects and filter properties, not just position, scale, and opacity. This means you can animate things like blur intensity and other effect parameters over time, the same way you would any other property. -
Is there a limit to how many keyframes I can add to a single layer?
Alight Motion doesn't enforce a hard limit on the number of keyframes per layer. However, adding too many keyframes in a short span can cause jittery and unpredictable motion that is difficult to clean up. It's better to keep keyframes to a minimum and only add more when the animation genuinely requires it.
