
 100% Security Verified | No Subscription Required | No Malware


 ChatGPT
 Perplexity
 Gemini
 Claude
 Grok
Grok

Nothing adds flair to a video like having some animated text as a title card or just giving some context to the scene, and Premier Pro is the go-to tool for content creators who want to add this effect.
However, while it is a highly functional tool that lets you do a lot of different things, it’s also fairly complex and takes some getting used to. Even when you’ve mastered the basics of Premiere Pro, it will still take time to go through all the steps that we will outline below.
That’s why we will give you some tips on using a much more efficient and user-friendly tool, Wondershare Filmora, to get the same effect and much more.
In this article
How to Add Text Transitions in Premiere Pro: Step-by-Step Guide
First, we’ll take a look at Premiere text transitions, which will take a few extra steps to get just right, so you’ll need to go over the following guidelines carefully. You can also add things like text fade, rise up, reflection, and the popular glitch text effect in Premiere Pro.
Once you get used to where all the icons are and what settings to focus on, it will get easier, though. Here’s what you’ll need to do.
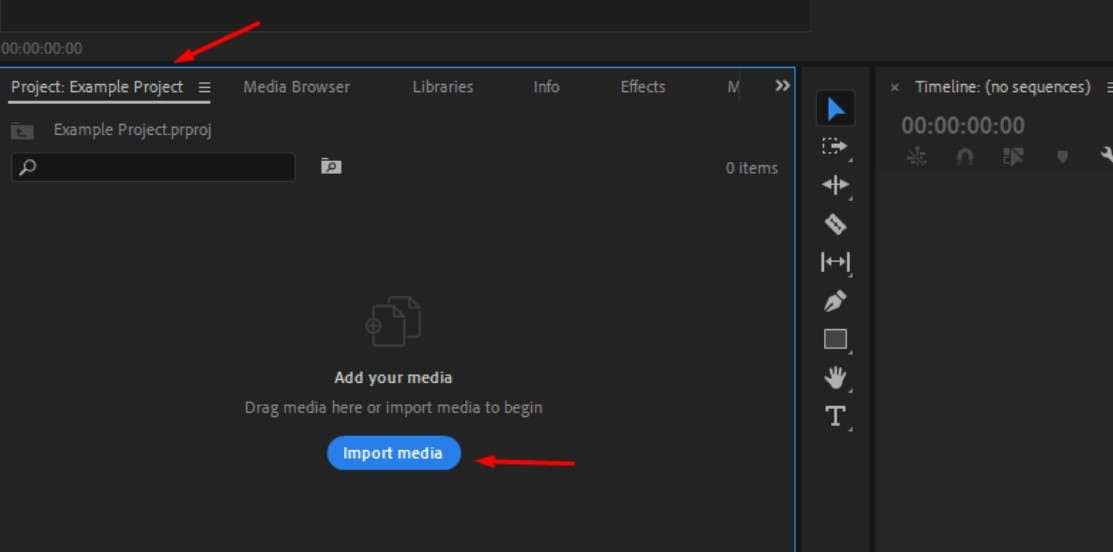
Step 1: Start Premiere Pro, hit New Project > Create, and then Import media or drag videos from a folder over to Premiere Pro.
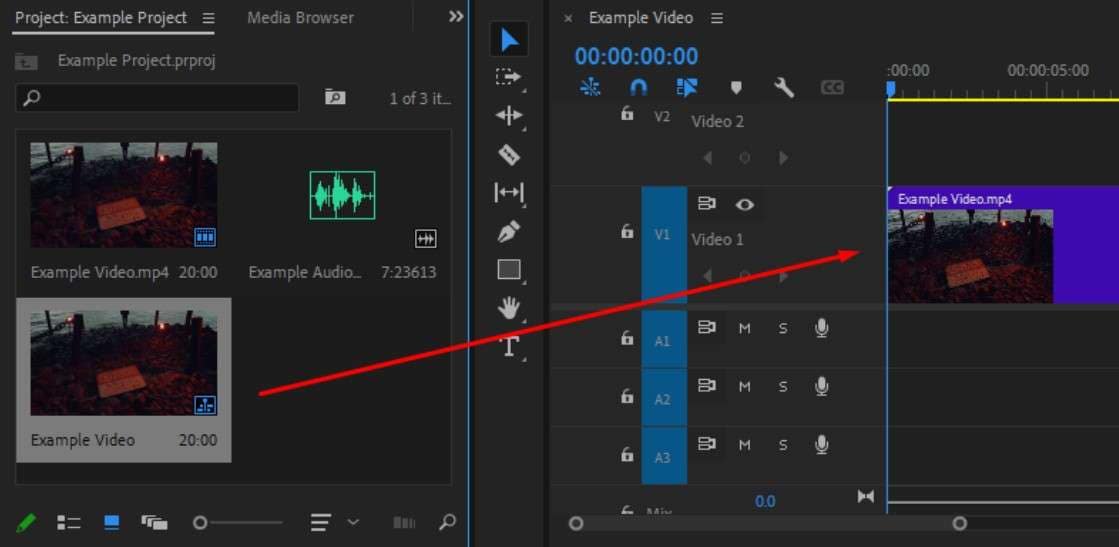
Step 2: Drag your videos over from the Project tab to the Timeline on the right.
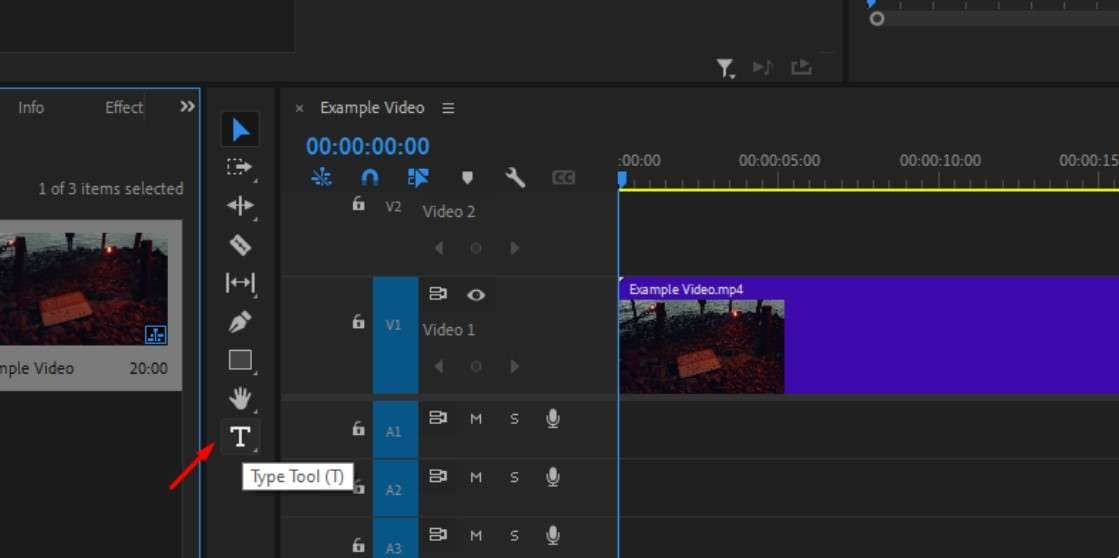
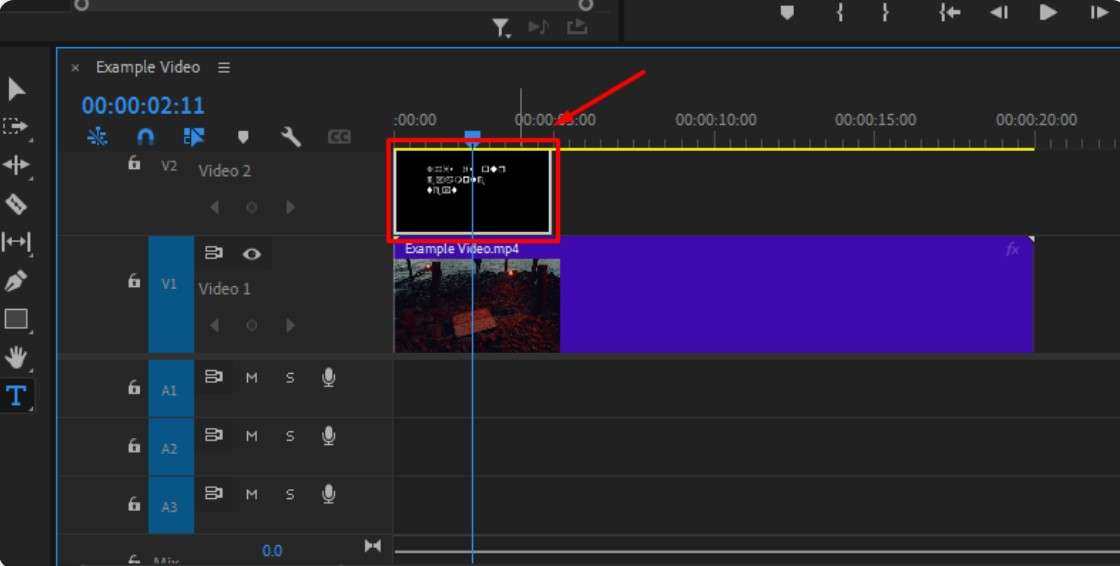
Step 3: Click the Type Tool icon, then type out the text you want and hit Enter.
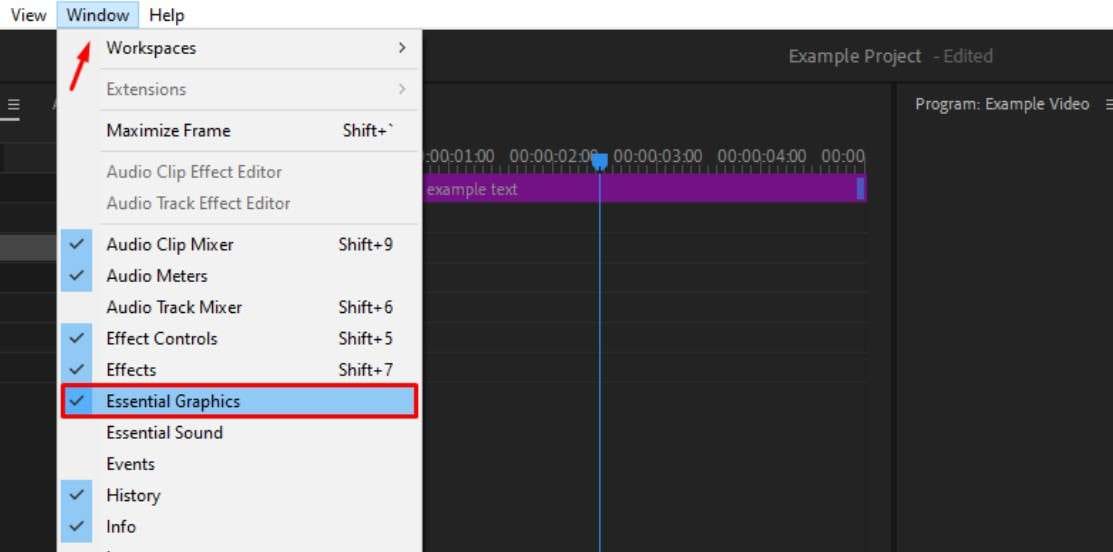
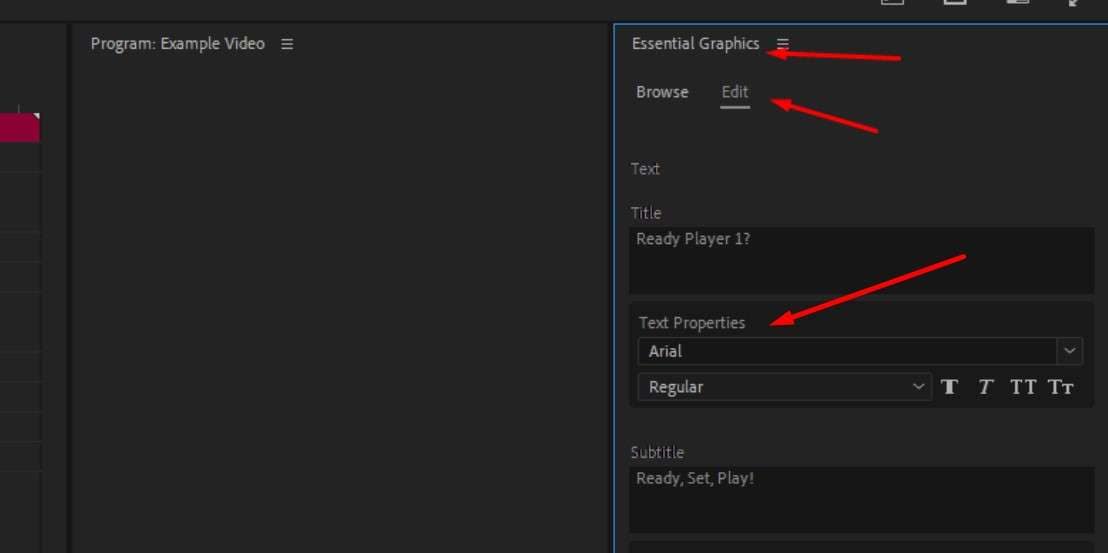
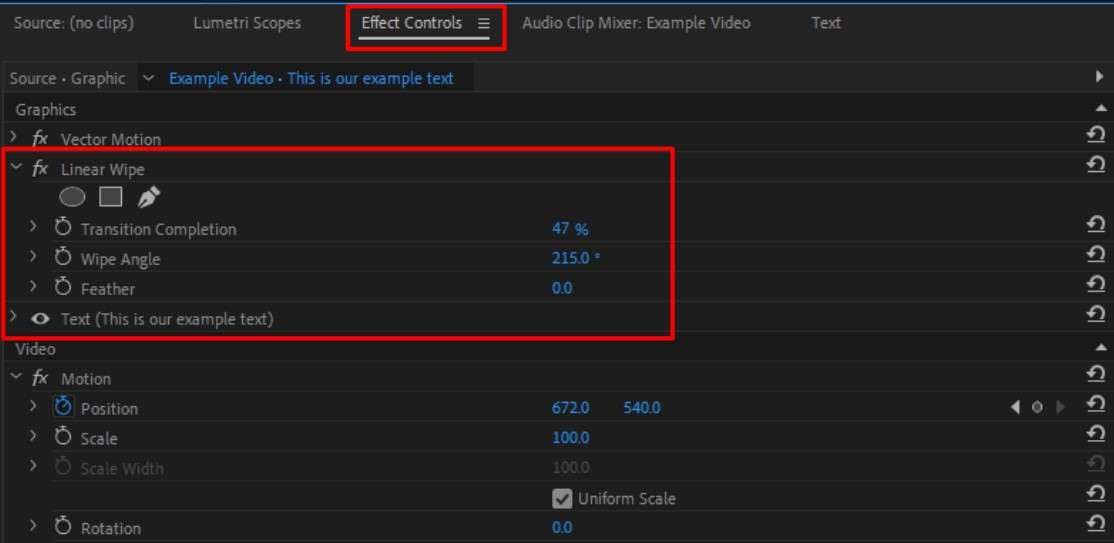
Step 4: Note the Effect Controls tab that you will use to make modifications, but first, you’ll need to go to Window > Essential Graphics.
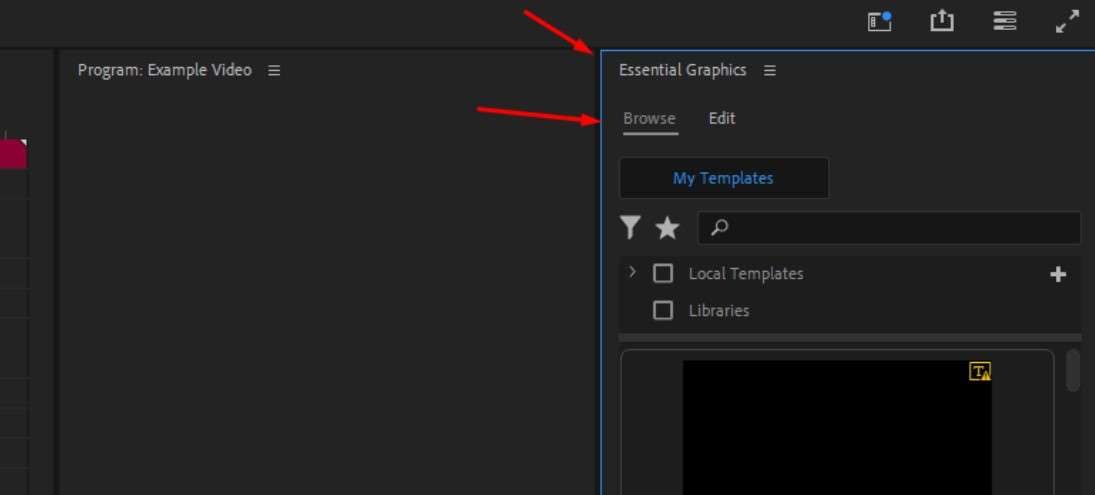
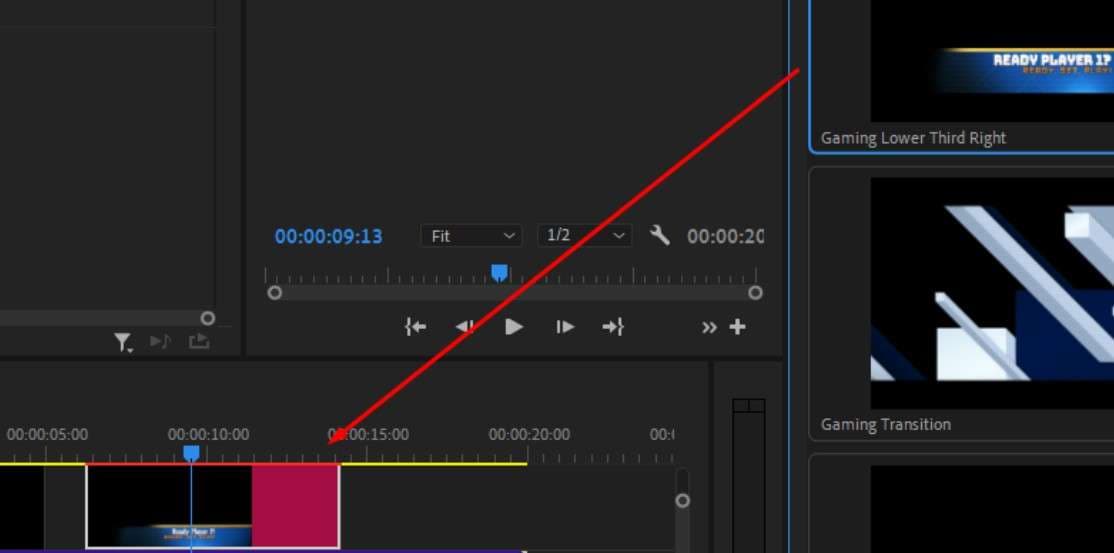
Step 5: You can change the positioning of the text or go to Browse to gain access to preset text templates, which you can then add to the timeline by simply dragging it over.
Step 6: You can now go to the Edit tab to change the font and size under Text Properties or add changes to your text.
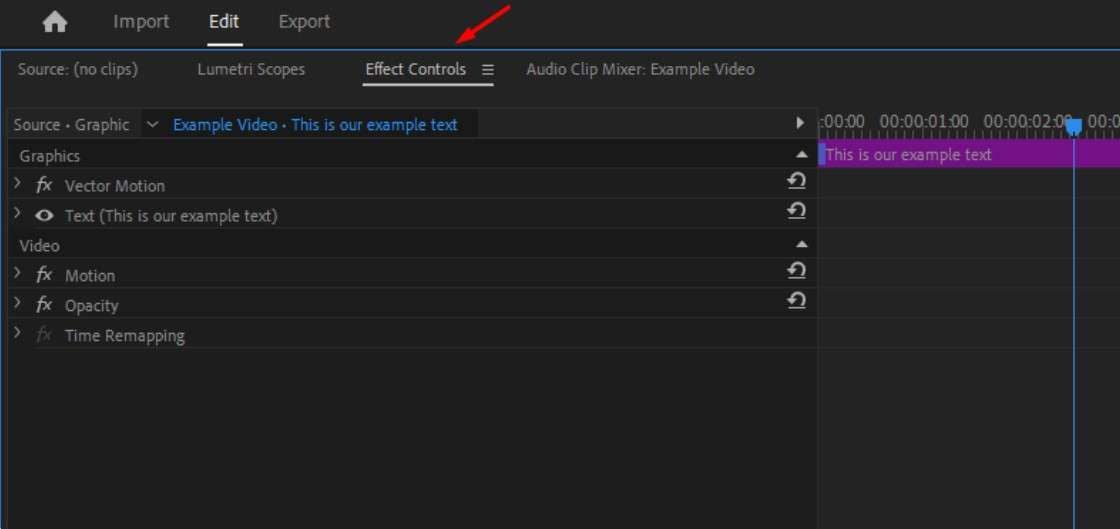
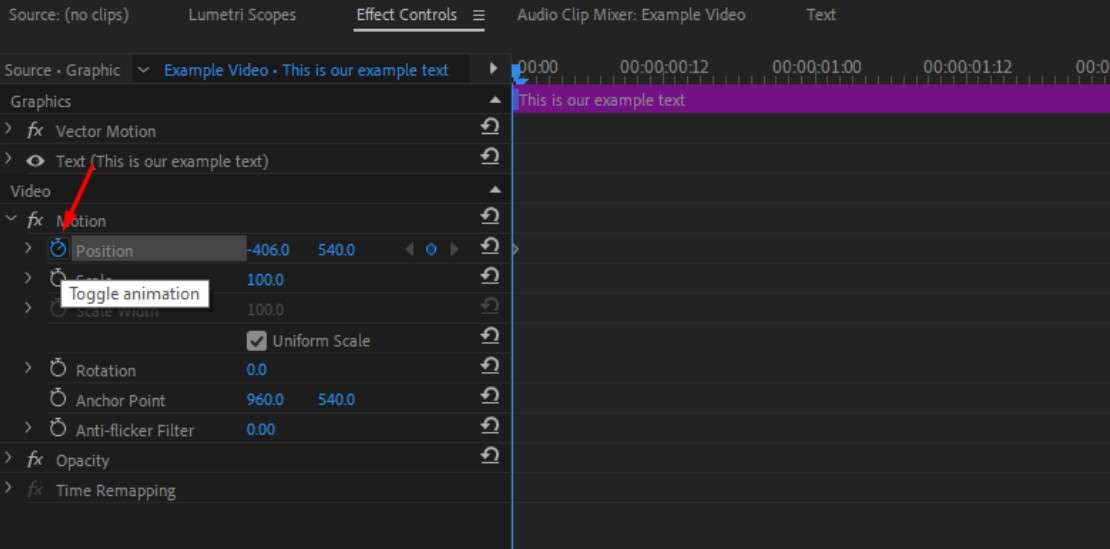
Step 7: Click on the text layer on the timeline, go to the Effect Controls tab, and under Motion, go to Position to set where the text will appear once the video starts.
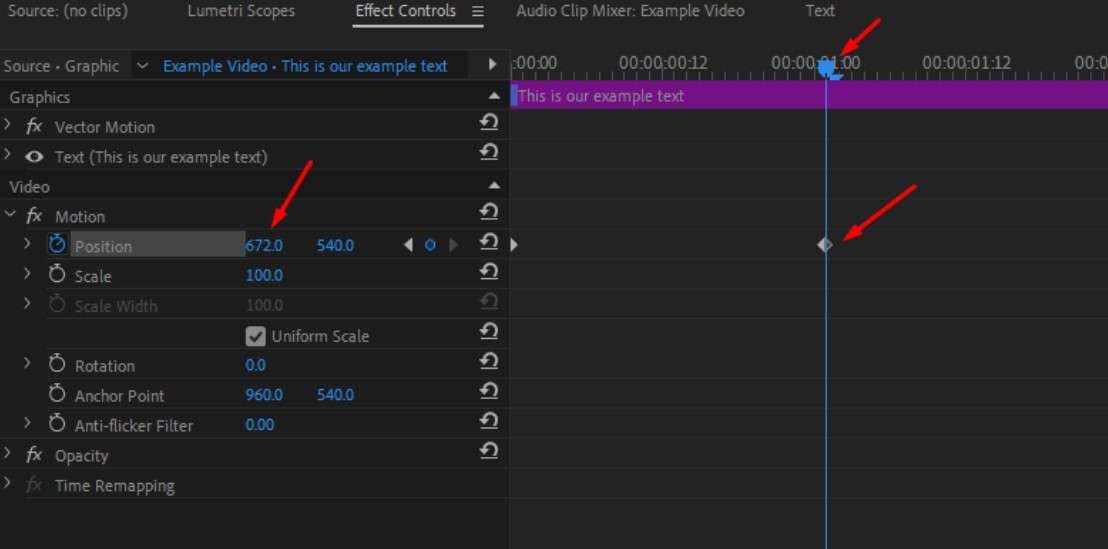
Step 8: Click on the stopwatch next to the Position setting to create the first keyframe, and then position the playhead to where you want the effect to take place and adjust the position to add the next keyframe.
Step 9: You can play around with the settings and add keyframes for any specific change you want to happen, from changes in opacity to rotating the text.
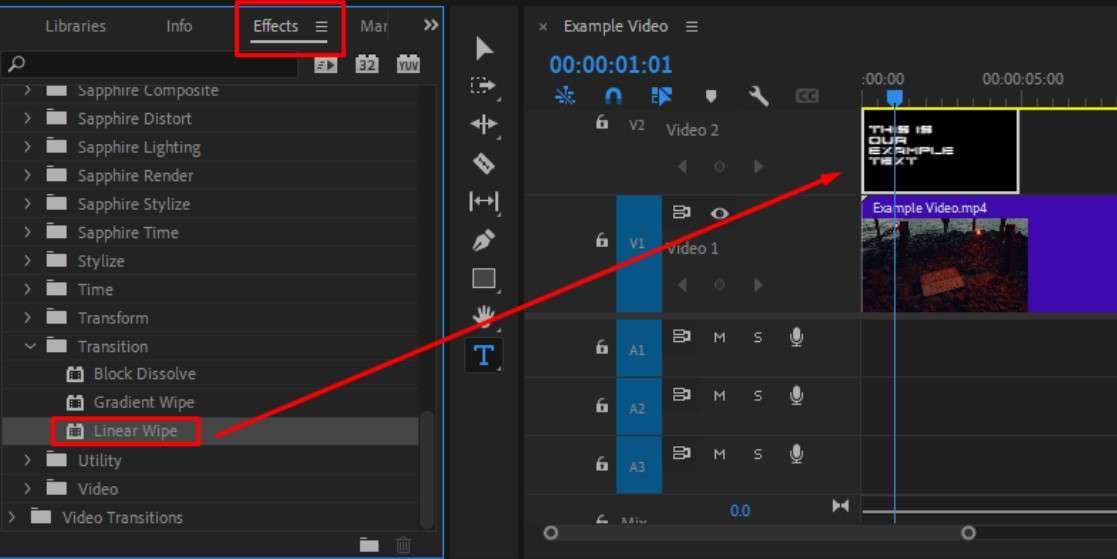
Step 10: You can also go to the Effects tab, choose one of the free text transitions Premiere Pro offers, and drag it to the timeline, then adjust it from the Effect Controls tab.
Step 11: When you’re done and everything looks good, go to File > Save or File > Project Manager, then set a location with Browse, and hit Save and Export.
The results will be great in the end, but it will take you some time to get there, and it’s like that for any other effect or editing trick you might want to apply. There are also plugins you can use to make different tasks easier, but then you’ll have to spend time hunting down more plugins.
If you need something more beginner-friendly that can get the job done in just a few clicks, Wondershare Filmora has an intuitive interface and many useful effects that you can just drag and drop on the timeline.
You can get it for Windows, Mac, iPhone, and Android, and we’ll help you create fun text transitions and other effects.
Add Text Transitions Quickly with Filmora
In a moment, you’ll see just how quick and easy it is to add different elements to your videos and fine-tune them using Filmora. Just follow these basic steps, and you’ll have everything ready in a couple of minutes.
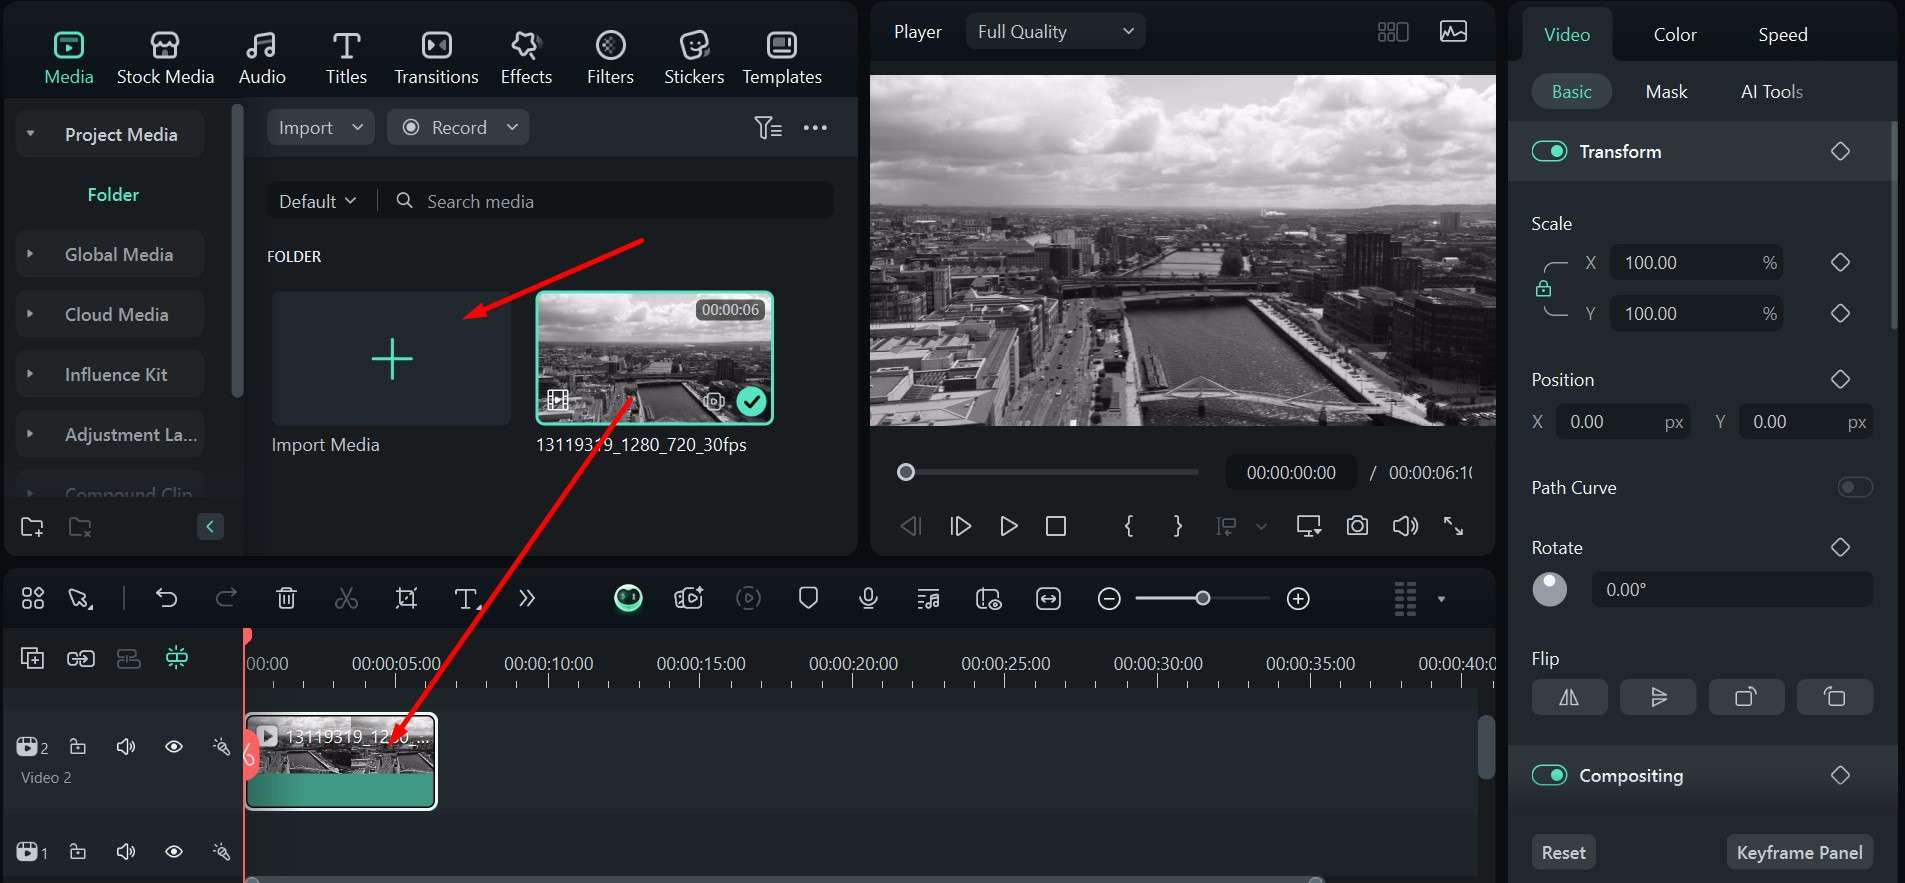
Step 1: Download and run the app on your preferred divide and start a New Project from the main menu.
 secure download

Step 2: Import the videos you want to edit, or just drag them over to the designated area in the Media section and drop them there.
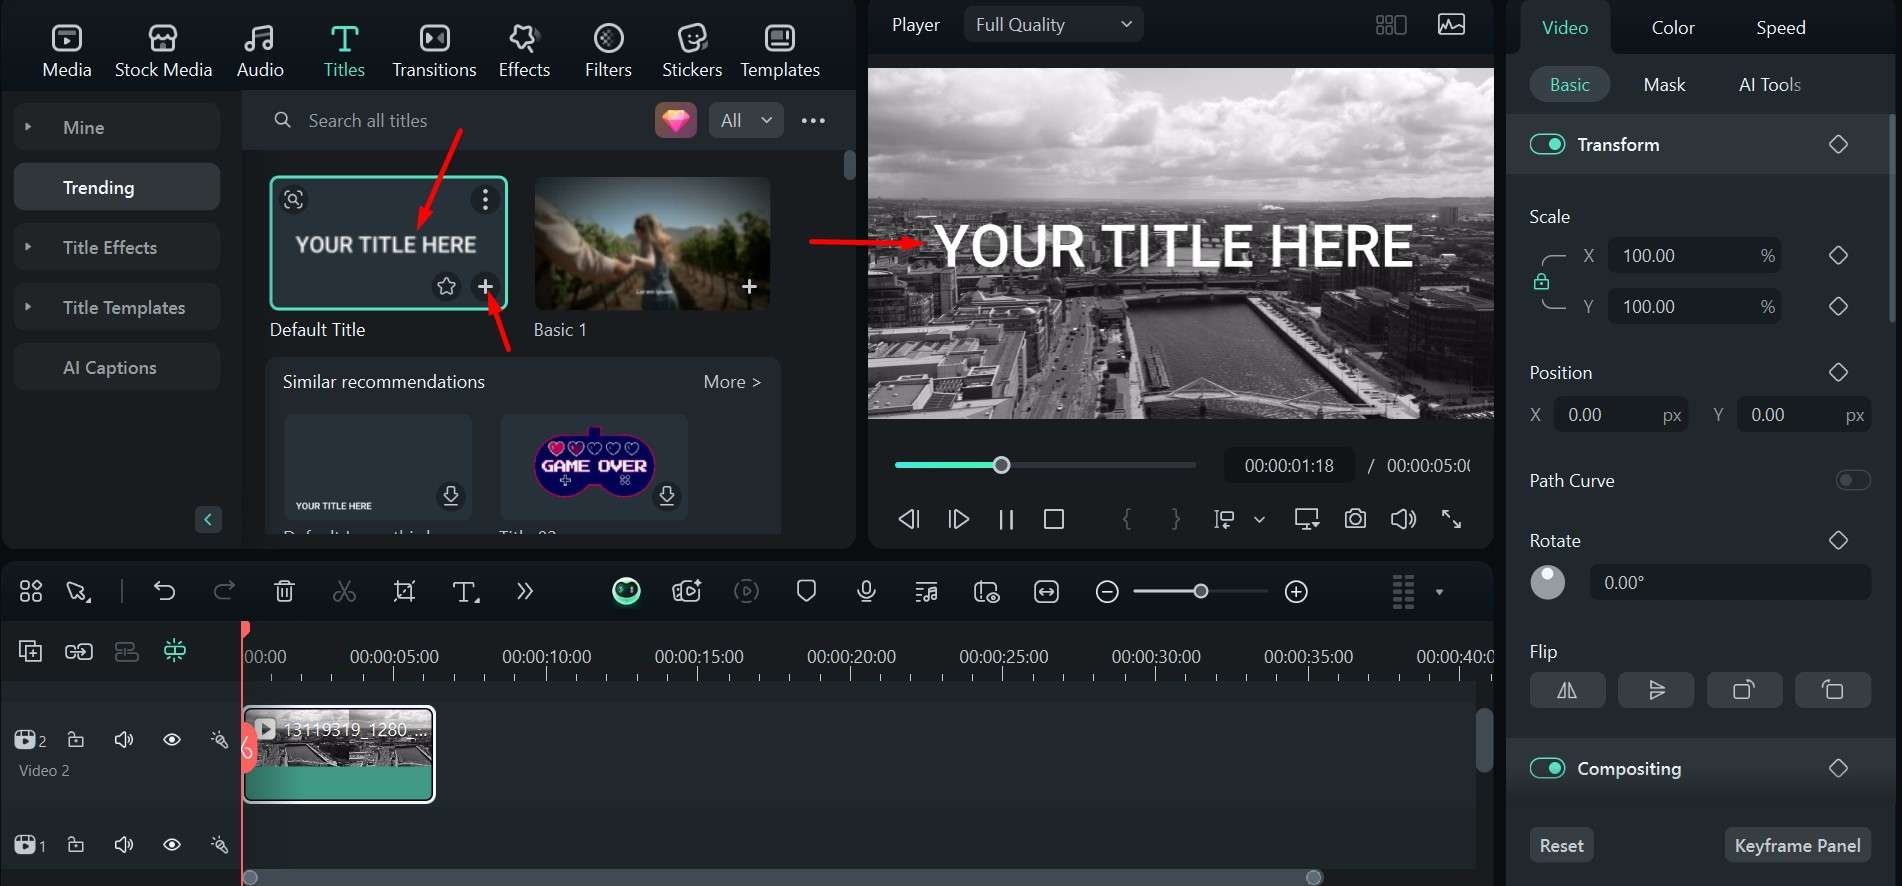
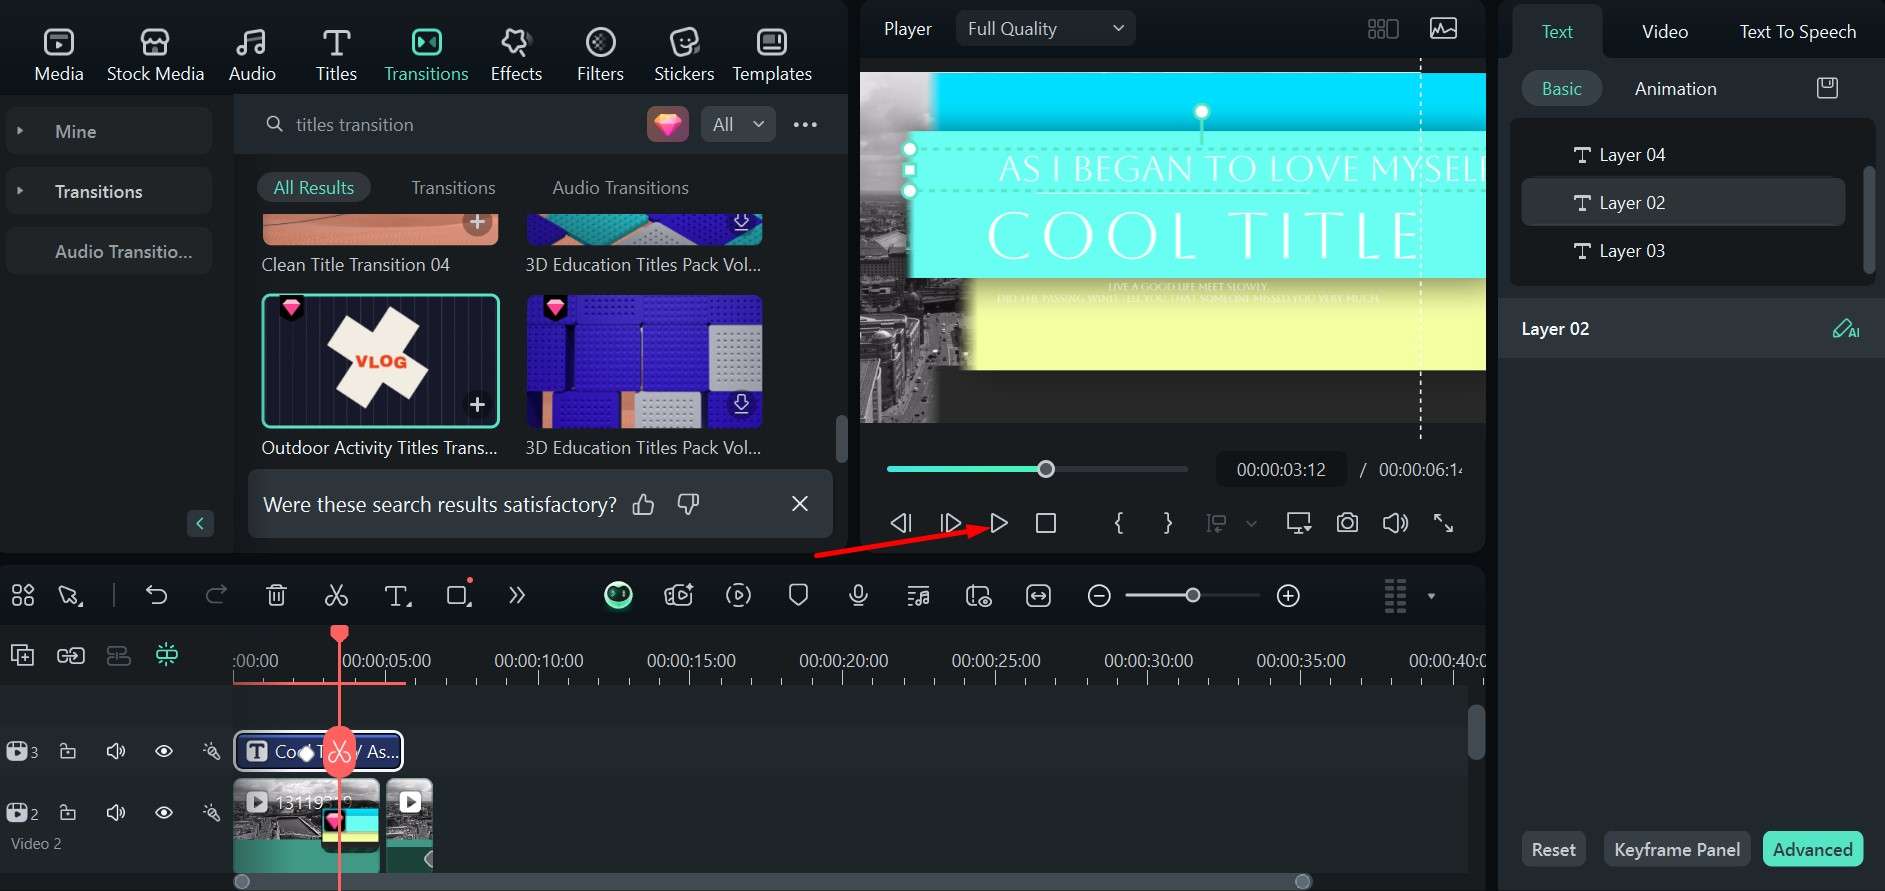
Step 3: Click the Titles tab and look for options you like from the selection in the various dropdown menus on the left side. Click the effect to preview it and hit the + button to add it to the project. Make sure it’s the top layer.
Step 4: Click the Transitions tab, and in the search bar, type in “Title Transitions” to get a list of options you can scroll through.
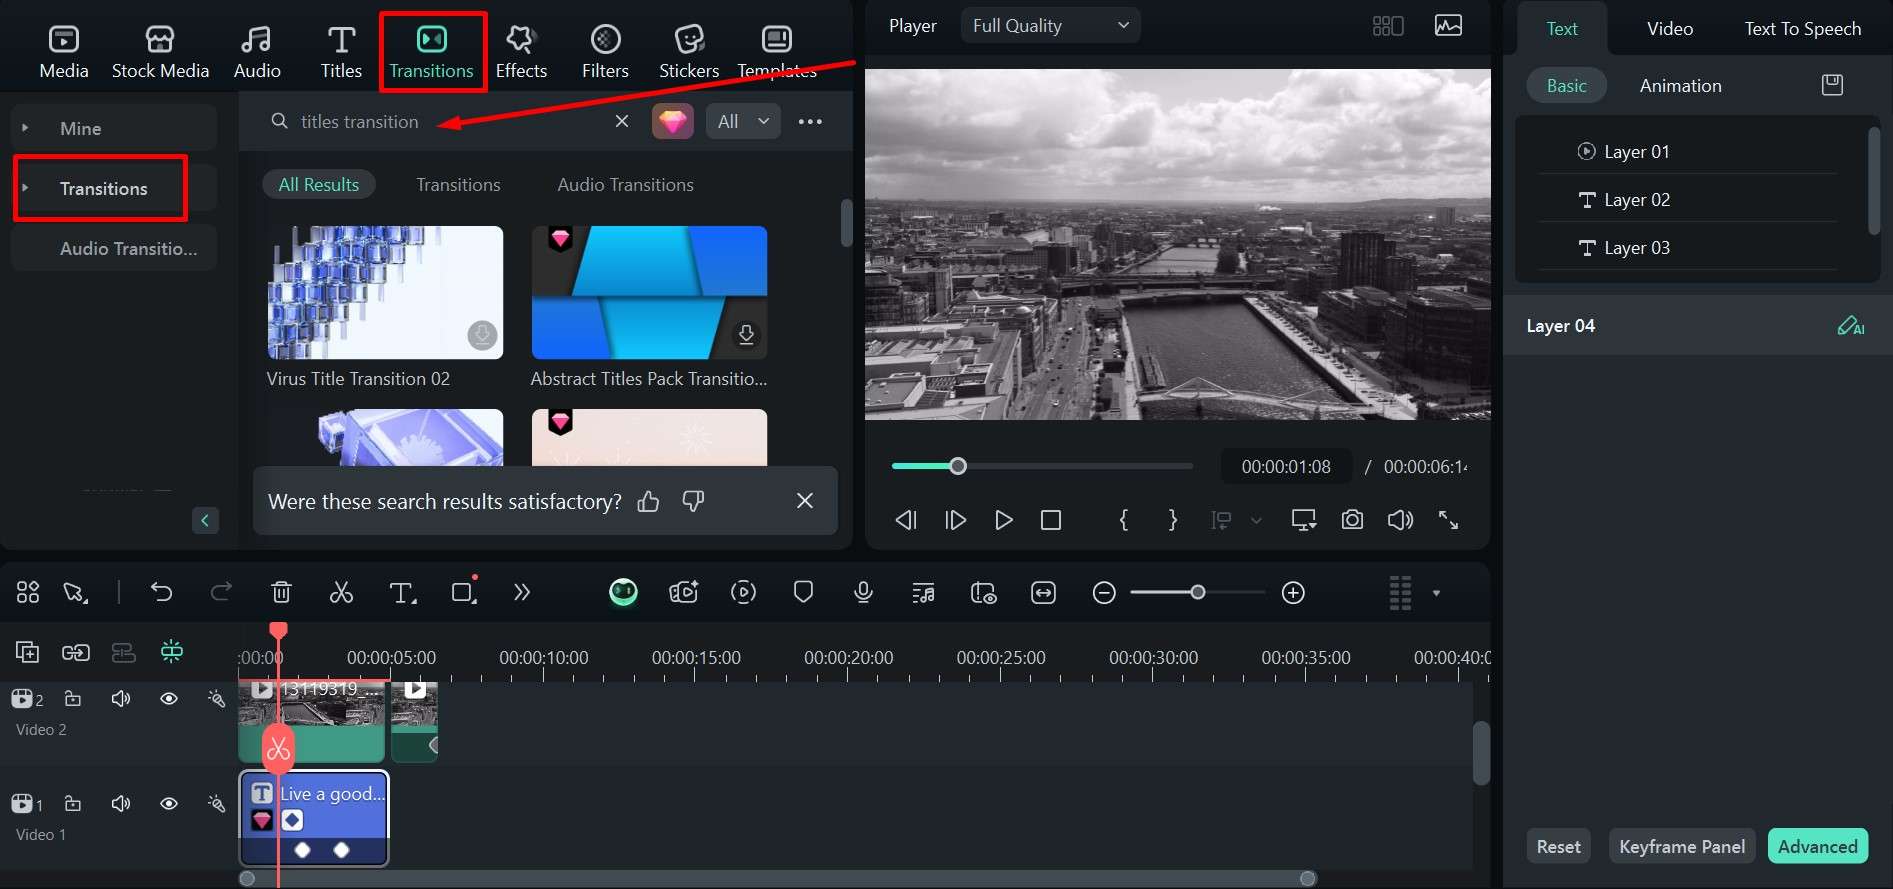
Step 5: Take a transition you like and drag it down to the timeline, or press the + button to add it automatically.
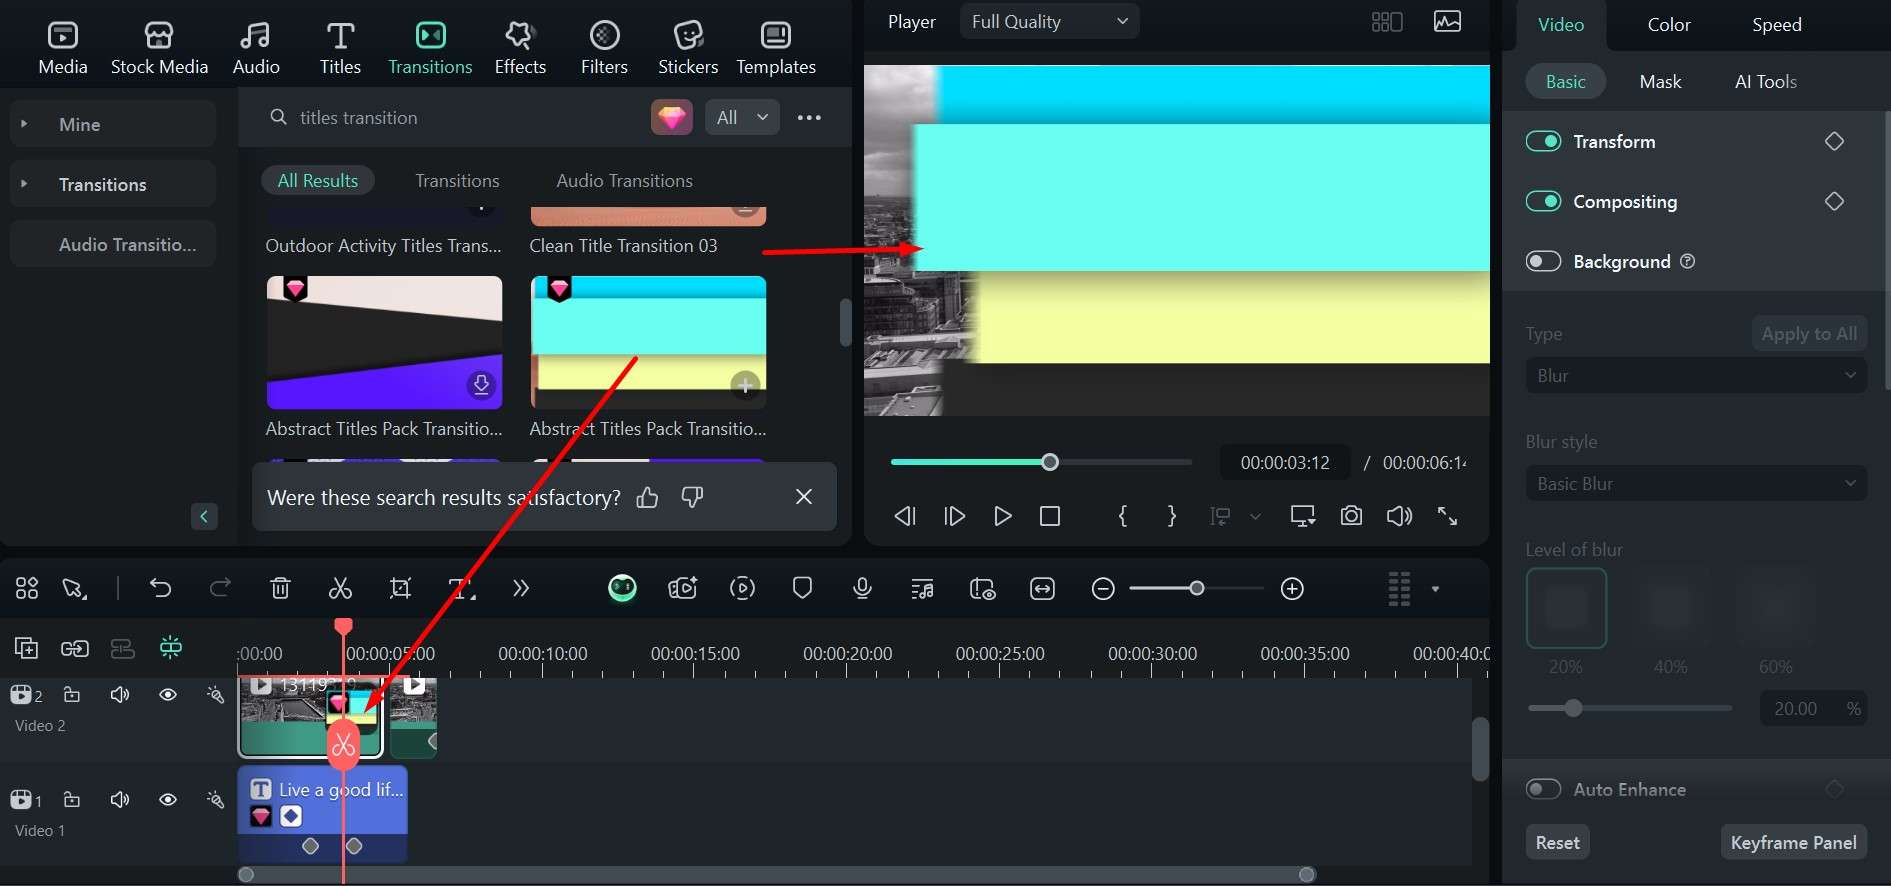
Step 6: Play around with the settings to adjust the lettering and the length of the transition by simply moving the ends of the clip left or right on the timeline. You can preview it by moving the playhead to the start and pressing the play button.
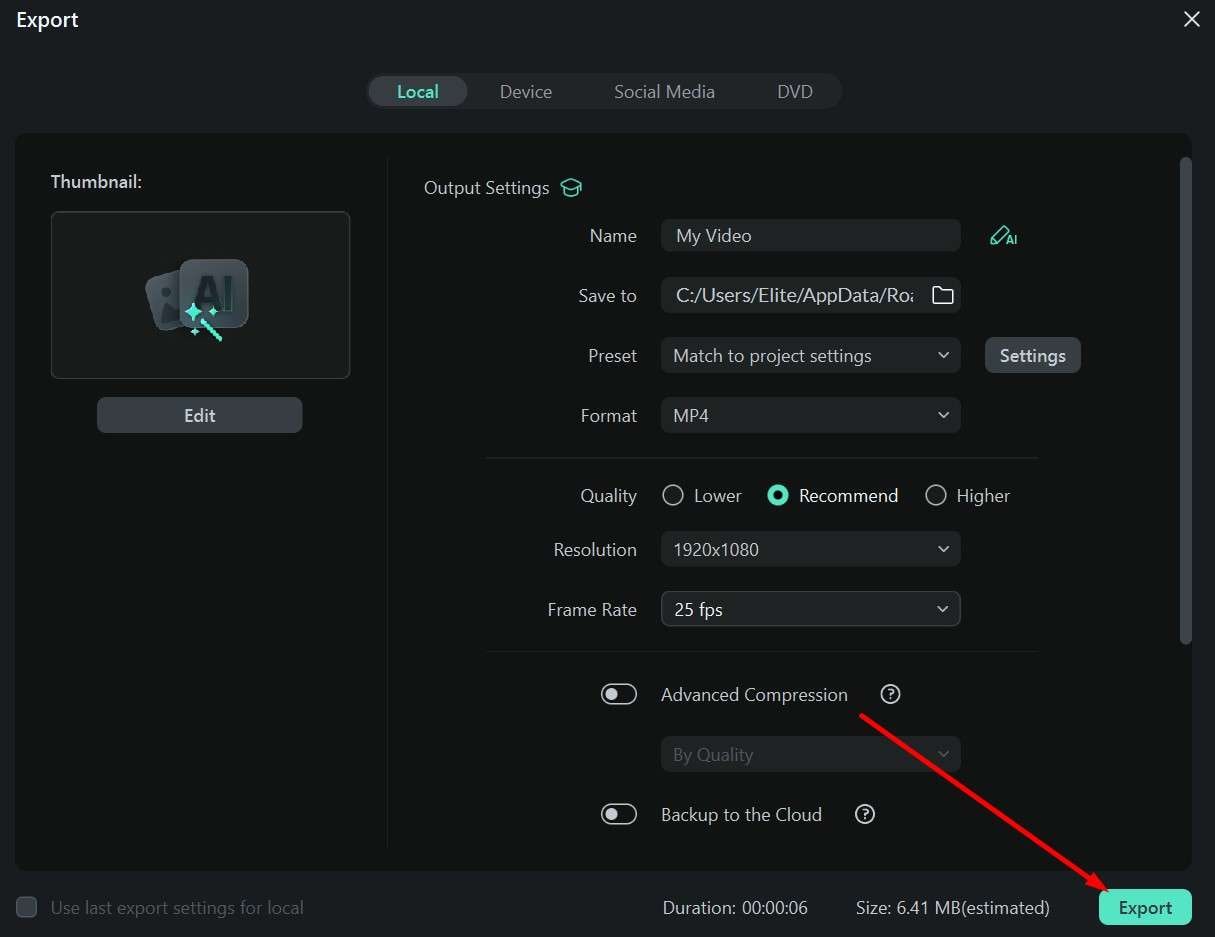
Step 7: When you are satisfied with the results, go to Export in the upper right corner, set the parameters you want, and confirm by hitting Export again in the pop-up window.
As you can see, it’s a much faster process. All the elements have large icons with text clearly explaining what each does, and it’s easy to make modifications with a click or two. There’s also a simple way to add text transitions on the mobile app.
Implement the Glitch Text Animation With Filmora’s Mobile Version
If you just need to make a few quick video edits on your phone before posting videos on social media, don’t worry. Filmora also has a mobile version you can use. Adding various effects is easy, as you will see. Just follow these steps.
Step 1: Start the app and add some videos from your phone.
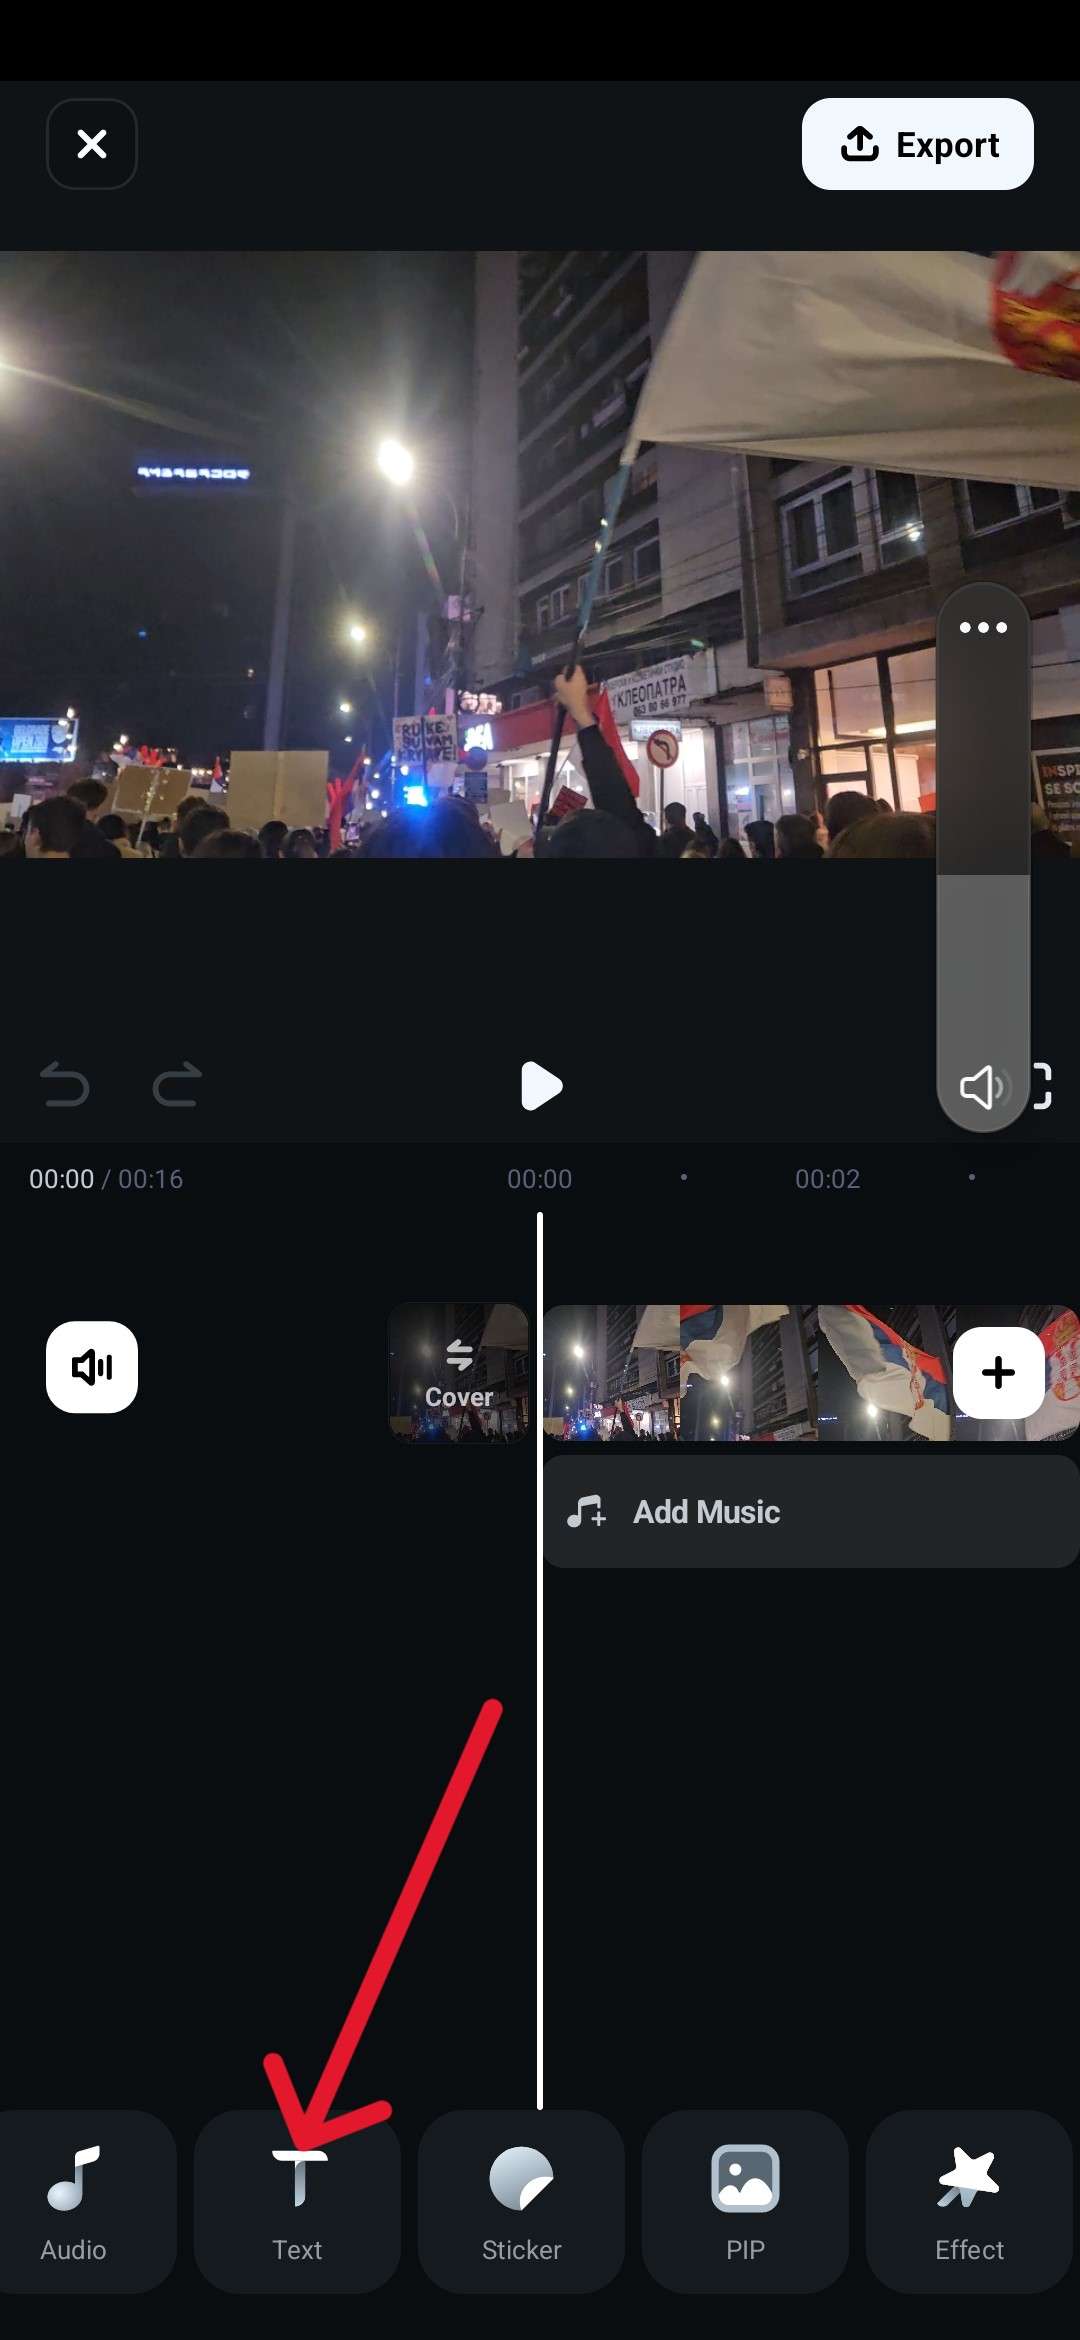
Step 2: Tap on the Text icon to open further options.
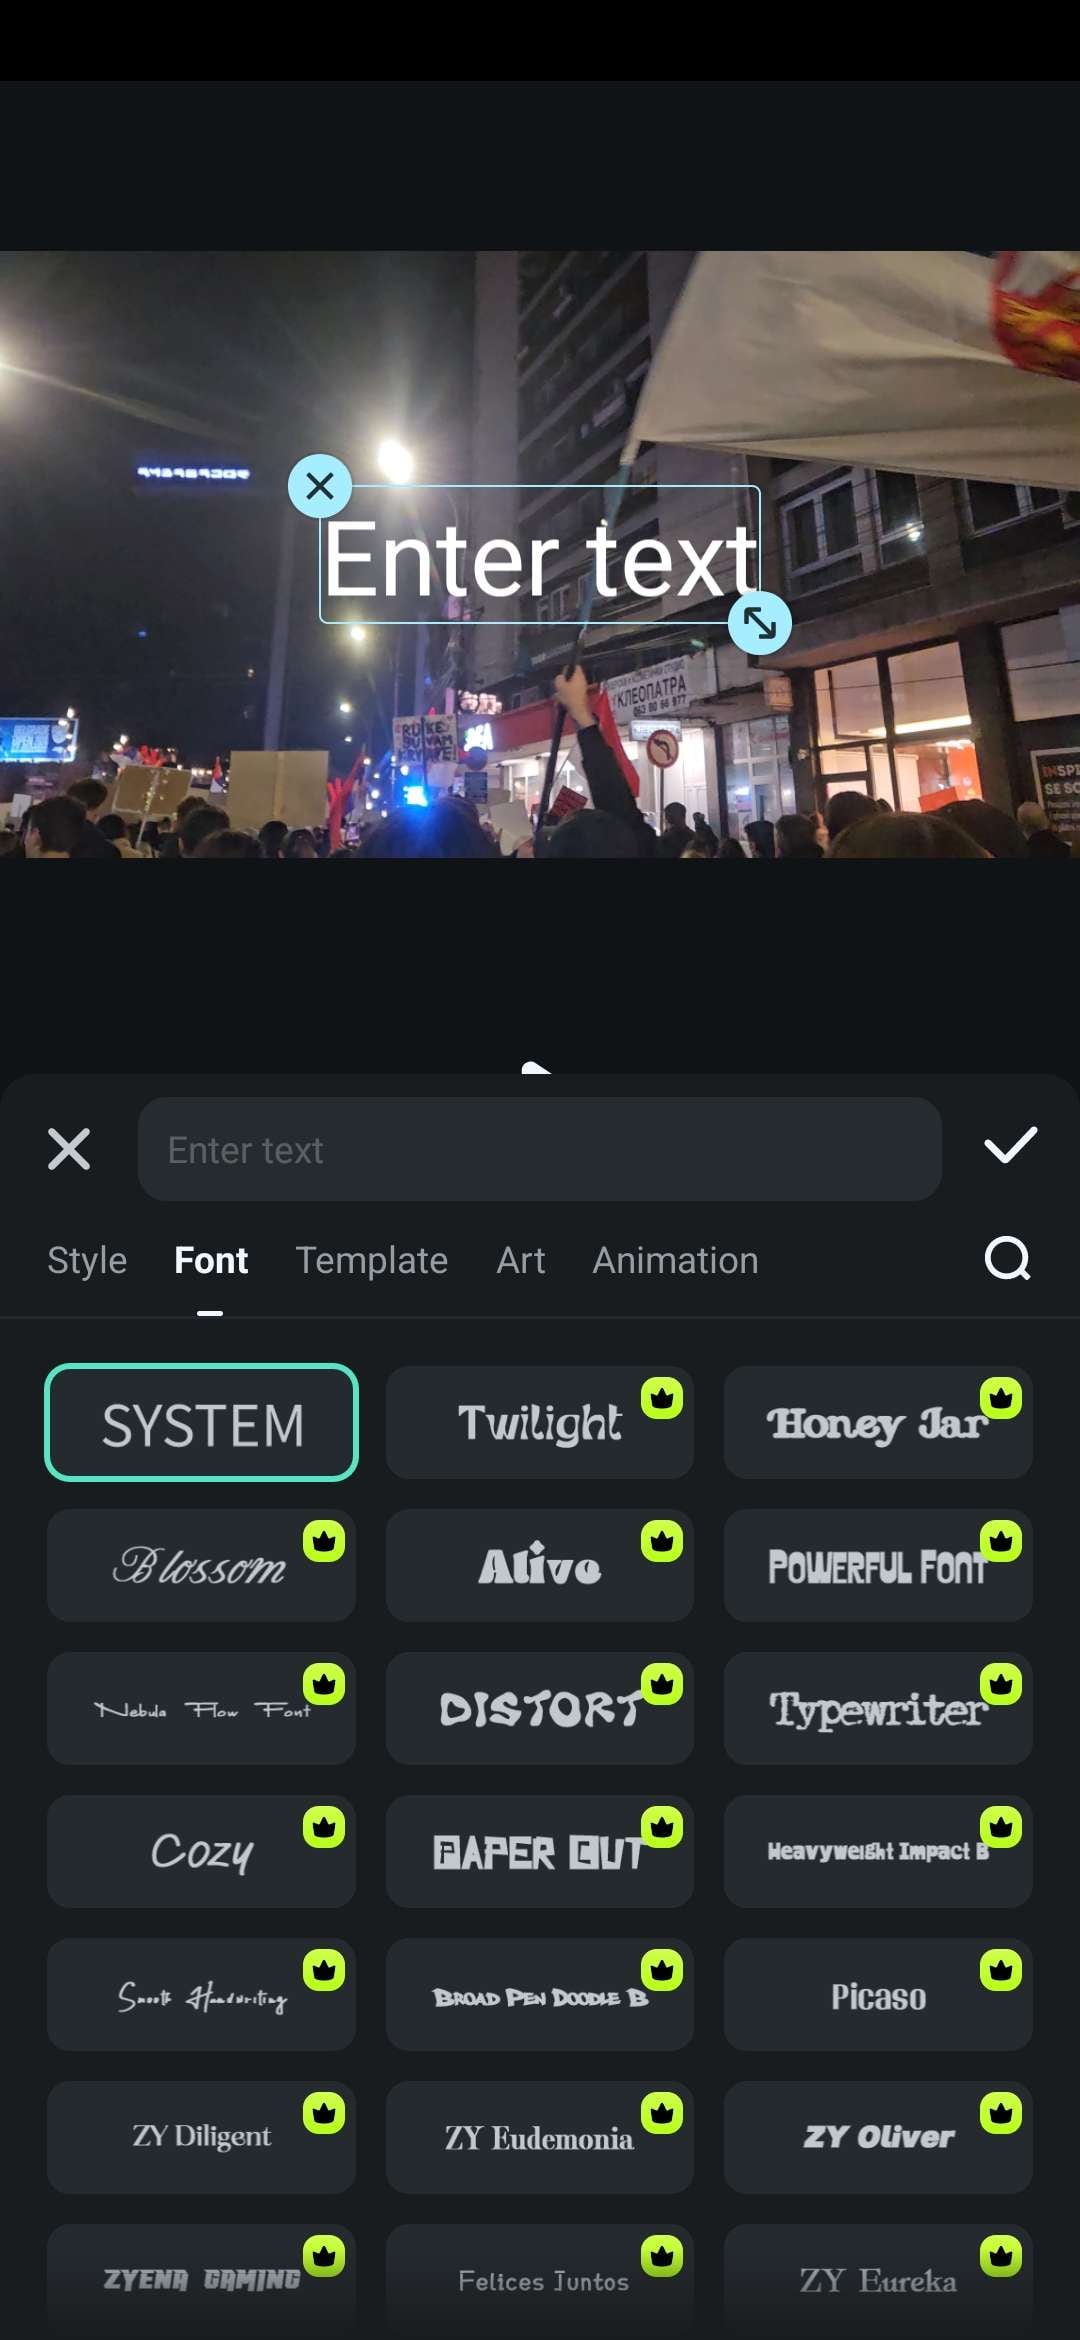
Step 3: Choose between the different font and style options to find what you like.
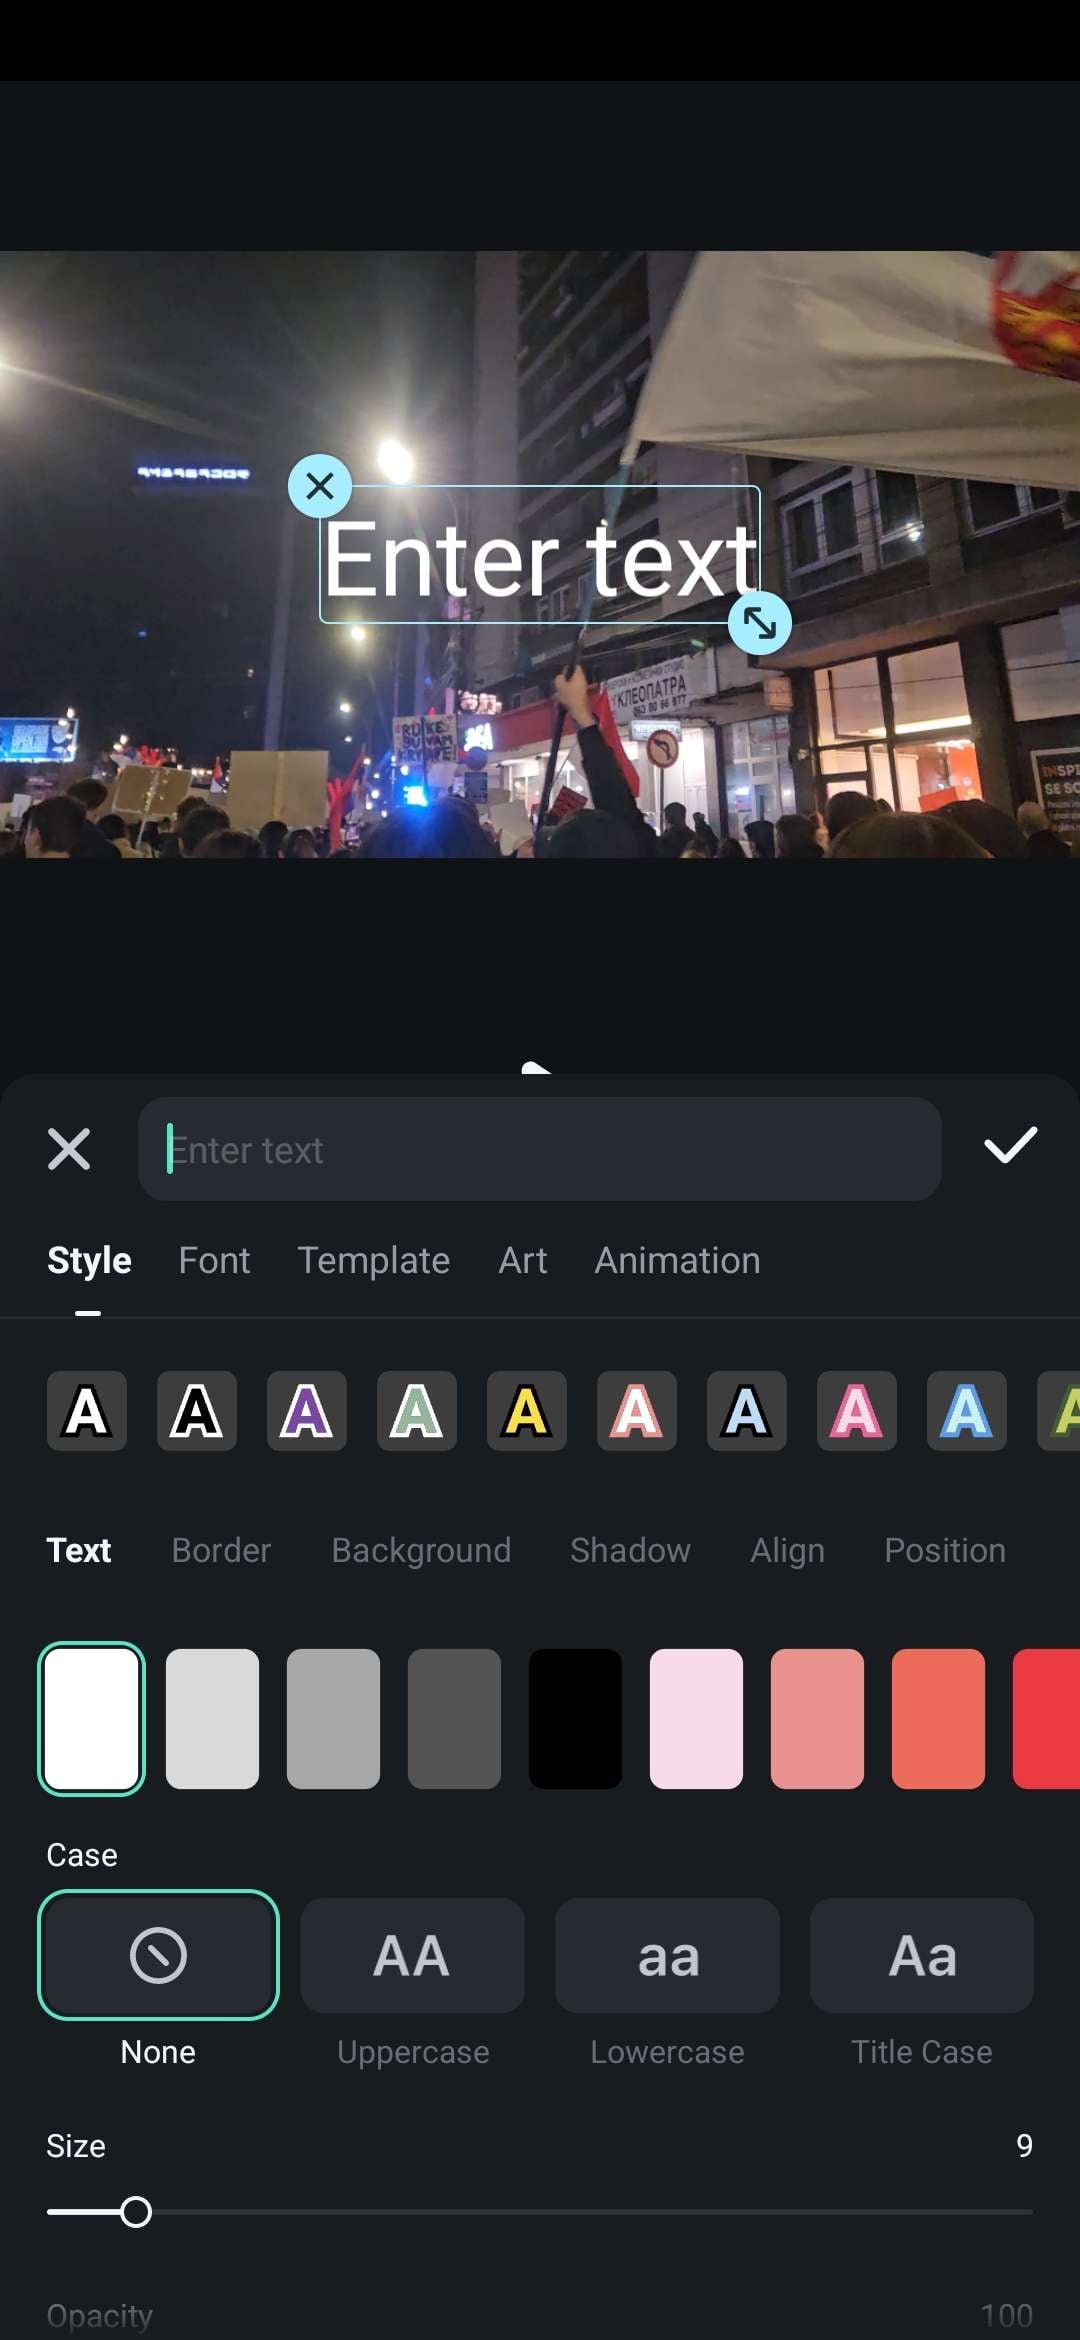
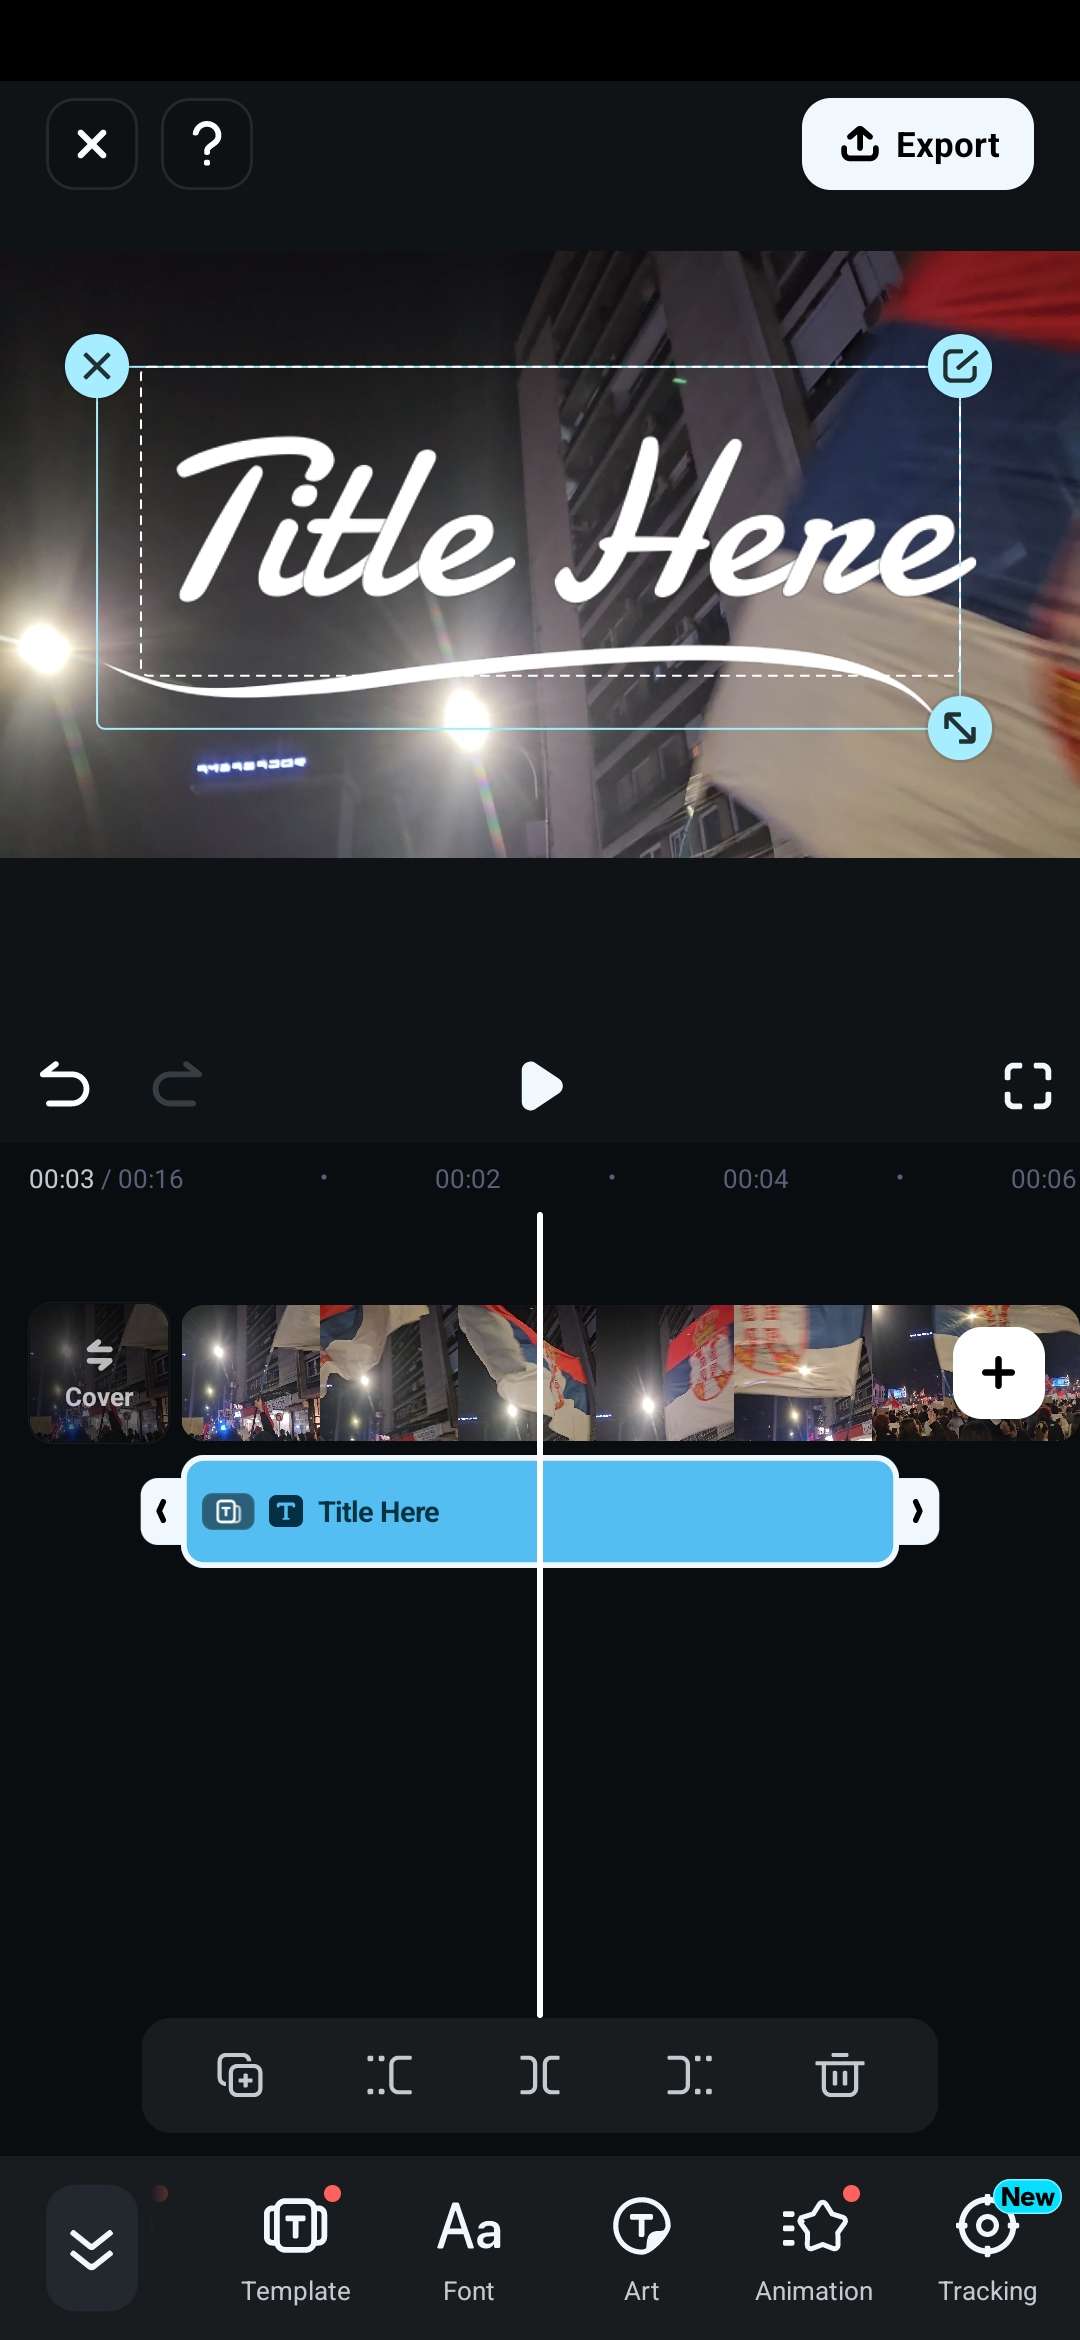
Step 4: Modify the size and positioning of the text.
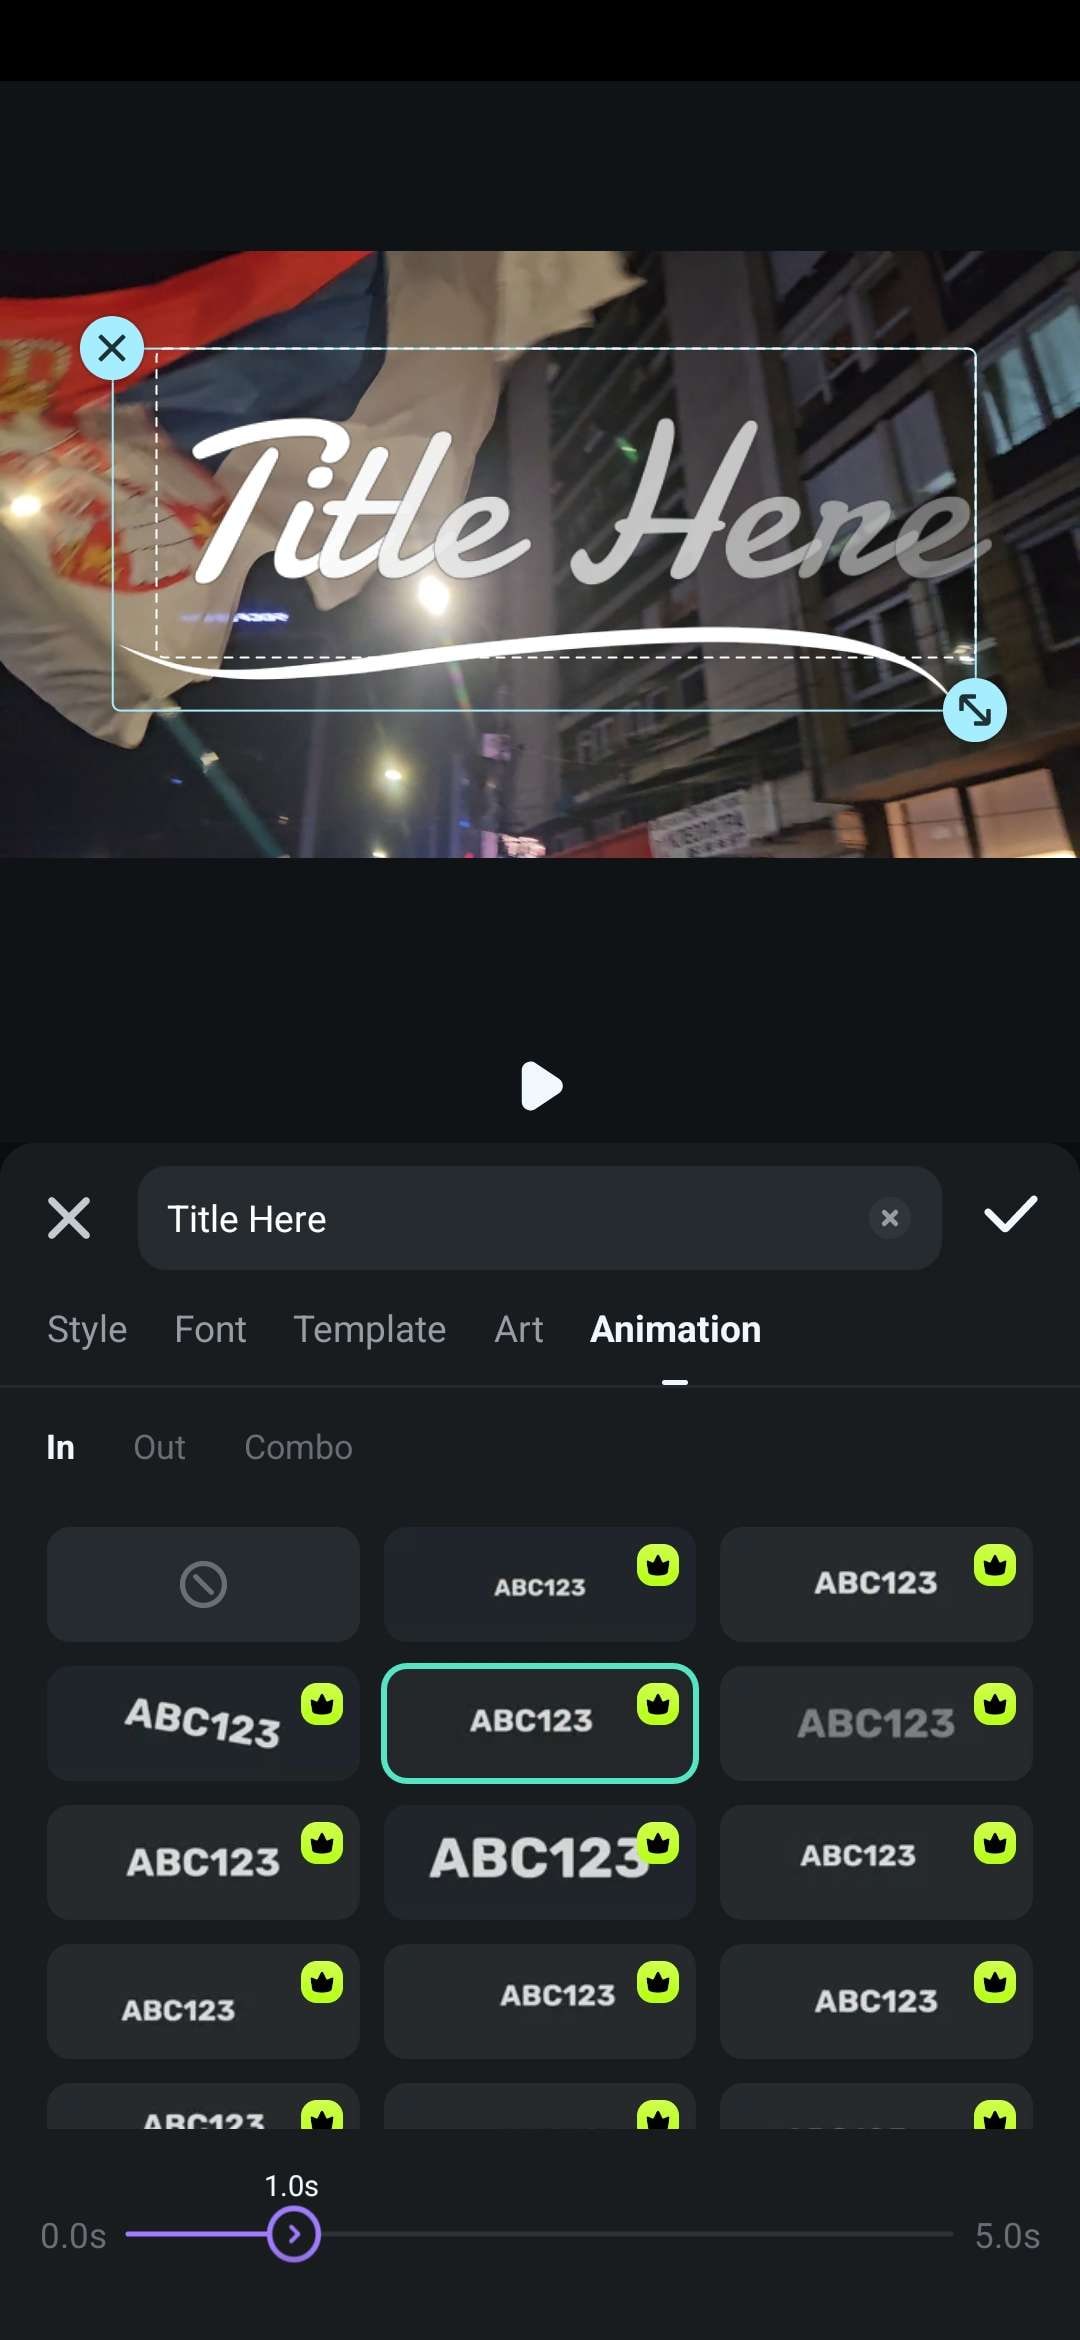
Step 5: Go to the Animation tab and choose a text transition you like, then go back to the main screen to preview everything and decide if it needs more work.
Step 6: When you’re done, simply tap Export in the top right of the screen.
It’s even faster than on the desktop versions, and there are also lots of other effects you can try out.
Improve Your Video with Filmora’s AI Features
The best part of using Filmora is that you have various AI features at your disposal that can help improve your videos in different ways. Here are three great examples that you can use alongside text transitions.
AI Translation
Content creators with a worldwide audience or those from other countries who want to make their videos accessible to English speakers may want to look at AI translation. It helps you add a bit more versatility without spending too much time or money on translation services.
AI Copywriting
If you want to use subtitles or have some explainer text appear throughout your video, you can save yourself the trouble of writing several pages worth of content by simply using this AI feature to help you out. You can get ideas or general outlines that you can then spice up and use.
Smart BGM Generation
Even when everything is set, and you have the perfect title card with fun transitions for your intro, and the rest of the video is just the way you like it, it can still feel a bit empty without good background music. This feature has AI go over the video and create appropriate background music to elevate your project.
Conclusion
In the end, it’s not a question of whether adding text transitions in Premiere Pro is a good idea – it’s an incredibly powerful and versatile tool in the right hands. However, all that comes at the cost of higher complexity, which means more time spent on even some of the simpler video editing tasks.
Luckily, you can turn to Wondershare Filmora if you are new to all this and want to make things as streamlined as possible, or even if you have some experience but are working on tight deadlines and need to prioritize efficiency.
