


 100% Security Verified | No Subscription Required | No Malware


 ChatGPT
 Perplexity
 Gemini
 Claude
 Grok
Grok
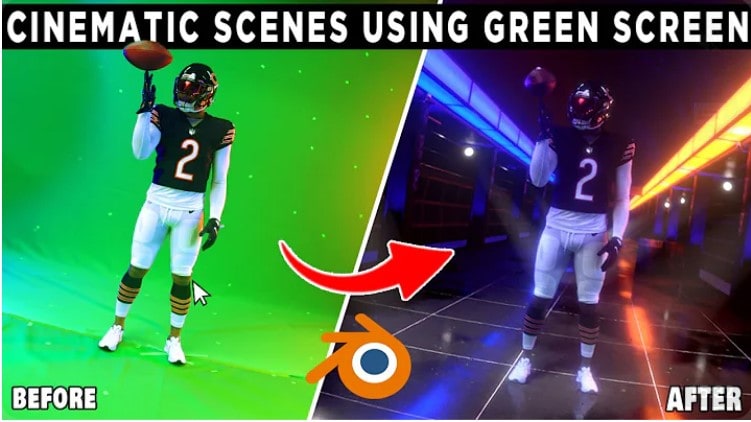
A green screen, or chroma key, is a video production technique that replaces a green-colored background with any image or video. This has revolutionized video editing_ from film and television to live streaming and virtual backgrounds, green screens have become indispensable.
There are many software used for green screens in videos. Blender’s green screen is a great choice for professional green screen editing. Blender is a professional open-source software that has extensive tools for compositing and green screen effects. It’s a popular choice for experienced video editors. However, Filmora is a great starting point for those new to video editing.
This article will guide you on how to use a green screen in Blender and Filmora. We’ll also provide practical tips and techniques to help you achieve professional-looking results.
In this article
Part 1. How to Use Green Screen in Blender
Let's go through the steps on how to make amazing videos using the chroma key in Blender video editor.
Set Up Your Shot
Before you start editing, you need to record your video. Make sure you have a solid green background, like a big piece of green cloth. The more even the green color, the better your final result will be. You also need good lighting to avoid shadows on the green screen.
Steps to Use Chroma Key in Blender Video Editor
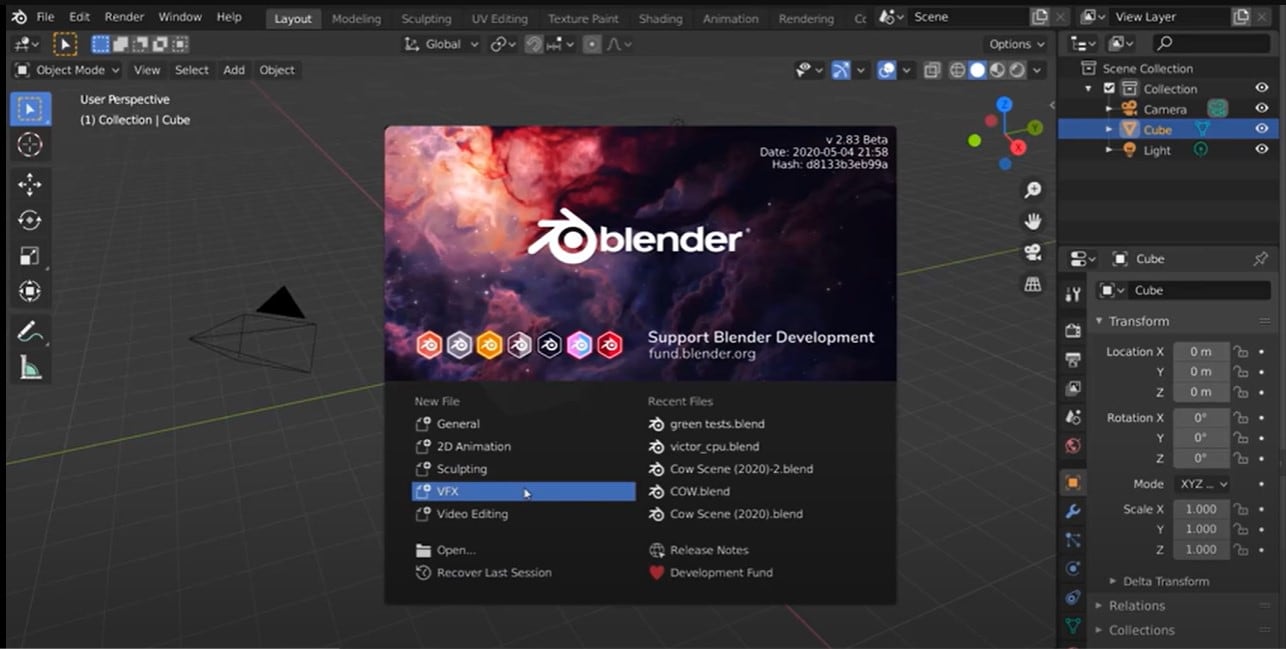
Step 1:Get Blender Video Editor
Download and install Blender on your device. Open it, and click VFX to proceed.
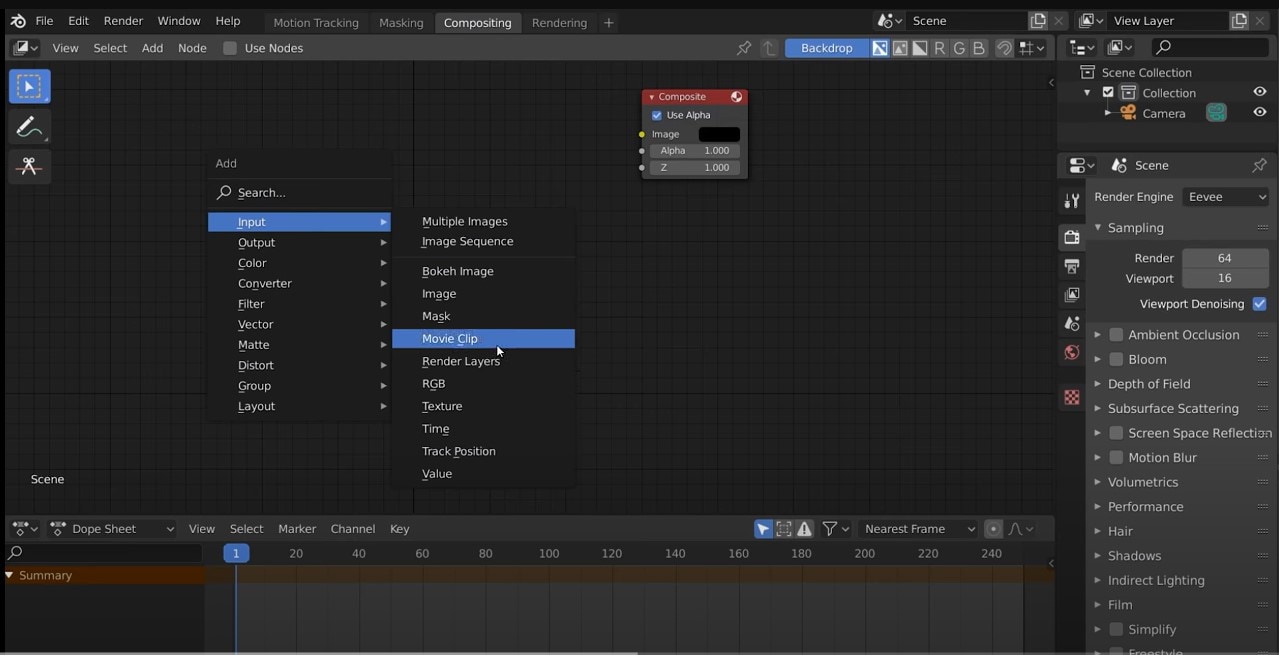
Step 2:Set Up Your Project and Import Footage
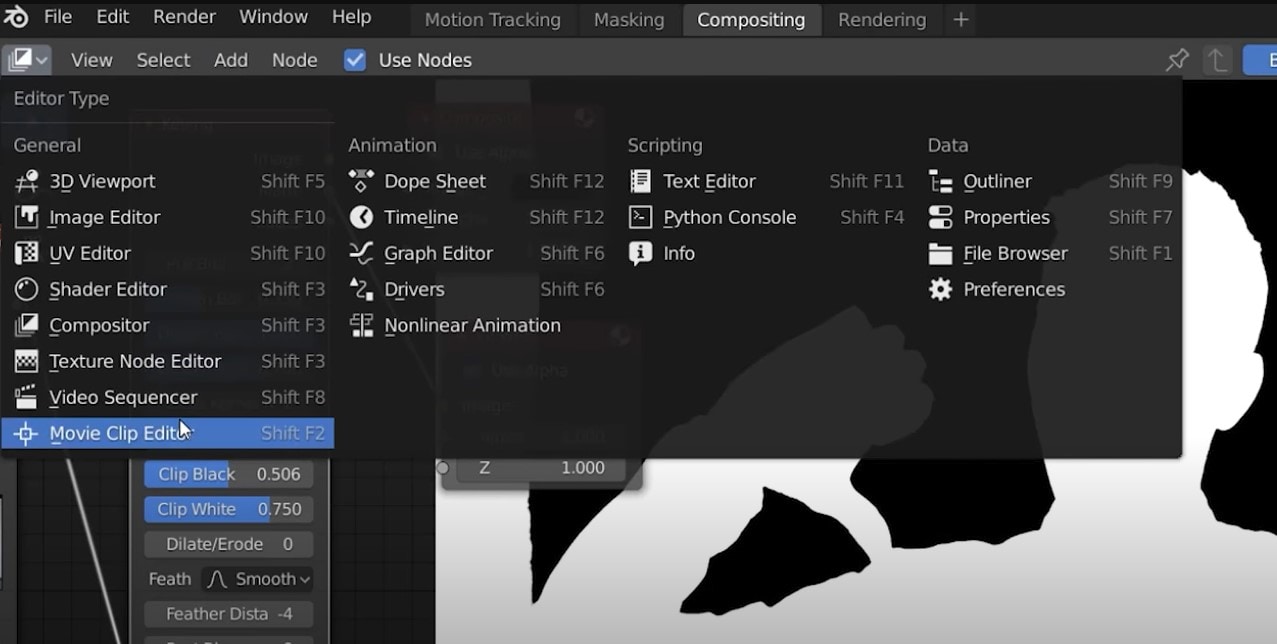
Then, select the dimensions for your video. Go to the Compositor workspace. Click on the "Movie Clip" node to import your green screen footage.
Step 3:Create a Chroma Key
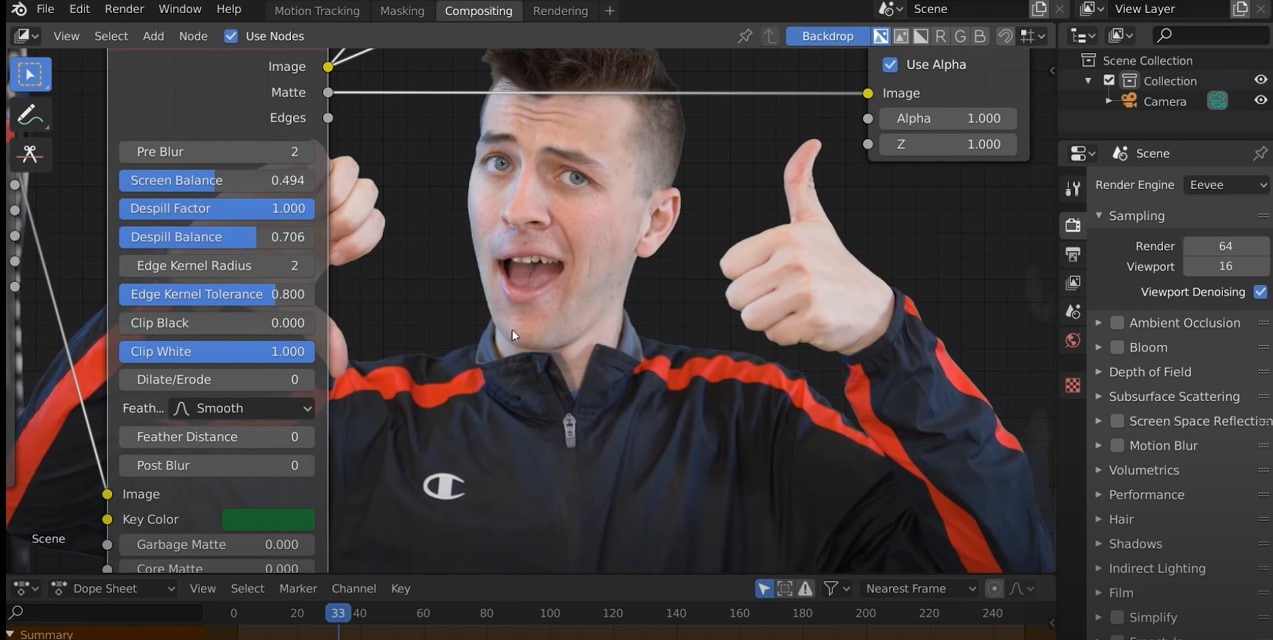
Add a "Keying" node to the compositor. Connect the output of the Movie Clip node to the Image input of the Keying node. Adjust the Keying nodes in Blender chroma key settings:
- Screen Color: Use the eyedropper tool to select the green color from your footage.
- Clip Black: Increase this value to remove darker shades of green.
- Clip White: Increase this value to remove lighter shades of green.
- Screen Balance: Adjust this to fine-tune color selection.
- Despill: Use this to reduce green spill onto your subject.
- Edge: Refine the edges of the keyed area.
Step 4:Preview the Keyed Footage
Add a "Viewer" node to preview the result of the keying process. Connect the output of the Keying node to the Image input of the Viewer node.
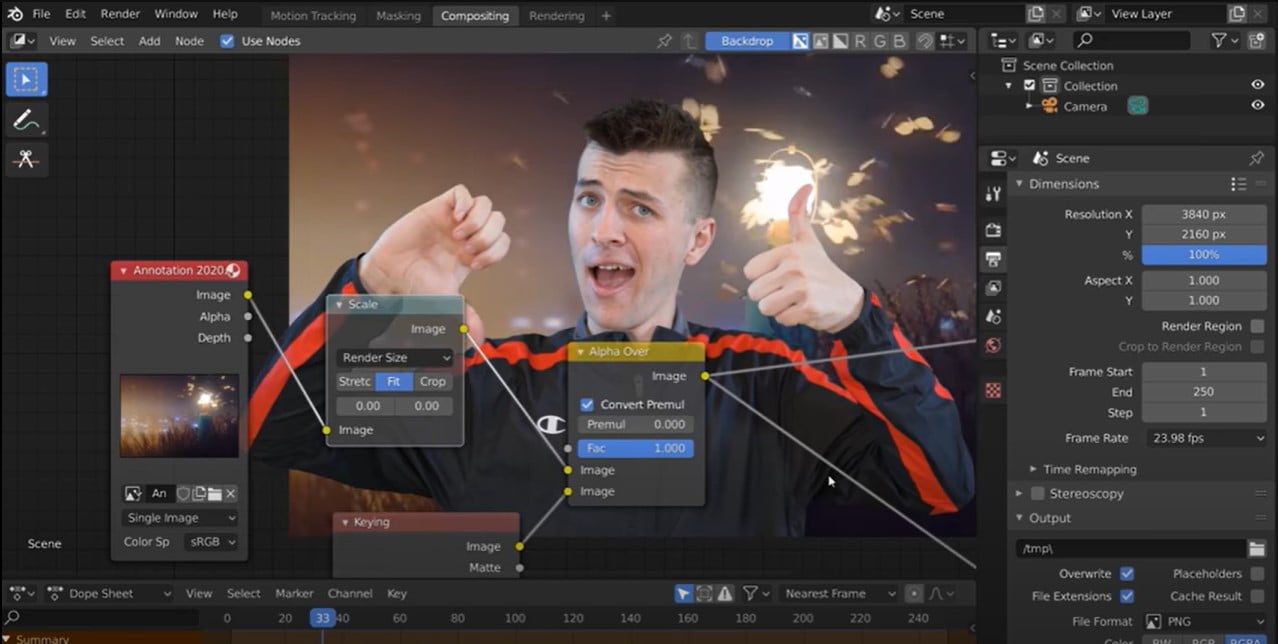
Step 5:Add a Background
Use an "Image" or "Movie Clip" node to import your desired background. Position and scale the background as needed.
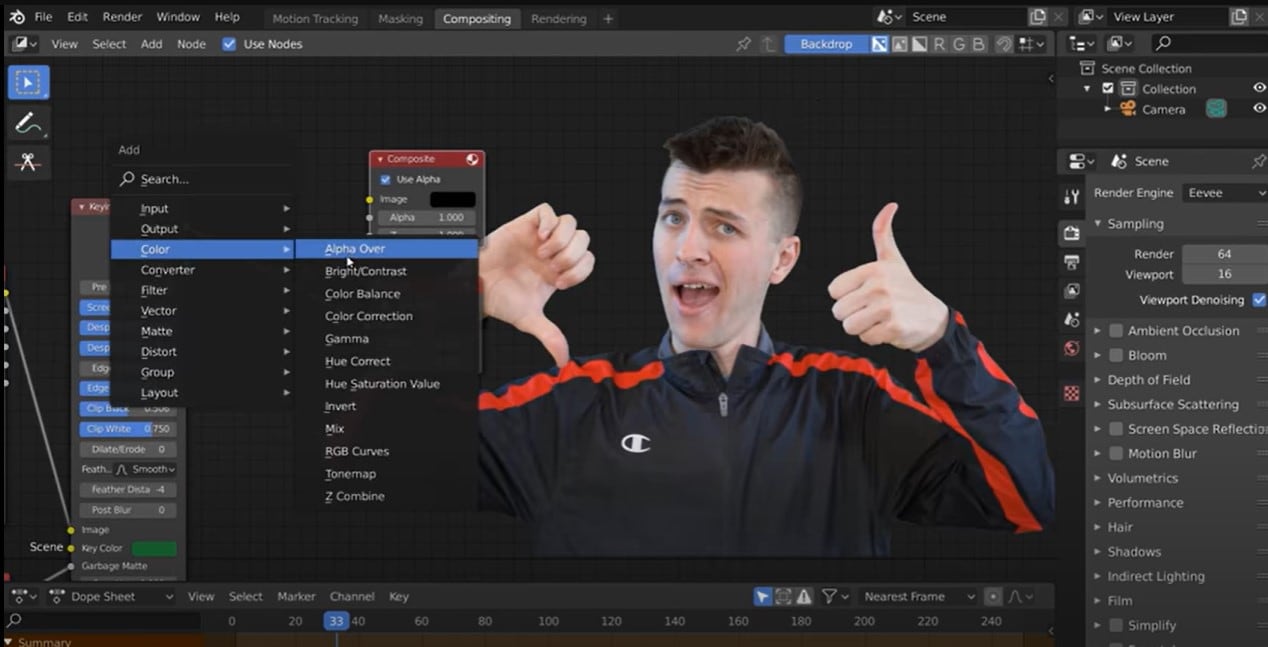
Step 6:Combine Layers with Alpha Over
Add an "Alpha Over" node to combine the keyed footage with the background. Connect the output of the Keying node to the "Foreground" input of the Alpha Over node. Connect the output of the background node to the "Background" input of the Alpha Over node.
Step 7:Refine the Composition
Use additional nodes like "Color Correction" or "Grade" to adjust colors and contrast. Add effects or transitions as desired.
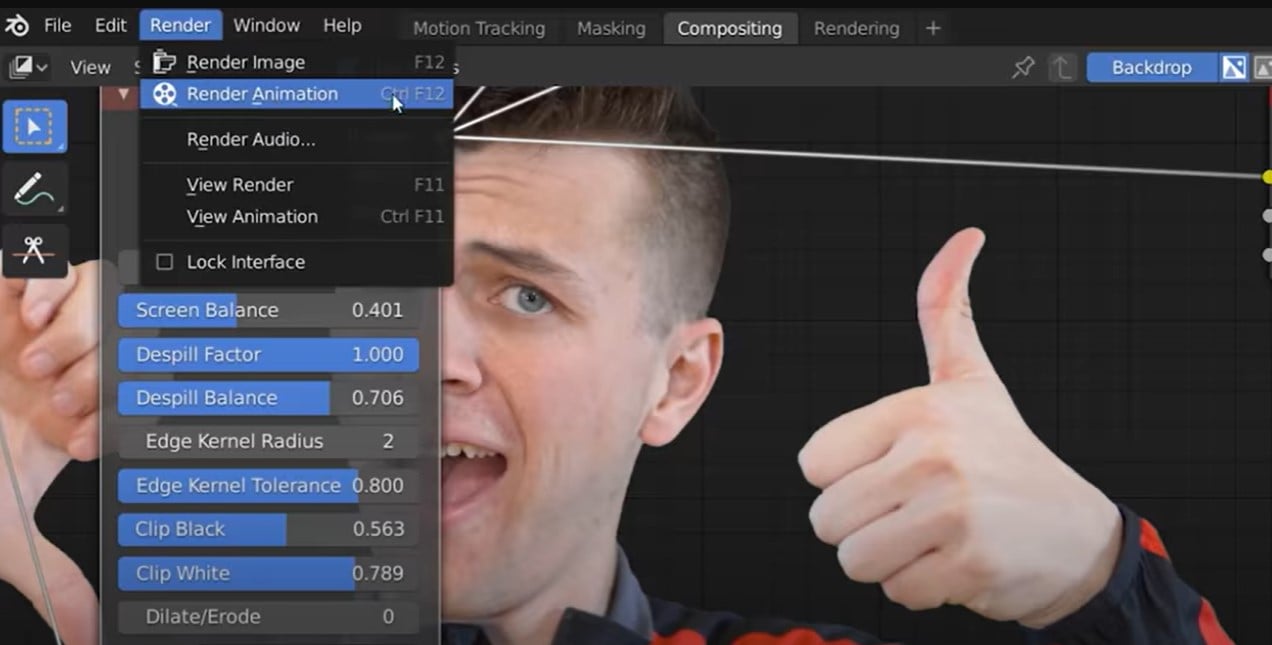
Step 8:Render Your Output
You can create a new video with your changes. This is called rendering. Add a "Composite" node to output the final image. Adjust render settings (resolution, format, output path) in the Render properties panel. Then, click "Render" to create your final Blender green screen video.
Part 2. More Choice: Green Screen Made Easier with Wondershare Filmora
Blender video editing using chroma key has a complex interface and many features, which can be overwhelming for beginners. So, you might want to make awesome videos without all the complicated stuff. That’s where Wondershare Filmora can help you!
Filmora is a professional video editing software with advanced tools. One of the amazing features is Chroma Key. It makes it easy to do all sorts of fun things with your videos. You can replace green screens in your videos with amazing backgrounds.
- Wide range of effects (slow-mo, speed-up, transitions, filters)
- Built-in music library and sound effects
- Customizable text and titles
- Auto color correction
- AI noise reduction
- Picture-in-picture feature
- Versatile export options
- AI object remover
- Screen recording
Steps to Use Green Screen/Chroma Key in Filmora
Unlike the chroma key in the Blender video editor, using the chroma key in Filmora is relatively easy. Anyone can do it. Here is the step-by-step process.
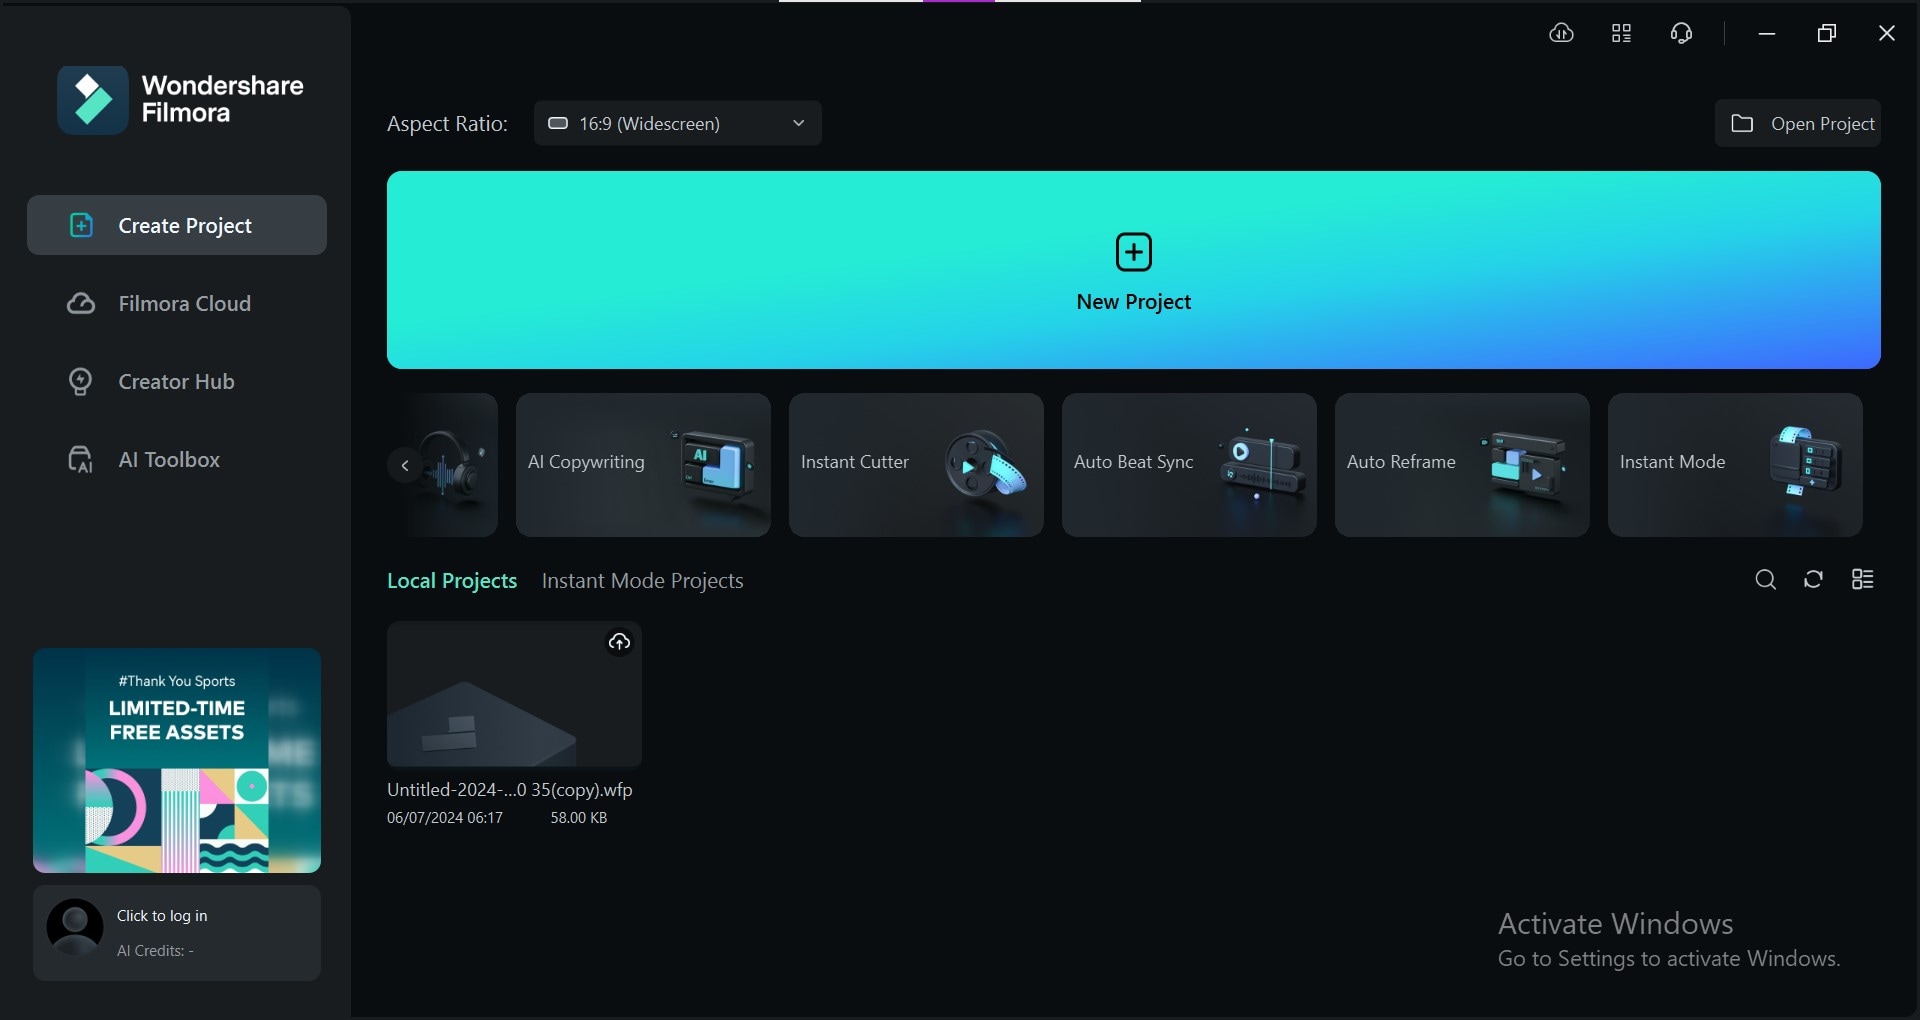
Step 1. Create a New Project
Download and install Wondershare Filmora, it’s available for both Windows and Mac. Open Filmora and click Create New Project with the desired aspect ratio and resolution.
Step 2. Import Your Clips
Import your green screen video and the background you want to use into Filmora's media library. Drag and drop it onto the video track in the timeline.

Step 3. Apply the Green Screen Effect
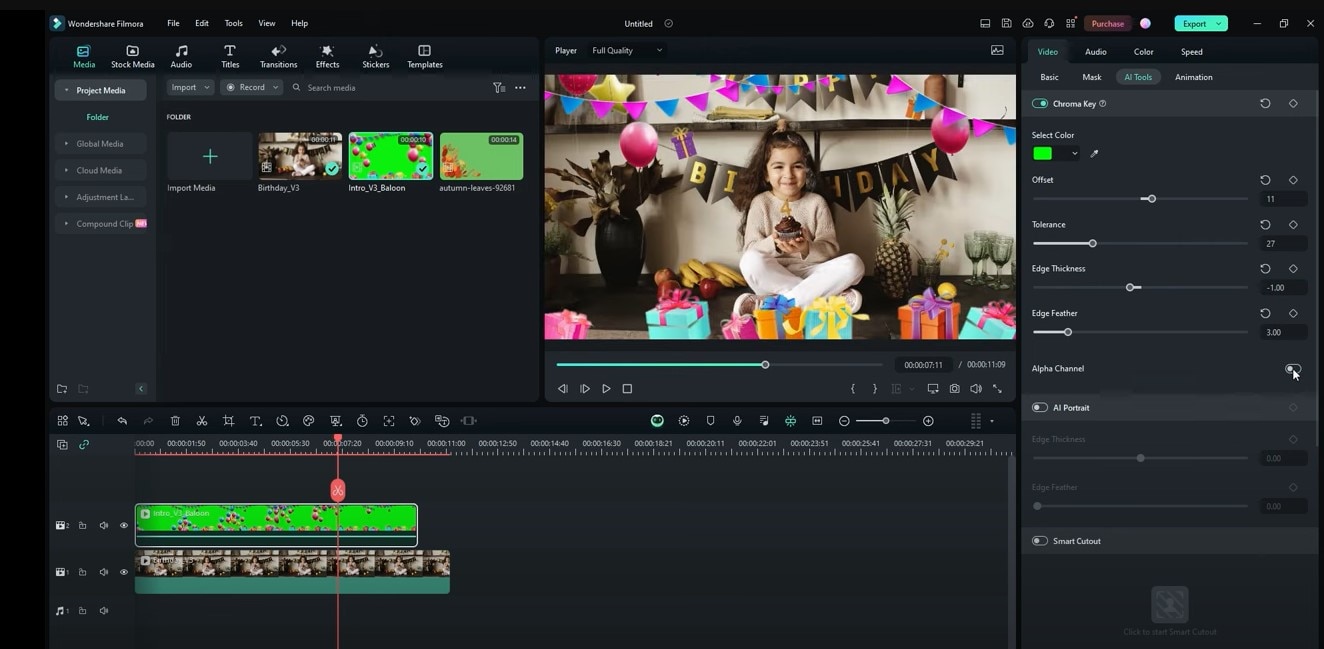
Go to AI Tools, and enable the Chroma Key. Filmora will automatically detect the green color.
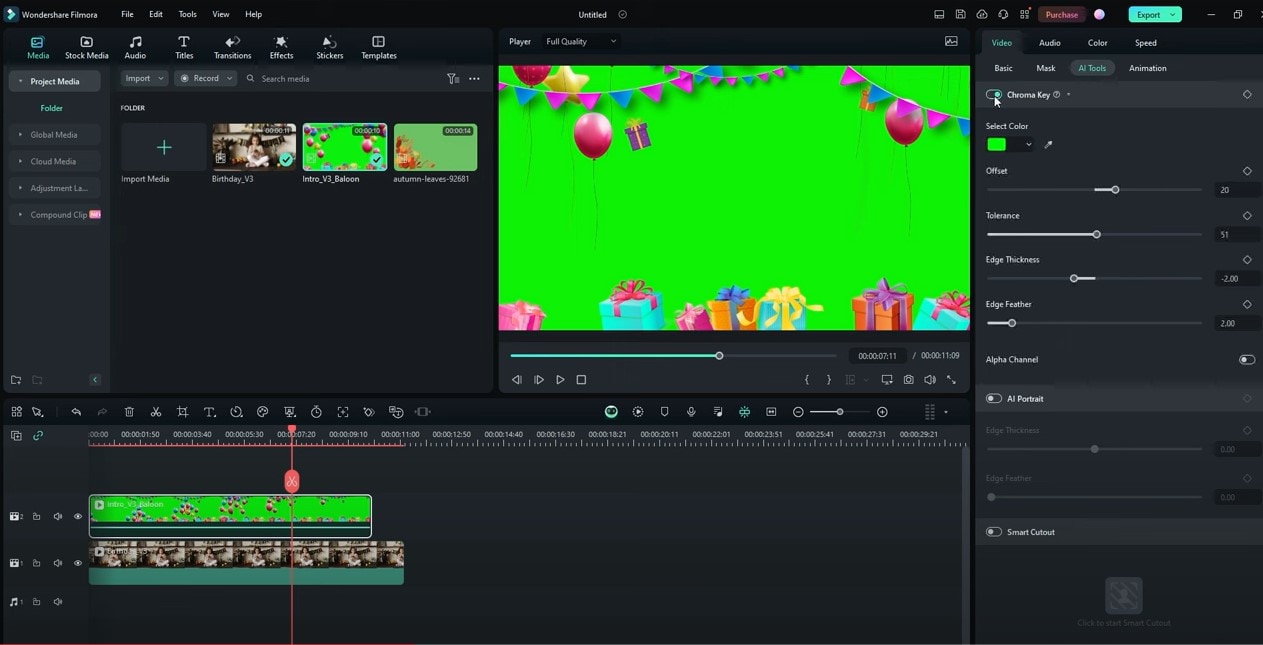
Step 4. Adjust Green Screen Settings
Use the sliders for Tolerance,Edge Smoothness,and Feather to refine the green screen effect.
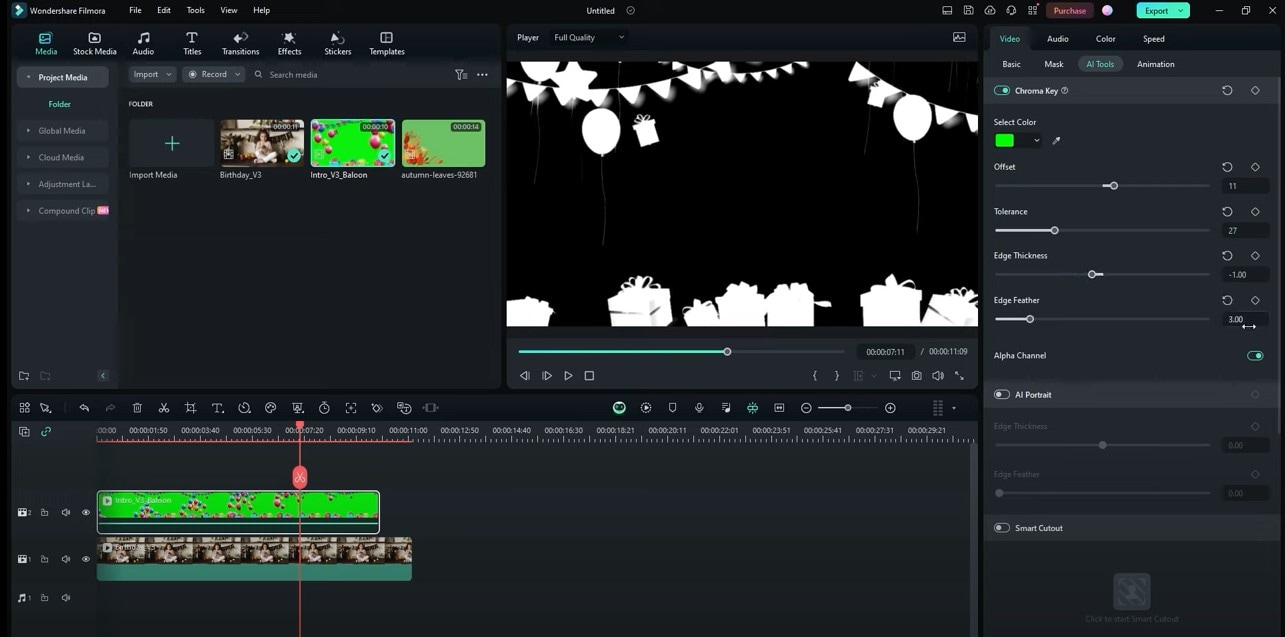
Step 5. Add Your Background and Export
Drag and drop your chosen background video or image onto a lower video track. Adjust the size and position of the background as needed. Finally, export your video to save it to your device.
Part 3. Choose the Right Software: Blender vs. Wondershare Filmora
So, which one is right for you? Blender chroma key or Filmora green screen? Take a look at this table and decide yourself!
| Feature | Blender | Filmora |
| Learning Curve | Steep | Easy |
| Customization | Extensive | User-friendly |
| Green Screen | Powerful | Easy to use |
| Editing Time | Time-consuming | Quick and fast |
| AI Features | Limited | Many (AI smart cutout, AI portrait, AI object remover, and others) |
| Ideal User | Experienced Video Editors, 3D Artists | Beginners, experienced creators |
Part 4. Troubleshooting Common Green Screen Issues
Even the pros face challenges with green screens, especially with Blender's green screen. However, many issues arise while shooting. Here are some common problems and how to fix them.
- Uneven Lighting
If your green screen is too bright or dark in spots, you'll get shadows or uneven color. Adjust your lights to create a more even glow on the green screen. The Chroma key blender video editor also has a feature called "spill removal" nodes to help.
- Green Spill
Sometimes, a little bit of green can sneak onto your subject. To fix this, use tools like "Desaturation" or "Color Balance" to remove the green tint without affecting your subject's colors.
- Edge Problems
The edges of your subject might look a bit fuzzy or have green halos. You can often fix this by adjusting the "clip black" and "clip white" values in Blender. Filmora has an "Edge" setting that can help clean up the edges.
Tip! Practice makes perfect! Keep experimenting with different settings and techniques to achieve the best results.
Part 5. Important Tips for Green Screen Success
To achieve the best results with your Blender green screen or Filmora chroma key, keep these tips in mind:
- Shadows or uneven brightness can cause problems when removing the green color. Use soft lights to avoid harsh shadows.
- Be mindful of your subject's movement. If they move too quickly or close to the green screen, it can be difficult to accurately remove the green color. Try to maintain a steady distance from the screen.
- Once you’ve mastered the basics, explore advanced techniques like using multiple lights, adding shadows, and experimenting with different green screen colors. These can elevate your green screen projects to a professional level.
🤩 Posts You Might Be Interested In:
Conclusion
Both Blender video editing chroma key and Filmora green screen produce stunning results but cater to different skill levels and project needs.
Blender provides unparalleled control for experienced users. Using Blender Green Screen, you can create captivating videos that leave a lasting impression on your audience. On the other hand, Filmora's user-friendly interface makes it a great choice for beginners and those seeking quick results.
We recommend Filmora to everyone who wants high-quality, professional, and quick results. By following the tips and techniques outlined in this guide, you'll be well on your way to creating outstanding videos.
