
 100% Security Verified | No Subscription Required | No Malware


 ChatGPT
 Perplexity
 Gemini
 Claude
 Grok
Grok
Most of the time, the hardest part of video editing is piecing all the footage together. You pick the right scene, arrange the clips in the timeline, and make the necessary adjustments. There’s no problem with that—you can do everything manually. However, it can take time. If you want to save yourself the hassle, you can try multicam editing in DaVinci Resolve, a powerful tool that syncs and shuffles multiple camera angles automatically.
In this article, we’ll discuss how DaVinci Resolve multicam editing works and introduce an alternative tool you can explore.
In this article
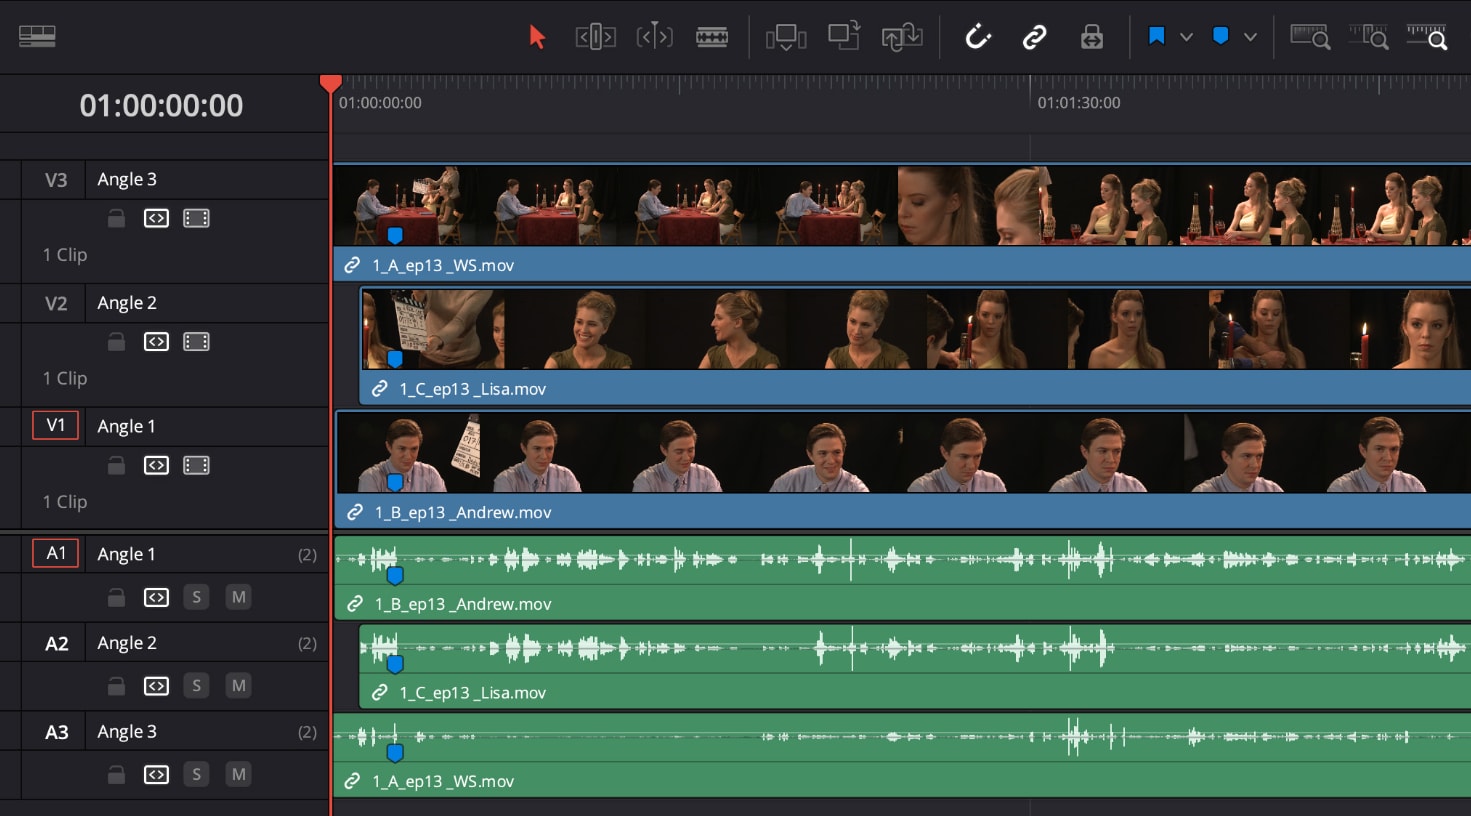
Getting to Know Multicam Editing in DaVinci Resolve
Multicam editing in DaVinci Resolve helps streamline your workflow by synchronizing and arranging multi-angle footage instantly. It simplifies clip arrangement and enables real-time angle switching — all in just a click or two.
Pros & Cons
Pros
- Fast and accurate synchronization using timecodes or audio.
- Real-time angle switching and preview.
- Multicam editing is available in the free version of DaVinci Resolve.
- Comes with powerful editing tools for further refinement.
- Perfect for interviews, podcasts, live sessions, and multi-angle content.
Cons
- Requires a strong processor to keep playback smooth.
- Not beginner-friendly — steep learning curve.
- Sync errors may occur due to faulty or missing timecodes.
- Playback and preview may lag during editing.
- Exporting multi-angle projects can take longer than usual.
Filmora V15 as an Alternative
Wondershare Filmora is a simpler yet powerful option for users who find DaVinci Resolve multicam editing overwhelming. It provides the same multicam functionality, with a more user-friendly interface and smoother performance.
 secure download

How to Create a Multi-Camera Clip in Filmora (Step-by-Step)
Follow this workflow to sync multiple camera angles, switch views in real time, and refine your multi-camera edit inside Filmora.
- Step 1: Create a New Project
Launch Filmora, sign in, and on the left panel click Create Project. In the main window, choose New Project to open a blank timeline for your multi-camera edit.

Create a new project before starting your multi-camera edit. - Step 2: Import Your Footage
Go to the Media tab in the top toolbar and click Import to bring in all video and audio clips from your cameras. Each angle should appear in the Media panel.
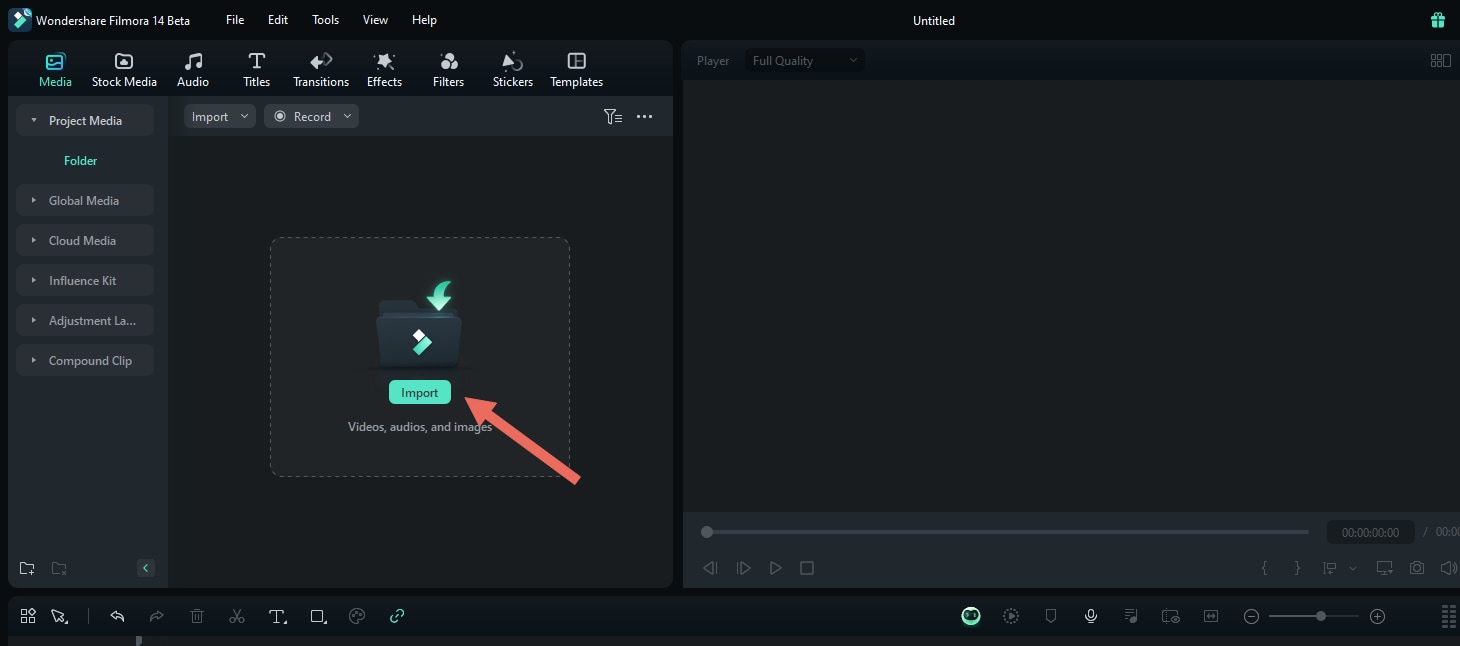
Import all camera angles into the Media panel. - Step 3: Create a Multi-Camera Clip
Combine your angles into a single multi-camera clip. You can do this from either the Media bin or the timeline:
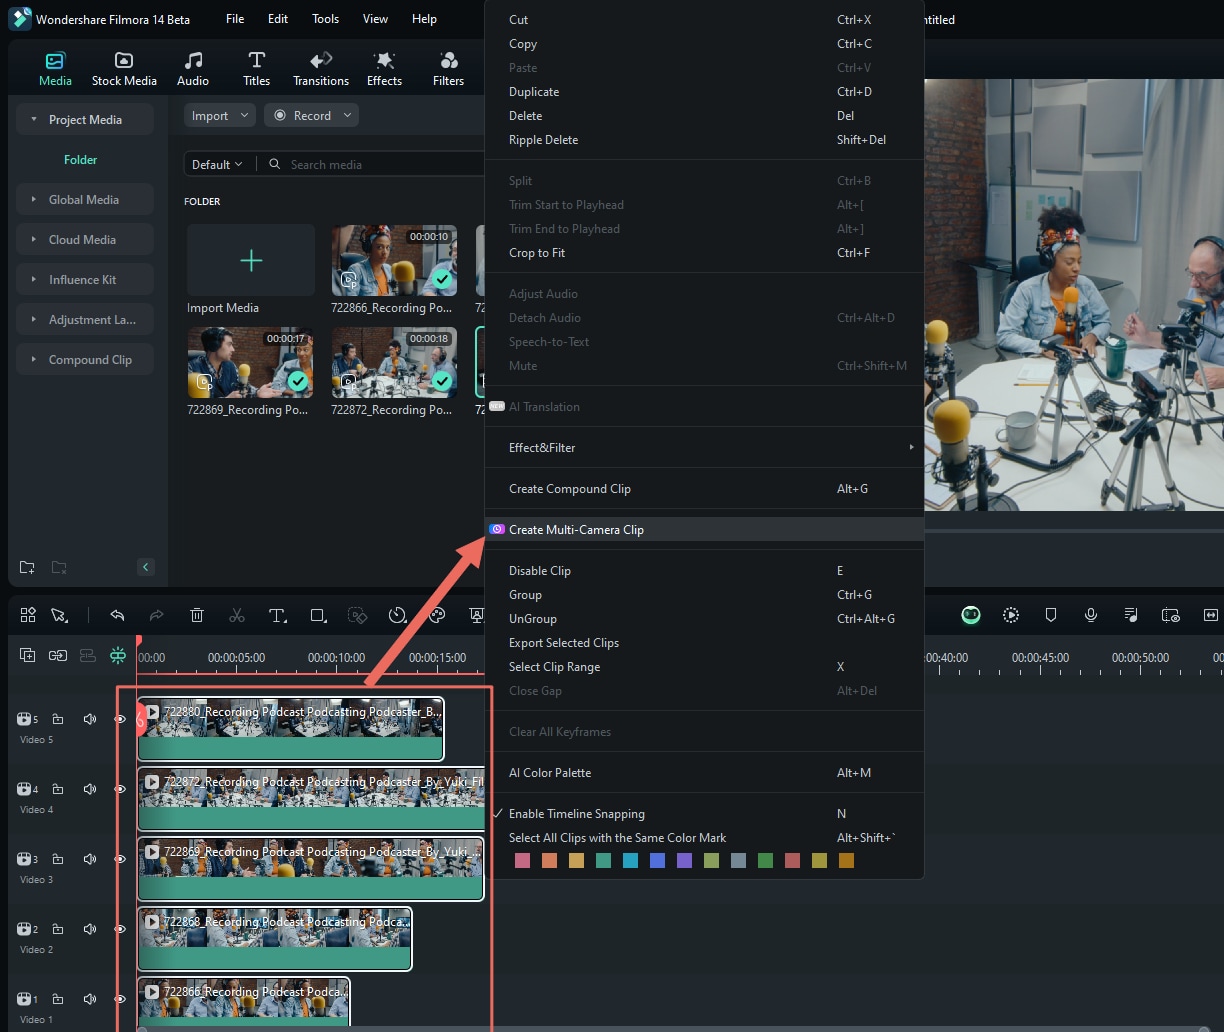
Method 1 (Media bin): Select the clips in the Media panel, right-click, and choose Create Multi-Camera Clip.
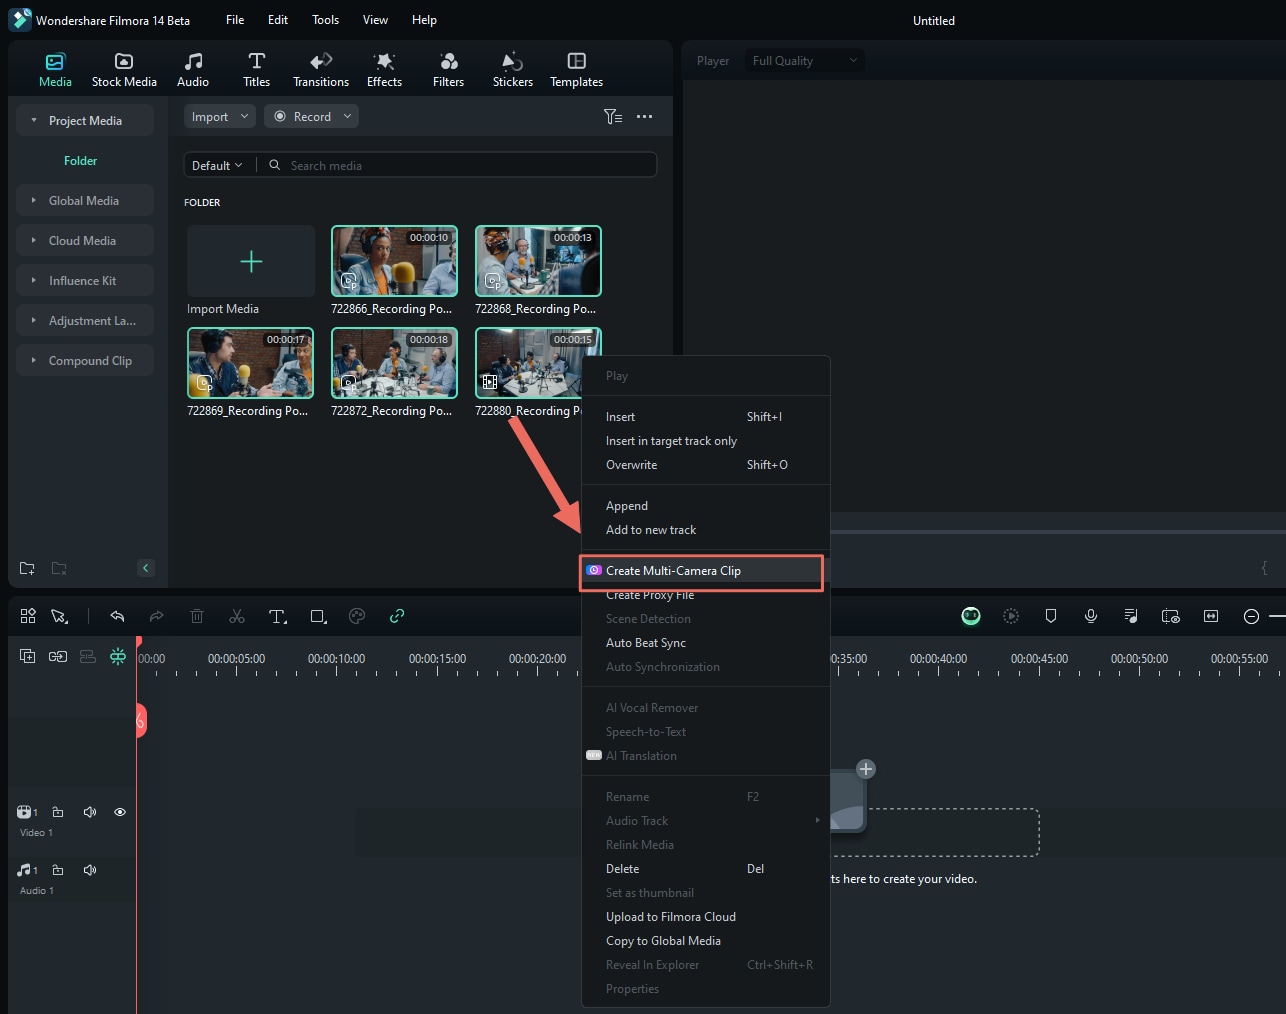
Create a multi-camera clip directly from the Media panel. Method 2 (Timeline): Place your angles on the timeline, select them, right-click, and choose Create Multi-Camera Clip.
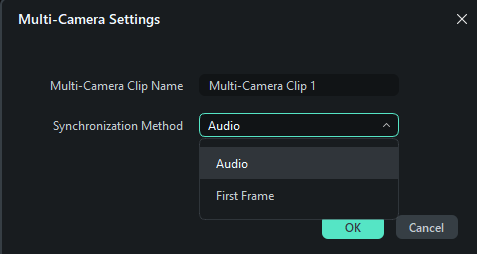
Create a multi-camera clip from clips already on the timeline. In the dialog that appears, name the multi-camera clip and choose a sync method:
- Audio – Aligns angles using their audio waveforms.
- First Frame – Syncs based on the first frame of each clip.
- First Marker – Uses the first marker on each clip as the sync point.
Choose how Filmora synchronizes your camera angles. 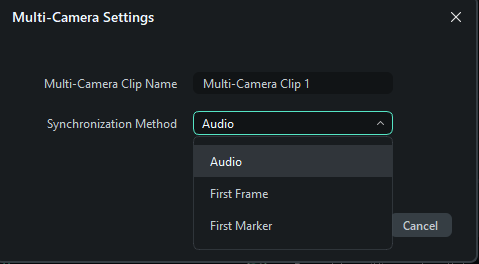
Confirm your sync settings to build the multi-camera clip. - Step 4: Enable Multi-Camera View
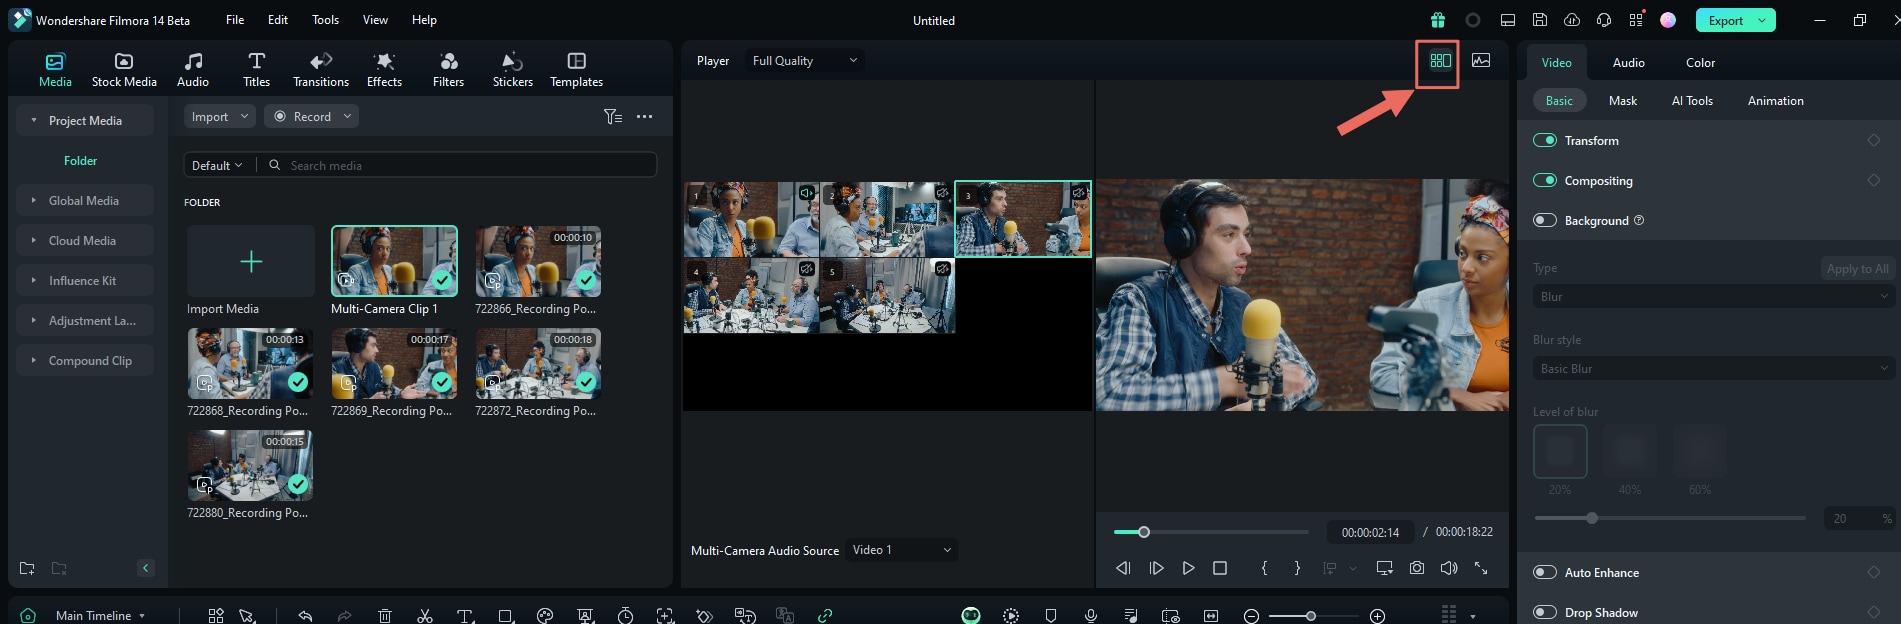
In the Player window, click the Switch Multi-Camera View button to turn on multi-camera view. All synced angles appear in a grid so you can monitor them at once.
Enable multi-camera view to see all angles side by side. - Step 5: Live-Switch and Edit Multi-Camera Clips
Press the Spacebar or click Play to start playback. While the video plays, click on any camera window in the multi-camera view to cut to that angle on the timeline. Each click adds an edit point and switches the active camera.
Click on different views during playback to switch camera angles. You can also map and use keyboard shortcuts (via File > Keyboard Shortcuts) to switch angles without clicking.

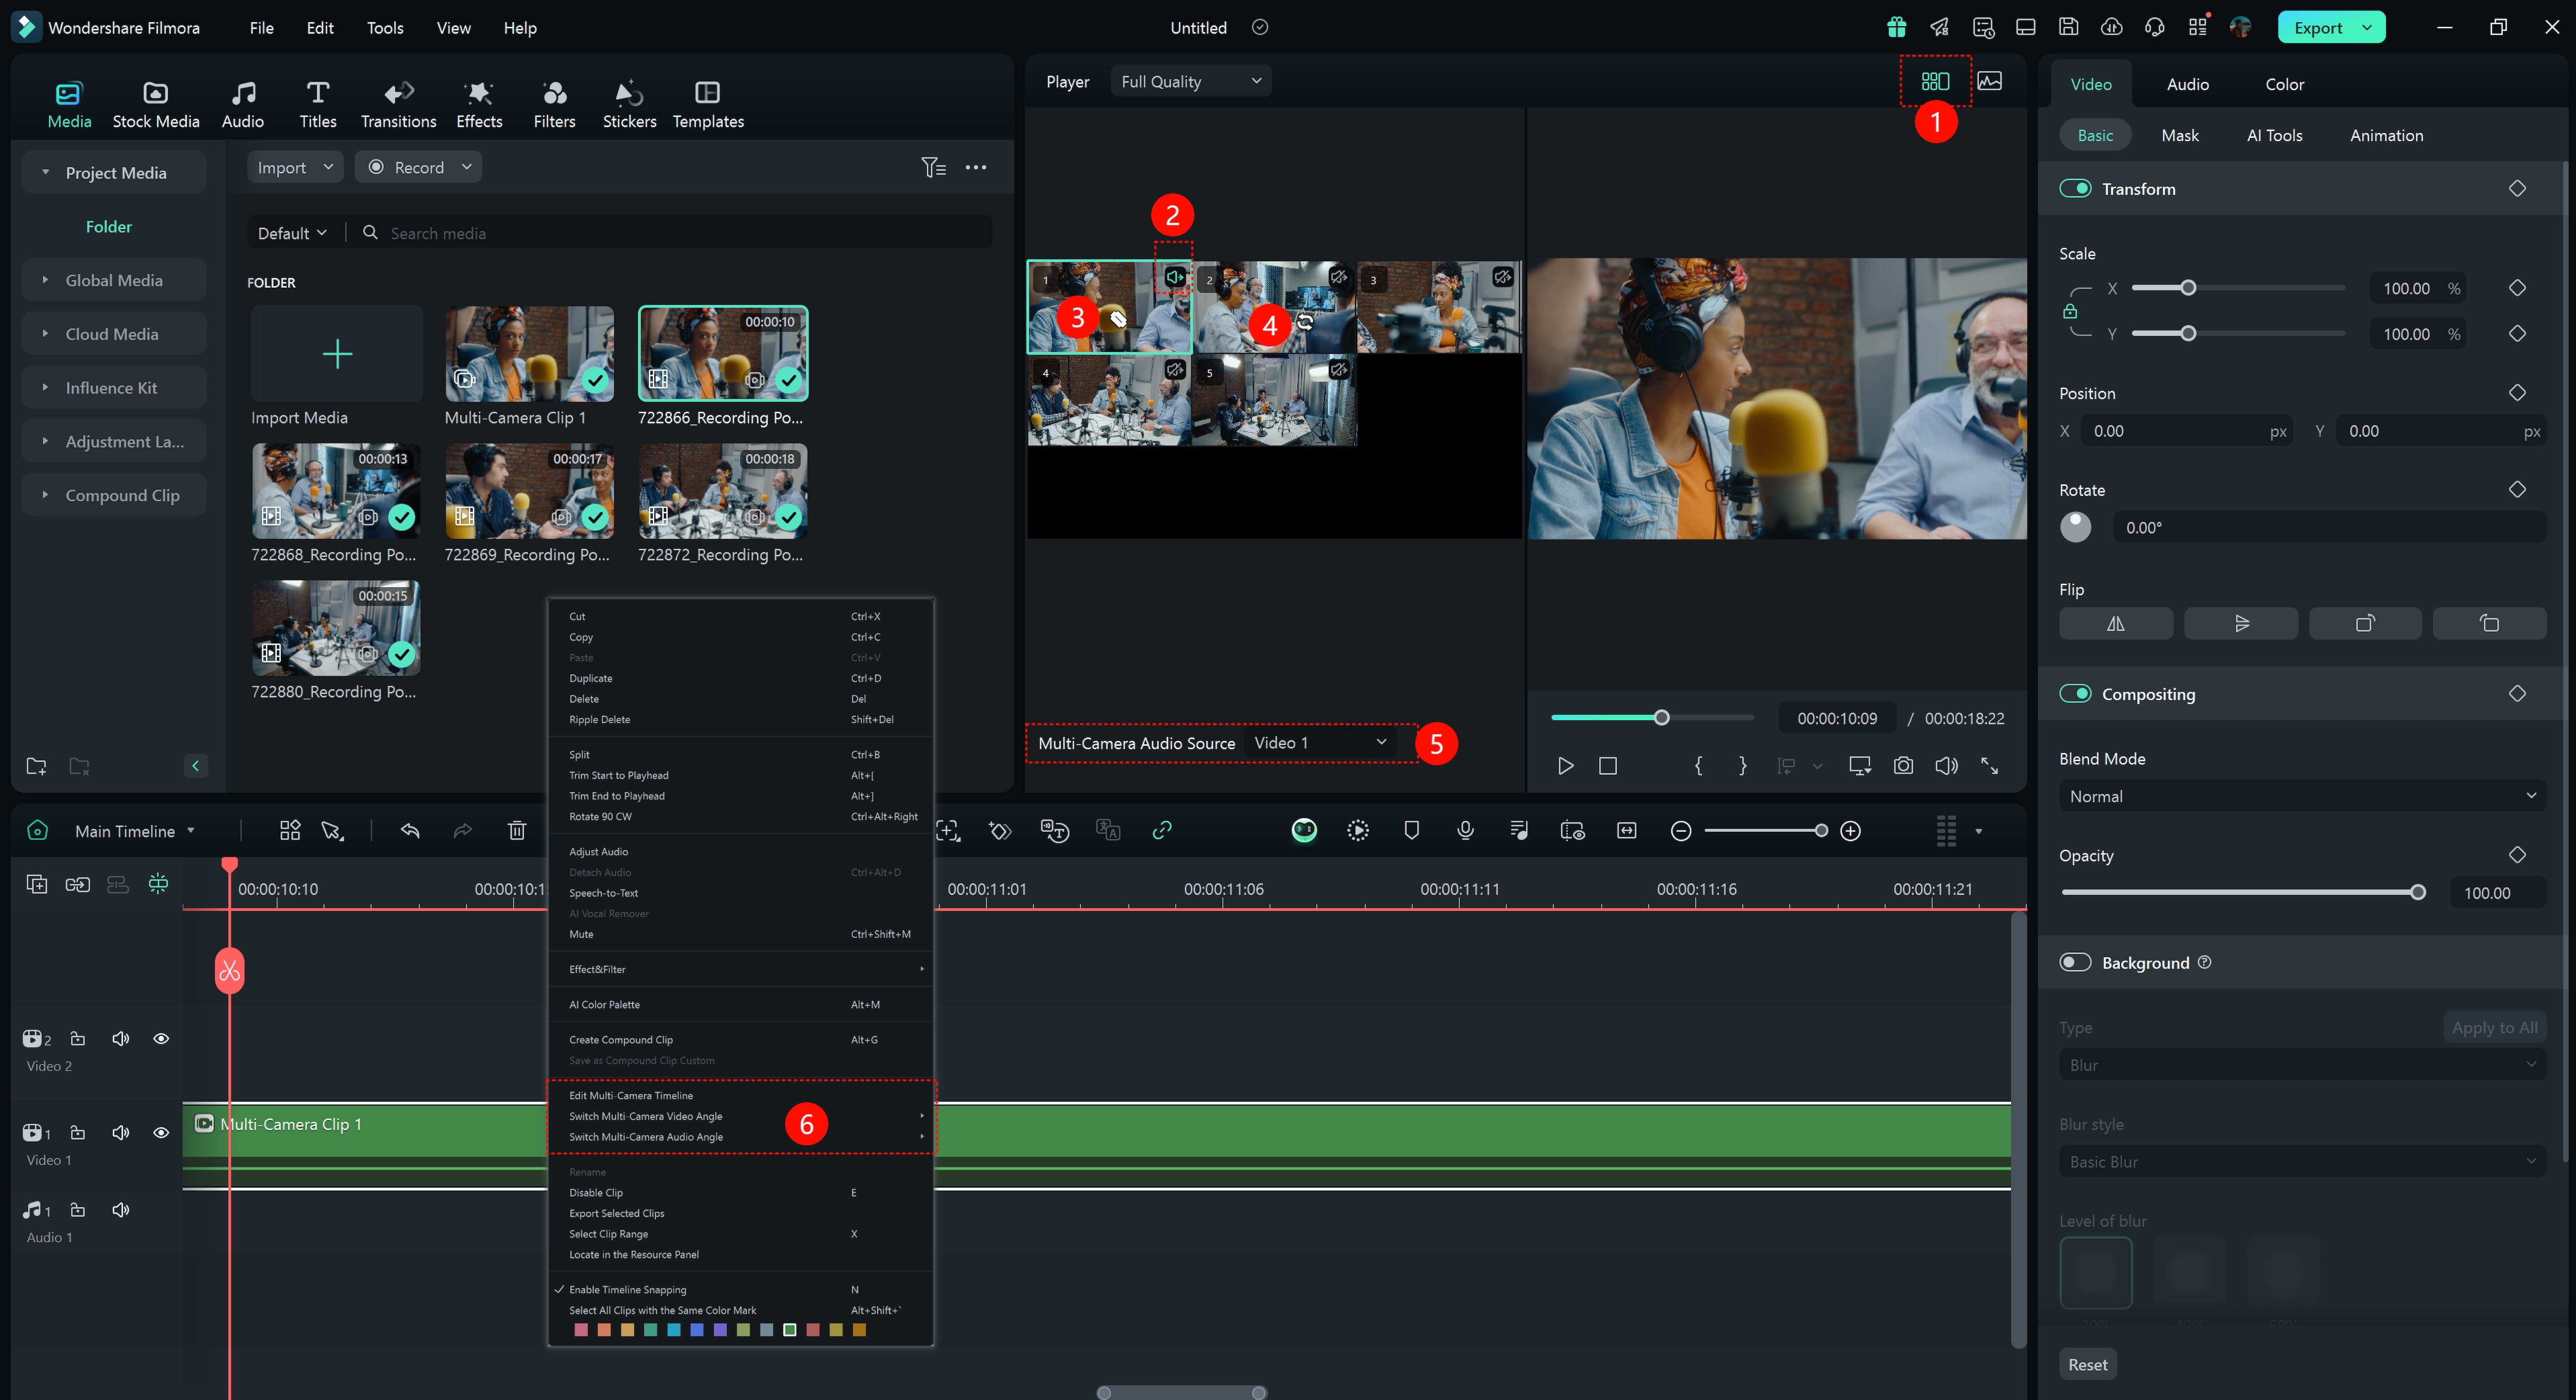
Use keyboard shortcuts to change angles even faster. - Step 6: Adjust and Refine Your Edit
After your first pass, refine the multi-camera sequence:
- Edit the multi-camera timeline: Double-click the multi-camera clip or right-click it (in the timeline or Media tab) to open and fine-tune the internal cuts.
- Replace camera angles: Select a segment on the timeline and click a different view in the multi-camera monitor to swap that section’s camera.
- Adjust cut points: Hover over a cut between angles until the bidirectional trim cursor appears, then drag to nudge the edit earlier or later.
Drag cut points to refine when each camera angle switches.
Other Features to Explore in Wondershare Filmora V15

- Advanced Video Compressor: Reduce the file size of large multi-angle projects.
- AI Color Palette: Copy color grading settings from reference clips.
- Speed Ramping: Adjust clip speed for dynamic visual effects.
- LUTs: Import, apply, and customize LUT files.
- Compound Clip: Group multiple timeline elements for easier editing.
Note: Filmora regularly releases updates with new features and improvements. Update your app to access the latest tools.
Conclusion
DaVinci Resolve multicam editing is extremely powerful for syncing and switching between camera angles, especially for interviews, podcasts, and multi-camera productions. However, it may not be ideal for beginners or users wanting a simpler workflow.
If you’re looking for a more accessible tool with the same multicam features, Wondershare Filmora V15 is an excellent alternative. It supports automatic syncing, easy previewing, and offers a wide range of creative tools — perfect for any type of multi-angle project.
secure download FAQs
-
Q1: Can you use multicam editing in DaVinci Resolve without a subscription?
Yes. The free version of DaVinci Resolve includes multicam editing. -
Q2: What types of projects benefit from multicam editing in DaVinci Resolve?
Interviews, podcasts, talk shows, events, and any project with multiple camera angles. -
Q3: Can I add color grading to multicam clips in DaVinci Resolve?
Yes. Color grading applied to one clip within a multicam structure will automatically reflect on linked angles.
