
 100% Security Verified | No Subscription Required | No Malware


 ChatGPT
 Perplexity
 Gemini
 Claude
 Grok
Grok
What makes the timeline in Final Cut Pro so important for editing? In any video editor, the timeline acts as your main workspace. It’s where editors keep every clip, audio, and effect organized in one place to shape the final story.
Unlike other software, Final Cut Pro's timeline stands out because it uses a magnetic timeline system. It keeps clips connected, prevents empty gaps, and makes rearranging scenes much faster. Many editors call it the heart of the FCP timeline for its clean, efficient workflow.
This guide explains how Final Cut Pro's magnetic timeline works and how to use its editing tools. By the end, you’ll know how to manage, adjust, and speed up your editing process with confidence. Let’s get started!

In this article
- Part 1. How Timeline in Final Cut Pro Differs from Other Editors
- Part 2. How to Use the Final Cut Pro Timeline
- Part 3. Advanced Editing on the Final Cut Pro Timeline
- Bonus: Filmora’s Dual-Timeline Editing for Better Workflow Control
- Conclusion
- FAQs
Part 1. How Timeline in Final Cut Pro Differs from Other Editors
The timeline in Final Cut Pro works differently from most video editors, such as Premiere Pro or DaVinci Resolve. Traditional editors use a track-based layout where clips are placed on different layers. They need manual adjustments to align audio, close gaps, and keep everything in sync.
The Final Cut Pro magnetic timeline changes that approach. Instead of stacking clips on separate tracks, it links them within a single, flexible structure called the primary storyline. When you move one clip, the rest auto-adjust to keep everything connected. This eliminates gaps, prevents sync loss, and speeds up workflow.
| Feature | Traditional Editors | Final Cut Pro Timeline |
|---|---|---|
| Layout | Track-based layers | Magnetic, connected layout |
| Movement | Manual rearrangement needed | Clips shift together automatically |
| Sync | Can easily break | Always stays linked |
| Cleanup | Gaps removed manually | No gaps allowed |
| Learning Curve | Traditional workflow | New approach but faster |
Part 2. How to Use the Final Cut Pro Timeline
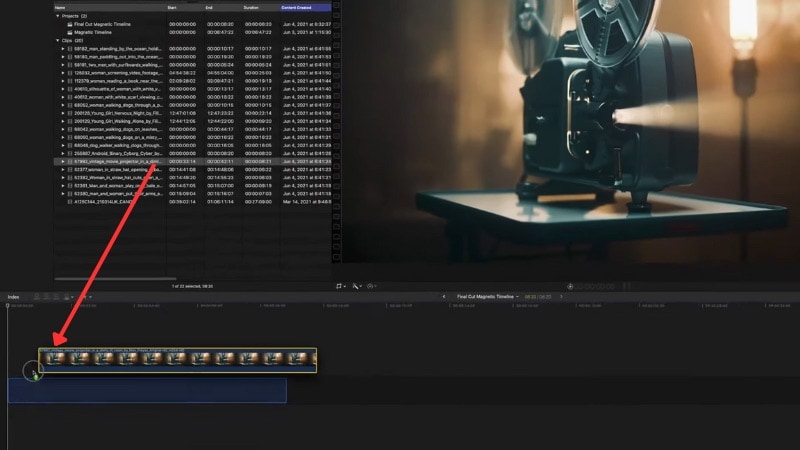
How to Add Clips
Method 1. Drag and Drop
Method 2. Toolbar Buttons
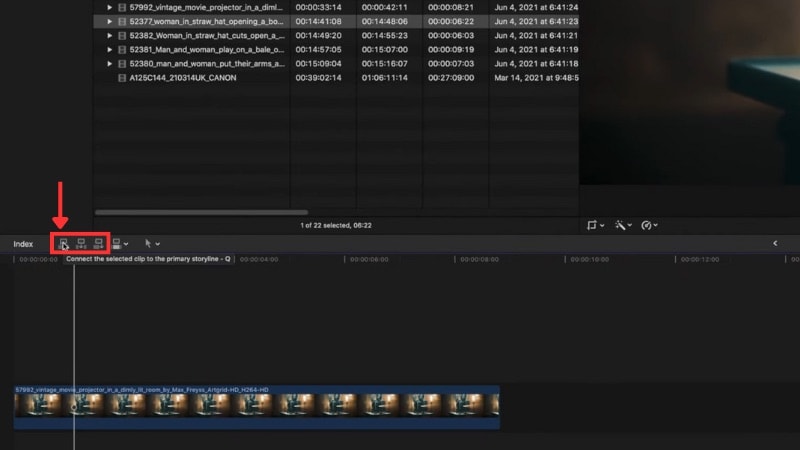
- Connect (Q) — Adds clip above primary storyline.
- Insert (W) — Inserts clip at playhead and pushes forward.
- Append (E) — Adds clip at the end of the main sequence.
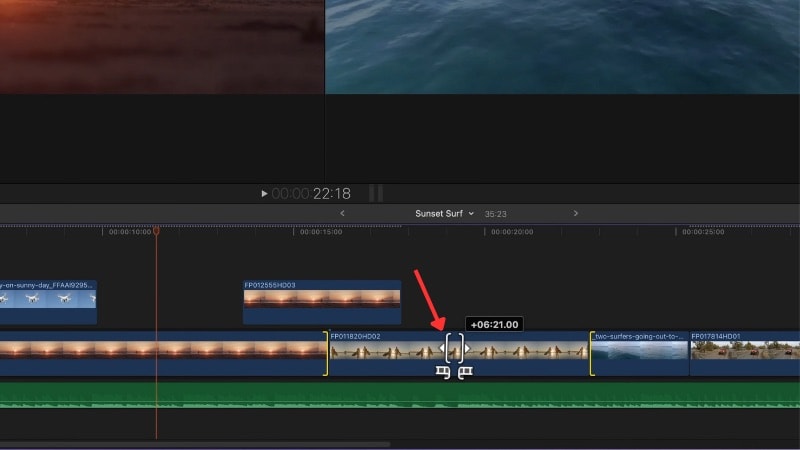
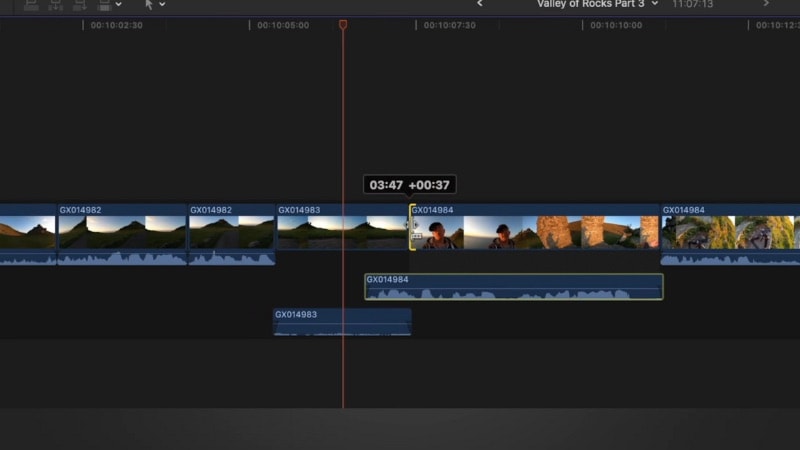
How to Move Clips
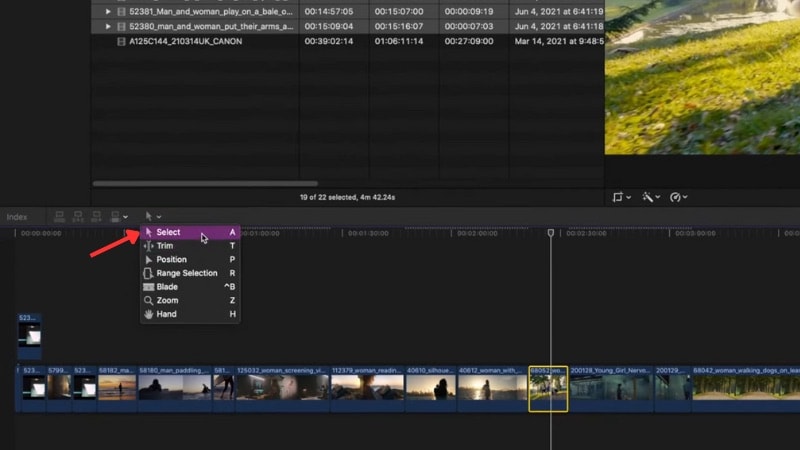
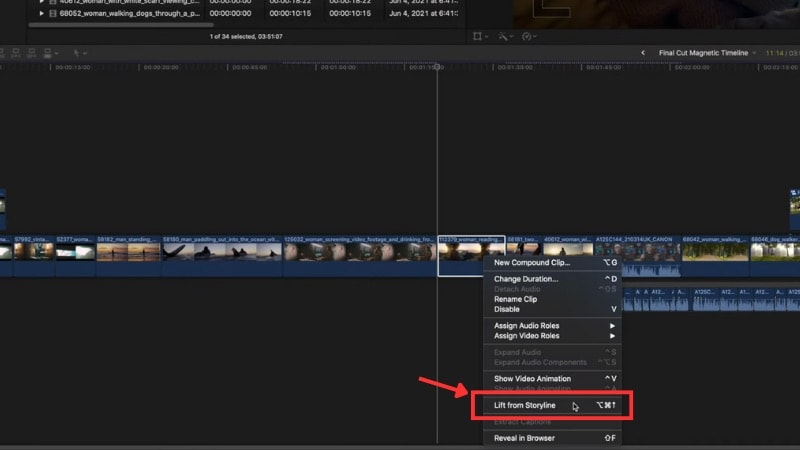
1. Select Tool (A)
You can drag clips to rearrange. To lift a clip out of the primary storyline: Option + Command + Up Arrow. To place it back: Option + Command + Down Arrow.
2. Position Tool (P)
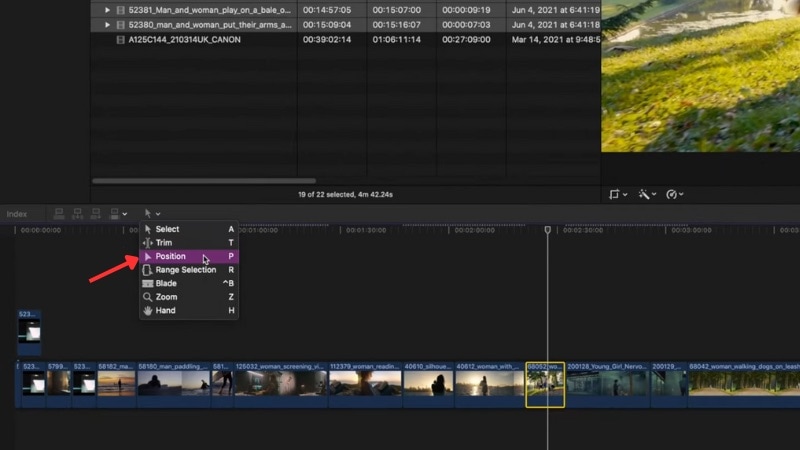
Allows free placement without magnetic snapping. Overwrites clips and creates gap clips.
3. Trim Tool (T)
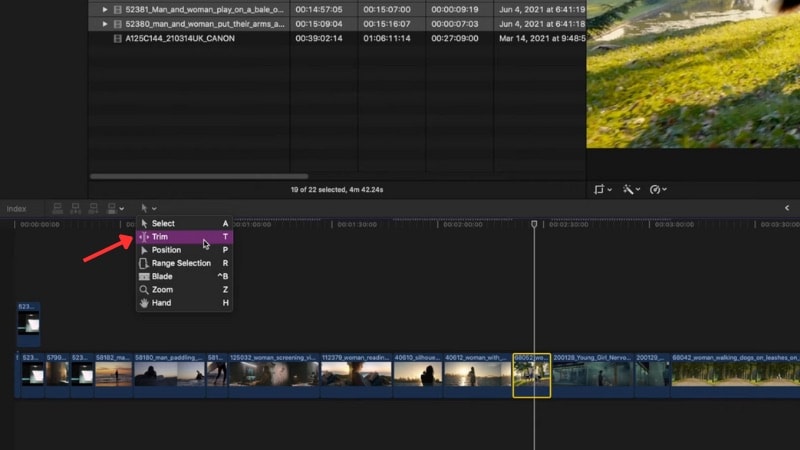
Used for trimming clip edges. Several types of trims include:
- Roll Edit
- Slip Edit
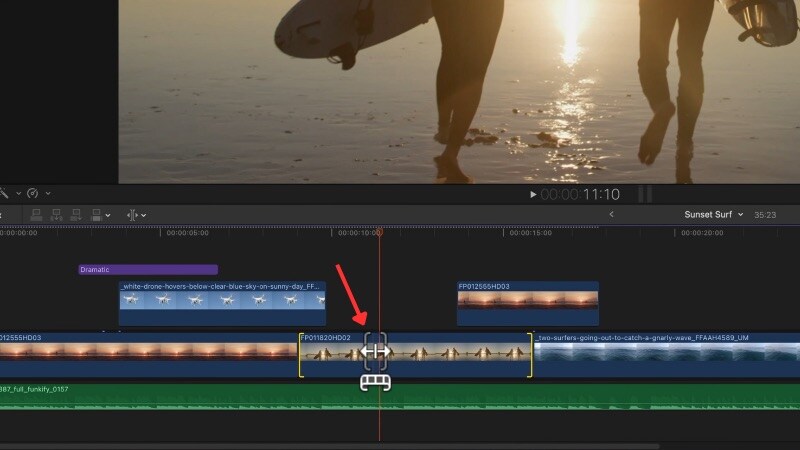
- Slide Edit
How to Navigate, Scroll & Customize the Timeline
1. Scrolling
2. Zooming
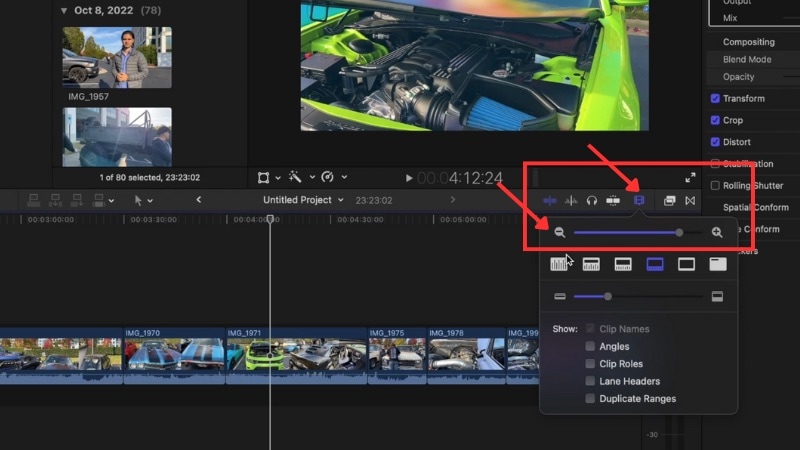
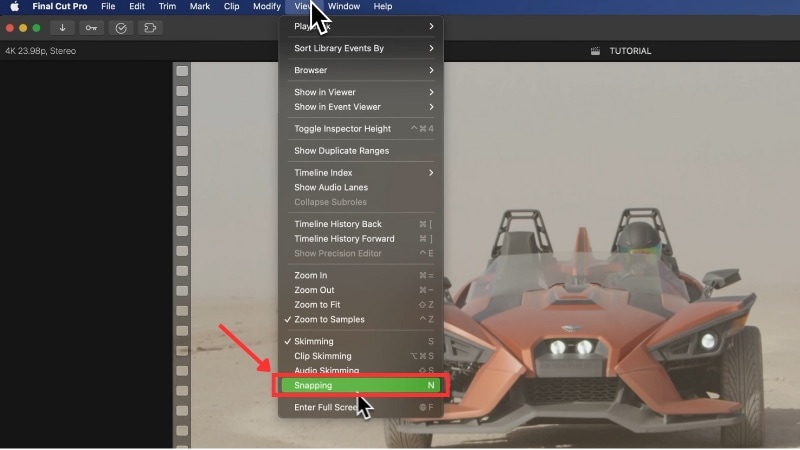
3. Snapping
Part 3. Advanced Editing on the Final Cut Pro Timeline
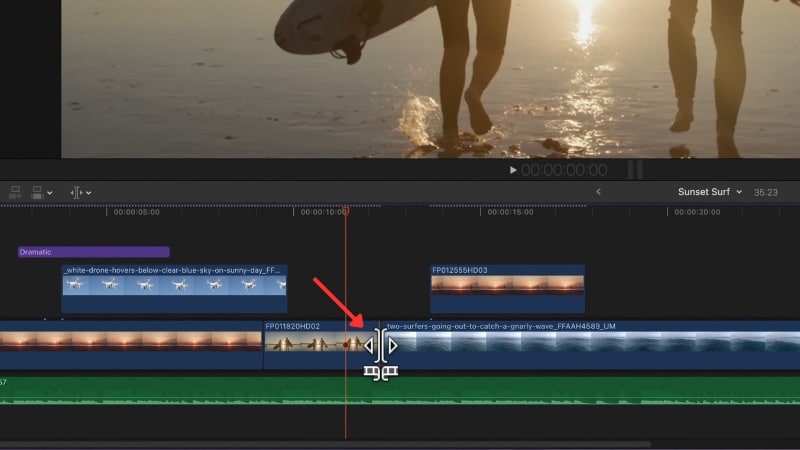
Refine Sound with J-cuts & L-cuts
Press Command + S to expand audio. Drag edges to create sound overlaps.
Connected Clips & Secondary Storylines
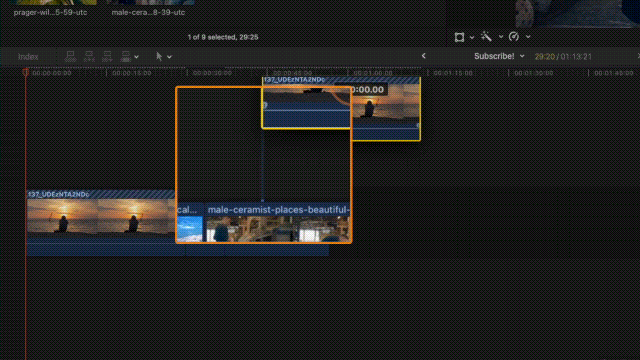
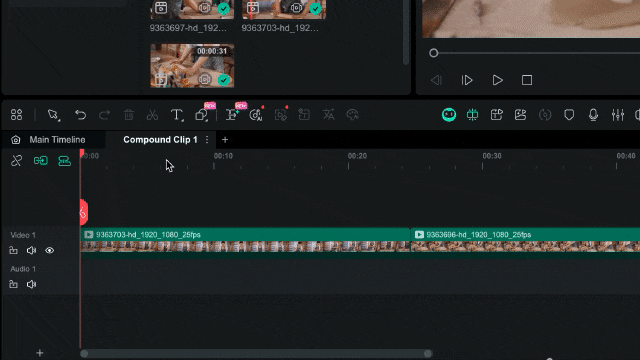
Compound Clips
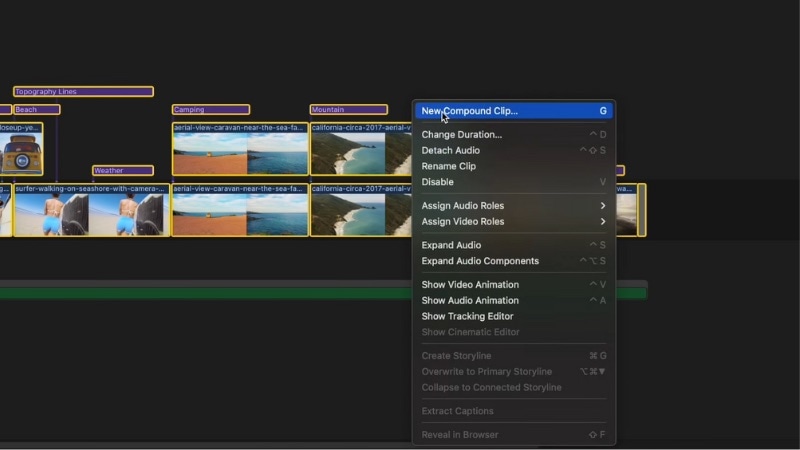
Create one via Option + G.
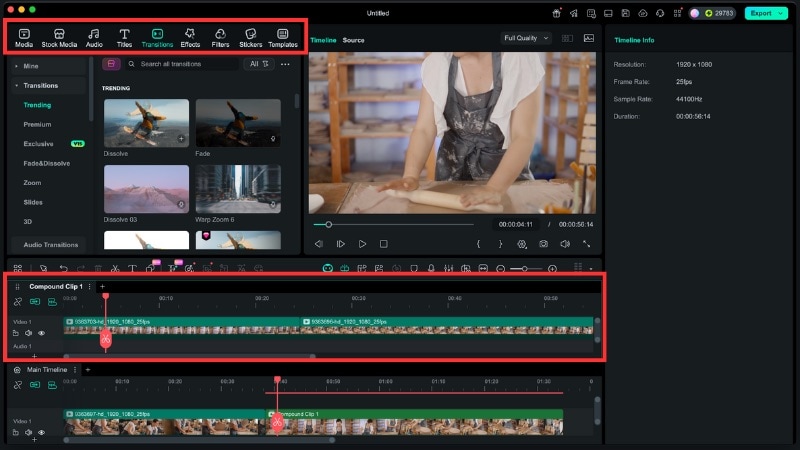
Bonus: Filmora’s Dual-Timeline Editing for Better Workflow Control
 secure download

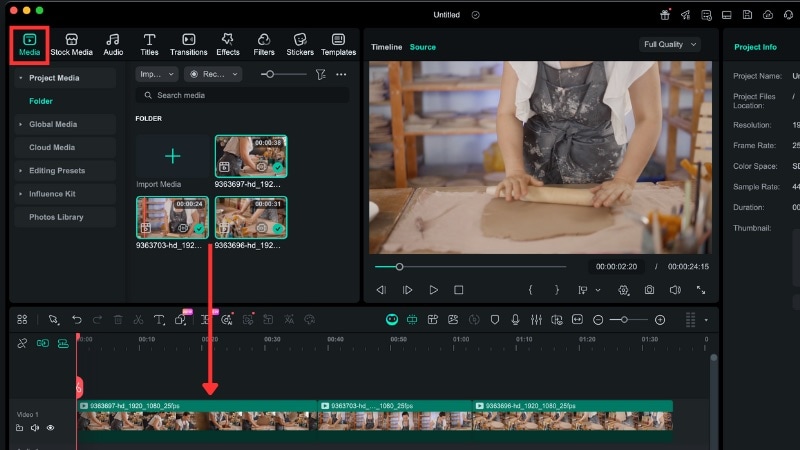
Filmora allows a dual-timeline view: main timeline + focused compound-clip timeline.

How to Enable Dual Timeline
Step 1. Add Clips
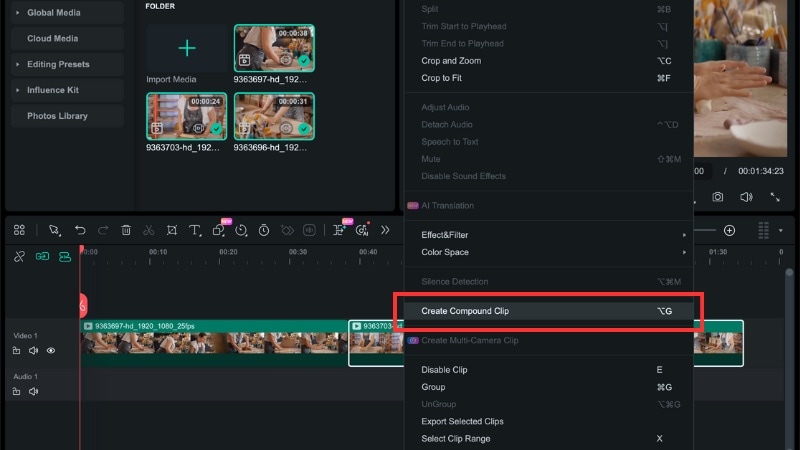
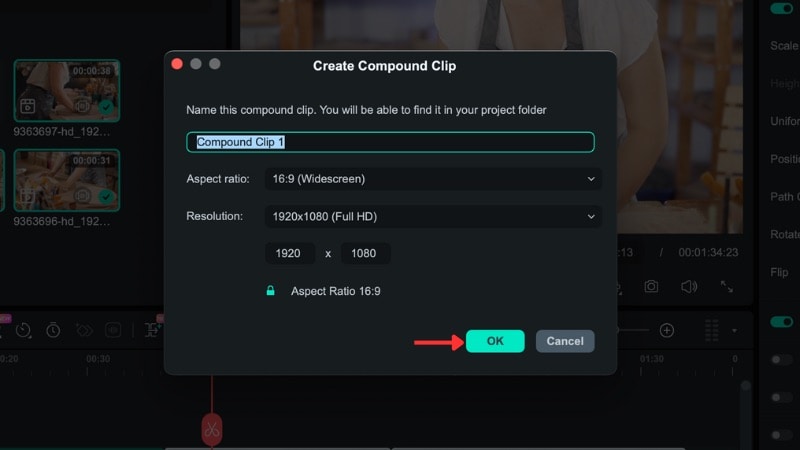
Step 2. Create Compound Clip
Step 3. Open Dual Timeline
Step 4. Edit Independently
Conclusion
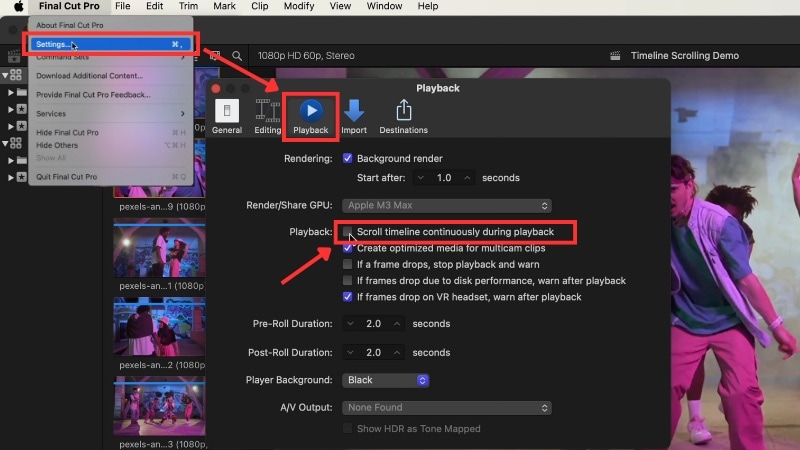
The Final Cut Pro timeline improves editing through its magnetic system, making your workflow faster, cleaner, and more intuitive. If you want even more control, Filmora’s dual-timeline offers enhanced precision and organization for complex edits.
secure download FAQs
- Can I turn off the magnetic timeline? You can’t disable it, but the Position tool (P) and tilde (~) let you temporarily bypass it.
- Does Filmora’s dual timeline work like FCP’s magnetic timeline? No. FCP focuses on clip connection; Filmora focuses on navigation and organization.
- Can I ungroup a compound clip in Filmora? Yes. Right-click → Detach Compound Clip.
