
 100% Security Verified | No Subscription Required | No Malware


 ChatGPT
 Perplexity
 Gemini
 Claude
 Grok
Grok
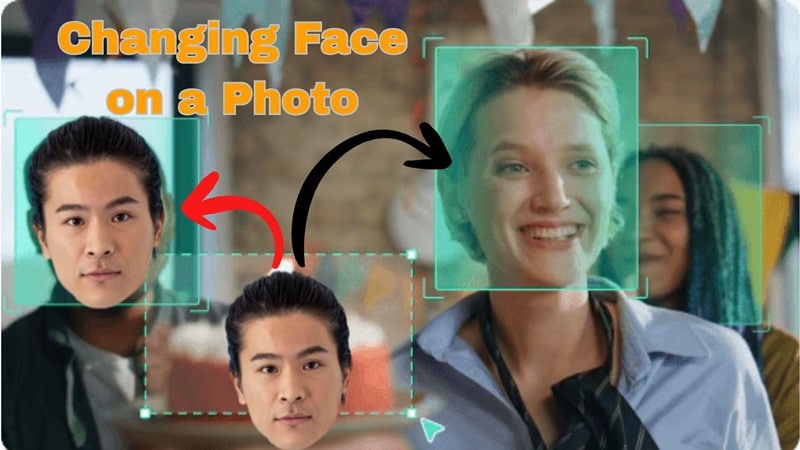
Changing the face on a photo can be helpful for many reasons. Say, you can fix mistakes in an otherwise perfect shot with a better photo of your face in a group picture, make funny edits with friends, or even turn an ordinary shot into something completely new.
The most widely known method to change the face on a photo is using Photoshop. But thanks to AI technology, there is also a quicker way to do it, and that's what we're going to show you today. We'll guide you through both methods of replacing faces in a picture, with additional tips on how to animate and swap faces for more creativity!
In this article
Part 1. Different Ways to Change the Face on a Photo
When you want to change the face on a photo, the method you use usually depends on your goal. Some people do a face replacement for fun, while others may use it to fix a group shot.
1. Change Faces Between Friends
Swapping faces with friends is one of the most popular ways to change the face on a photo. It turns ordinary selfies into hilarious edits and often ends up as the highlight of a group chat.

2. Funny Face Replacements
Sometimes people replace a face in a picture just to create a funny surprise. Adding a celebrity face to your own shot, swapping with a cartoon character, or switching someone’s funny expression can make a hilarious edit. You can use it to prank friends or just share a laugh on social media.

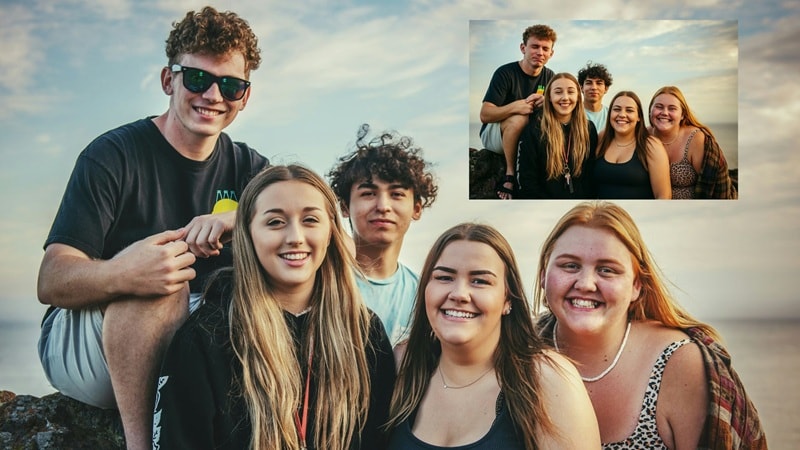
3. Face Replacement for Photo Fixing
A group shot does not always turn out perfectly, but a quick face replacement can save the day. If someone blinked or looked away, you can replace the photo face with another image where they look better. This small edit makes the whole group picture look better without needing to retake it.
Part 2. How to Replace Face in a Picture Using Photoshop
There are plenty of apps to replace faces in a photo, but when it comes to serious editing, Photoshop is the name that always comes up. This photo editor is trusted by professionals because it offers precise tools and detailed control.
The process can be a bit complex, though, and it often requires careful planning to make the final result look natural. So, guided by tutorials from Photoshop experts on YouTube, here’s a step-by-step look at how to use Photoshop to replace a face.
How to Change a Face in a Picture Using Photoshop
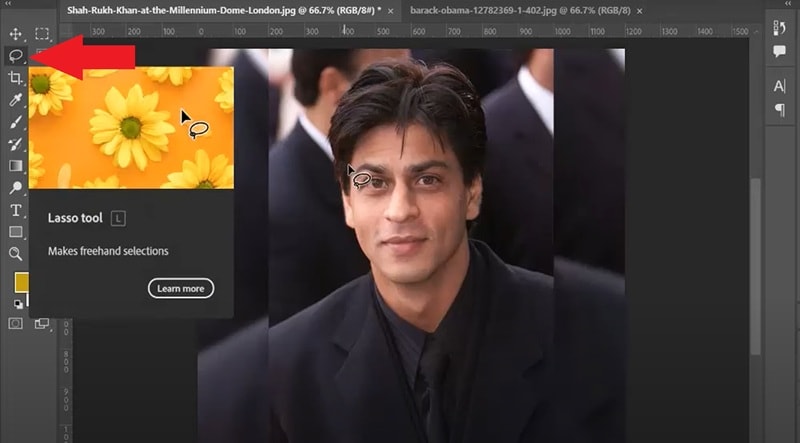
- Step 1. Import photos and make a clean face selection
First, open both photos in Photoshop: the one with the face you want to use and the target image where you want to place it. In the source image, use the "Lasso Tool" and capture the face and a bit of surrounding skin.
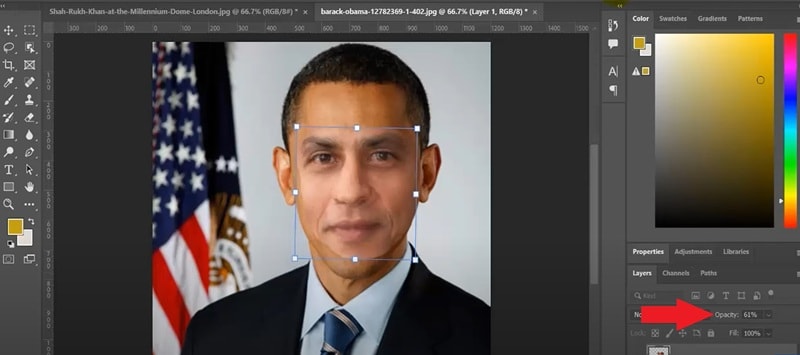
- Step 2. Paste to target image
Copy the face selection you just made and paste it onto the target photo. Reduce the face layer's Opacity to about 60 percent so you can see both layers at once. Then use "Free Transform" (Ctrl or Cmd + T) to resize and rotate until the eyes, nose, and mouth align naturally with the original face.
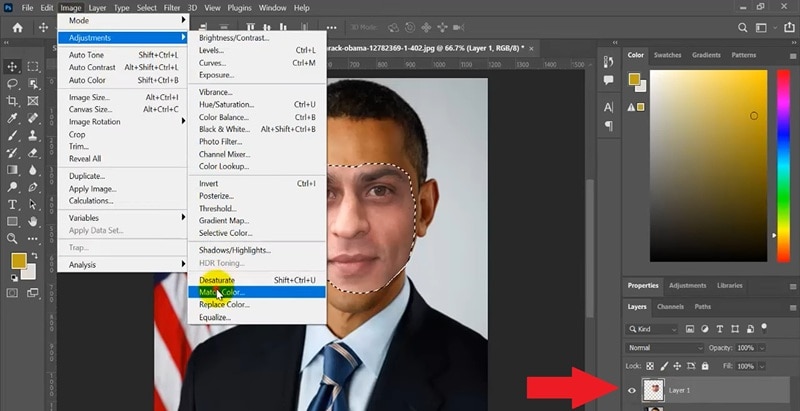
- Step 3. Adjust color
Once you bring the opacity back to 100 percent, select the face layer and go to the "Image" menu. From the options, choose "Adjustments" and then click "Match Color".
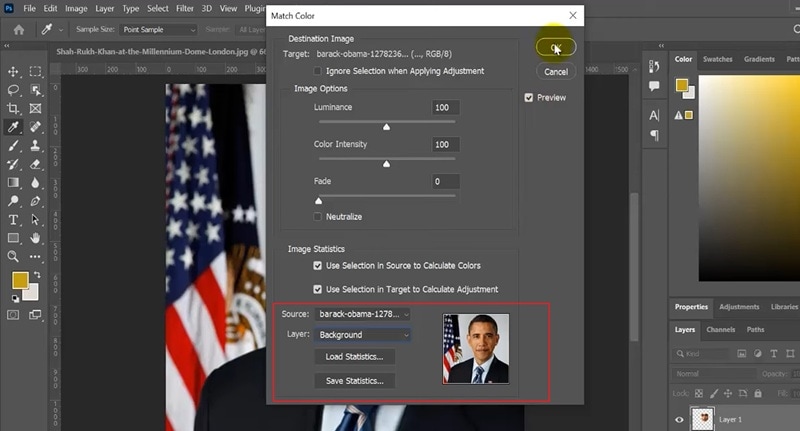
In the Match Color window, set the "Source" to your target photo and make sure the "Layer" is set to Background. Click OK to apply the changes and blend the tones.
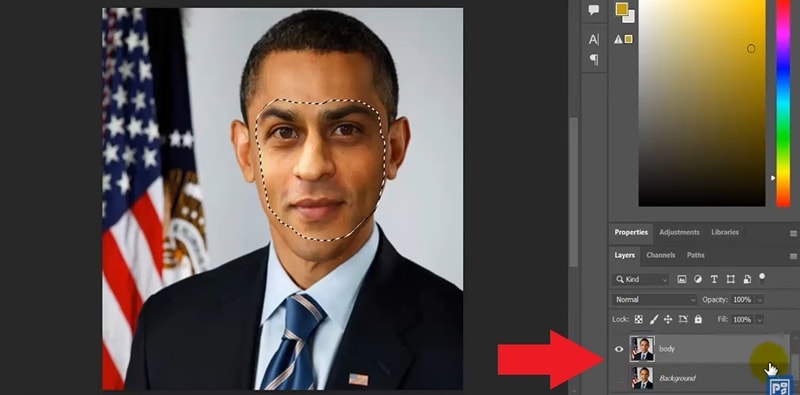
- Step 4. Create duplicate layers
Right-click the background layer and choose "Duplicate Layer", then rename it as Body. Next, hide the original background by clicking the eye icon next to it so you can work only on the duplicate layer.
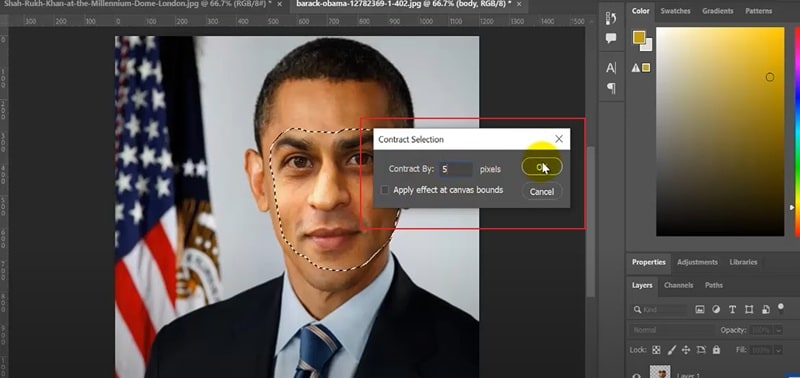
- Step 5. Make a contract selection
Select both the face layer and the Body layer, then go to the "Select" menu. Choose "Modify" and click "Contract". In the Contract Selection window, set Contract By to 5 pixels and click OK.
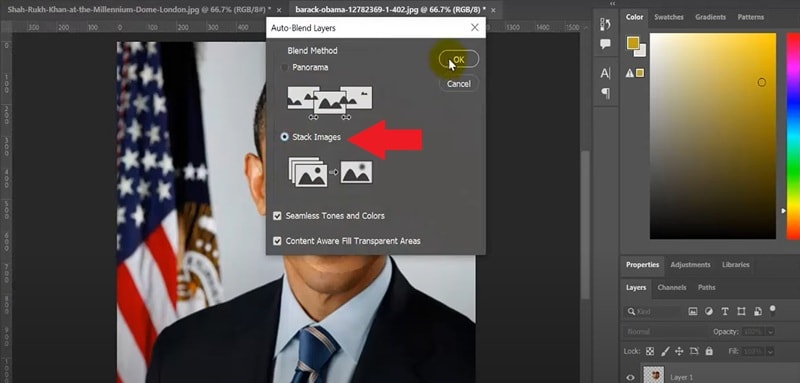
- Step 6. Use the Auto Blend Layers feature
Deselect the current selection by pressing Ctrl + D (Windows) or Cmd + D (Mac). Next, select both layers and go to the "Edit" menu, then choose "Auto-Blend Layers". In the window that appears, check "Stack Images" and click OK to let Photoshop blend the face seamlessly with the body.
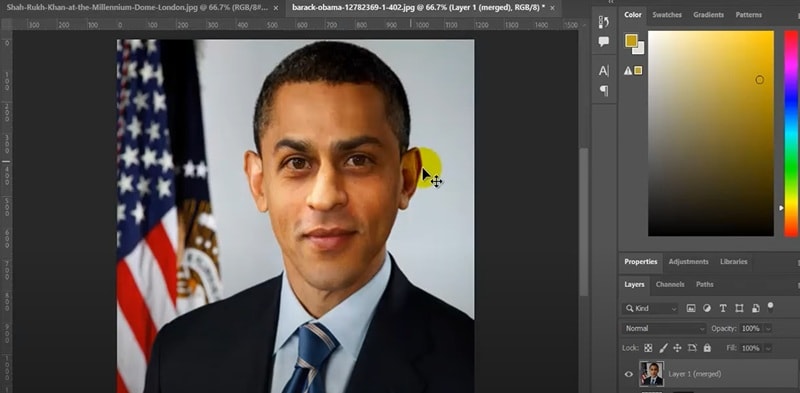
And that's pretty much it! Take a look at the final result, and you’ll see that you’ve managed to replace a face in the picture successfully.
Part 3. Quick Method to Replace Face in a Photo
Now you’ll notice, Photoshop can definitely replace faces in photos with precision, but for beginners, the process may feel a bit heavy. Worry not, it’not the only way to do it.
If you want to replace a face in a faster way, you can replace a face in a picture online using tools like Fotor and let the tool handle most of the hard work. It is a faster, easier path that still gives you a clean result.
How to replace a photo face quickly
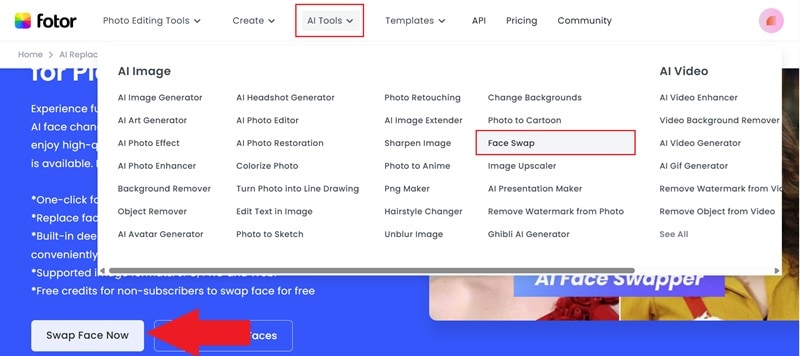
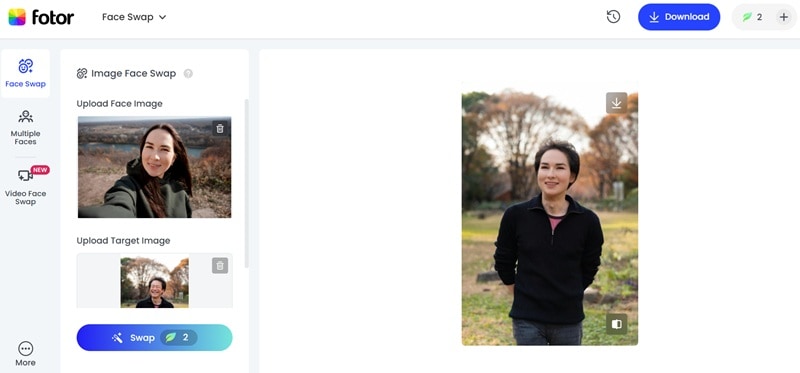
- Step 1. Visit Fotor and access the face swap feature
First off, go to the official Fotor website and open the face swap feature. To find it, click on the "AI Tools" option and then select "Face Swap". Once you are on that page, click "Swap Face Now" to get started.
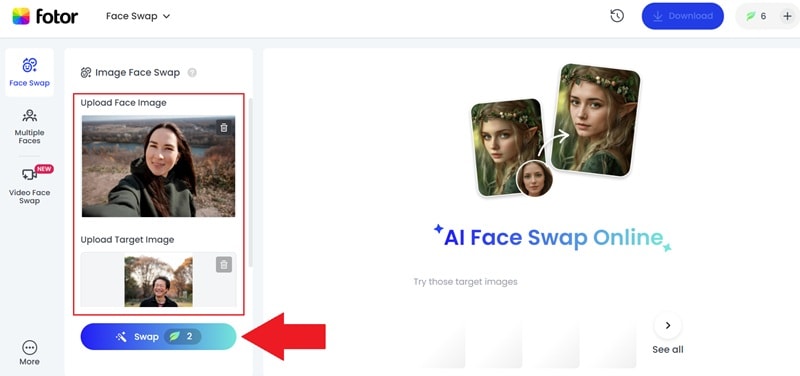
- Step 2. Upload your photos and swap faces
Once you are in the face swap feature, sign in to your account. That's because Fotor’s option to replace a face in a photo for free is not fully unlocked without credits, but you usually get a few credits just for creating an account.
Next, upload the target photo and the face you want to use. For example, if you want to see your face on your dad’s body, upload your dad’s photo as the target image and your own as the face image. Finally, click "Swap" and wait a few seconds for the result.
- Step 3. Preview and download it
After the tool finishes processing, the swapped photo will appear on your screen. You’ll see the new face blended into the picture instantly. If you’re happy with the result, click the download icon to save the edited photo to your device.
Bonus: Animate and Face Swap Your Photo to Get Viral Fast!
You have learned how to replace faces in photos. But instead of stopping there, you can push it further by bringing your picture to life and creating content that grabs attention fast.
With Wondershare Filmora, you can turn a still image and animate it into a short video using the Image-to-Video feature. Once the clip is ready, Filmora’s video element replacement tool lets you swap faces directly inside the video. The best part is that it feels simple and fun to do, yet the result looks like something you would expect from a pro editor.
In the next steps, we will walk through how you can try it yourself and create edits that are ready to go viral.
Animate Your Photo Using Image-to-Video
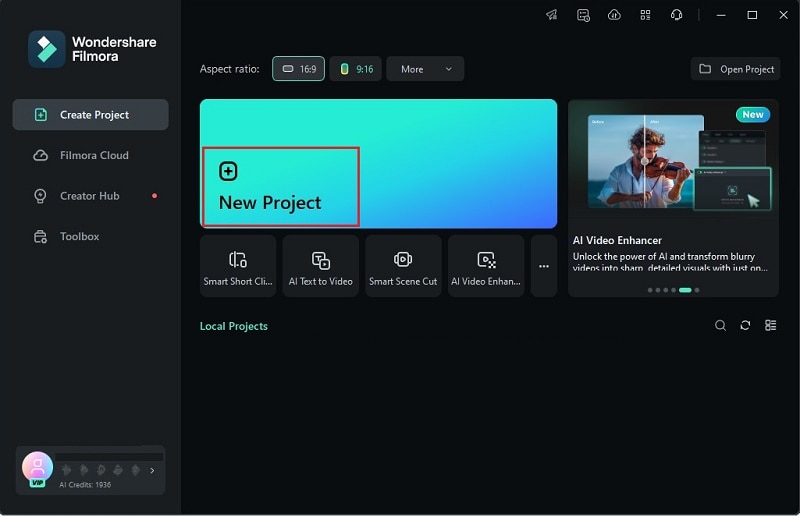
- Step 1. Open Filmora and start a new project
Download and install the latest version of Filmora, then launch the app and click "New Project" to begin editing with a fresh workspace.
- Step 2. Upload your image and generate an AI video
 secure download

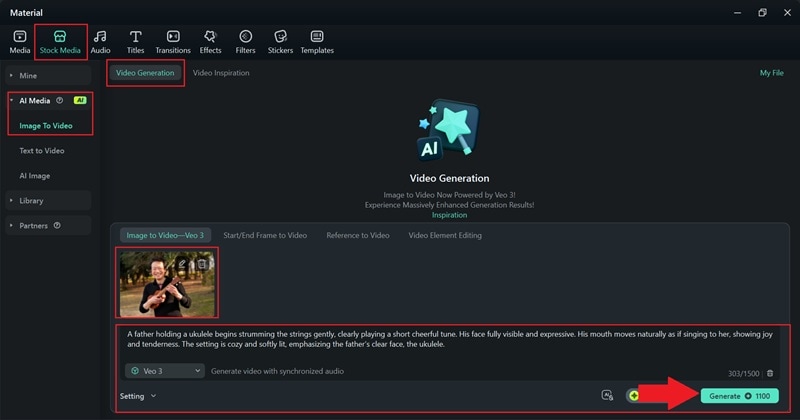
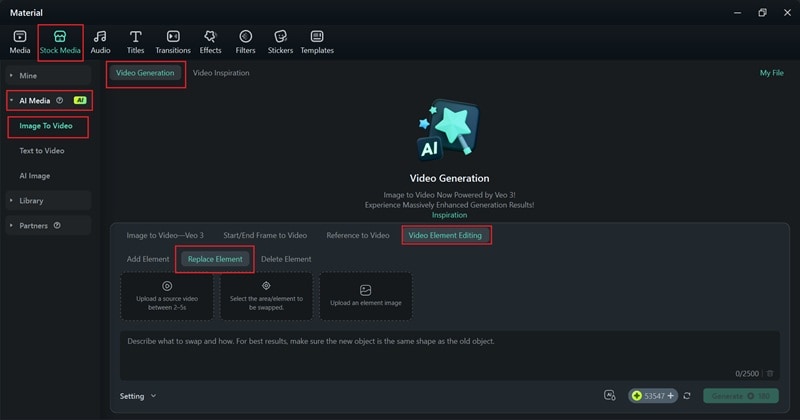
Go to the "Stock Media" tab and open the "AI Media" section. Choose "Image to Video" > "Video Generation."
Upload the photo you want to animate and enter a prompt that describes the movement you want to create. When you are ready, click "Generate".
- Step 3. Preview the video and export it
After Filmora finishes processing, drag the generated clip onto the editing timeline. As you can see, the Filmora AI video generation runs on Veo 3, which delivers high-quality results and even includes audio.
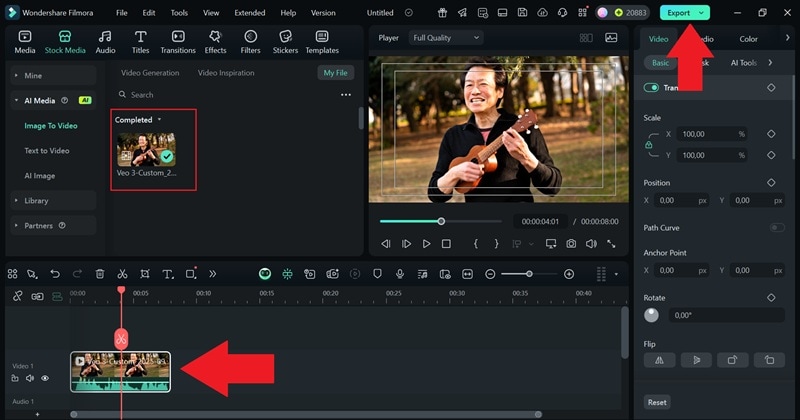
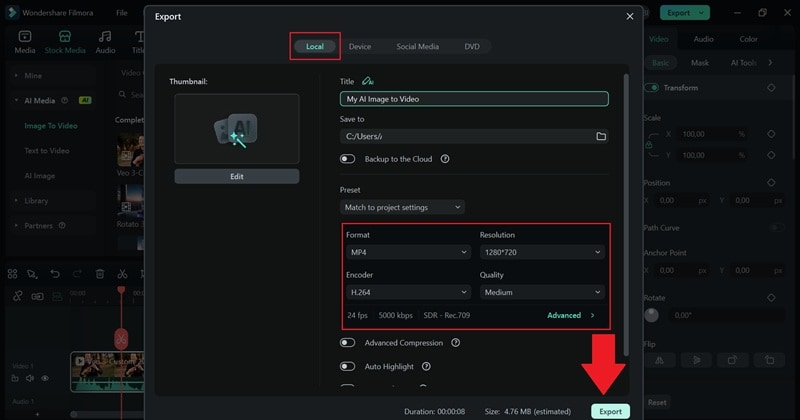
When you are satisfied, click "Export". Choose "Local" to save it to your device, add a title for your video, pick the format and resolution, set the save location, and then click "Export" again to finalize.
Face Swap Your Animated Photo
- Step 1. Access the replace element feature
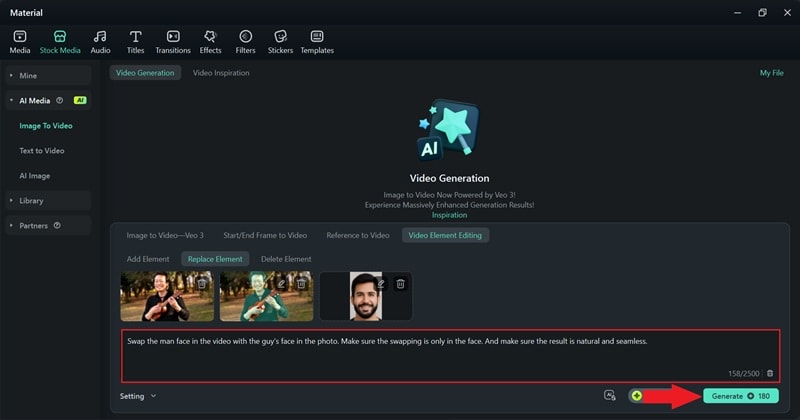
This time, when you open the "AI Image to Video" feature, select the "Video Element" method. Next, click on the "Replace Element" option to begin.
- Step 2. Upload your video and photo to create the swap
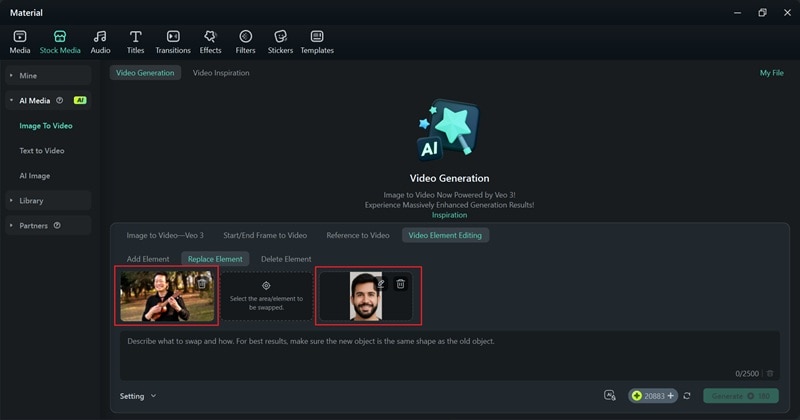
With this feature, you can swap an object in the video with any photo you choose. So, upload the AI-generated video you created earlier, along with the image you want to use for the replacement.
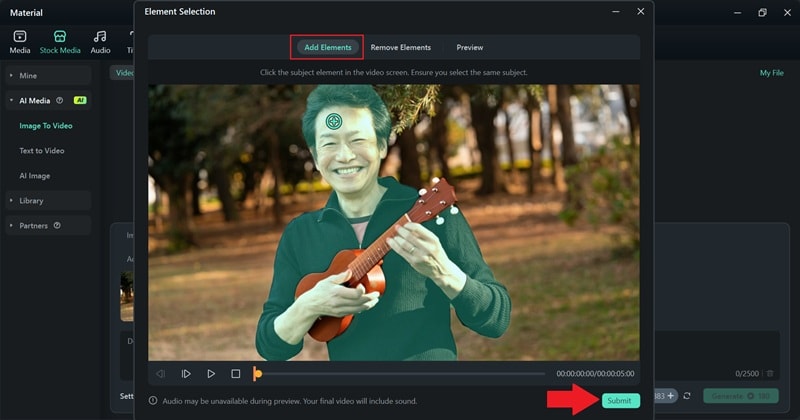
Next, click “select the area/element to be swapped” to highlight the object in the video you want to change. Select "Add Element" and click on the subject’s face in the video. Filmora will outline the area automatically. Hit "Submit" once done.
Now, type your prompt in the description box, say which part you want to swap, and add a few details to make it more accurate. Hit "Generate" and let Filmora do the work for a few moments.
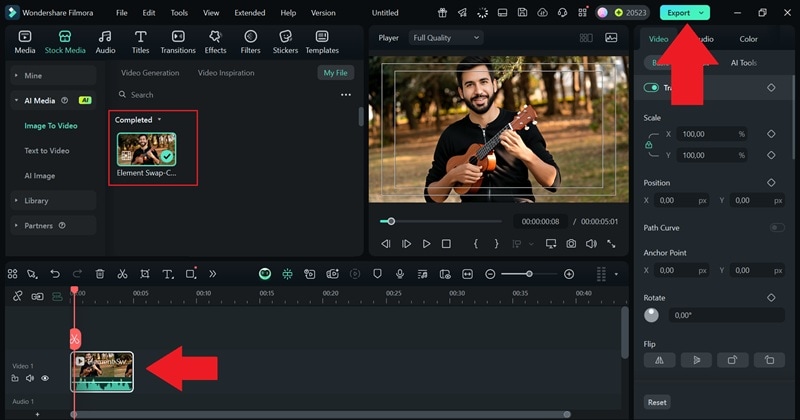
When Filmora finishes generating, check the video and drag it onto the editing timeline. The swap should already look natural, but you can still use Filmora’s tools and effects to refine it further.
When you are happy with the result, export it to your device using the same "Export" steps as before.
And just like that, you’re done! Filmora makes changing faces on a photo feel more advanced by letting you animate it with powerful AI tools that bring images to life. You can turn a simple edit into something worth sharing.
Key Takeaway
From the creation above using Filmora, we can see how much more you can do when you replace a face in a photo and bring it to life with animation.
- The Replace Element option lets you directly swap a face or object inside a video without complicated masking.
- Filmora keeps the alignment natural by automatically adjusting size and position.
- You can fine-tune the result with extra editing tools like color correction and blending modes.
- The interface keeps the whole workflow quick, even for someone new to video editing.
- Combining this video element feature with Filmora’s Image to Video feature means you can create animated face swaps from a photo in just one project.
Conclusion
There are plenty of reasons why people want to change their faces in a photo, and this guide showed how to do it using a few different tools. For a quick face replacement online, Fotor works well, while Photoshop is the popular photo editor for more manual control.
Both have their strengths, but Filmora takes things a step further by letting you not only change a face but also animate it through the Image to Video feature. With Filmora, you can transform a simple photo swap into a short video that feels alive and ready to share. Its intuitive interface and built-in AI tools make it easier to replace photo faces and polish the final result without extra hassle.
secure download
