100% Security Verified | No Subscription Required | No Malware


 ChatGPT
 Perplexity
 Gemini
 Claude
 Grok
Grok
In this era of artificial intelligence, a number of things have been made easy for computer users, one of which is speech recognition. Typing isn't easy or even possible for everyone, which is why you might prefer to talk. Speech-to-text software, also sometimes called dictation software, makes it possible by turning what you say into typed text. You also get help with basic tasks like writing simple notes and creating video subtitles.
If you have an Apple device, you don't need to install software to dictate text to your Macbook, iPad, or iPhone because they come with a built-in function for speech recognition. However, they support other tools with this feature enabled should you need to do more with a speech-to-text tool than the built-in options offer. In this article, we’ll explain how to set up Apple's speech recognition and rank the best voice recognition tools for Apple devices.
In this article
Part 1: How to Setup Apple Speech Recognition Across iOS Devices
Apple has built-in speech recognition tools for iPhones, Macs, and iPads, which are free and do not require the internet to use. Below, we are going to look at how to set up the different iOS speech recognition tools, which are voice control, dictation, and text-to-speech.
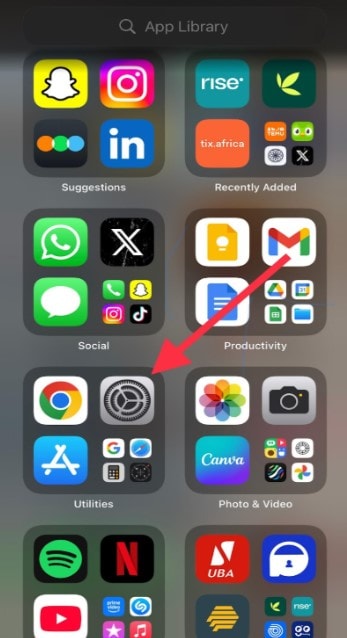
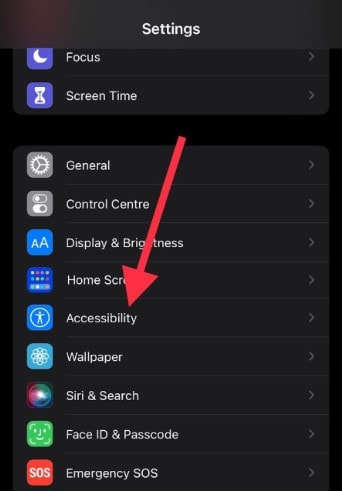
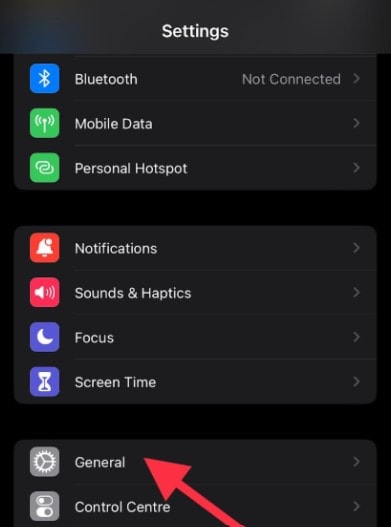
How to Setup Apple Speech Recognition on iPhones
To set up the voice control Apple voice recognition software using voice control, follow the steps below:
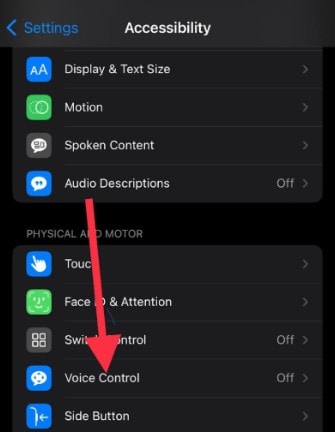

After you complete these steps, a blue microphone will appear in your device's status bar, indicating whether Voice Control is listening or not.
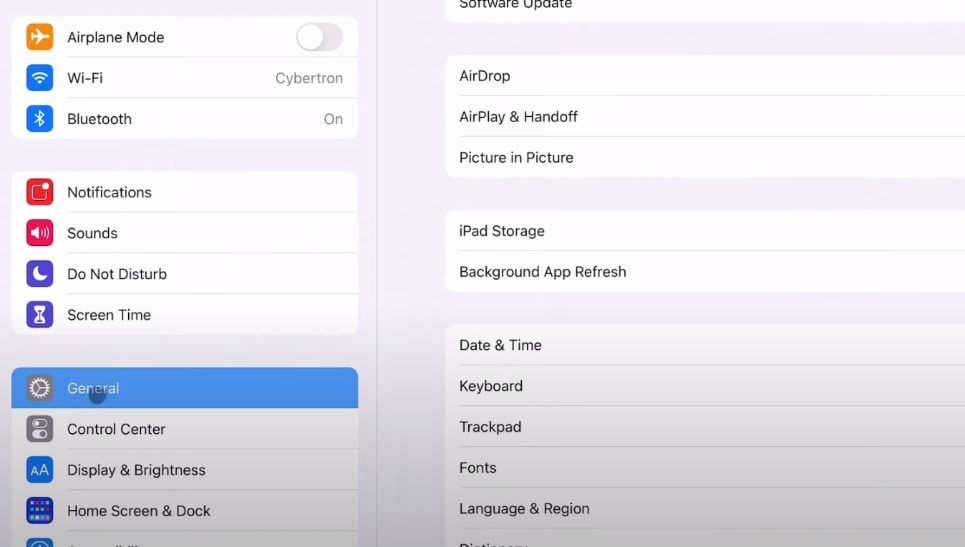
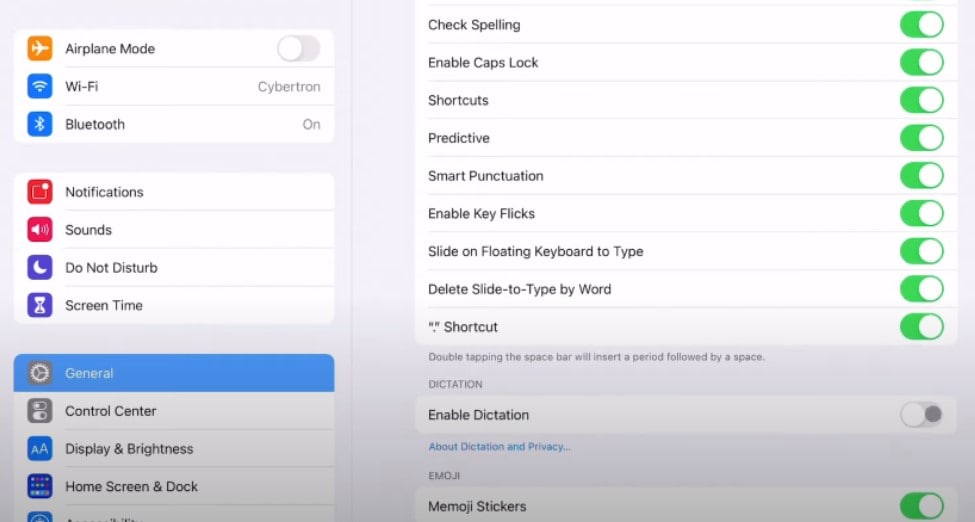
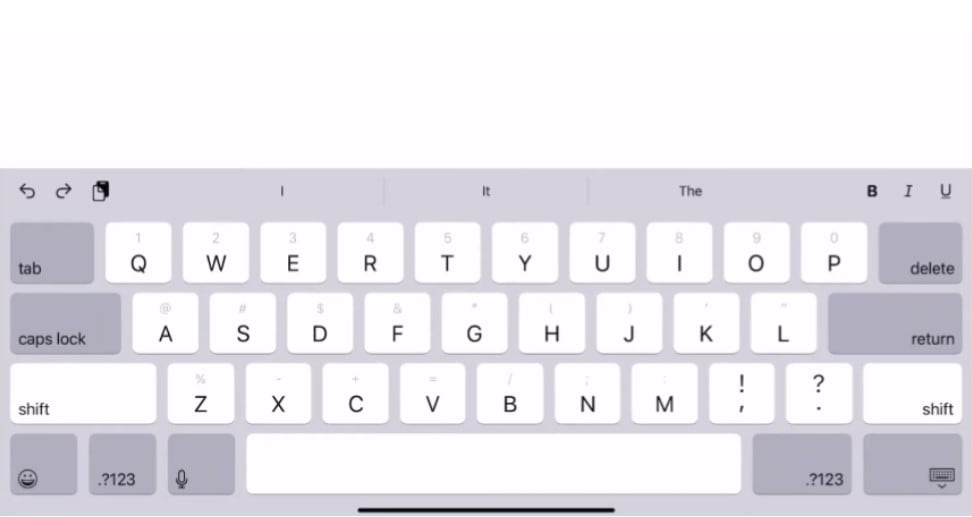
Aside from voice control in the Settings app, you can set up Apple speech recognition using the Dictation feature. Follow the steps below:

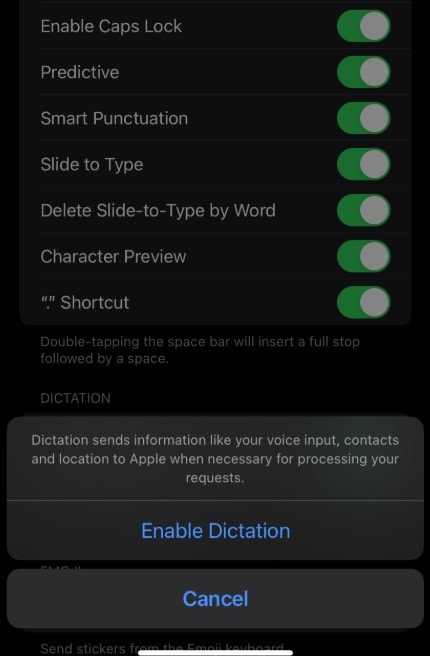
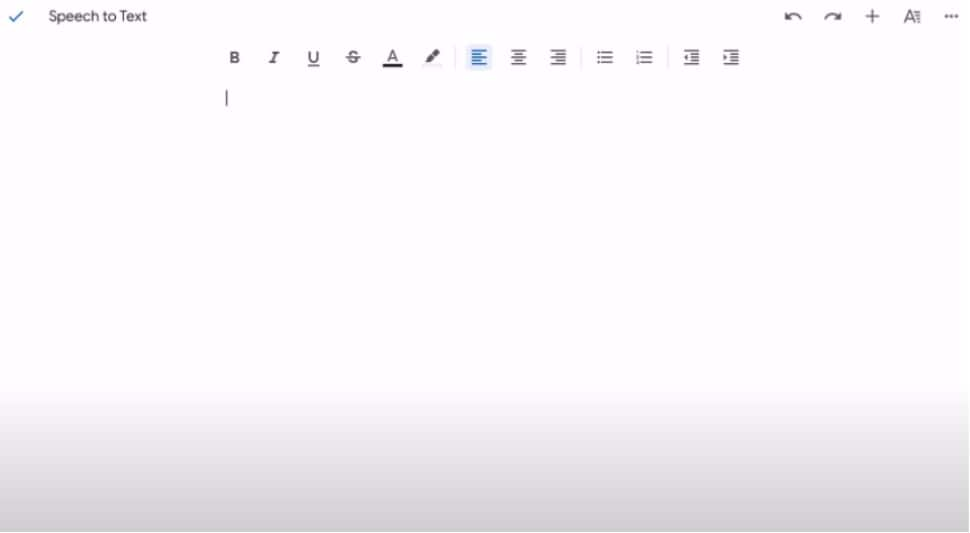
Once dictation is set up, you can access the microphone(Speech-to-Text) feature on your iPhone. Follow the steps below to do it:
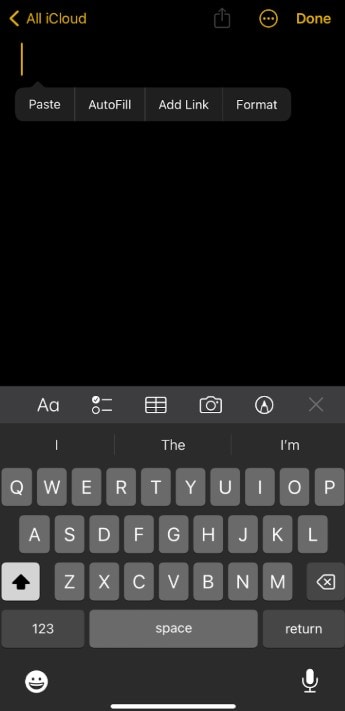
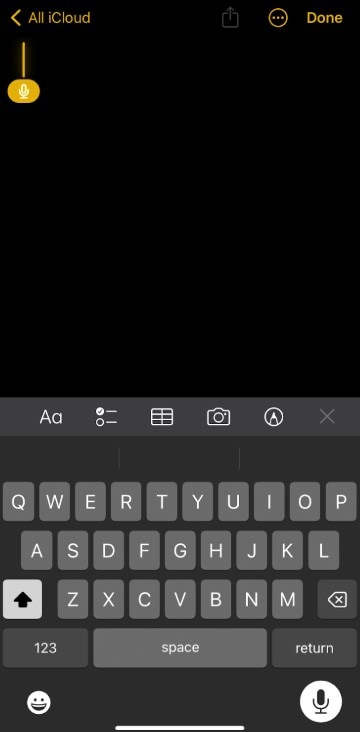
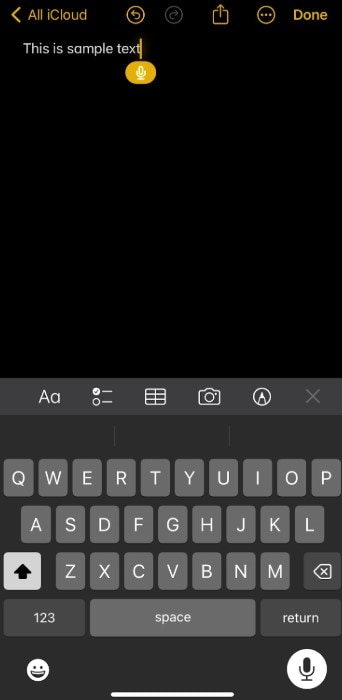
When you’re done, tap the microphone icon icon to turn it off. Dictation stops automatically when you stop speaking for 30 seconds.
How to Setup Apple Speech Recognition on Macbooks
Macbooks, like other Apple devices, come with a speech recognition function. They sync well with your iPhones and iPads, too, letting you seamlessly transfer speech-derived notes across devices. Below are steps for setting up Apple voice recognition on Mac PCs using voice control, dictation, and speech-to-text:
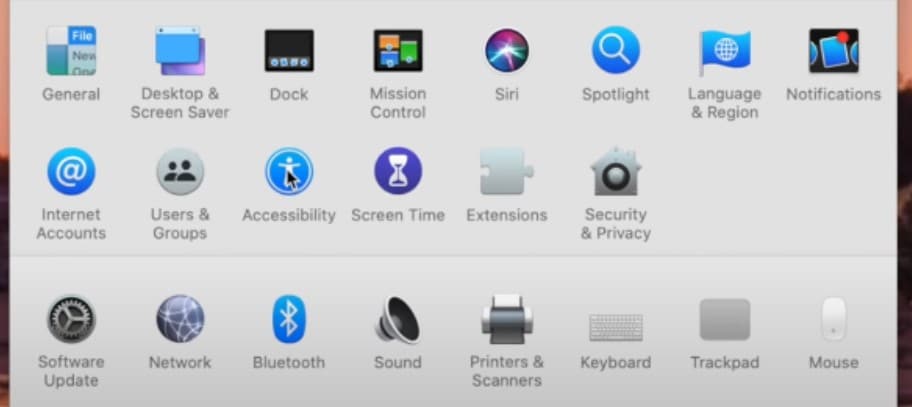
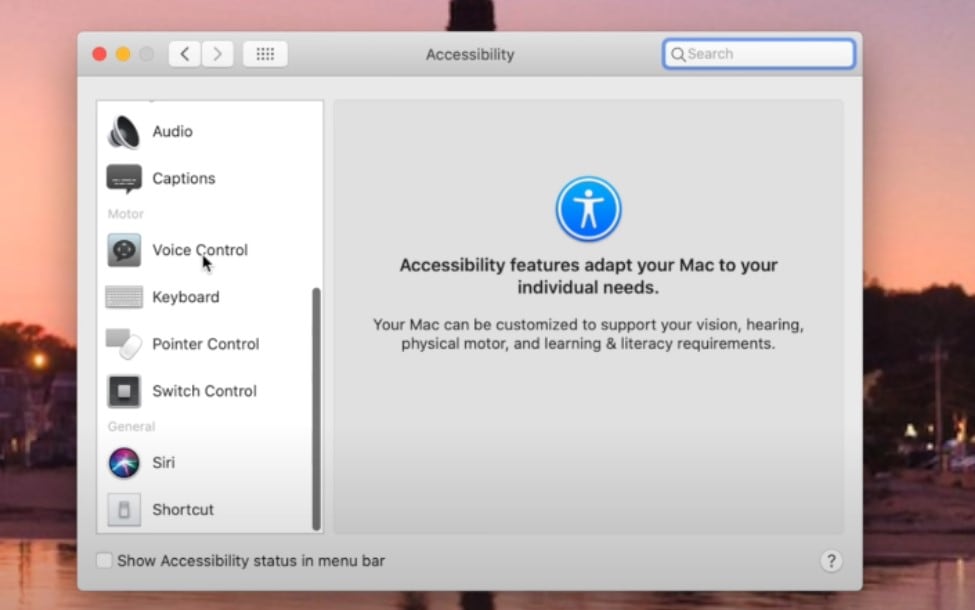
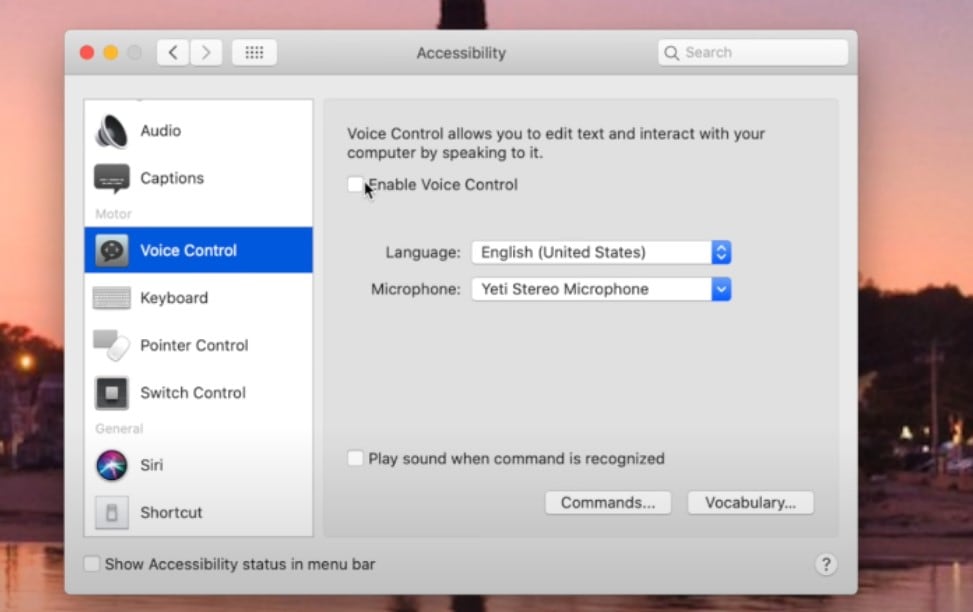
To set up Apple speech recognition on your Macbook using voice control, follow the steps below:
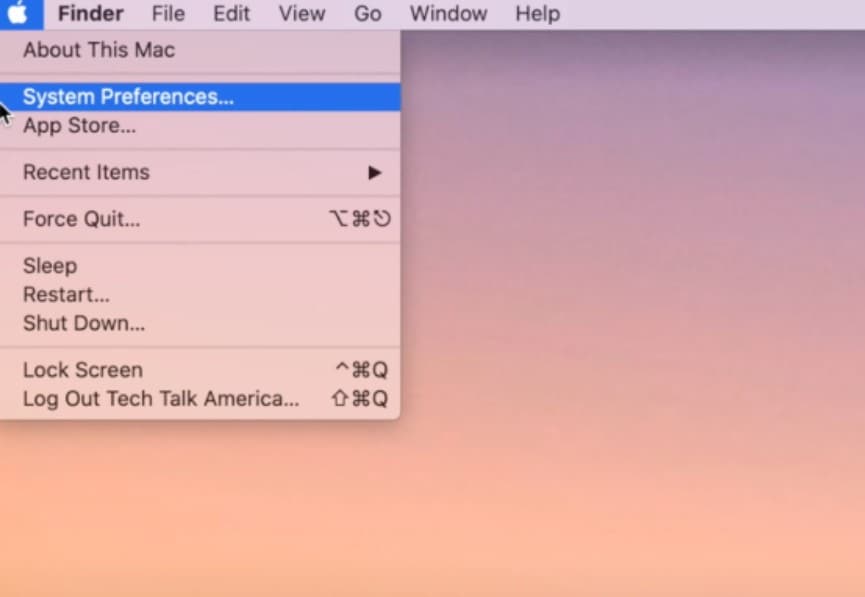
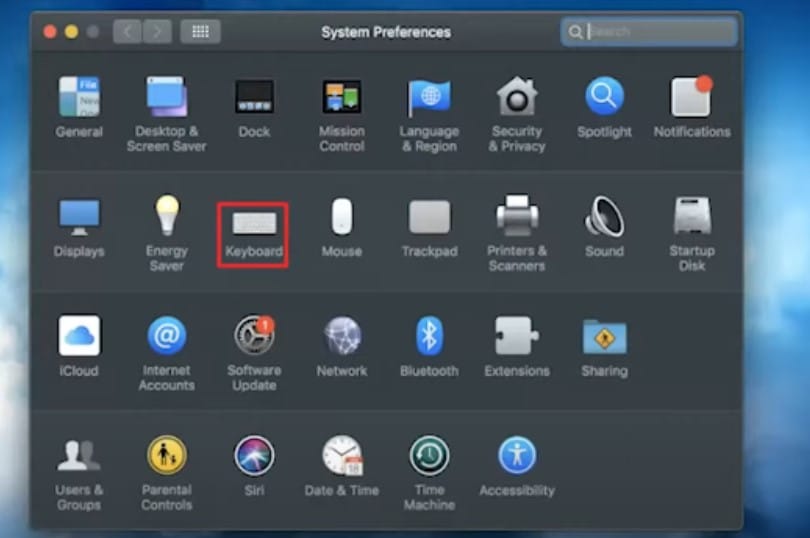
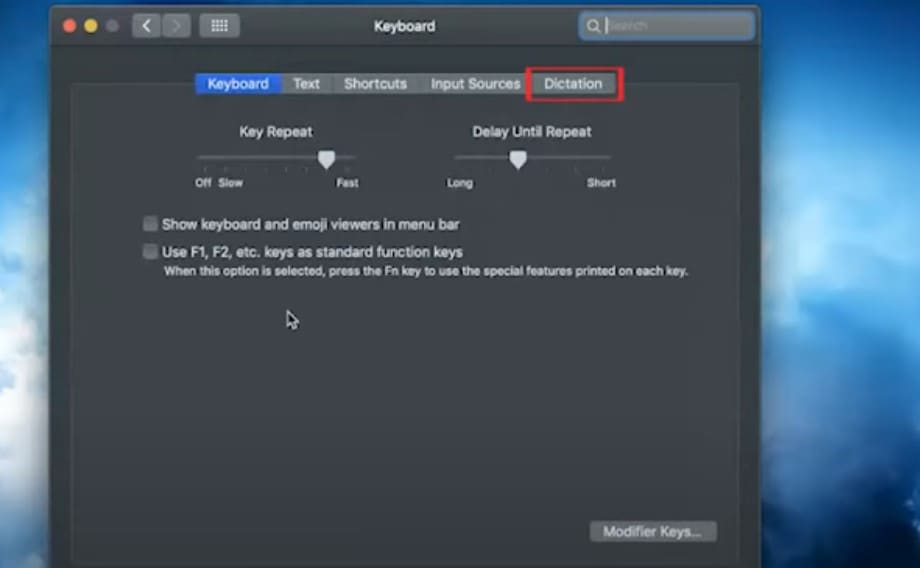
Next, you can use the Dictation tool from your settings to recognize and transcribe spoken words into text. To set up Apple voice recognition using Dictation on your Mac, follow the steps below:
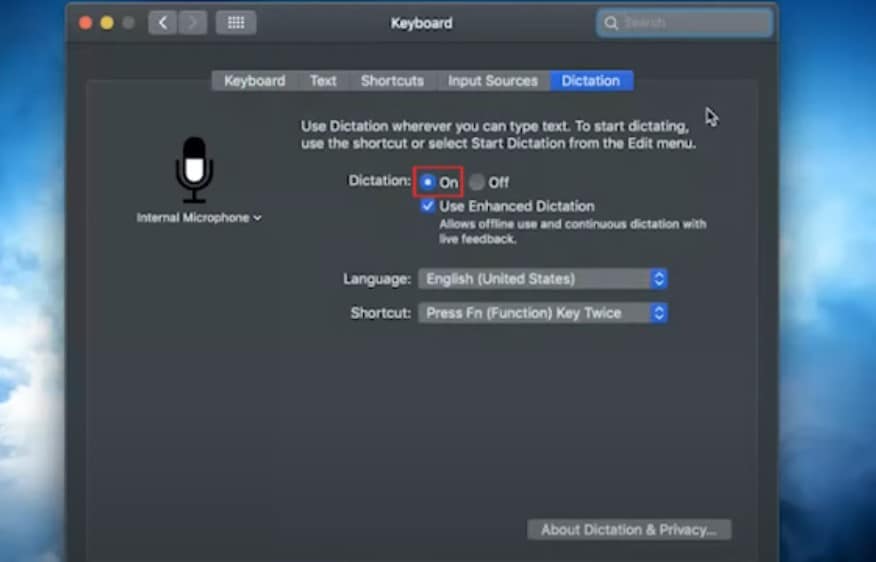
Pro Tip: If you’re asked whether you want to improve Siri and Dictation, you can share audio recordings byclicking Share Audio Recordings. This allows Apple to store audio of your Siri and Dictation interactions from your Mac. Apple may review a sample of stored audio. To stop sharing these recordings, click Not Now.
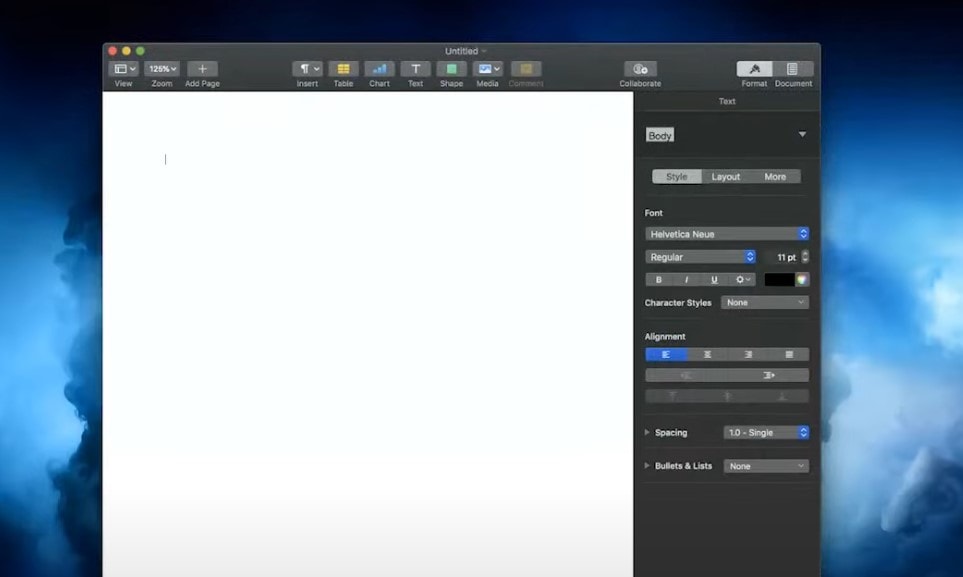
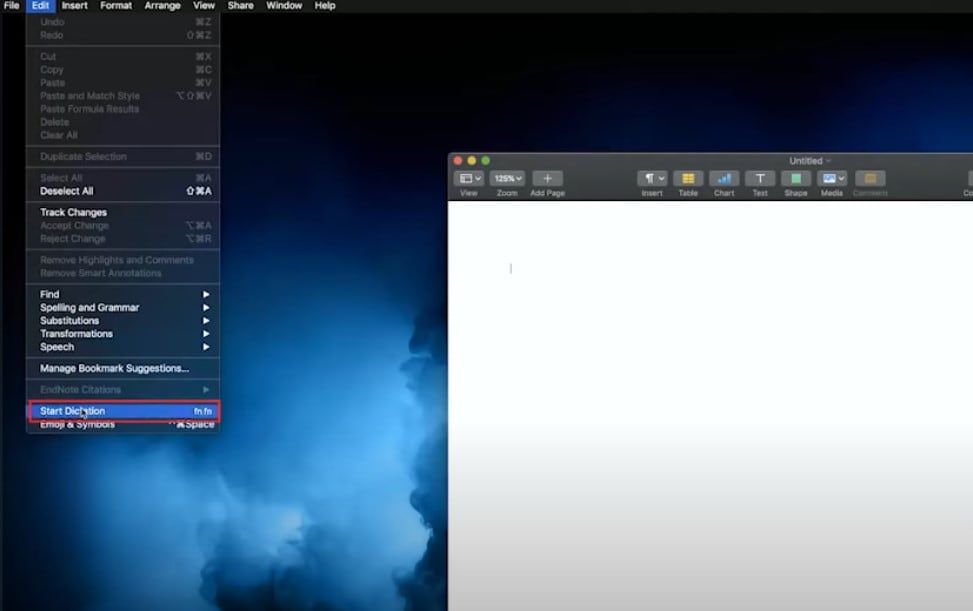
Finally, you can access speech recognition from your keyboard if dictation is already enabled on your Mac. To use Apple speech recognition via Speech-to-text on your Macbook, follow the steps below:
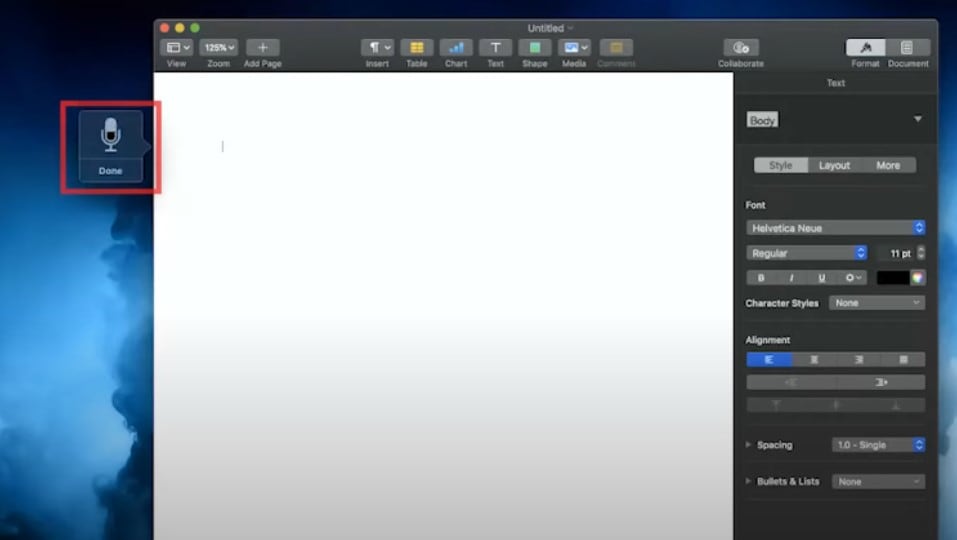
Tips: Here are some additional functions you can perform using the speech-to-text feature:
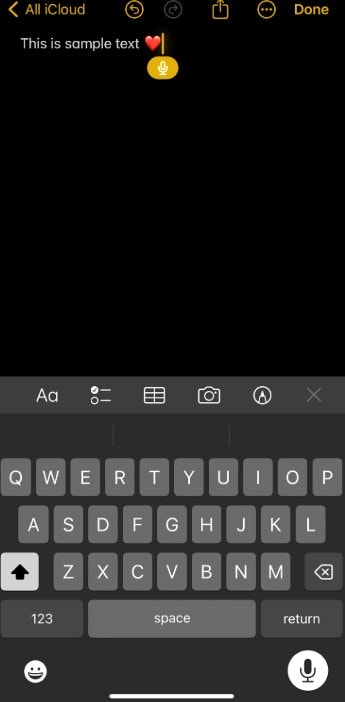
- To insert an emoji or a punctuation mark or perform simple formatting tasks, do any of the following:
- Say the name of an emoji, like “heart emoji” or “car emoji.”
- Say the name of the punctuation mark, such as “exclamation mark.”
- Say “new line” (equivalent to pressing the Return key once) or “new paragraph” (equivalent to pressing the Return key twice). The new line or new paragraph appears when you’re done dictating.
You can dictate text of any length without a timeout. When you’re done, press the Escape key, the Microphone key (if available), or the Dictation keyboard shortcut. Dictation stops automatically when no speech is detected for 30 seconds.
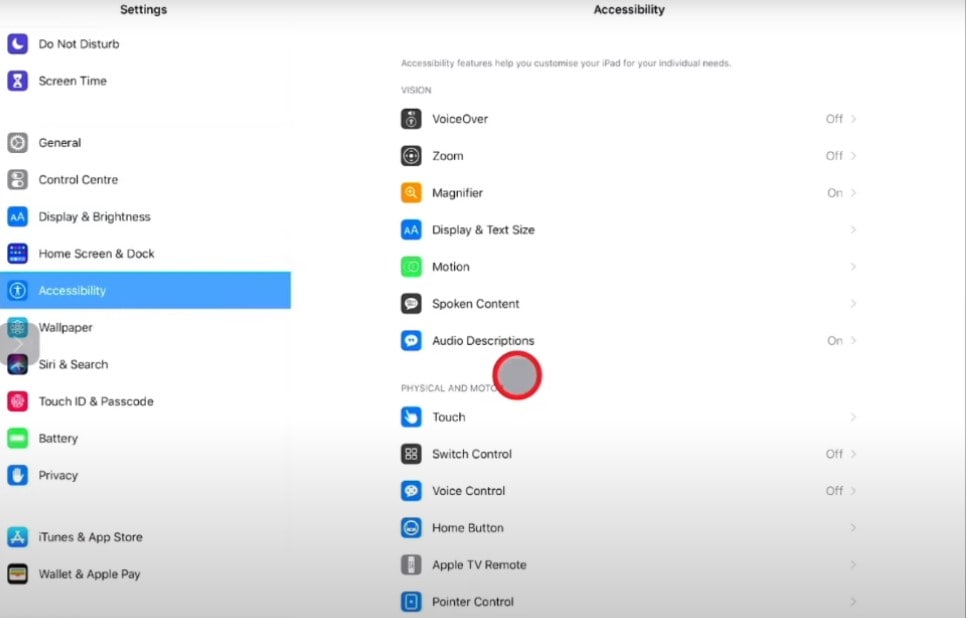
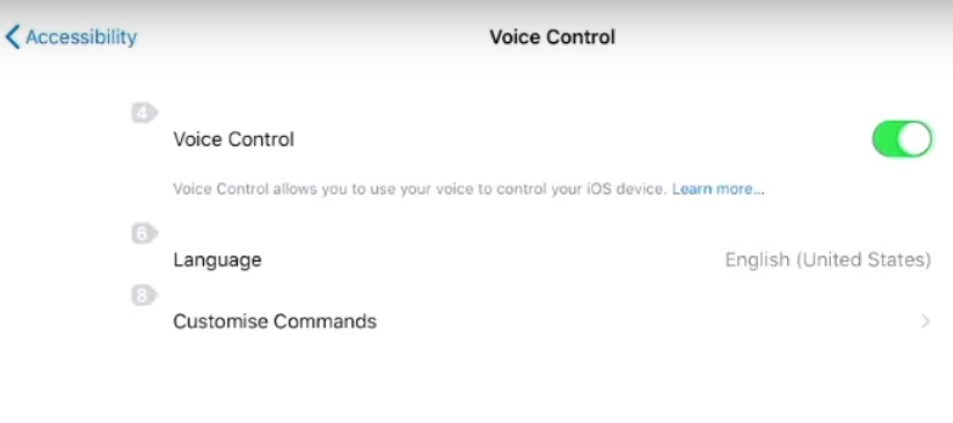
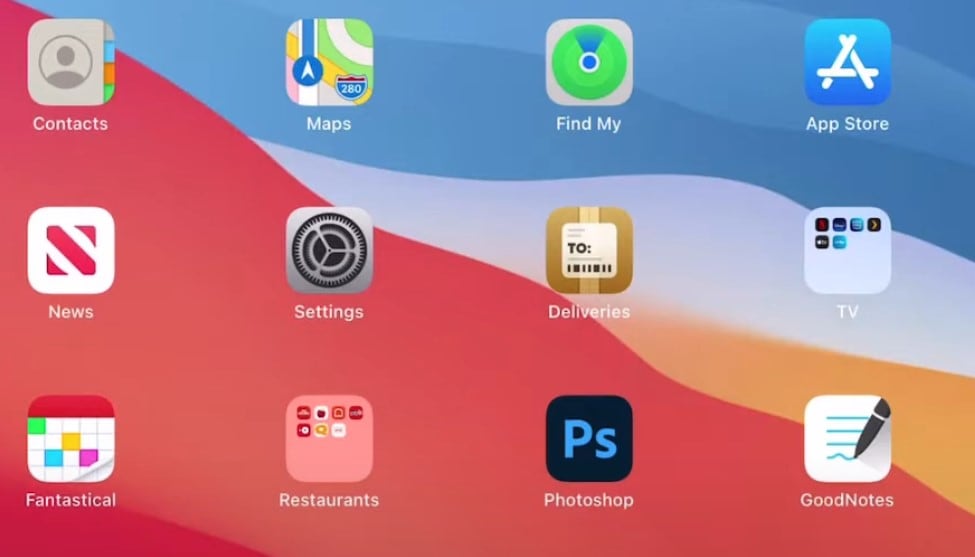
How to Setup Apple Speech Recognition on iPads
With iOS sound recognition, you can navigate and interact with your iPad using only your voice instead of the traditional act of typing. Below are steps for setting up Apple speech recognition on your iPad using voice control, dictation, and speech-to-text:
To set up Apple speech recognition on your iPad using voice control, follow the steps below:

Your iPad also gives you access to Dictation on your keyboard for iOS speech recognition. Here’s how to set it up:
Once the Dictation feature is set up, you can access the Speech-to-text tool via the microphone on your iPad keyboard. Here’s how to use it for Apple speech recognition:

Part 2: Best Additional Apple Speech Recognition Software For Different Use Cases
It is important to note that basic Apple speech recognition with voice control, dictation, or text-to-speech might not be able to meet your needs completely. This is why you need additional tools enabled for speech recognition on Apple devices. In this section, we will rank 3 of the best voice recognition software suited for Apple devices so it's easy for you to make a pick depending on your needs:
1. Wondershare Filmora: Best for Speech Recognition Enabled Video Editing
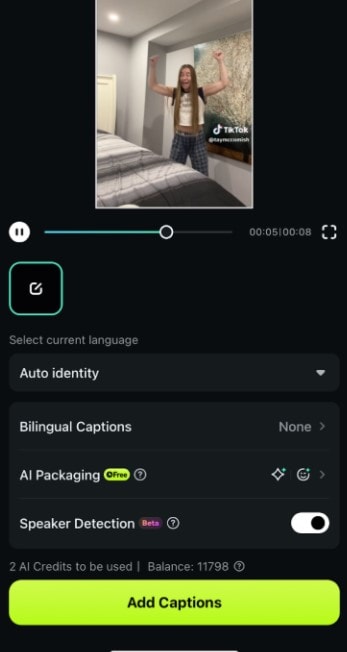
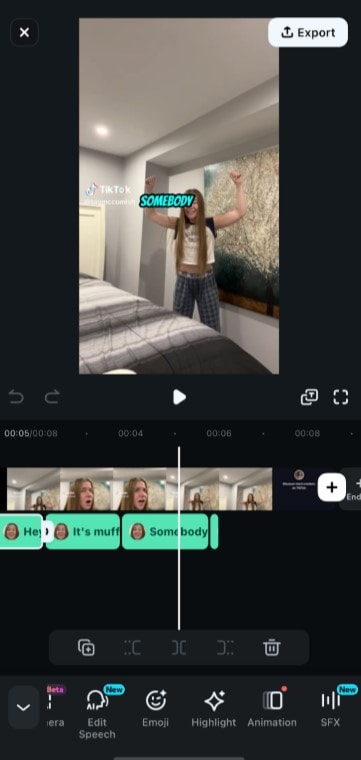
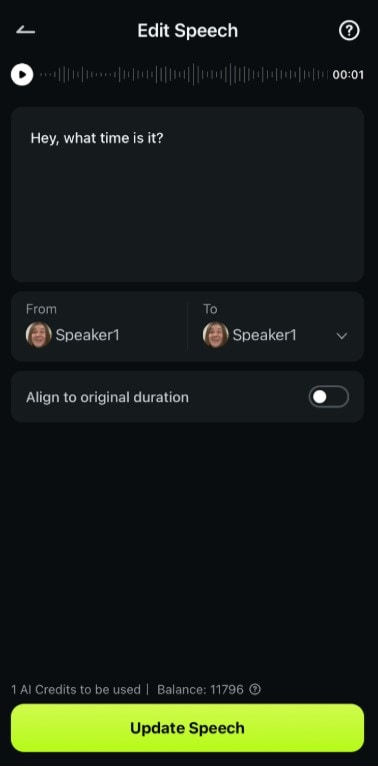
Wondershare Filmora is an advanced video editor that is packed with many powerful features, including Speaker detection and Speech Editing features. With these, your video gets to be transcribed automatically, and you can also edit what has been transcribed.
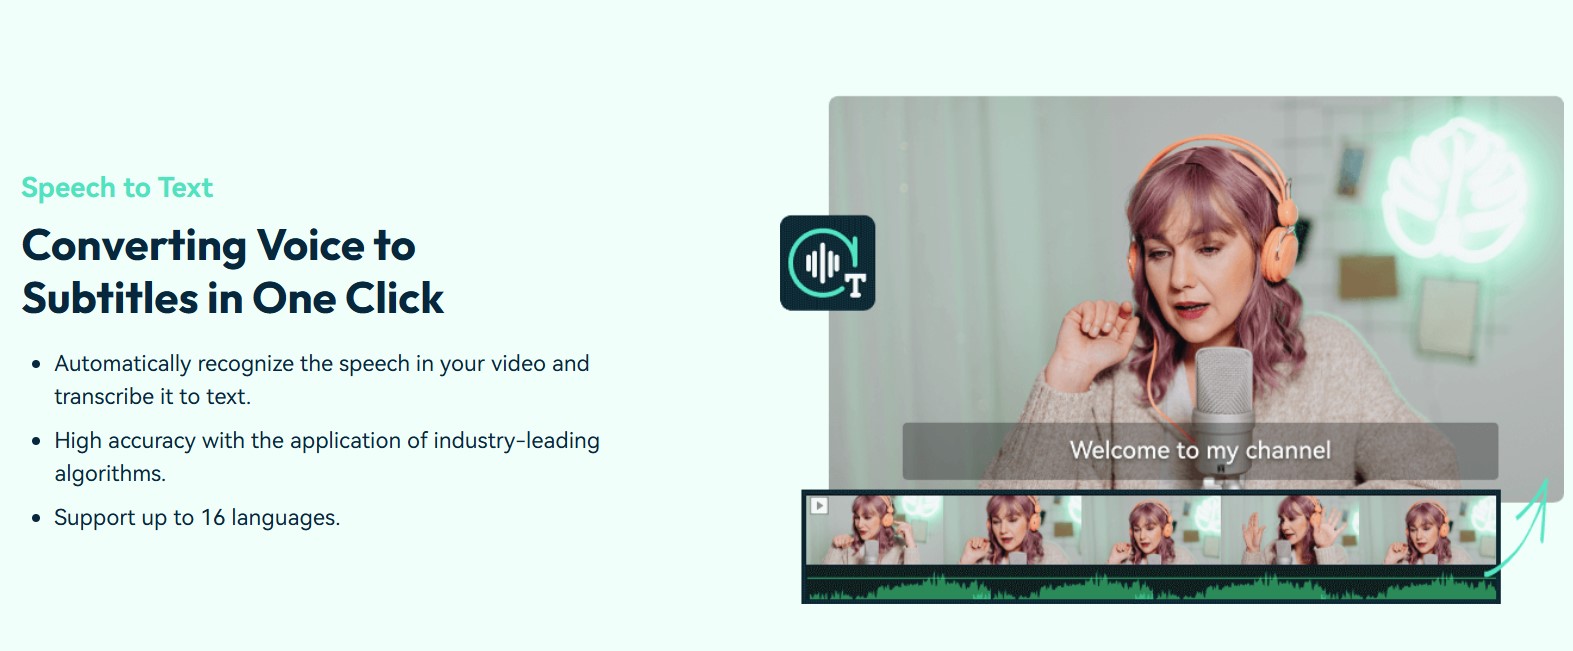
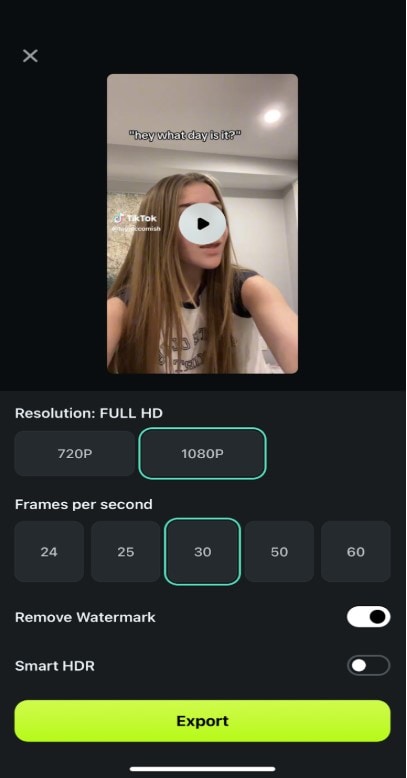
The speaker detection feature, similar to iOS voice recognition, listens to audio input from your videos and converts them to written text. This feature is exclusive to mobile versions of Filmora so that you can access it from your iPhone easily. For Macs, however, you can use the Speech-to-Text feature, which actively listens to and transcribes your video’s audio captions to text.
Filmora for Mobile Filmora for Mobile Filmora for Mobile Filmora for Mobile Filmora for Mobile
Edit Videos on Your Mobile Phone with 1-Click!
- • Powerful Brand New AI Features.
- • User-friendly video editing for beginners.
- • Full-featured video editing for professional.


How to Setup and Use Speech Recognition Tools on Filmora
To use the Speaker detection feature on your iPhone, follow the steps below:
 secure download

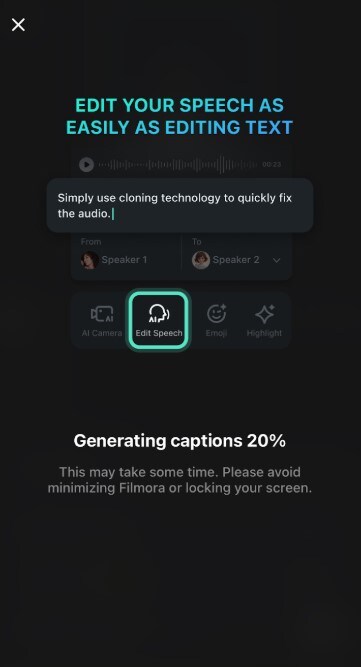
To access the Speaker edit feature, you have to edit your already transcribed video. Here’s how to do it:
 secure download
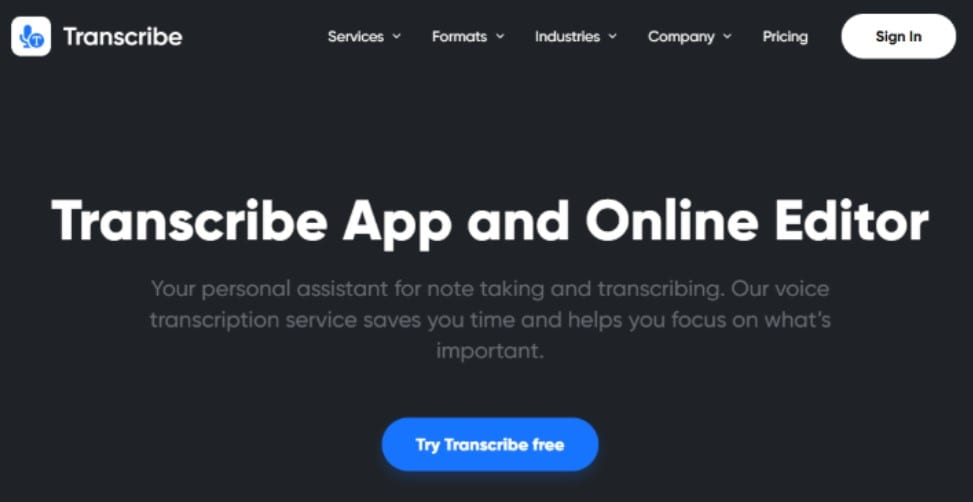
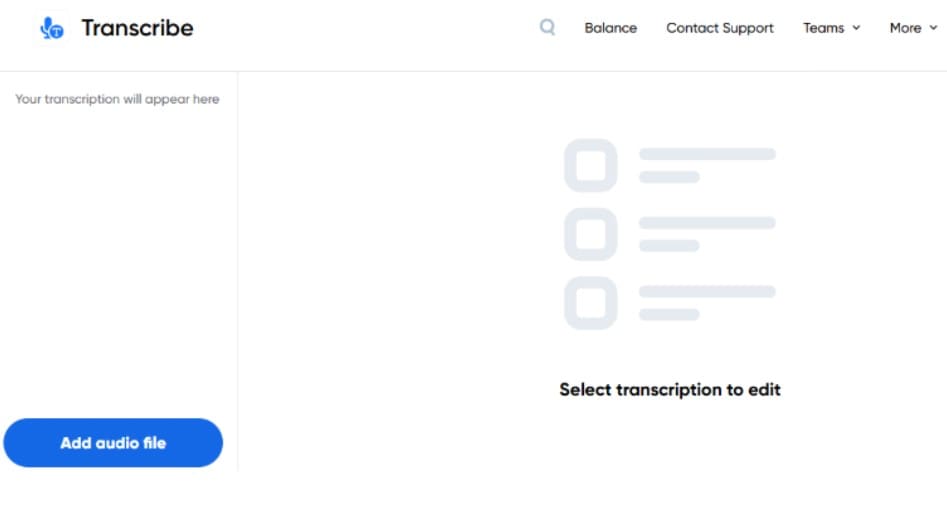
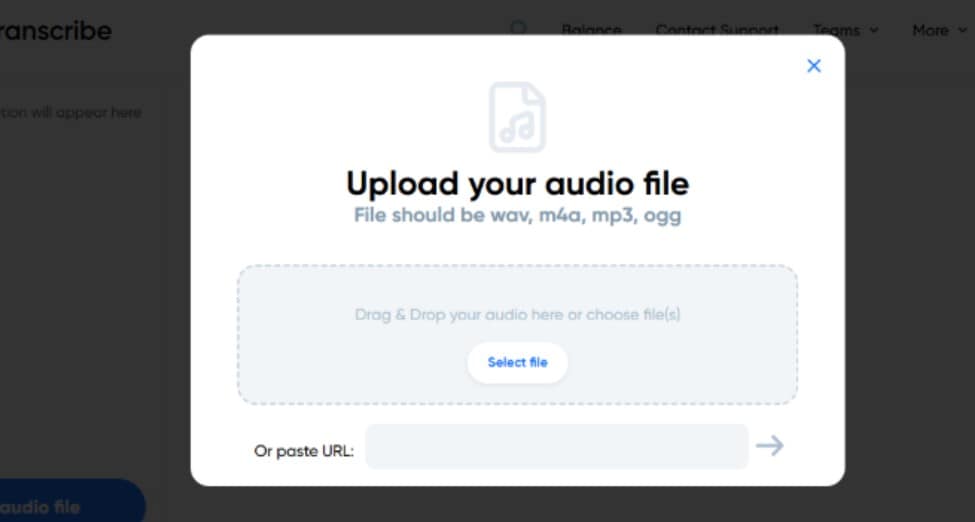
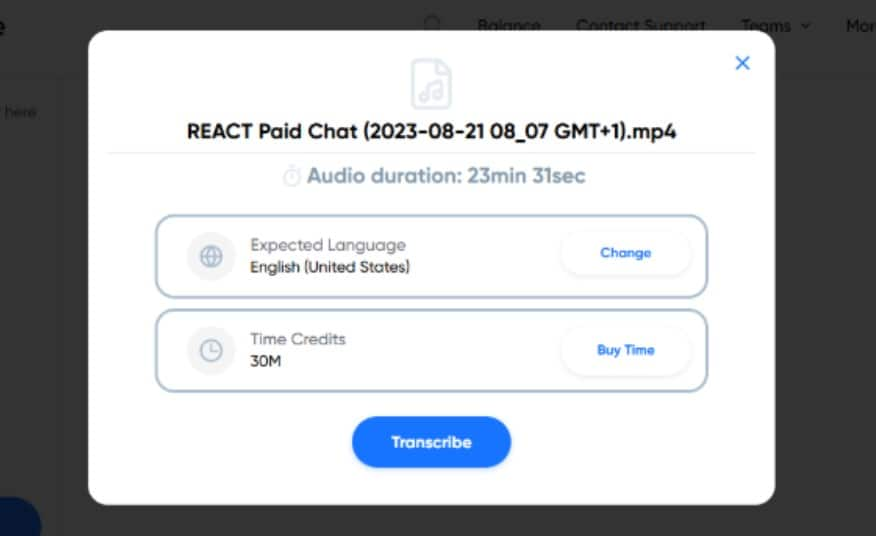
2. Transcribe: Best for Speech-to-Text Functions
Transcribe is an Apple voice recognition and transcription tool accessible on Mac from the App Store, but you can also use it from the official website. It is basically your assistant for note-taking and recording using audio input with access to over 120 languages. It also offers Transcribe Pro and Transcribe Business, which are available to fit your more advanced needs.
How to Setup and Use Transcribe
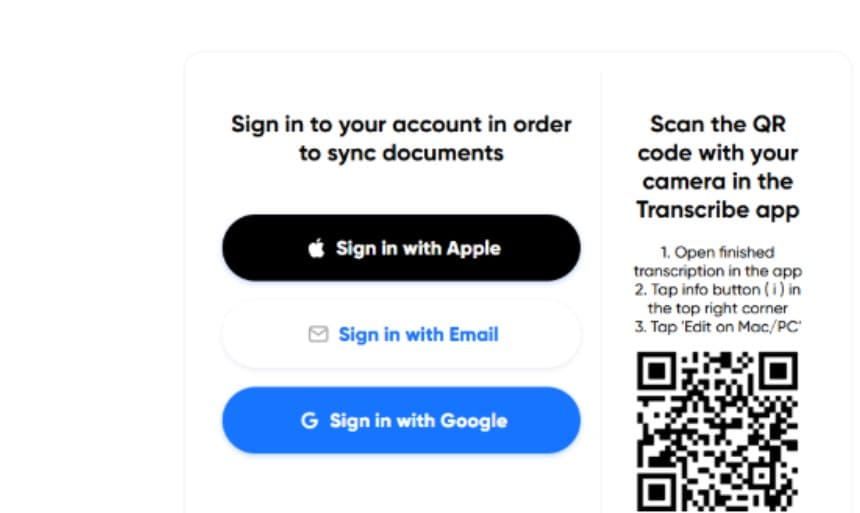
After downloading the tool, to set up and use Transcribe on your Apple device, follow the steps below:
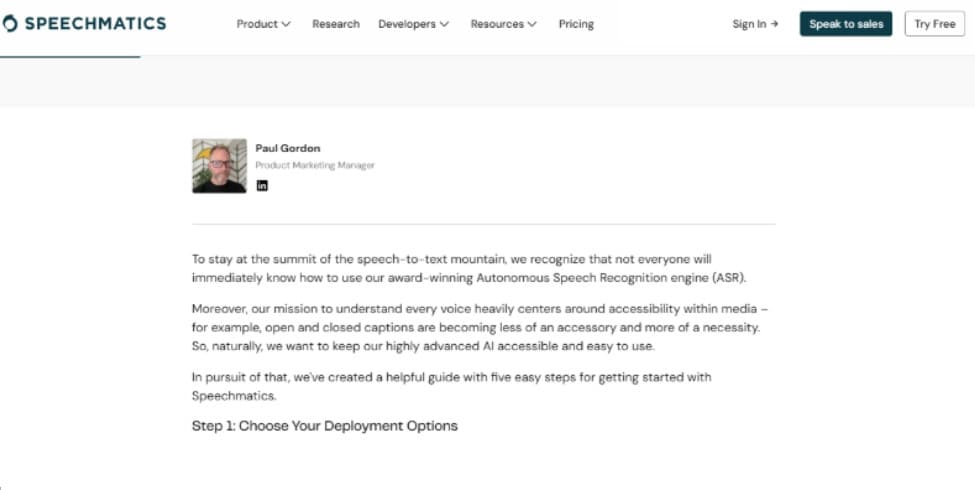
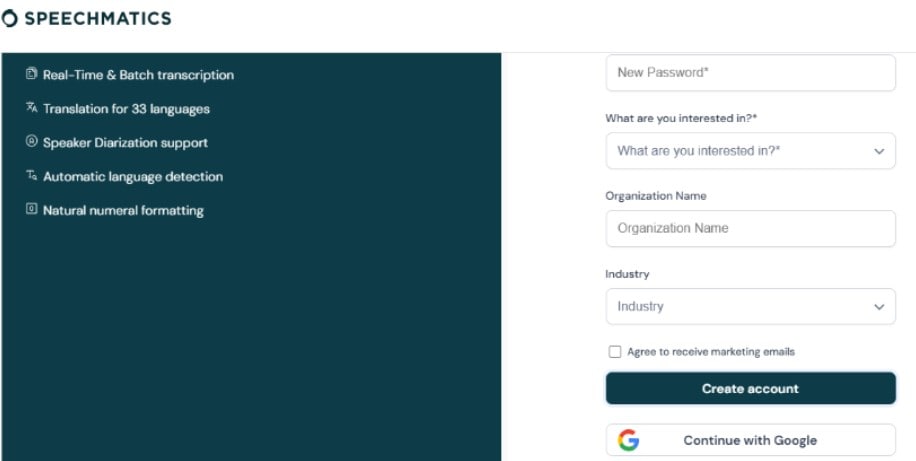
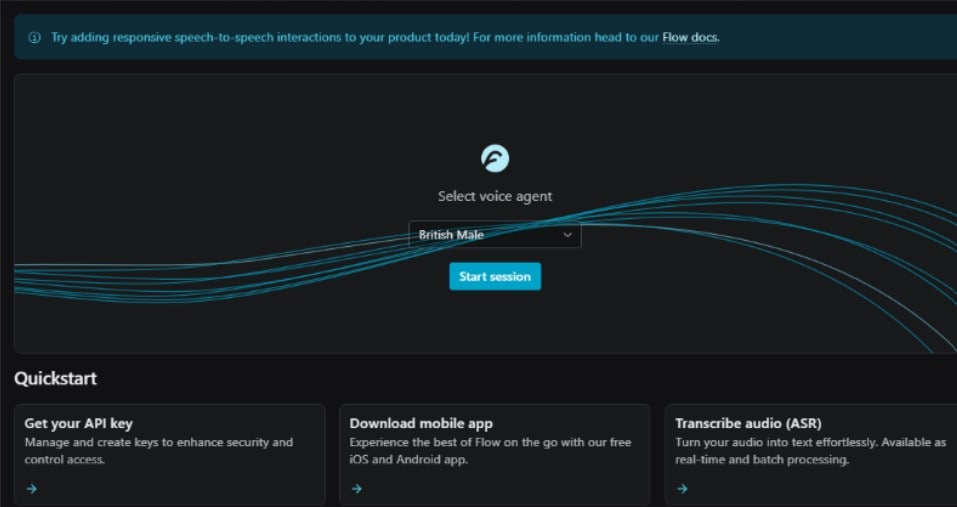
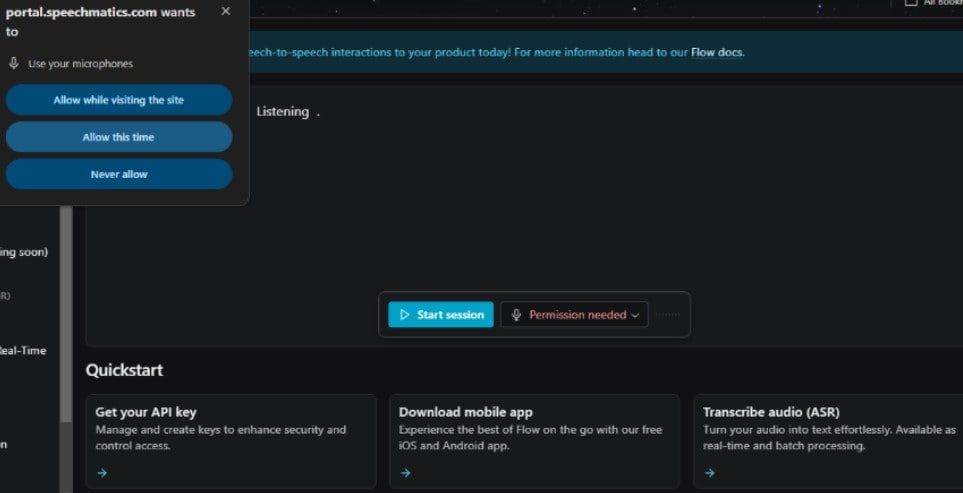
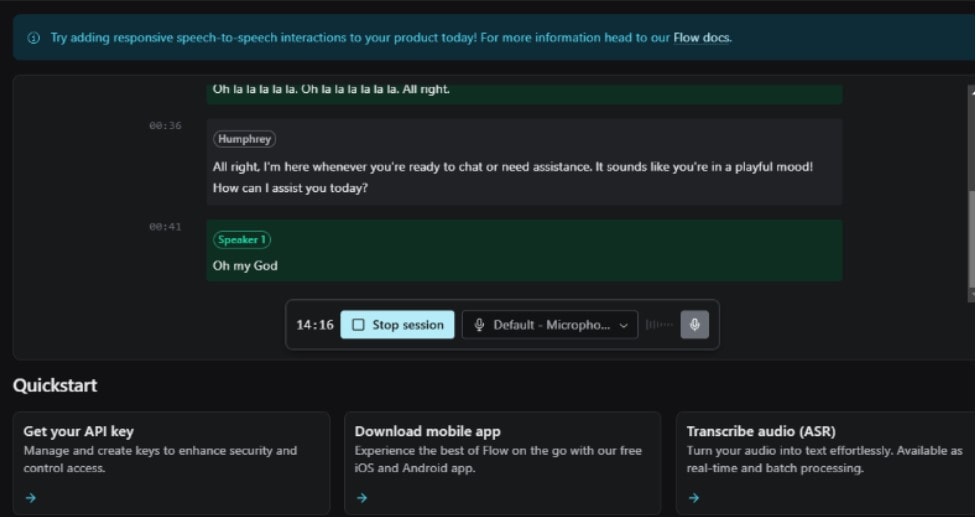
3. Speechmatics: Best Speech Recognition API
Speechmatics is an Apple speech recognition API that leverages advanced machine learning algorithms to transcribe spoken language into written text accurately. It can be integrated into your Macbook with over 50 languages for speech recognition. Its operations include audio input, speech detection, transcription, and output, which is the written text.
How to Use Speechmatics
To begin, go to the Speechmatics iOS speech recognition API. Then, you can set up and use Speechmatics on your device by following the steps below:
Conclusion
Apple voice recognition technology has undoubtedly revolutionized accessibility on iOS devices. From Voice Control to Dictation and Speech-to-Text, it's never been easier to convert your speech into written text, and you can do so directly from your iPads, MacBooks, and iPhones without using the internet.
However, if you want to use speech recognition for a more specific purpose, you should consider using a third-party tool like Filmora, which is great for incorporating speech recognition into videos with the Speaker Detection and Speech Edit features. You can try them both out by downloading the app on your iPhone to begin.
secure download