

How to Reduce Noise in Premiere Pro Easily

Jun 09, 2026• Proven solutions
Removing noise and graininess from videos is easier than ever. Noise and graininess usually occur when a video is shot with poor lighting when the ISO of the camera was unusually high when the video was being recorded or when the camera used in recording the video does not have the right specs.
Video and multimedia content editors like Premiere Pro have proprietary algorithms and filters for fast noise reduction. And when these built-in filters are not adequate or convenient, you can use plugins or standalone noise reduction software to improve the quality and clarity of your videos.
This post shows you how to remove noise from videos using Premiere Pro, Premiere Pro Plugins, and free noise reduction software.
Filmora Video Denoiser helps to achieve noise reduction from video and audio. Remove background noise in different scenes to boost your video and audio quality.
Part 1: Use 2 Ways to Reduce Noise in Premiere Pro
We find 2 ways for helping you reduce and remove noise from video by using Adobe Premiere Pro, keep reading.
Way 1. Use Media Effect
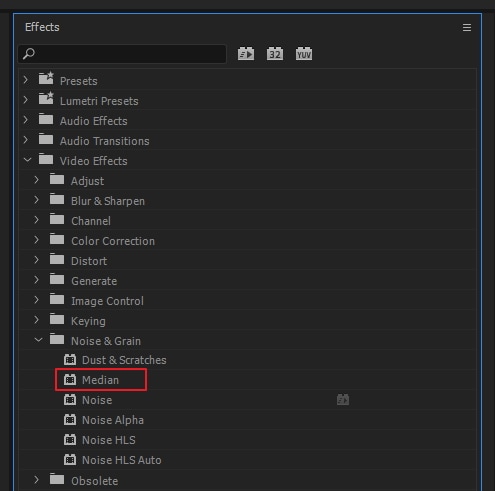
Premiere Pro has a noise reduction filter in the effects panel called MEDIAN. To apply this filter, follow the steps below:
Step 1: Go to Effects > Video Effects > Noise & Grain > Median. Drag Median onto the timeline for your noisy video. Note that this will not apply noise reduction to your video immediately.
Step 2: Check the Effects Control window to see a dropdown menu where you can adjust the Median effect for best results. Adjust the Radius parameter under Median > to immediately preview the effect applied.
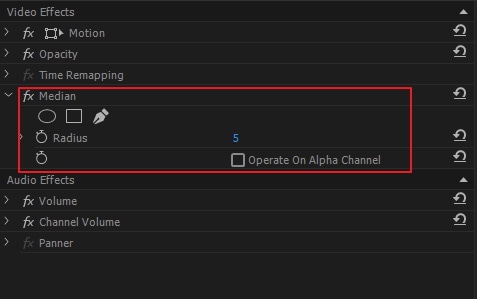
Step 3: Alternatively, you could draw masks around noisy portions of your video to only preview the denoising effect on those areas.
Step 4: Be sure to feather the edges of your masks to avoid hard edges around areas where the Median effect is applied.
Way 2. Using Adobe After Effects
Noise reduction in Premiere Pro does not always yield the best results. Even when the MEDIAN effect is applied with masks, you may find that the denoising effect is applied to parts of the video where noise reduction is not needed. This is because while the masks are static, the contents of the video are not.
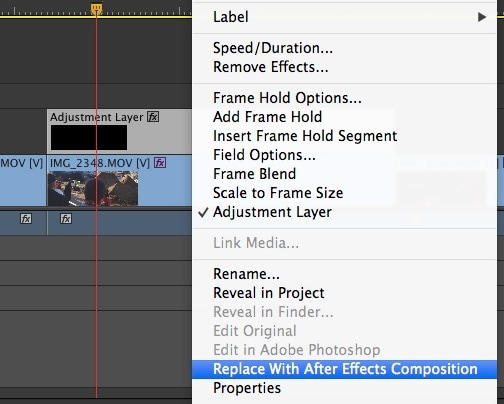
In this case, you could open your video in Adobe After Effects using the following steps:
Step 1: Right-click, the timeline for the noisy video, is Premiere Pro, and click Replae with after effects composition.
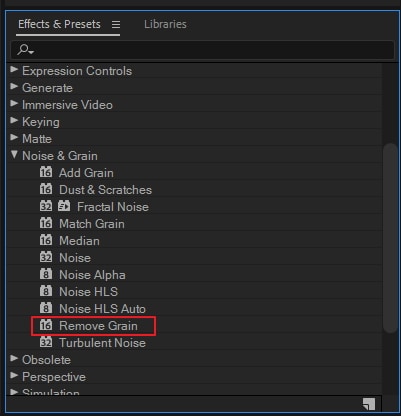
Step 2: When After Effects opens with your video loaded, go to Effects & Presets>, select Remove Grain and drag it onto the timeline for your video.
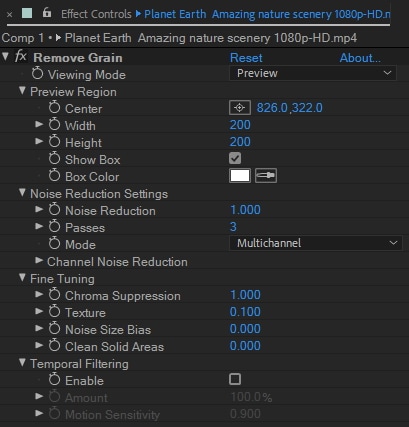
Step 3: Check the Effects Control panel to see settings for the RRemove Grain effect. Adjust preview region, noise reduction setting, and temporal filtering for best results.
Filmora - AI Audio Denoise
Part 2: Use Noise Reduction Plugins for Premiere Pro
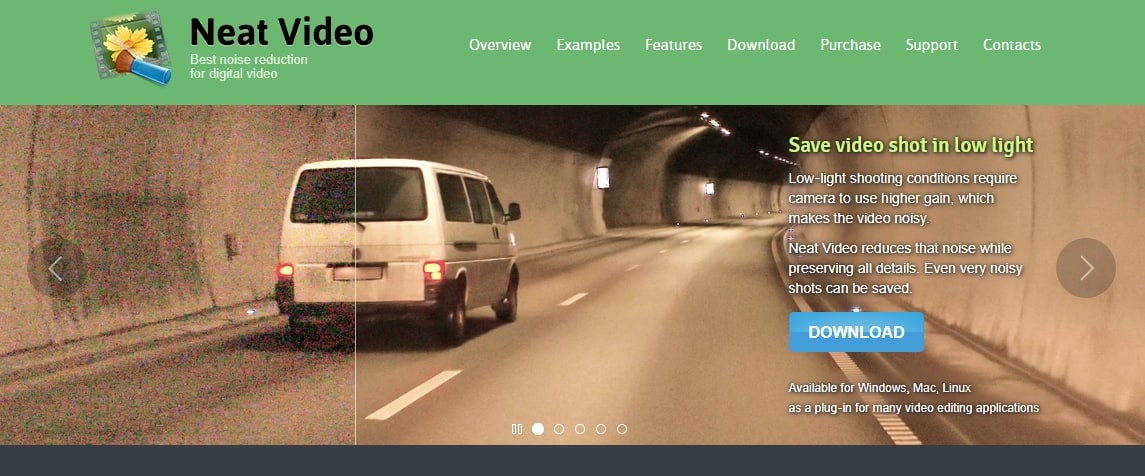
1. Neat Video
Neat Video is arguably the most popular denoising plugin for Premiere Pro. It is both powerful and fast and is used by many professionals. It works with other popular video editing software like Final Cut and Avid and has versions compatible with PCs and MacOS. Neat Video also has a free version and a premium version.
Features:
Neat Video works by creating a noise profile. It also allows users to select areas of the footage from which a noise profile can be created or load their own noise profile footage.
Once installed in Premier Pro, Neat Video will be listed in the Video Effects panel, where it can be selected when needed. Its default settings are powerful and can be further customized through the setup menu visible in the Effects Control panel.
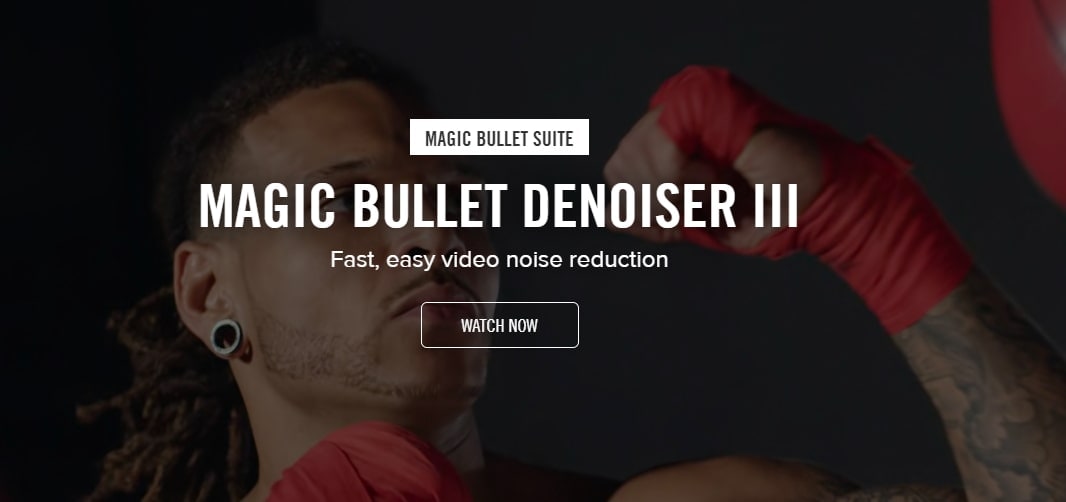
2. Magic Bullet Denoiser
Magic Bullet Denoiser III is another powerful denoising plugin compatible with PC and MacOS. It has a fully functional trial version and a paid version. However, its paid version is nearly double the price of Neat Video. Professionals may find it more cost-effective to buy the complete suite of Magic Bullet plugins.
Features:
Like Neat Video, Magic Bullet Denoiser III works by creating a noise profile. Unlike Neat Video, however, Magic Bullet Denoiser III samples every video frame to create its noise profile. Its settings are also very simple and intuitive, with sliders for reducing noise, smooth colors and preserve details.
Part 3: Best 4 Video Noise Reduction Software
1. Filmora
Filmora AI Noise Reducer is a great tool to remove background noise from video & audio and enhance the vocal sound. It allows you to denoise the background audio from videos with a simple click. The AI algorithm will denoise video and audio with high efficiency and quality.
Filmora also is a comprehensive and powerful video editor that offers a user-friendly interface and easy-to-use operation to polish your video. A huge amount of built-in templates and video effects can show you the magic of video making.
For Win 7 or later (64-bit)
For macOS 10.14 or later
Features: Offers multiple audio and video editing tools with AI. Easily add audio visualization with cool effects, sync audio to video for a better experience, change speaking sound for more fun, etc...
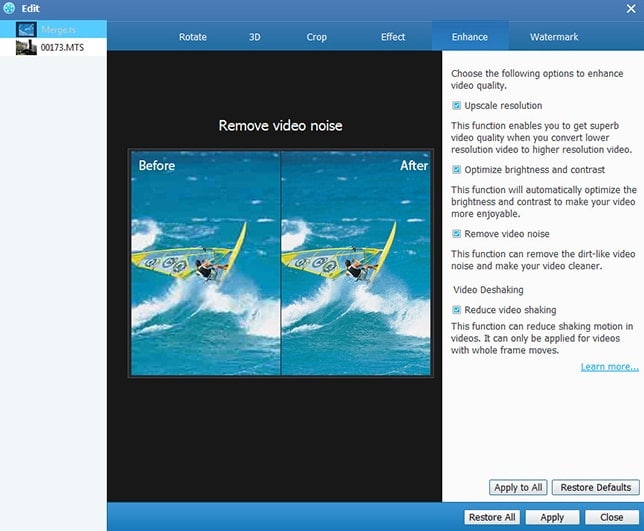
2. Aiseesoft
Aiseesoft Video Enhancer is a standalone application with PC and MacOS compatible versions that has good noise reduction and video conversion features. It also has a free version and an affordable paid version. It is very light, feature-specific, and very easy to use.

Features: Noise reduction is one of three (3) enhancement features available in Aiseesoft Video Enhancer. To remove noise from a video, open it in Aiseesoft, check the NOISE REDUCTION box under the ENHANCE menu and click APPLY. This application lets users export their enhanced videos in many formats and with no compression.
3. Cinemartin Denoiser
Cinemartin Denoiser is a professional video denoising application that offers powerful features for a small fee. A free version with a few locked features is available for a limited time. The full version delivers excellent noise removal options to export to multiple video formats.
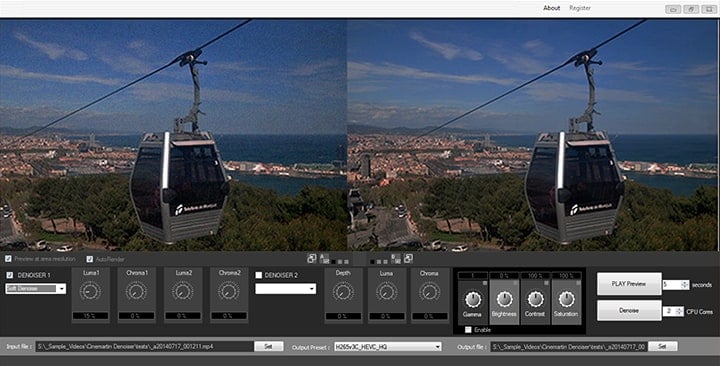
Features: This application has simple noise removal settings and built-in presets for fast and easy noise removal. It works with 2 proprietary noise removal mechanisms to remove the most common noise generated by DSLR cameras.
4. Tipard
Tipard Video Enhancer looks and feels a lot like AISEESOFT VIDEO ENHANCER. Their interfaces, colors, and menus are very identical.
Noise removal is an enhancement feature in the Tipard Video Enhancer software and the Tipard Video Converter Ultimate. So, you can download any of these two Tipard applications to enjoy noise removal features. They both have free and affordable paid versions.
Features: The Tipard Video Enhancer enables users to enhance videos through noise reduction and increased video resolution. Unlike Aiseesoft Video Enhancer, Tipard also lets users improve their videos by reducing the perceived shaking or unsteadiness of the video footage.
Quick Comparison: Top 5 Video Noise Reduction Tools
| Tool | Type | Key Strengths | Device |
|---|---|---|---|
| Filmora | Standalone Software | AI-powered one-click denoise, comprehensive video editor, user-friendly. | Windows, macOS |
| Neat Video | Premiere Pro Plugin | Most popular, powerful, fast, creates noise profiles, highly customizable. | Windows, macOS |
| Magic Bullet Denoiser | Premiere Pro Plugin | Powerful, samples every video frame for noise profiling, simple intuitive sliders. | Windows, macOS |
| Aiseesoft Video Enhancer | Standalone Software | Lightweight, easy-to-use, good noise reduction & video conversion. | Windows, macOS |
| Cinemartin Denoiser | Standalone Software | Professional, powerful features, presets for DSLR noise, multiple export formats. | Windows |
Conclusion
As with audio noise removal, video noise removal is rarely perfect. Users need to ensure that desirable details of video footage are not lost in the denoising process.
You may also feel interested in:
Quick Guide to Remove Wind Noise in Premiere Pro >>
Do you want to know what are the 20 best free video editors? In this article, you will know 20 free video editing software on desktop and phone. Check it out!
by Benjamin Arango Jan 06, 2026 11:37 AM
Benjamin Arango
staff Editor
