
 100% Security Verified | No Subscription Required | No Malware

One of the best things about GoPro cameras is that they can capture the most incredible action shots, beautiful scenery, and the most fun moments of your trips. However, there is a catch: although GoPro provides top-notch videos, the raw files are still not appealing as they are sometimes boring, shaky, or look like they are not well put together. Firstly, these files need to be changed into images to show the excitement of the moment and for that, editing is a must.
This how-to guide by steps breaks down all the procedures needed to transfer your GoPro videos to a PC or an iPhone and then do the required editing to make the video look professional. These tips can be used to enhance the quality of your videos that are already there, irrespective of the platform, if you are a new or an experienced creator. Let’s find out how to edit GoPro video:
Understanding GoPro's Unique Footage:
Before going through the method, we want to point out that GoPro footage has its peculiarities, and this is the reason why it is treated differently in an editing room:
- HDR (High Dynamic Range): A GoPro camera essentially records a wide spectrum of light and color, and with the correct editing, there can be a glow of both the very bright and the less bright areas, thus bringing out a more striking look for the image.
- High Frame Rates (e.g., /120fps): A high FPS short movie is ideally made in a way that the slow-motion is soft and clear, as it is possible to unfold the action in this manner.
- Wide-Angle Lenses: The main disadvantage of wide-angle shots, which allow users to see more details of the product, is that the edges may get distorted because of the lenses. Anyway, with the help of the editing tool, the distortion can be removed, which in turn will make your composition nice again.
- 360° Footage: The advent of a special workflow makes the handling of the spherical or 360-degree videos from GoPro easier, but when properly done, they give viewers the opportunity to view an interactive world, thus making a nice experience.
Once you understand these characteristics, you can really leverage your GoPro footage to tell stories that are as wild as your travels.
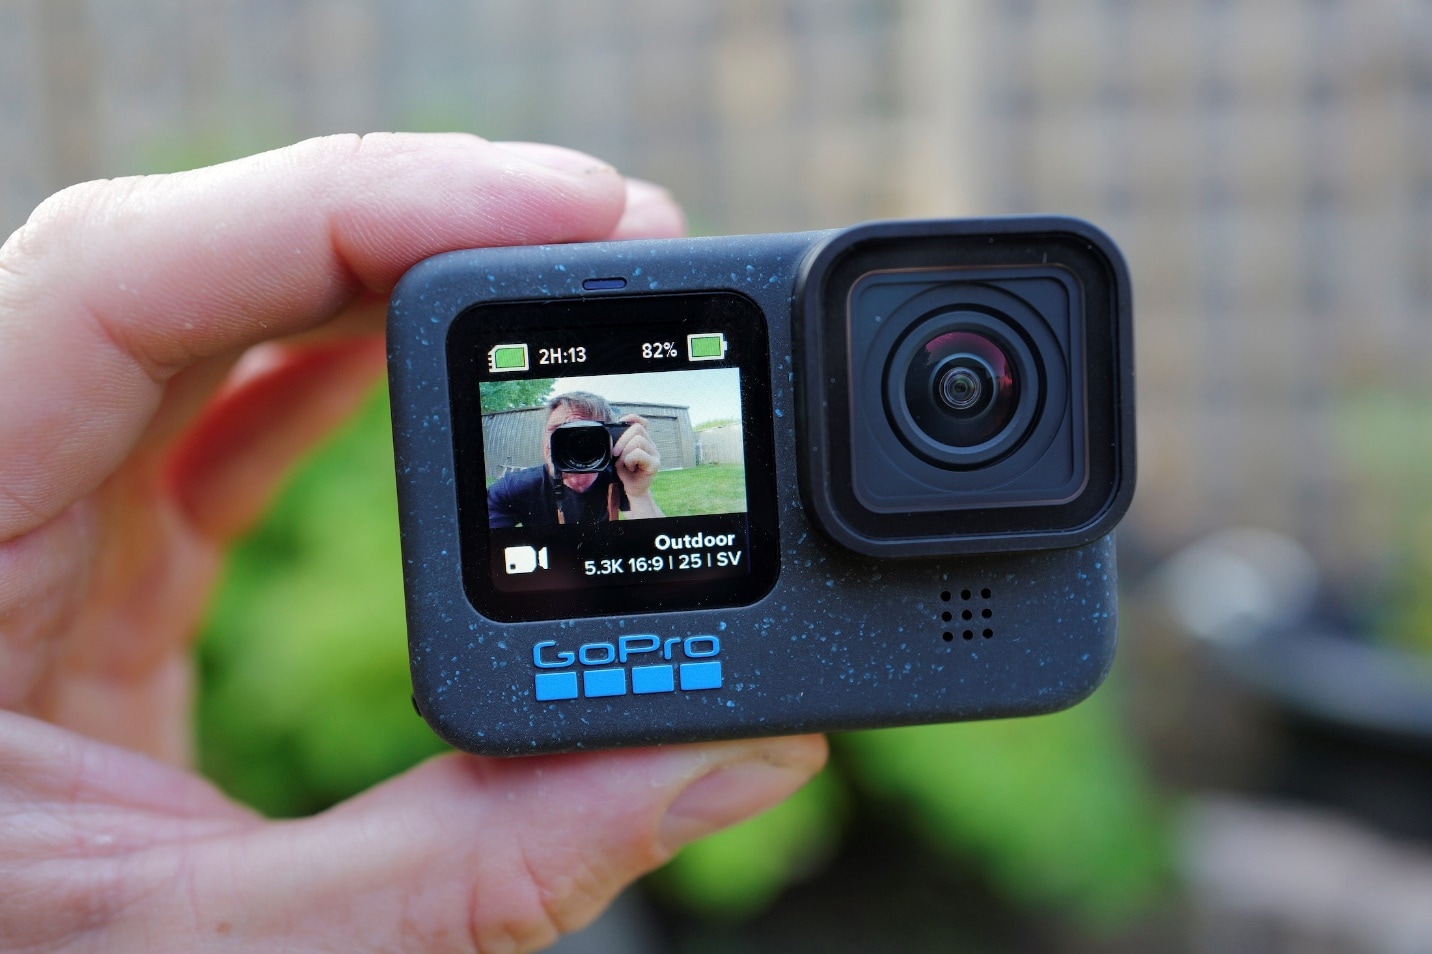
Table of Contents
Part 1: Pre-Editing - Editing Prep with Footage Organization
A pre-edit workflow that is efficient will be a time saver for you and also protect your data from losing, not to mention it will enable you to have your best shots at the time of editing.
1. How to get videos from your GoPro to your computer or phone
Basically, there are many methods to move the footage. The main factors that determine the best option are the file speed and the device on which the editing will be done.
The simplest method (wireless): via the GoPro Quik app
The GoPro Quik app is definitely the best option if you want to have a good time editing your footage. Through Wi-Fi or Bluetooth, you connect the GoPro to your phone, and Quik automatically imports pictures and videos directly to the phone's gallery. Thus, the setting makes a lot of sense if you are traveling or if a computer is not available. Moreover, it should be noted that the wireless delivery of big 4K or 5K files can be slow and consume a lot of the phone's memory.
The quickest method (wired): SD card or USB-C connection
- The fastest way (wired): SD card or USB-C connection on PC/Mac (for large projects, is highly advisable). Take out the microSD card from your GoPro and work through a high-speed card reader. In this way, you will be transferring big files quickly and most securely without any interruption in the connection.
- By direct connection: Connect your GoPro to your PC with a USB-C wire. In this case, it is suitable for smaller transfers only; however, the time required can be longer compared to using a dedicated card reader.
- GoPro Webcam Desktop Utility: With the GoPro Webcam Desktop Utility on your computer, the software is not only available for a live streaming session but also for the direct import of media to your PC. It is advantageous to have the software in place as a webcam.
2. File management is key
After the clips are moved, it is extremely necessary to properly arrange the clips before the actual editing takes place. Bad paperwork may result in lost time searching for clips or even file overwriting by mistake.
- Set This Project Folder as Dedicated one: Creating a main folder for your project is the first step. Add subfolders for the raw clips, audio, photos, and final exports in it. This way, everything will be arranged properly, and locating them later will be easy.
- Name your clips: Start with file names, change them to short and descriptive names like "Beach_Sunset_01.mp4" instead of using default names. This little thing will save you lots of time and also make your search for a particular scene hassle-free as you will not have to face any kind of confusion.
- Create the backup first: Backing up all your original recordings on an external hard drive or cloud storage is something you should do before you start editing. It is the safeguard of your files in case your computer crashes or the files get lost.
- Be ready for huge video files: GoPro footage, especially when using 4K or slow-motion, can be sizable and consume a significant amount of the computer's resources. Either you should have sufficient storage space or use a fast external SSD for proper editing.
- Choose only the best shots: Reviewing all your footage and then picking the clips that most effectively represent the story is the best way to go. Put these into a "Best Shots" folder so you don't have to scroll through the unwanted clips while editing.
Part 2: How to Edit GoPro Videos with GoPro Quik
If you are looking for an easy and trouble-free method to change your GoPro footage, the GoPro Quik app is definitely the way to go. This application is simply making your editing work less complicated, no matter if you are making short videos for your social media or preparing gists of your walks and hikes. On both iPhone and Android, the app allows for a GoPro video to be created automatically, editing to be done manually, adding transitions, filters to be applied, and even a collection of royalty-free music to be used.
Step1Install and set up GoPro Quik
Get the app that suits your device, either from the App Store or Google Play. Then log in with your GoPro account. The premium editing tools, as well as the cloud storage, will be at your disposal for one month totally free.
Step2Connect your GoPro and import footage
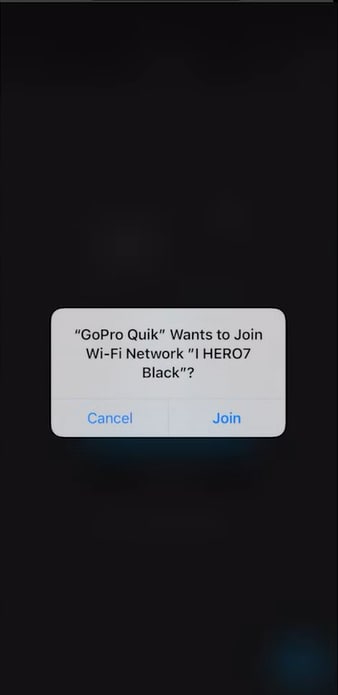
Switch on your GoPro, establish a connection using Wi-Fi or Bluetooth and then an app to access your media, tap the GoPro icon. Choose your clips and download them to Quik. Besides that, you can upload videos from your mobile device or cloud storage.
Step3Create a project in Quik
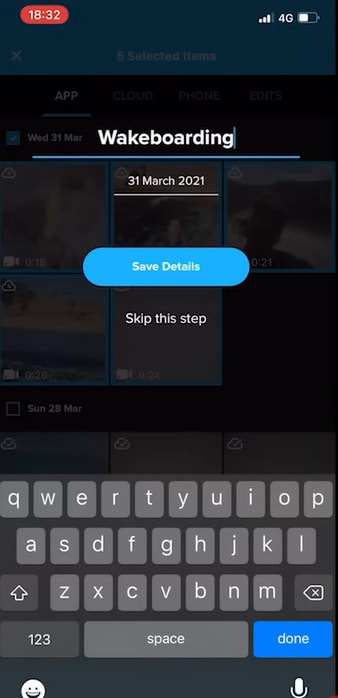
Go to the Media tab, select your clips, and tap the "+" button to start a new project. Name the project. Quik automatically generates a basic montage with transitions and music as a starting point.
Step4Trim and arrange clips
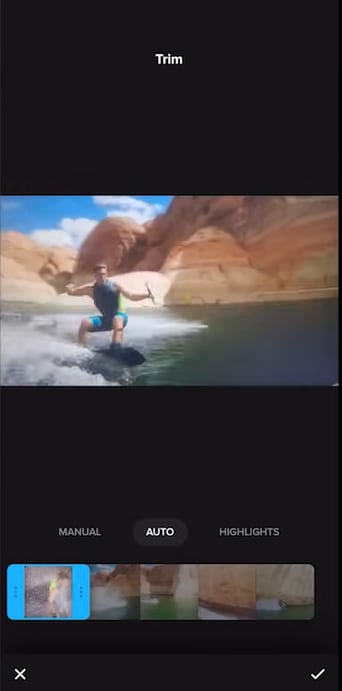
For editing, tap the Trim icon. Cutting out the unwanted parts, deleting extra clips, and dragging clips to arranging them in the right order for a storyline that flows will make you edit easily.
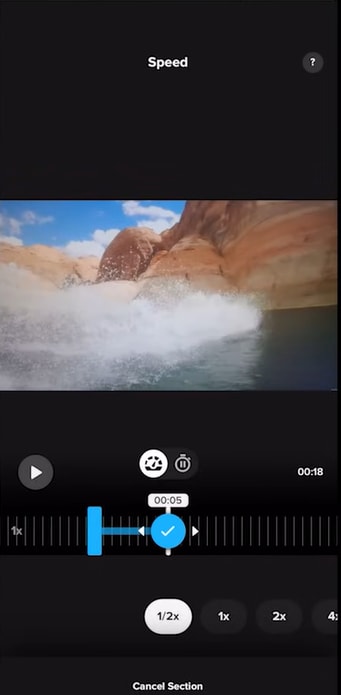
Step5Adjust speed for effects
The Speed tool can be used to reduce the speed of thrilling moments or to increase the speed of boring parts. Speed ramps give the viewer a clear focus on the featured movement, impact, or other rapid-fire sequences of the film.
Step6Apply filters and color adjustments
Tap on Filter. Choose a filter to set the mood and tweak settings like exposure, contrast, and vibrance to enhance your footage. Apply the same filter across clips for a consistent look.

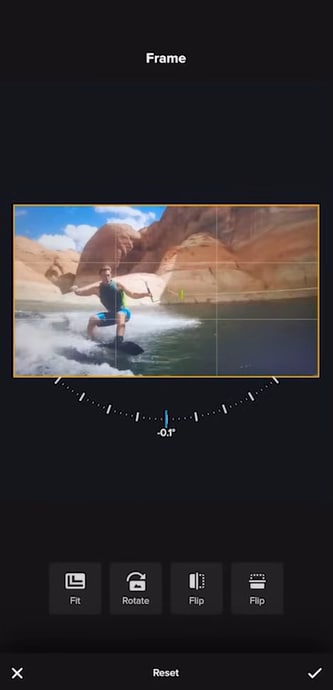
Step7Reframe and adjust orientation
Use the Frame tool to rotate, crop, or focus on your subject. This is especially useful for correcting wide-angle shots.
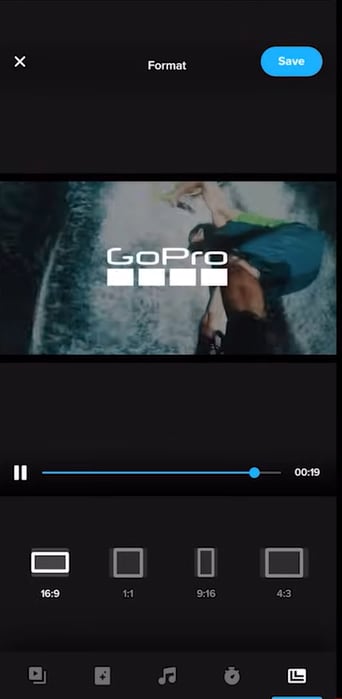
Step8Adjust video length and aspect ratio
Make a shorter version of your video for social media and change the aspect ratio – 16:9 for YouTube, 9:16 for TikTok or Stories, or 1:1 for Instagram posts.
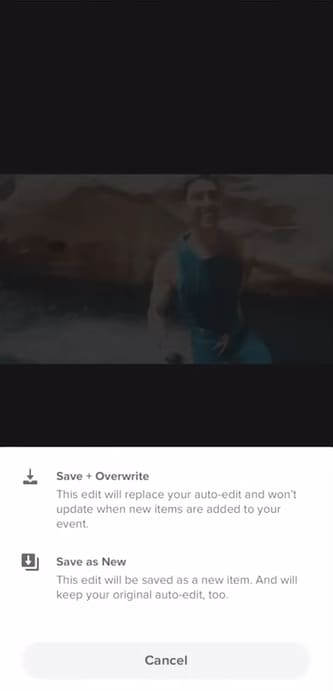
Step9Save and share
Once satisfied, save the video to your phone or share it directly to platforms like Instagram, YouTube, or Facebook.
Part 3: How to Edit GoPro Videos with Wondershare Filmora
If you have made up your mind to go beyond the basic editing and have more control over your GoPro videos, Wondershare Filmora is an excellent way to do that.
Why choose Filmora over Quik
Filmora is much more flexible when compared to Quik. Not only can editing through a computer provide you with a larger workspace, but it also enables you to zoom in on your timeline, carry out color correction, or work on big GoPro 4K or 5K files without any waiting. Multi-camera editing, AI-powered tools, and high-resolution exports are some of the features that come with Filmora, a tool that can be used by both amateurs and professionals.
Key Filmora features for GoPro video editing
Filmora 14 introduces powerful tools tailored for creators working with action-packed GoPro footage:
- Multi-Camera Editing: This is a valuable feature that complements the syncing of different angles shot with the GoPro.
- Planar Tracking & Smart Masking: Now you can supplement small graphics that follow the exact object or change the background without any visible seams.
- AI Portrait Cutout: Just one click to remove or change the background of talking-head segments and the like.
- Audio Tools: AI Vocal Remover, noise reduction, and audio ducking for simple, dandy sound quality are included in the package.
- 2M+ Creative Assets: Just waiting for you to grab the opportunity to have numerous kinds of titles, effects, stickers, and royalty-free music, which will make your videos look visually stunning.
- Auto Reframe: It simplifies the process of reshaping your clip for different platforms, such as 16:9 for YouTube or 9:16 for TikTok, while also adjusting the subject position to keep it centered.
- Advanced Color Grading & LUTs: Use different tools to clean up underwater shots or simply brighten the sunset and nature scenes of yours to make them look like movies.


How to Edit GoPro Videos on Windows or Mac with Filmora
On Wondershare Filmora, editing GoPro videos is a simple and efficient process. Here we show you how to get started with these steps:
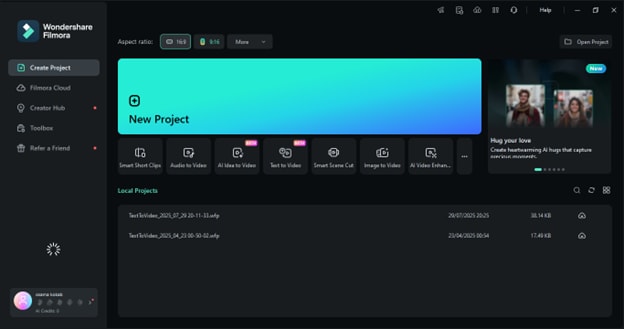
Step1Create a new project
In case you own either a PC or a Mac and you have already installed and started Filmora, clicking on "New Project" from the first screen will switch you to the editing space. The editing space is where you import, organize, and edit your GoPro videos.
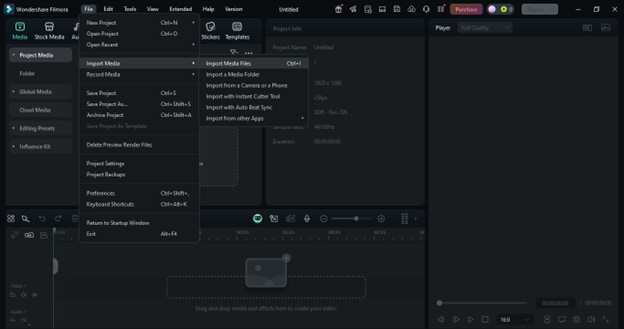
Step2Add your media files
Importing your GoPro footage is simple. Go to File > Import Media > Import Media Files, or simply drop the videos, audio tracks, and images into the Media Library.
Step3Organize and place clips on the timeline
With the help of the Media tab, you can create folders for your clips and organize them.
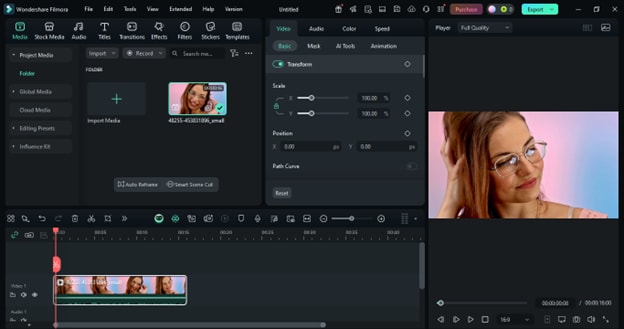
Step4Refine with trim, split, and cut tools
Simply relocating the playhead to the desired location of your work editing will allow you to use the Trim, Split, or Cut tools in order to remove the parts that are unnecessary or to correct the errors.
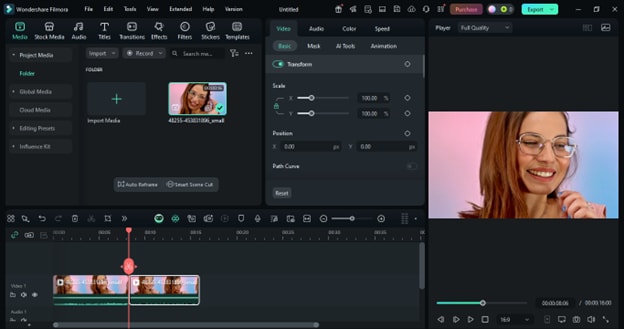
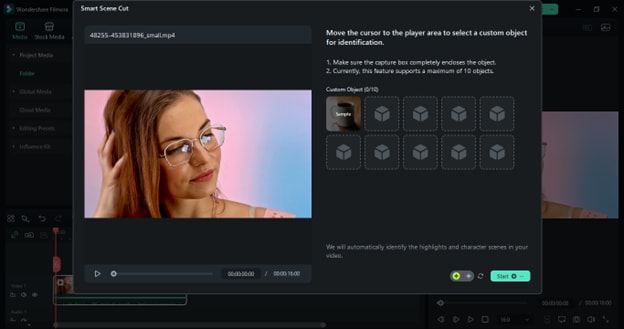
Step5Speed up editing with Smart Scene Detection
Place the Smart Scene Cut button located on the toolbar that allows Filmora to automatically detect scene changes. This tool will help you separate your long clips into smaller parts that are easy to delete or rearrange in a different order without having to watch the entire recording.
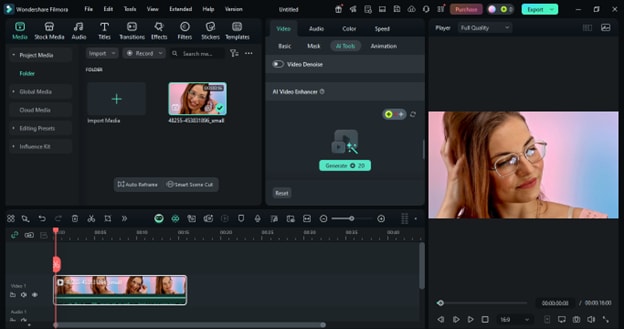
Step6Upgrade the footage with the AI Video Enhancer
Take a look at the timeline, selecting the clip you want to work with, then head down to Video > AI Tools and turn on the AI Video Enhancer. Filmora will do its job - it will clean the noise, brighten the picture, reduce the blur, and even upgrade your video to 4K, giving you sharper and more colorful visuals.
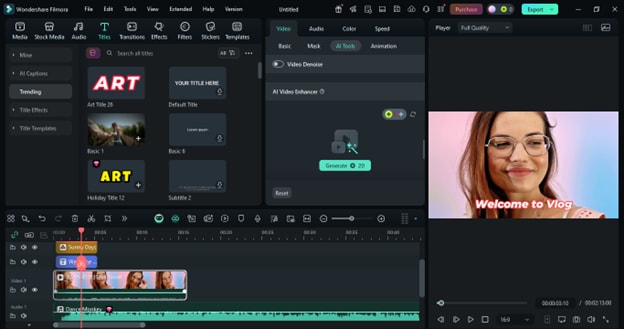
Step7Insert music, effects, and text
You can freely drag titles, captions, or credits from the Text/Credit panel, and then you have them in the preview window, where you can alter them to suit your story's style. To achieve the perfect scene transitions, try using the Transitions panel. Additionally, utilizing the Filters and Overlays from the Effects panel can help you create a cinematic look for your video.
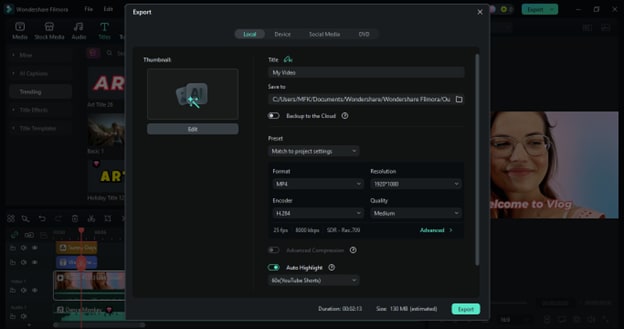
Step8Export and share your video
If your video is done, just click Export. You can save the video directly to your computer or upload it to platforms like YouTube, Instagram, or TikTok without needing to exit Filmora.
How to Edit GoPro Videos on iPhone or Android with Filmora
On Wondershare Filmora, editing GoPro videos on iPhone and Android is a straightforward process. With its user-friendly interface, handy features, and creative tools, you can easily turn your GoPro footage into polished videos. Here's how to do it step by step:
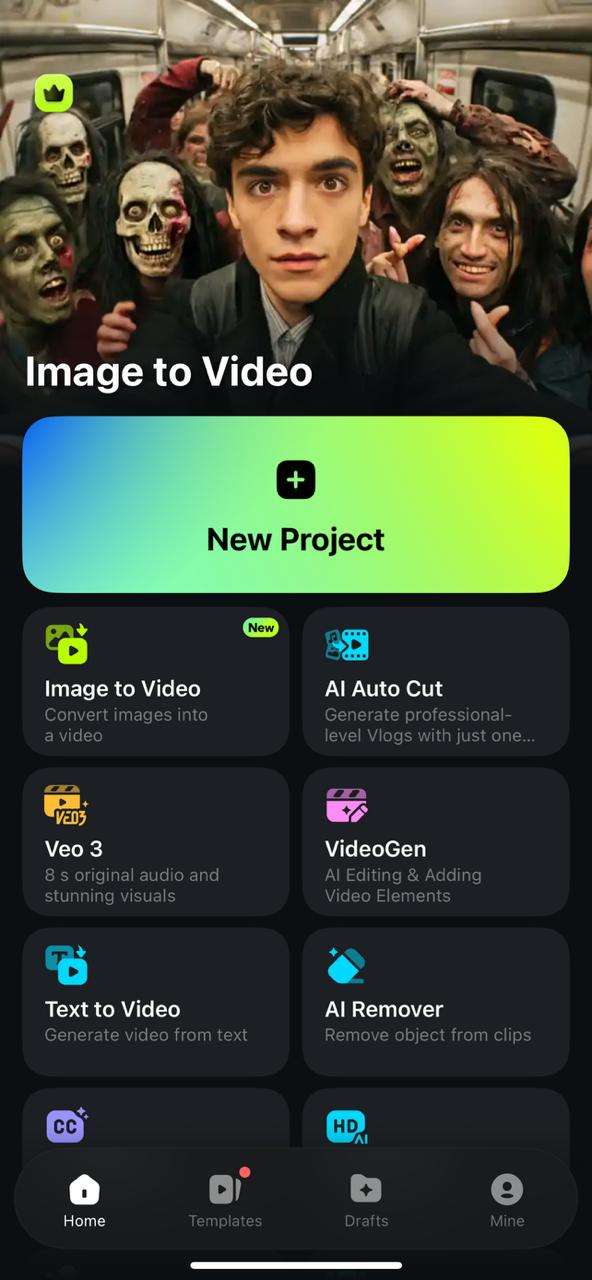
Step1Start a new project
Open the Filmora mobile app and select "New Project" or tap the "+" icon at the bottom. Choose the GoPro video you want to edit and click "Import" to add it to the timeline.
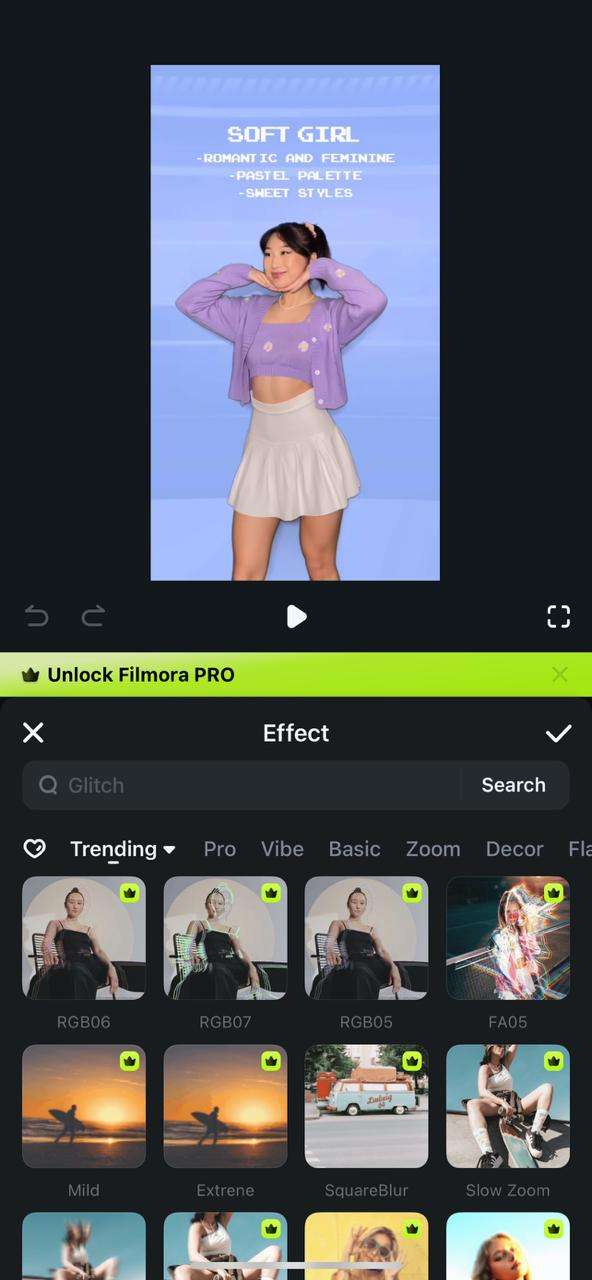
Step2Edit video with effects, filters, and text
Navigate to the Effects, Filters, or Text tab to add stunning effects, stylish filters, and customized text to enhance your video.
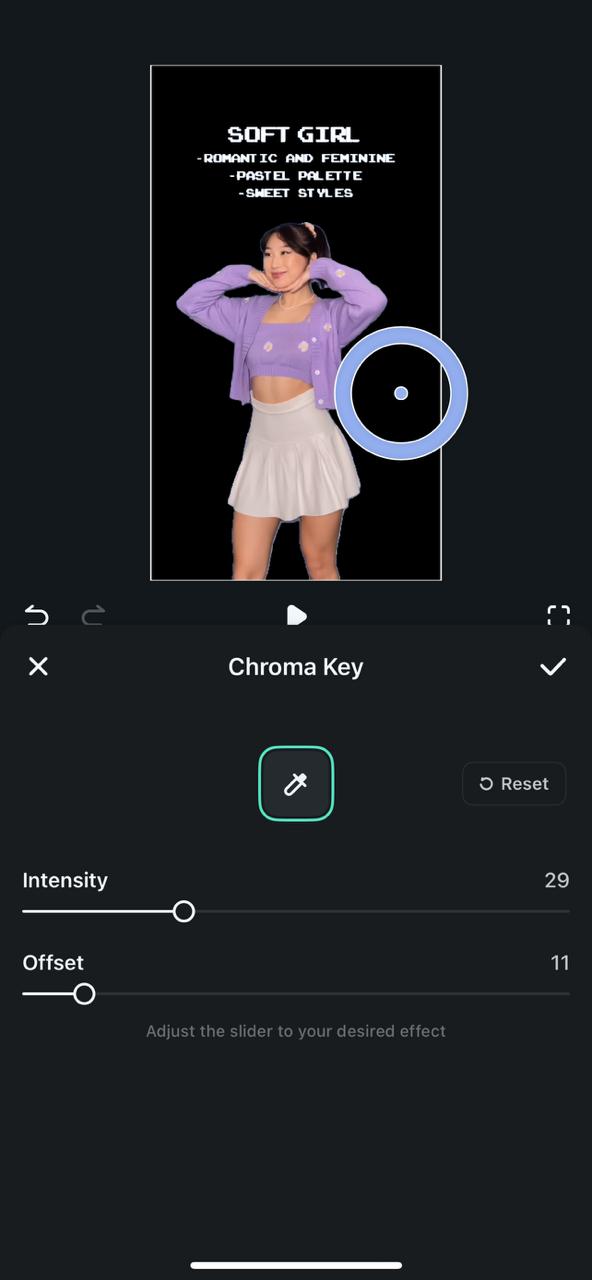
Step3Background Removal using Chroma Key
To separate the background, go to "Trim" in the bottom bar and select "Smart Cutout > Chroma Key." Use the Color Picker to choose the green screen, then adjust the Strength and Shadow sliders for a clean cut.
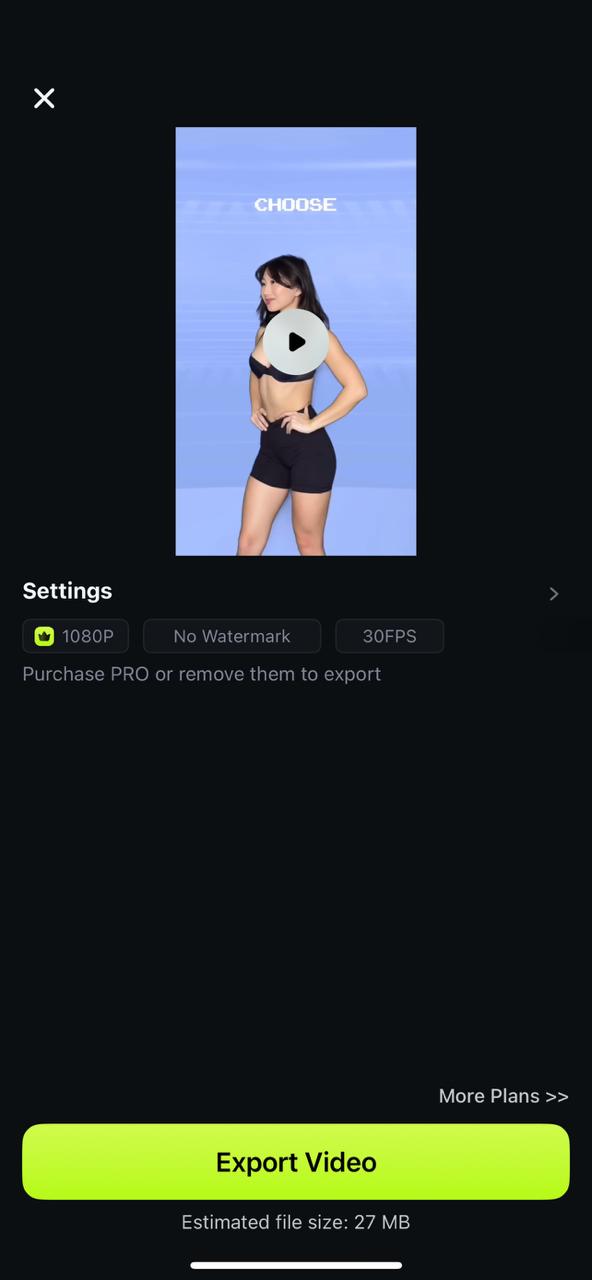
Step4Export video
Tap the Export button at the top right corner, select your desired quality, and export your edited GoPro video.
Part 4: Comparative Analysis: Quik vs. Filmora
Here is a comparative analysis between GoPro Quik and Wondershare Filmora:
| Feature | GoPro Quik | Wondershare Filmora |
| Primary Use Case | Fast mobile editing and social-ready videos directly from your GoPro or phone | Full-fledged desktop editing for more control, complex edits, and polished outputs |
| Learning Curve | Very low — designed for beginners or casual users | Moderate — intuitive UI but with deeper tools to master |
| AI Tools | Basic auto-edit, highlight detection, beat sync of clips to music | Advanced AI features include auto-enhance, smart clip trimming, object removal, AI voice enhancement, and auto reframe, among others. |
| Editing Depth | Limited: trimming, split, basic filters, transitions, and styles | High: multiple tracks, keyframing, layer effects, motion graphics, multicam editing, lens correction |
| Color Grading | Simple filters and presets; limited manual control | Full control: LUTs, manual sliders (exposure, contrast, highlights/shadows), color matching, correction tools |
| Audio Control | Basic: add music, sync to beat, adjust overall volume | Advanced: multiple audio tracks, noise reduction, vocal enhancement, audio ducking, mixing tools |
| Creative Assets (Templates / Effects / Music etc.) | Includes built-in themes, filters, transitions, royalty-free music (some require subscription) | Extensive asset library: filters, LUTs, transitions, text/graphics, stock media, plugins, effects |
| Cross-Platform Sync | Primarily mobile (iOS & Android) no robust desktop version | Available on PC, Mac, and mobile to some extent; better for cross-device workflows |
| Format Support | Optimized for GoPro’s file formats (MP4, HEVC, 360°) with limited export options | Supports a wide variety of formats and codecs; better export options up to 4K with customizable settings |
| Ideal User | Anyone needing quick, mobile edits and social sharing directly from their phone | Creators, vloggers, hobbyists, semi-pros who want more control, higher quality, and advanced features |
Part 5: Pro tips to make your GoPro videos look amazing
Don't just capture your rides, turns, and tricks - create stunning videos that will get you fame and fortune. These expert tips allow you to revive stability, color, and story to get your viewers engaged from the first to the last minute.
- Use slow motion to highlight action: High frame rate (60-240 fps) shooting enables the capture of even the tiniest details, such as a water drop or a dust trail. When these clips are slowed down in editing, it creates a dramatic and cinematic vibe for your action scenes.
- Apply stabilization for smooth playback: GoPro's HyperSmooth feature should be enabled to minimize shaking while filming. If necessary, utilize the stabilizing feature in Quik or Filmora during the post-production process to enhance the quality of your footage and make it more professional and enjoyable to watch.
- Use LUTs or presets for color grading: The original video captured by GoPro can appear lackluster. Applying LUTs or prearranged color settings that you have created can bring out the light and color in the video, allowing the sun, water, and exciting scenes of your outdoor activities to truly stand out.
- Mix different field-of-view (FOV) shots: Scenery is best captured with a wide field of view, as objects in the frame appear more realistic than in a linear one. A narrow field of view, on the other hand, is suitable for capturing a portrait of the area or item. By combining multiple angles, you cannot only create captivating visuals but also engage the viewer more actively rather than passively when watching your video.
- Experiment with unique camera angles: You don't have to stick to the helmet mount; try other mounts, such as a board, bike, or chest. Moreover, the audience will be able to see what you were only able to see, and your video will stand out from others. In turn, unique angles will capture the audience's attention and impress them.
- Keep clips short and engaging: Did you do one trick multiple times? Better cut out all but the best of those repetitive parts and keep your fans' focus on the highlights. Quick cuts with short clips and transitions create a party atmosphere while keeping the viewer engaged throughout the entire video.
Part 6: Troubleshooting common issues
Just as you expect the best from the workflow, you will still encounter some technical hiccups while editing your GoPro videos. A brief guide on how to resolve your most frequent issues quickly follows.
- GoPro videos not importing: If the footage refuses to import into Quik or Filmora, the problem is usually caused by unsupported codecs or outdated software. First, check if your editor supports HEVC (H.265), and then update your software or install the required codec packages.
- Choppy playback during editing: 4K or 120 fps high-resolution clips are not compatible with low-end computers, thus they can choke your playback. Use Filmora to create proxy or optimized media, allowing you to use lighter versions of your clips for seamless playback while editing.
- File sizes too large: GoPro's high data rate footage can quickly fill your storage space. You can reduce the size of your videos using Filmora's export settings or Quik's smart compression without losing quality, which is not noticeable. Select MP4 (H.264) as a compromise between size and clarity.
Conclusion
It is only half of the process when you film your trips with a GoPro; the other half is editing, which is where those original moments become powerful stories. This tutorial covers everything from transferring and organizing your footage to using GoPro Quik for simple, quick social-ready edits, Filmora for advanced desktop editing, and expert tricks like slow motion, stabilization, and LUTs to make your videos more attractive. Additionally, we have included the most frequently occurring issues and their solutions to provide you with simple access to your work.
Suppose the creators are not satisfied with simple cuts and filters alone. In that case, Wondershare Filmora is the software that can make them stand out due to its AI-powered tools, extensive effects library, and precise editing controls that allow you to customize every frame. Whether you are a beginner or an experienced editor, these methods and tools will make your GoPro videos look amazing, flow smoothly, and amaze anyone on any platform.
