
 100% Security Verified | No Subscription Required | No Malware


 ChatGPT
 Perplexity
 Gemini
 Claude
 Grok
Grok
Perhaps you would want to take out the silence, make a highlight video of the clips, or just simply add background music to give it a nice professional look? Well, you are at the perfect spot. MP4 is a very well-known standard video format that is almost the case for any video, such as capturing from a smartphone, a computer screen, etc. It is a nearly universal device, and platform compatibility makes it a favorite among both casual and professional users.
Whether you are editing a quick social media post, editing a presentation video, or even just taking care of your personal footage, learning editing will be an invaluable skill. The good thing is that you only need it if you do not have expensive software or years of experience.
Through this comprehensive, step-by-step guide for beginners, we will show you how to edit MP4 videos. You will be shown how to remove the parts you dislike, cut and merge clips into smooth sequences, add music or voiceovers, apply filters and effects, and even export your work in high quality. We will tell you how to do it on both Windows and Mac. First, we will utilize free built-in tools for quick changes, and then we will transition to a more powerful professional editor for advanced results.
Table of Contents
Part 1: The Basics of Editing MP4 Files
MP4 is a format that is used to denote (video) files. MP4 is a video file format that is widely known as one of the most used formats worldwide. It is preferred by many people due to the fact that it employs contemporary data compression technology that maintains the original video and audio quality, but with less file size. So, it is almost on any device that is the most convenient one for recording, sharing, and streaming, or in other words, from smartphones and tablets to laptops and TVs - all are compatible with MP4.
Actually, no raw videos can be compared to MP4 files in terms of size and quality; moreover, MP4s are much lighter. Hence, almost all cameras, screen recorders, and social media platforms are practically set to MP4 by default. Besides, its universal compatibility means that you can open and edit it with almost any video editing software, and this is what makes it the perfect starting point for novices.
Choosing your tool
In case your activity is just limited to cutting off the beginning or the end of a clip, cropping a certain area, or making a quick adjustment, then the free, built-in editors in Photos (on Windows) or iMovie (on Mac) are just perfect for you to get the result that you want.
Anyway, if you want to go beyond the limits of basic operations and, for example, combine multiple clips, add seamless transitions, insert text and captions, adjust colors and apply special effects, then not only will you have a professional result, but also save your time with a dedicated video editor. Filmora is the first factor to be mentioned because it offers a user-friendly interface for a novice along with several features like drag and drop editing, one-click effect, audio enhancement, and multiple exporting options.


Part 2: How to Cut, Trim, and Shorten an MP4 Video
Manipulation of video format, such as cutting, trimming, or shortening, is usually the first time beginners want to make such an edit. The computer's built-in tools can do the work for you without any extra downloads if you want to remove the silence, delete the additional part, or make the video shorter for social media.
This part will guide you through the free editors of your operating system - Photos or Clipchamp on Windows and iMovie on Mac - and how you can use them. These apps are just right for preparing simple edits and allowing you to make a quick MP4 video cleanup.
Method 1: Using free built-in tools (Windows & Mac)
If you are a newbie then it's better not to buy high-end software just to do some simple tasks. Video editing tools provided by both Windows and Mac are quite efficient for simple editing, such as cutting, trimming, and shortening MP4 files.
On Windows: Using Photos or Clipchamp
There are two easy-to-use applications on Windows for those who have no experience in video editing. If your video editing requires only quick and simple trimming, then the Photos application is the optimal application for you. Want to handle the video in a more complete way? Then Clipchamp would be the right tool to do that.
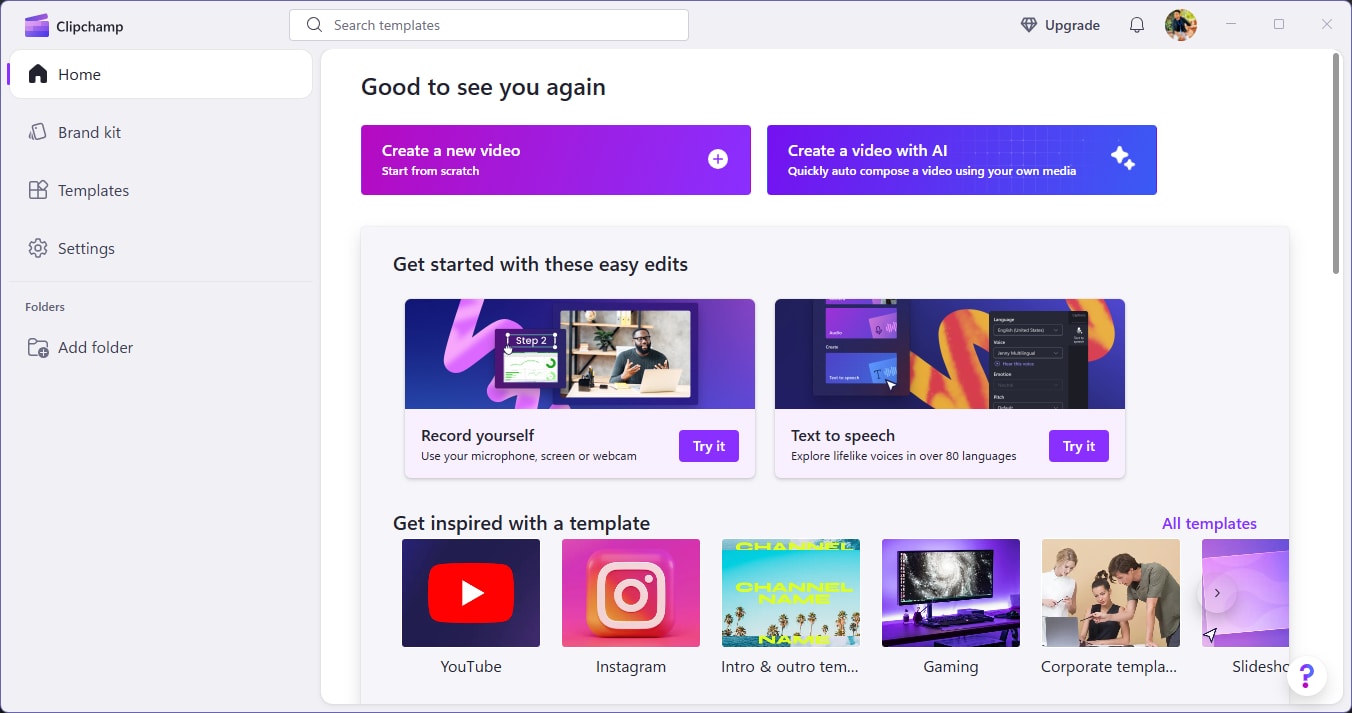
Step 1. Open Clipchamp from your Start menu.
Step 2. Click Create a new video, then drag and drop your MP4 file into the media section.
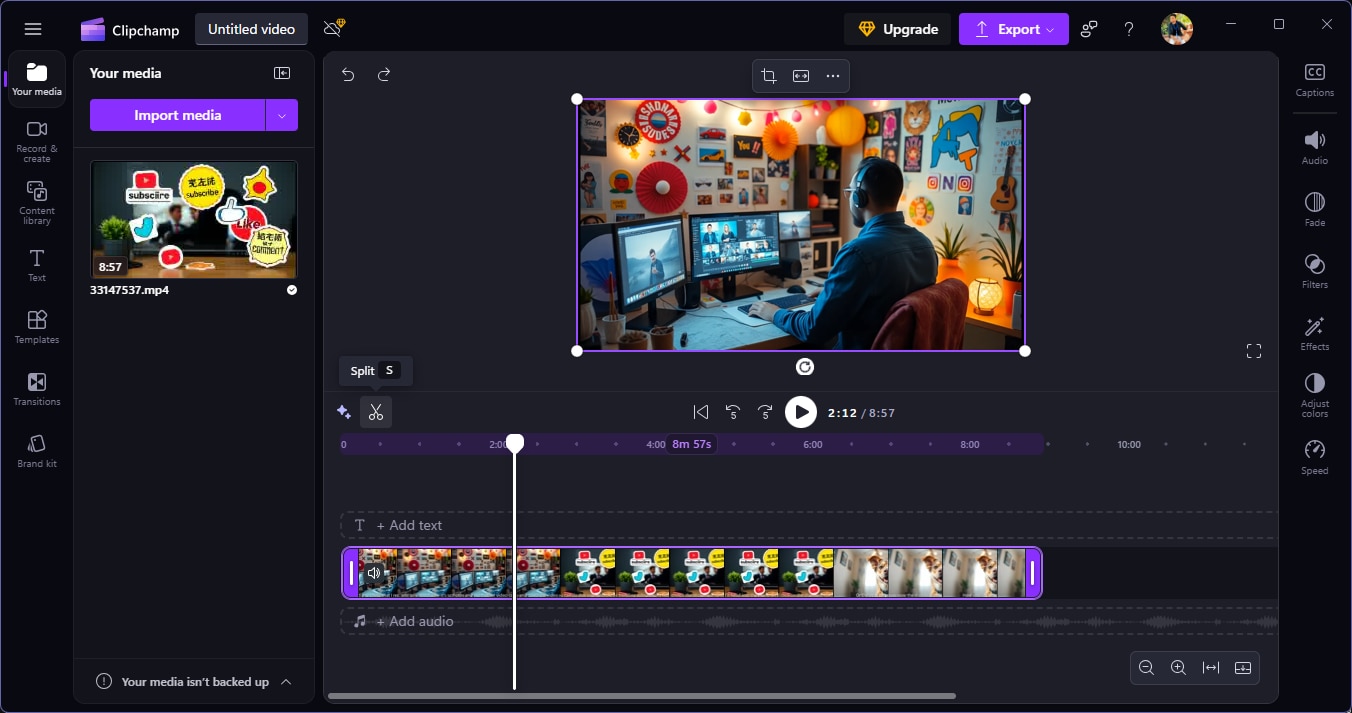
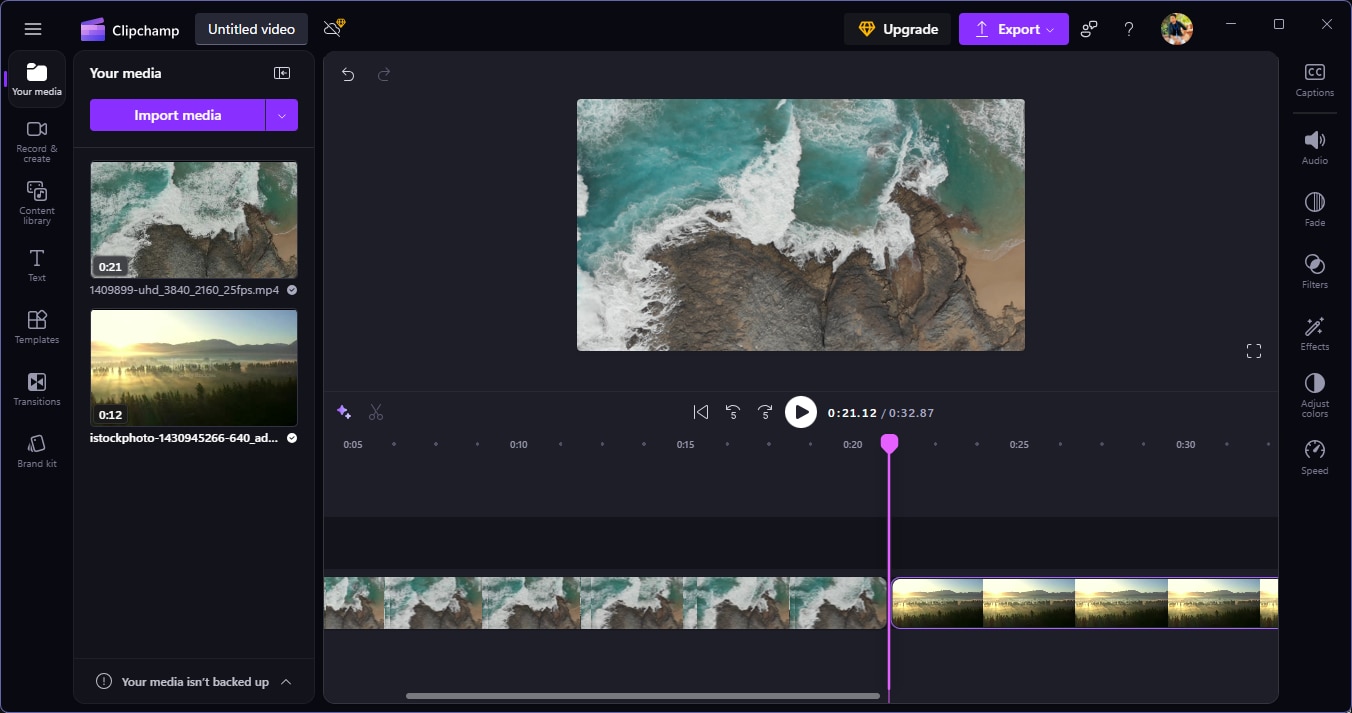
Step 3. Drag the imported video down to the timeline at the bottom of the screen.
Step 4. Select the video clip on the timeline, then click on Split to trim unwanted parts.
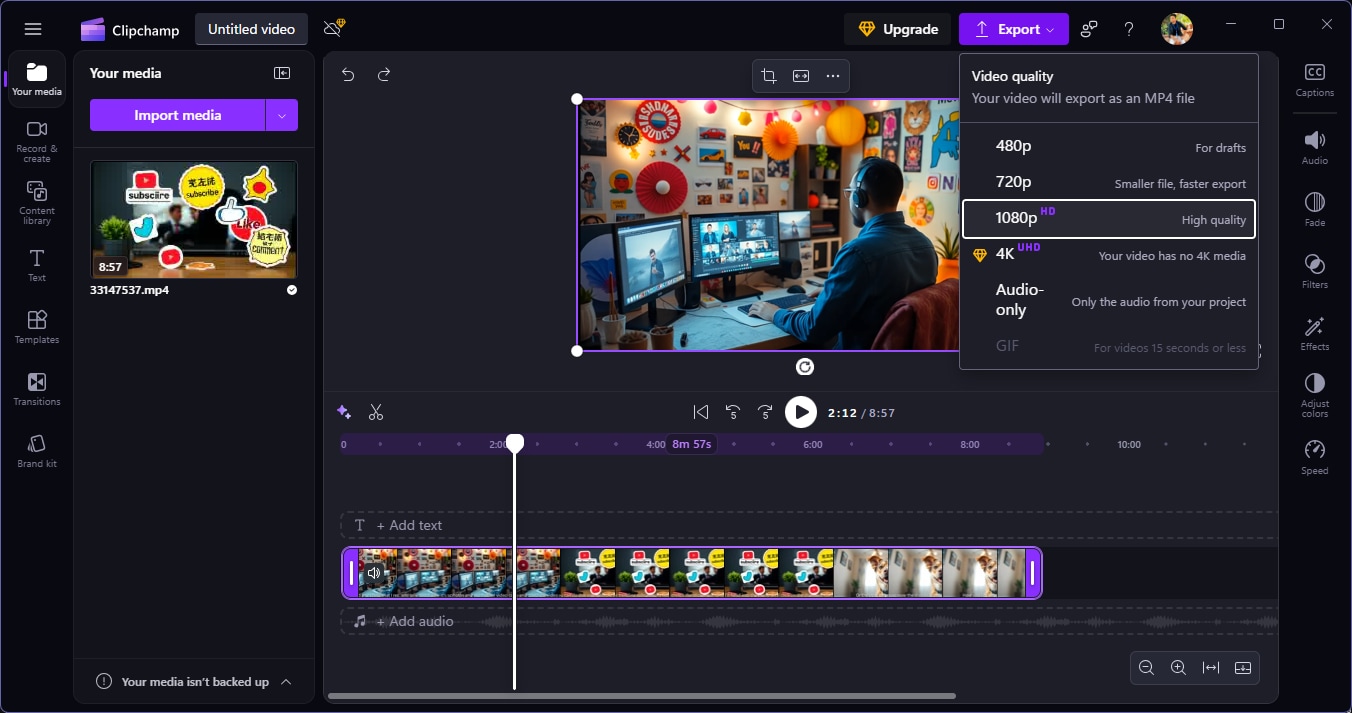
Step 5. When you're happy with the result, click Export to save the edited MP4.
On Mac: Using iMovie
A Mac user might want to think about iMovie, the free and powerful video editor from Apple. For just a quick cutting or trimming of your file, it is very handy and very fast, also you don't have to use another software. The new direction you're looking at is a more detailed one on how to trim your MP4 video using the playhead and keyboard shortcuts.
Trimming a clip in iMovie
The feature trimming in iMovie allows you to cut out the removed parts from the beginning, middle, or end of your MP4 video.
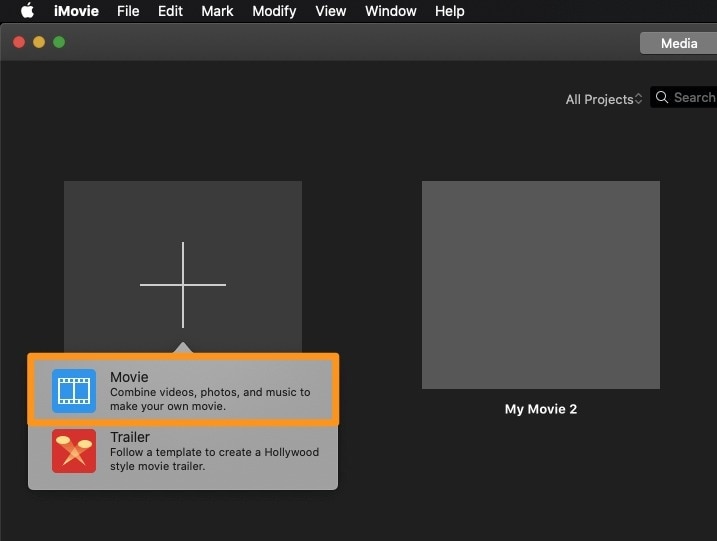
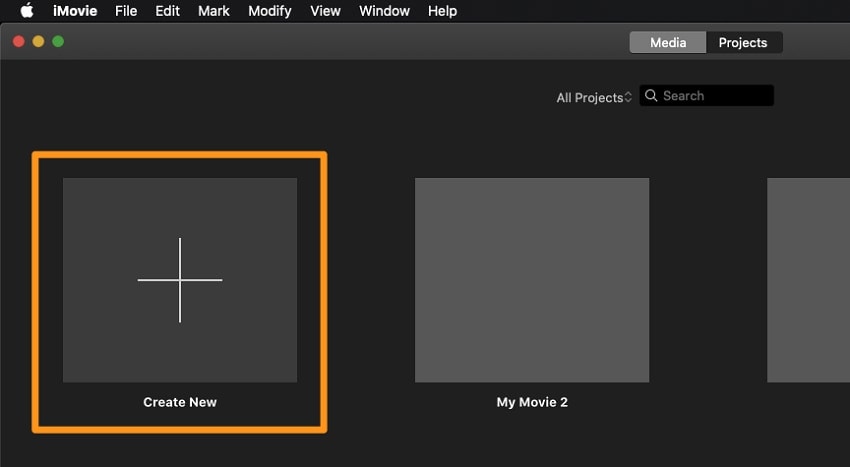
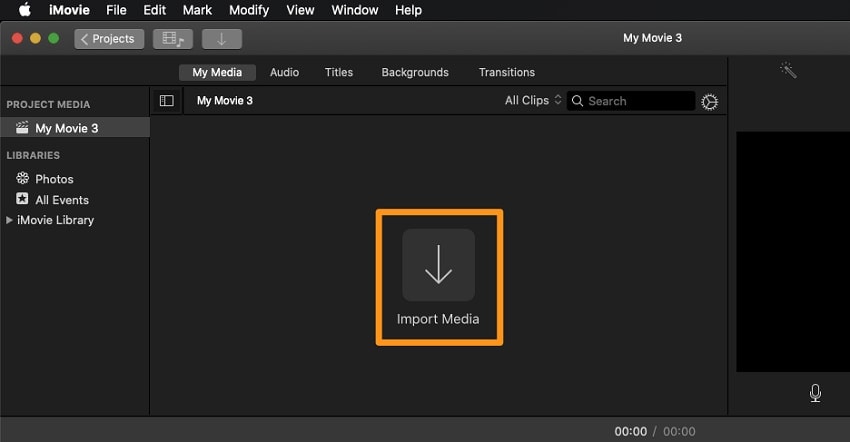
Step 1. Launch iMovie and go to the Projects tab. Click Create New, then select Movie to start a new project.
Step 2. Click on Import Media to choose your MP4 video.
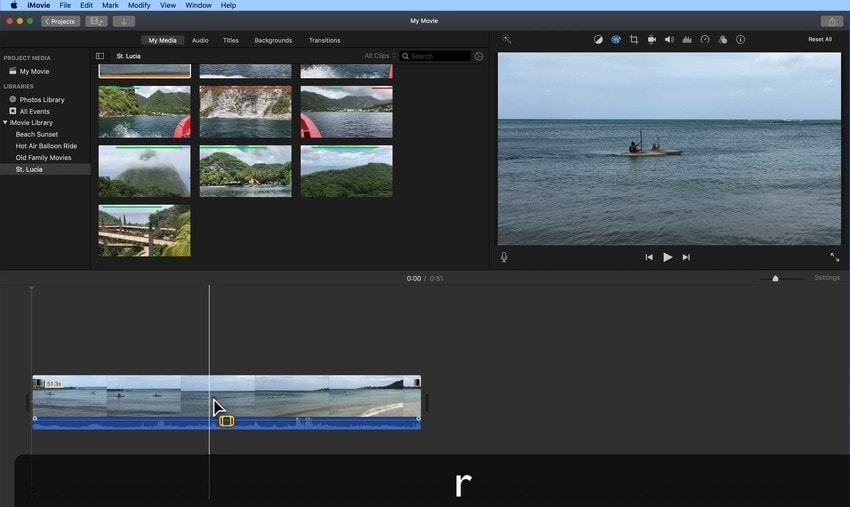
Step 3. Locate the playhead at the frame. Press and hold the R key on your keyboard.
Step 4. Once the range is selected, press Option + / to trim the video to that selection.

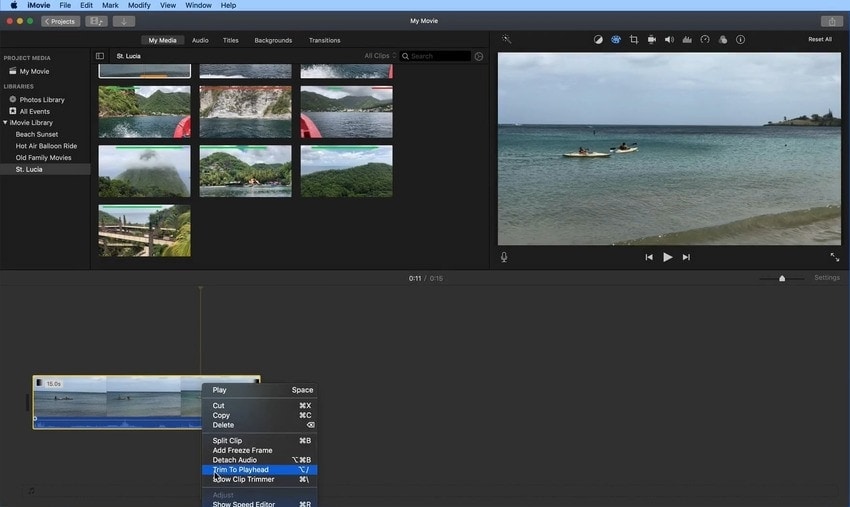
Step 5. Place the playhead on the frame where you want the video to end. Right-click the video and choose Trim to Playhead.
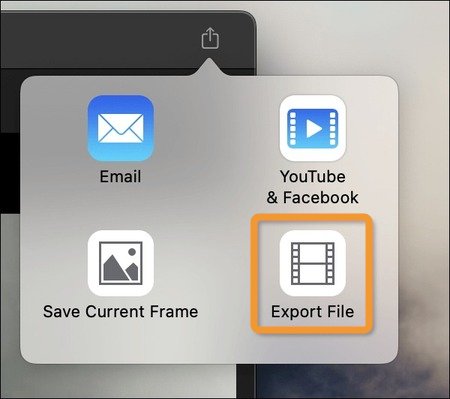
Step 6. Click the Export button and select "Export File" to save your finished MP4 video.
Method 2: For Precision and Speed (Wondershare Filmora)
If you want to edit your videos in a hoot and still maintain the quality then Wondershare Filmora should be on your list of consideration. Its user-friendly interface and AI-powered tools perfectly cater the needs of novices who still want to produce a professional-like result. The Fast Split Tool, Ripple Delete, and magnetic timeline features, etc., allow you to cut or shorten your MP4 files down to the last pixel without going through the intimidating process of mastering advanced video editing software.
If Filmora's drag-and-drop capability and unobstructed playback were available, the execution of your work, particularly when it is a length of a project, would be a breeze. Apart from cutting different clips simultaneously, the user has the liberty to combine them without any gap and also add the desired effect with minimal clicks, which is a clear indication that the program is designed for such users who desire to have more control over the editing process.
Why Filmora is better for this task
Filmora is quite different from Photos or iMovie as it brings to the table not only the speed and precision but also a very user-friendly workspace that is easy to navigate. Below is the outstanding feature that makes it very suitable for cutting and trimming MP4 videos:
- Fast Split Tool: Cut off parts of your video anytime with splitting just at that point on the timeline without stopping playback.
- Ripple Delete: Removes the chosen part of the video and simultaneously moves the remaining part to fill the vacant space.
- Magnetic Timeline: You can always keep your clips in the correct place without losing synchronization during editing.
- AI Video Enhancer & Auto Scene Cut: Make your video quality better in no time and detect scene changes for easier cuts.
Editing MP4 videos in Wondershare Filmora
Use these instructions to edit your MP4 videos quickly and accurately while editing in Filmora.
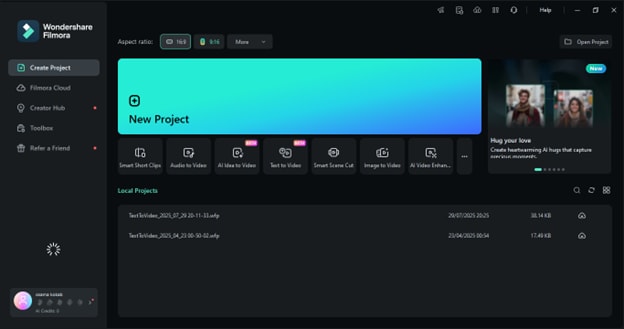
Step 1: Launch Filmora
Launch Filmora, tap New Project to create a new project and access your MP4 file working environment.
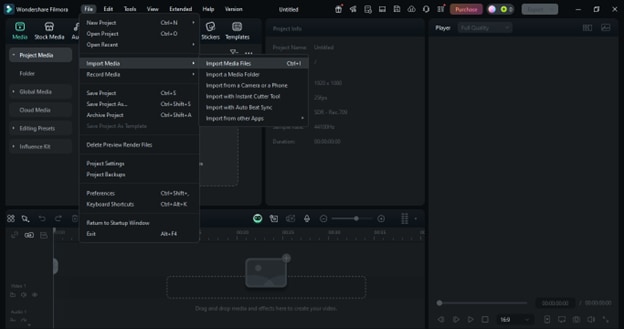
Step 2: Import your media files
To add your MP4 videos (and other media like audio tracks or images), go to File > Import Media > Import Media Files.

For a quicker workflow, simply drag and drop your MP4 file directly into the media library — this method is fast and convenient.
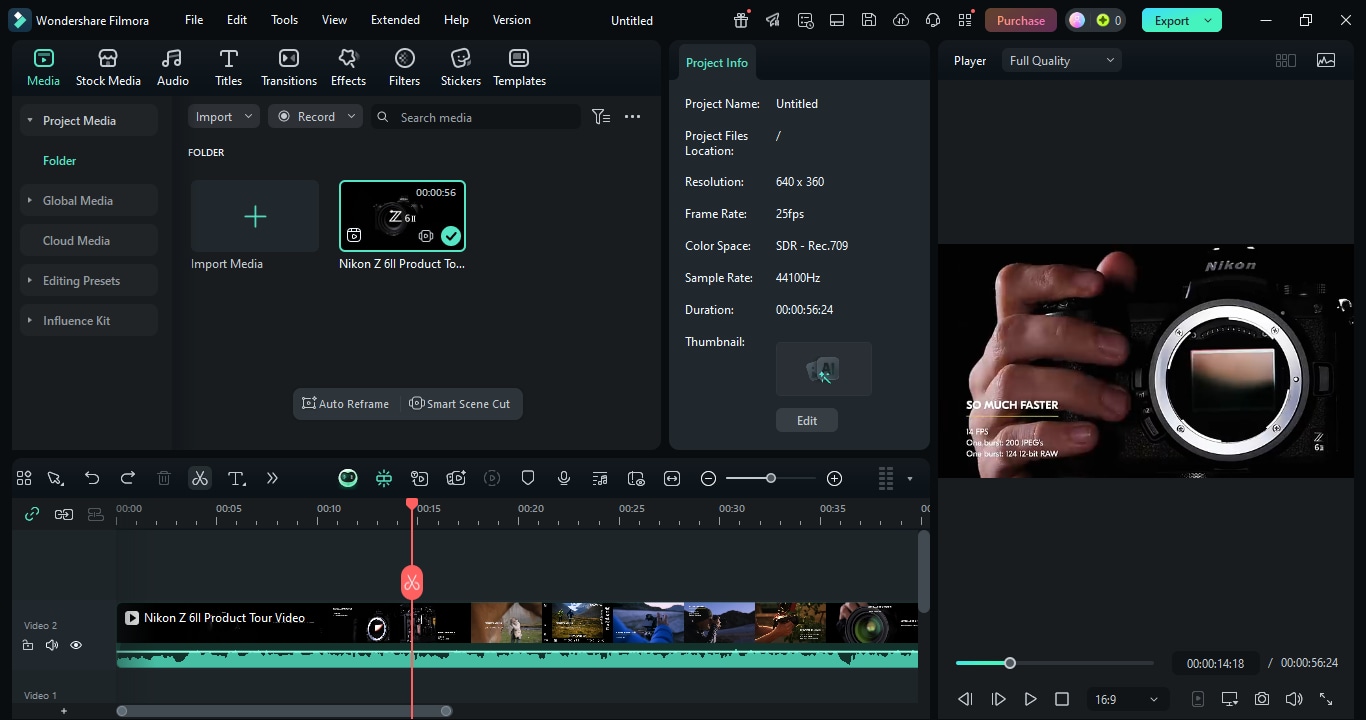
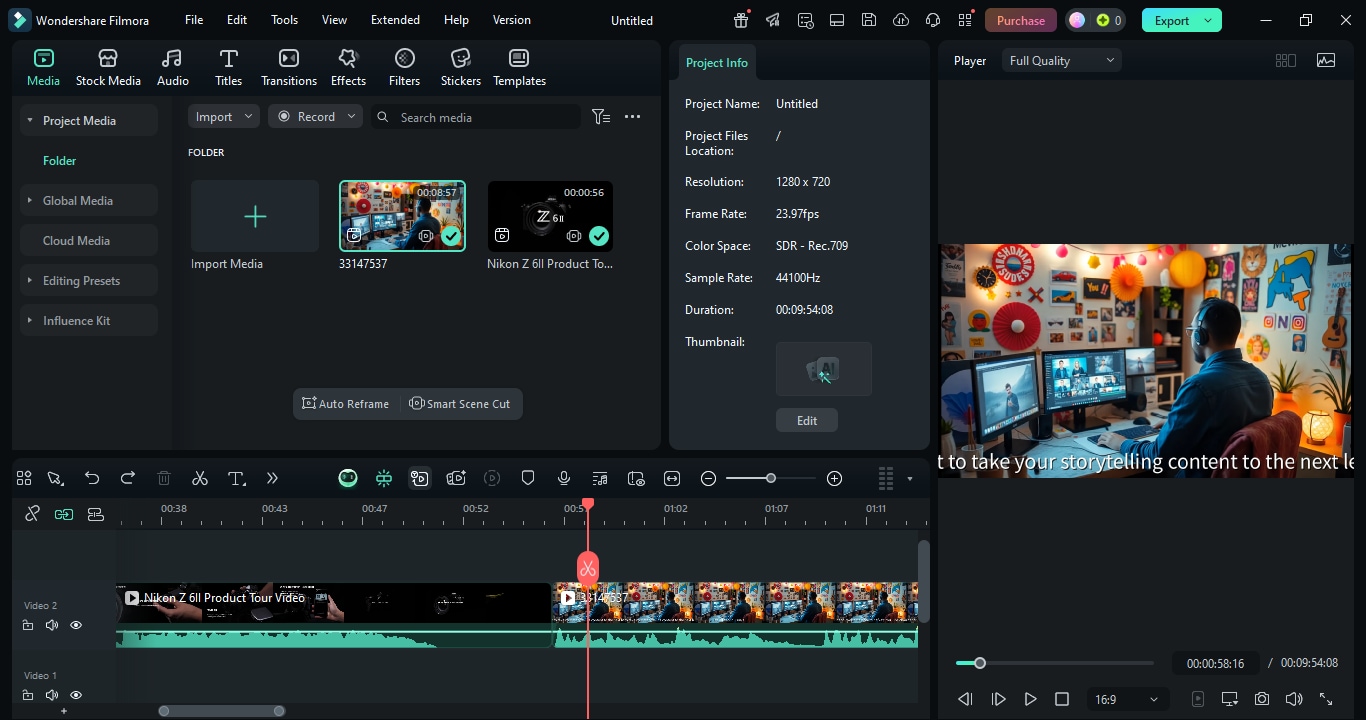
Step 3: Trim, split, or cut your clips
Use the playhead to navigate. Select one of the tools — Trim, Split, or Cut — to remove unwanted sections, shorten scenes, or tidy up mistakes.
Part 3: How to Merge MP4 Files and Rearrange Clips
It is very necessary to combine MP4 files when you intend to join several videos one after another without interruptions. In this case, you can use the tool to create a vlog, travel montage, or presentation. After combining your clips, you can also reorder them according to your narrative.
Method 1: Using built-in free tools (Windows & Mac)
Clipchamp on Windows and iMovie on Mac are the default video editing software that come with both operating systems. These apps are handy if you want to merge MP4 files. Simply open the timeline, drop your clips there, and then organize them by dragging and dropping.
On Windows: Using Clipchamp
Clipchamp is an in-built Windows editor that enables you to merge multiple MP4 files into a new video with minimal clicks.
Step 1. Open Clipchamp from the Start menu and click "Create a new video."
Step 2. Add clips to timeline and merge them.
On Mac: Using iMovie
Trying to combine MP4 files is made extremely easy by iMovie on Mac. The procedure is very easy; you are just dragging your pieces of video onto the storyline and then combining them.
Step 1. Open iMovie
Launch iMovie. At the New Project window, press the Create New button, and then choose Movie.
Step 2. Select and Import videos
Drag and drop the video segments that you want to combine into the event browser. Hit the File menu > Import Media. Rock down the files on your Mac and tap Import Selected. You could also choose multiple clips for import simultaneously.
Step 3. Drag and drop your videos
Simply drag and drop clips from the media library into the timeline.
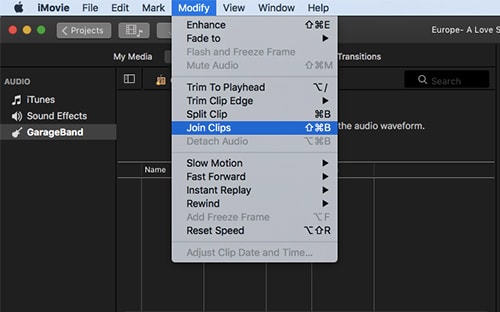
Step 4. Combine videos
Firstly, hold down the Shift key and then using the mouse click select all the videos that you wish to merge into one. Next, navigate to the Modify drop-down menu, click on it and choose Join Clips.
Method 2: Seamless Merging with Transitions (Wondershare Filmora)
Wondershare Filmora is a really good option if you want to combine your MP4 videos in a clean and professional manner. The clips can not only be just connected through Filmora's magnetic timeline but you can also pick the transition from the various transitions like fade, wipe or zoom to make your next scene a smooth continuation of the previous one. In no time, beginners will be able to combine their clips, while advanced users will find the one-click transitions for their entire project very handy.
Step 1: Place all clips on the timeline
Open Filmora and create a New Project first. Go to File > Import Media > Import Media Files or simply drag them into the Media Library.
Step 2: Drag and drop to rearrange
The magnetic timeline allows you to rearrange without any effort because when you move one clip, it will snap the rest of the clips in their proper position.
Step 3 (Optional): Add a transition

Step 4: Export as a single MP4 file
Click the Export button and select MP4 as the output format.
Part 4: How to Add Music, Text, and Effects to an MP4
A simple MP4 video can be made to a fantastic one just by adding music, text overlays, and effects. The video of you making a presentation, a vlog, or sharing your personal moments with the world might look dull and lifeless, but even basic tools will help you make it stand out. We will tell you how to do it by using free built-in tools on Windows and Mac.
Method 1: Using free built-in tools (Windows & Mac)
In case you are a complete beginner or just do not need beautiful effects, then the built-in editors with their user-friendly interfaces—Clipchamp for Windows and iMovie for Mac—are the most suitable ones for you.
For Windows: Using Clipchamp
Clipchamp is installed by default on most Windows computers and is your tool for simple video editing.
Step 1: Launch Clipchamp
Open the Windows Start menu and select Clipchamp. You then drag the MP4 file straight into the timeline and you are ready to make the changes you want.
Step 2: Add background music
The easiest way to add music to your video is to choose a song from the Clipchamp free music library or find an audio file on your computer and import it by clicking "Add Media." After that, simply drag the music you want to the audio timeline, right below your video.
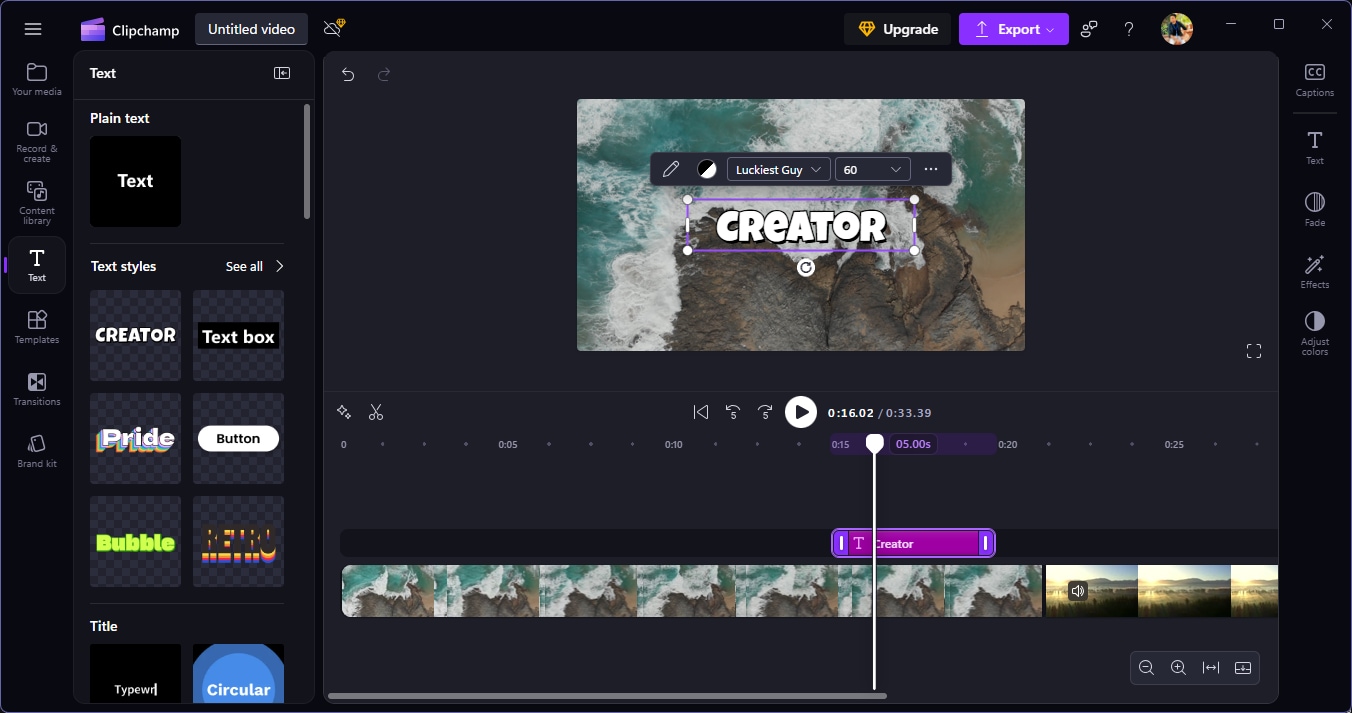
Step 3: Insert text or titles
The process of adding text to your video is easy. You just need to go to the Text tab, find the style that suits you the most, and drag it to the part of the timeline that displays your video. When you double-click on the text box, you can enter your message and then change the font, size, and color.
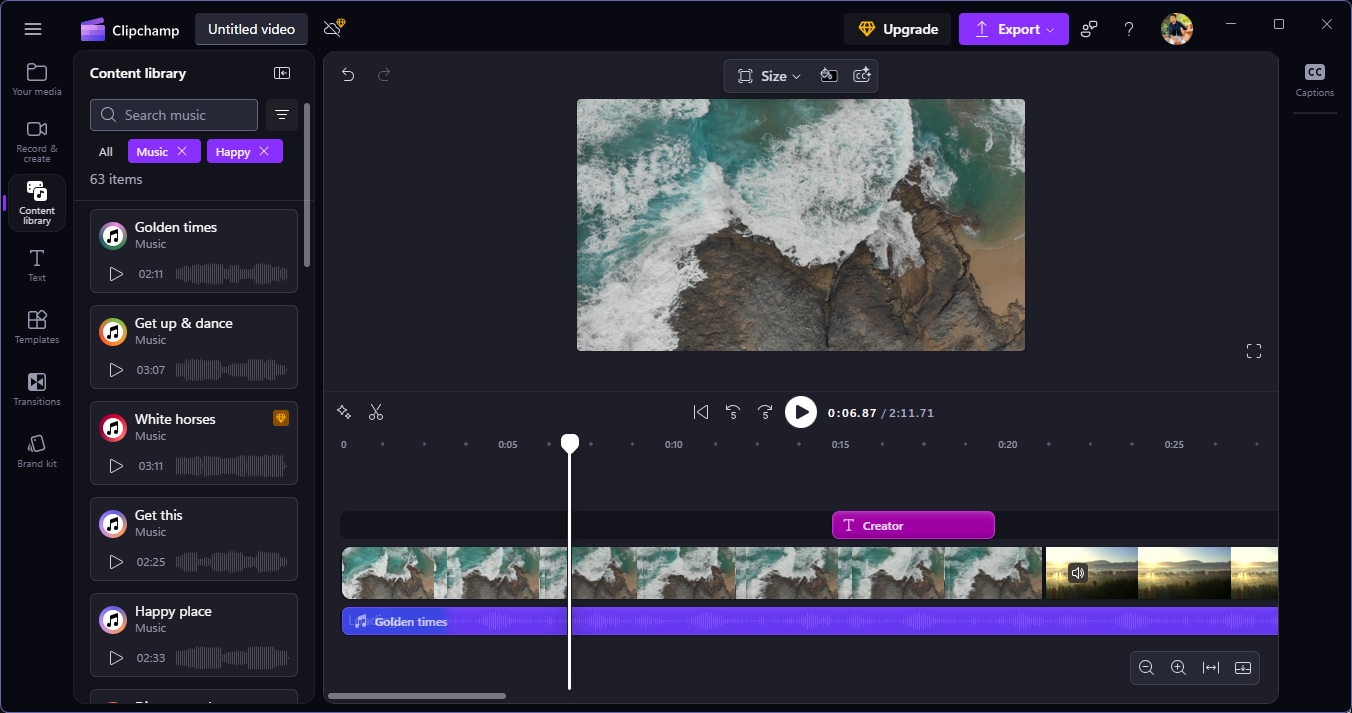
Step 4: Insert audio
Navigate to Content Library and look for the music. Click on + sign to add music.
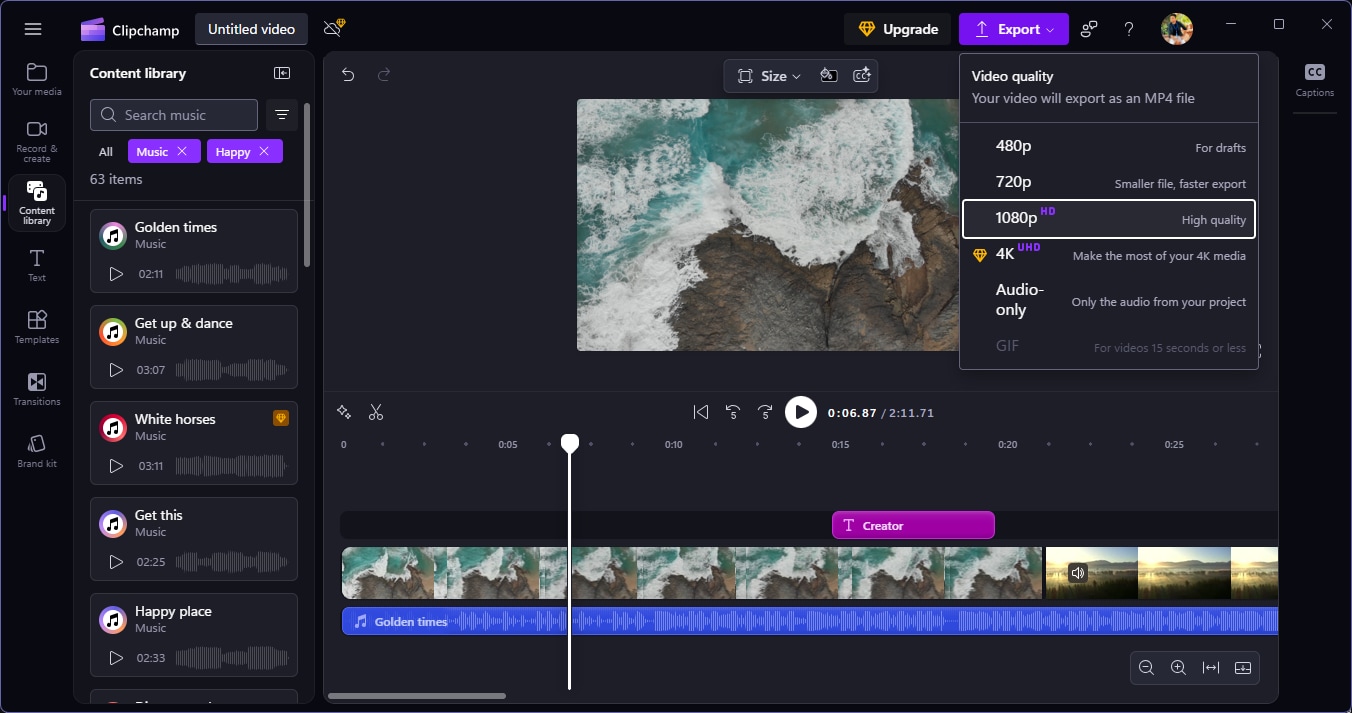
Step 5: Export as an MP4 file
When your video is perfect, simply click the Export button in the top-right corner, select MP4 as your format, and save it to your computer.
For Mac: Using iMovie
iMovie is a go-to solution for Mac users if they want an easy and efficient way to edit their videos. iMovie can be summed up as a video editor that is simple enough for beginners but still has the ability to impress with its sleek results. Adding music, text, or even simple effects is just a few clicks away with iMovie.
Step 1: Open iMovie and create a new project
The first step is to open iMovie and then click Create New > Movie to enter a new timeline. You can start editing your work by dragging your MP4 video to the designated work area.
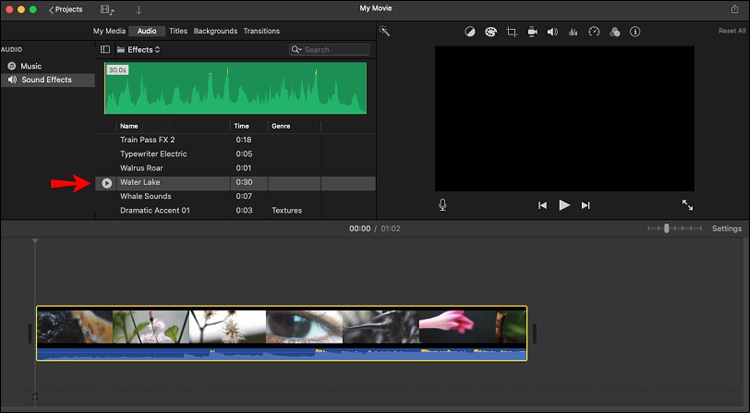
Step 2: Add background music
The voice of the video is one way to add music to it. For that, you'll need to go to the Audio tab, located at the top left side of the screen. The audio is imported from the iMovie library or can be yours, and then it is dragged to the audio track under the video.
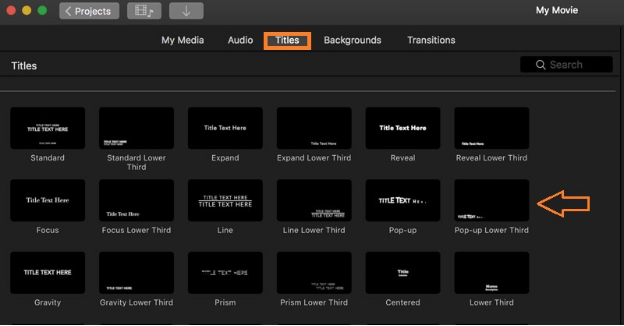
Step 3: Add titles or text overlays
Go to the Titles tab, choose the font that you think would be a perfect match with your video, and then drop it into the timeline above your MP4 clip. You can personalize the text part by style and color, inclusive.
Step 4: Export the video as MP4
Once you've finished making your changes, click the Share button (the square with an arrow icon) in the top-right corner. Then your project will be saved as an MP4 video when you click Export File.
Method 2: For creative control (Wondershare Filmora)
In case you are willing to have a professional and elegant MP4 video of yours, Wondershare Filmora is the ideal option. In contrast to free editors, it offers extensive features such as a built-in royalty-free music library, animated titles, filters, effects, and even voiceovers, in addition to a simple drag-and-drop user interface that allows you to easily try out creative elements without interrupting your flow or requiring prior experience.
Step 1. Import your MP4 files
First, launch Filmora and click New Project. Drag and drop your clips, audio files, and images into the Media Library, or select Import > Import Media Files to import your MP4 videos.
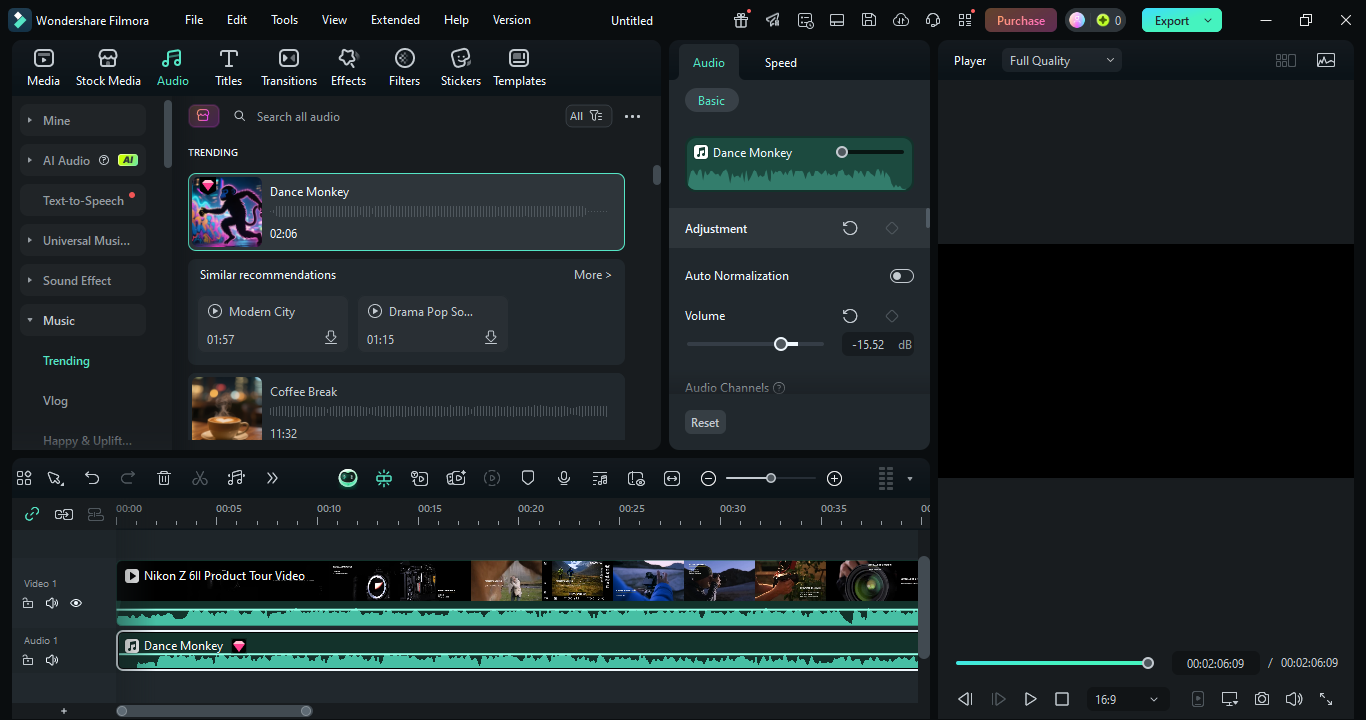
Step 2. Add music and voiceovers
Go to the Audio tab and check out Filmora's introduction-free music base. Put the song you have chosen under the sound part of your video on the audio timeline. Make sure that music and voiceover can be mixed seamlessly with your original clip's sound by adjusting volume.
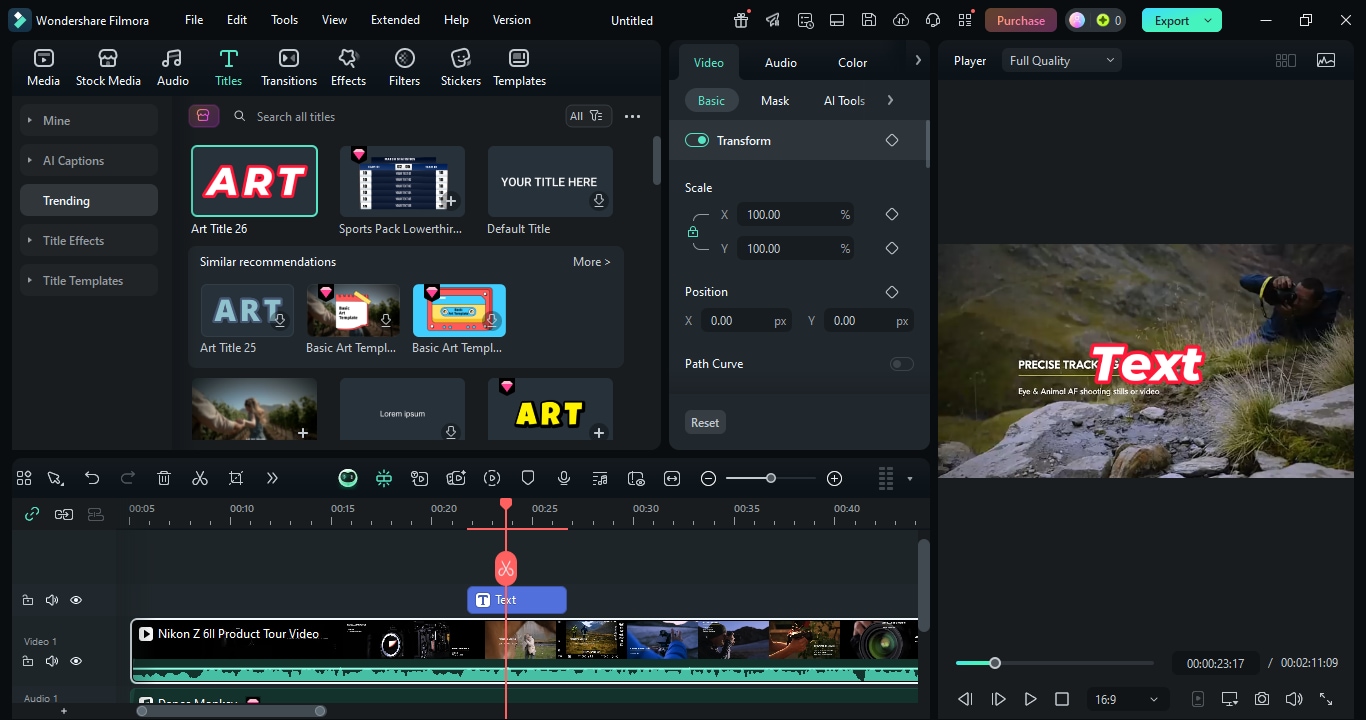
Step 3. Add animated titles and text
Go to Text tab and add suitable text. Double-click the font, color, size, animation, and the time of the title to change it.
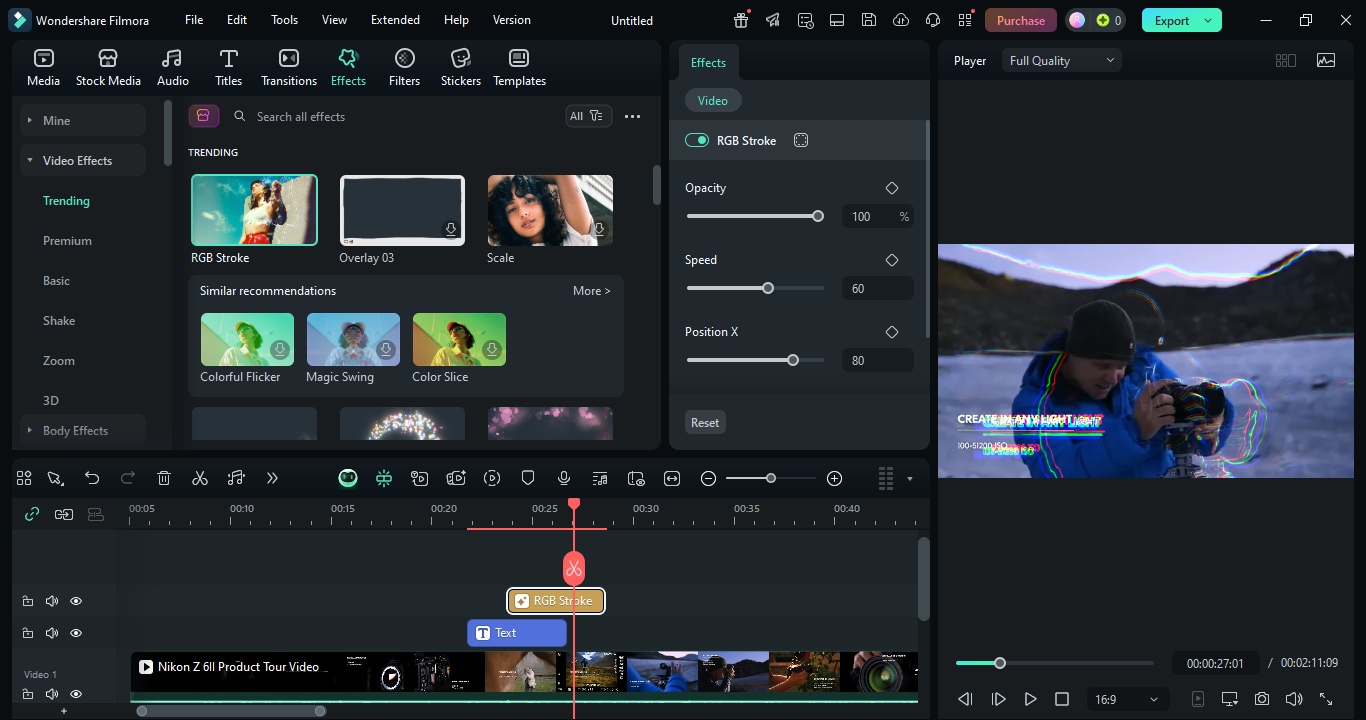
Step 4. Apply filters and effects
The Effects tab in Filmora is the place where you can change your video's appearance with beautiful filters, along with the help of overlays, stickers, or LUTs.
Step 5. Export your finished MP4 video
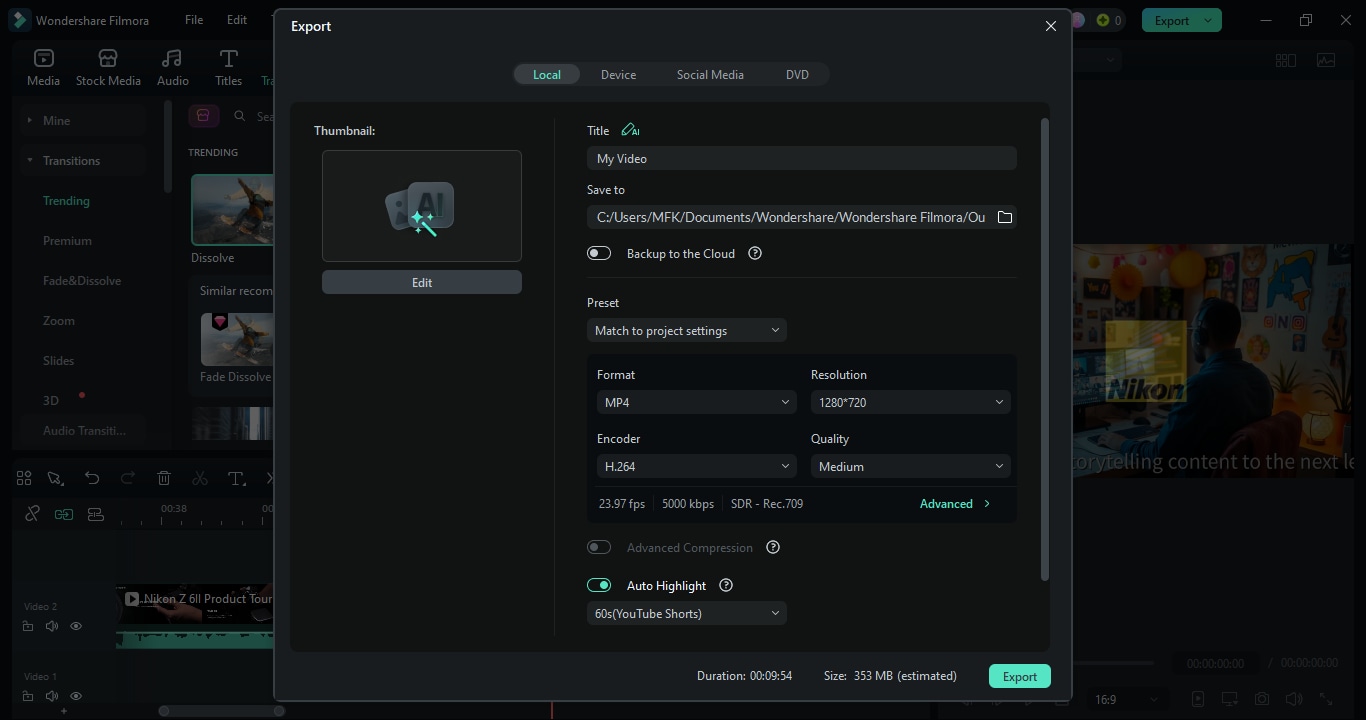
Click the Export button. Select MP4 as the file format to ensure the highest compatibility, and if you need adjust the quality and resolution.
Part 5: Advanced MP4 Editing Techniques with Filmora
Filmora, besides being software for novices, evolves as your skills grow, with several features that go beyond the basics, which in turn give your MP4 videos a more professional look. Basically, you can find out more detailed information on the powerful tools that are at your disposal.
Enhancing visuals
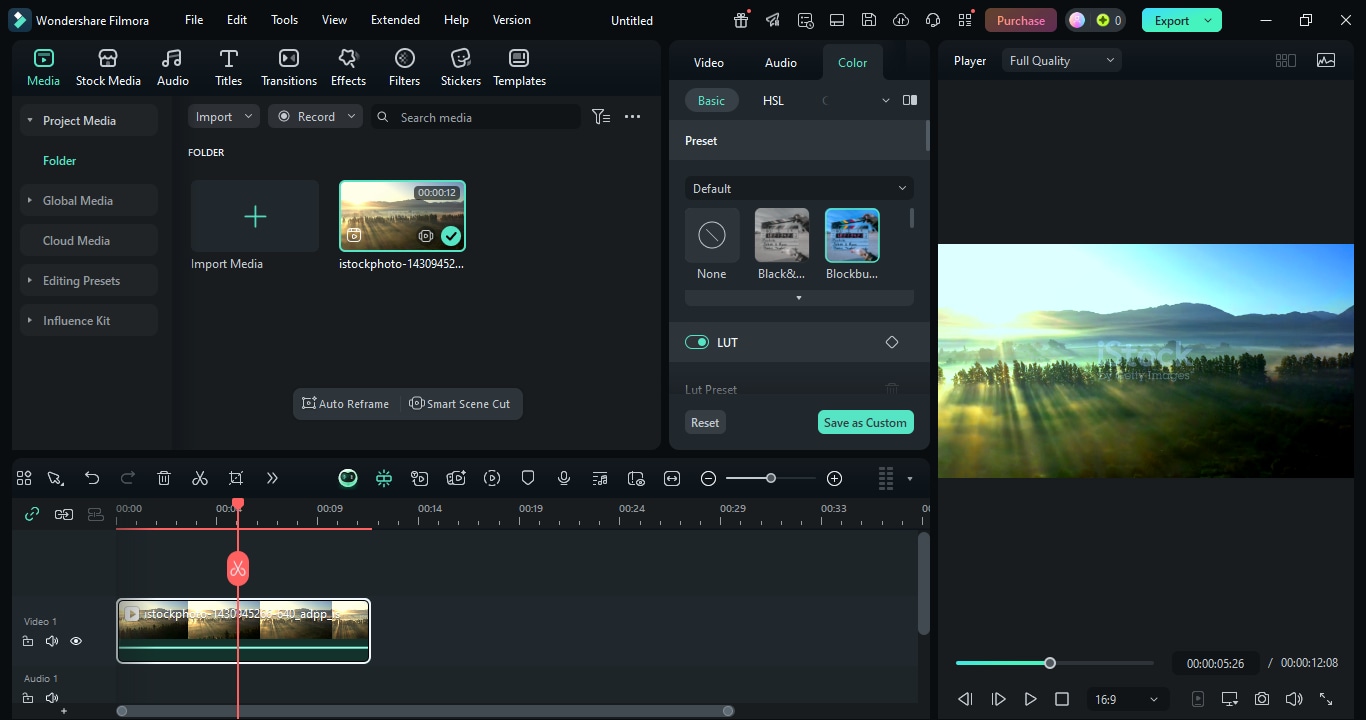
Filmora provides simple and effective color correction and color grading tools that allow the user to set brightness, contrast, saturation, and more. The user is given the option to adjust color and light in the video or even to apply cinematic colors so that the footage can become more unique.
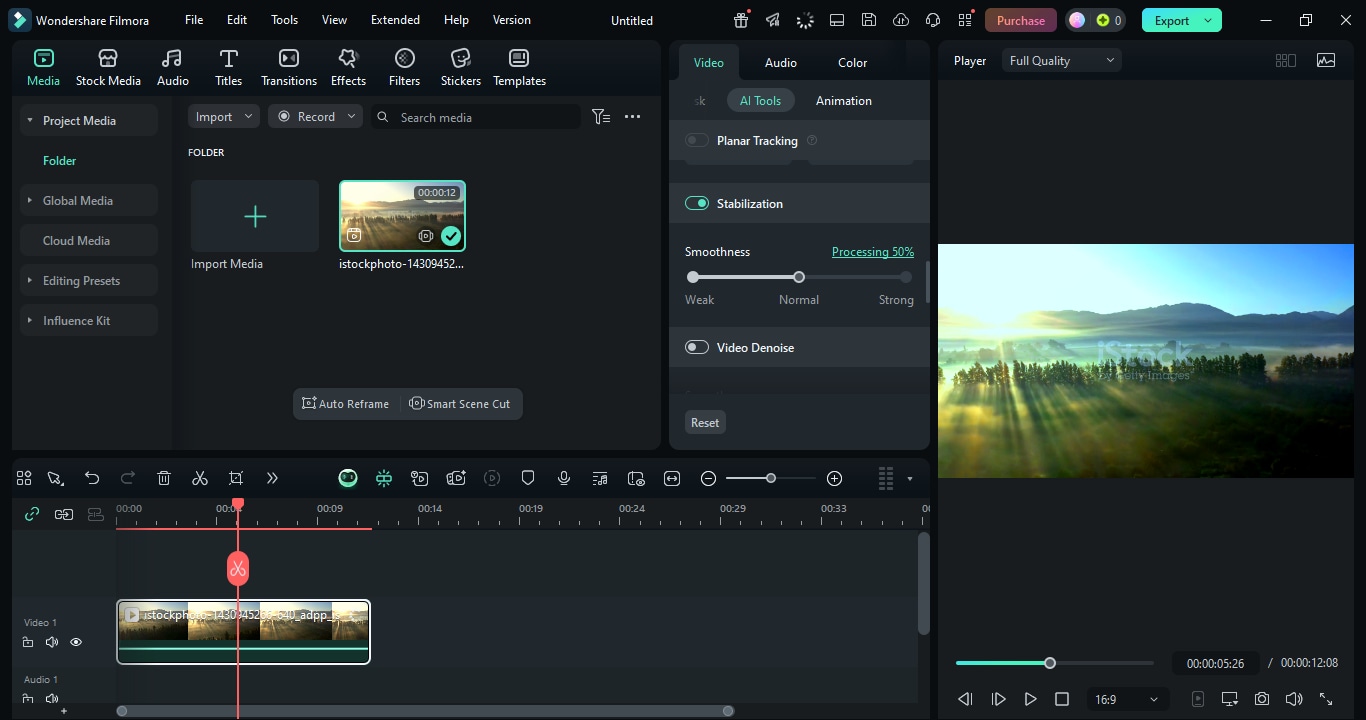
Fixing shaky footage
Stabilization of the video is one of the functions of Filmora that gives comfort to the users when it comes to handheld or action-shot clips. In fact, this feature is also capable of eliminating camera shake, hence the videos become less blurry and thus movies of higher quality are obtained.
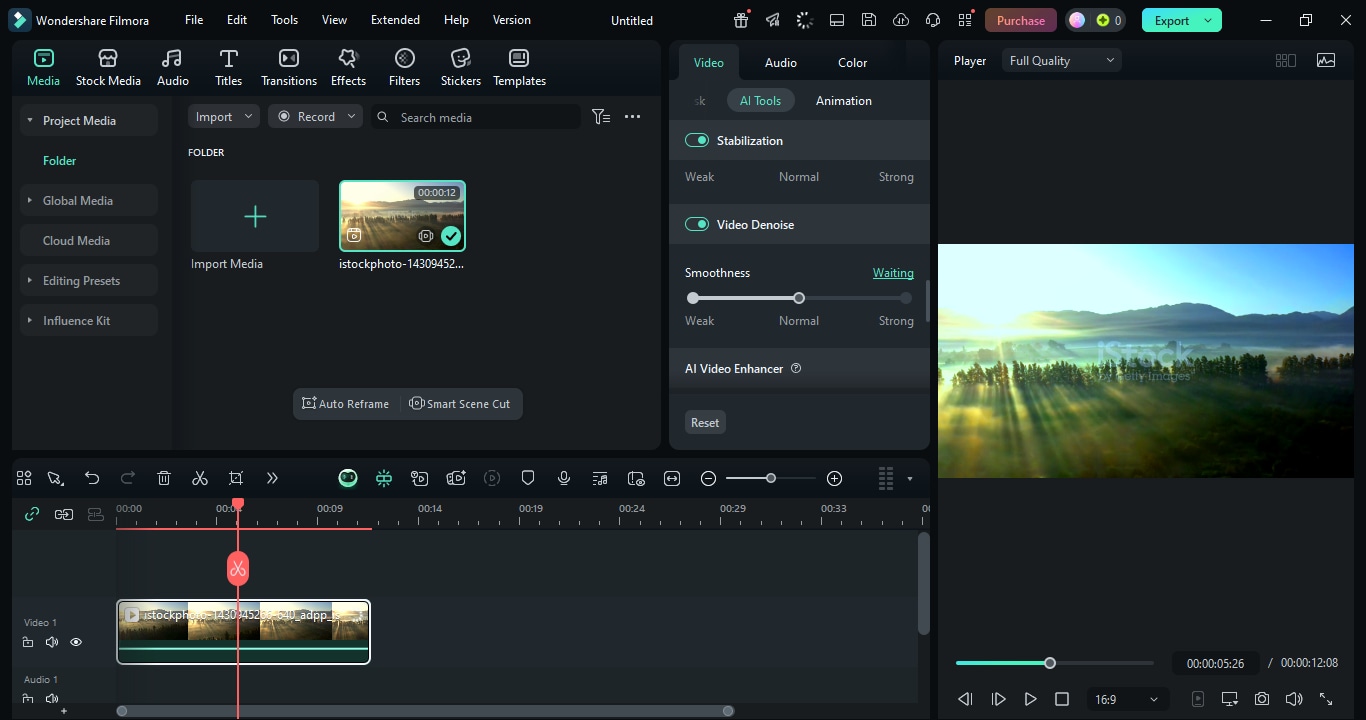
Fixing blurry video quality
Filmora comes with tools that are used to make videos clearer and sharper, particularly in cases of video blurriness. This basically means that even if there are low-resolution or out-of-focus clips that you want to use, you still can improve them in Filmora so that they look nice.
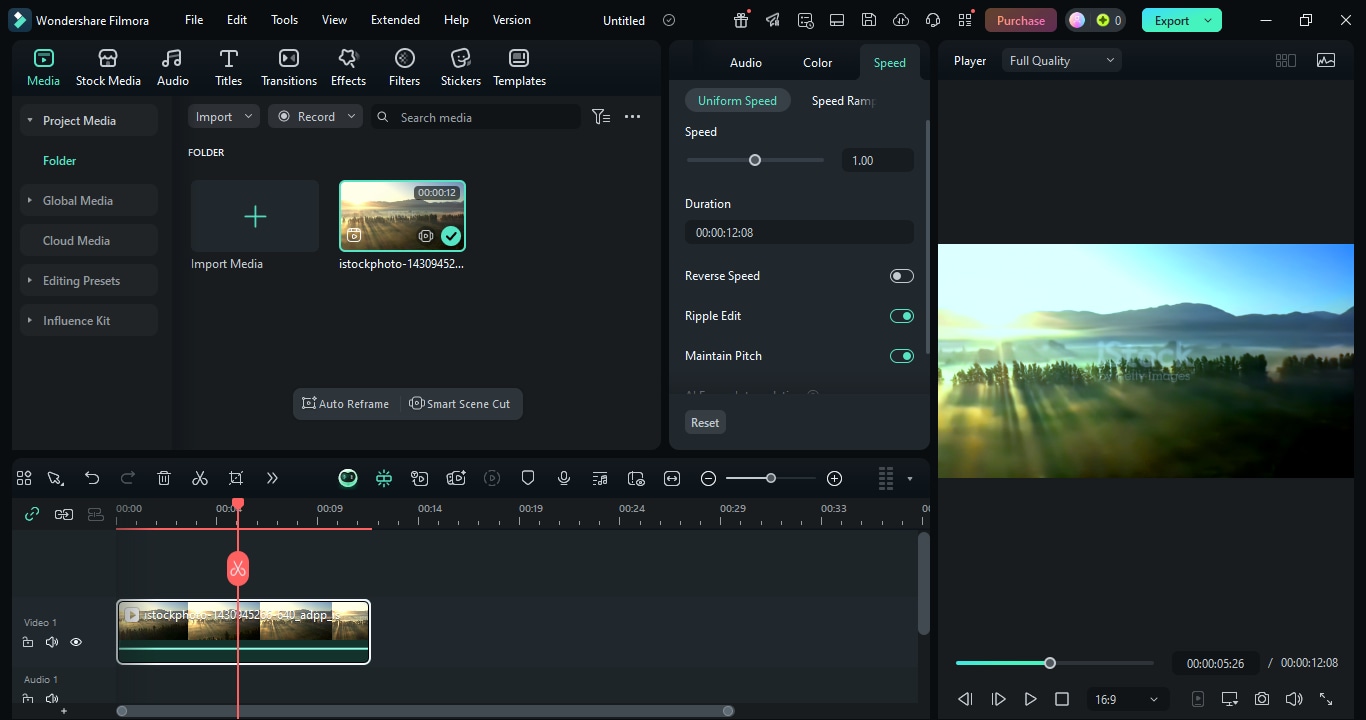
Creating dramatic effects
Basically, the speed transformation feature that is found in Filmora grants you with the ease of making slow-motion or fast-motion effects. The dramatization of slow or fast motion can be achieved by adjusting the speed curves for the part of the video that is desired to be underexposed or overexposed.
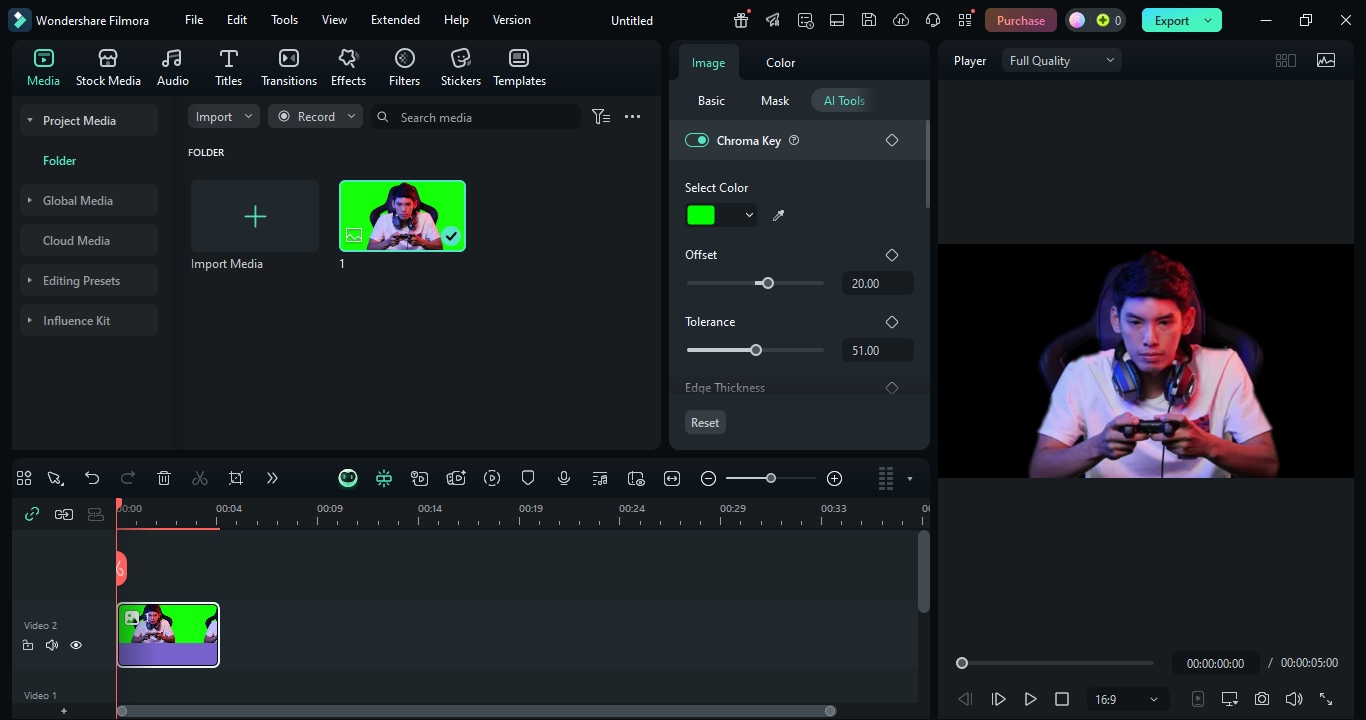
Changing the background
Filmora's green screen (chroma key) tool not only helps you change the background of your video but also allows you to update it with an image or video of your choice. So it can be for art, for business purposes, or just for an unusual and unique background for your MP4 footage.
For more advanced video editing features, you can go to the relevant Filmora feature page.
Part 6: How to edit MP4 files online & on mobile
Editing MP4 files is not always a must that should be done on a big computer with a program installed. If you want to be more comfortable or just need the changes to be made quickly while you are out, you can use online editors or mobile apps. Both alternatives give you the freedom to carry out the same work and the only difference is the way they are executed.
Online MP4 editors
Web-based MP4 editors are an excellent tool for making quick edits with no hassle of software installation. They are universal from any browser and usually come up with a set of tools that may include trimming, cropping, getting some text added, and inserting simple transitions.
Yet, there is quite a big gap between what they are capable of and what they promise. It includes privacy when uploading your videos, file size limits, and a few advanced features compared to desktop apps like Filmora. These are good-for-nothing editors for small projects or quick work while running.
Mobile MP4 editors
Those who edit mobile videos regularly while being on the move or who wish more freedom, mobile MP4 editors are a brilliant pick. Moreover, they offer portability plus cutting-edge features other than just basic trimming.
The most noticeable one is Filmora for Mobile (Filmora: AI Video Editor & Maker), present for iOS and Android. With this kind of technology, the user has access to AI-driven tools such as AI Auto Cut for making highlights, AI Remover to erase unwanted stuff, and Dynamic Captions that effortlessly coordinate with the video recording by its audio. Additionally, the user can slow the speed down for a nice effect, add filters and effects, and use advanced editing tools like chromakey, masking, and keyframes, even on their phone.
Filmora's mobile app is the best for artists who want to achieve top-notch quality results without being limited to a computer—hence, vlogs, social media reels, or editing on the move are perfect with this app.
Part 7: Troubleshooting Common MP4 Editing Issues
The powerful editor Filmora is no exception of the problem raised, and it may be that some problems prevail while you are working with MP4 files. The following is a list of these problems, including their solutions, which are indispensable to the uninterrupted flow of your editing.
1. Problem: MP4 file won't import
Additionally, the editor may be unable to load the MP4 file if the codecs are not compatible or are missing.
Solution: Check codecs or switch to a robust editor
Convert the MP4 with a reputable video compressor tool to a format such as MOV or AVI that is more compatible with almost all kinds of devices and software. Alternatively, take full advantage of advanced editing software like Filmora, which is known for being very flexible with the codec support, and releasing most MP4 files directly without the need of pre-processing.
2. Problem: Video is blurry after export
If the exported MP4 is blurry or lacking, it is a low-quality export setting that probably caused it.
Solution: Adjust export resolution and bitrate
If you want a high-quality video, it is better to export it at least in 1080p or 4K resolution. Moreover, the lower the bit rate is, the more obvious the video will be characterized by the loss of quality. The good thing about Filmora is that it not only comes equipped with a variety of quality preset exports but also when you want to do it manually, it will guide you along without wasting your precious time
3. Problem: Audio is out of sync
Sometimes the audio and video tracks may become out of sync, particularly if it is a file that was recorded on a separate device.
Solution: Detach and realign audio in the timeline
Just in Filmora, you are allowed to separate the audio from the video track and, thus, you can adjust it by moving it on the timeline till you find the exact place where it fits with the visuals. This Tool is very important in cases where you want the audio and video to remain together and be synchronized after the whole process of editing.
Frequently Asked Questions (FAQs)
-
How can I edit an MP4 file for free?
For example, you can utilize free built-in editors such as Clipchamp for Windows or iMovie for Mac to do your basic works like cutting, joining clips, or merely adding some text. These tools are helpful if you plan to do quick edits and are not willing to install any other software. -
What is the fastest way to cut an MP4 video?
In case you want to simply cut the video very fast, use the Trim tool in Clipchamp (Windows) or the Split Clip/Trim feature in iMovie (Mac). However, if the video is lengthy and you want to be very accurate, then Wondershare Filmora is the best option as it has the magnetic timeline and advanced editing controls that simplify and accelerate the process. -
How do I edit an MP4 on Windows?
First of all, Clipchamp is the recommended choice on Windows if you want to do simple trimming or merging of videos without downloading any other software. In case you want to do complex editing like adding effects, transitions, and color grading, then Filmora is the best software as it caters to both beginners and professionals.
Conclusion
How to edit MP4 video has been incredibly simplified. With the free and built-in software on your computer, for instance, Clipchamp and iMovie, almost everyone can do the basic editing functions such as cut, trim, and merge as well as add music, text, and effects to their videos. Also, you had the opportunity to know more about some technical operations which were frightening to you before, for instance, color correction, video stabilization, speed ramping, and green screen effects that essentially changed your video to the one that looks like it is done by a professional.
Only in case you want to create a complex project, free editors seem to be useless because of their lack of flexibility and power. As a matter of fact, Wondershare Filmora is a great example of how to merge an easy interface with professional tools like AI enhancements, smart scene detection, seamless transitions, and a huge effects library—thus giving the desired result to both beginners who are looking forward to developing their skills and experienced editors who are eager for productivity.
