Do you want to transform your favorite live photos into captivating videos in just minutes? Then you are in the right place! When it comes to live photos, they capture those fleeting moments uniquely. However, sometimes you want to share them as videos for a more dynamic experience.
Doesn't matter if it is for social media, a special project, or just for fun; it is easier to turn a live photo into a video than you think. Sounds great, right? Well, in this article, we'll walk you through simple yet effective steps to create those stunning videos from your live photos. So, let's get started!
In this article
Part 1: Know the Difference Between Live Photos and Regular Photos
Before diving into the topic of how to turn a live photo into a video, it is quite crucial to know what the exact difference is between live photos and regular photos.
So, regular photos are still images that capture a moment as it is, which is perfect for maintaining snapshots. On the other side, live photos bring moments to life by recording a few seconds of motion and sound before. This amazing feature helps you recreate the experience while adding context and emotion.
While regular photos are a great option for simplicity, live photos allow a more engaging way to remember those special occasions. So, if you are aware of when to use each type of photo, then you can definitely elevate your photography game and storytelling!
Part 2: How to Turn a Live Photo into a Video Using iPhone's Photos App
Well, if you want to turn an iPhone live photo into a video, then there is no hassle at all. You can do this by simply using the iPhone's built-in Photos app, which is a quick and easy way to enhance your memories. Here we have mentioned a step-by-step guide to help you create stunning videos in just a few minutes. So, let's figure out what these are:
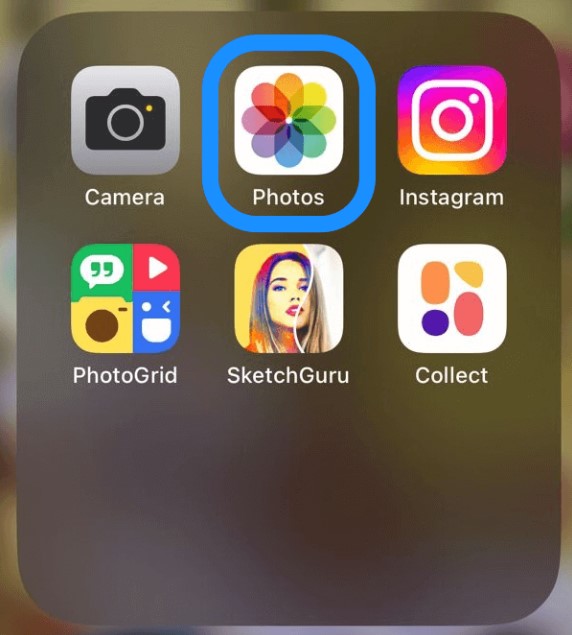
Step 1: Navigate to the Photos app and click on it.
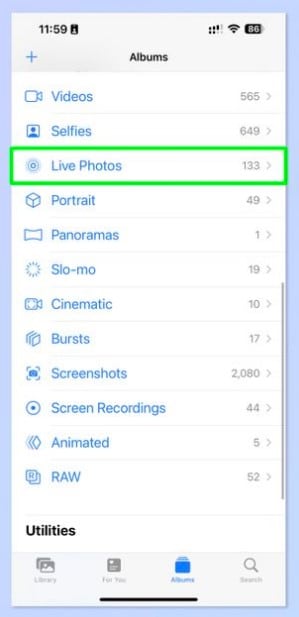
Step 2: Once you click on the icon, tap on the Albums option at the bottom of the screen. Then scroll down and select the Live Photos option. Now, you will see all your live photos organized for easy access.
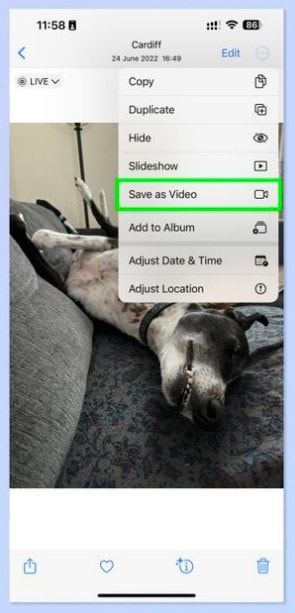
Step 3: Then simply browse through your live photos and tap on the one you would like to convert into a video. Once selected, the photo will open in full view.

Then click on the three dots symbol that appears at the top right side of the page to proceed further.
Step 4: After that, you will get various options. Among these options, click on the Save as Video option to save the live photo in the video. Here, your iPhone will process the live photo and convert it into a video format. It usually takes just a few seconds to complete the process.
Once the conversion is done, you can find your new video alongside your other photos and can also get into the video albums easily.
Moreover, if you wish to share your newly created video, then tap on it to open it and hit the share icon again. You can send it via various platforms, such as Instagram, Facebook, or messaging apps, effortlessly.
This is not enough yet. If you want to make any adjustments to your video, such as trimming or adding effects, simply click on the video and select the Edit option in the top right corner. This feature helps you to enhance your video before sharing it.
Hope you really enjoyed such a simple yet effective step-by-step guide and find it useful!
Part 3: How to Create a Single Video from Multiple Live Photos on Mac
Well, in the above section, we came to know how to turn live photos to videos. But if you have multiple live photos and are thinking of creating a single video using them, you might be wondering which tool is the perfect fit for you. Well, we have done your job and introduced a tool known as Wondershare Filmora. This tool comes in handy and provides ease while performing tasks. With this tool, you can create a single video from multiple live photos in just a few clicks. Sounds amazing, right?
Key Features:
- Doesn't compromise the video quality and provides professional videos.
- Offers a vast range of advanced features for video as well as audio editing to make your content stand out.
- Support a range of import and export format options. So, you don't have to worry if you wish to edit a video in a different format.
- Its AI-driven features make your workflow smooth and effortless.
Well, this is not enough yet. We have not only introduced a tool but also shared its step-by-step guide. Knowing this, you will get to know how it actually works.
- Superb video stabilization with low distortion.
- Vast video/audio effects and creative assets.
- Powerful AI for effortless content creation.
- Intuitive, professional yet beginner-friendly.
- Works on Mac, Windows, iOS, and Android.

Moreover, we are sharing some other features to make your video more visually appealing. So, let's figure out what these steps are:
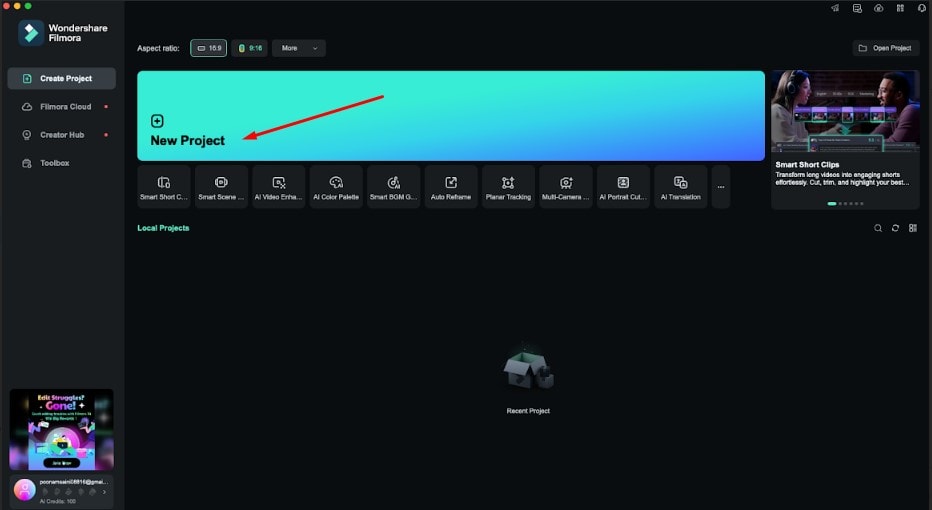
Step 1: Download Wondershare Filmora's latest version on your Mac. Then launch and open, and tap on the New Project option.
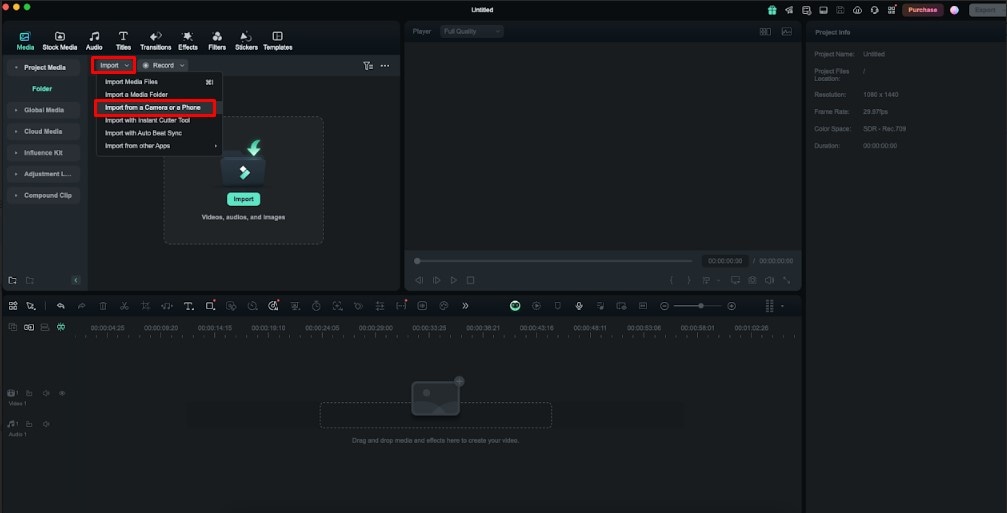
Step 2: Click on the Import option and select the option Import from a Camera or a Phone.
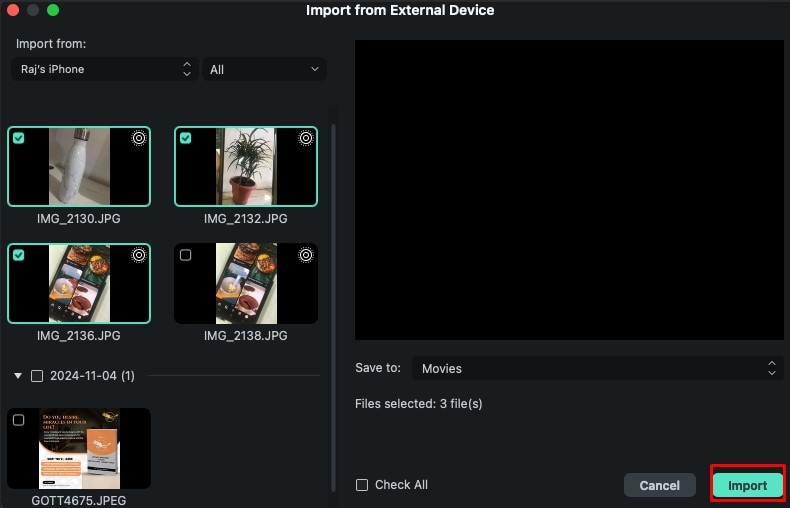
Step 3: Here, select the live photos and click on the Import option again.
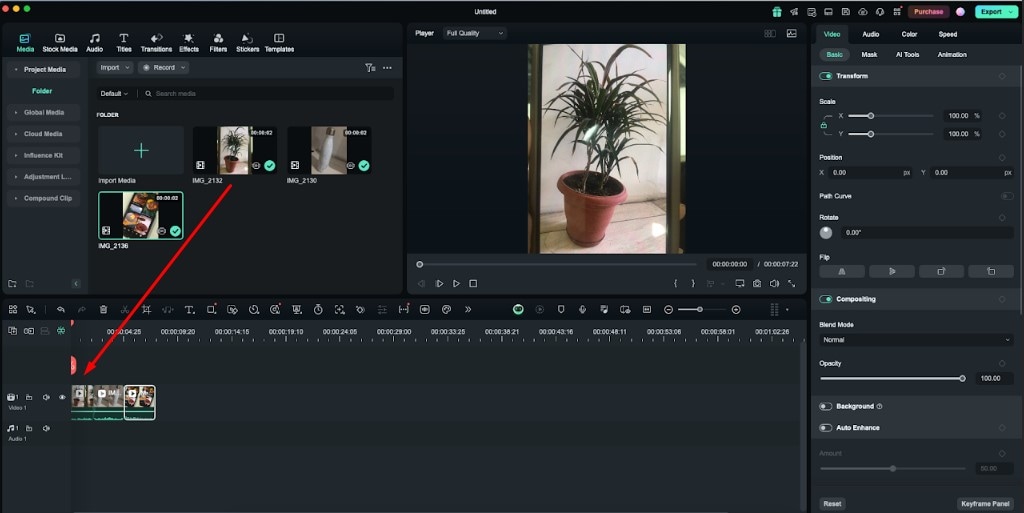
Step 4: Now, you will get your live photos into videos in the project media area. Drag and drop these videos in the timeline.
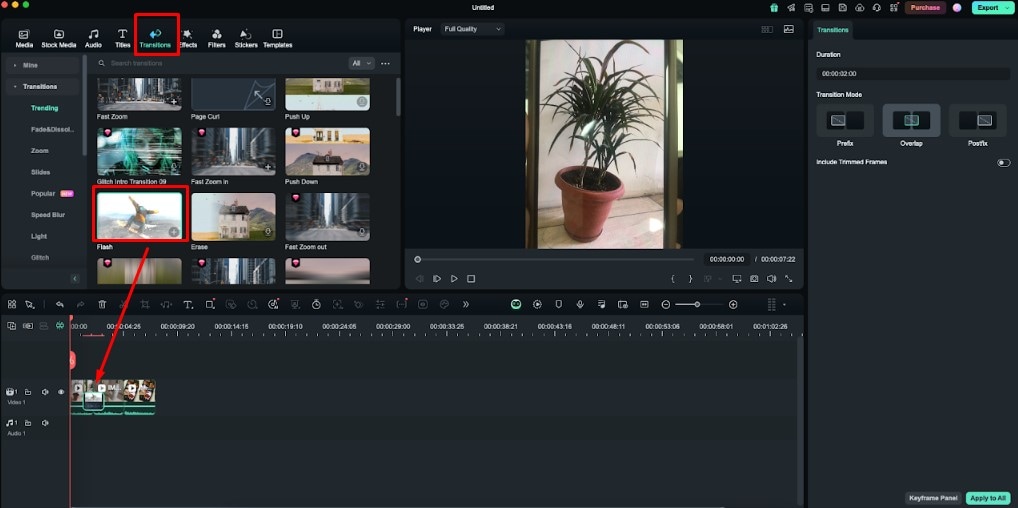
Step 5: To give your video a smoother effect, you can add transitions. To do this, navigate to the Transitions option, select the transition of your choice, and place it between the first two videos.
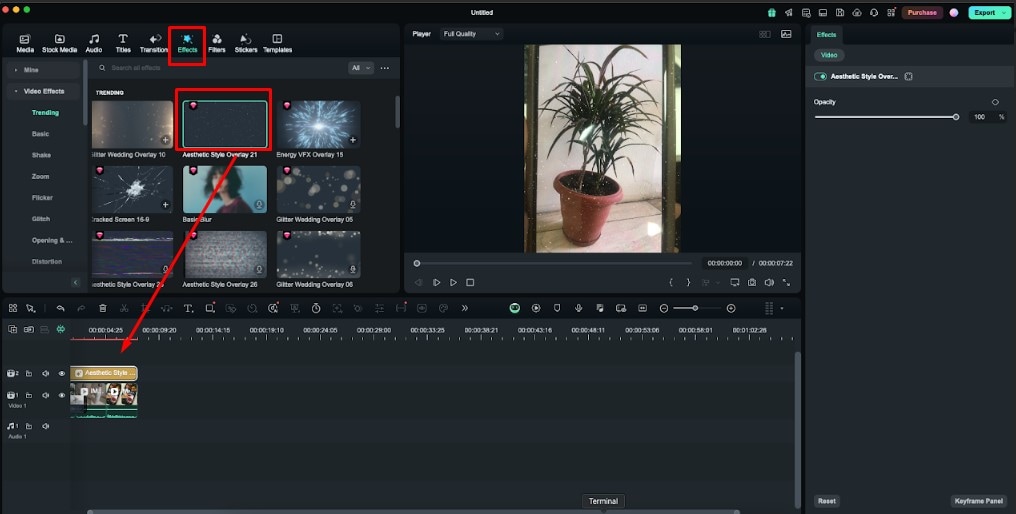
Step 6: To add an effect, click on the Effects option and select the one you like. Then place it in the timeline and stretch it to the length you prefer.
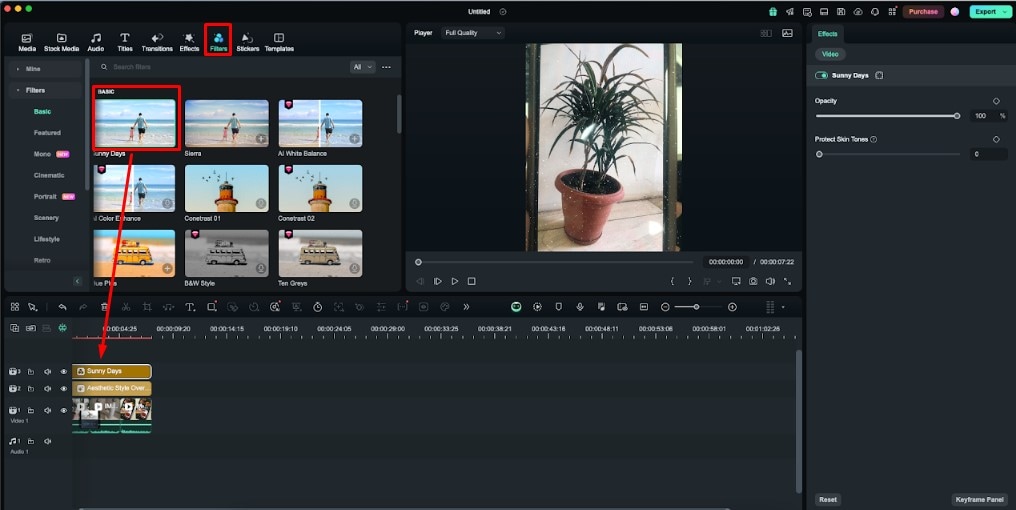
Step 7: If you want to add a filter, navigate to the Filters option, select according to your need, and drop it in the timeline.
Step 8: To make your video more engaging, you can add music to it. To do so, go to the Audio option, then scroll down and select the Music option. Here you can select the music of your choice.
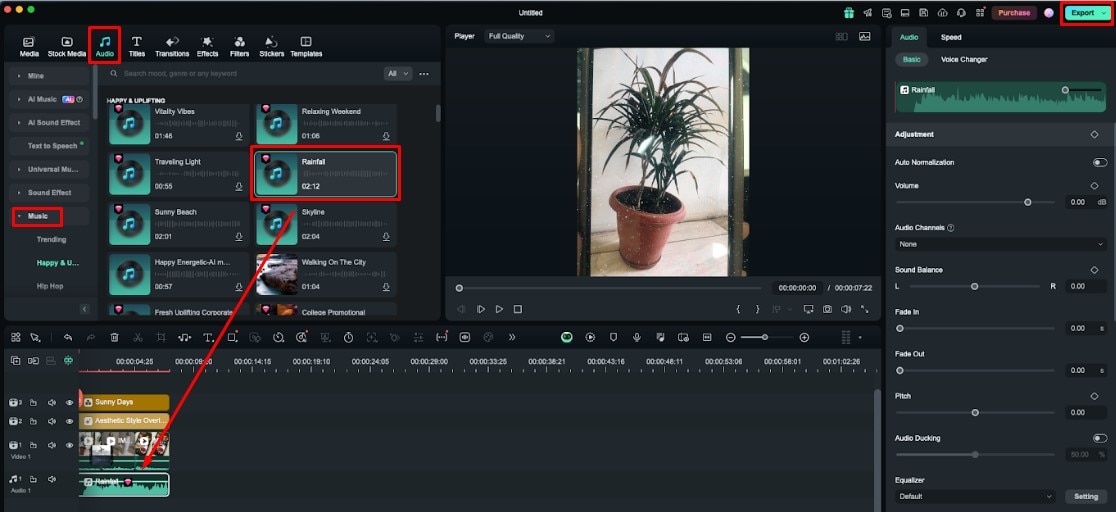
Once you are done with your editing, click on the Export option that appears at the top right corner of the page.
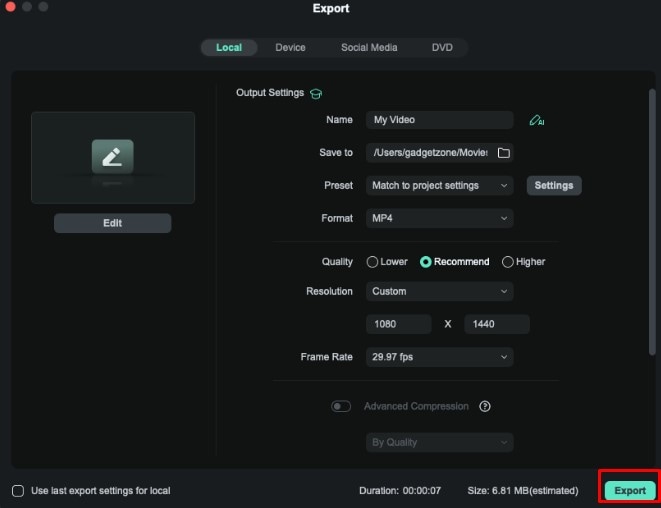
Step 9: Now, a pop-up window will appear. Here you can change the format, resolution, frame rate, and quality of your video. To finalize the result, click on the Export option once again, and you will get an amazing single video content.
However, you can directly share your video on social media platforms such as YouTube, Vimeo, and TikTok effortlessly.
Hope, you really loved this simple yet effective step-by-step guide and found it useful!
Conclusion
So, transforming live photos into videos is a fun and easy way to enhance your memories. Live photos capture moments with motion and sound and uniquely provide them, whereas regular photos are static snapshots. With the help of this article, we provided you with a straightforward method to turn a live photo into a video with sound using your iPhone's Photos app. However, if you wish to create a single video from multiple live photos on Mac, then Wondershare Filmora is the perfect option for you.
This tool offers you advanced editing features that work for you to get a professional video. So, without any second thought, visit its official website, and you will love to explore everything about it!


 100% Security Verified | No Subscription Required | No Malware

