100% Security Verified | No Subscription Required | No Malware


 ChatGPT
 Perplexity
 Gemini
 Claude
 Grok
Grok
Shaky videos can ruin a great shot. But don't worry—you can fix them! This guide will show you how to stabilize video in iMovie, and provide a quick fix to turn your jittery clips into smooth, professional-looking videos.
iMovie stabilization is a built-in feature in Apple devices. It reduces camera shake and improves the overall quality of footage. With just a few clicks, you can enhance your videos and make them more watchable.
But if iMovie doesn't give you the desired results, we will also introduce an alternative that stabilizes video without cropping and offers more control.
In this article
Part 1. Why You Need iMovie Stabilization?
Shaky videos happen all the time. Even if you try to hold your camera steady, small movements can make your footage look unstable. Here are some common reasons why videos turn out shaky:
- Handheld recording without a stabilizer: Holding your phone or camera in your hands can cause small shakes, especially if you're filming for a long time.
- Walking or running while filming: Moving while recording makes your video bumpy and hard to watch.
- Zooming in too much: The more you zoom, the more even tiny movements get amplified.
- Sudden camera movements: Quick pans, tilts, or accidental shakes can create unwanted motion blur.

How Stabilization Works
Video stabilization uses special algorithms to detect and fix shaky movement. It analyzes the video frame by frame and adjusts each one to create a smoother effect. There are two main types of stabilization:
- Optical Stabilization: Found in some cameras and smartphones, this feature uses hardware (like tiny motors or lens shifts) to reduce shake while recording.
- Digital Stabilization: This method is software-based, meaning it adjusts the video after recording. It works by cropping the shaky edges and aligning the frames to create a more stable result.
With iMovie's stabilization, it makes it easy to fix shaky videos. It analyzes motion, reduces unwanted movements, and makes your footage look smoother.
Part 2. How to Stabilize Video in iMovie on iPhone & iPad
Unlike on Mac, iMovie on iPhone and iPad does not have a built-in iMovie stabilization feature. But don't worry! You can still fix shaky videos using other tools and workarounds. Here's how:
Method 1: Use iPhone's Built-in Stabilization (Before Recording)
If you're using an iPhone 13 Pro or later, Apple provides built-in video stabilization while recording. Here's how to use it:
Step 1. Open the Camera app on your iPhone.
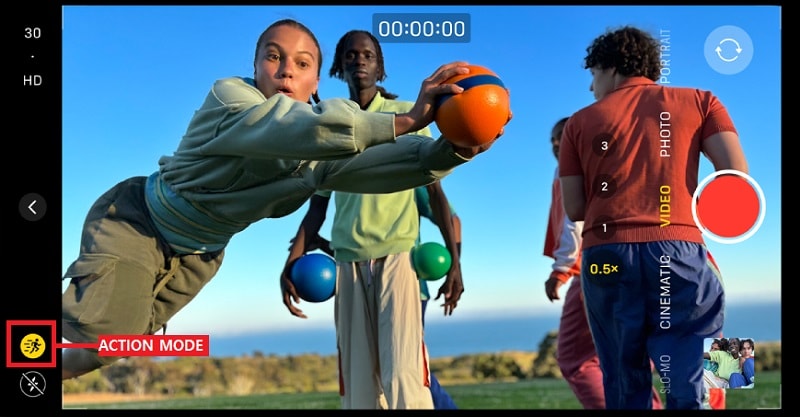
Step 2. Switch to Video mode. If available, turn on Action Mode (for ultra-smooth footage).
Step 3. Hold your phone steady and start recording.
If you're using an older iPhone, try recording in 60 FPS or higher resolution to reduce shakiness before editing.

Method 2: Use iMovie on iPhone/iPad to Reduce Shakiness (Alternative Fixes)
Since iMovie on iPhone/iPad doesn't have stabilization, you can use slow motion or cropping to make the video appear steadier.
Option 1: Slow Down the Video for a Smoother Effect
Step 1. Open iMovie on your iPhone or iPad. Tap Create Project > Movie.
Step 2. Import the shaky video from your gallery.
Step 3. Tap the Speed button (the speedometer icon). Then, drag the slider left to slow down the video slightly.

Step 4. Tap Done and export your video.
Option 2: Crop and Adjust to Minimize Shakiness
Step 1. Open iMovie and import your video.
Step 2. Tap on the video clip in the timeline and select the Zoom button (the magnifying glass icon).
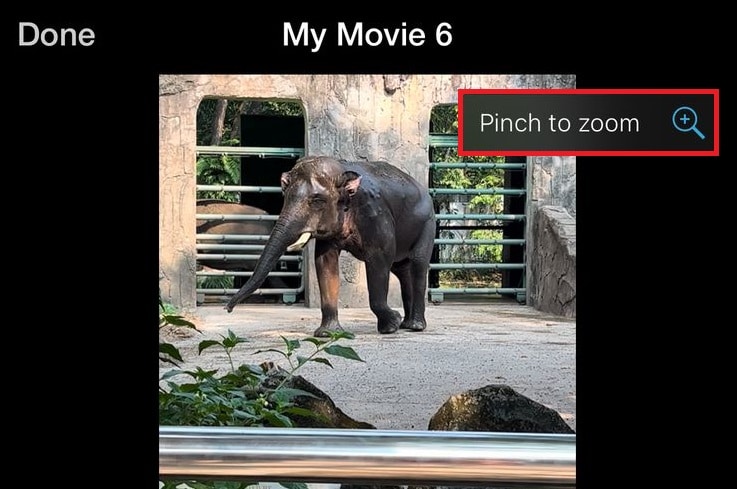
Step 3. Pinch to zoom in slightly, which helps reduce the visible shakiness.
Step 4. Tap Done and export the video.
Part 3. How to Stabilize Video in iMovie on Mac
Although iMovie on iPhone or iPad does not have built-in stabilization, iMovie on Mac has a built-in stabilization tool that automatically reduces camera shake and makes your video smoother. Here's how to stabilize video in iMovie on Mac.
Step 1. Open iMovie on your Mac. Then, click on Create New and select Movie.
Step 2. Click File > Import Media. Select the video you want to stabilize and click Import Selected. After that, drag the video to the timeline.
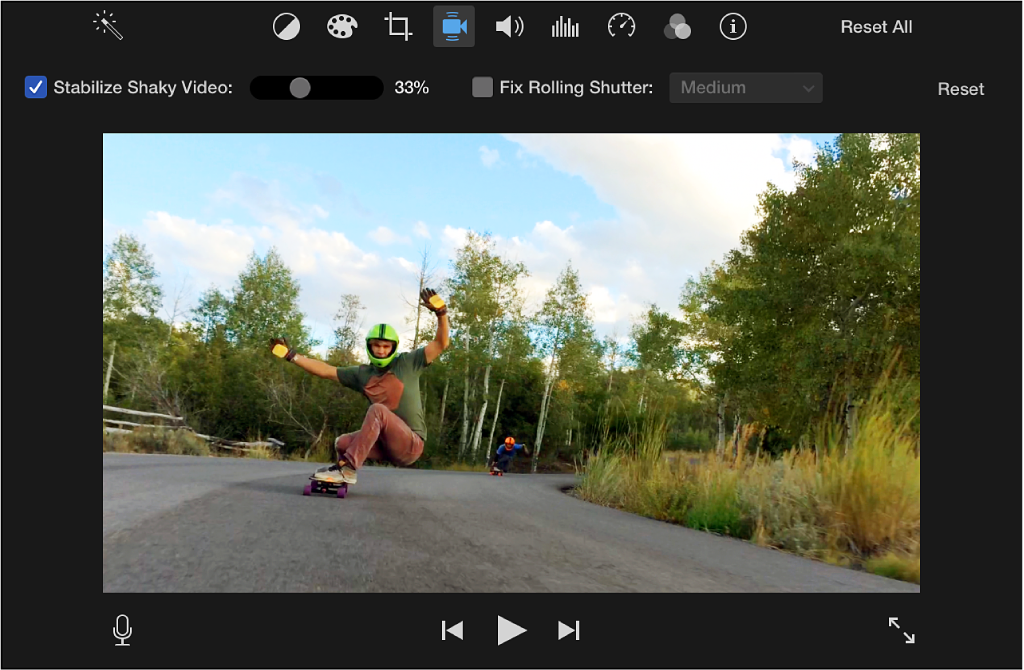
Step 3. Click on your video clip in the timeline to select it. Above the preview window, click the Stabilization button (it looks like a camera shaking). Check the box for “Stabilize Shaky Video” and adjust the stabilization strength using the slider.
Step 4. Play the video in the preview window. If the stabilization makes the video look unnatural or too zoomed in, reduce the stabilization strength. If the video still looks shaky, try re-applying stabilization at a different strength.

Step 5. Once you're happy with the result, click File > Share > File…. Choose your preferred resolution and quality settings. Click Next, then select where to save your video. Click Save and wait for iMovie to export your smooth video.
Part 4. Smarter Alternatives to iMovie Stabilization
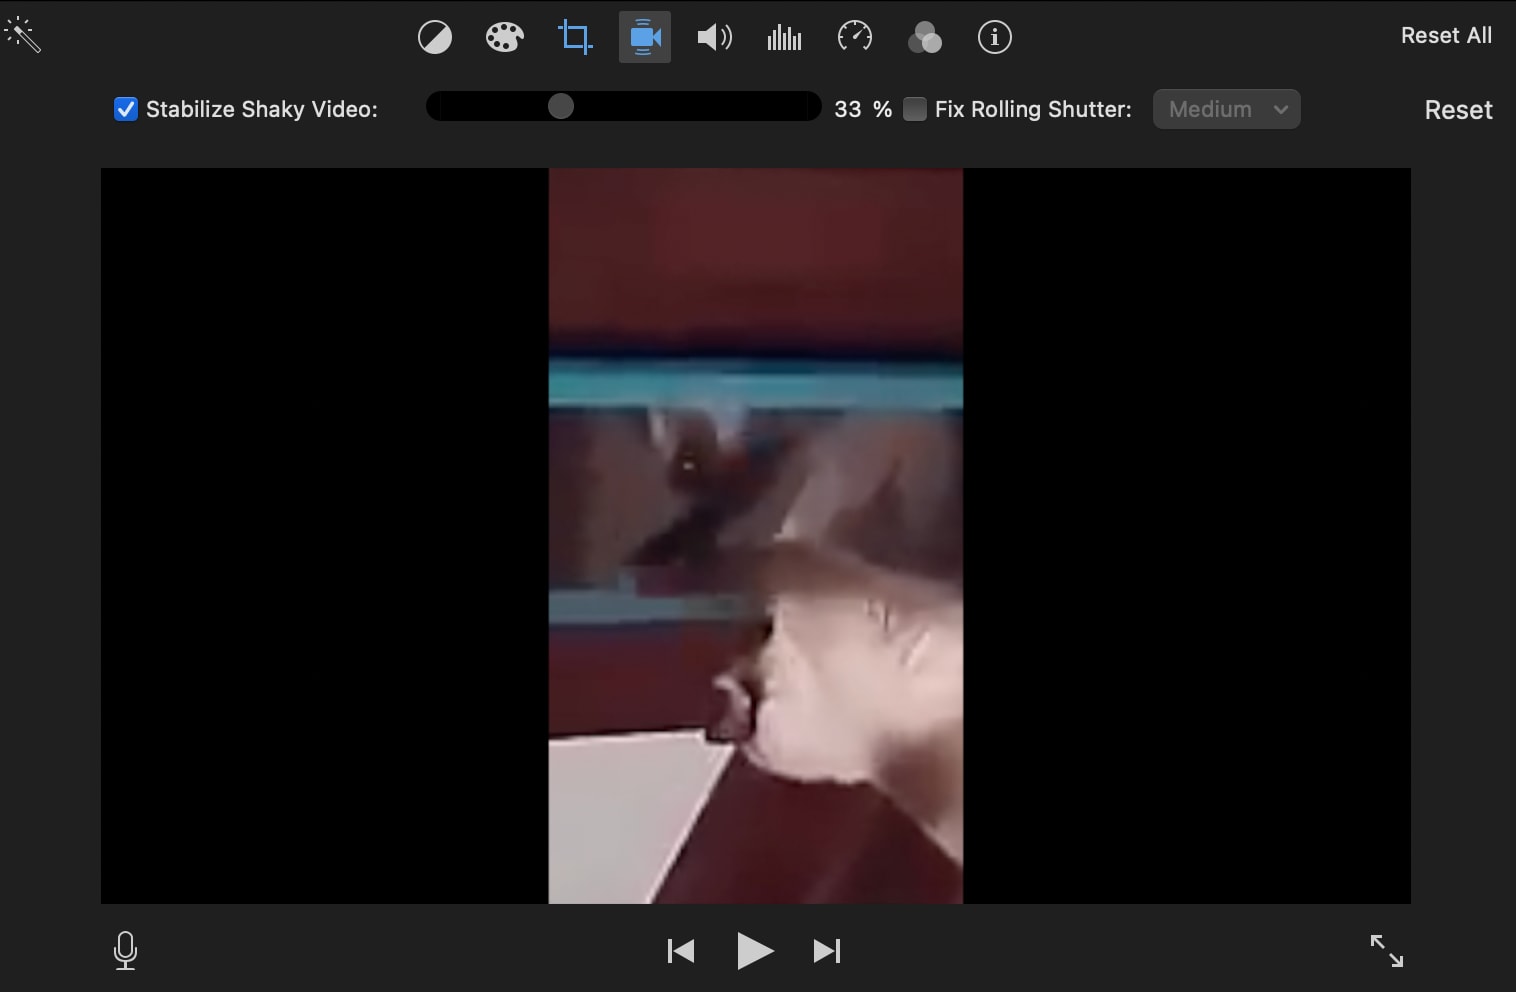
While iMovie's stabilization can improve shaky videos, it has some limitations. It crops your video to reduce shakes and offers limited control over stabilization strength. If you want a smarter, AI-powered solution, Wondershare Filmora is a better choice.
Filmora provides:
- AI-powered stabilization that smooths out video without heavy cropping.
- More control over stabilization intensity.
- Works on both Mac & Windows—no need to be locked into Apple software.
- Supports AI Interpolation for a smoother slow motion video
To give you a better comparison, you can check the table below.
| Feature | iMovie | Filmora |
| Auto-Stabilization | Yes, but limited control | Yes, AI-powered for smoother results |
| Compatibility | Mac only (No iPhone/iPad or Windows) | Works on Mac and Windows |
| Quality | Crops video to reduce shakes | Minimal cropping, keeps video quality high |
| Extra Features | Basic stabilization only | AI-powered enhancements, motion tracking, noise reduction |
With Filmora, you get AI-powered video stabilization, better video quality, and more advanced editing options across multiple platforms. If iMovie's stabilization doesn't meet your needs, Filmora is the more flexible alternative. Now, let's see how to stabilize shaky videos in Filmora.
How to Stabilize Video with Filmora on Mac or Windows
Step 1. Download and install Wondershare Filmora on your Mac or Windows PC. Open the software and click New Project. Import your video and drag it onto the timeline.
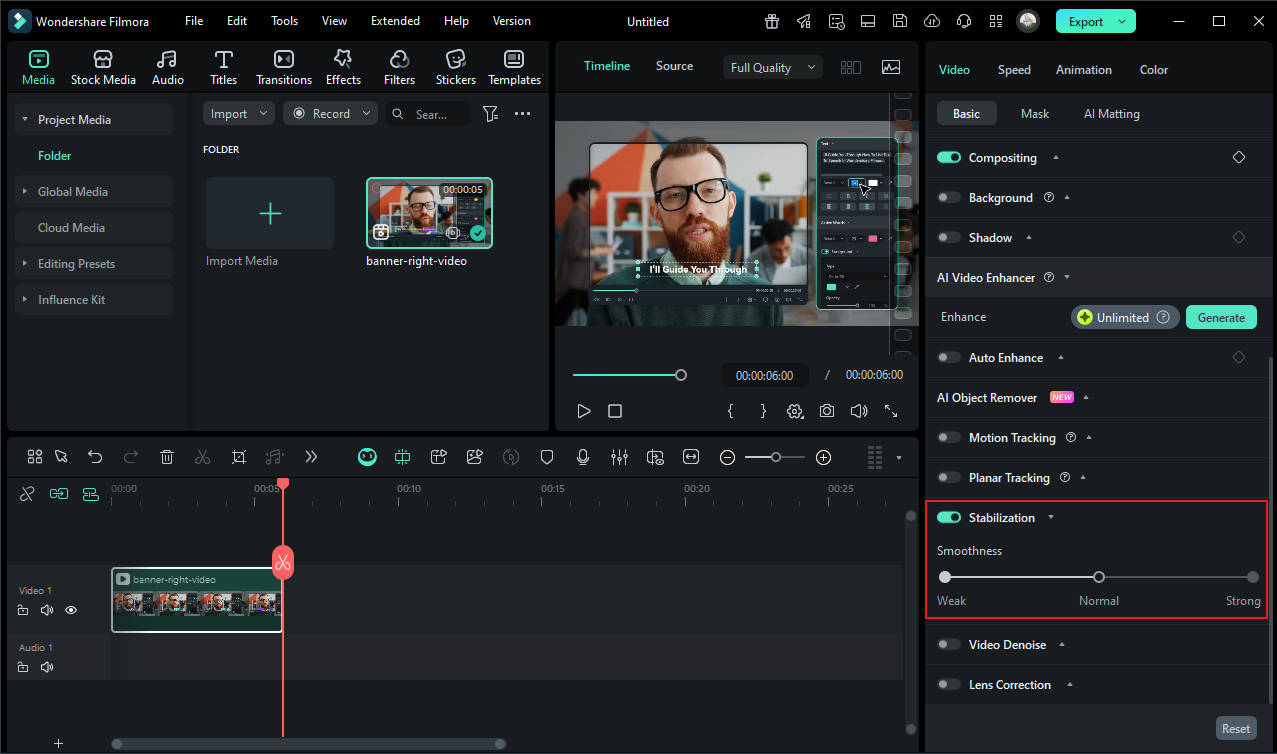
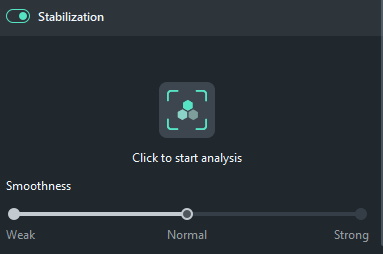
Step 2. Click on the video clip to select it. In the Video panel, go to AI Tools then Stabilization. Check the box for "Stabilize", and Filmora will start analyzing your video.
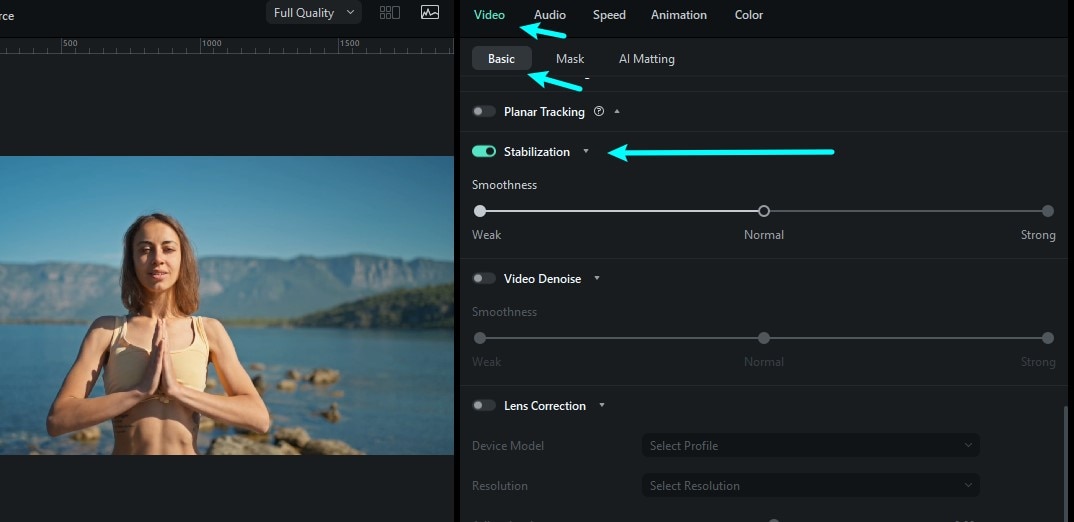
Step 3. Once Filmora analyzes the video, use the slider to adjust stabilization strength. Play the preview to see how smooth the video looks. If needed, tweak the settings with other Filmora's features until you get the best result.
Step 4. Click Export to save your stabilized video. Choose your resolution, format, and quality settings. Click Save, and your smooth, professional video is ready.
Check the video tutorial below to get more detailed information!


You can also stabilize videos on your mobile device! Filmora offers easy-to-follow instructions on how to stabilize videos directly on your iPhone, ensuring smooth footage no matter where you are.
Part 5. Pro Tips to Prevent Shaky Videos Before Editing
While iMovie and Filmora can help fix shaky footage, the best way to get smooth videos is to prevent shakiness while recording. Here are some pro tips to capture steady footage from the start.
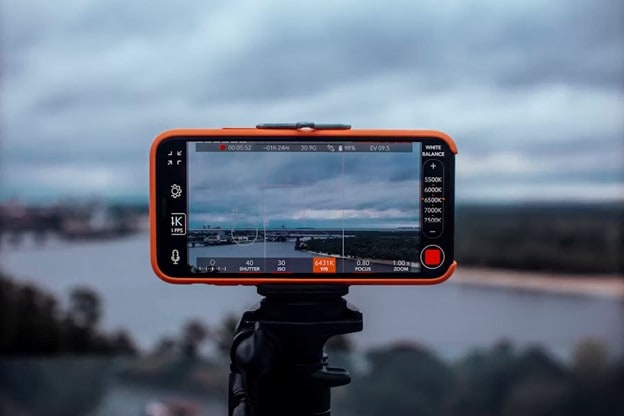
1. Use a Tripod or Gimbal for Steady Shots
Holding a camera by hand increases the chances of shakes, especially during long recordings or movement shots.
- Tripods provide a stable base for still shots.
- Gimbals allow for smooth movement, perfect for walking or panning shots.
- If you don't have a stabilizer, hold the camera with both hands and tuck your elbows in to your body for extra support.
Some budget-friendly gimbals work great with iPhones and Android phones—worth the investment for content creators!
2. Enable iPhone's Built-in Stabilization (Cinematic Mode & Action Mode)
If you're using an iPhone 13 or later, Apple has built-in stabilization features to help you shoot smooth videos without extra equipment.
- Cinematic Mode: Automatically adjusts focus and stabilizes video for a professional, movie-like look.
- Action Mode (for iPhone 13 Pro and later): Designed for high-motion filming—perfect for sports, running, or action shots. This mode works best in bright lighting. Avoid using it in low-light conditions for the best results.
3. Record at Higher Frame Rates for Smoother Playback
Recording at a higher frame rate (fps) captures more frames per second, which reduces motion blur and shakiness.
- Standard Frame Rate: 30fps (good for everyday videos)
- Better for Stability: 60fps (smoother motion, ideal for vlogs & travel videos)
- Ultra Smooth Action Shots: 120fps or 240fps (great for sports & fast movements)
If you plan to edit and slow down footage later, recording at 120fps or 240fps will give you ultra-smooth slow-motion results.
4. Apply Slow Motion Creatively to Reduce Perceived Shakiness
Even if your video is slightly shaky, slowing it down can make movements look smoother and more cinematic.
- Use iMovie or Filmora to slow down key moments and reduce visible shakes.
- Record at 120fps or higher, then slow it down for a dramatic, professional effect.
- Works great for sports, action shots, or scenic landscape videos.
Instead of stabilizing every shaky clip, sometimes slowing it down can make it look intentional and stylish.
Conclusion
Shaky videos can ruin great footage, but iMovie's stabilization helps smooth things out—at least on Mac. While it works, it crops your video and lacks fine-tuning options. iMovie on iPhone and iPad doesn't even support stabilization.
If iMovie isn't enough, Filmora is the smarter choice for professional-looking, shake-free videos. Filmora offers AI-powered stabilization with minimal cropping and more control. Try it today and take your videos to the next level!