

 ChatGPT
 Perplexity
 Gemini
 Claude
 Grok
Grok
Have you ever watched a video and wondered how they managed to show multiple clips at once, making everything way more dynamic? The key to this secret is a technique called split-screen video editing. With this, anyone can make a video that displays multiple clips.
It is easy to do split-screen video editing, especially with iMovie. The split screen feature in iMovie lets you divide the screen into two or more sections, each displaying different video clips. This technique is particularly useful for interviews, comparison videos, reaction videos, and more.
Our guide below will walk you through the process of using iMovie's split-screen feature. We'll go through it step by step, so by the end, you can add this nifty trick to your video editing skills.
In this article
Part 1. The Split Screen Effects in iMovie
If you are an Apple device user, you can just use iMovie to create and edit split-screen videos. It's pretty intuitive and easy to use for beginners. However, the split screen effect in iMovie allows for only two clips to be displayed side by side (either horizontally or vertically).
Creating multiple split screen in iMovie has many benefits. First, you can tell a more detailed story by showing different events happening at the same time. For example, you can show a conversation between two people in different places.

Moreover, split-screen allows you to display multiple viewpoints or angles simultaneously, which can help hold your viewers' attention better than a single clip. Here are some examples of its usage:
Films: Directors use split screens to show events happening at the same time in different places. Take an example of the Kill Bill film. There's a scene where one side of the screen shows a woman sleeping, while the other side shows an assassin preparing a lethal injection. Quentin Tarantino uses this technique to build suspense and keep viewers on edge.
Interviews: In interview videos, split screens can show both the interviewer and the interviewee at the same time. It helps the viewers see both participants' reactions and interactions more clearly.
Comparison Videos: For product reviews or tutorials, split screens are great for showing two products or steps side by side, making it easy to compare them.
In the next sections, you will learn how to create split-screen videos using iMovie on various Apple devices.
Part 2. How to Create Split Screen with iMovie on iPhone/iPad
The steps to create split-screen videos using iMovie on your iPhone and iPad are pretty similar. Just follow these steps:
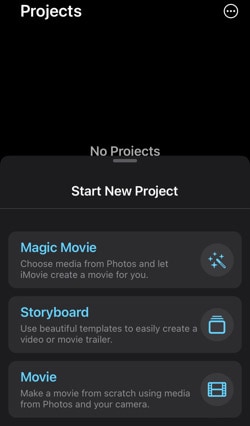
Step1Create a Project in iMovie
Open the iMovie app on your iPhone or iPad, then tap the Movie tab to start a new project and select your main video clip to load it into the project.
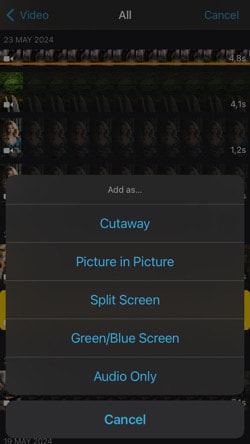
Step2Add a Split-Screen Clip
Tap the "+" button on the left to add another video clip. Choose the video you want to use as the split-screen clip. You'll see several options for inserting the video. Tap the Split Screen option to insert it as a split screen.
Step3Adjust the Split Screen
Now that the split screen is added, you can adjust it. You can zoom in or out of the split-screen picture as needed. Change the split screen display to side-by-side or up-and-down based on your preference.
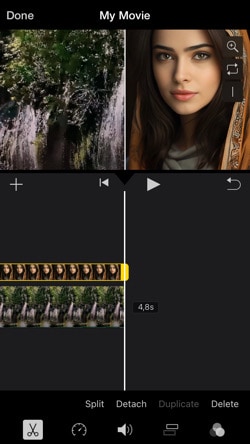
Step4Preview and Save
Preview your split screen effect to see how it looks. If you're happy with the result, tap the Done button to save your project. You can share your project as you like.
Part 3. How to Make Split Screen with iMovie on Mac
Not only you can make a split-screen video on iMovie for iPhone or iPad, but you can also do it on your Mac. iMovie on Mac offers a larger workspace and more editing capabilities, making it easier to fine-tune your split-screen videos.
You can follow these simple steps to create split-screen videos on iMovie on Mac:
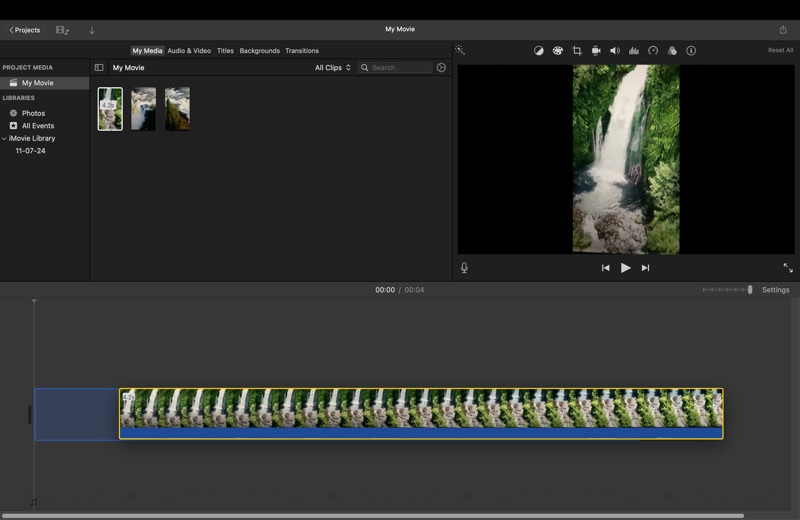
Step1Launch iMovie on your Mac
Open iMovie and start a new project or access an existing one. Import the video clips you want to use in your split screen effect into your iMovie library.
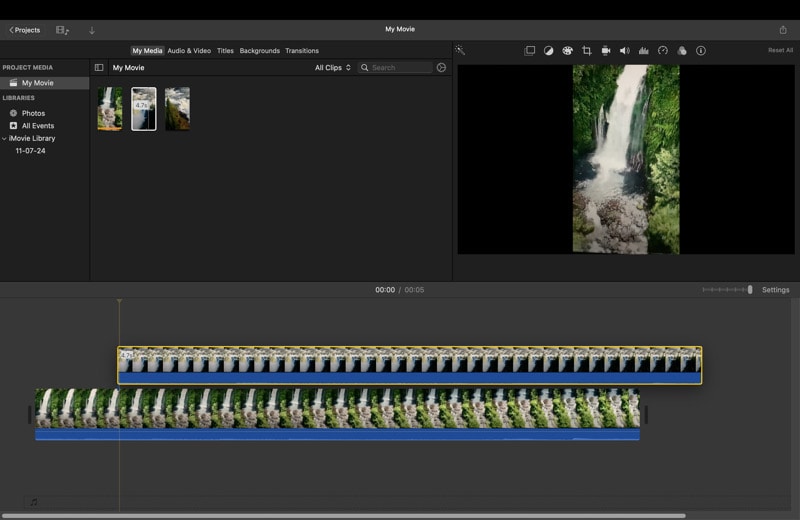
Step2Add Clips to the Timeline
Drag the first clip you want to use onto the timeline. Position the playhead at the point where you want the split screen effect to begin.
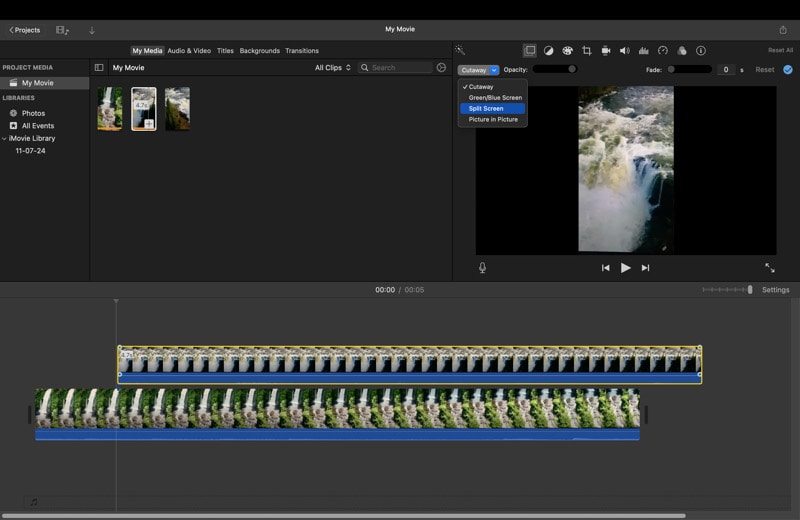
Step3Overlay the Second Clip
Drag the second clip above the first clip in the timeline. This will place the second clip on the upper video track.
Step4Apply the Split Screen Effect
Select the overlay clip (the one on the upper track). In the video overlay settings (above the preview window), click on the drop-down menu and choose Split Screen. The default split screen will divide the screen into two halves.
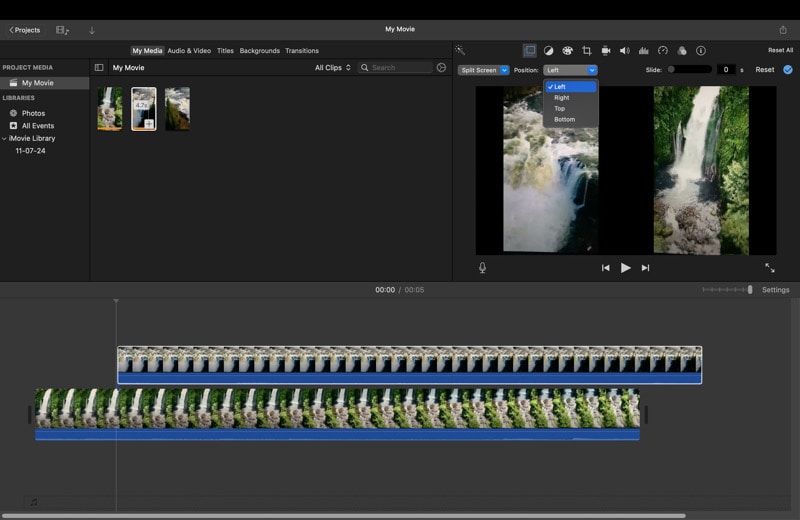
Step5Adjust Split Screen Settings
You can adjust the orientation of the split screen by choosing between Left & Right or Top & Bottom. Use the slider to adjust the position of the split screen divider. You can also swap the positions of the clips if needed.
Step6Fine-Tune the Clips
Resize or reposition the clips within their split screen sections by selecting them and dragging the handles in the preview window. Trim the clips to match the duration you want them to appear on the split screen.
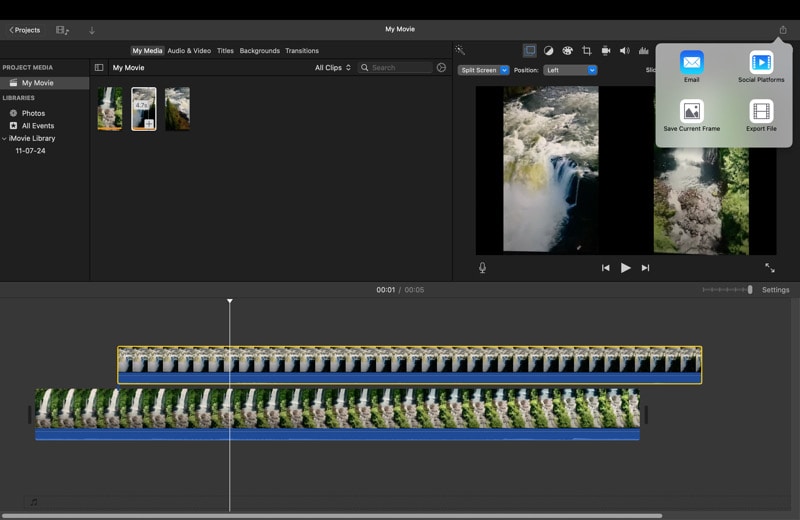
Step7Preview and Export
Preview your split-screen effect by playing the timeline. Make any necessary adjustments to timing, positioning, or transitions. When satisfied, export your project by clicking on File > Share > Export File.
Part 4. Common Issues and Troubleshooting in Using iMovie Split Screen
When using the split-screen effect in iMovie, you might face some common issues. The most common issue is iMovie does not show any response. If iMovie is not responding, it means the program has stopped working or isn't able to execute commands. This often happens when the cache becomes too large. To avoid and fix the issue, you can follow this guide.
Solution 1: Clear Cache and Cookies
Keep your cache size manageable by clearing it periodically. You also need to delete cookies from your browser regularly. Furthermore, run disk scans to remove unwanted files and free up space.
Solution 2: Clear the iMovie Preferences
When opening iMovie, hold the Options and Command key. A pop-up window will appear asking if you want to reset all iMovie preferences. Click "Yes" to reset preferences. This should help iMovie open normally.
Solution 3: Temporary Fix
Open Finder and go to Applications. Find iMovie and right-click on it. Select "Show Package Contents" from the drop-down menu. Click on "MacOS" > "iMovie to Launch." This can temporarily fix the not responding issue.
Another limitation of split screens in iMovie is its inability to create videos with more than two clips displayed at the same time. If you want to create a video with multiple clips displayed in split-screen format, you may need to use more advanced video editing software that supports multi-layered editing capabilities.
Part 5. How to Make Split Screen Effect Using iMovie Alternative
While iMovie is a great tool for basic video editing, it's not as feature-rich or flexible as professional-grade software. If you're experiencing this problem, especially when working on important projects, it might be time to look for an alternative.
One of the best alternatives recommended by experts is Wondershare Filmora. Filmora not only includes all the video editing features found in iMovie but also extends beyond them. It is also known for its interactive and easy-to-use interface, making video editing fun and straightforward.
To create split-screen videos with Filmora, you only need to use its split-screen templates. These templates can feature up to 6 clips simultaneously and offer different styles suitable for various purposes. You can download a free trial version from the official website to test out its features.
- Superb video stabilization with low distortion.
- Vast video/audio effects and creative assets.
- Powerful AI for effortless content creation.
- Intuitive, professional yet beginner-friendly.
- Works on Mac, Windows, iOS, and Android.


How to make a split screen video with Filmora:
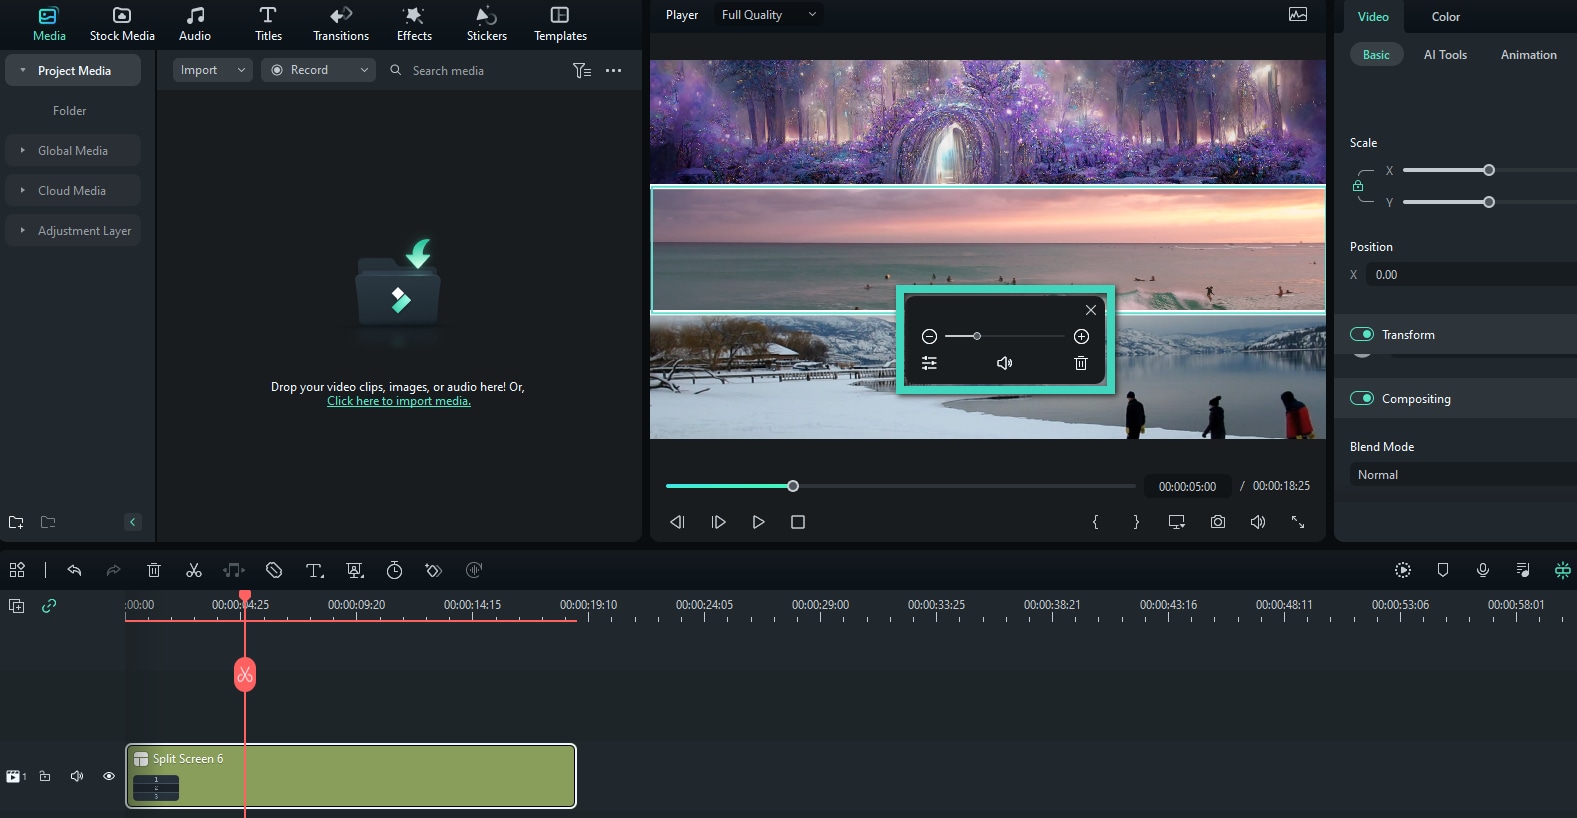
Step1Start a Project in Wondershare Filmora
Open Filmora and start a new project. Import the media files you need for your project.
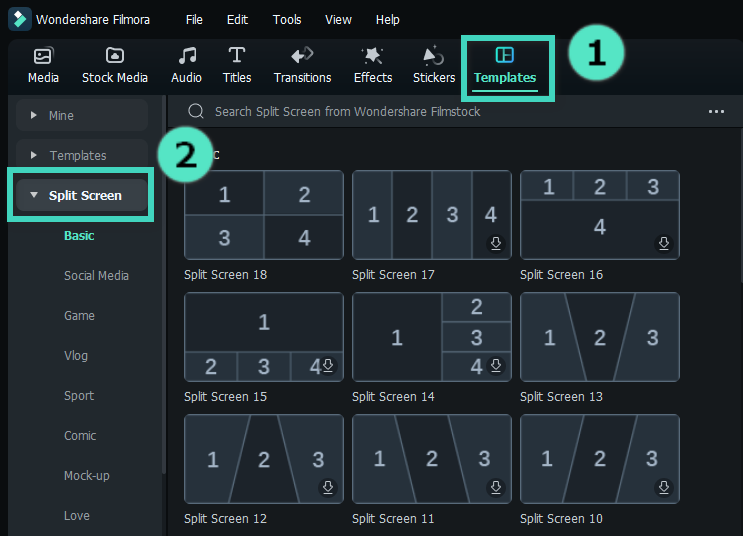
Step2Choose Split Screen Layout
Go to the Split Screen tab in the Media Library. Preview and choose a screen mode. You can place 2, 3, 4, 5, or 6 videos on the same screen using various split-screen layouts.
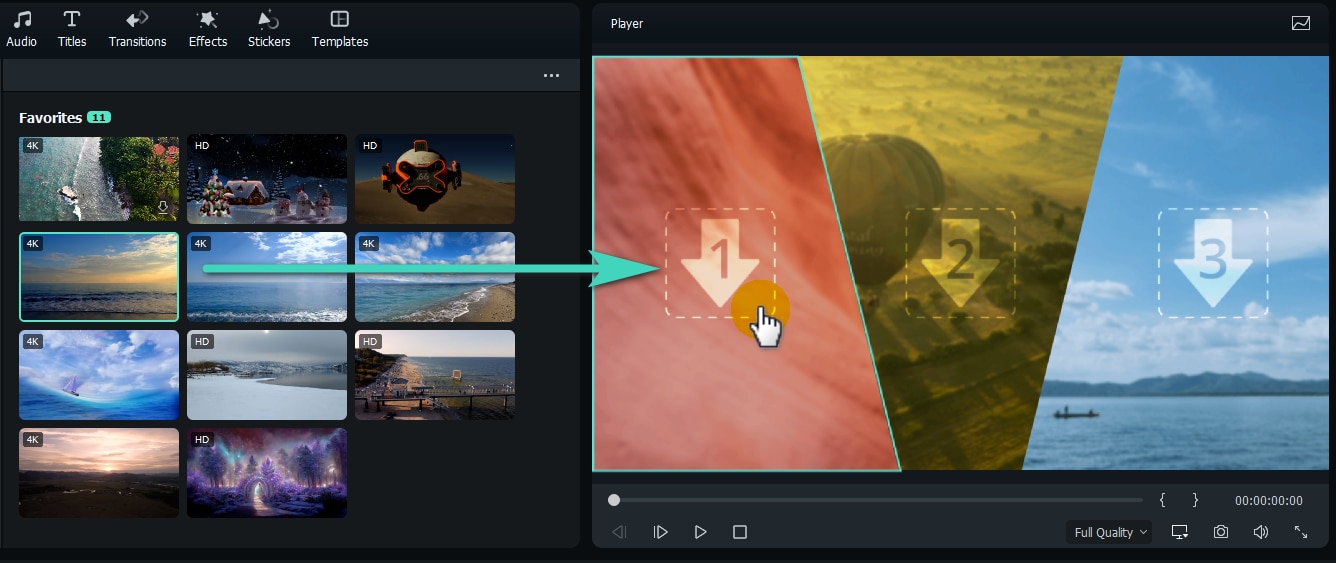
Step3Add and Edit Split Screen Clips
Drag the chosen split-screen layout to the timeline, then double-click the layout to enter the editing panel. Add your video clips from the Media Library to the screen in the Preview window.
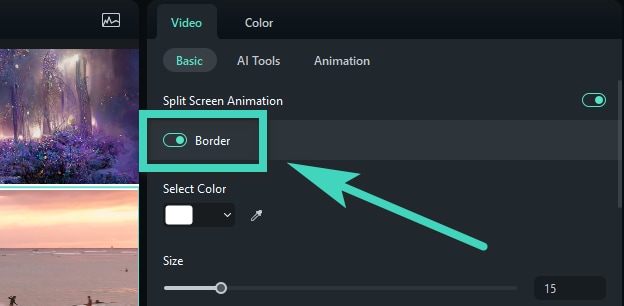
To add borders, you can go to Video > Basic on the right panel. Then, enable Border and adjust its color and thickness.
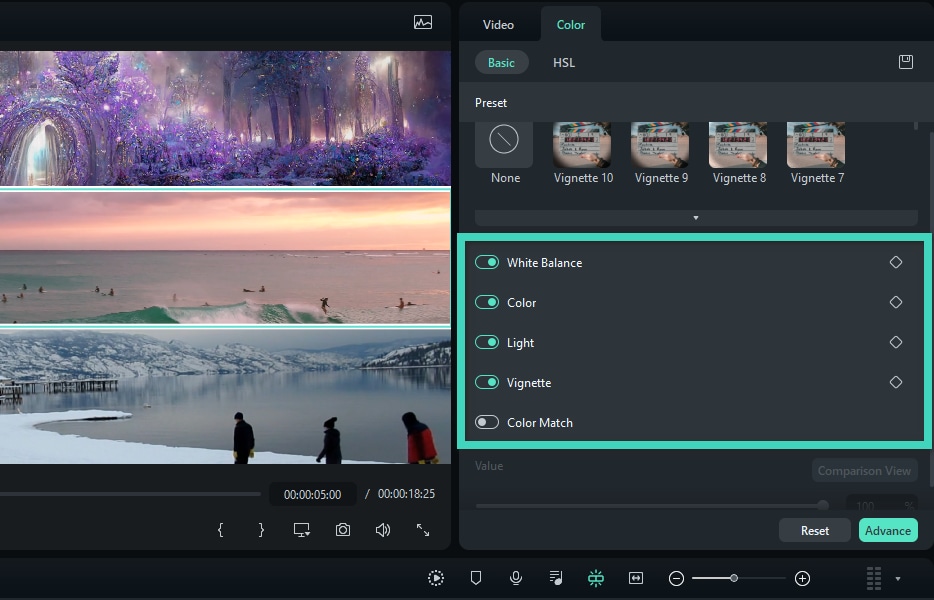
On the same menu, you can enhance your video clip further by applying white balance, auto color, light, vignette, filters, and more.
Step4Add More Advanced Editing
Click the Advanced button for more detailed adjustments. Modify the starting points of each split-screen clip or make further edits to individual clips.
You May Also Like: How to Put 4 Videos in One Frame
Conclusion
Creating split-screen videos can help you engage your viewers with multiple perspectives in a video. One of the ways to make a split screen video is using iMovie. And if you have no clue in how to use it, this guide has demonstrated how to create a stunning two-videos split screen on iMovie.
If you are facing performance issues with iMovie or looking for a better alternative, consider trying Wondershare Filmora. Filmora is easier to use with a simple layout and more features. You can create cool split-screen videos and add different effects easily.
