Key Steps of This Video Tutorial To Follow
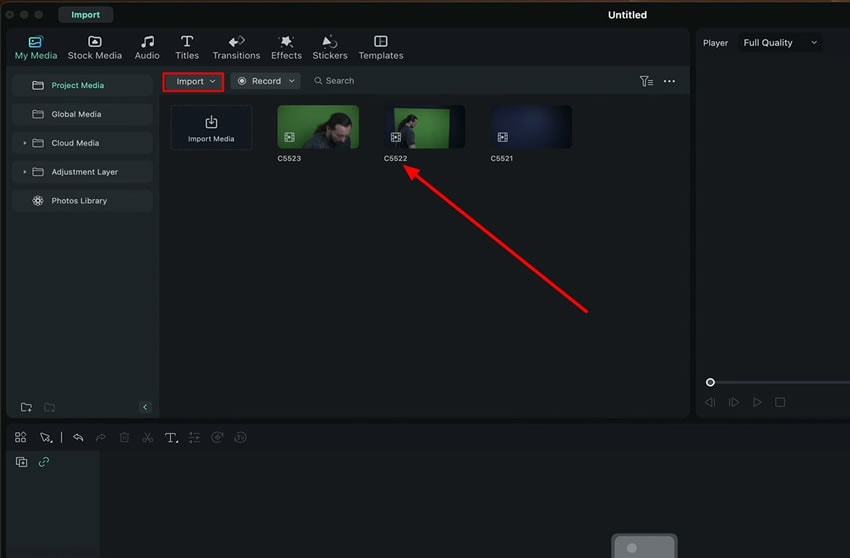
To do this type of editing, shoot three different videos. One includes an empty background video; the second video will be the reaction video and the third will consist of the green screen. Import these videos into Filmora's media panel after entering the new project.
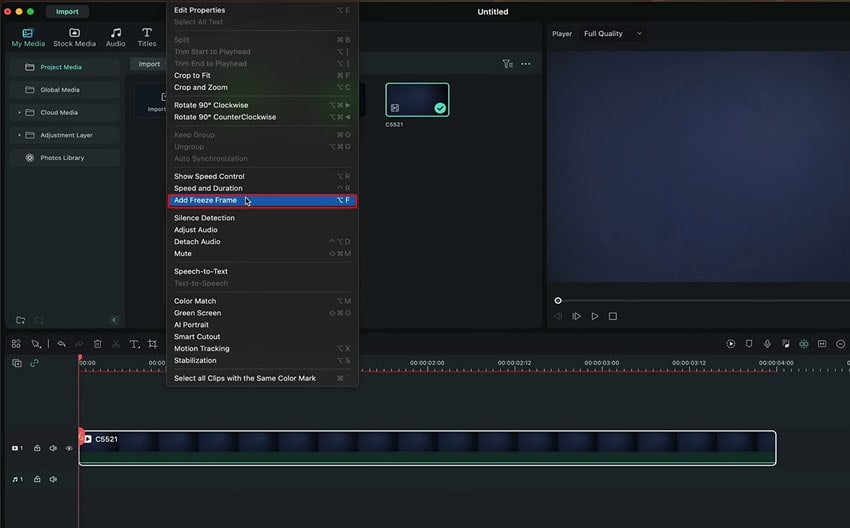
Drag and drop the background on the timeline as the first layer. Select this video and head towards the “Tools” from the main toolbar of Filmora. Select "Tools" and look for the "Add Freeze Frame" option from the dropdown menu. A freeze frame will be added to the background video.
Select the reaction video and place it on the top of the freeze frame on the timeline track. Adjust the duration of both videos to match exactly with each other. Drag the green screen video and drop it above the other two layers and adjust its duration.
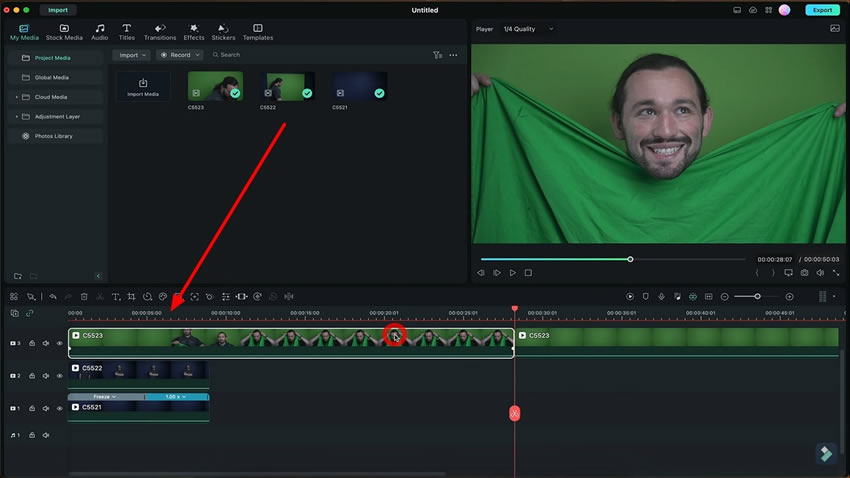
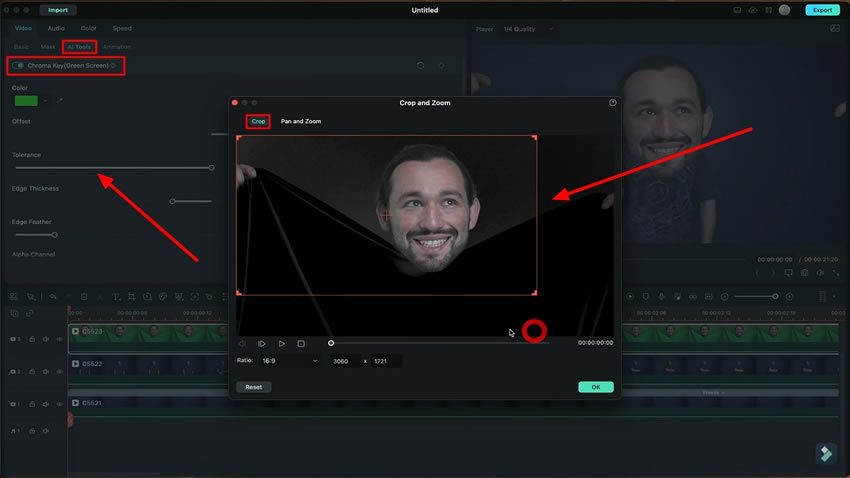
Double-click the video on the top layer, which contains the green screen video. From the newly opened window, select "Video" and lead into the "AI Tools.” Look for the "Chroma Key" option and enable it, after which you'll see that the green screen has disappeared.
To remove the unwanted parts of this video layer, you can access the “Crop” option present on the panel above the timeline. Adjust the dimensions and set the head according to the effect you want to create.
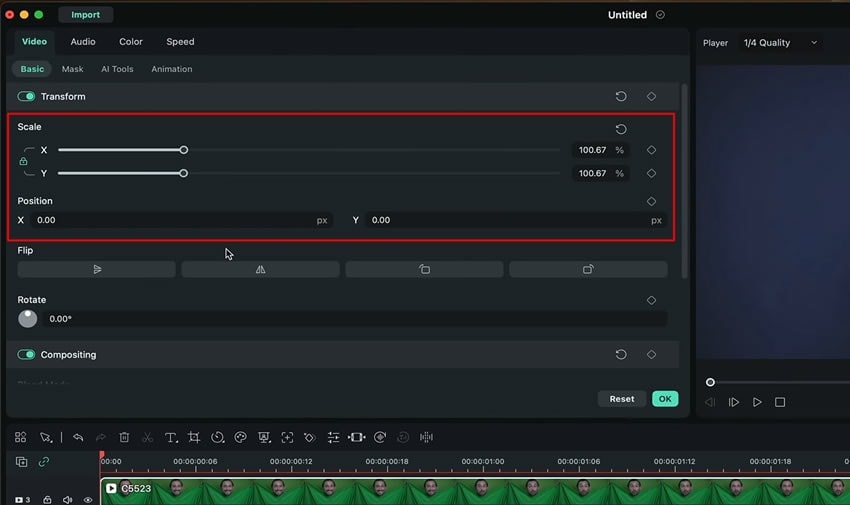
From the "Basic" section in video settings, you can adjust the "Scale" for the size by moving the sliders. Now, set the “Position” of your big head in the required place by changing the "X" and "Y" values. After doing that, go back to the "AI Tools" and make further adjustments if needed by moving the sliders.
As we know, ordinary editing can make the content boring, which will not attract the audience as well. Trying new techniques can help you compete in the world of creativity. In this guide, you have learned to create a big head effect in the videos with Filmora. In this way, you can provide a fun watching experience to the viewers.
Josh's Other Filmora Master Lessons
