Guide On How to Create Xray Effect Video

In this video, you will find out some explicit details on how to create the Xray effect on your videos using the tools presented by Wondershare Filmora.
Key Steps of This Video Tutorial To Follow
To begin with, creating a unique Xray effect video, you need to start your process with a few easy steps. First, you must record a video of an object whose Xray effect you want to make.
You will need a green box on your phone, which you can zoom in at a max. With this, you will need to move your phone up and down on your object to record the clip for the X-ray effect. But remember, your object should be stable to ensure that the green screen effect works properly.

After shooting the video, you can import it to the Filmora library by clicking the "Import" button in the editing tab. Following this, you can place it on the timeline to start with the editing process. You can cut and trim out the unwanted part from your video at the start according to your requirements. After this, double-click on your video to access the respective settings.
From there, you need to go to the "AI Tools" tab, where you can find the "Chroma Key" option. Select this to apply the green screen effect to your video here.

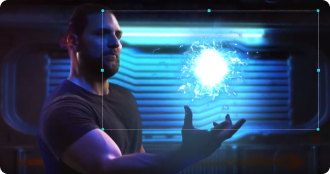
Once you apply the Chroma key, you can clearly see that now you need to add the X-ray image to complete our video. For this, you can download the X-ray image from the internet according to your object. Upon downloading, drag and drop it above the main clip in the timeline.
There you can double-click it to access the respective settings for adjusting the X-ray image and aligning it properly with your object. You can go under the "Basic" tab and change different settings like "Opacity" as per your requirements. You can also access the "Mask" tab and adjust the "X-axis" and "Y-axis" to make it more precise.

After finishing all the necessary settings, you can adjust the X-ray image on the green screen clip. Click on the "Render Preview" to see the final video with the X-ray effect.

Following these simple steps, you can create an X-ray effect video that you can share with your friends. You can also add some creativity to these steps to make your unique type of X-ray videos. The best part of creating videos like this is that you don't need to have a physical green screen when you have Wondershare Filmora.
Josh's Other Filmora Master Lessons