Key Steps of This Video Tutorial To Follow
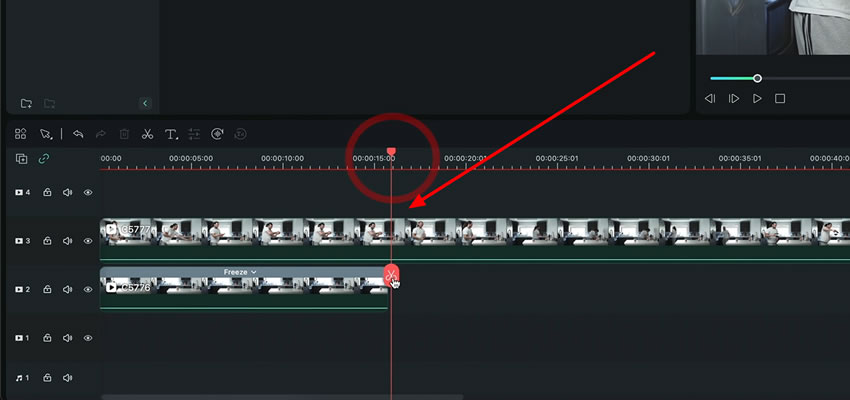
After shooting the video, drag them to the timeline. Place the clear background clip on another track and move towards the main toolbar of Filmora. On selecting the clear background footage, enter the “Tools” tab and look for the “Add Freeze Frame” option from the dropdown list.
As you select the option, a freeze frame will be applied over it, and since it is now a still image, here you can adjust its length.
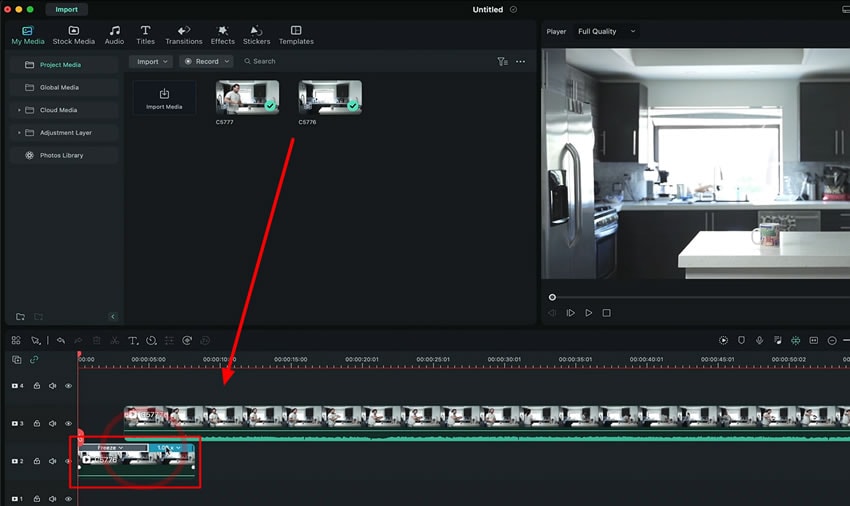
Head towards the primary video clip and trim it at the required place to get the reaction shot and coffee pouring shot. Select the later clip, drag it over the first clip on another track, and place it where you want to mask your action.
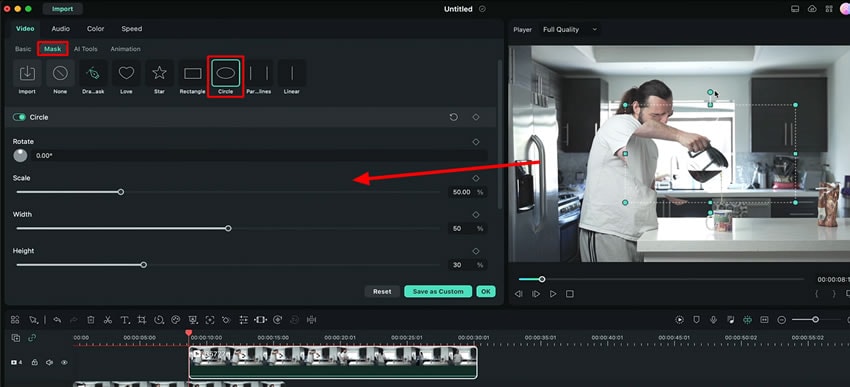
Now move forward and create the mask of the coffee pouring clip and apply it to the first video clip. To do so, double-click the coffee pouring clip and enter the "Mask" section from the settings window. Choose the shape of the mask and adjust its size by placing it over the pour. You can observe your actions in the preview panel.
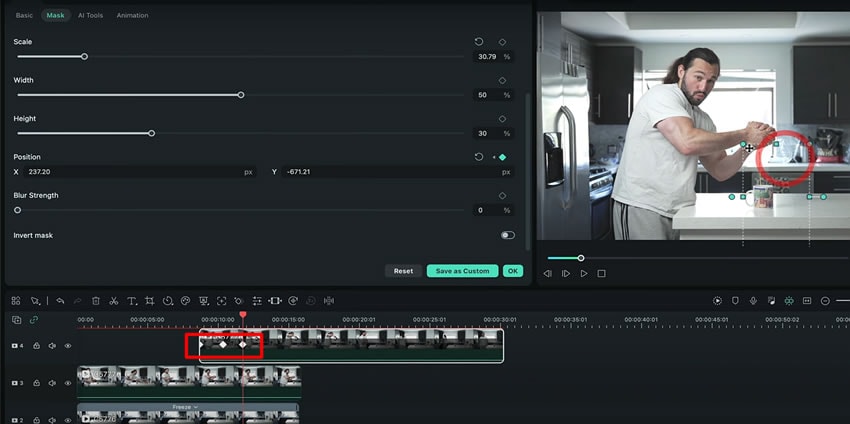
To animate the mask according to the hand movements, you need to add some keyframes. Apply keyframes at the points where you want to move your mask according to your hand movements. As you've applied the mask, you can also adjust the color grading and sound effects to your video to make it look more natural.
Applying animation brings creativity to the videos. In this article, we have learned to add coffee pouring animation by directly squeezing the coffee beans from the hands. This article has explained step by step process of adding this effect to one video clip by creating a mask for another clip.
Josh's Other Filmora Master Lessons
