

 100% Security Verified | No Subscription Required | No Malware

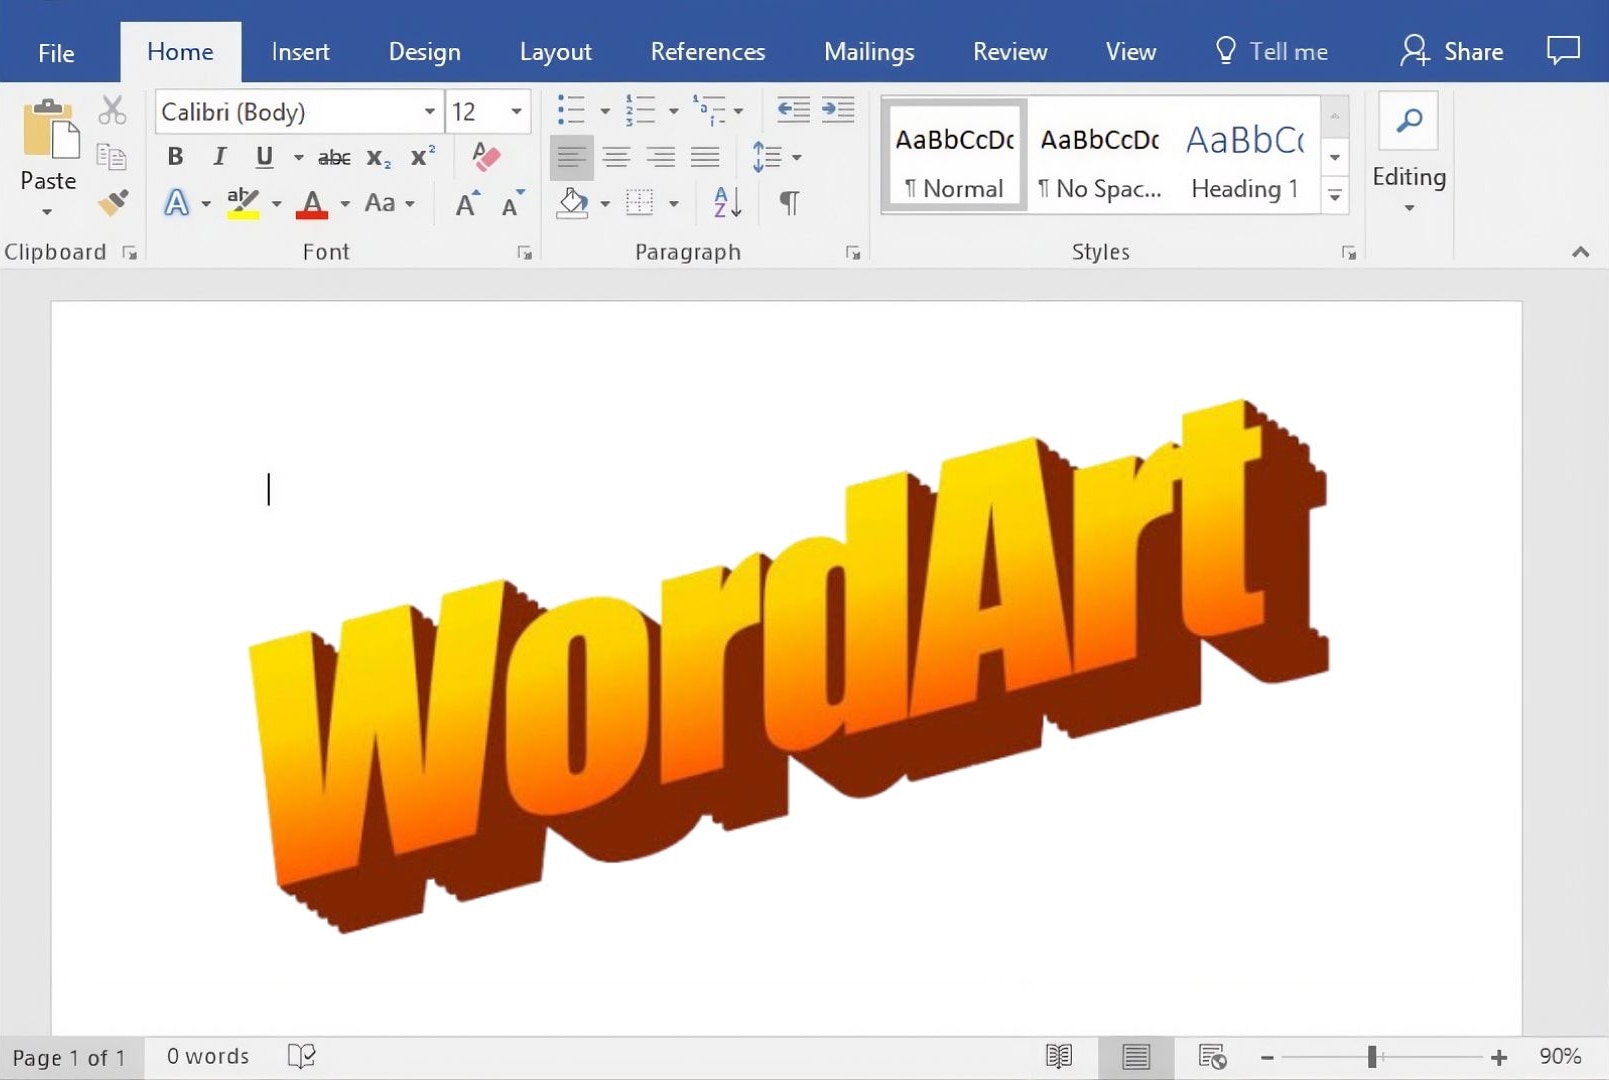
If a plain heading feels too ordinary, Microsoft WordArt can give visual impact with just a few clicks. WordArt lets you style text as a standalone design element, with options to adjust its size, color, shape, and visual effects such as outlines and shadows.
Use it for eye-catching titles, poster text, invitations, certificates, or section headings without leaving Word. In this guide, we'll walk you through how to make WordArt in Word, from inserting your first text to customizing its style, moving and resizing it, and removing it when you no longer need it.
In this article
Part 1. How to Add WordArt in Word
Microsoft WordArt starts with a preset style, but you can adjust almost every part of its appearance after inserting it. Change the lettering, colors, effects, size, and placement to suit everything from a simple document heading to a more decorative title.
So, how do you create WordArt in Word? Follow the steps below.
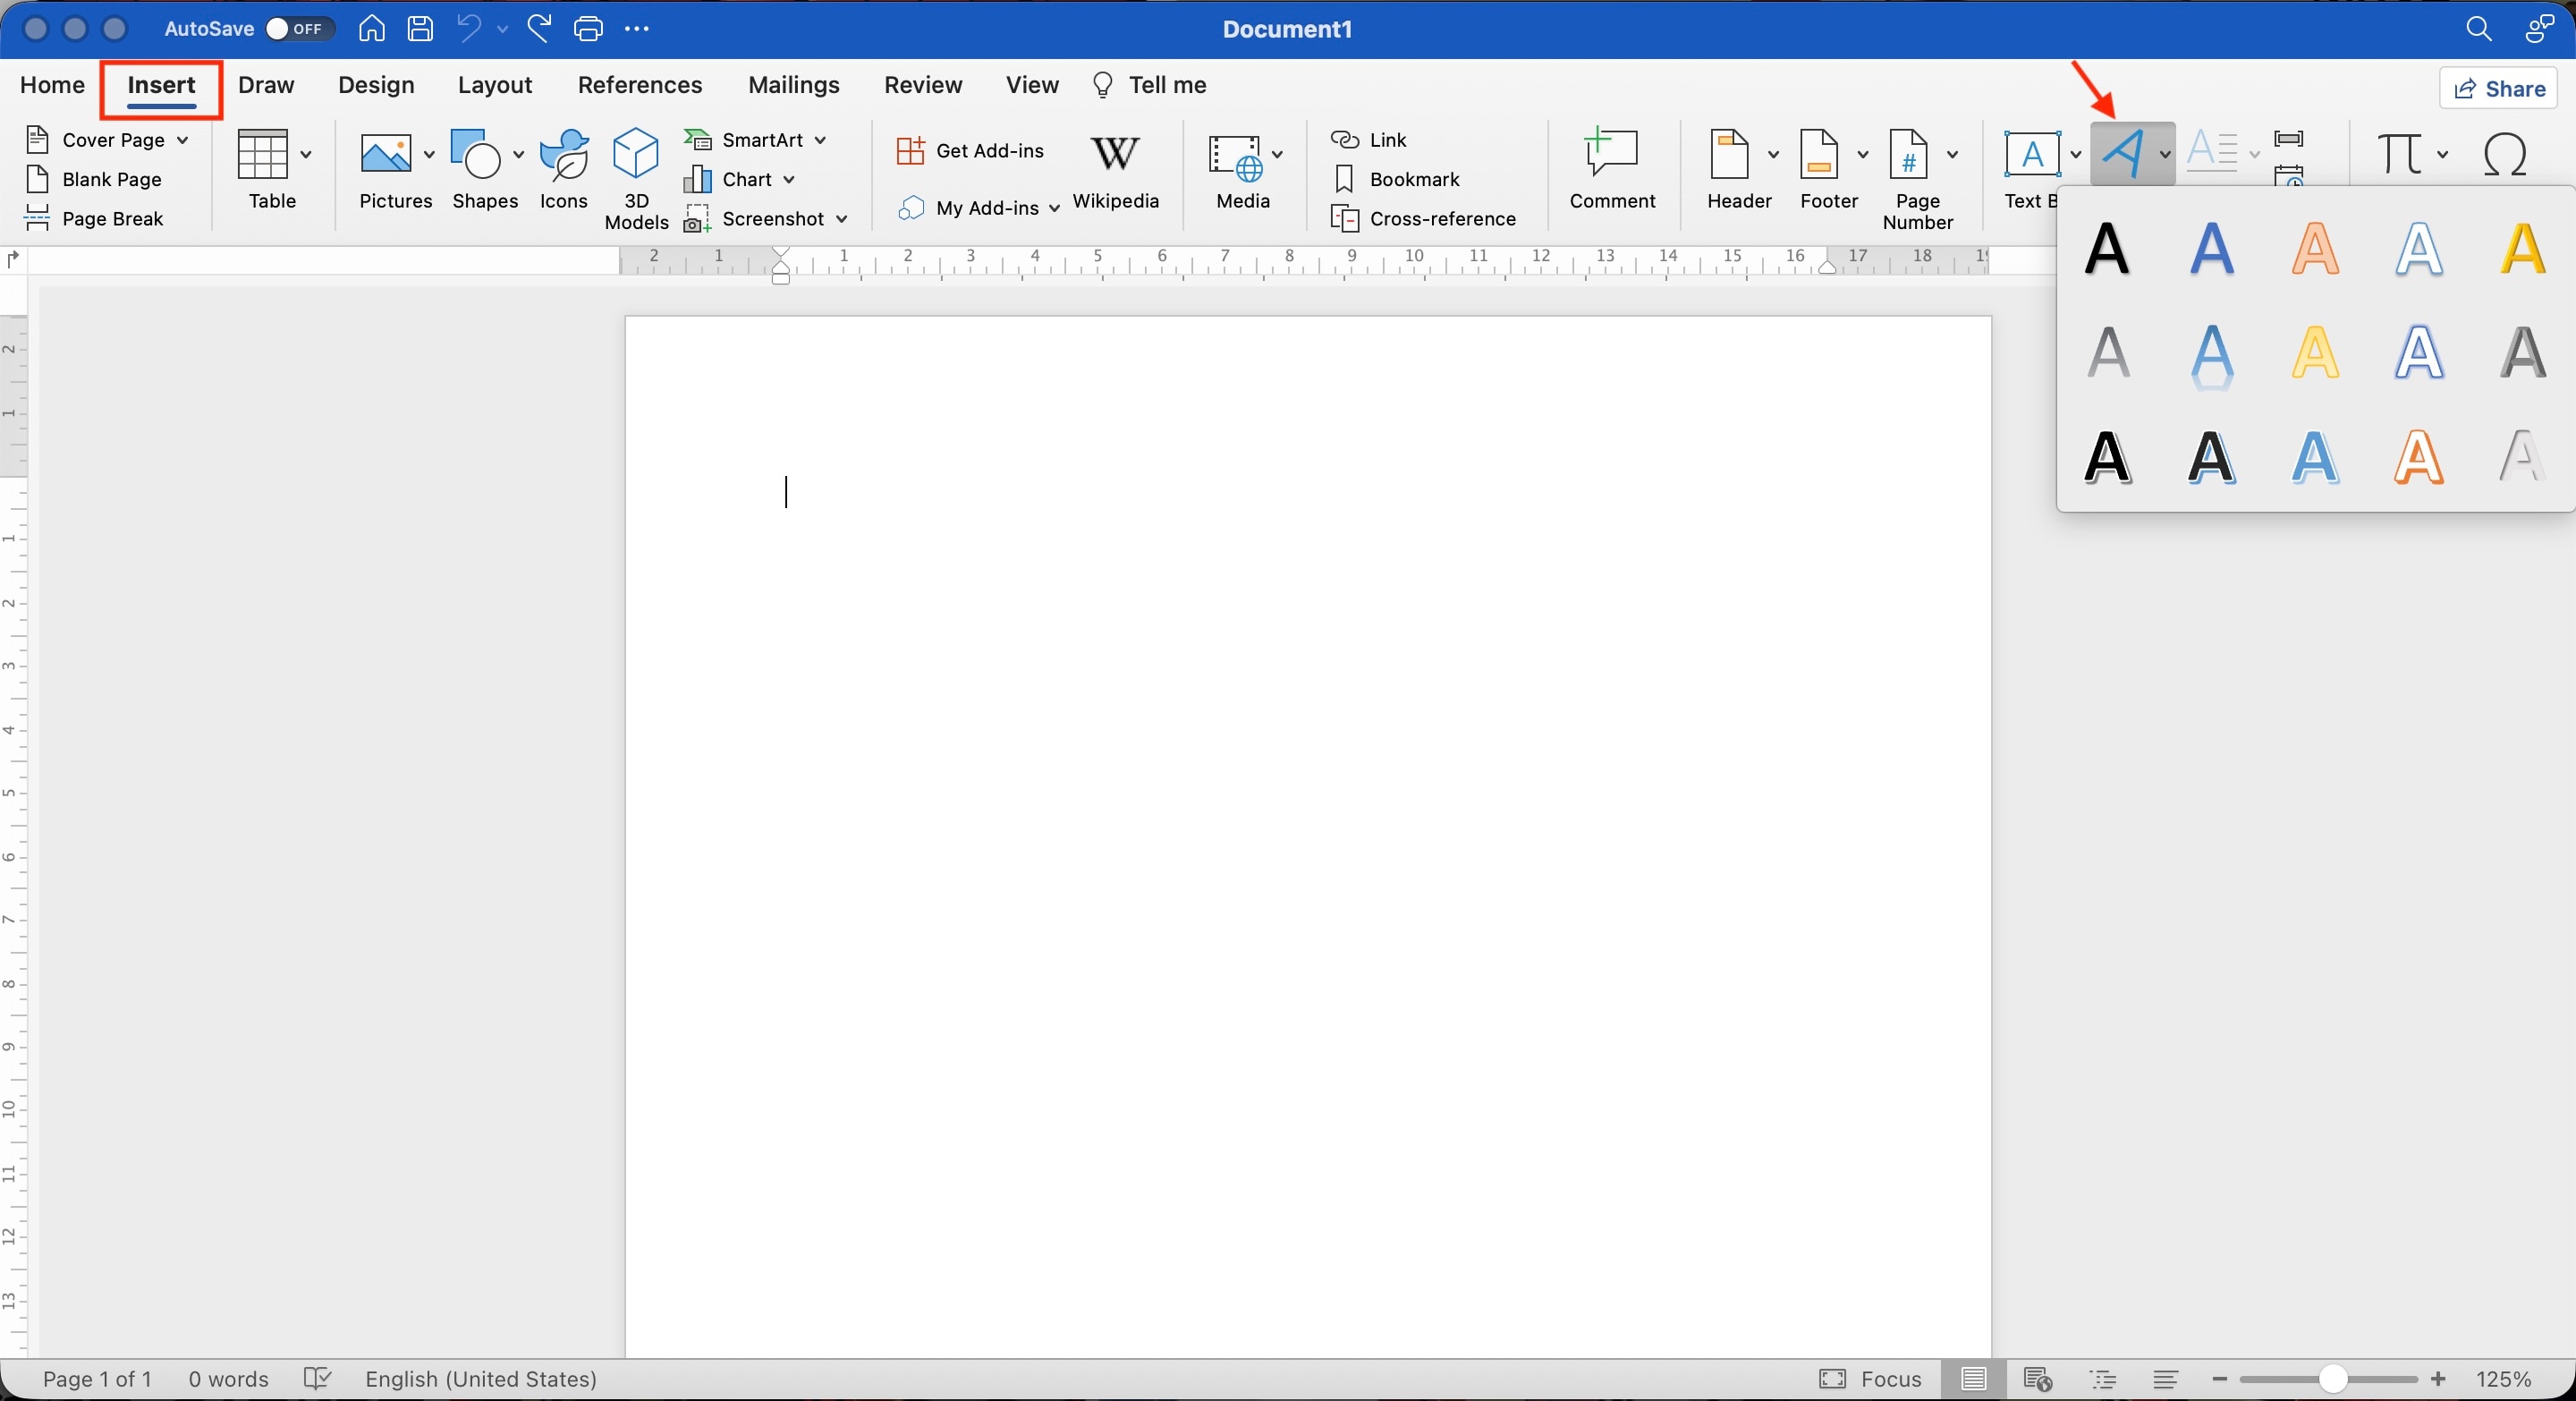
Step 1 Open the document where you want to add WordArt. Go to Insert > WordArt, then select a style from the gallery. Word will add the WordArt to your document with sample text.
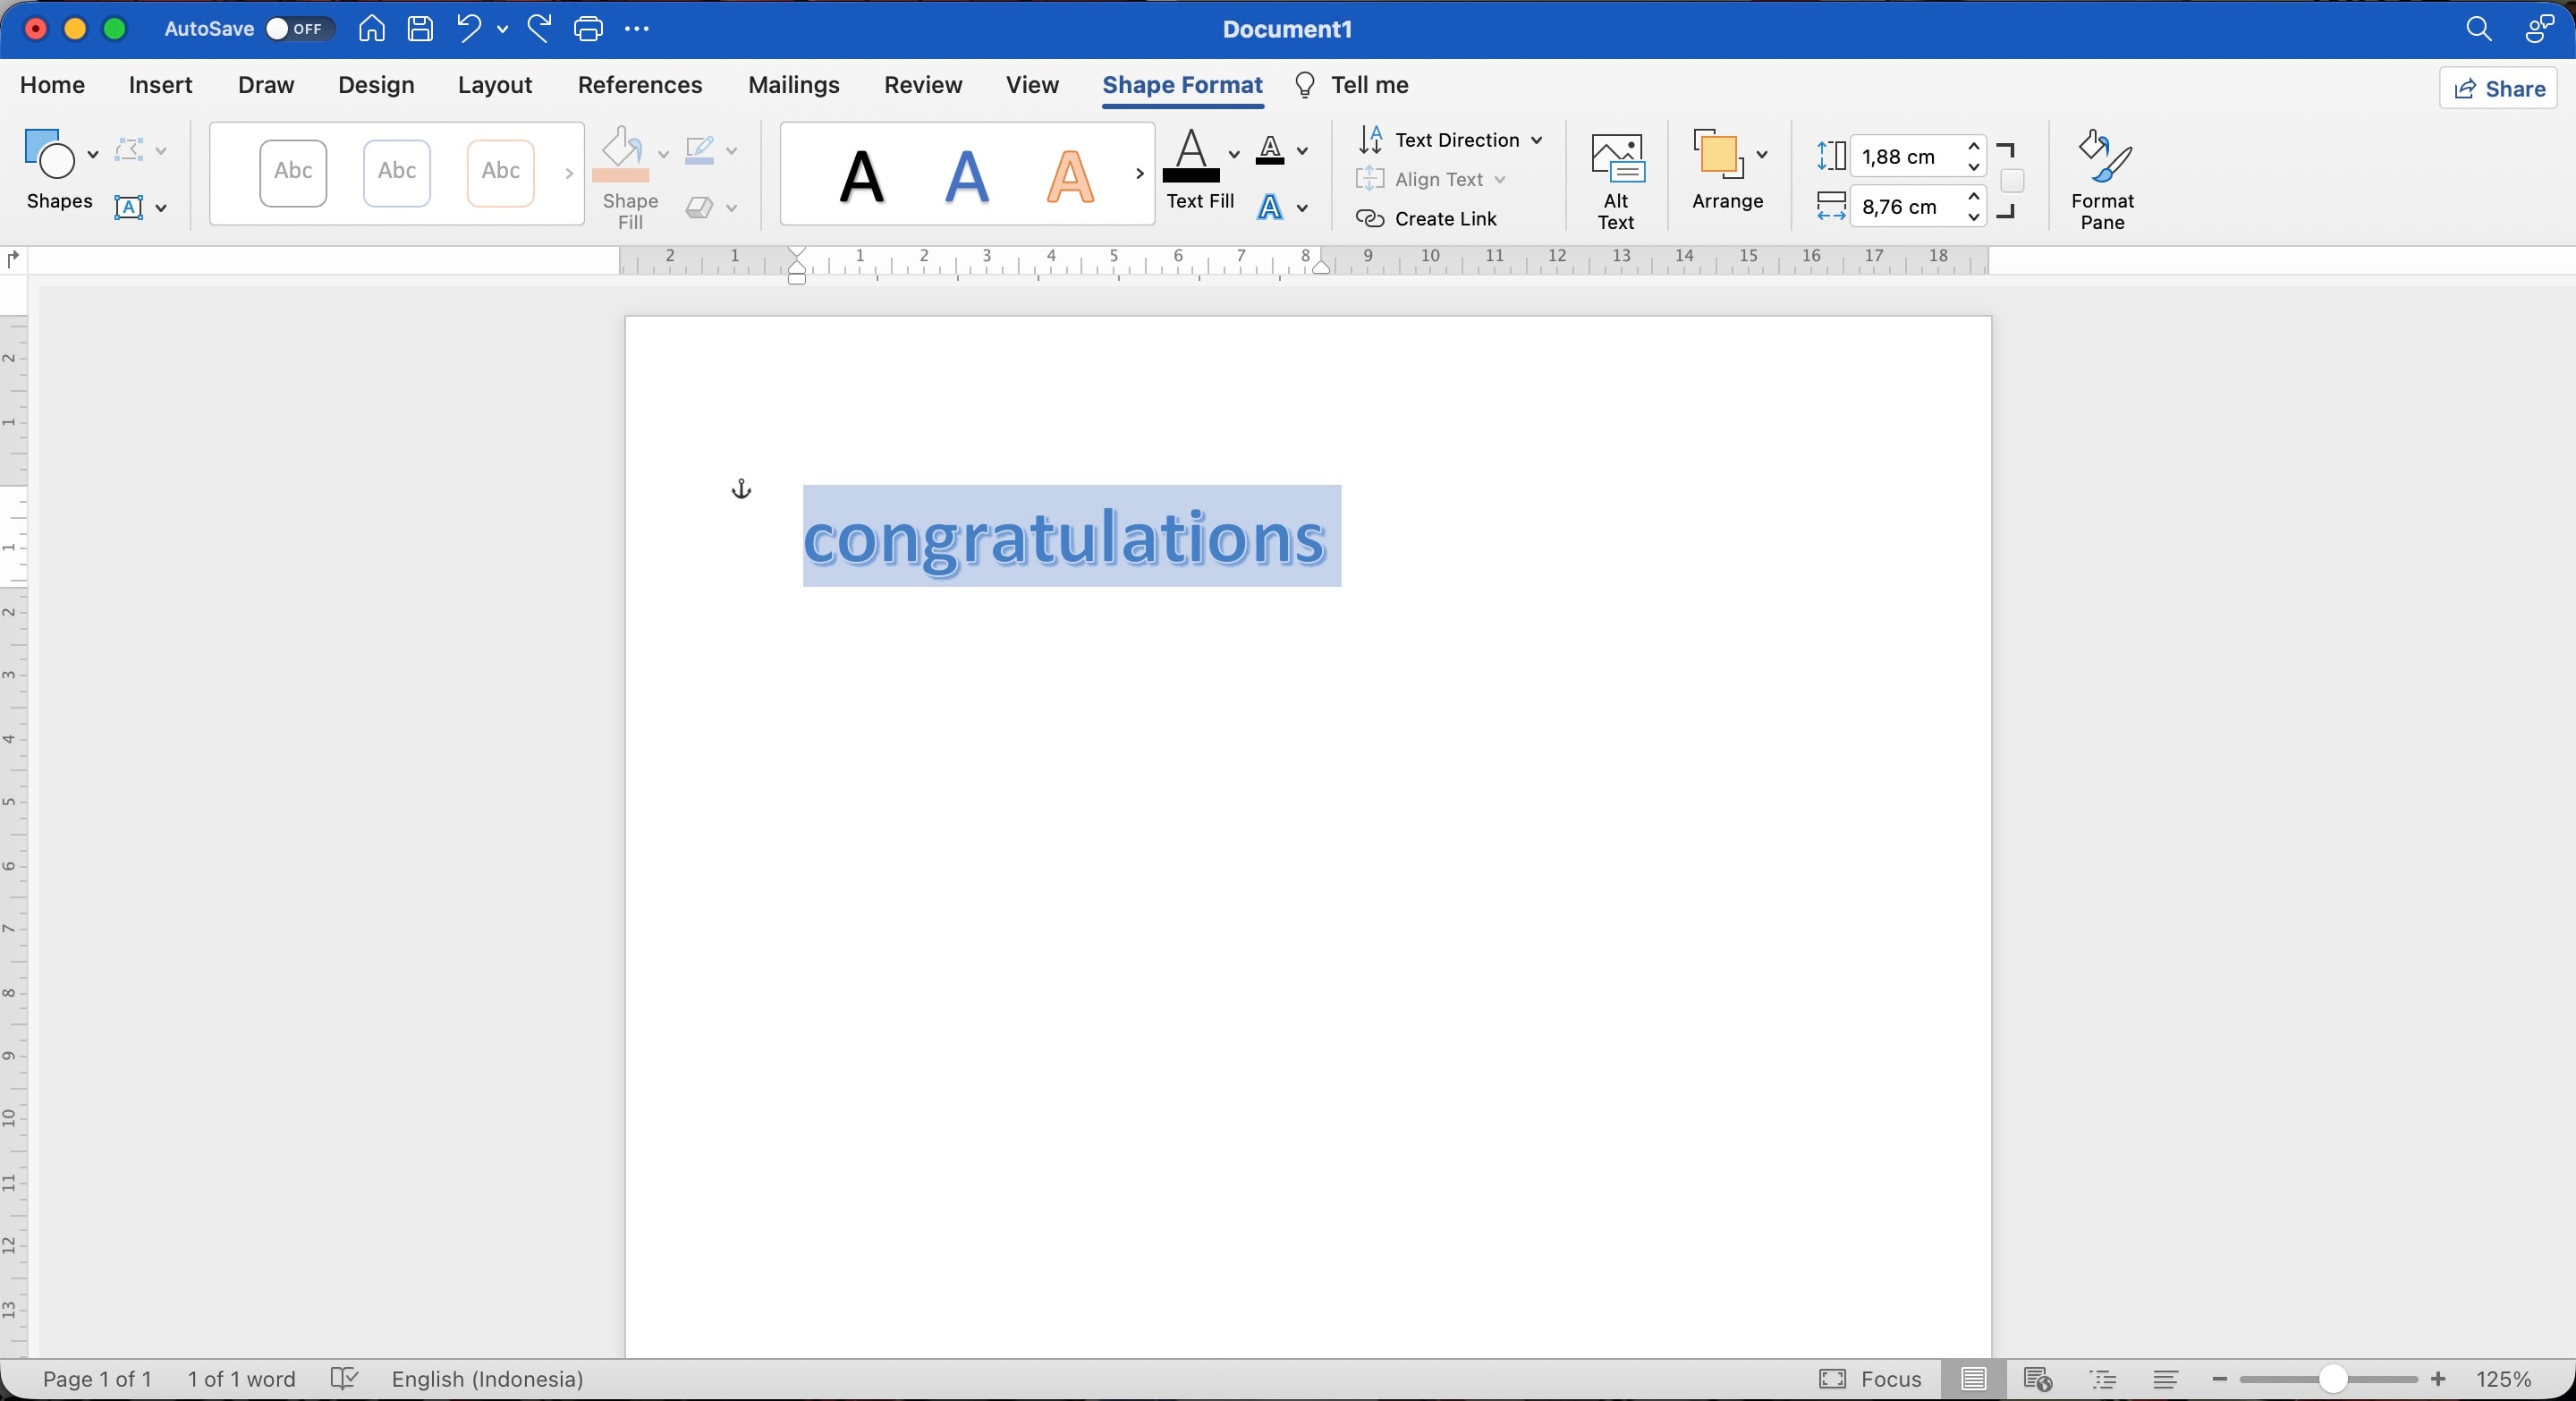
Step 2 Select the sample text and type your own title, phrase, or label. Use the Home tab to adjust the font, size, bold, italic, alignment, and other basic text settings.
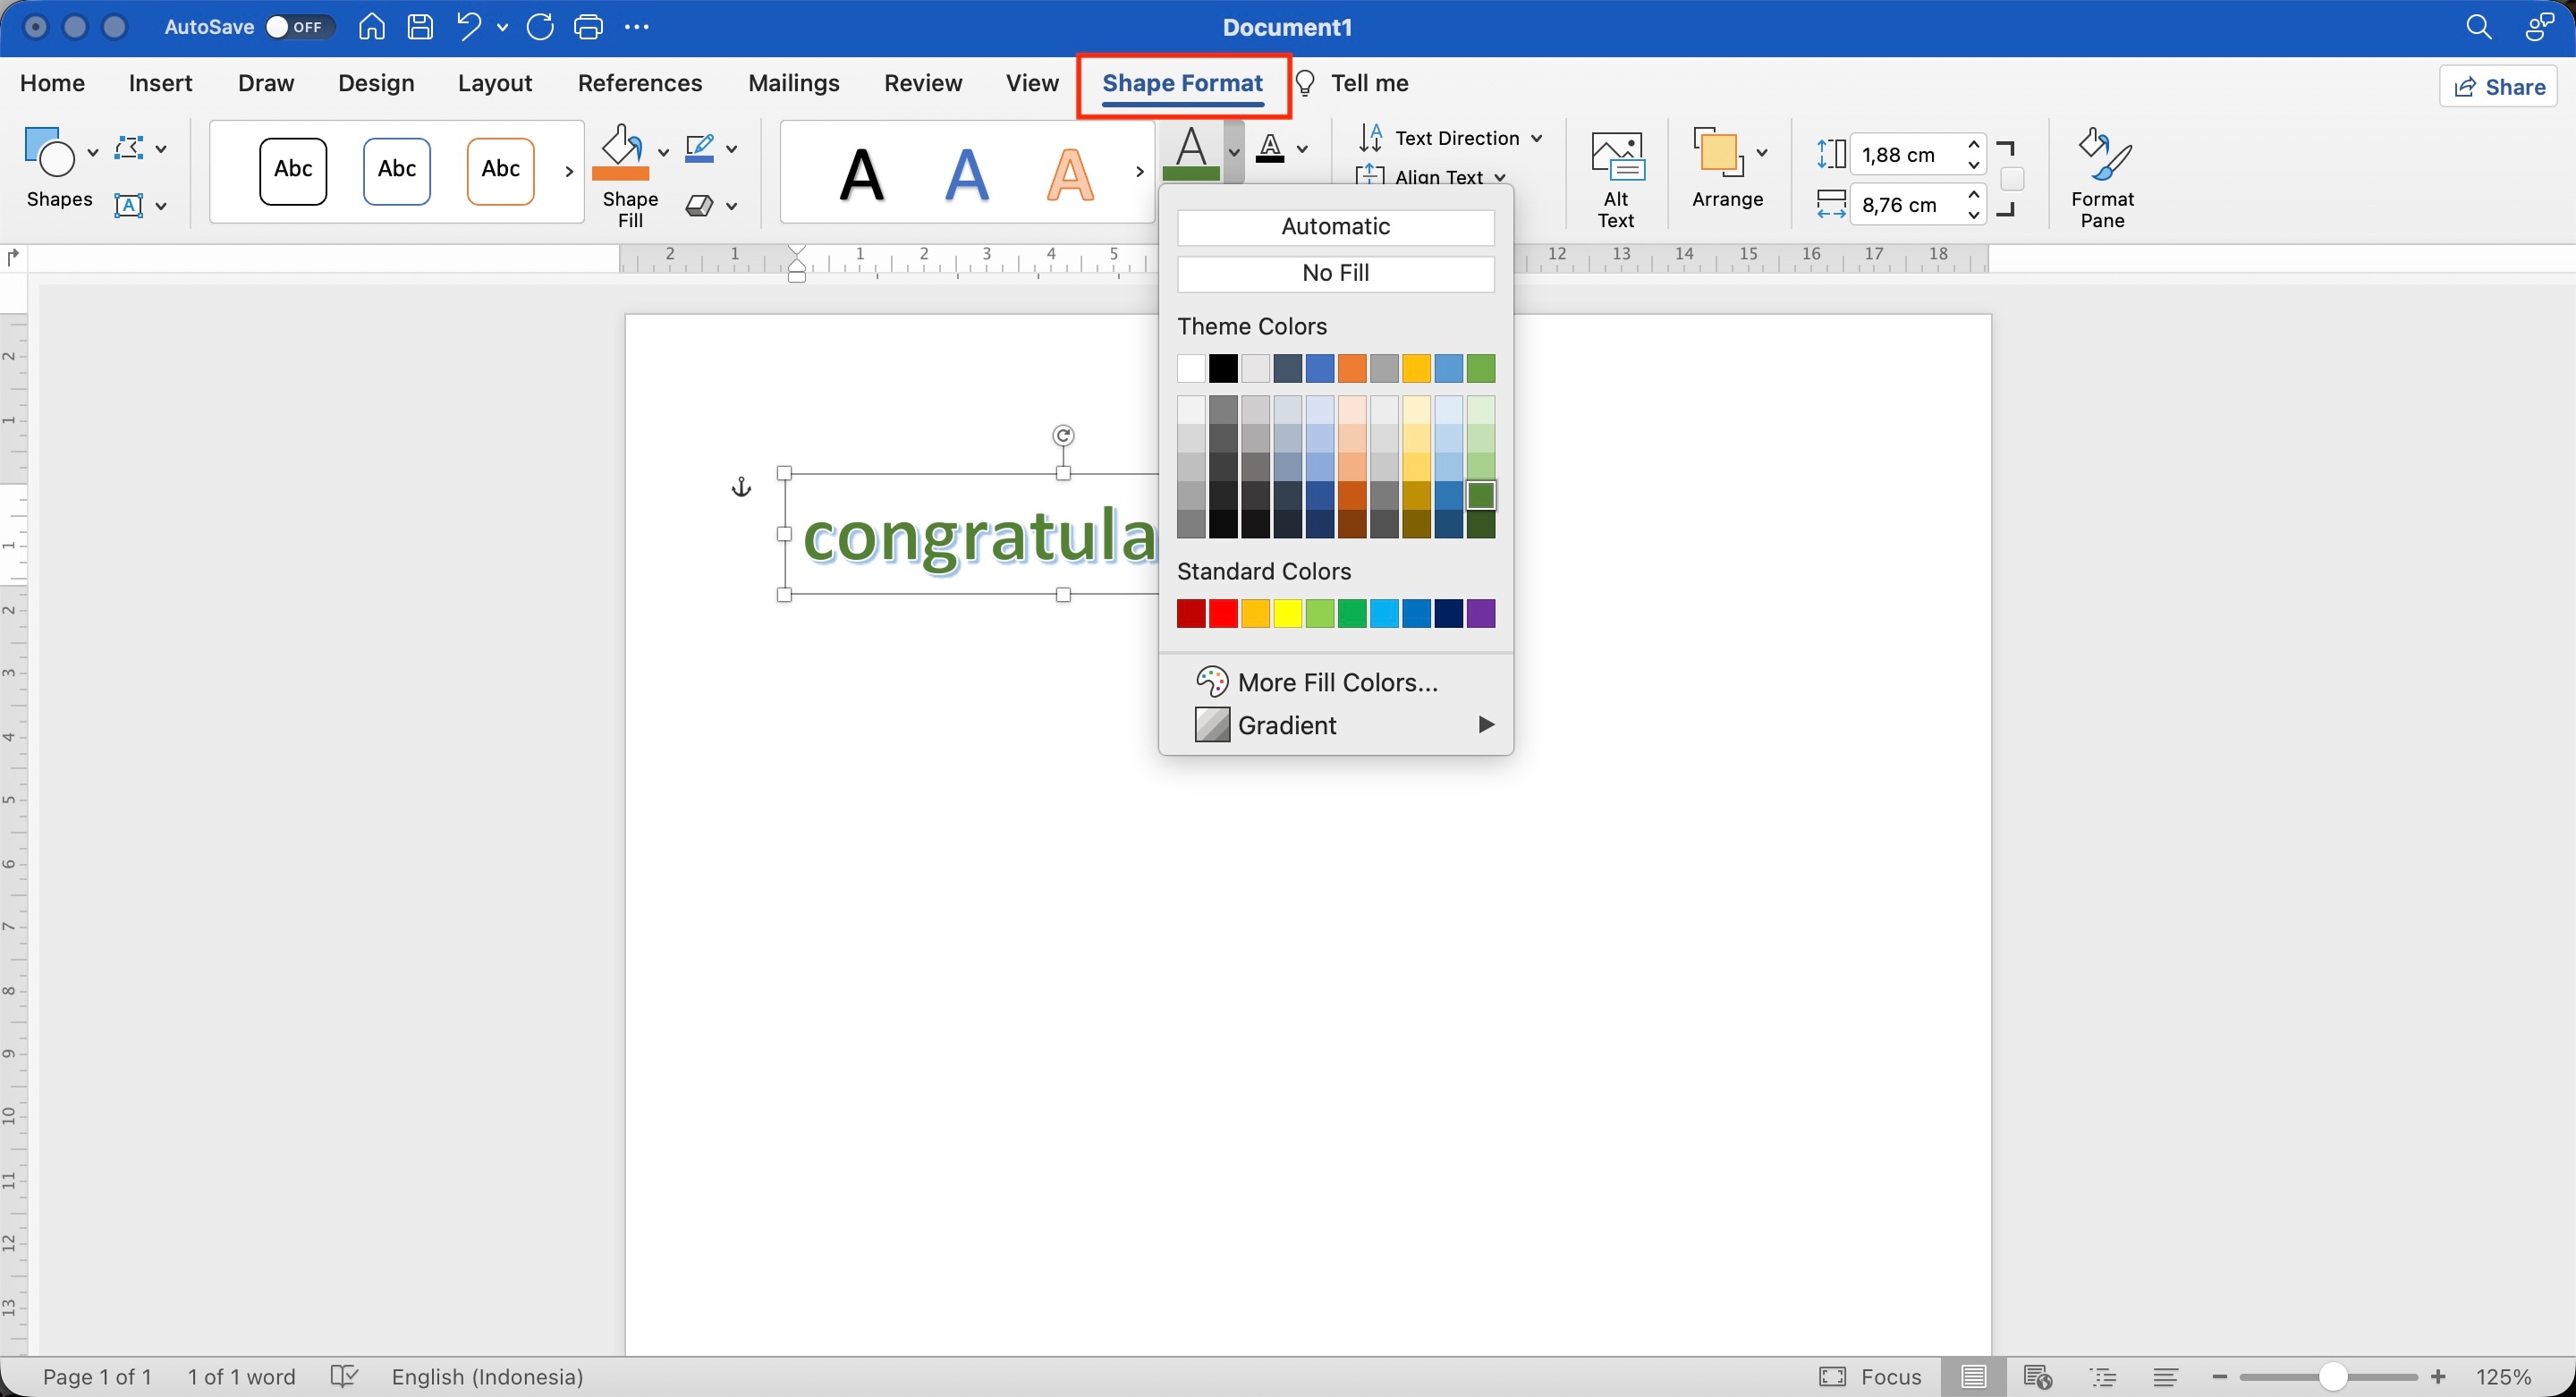
Step 3 Select the WordArt to open the Shape Format tab. Under WordArt Styles, adjust the Text Fill, Text Outline, and Text Effects. Add effects such as shadows, reflections, glows, and text transformations.
Step 4 Drag the sizing handles to change the WordArt's dimensions, then drag the object to place it where you want. For different text-wrapping options, select Wrap Text and choose a layout such as Square, Tight, or In Front of Text.
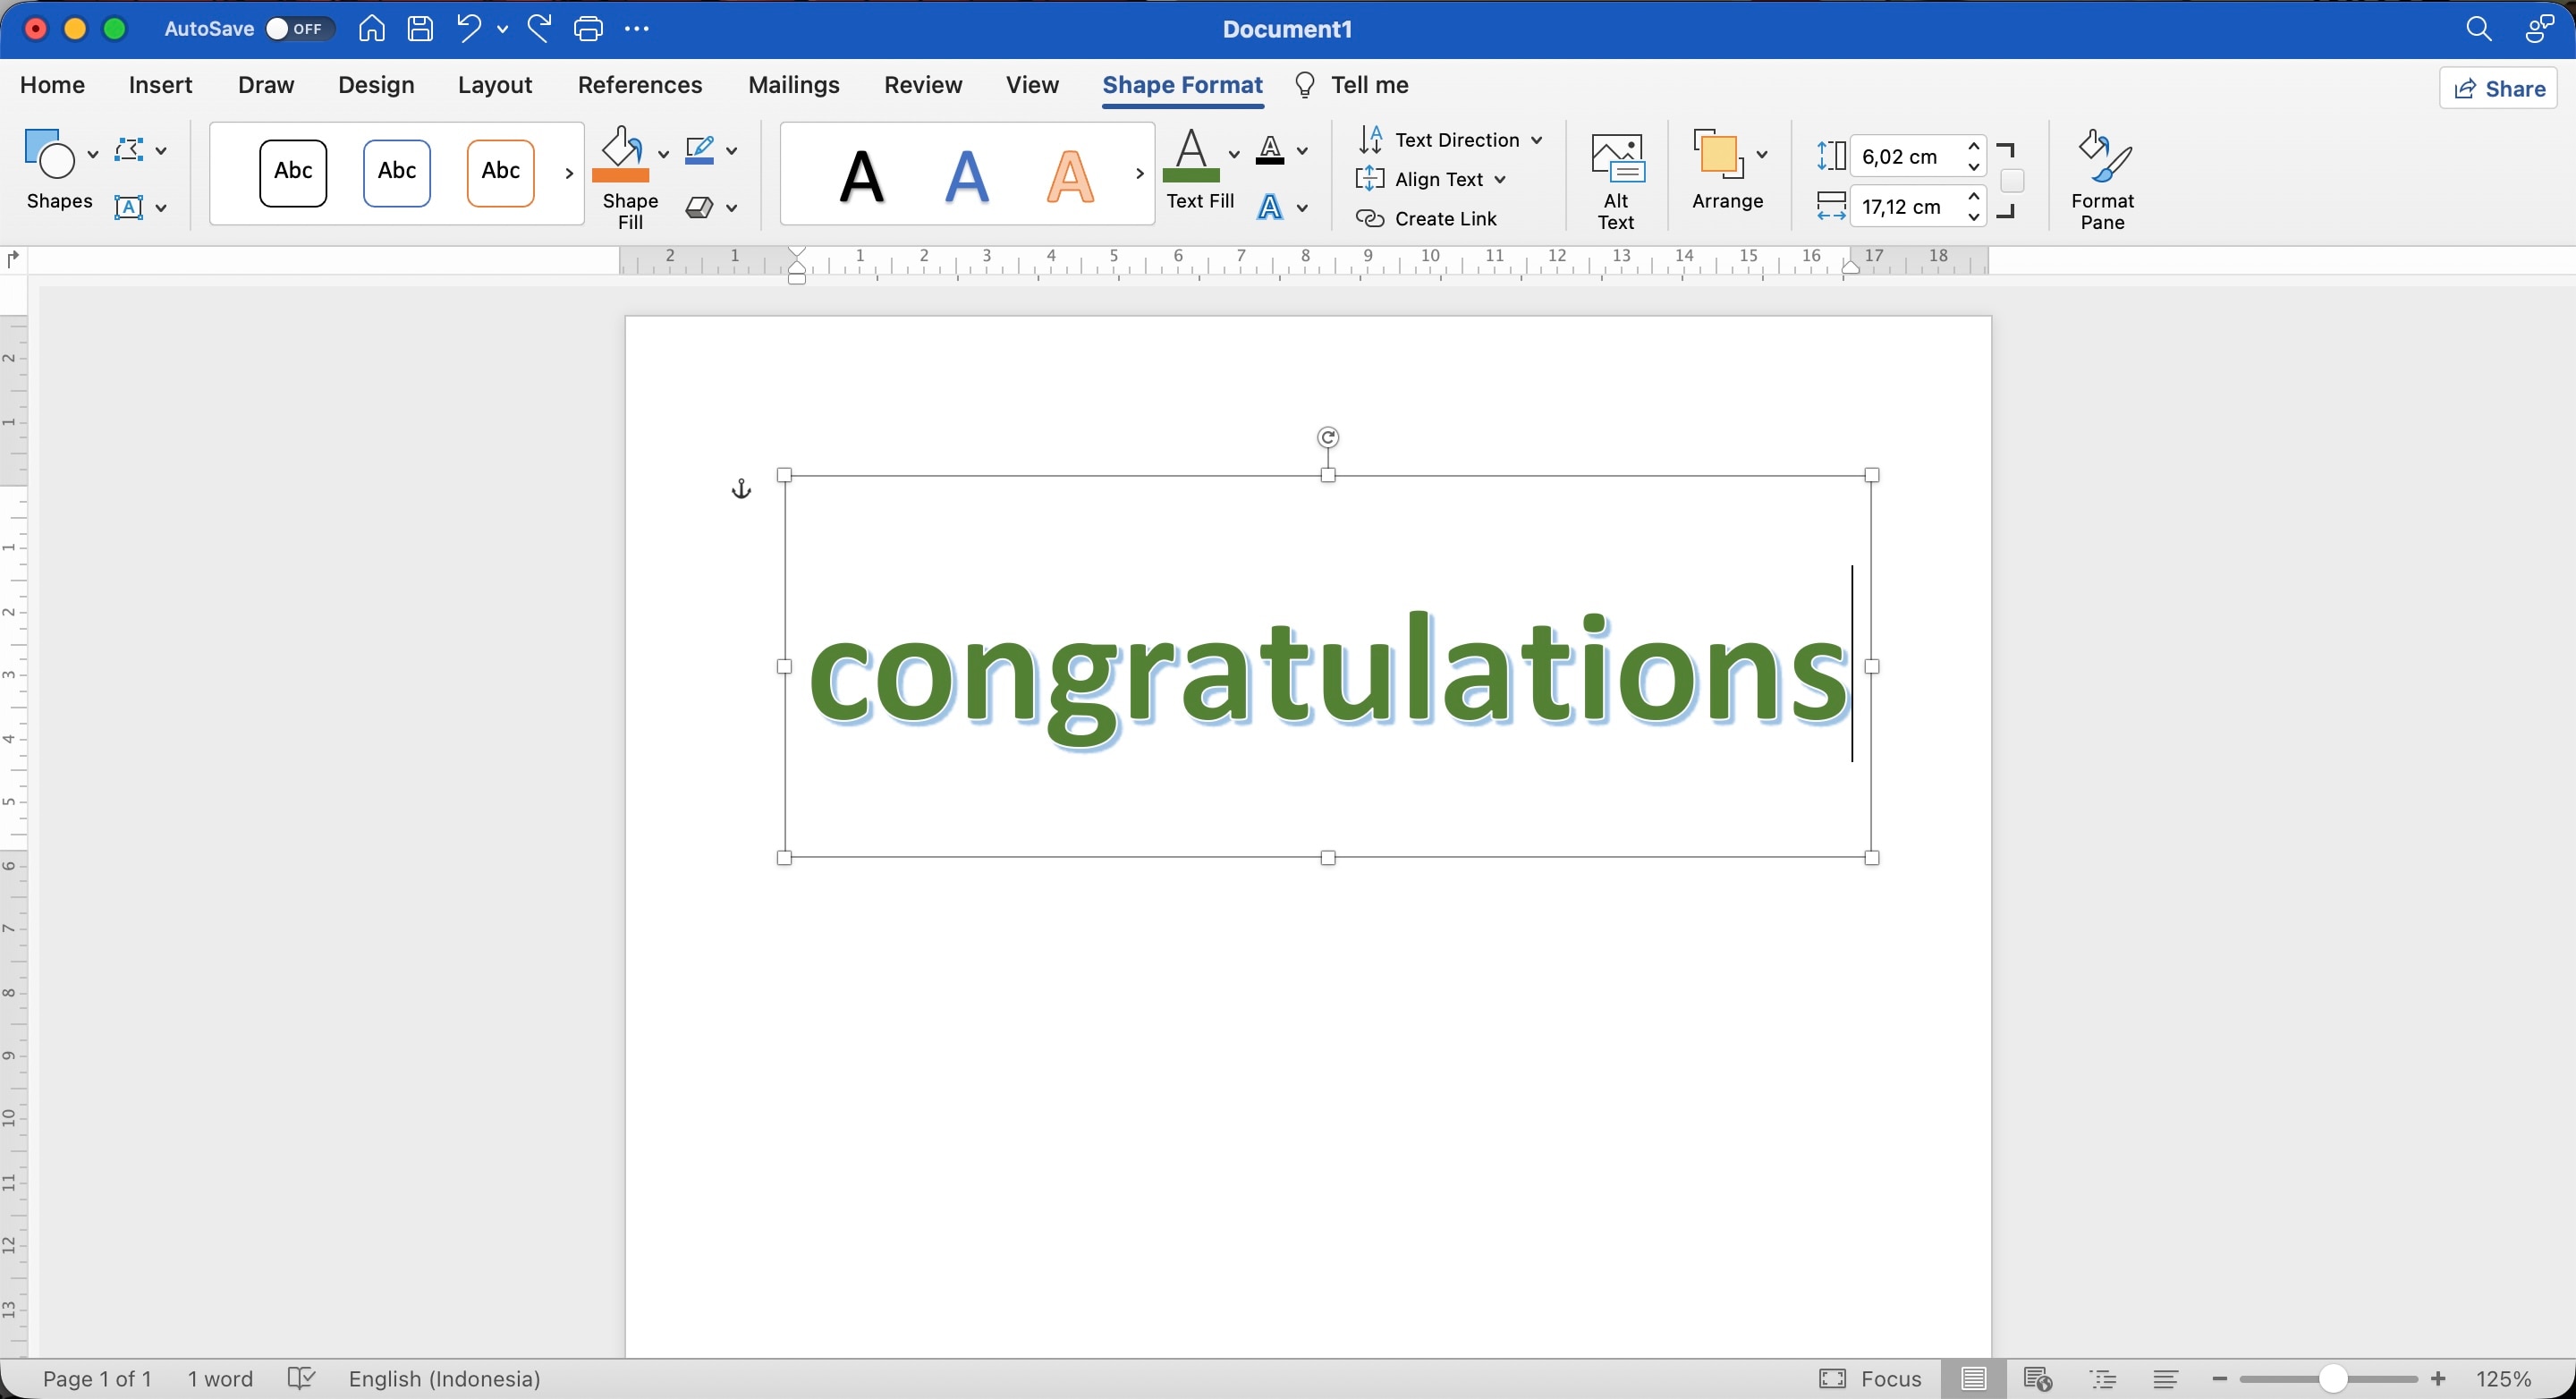
Prefer Google Docs for WordArt?
Check out our guide on how to create WordArt in Google Docs to explore ways to create and customize decorative text. →
Part 2. How to Customize WordArt in Word
A basic WordArt style can look very different with a few small adjustments. Once you've learned how to add WordArt in Word, you can swap the preset colors, build a gradient, add a subtle shadow or reflection, and reshape the letters to fit your design.
The Shape Format tab brings these controls together, so you can fine-tune the text without starting over. Here's how to customize each part of your WordArt.
1. Add a Gradient to WordArt
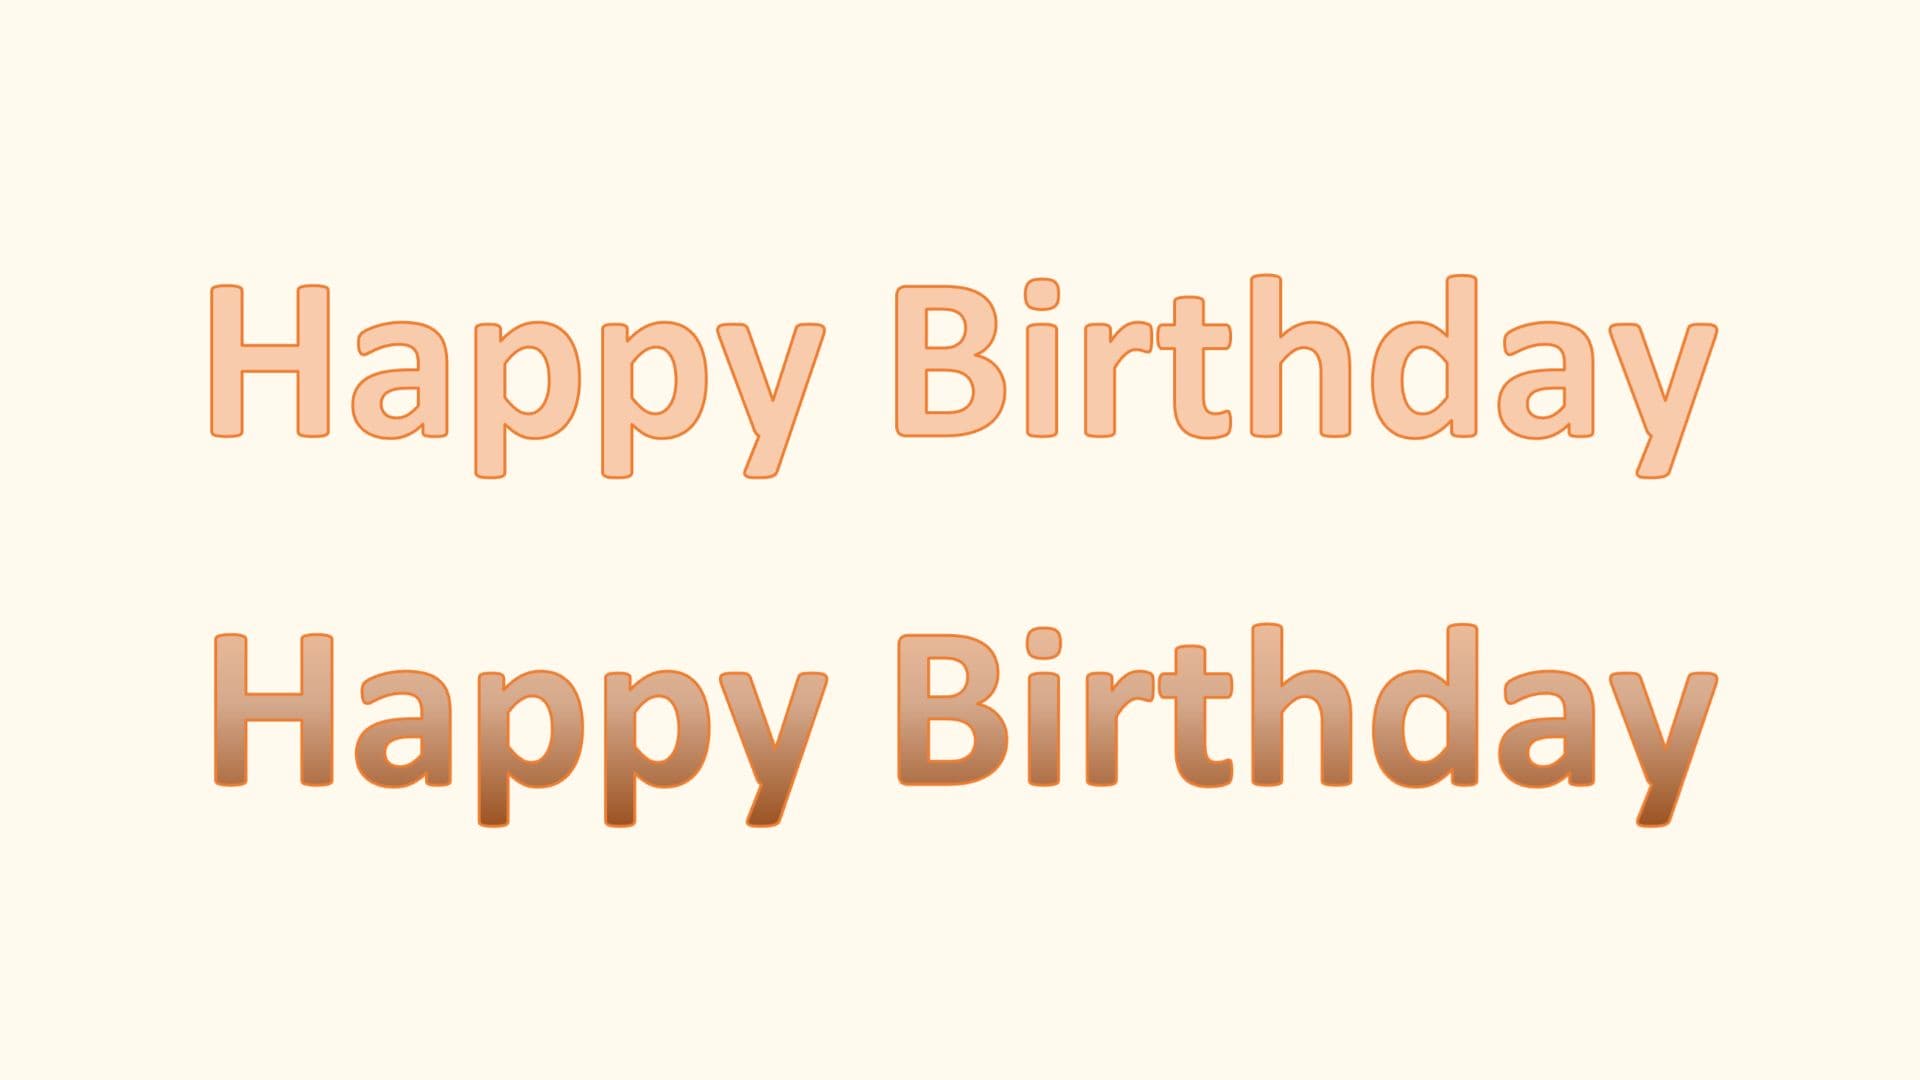
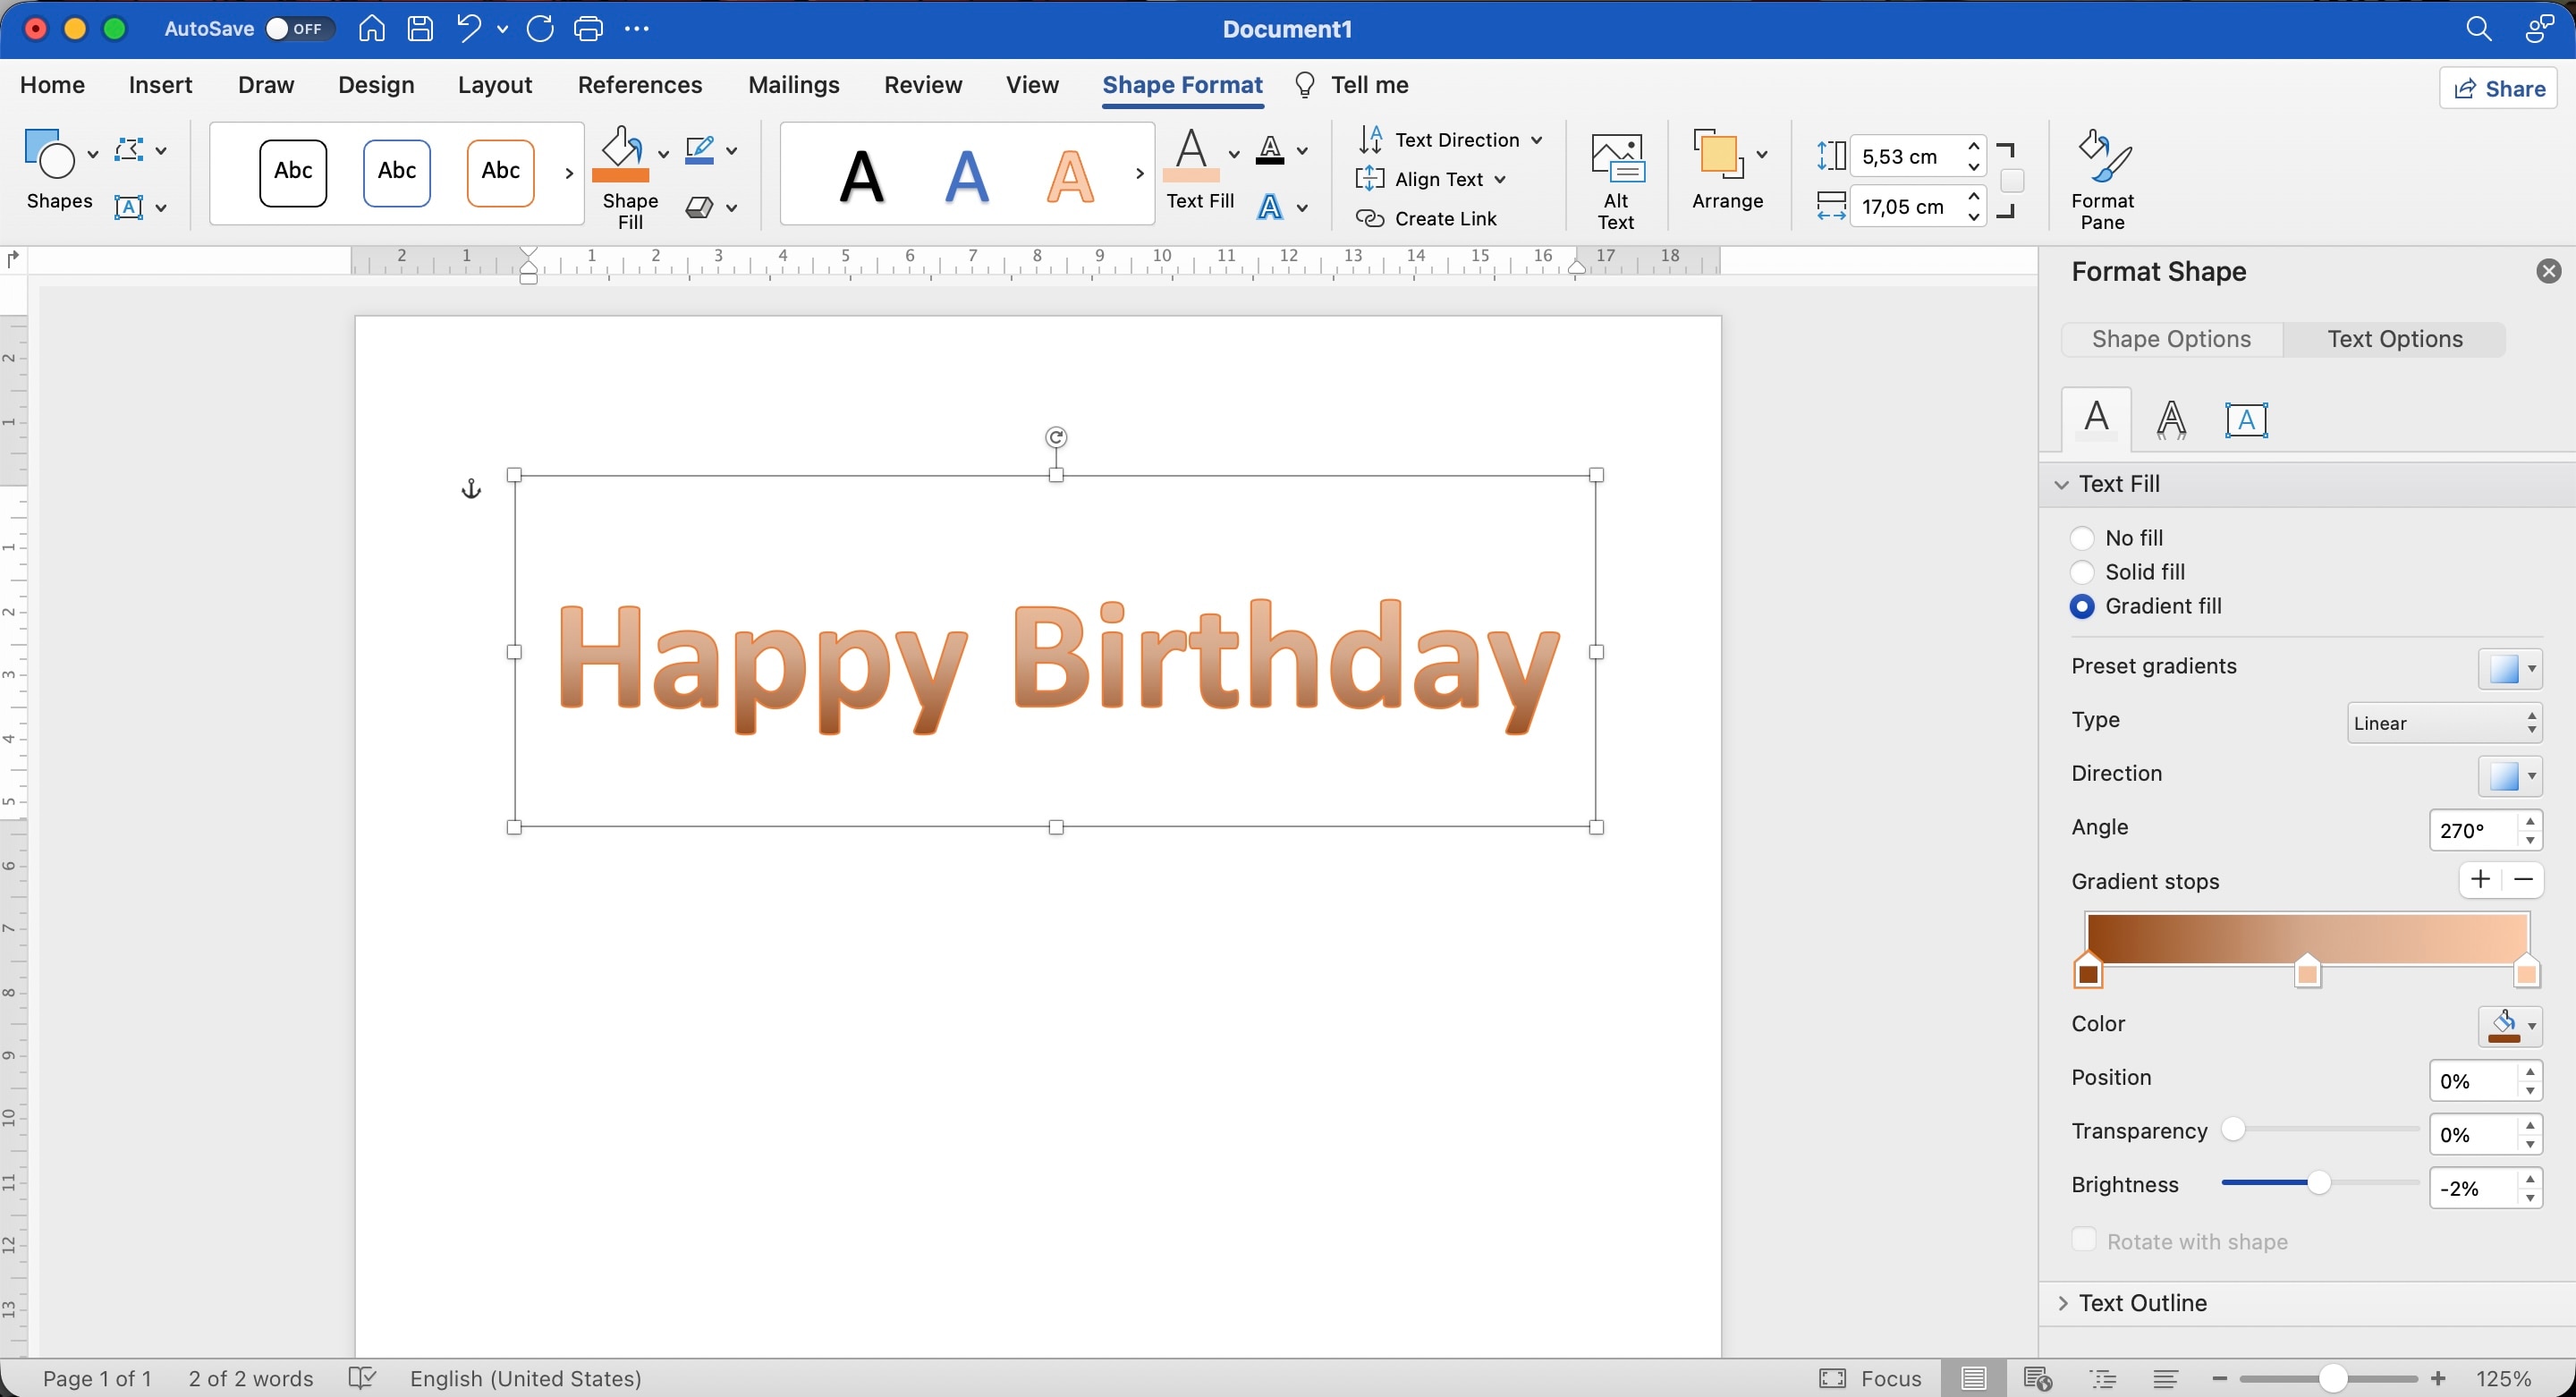
A gradient blends two or more colors across the letters, giving the text more visual depth than a single fill color. Word includes preset gradients and additional controls for customizing them.
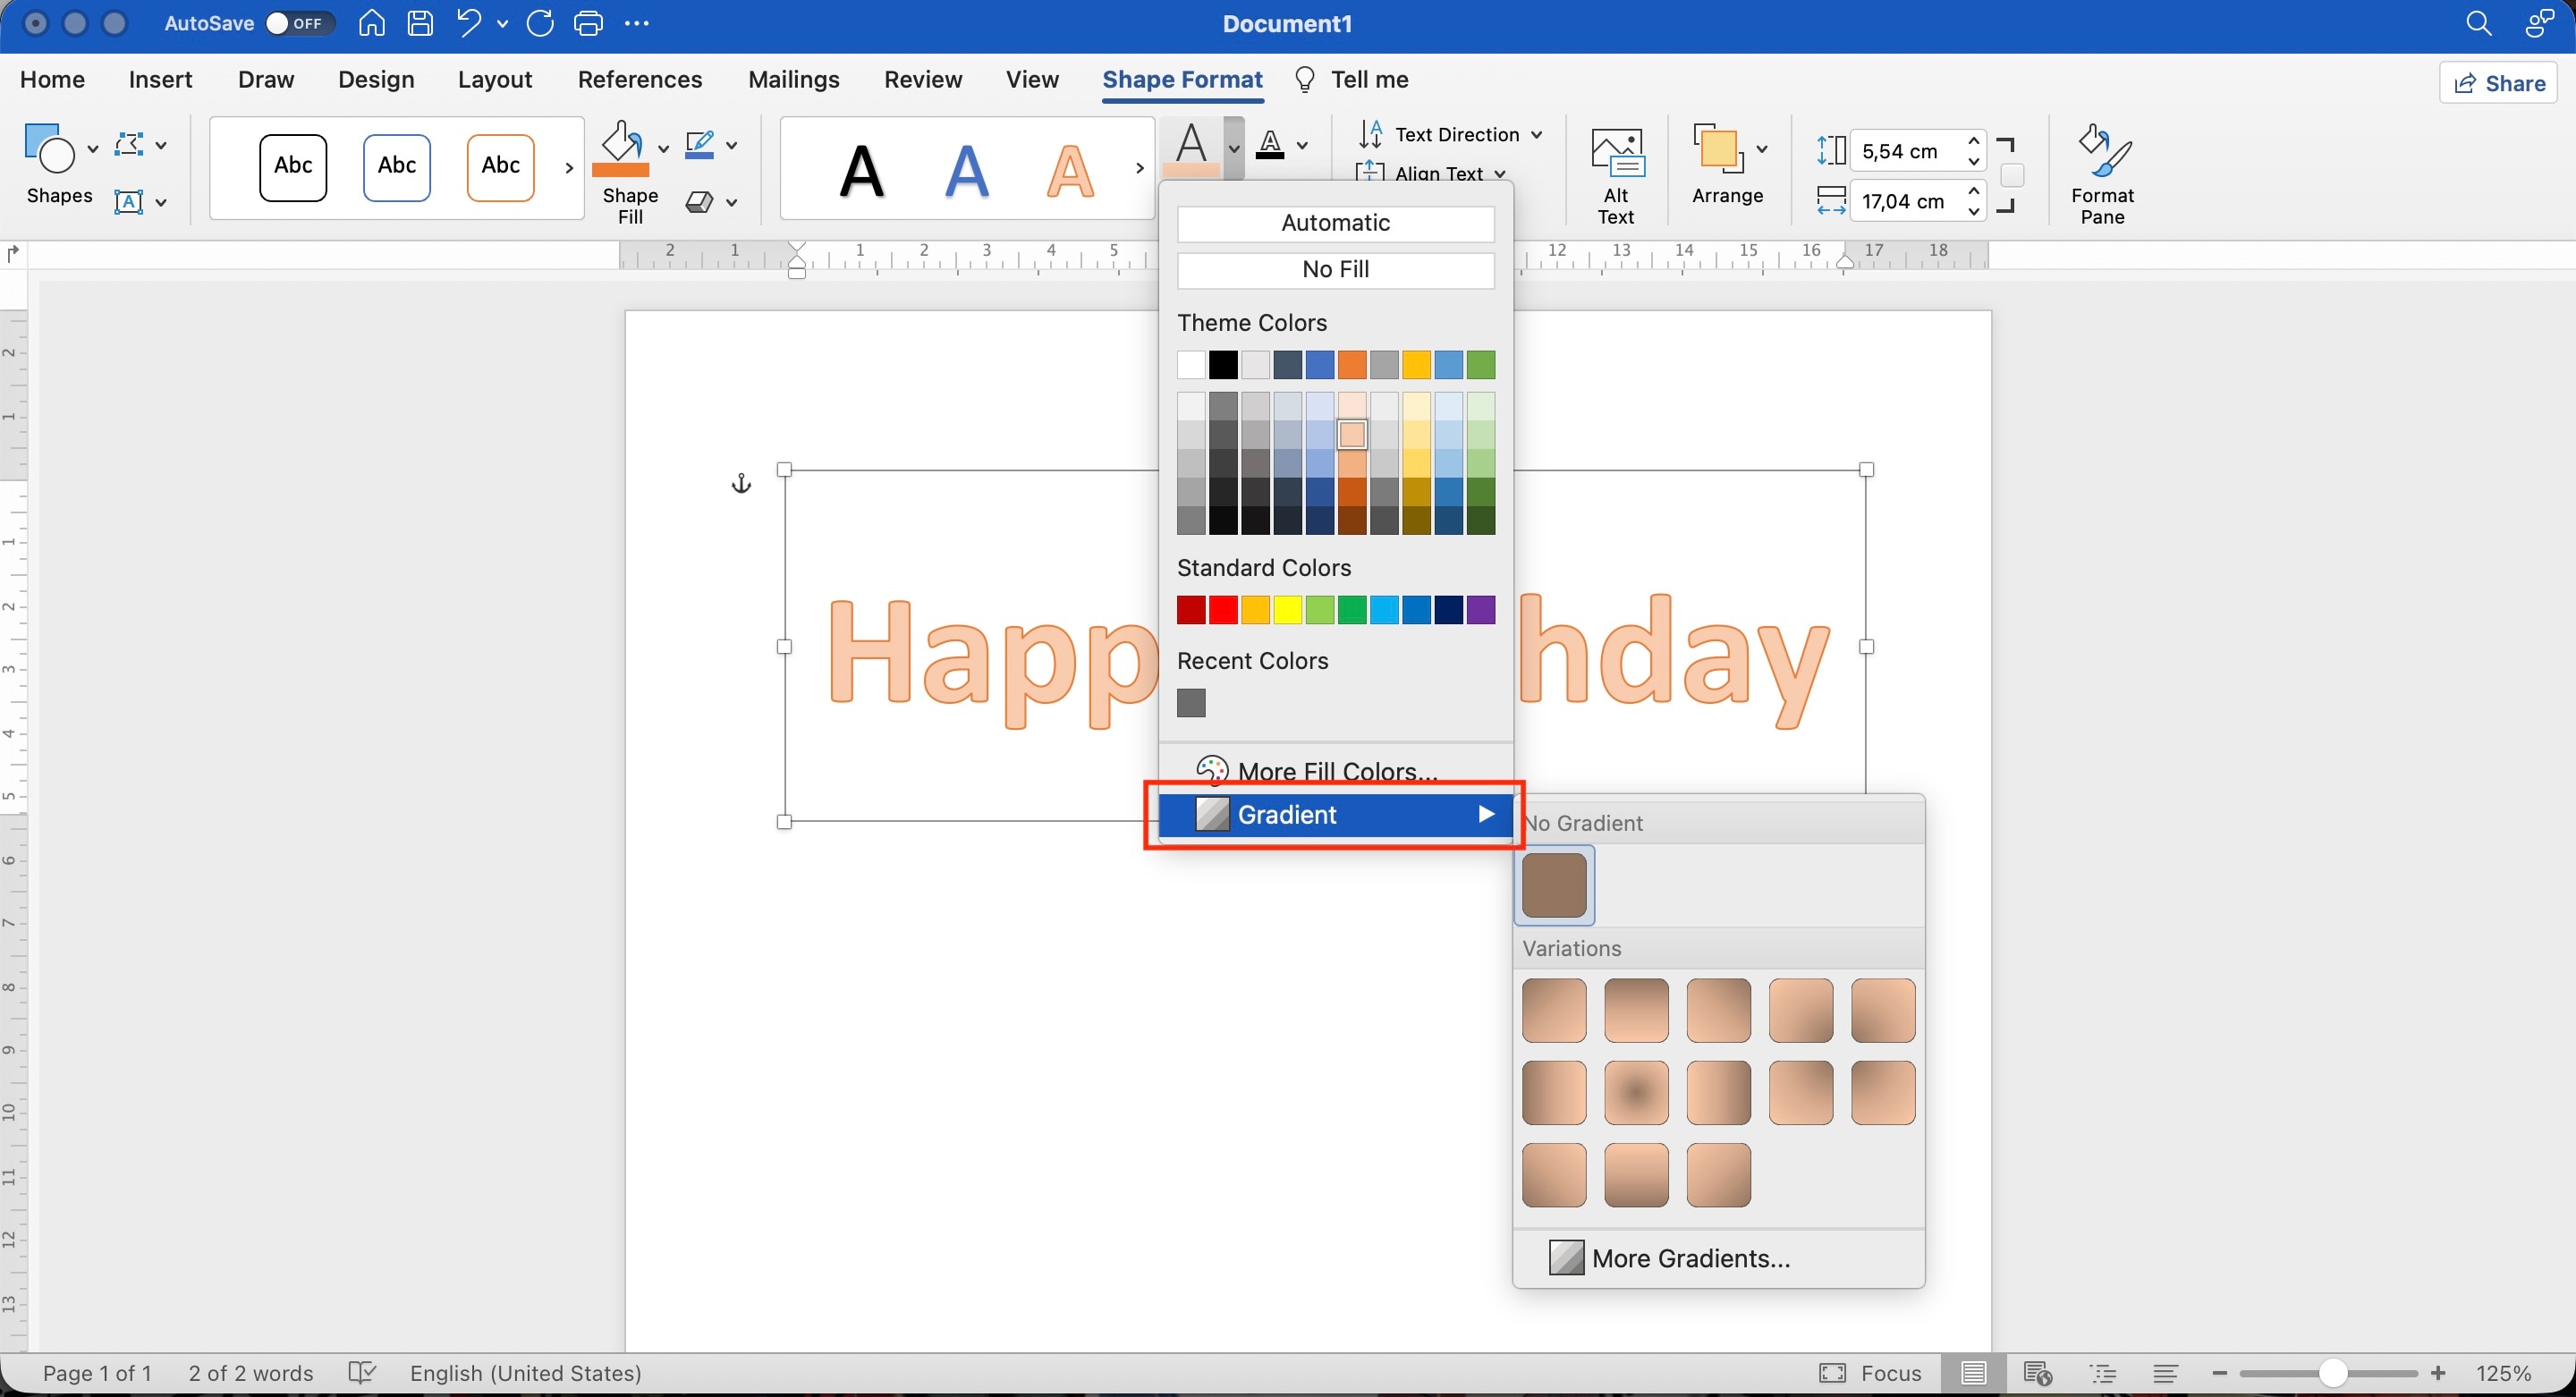
Step 1. Select the WordArt text. Go to Shape Format > Text Fill > Gradient.
Step 2. Choose a gradient variation.
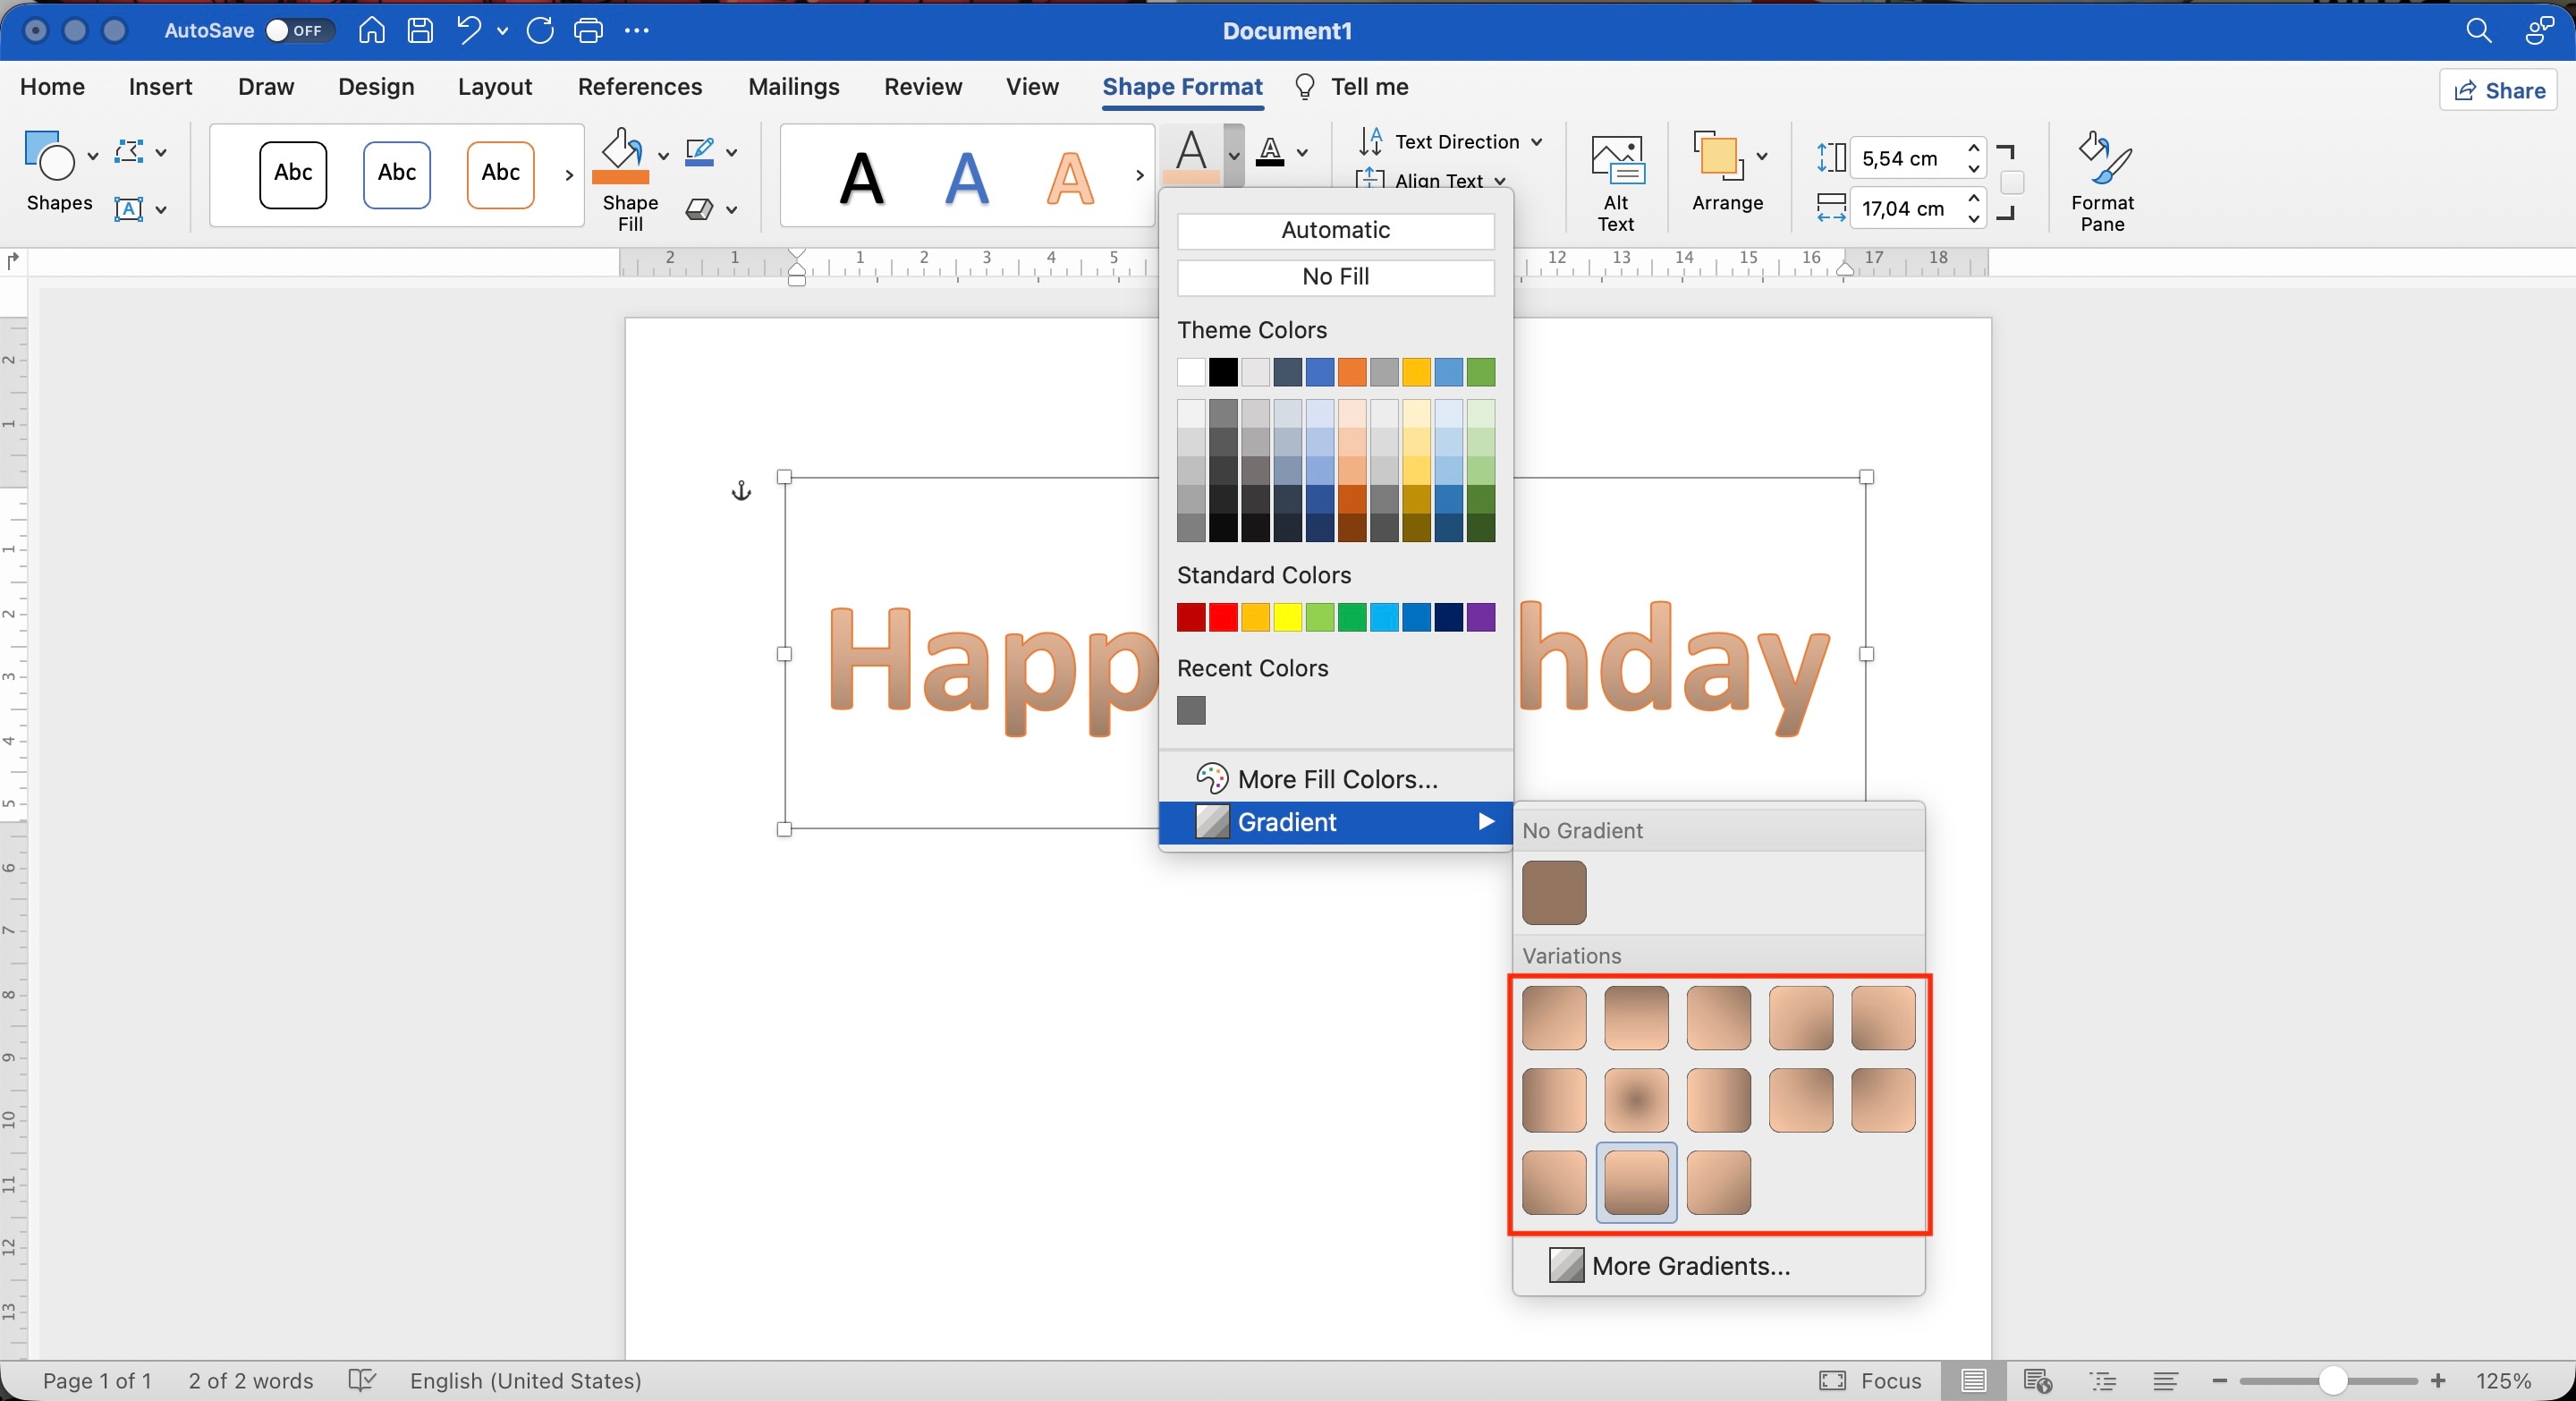
Step 3. For more control, select Text Fill > Gradient > More Gradients and adjust the available gradient settings.
2. Add a Shadow or Reflection

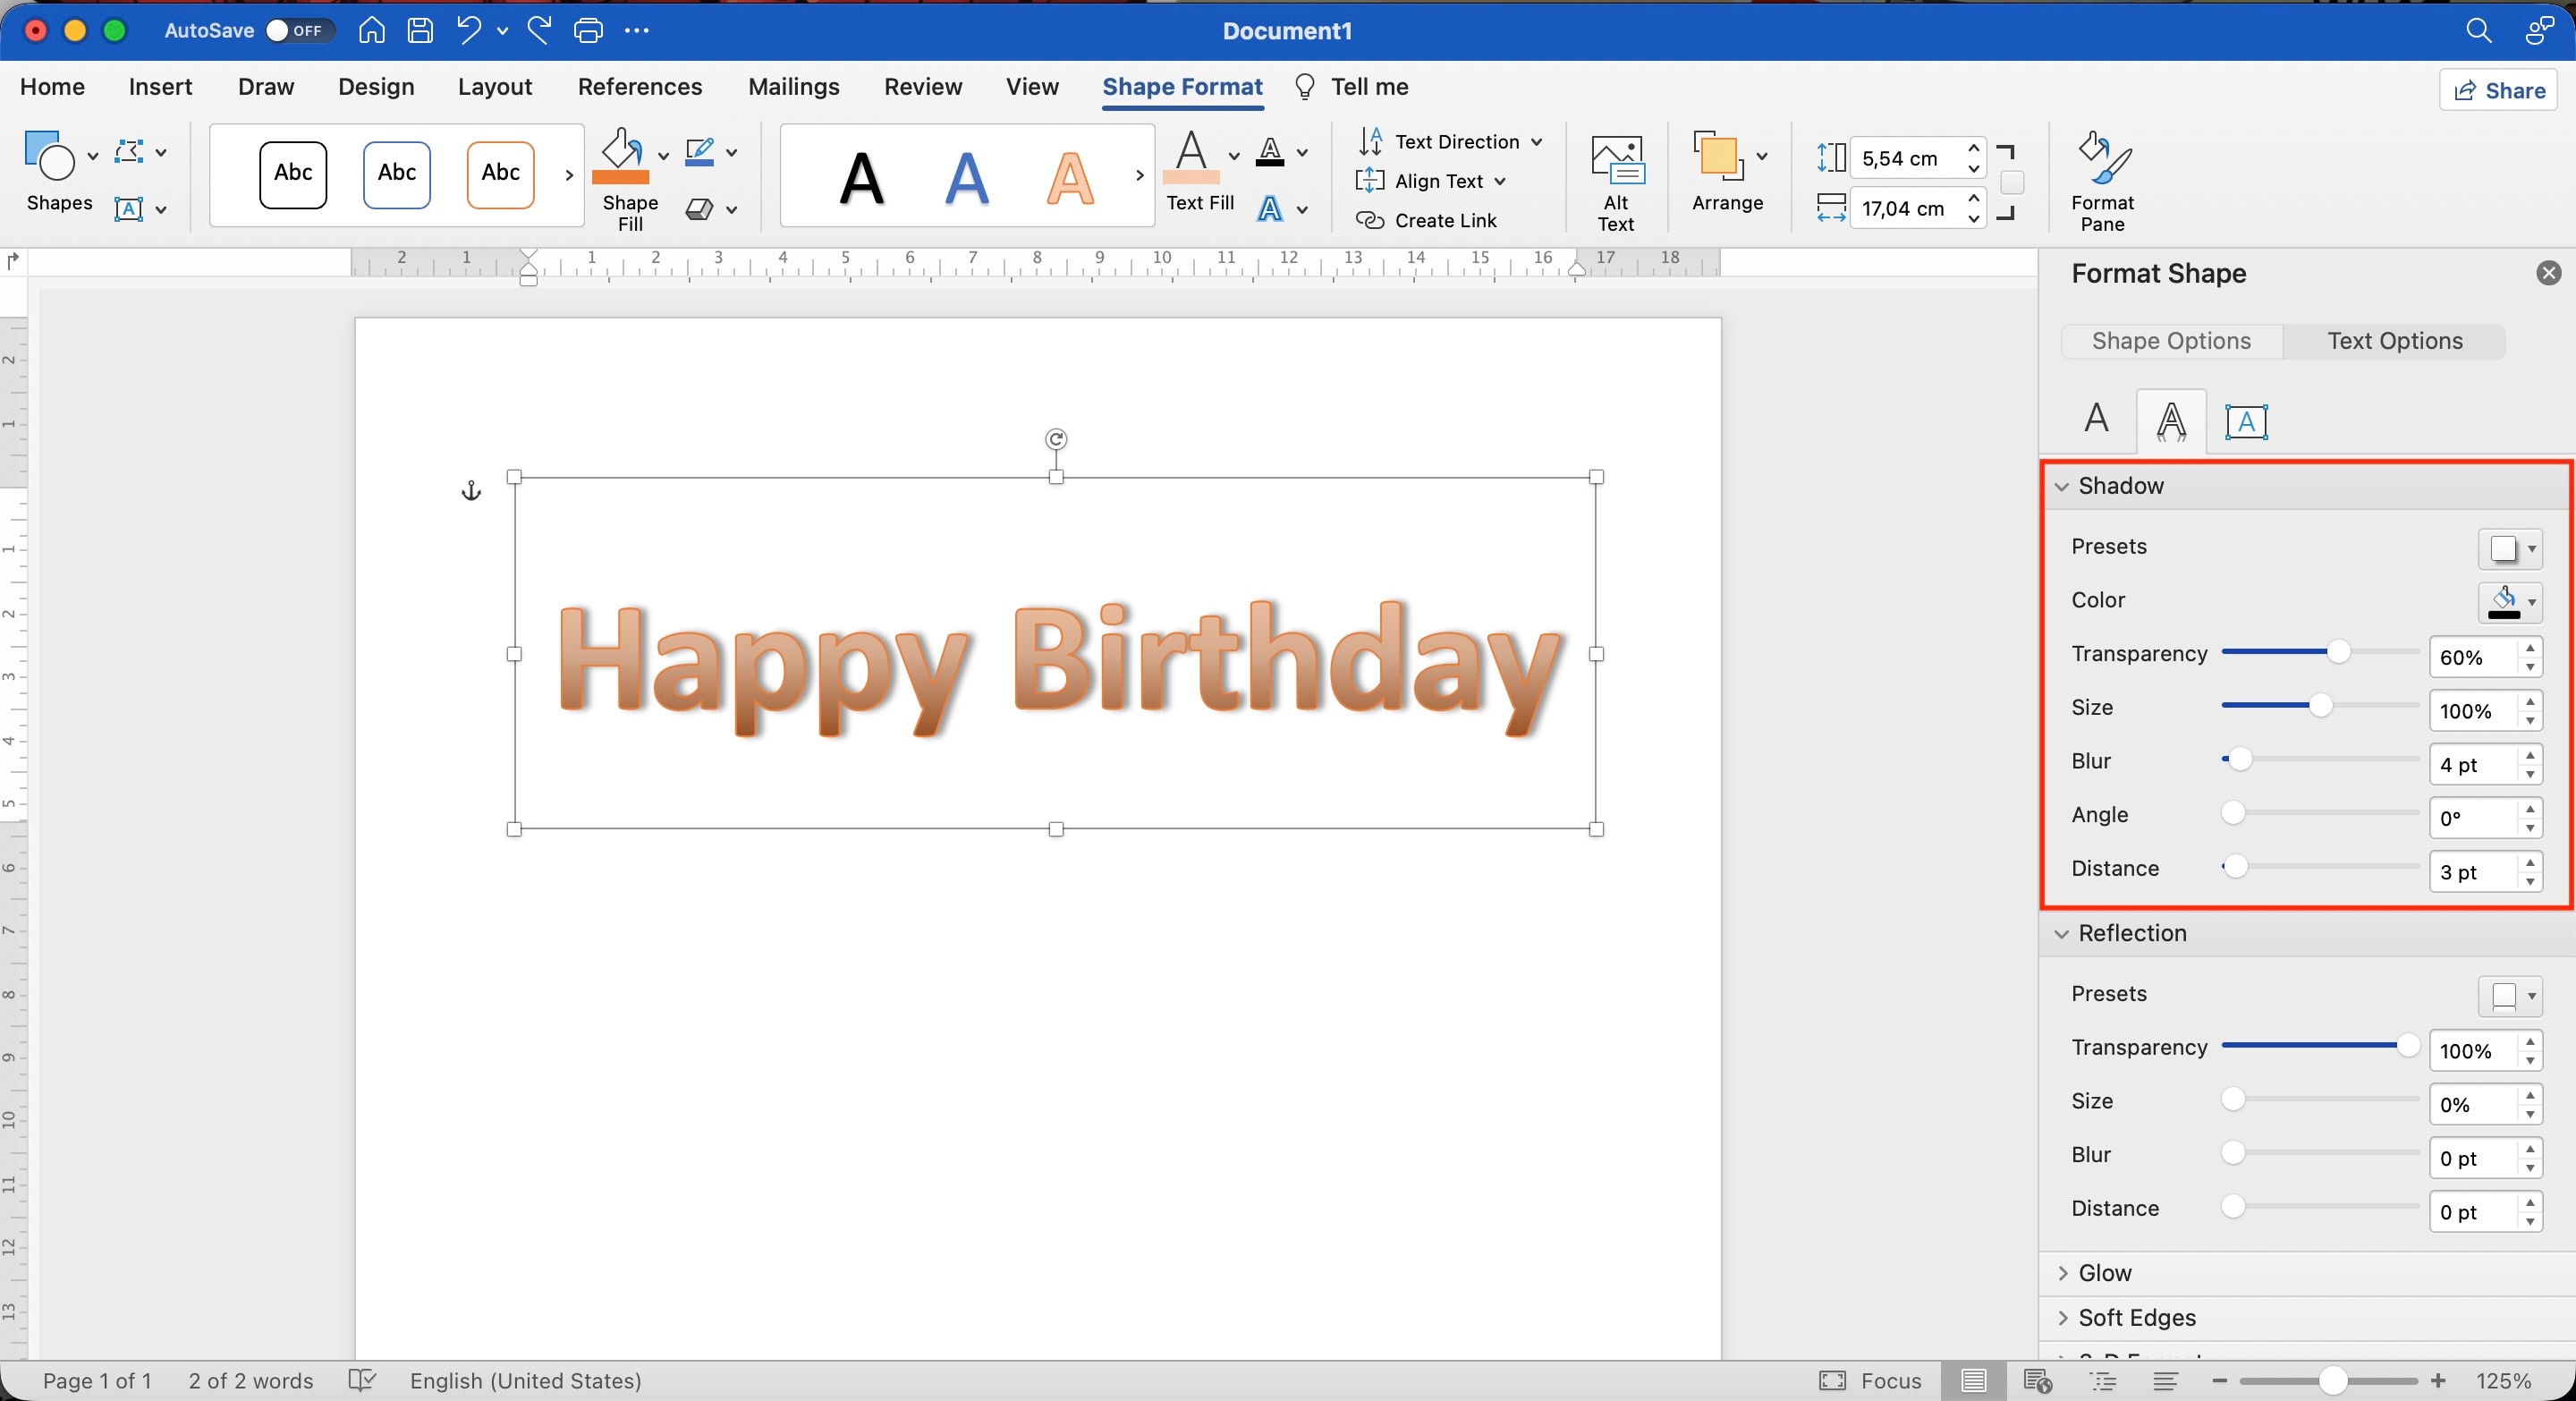
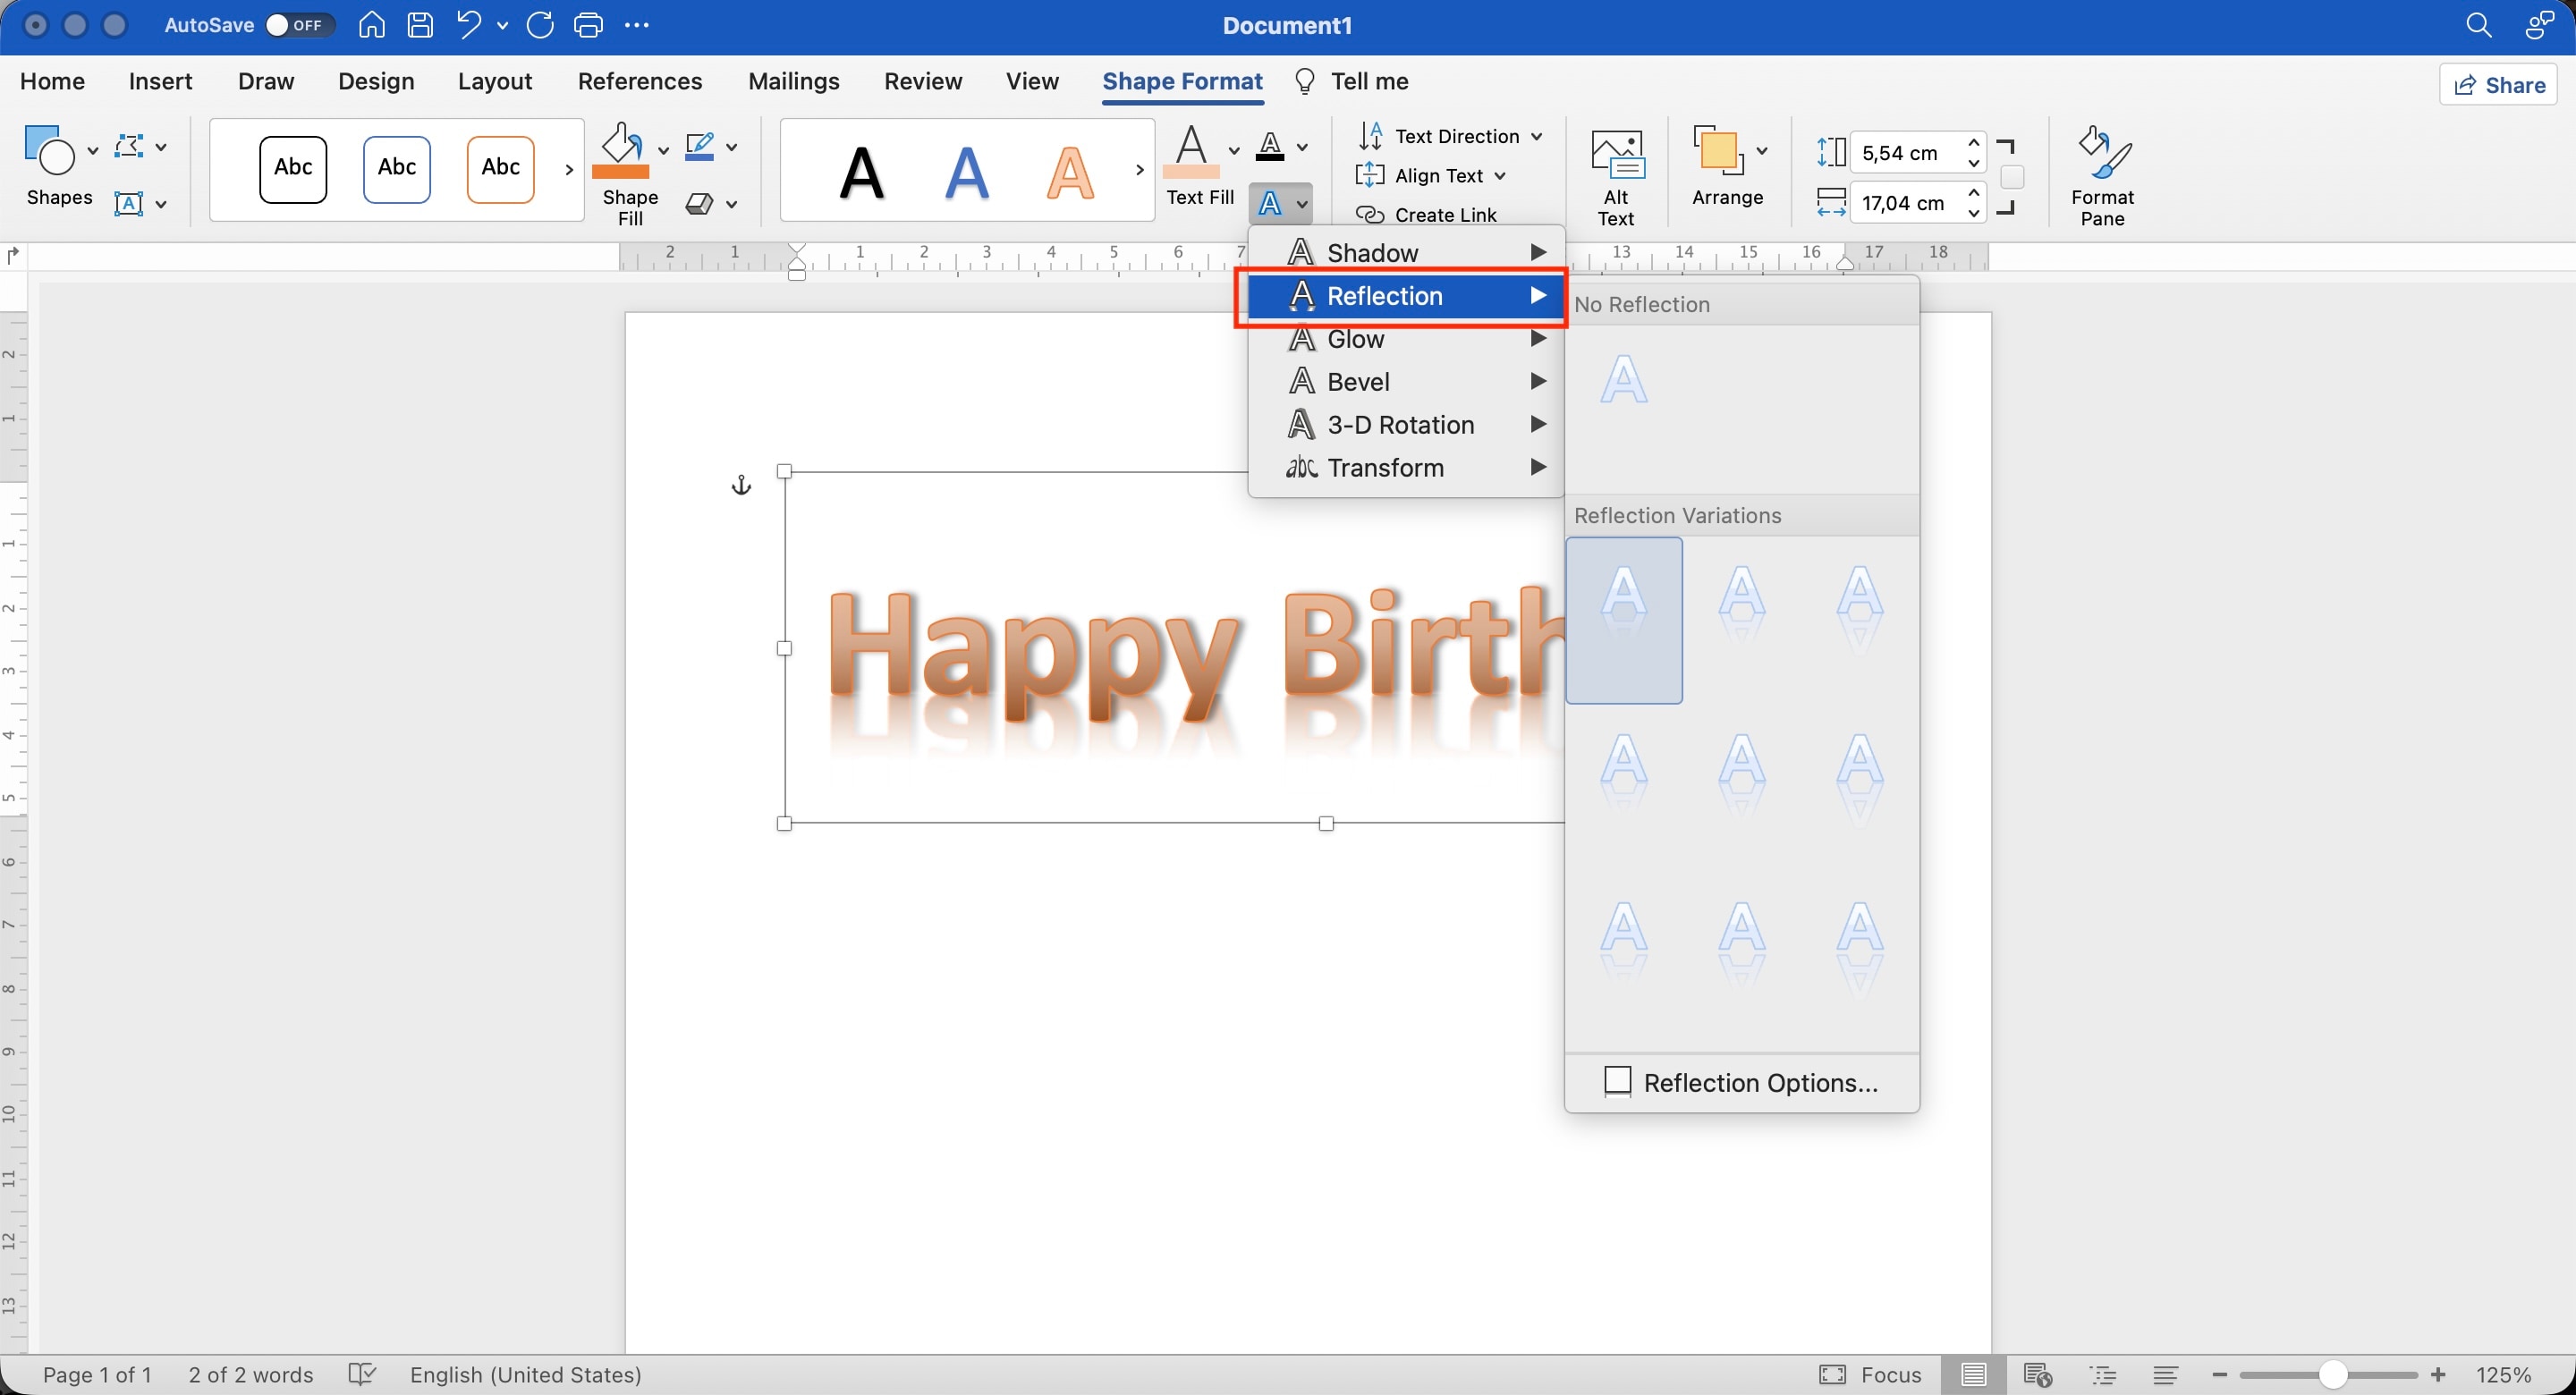
A shadow can separate WordArt from the background, while a reflection creates a mirrored effect beneath the letters. Both options are available through Text Effects.
Step 1. Select the WordArt text. Go to Shape Format > Text Effects. Point to Shadow and choose a preset.
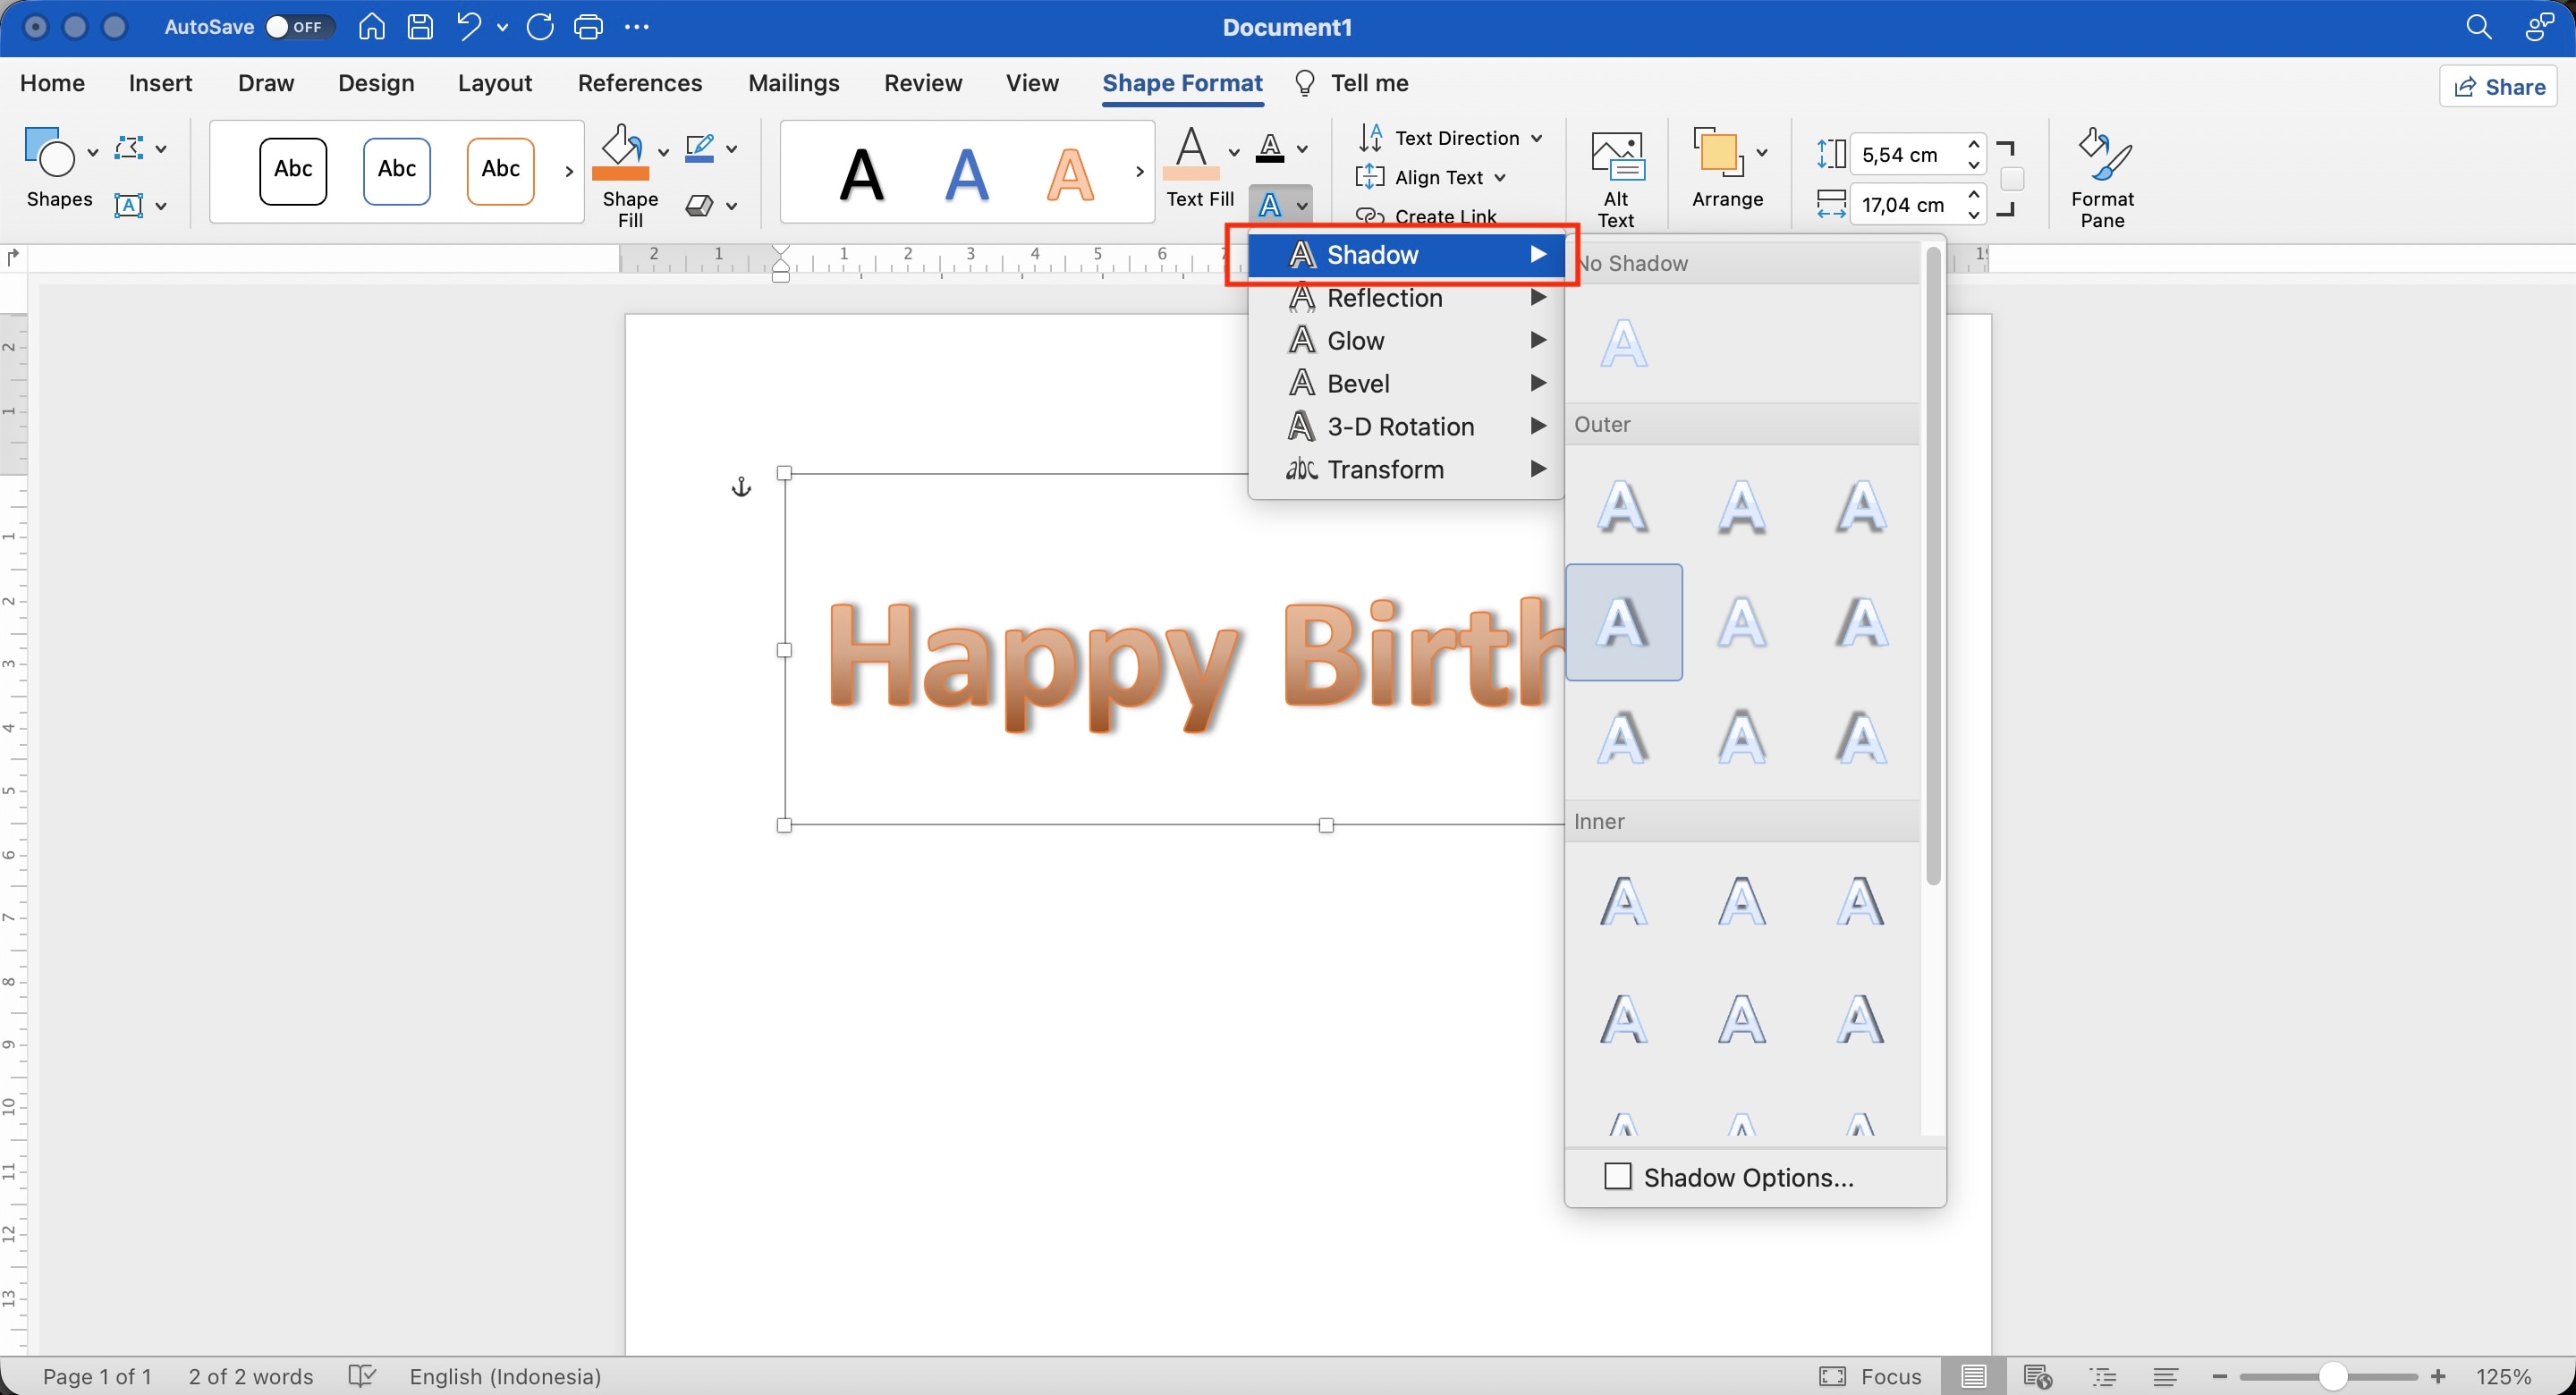
Step 2. Select Shadow Options to fine-tune settings such as color, transparency, blur, angle, and distance.
Step 3. For a reflection, return to Text Effects > Reflection and choose the variation you want.
3. Change the Text Fill and Outline

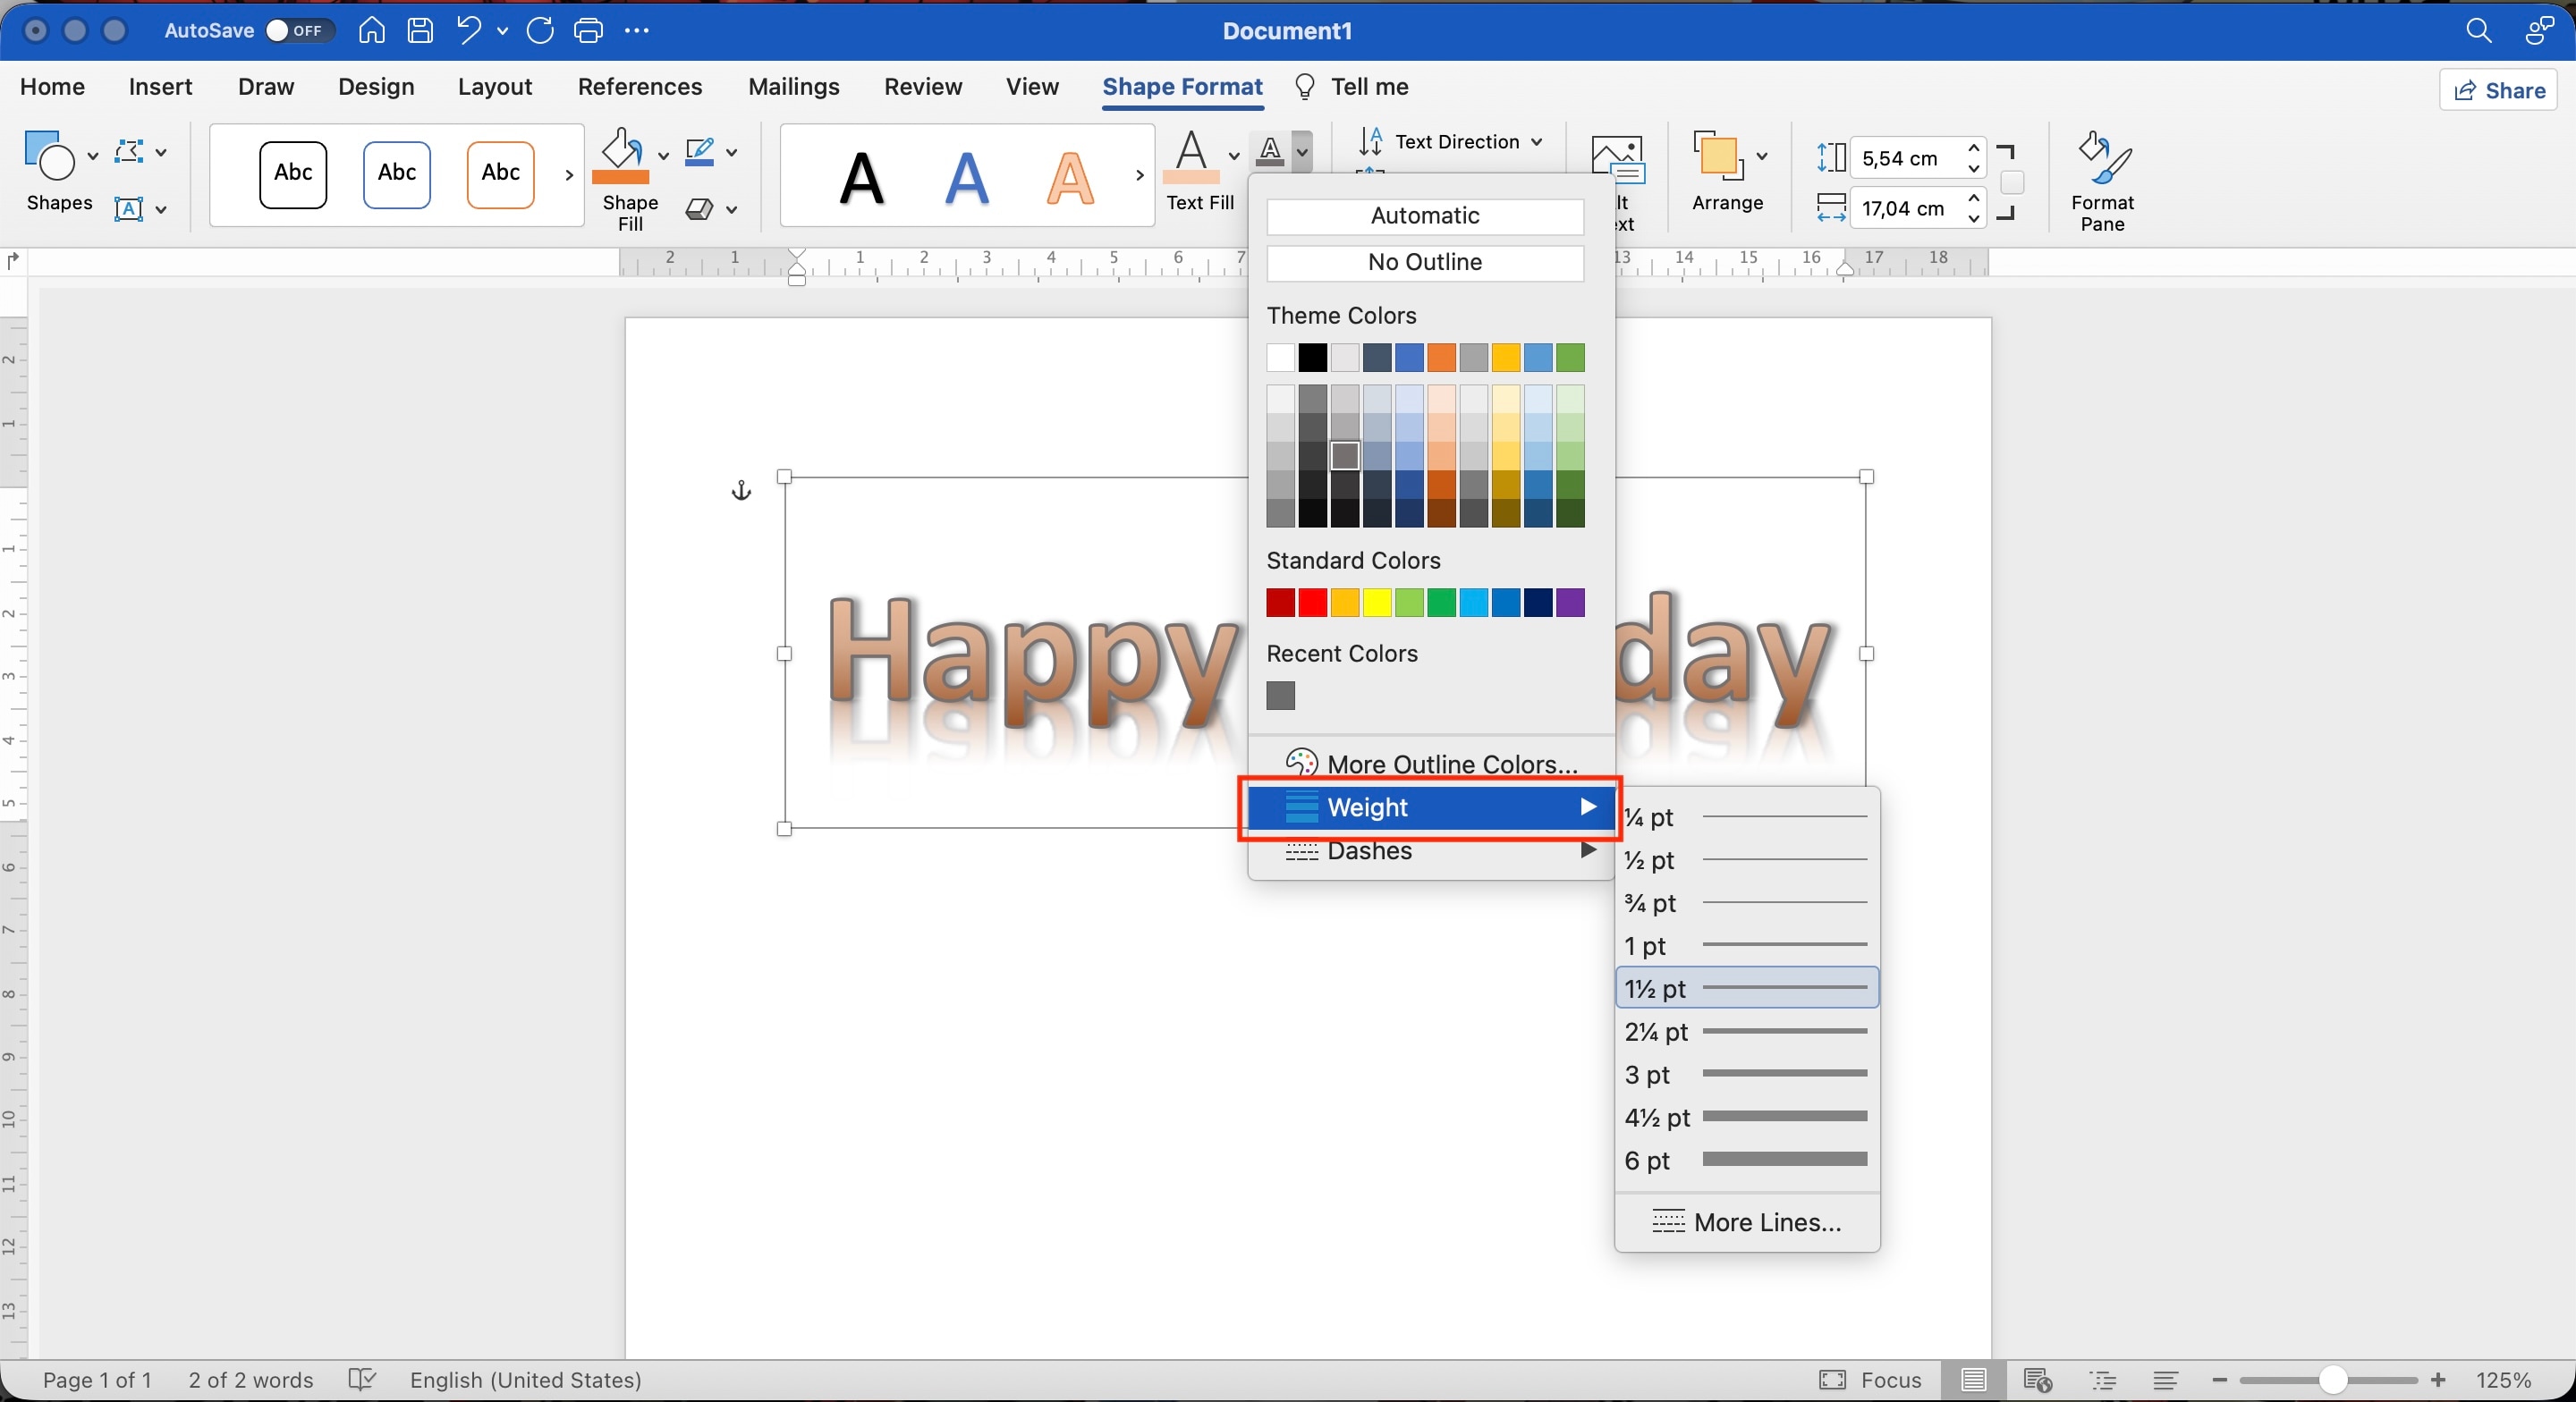
Changing the fill or outline is one of the quickest ways to give the same WordArt a different visual style. You can use a solid color, gradient, picture, or texture for the fill, and adjust the outline's color, thickness, or line style.
Step 1. Select the WordArt text. Go to Shape Format > Text Fill and choose a color, gradient, picture, or texture. Select Text Outline to choose an outline color.
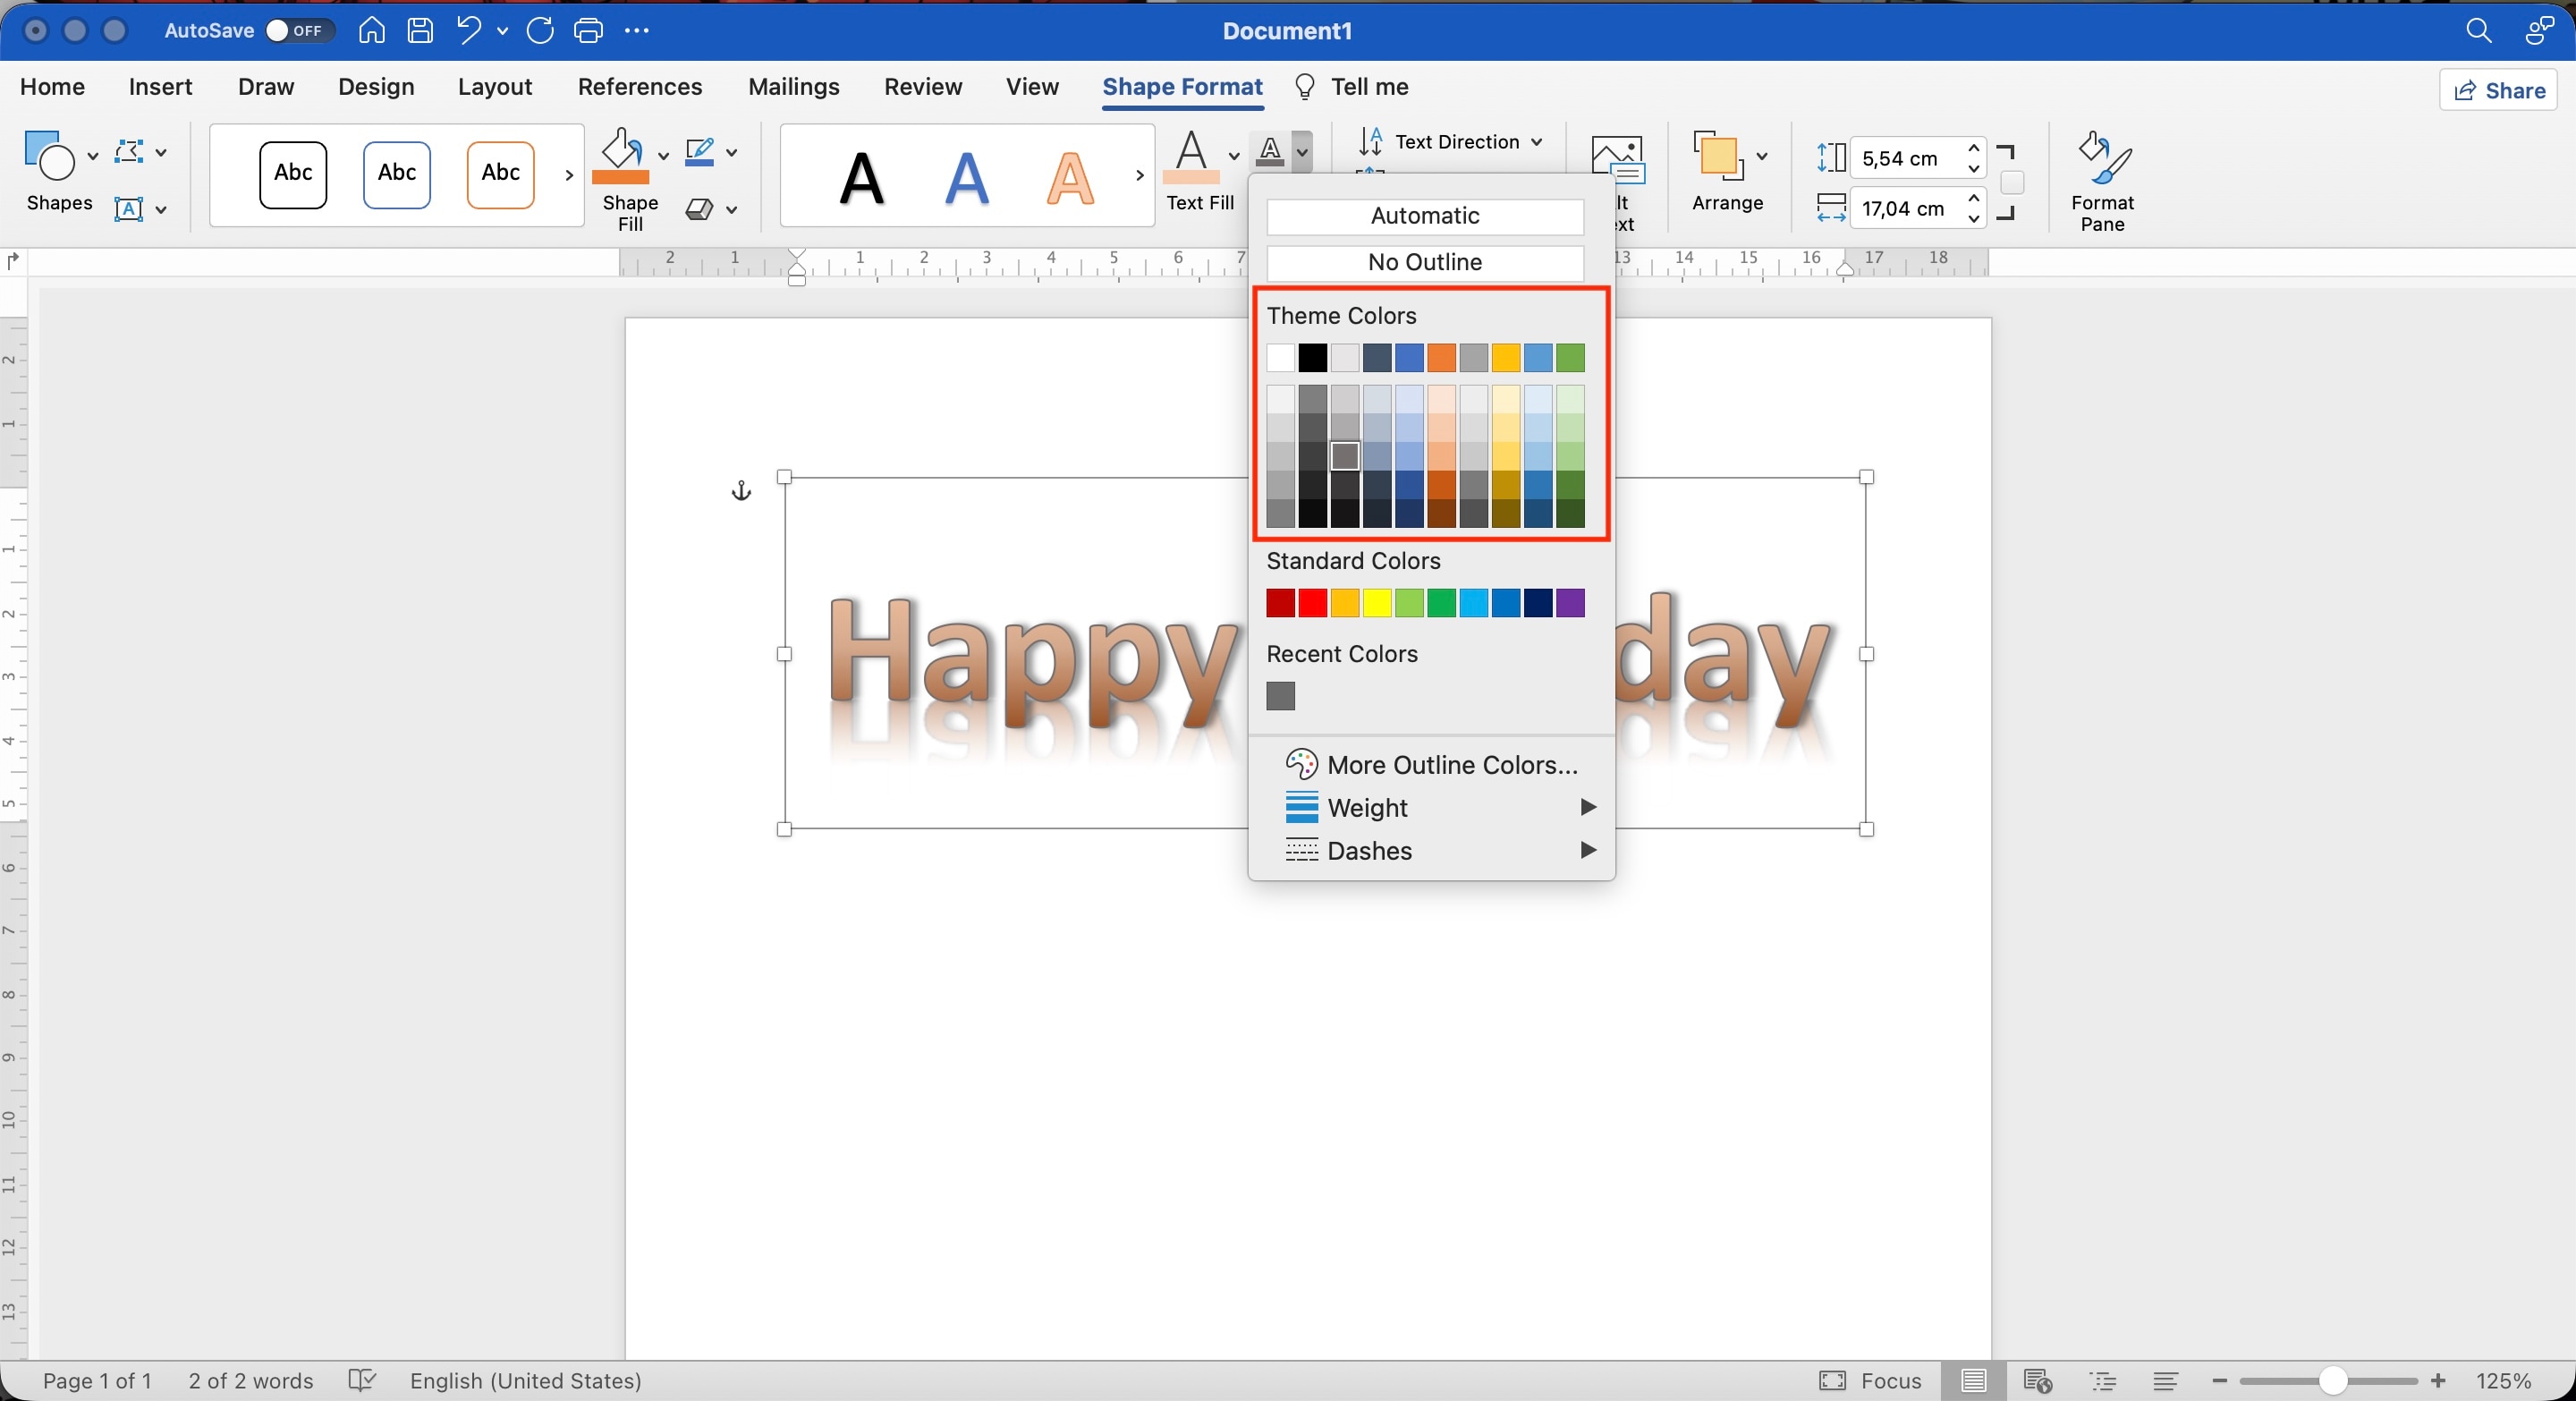
Step 2. To change the outline's thickness or style, go to Text Outline > Weight or Dashes.
4. Add Glow, Bevel, or 3D Effects

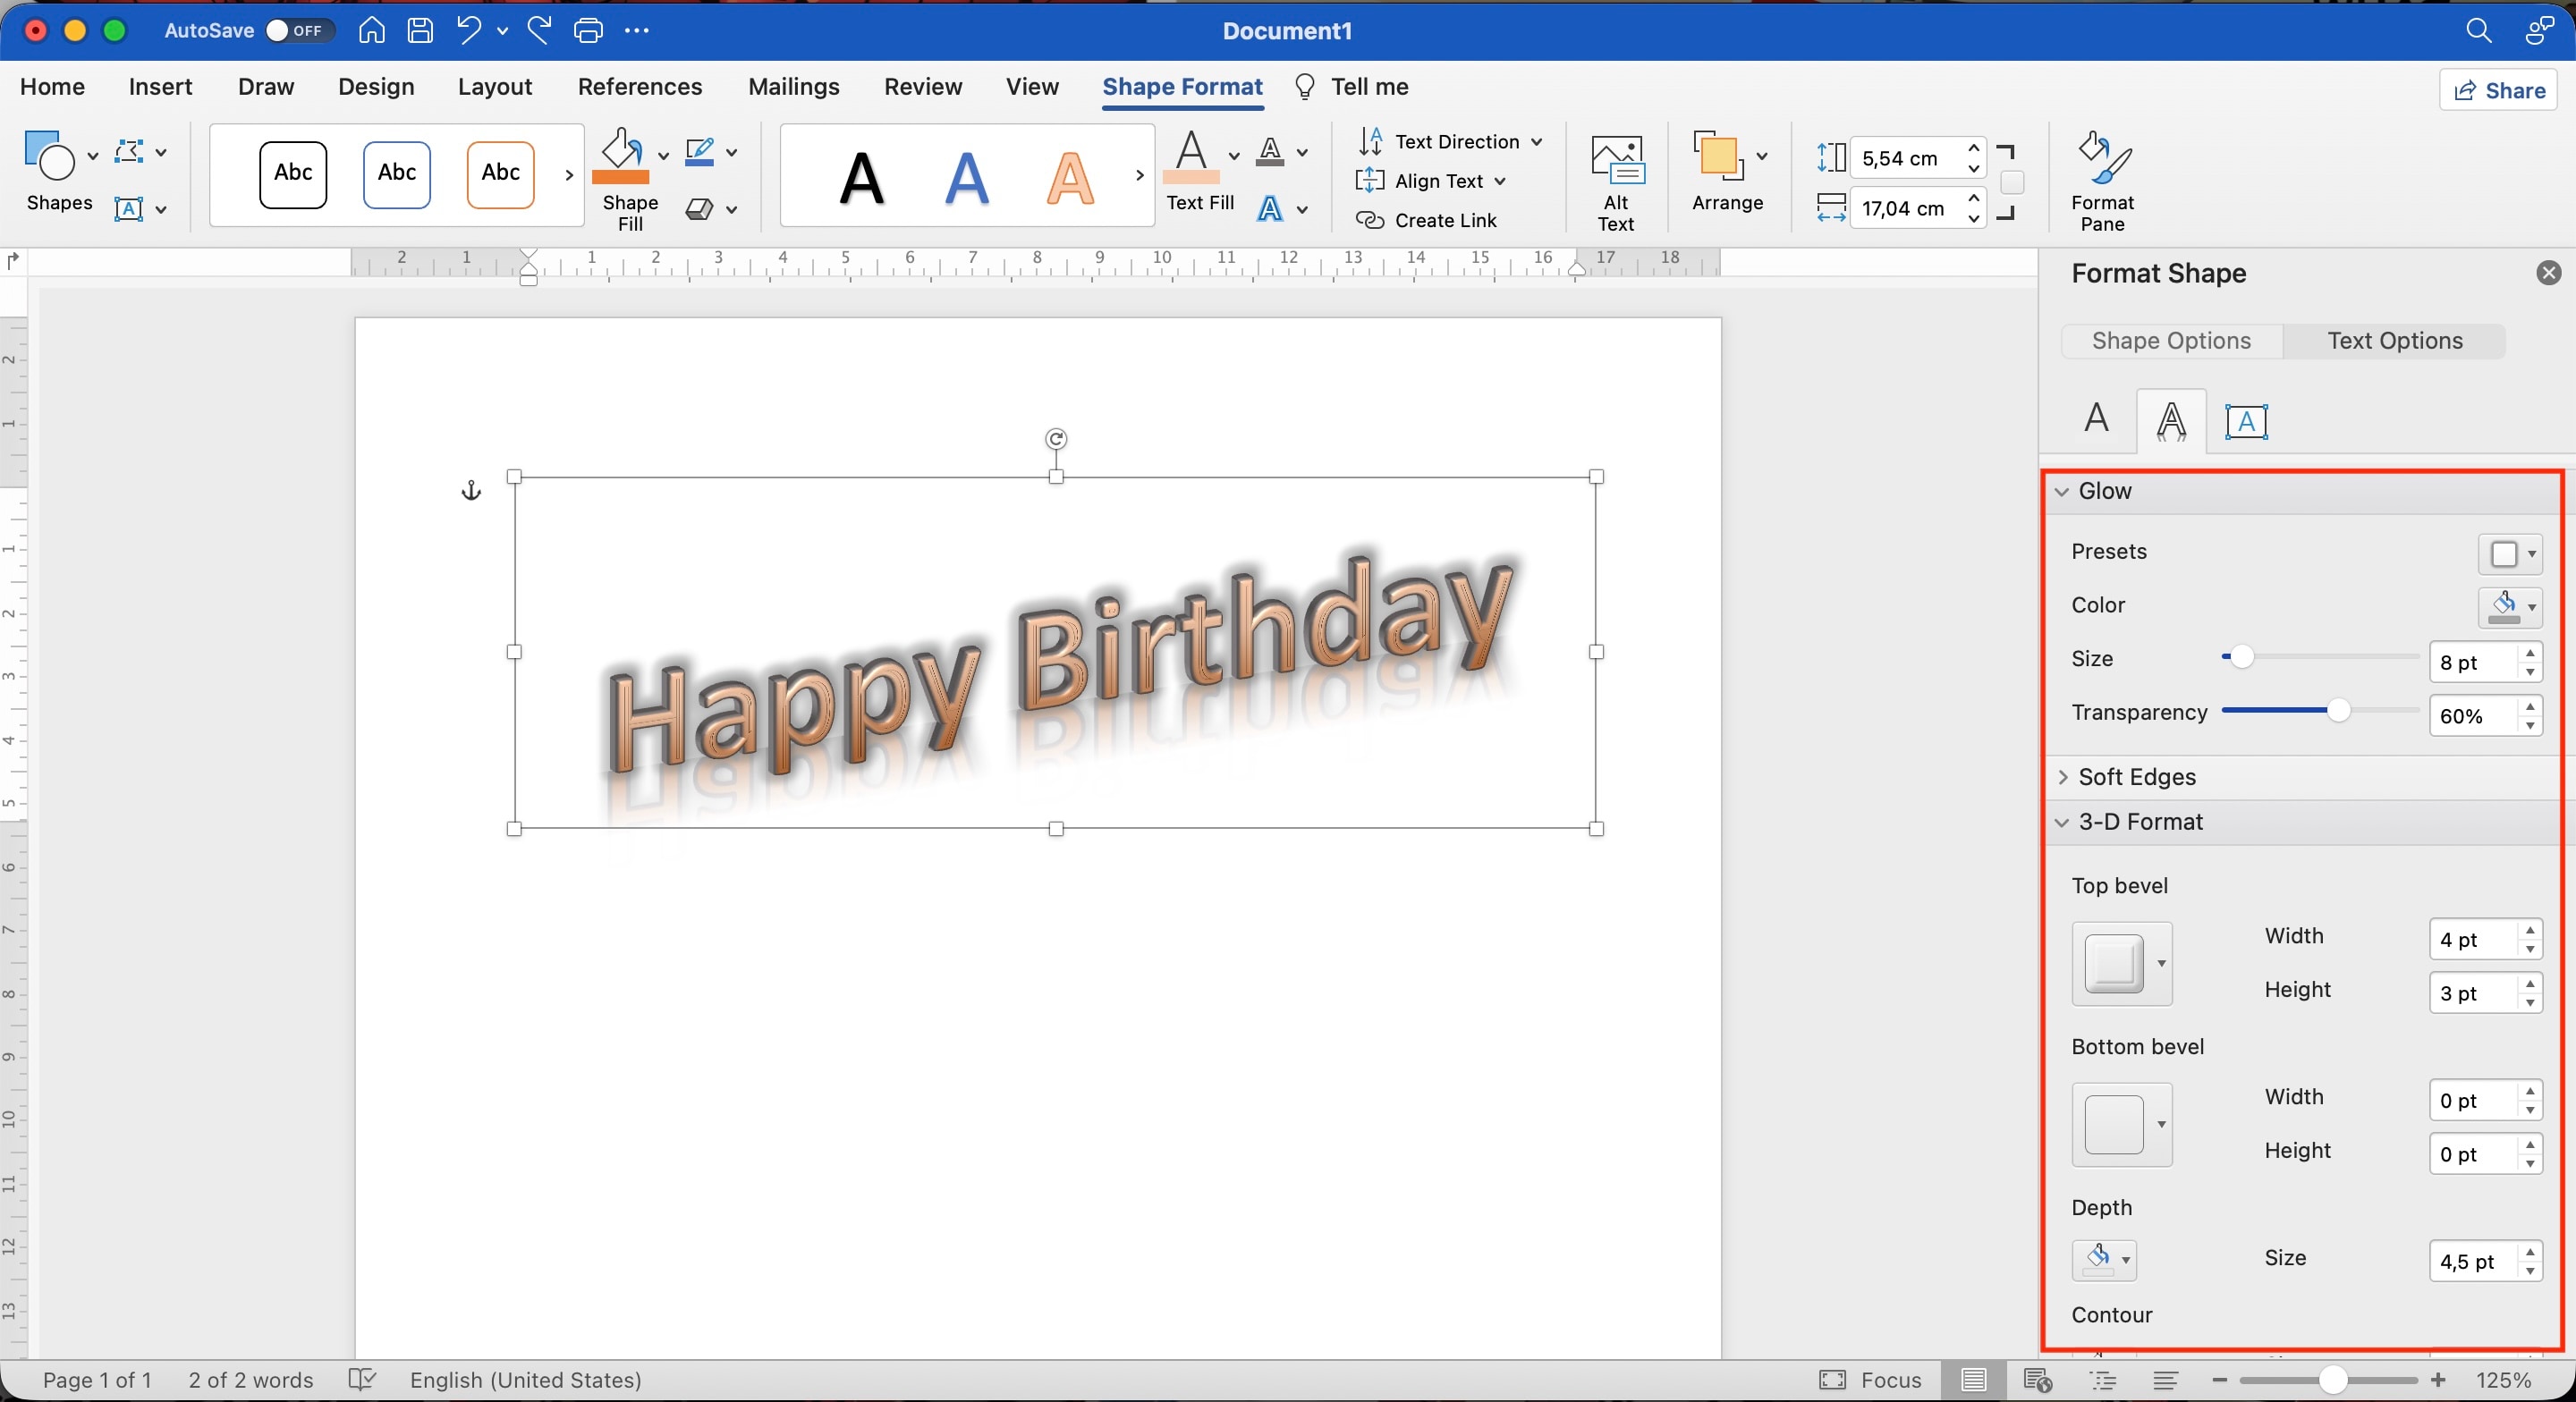
WordArt in Word also includes effects such as Glow, Bevel, and 3-D Rotation. These can add depth or make decorative text stand out more prominently.
Step 1. Select the WordArt text. Go to Shape Format > Text Effects. Point to Glow, Bevel, or 3-D Rotation.
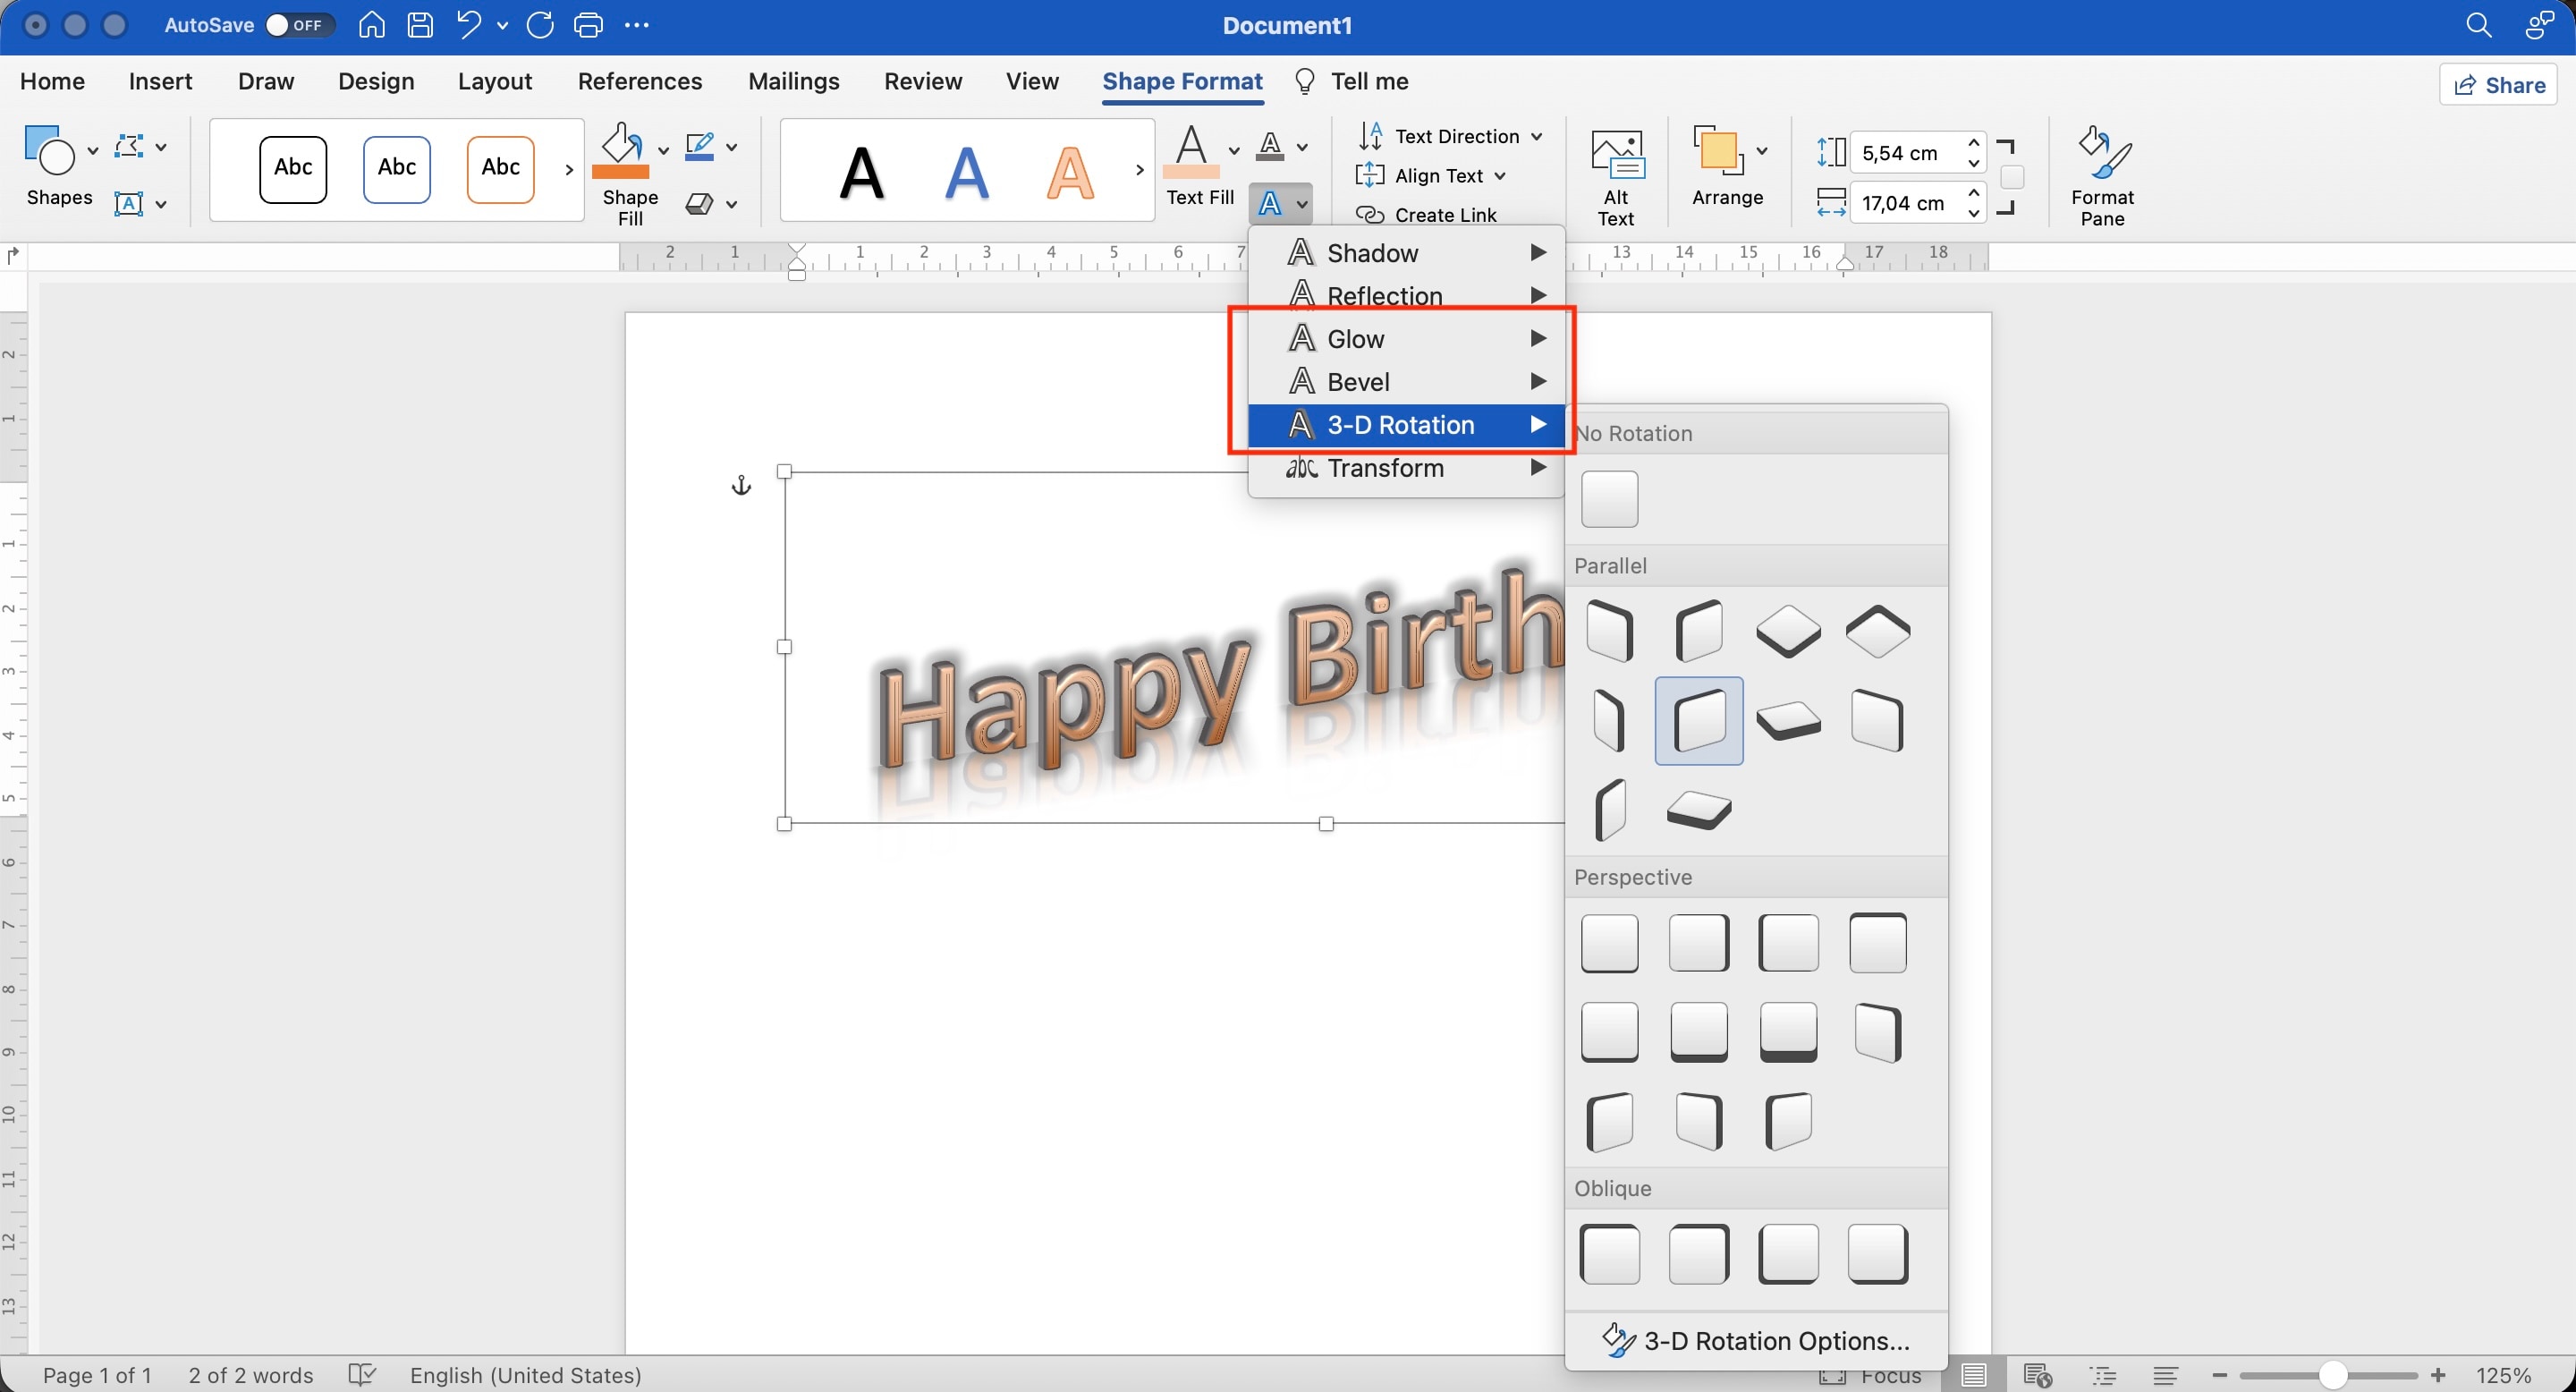
Step 2. Choose a preset or open the corresponding options to fine-tune the effect.
5. Curve or Warp the WordArt

Straight text isn't your only option. The Transform effect lets you curve, bend, or reshape WordArt along different paths, including circular layouts.
Step 1. Select the WordArt text. Go to Shape Format > Text Effects > Transform.
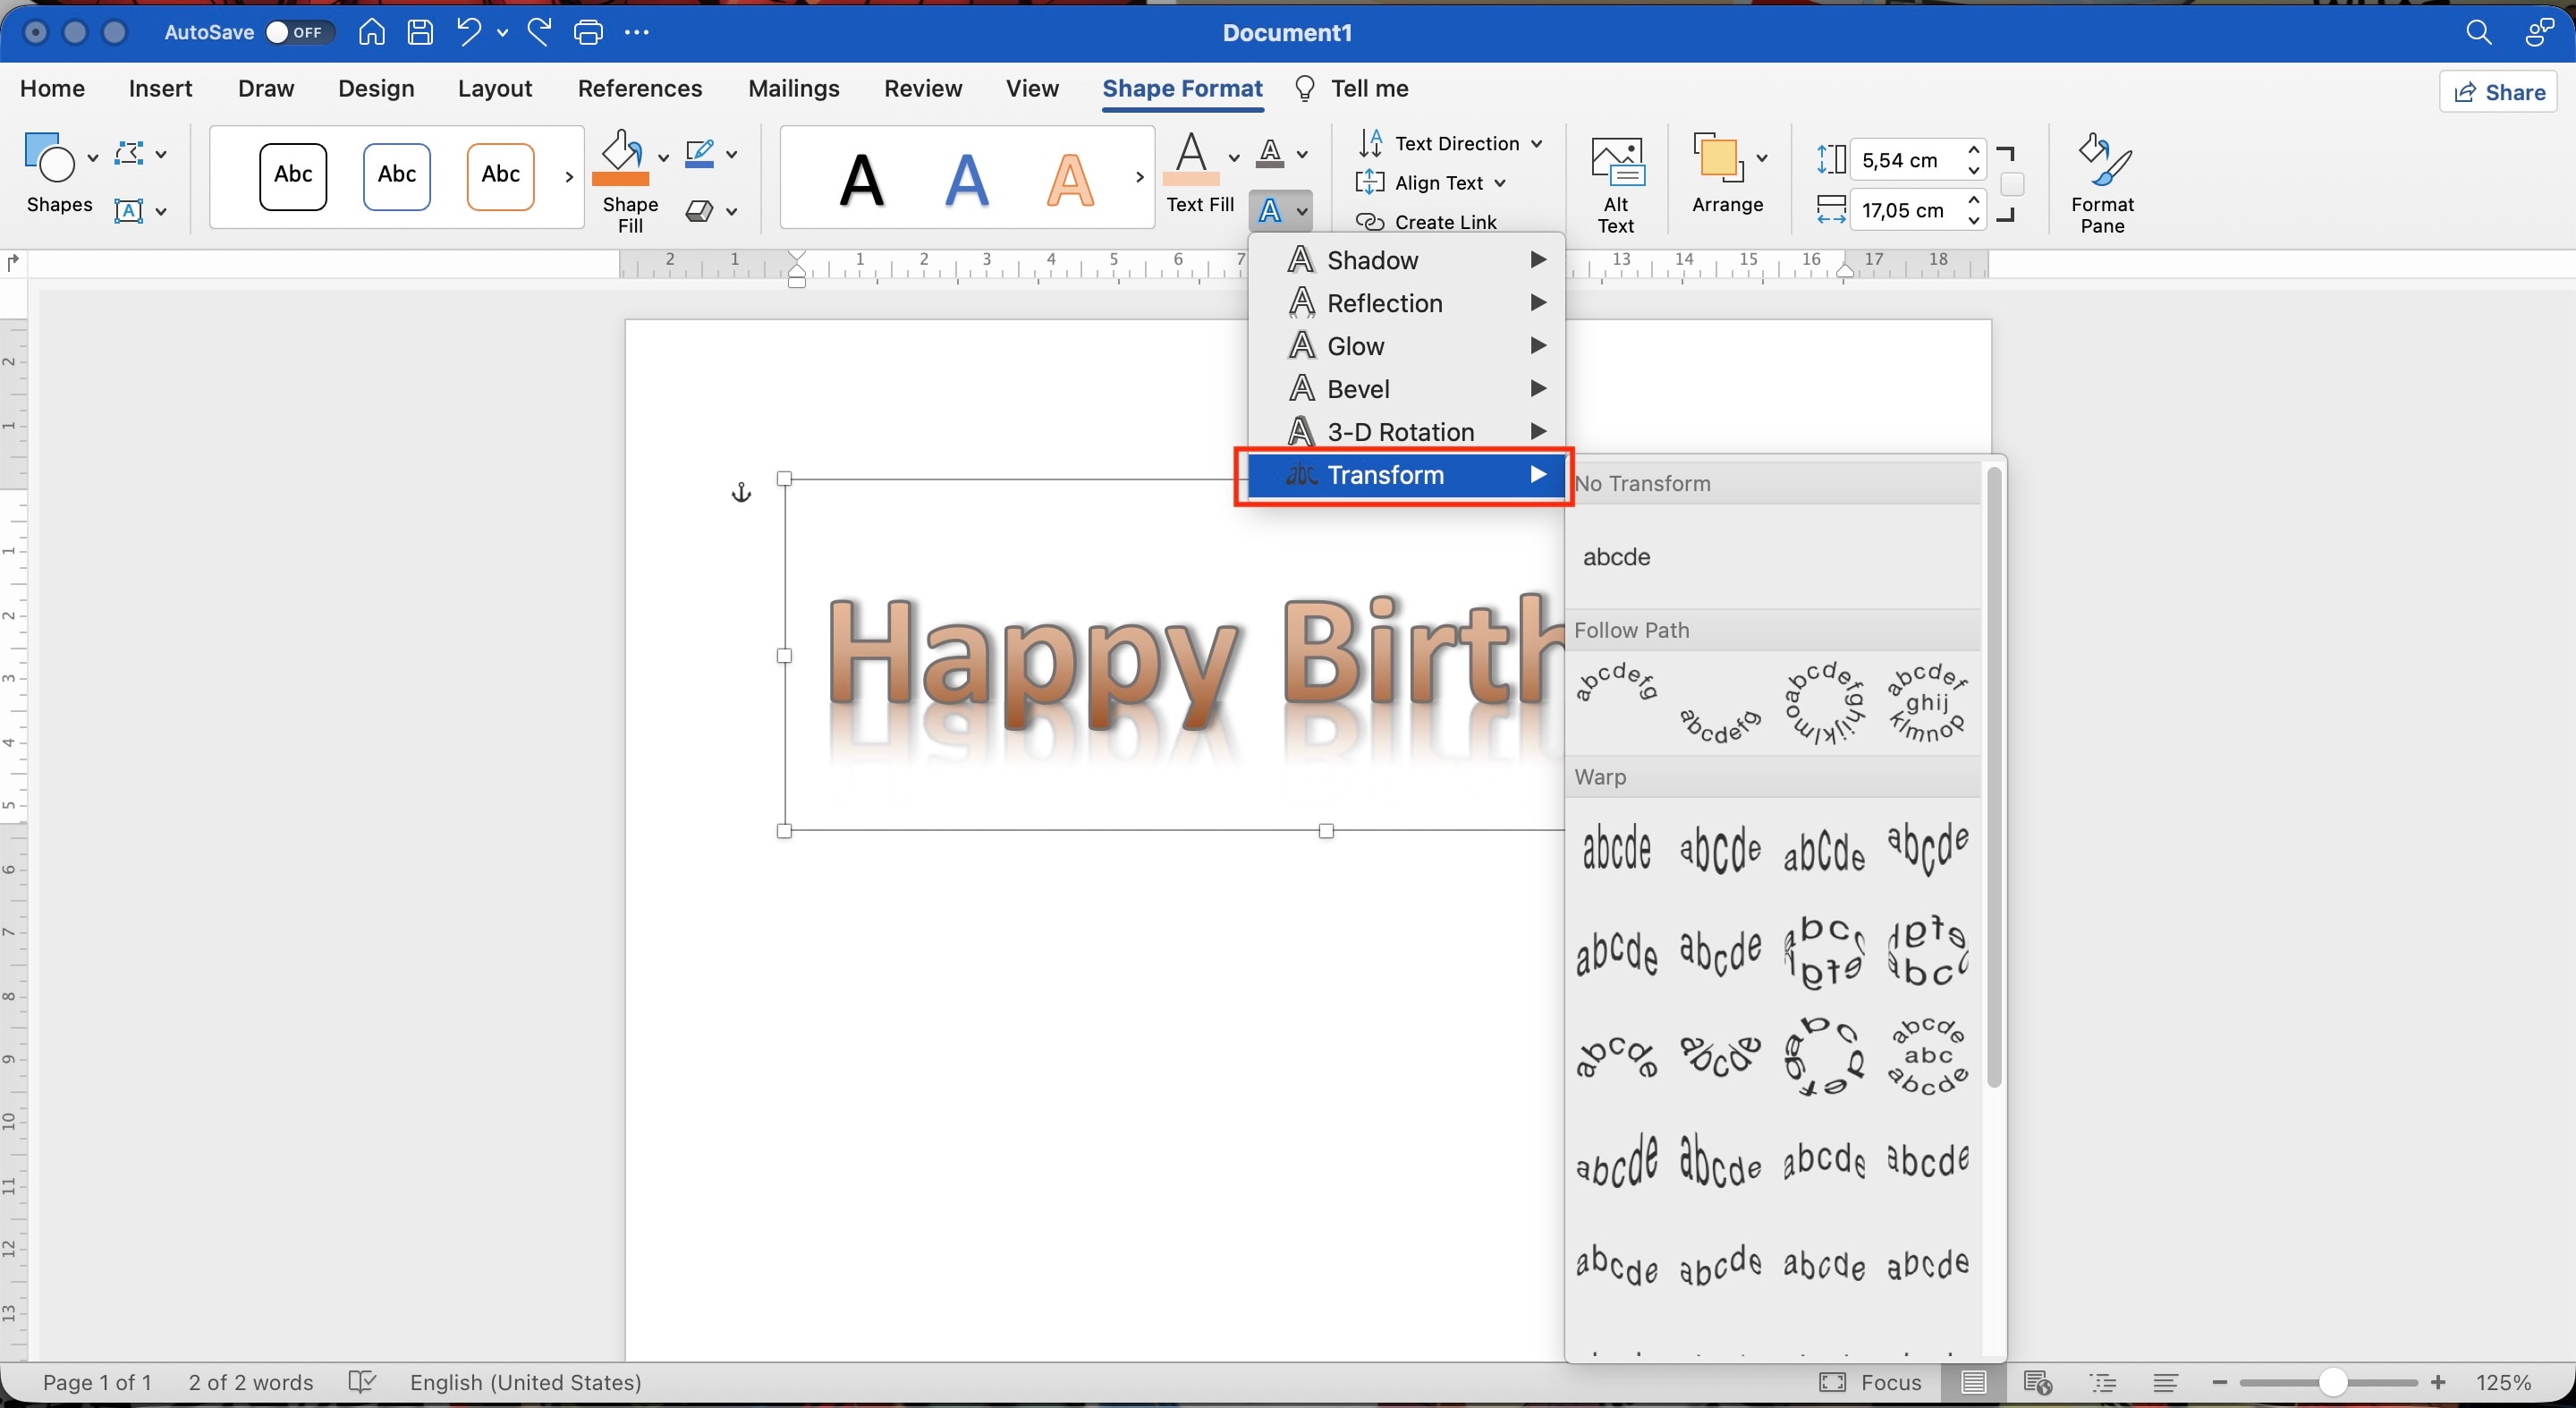
Step 2. Choose a curved, circular, or other transformation style.
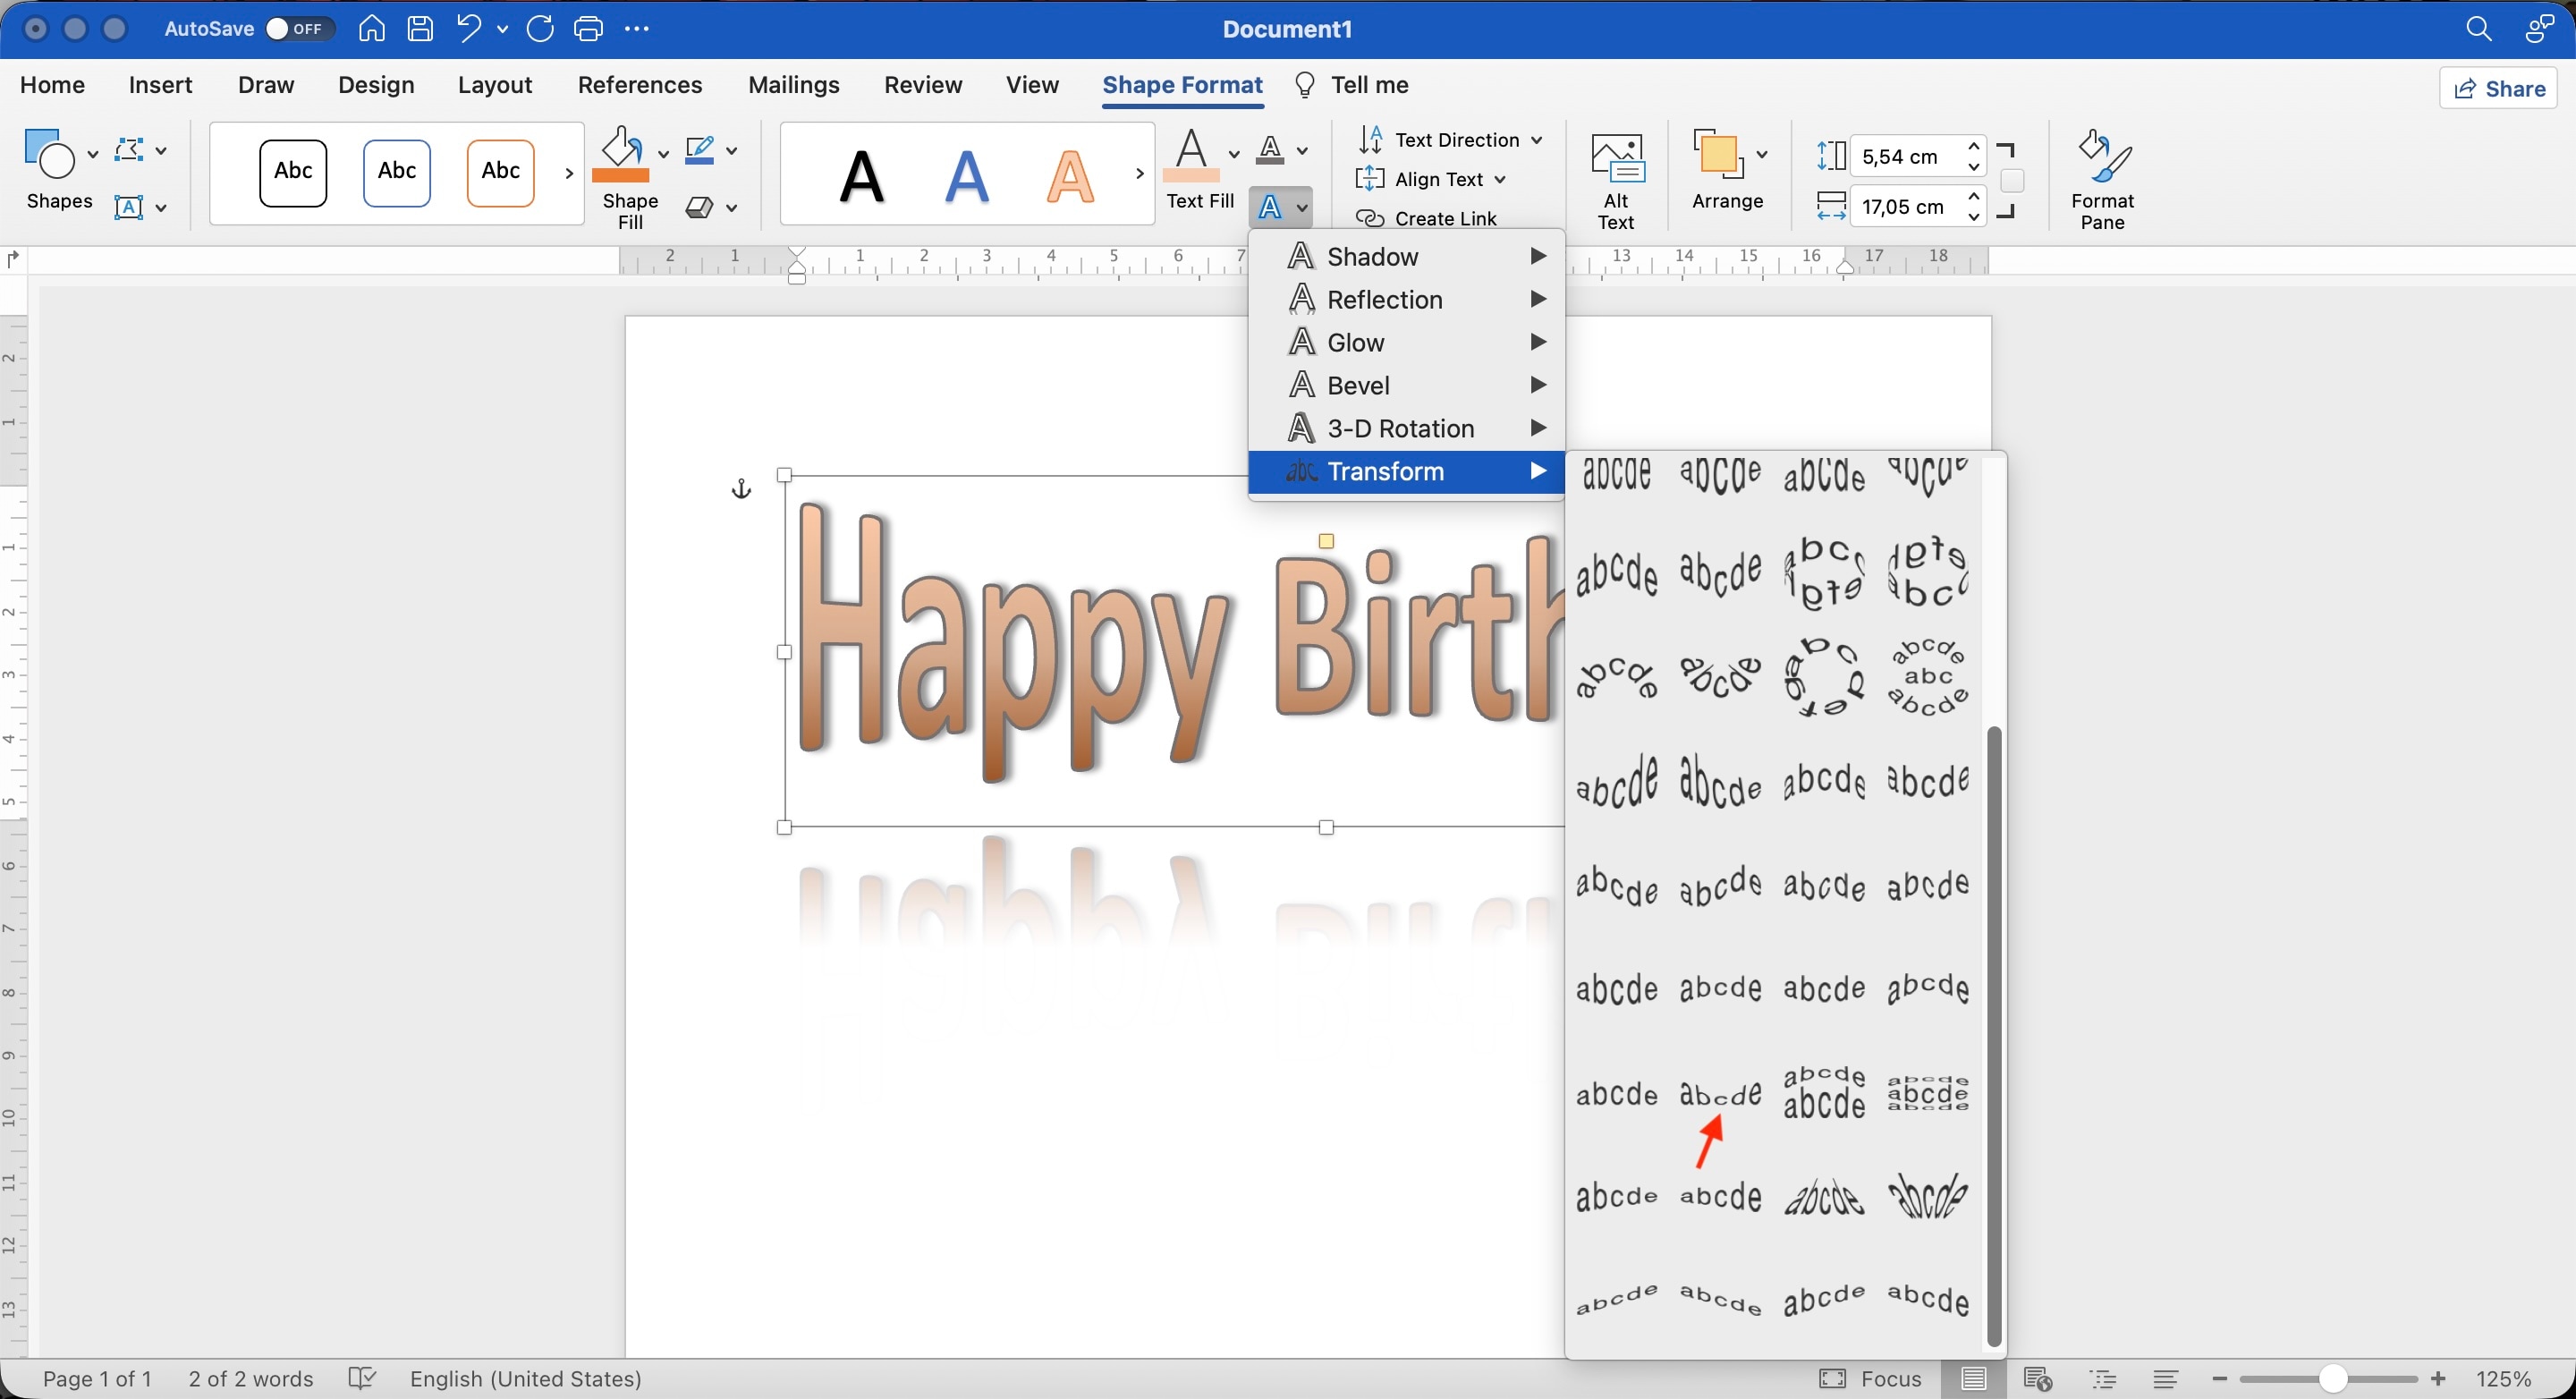
Step 3. Resize or reposition the WordArt to fit the new shape.
Part 3. What Can You Create with WordArt?
Now that you know how to use WordArt in Word, it becomes more useful once you use the text as part of the layout, not just a decorated heading. Below are practical ideas for making WordArt in Word, with sample concepts you can recreate.
1. Create Eye-Catching Titles
Use WordArt to give a specific title more personality. Try a bold fill with an outline or shadow for event posters, project covers, menus, or announcements.
Example: Large gold-gradient lettering with a dark outline and subtle shadow

2. Create Curved and Shaped Text
The Transform effect lets you move beyond a straight line. Curved text works especially well around badges, illustrations, photos, and circular designs.
Example: Text curved into an arch above a coffee cup illustration

3. Layer WordArt with Images and Shapes
Combine WordArt with photos or basic shapes to create a more complete composition. Adjust the text fill, transparency, and placement so the lettering works with the image instead of covering important details.
Example: White WordArt positioned across a sunset beach photo, with a soft shadow for contrast

4. Turn WordArt into a Visual Asset
With the right combination of text effects and shapes, WordArt can become a separate design element for an invitation, announcement, thumbnail, or promotional graphic.
Example: Large WordArt layered over a colored shape with a contrasting outline

Part 4. Turn Your WordArt into Animated Clips or GIFs
Microsoft WordArt works well for static designs, but animated text requires a video editor. Wondershare Filmora offers more text styles and animation controls, allowing you to turn a WordArt-style title into a moving video element or GIF. Its Perspective Text feature also lets you change the text's angle and position for a more dimensional look.



How to Make Animated WordArt in Filmora
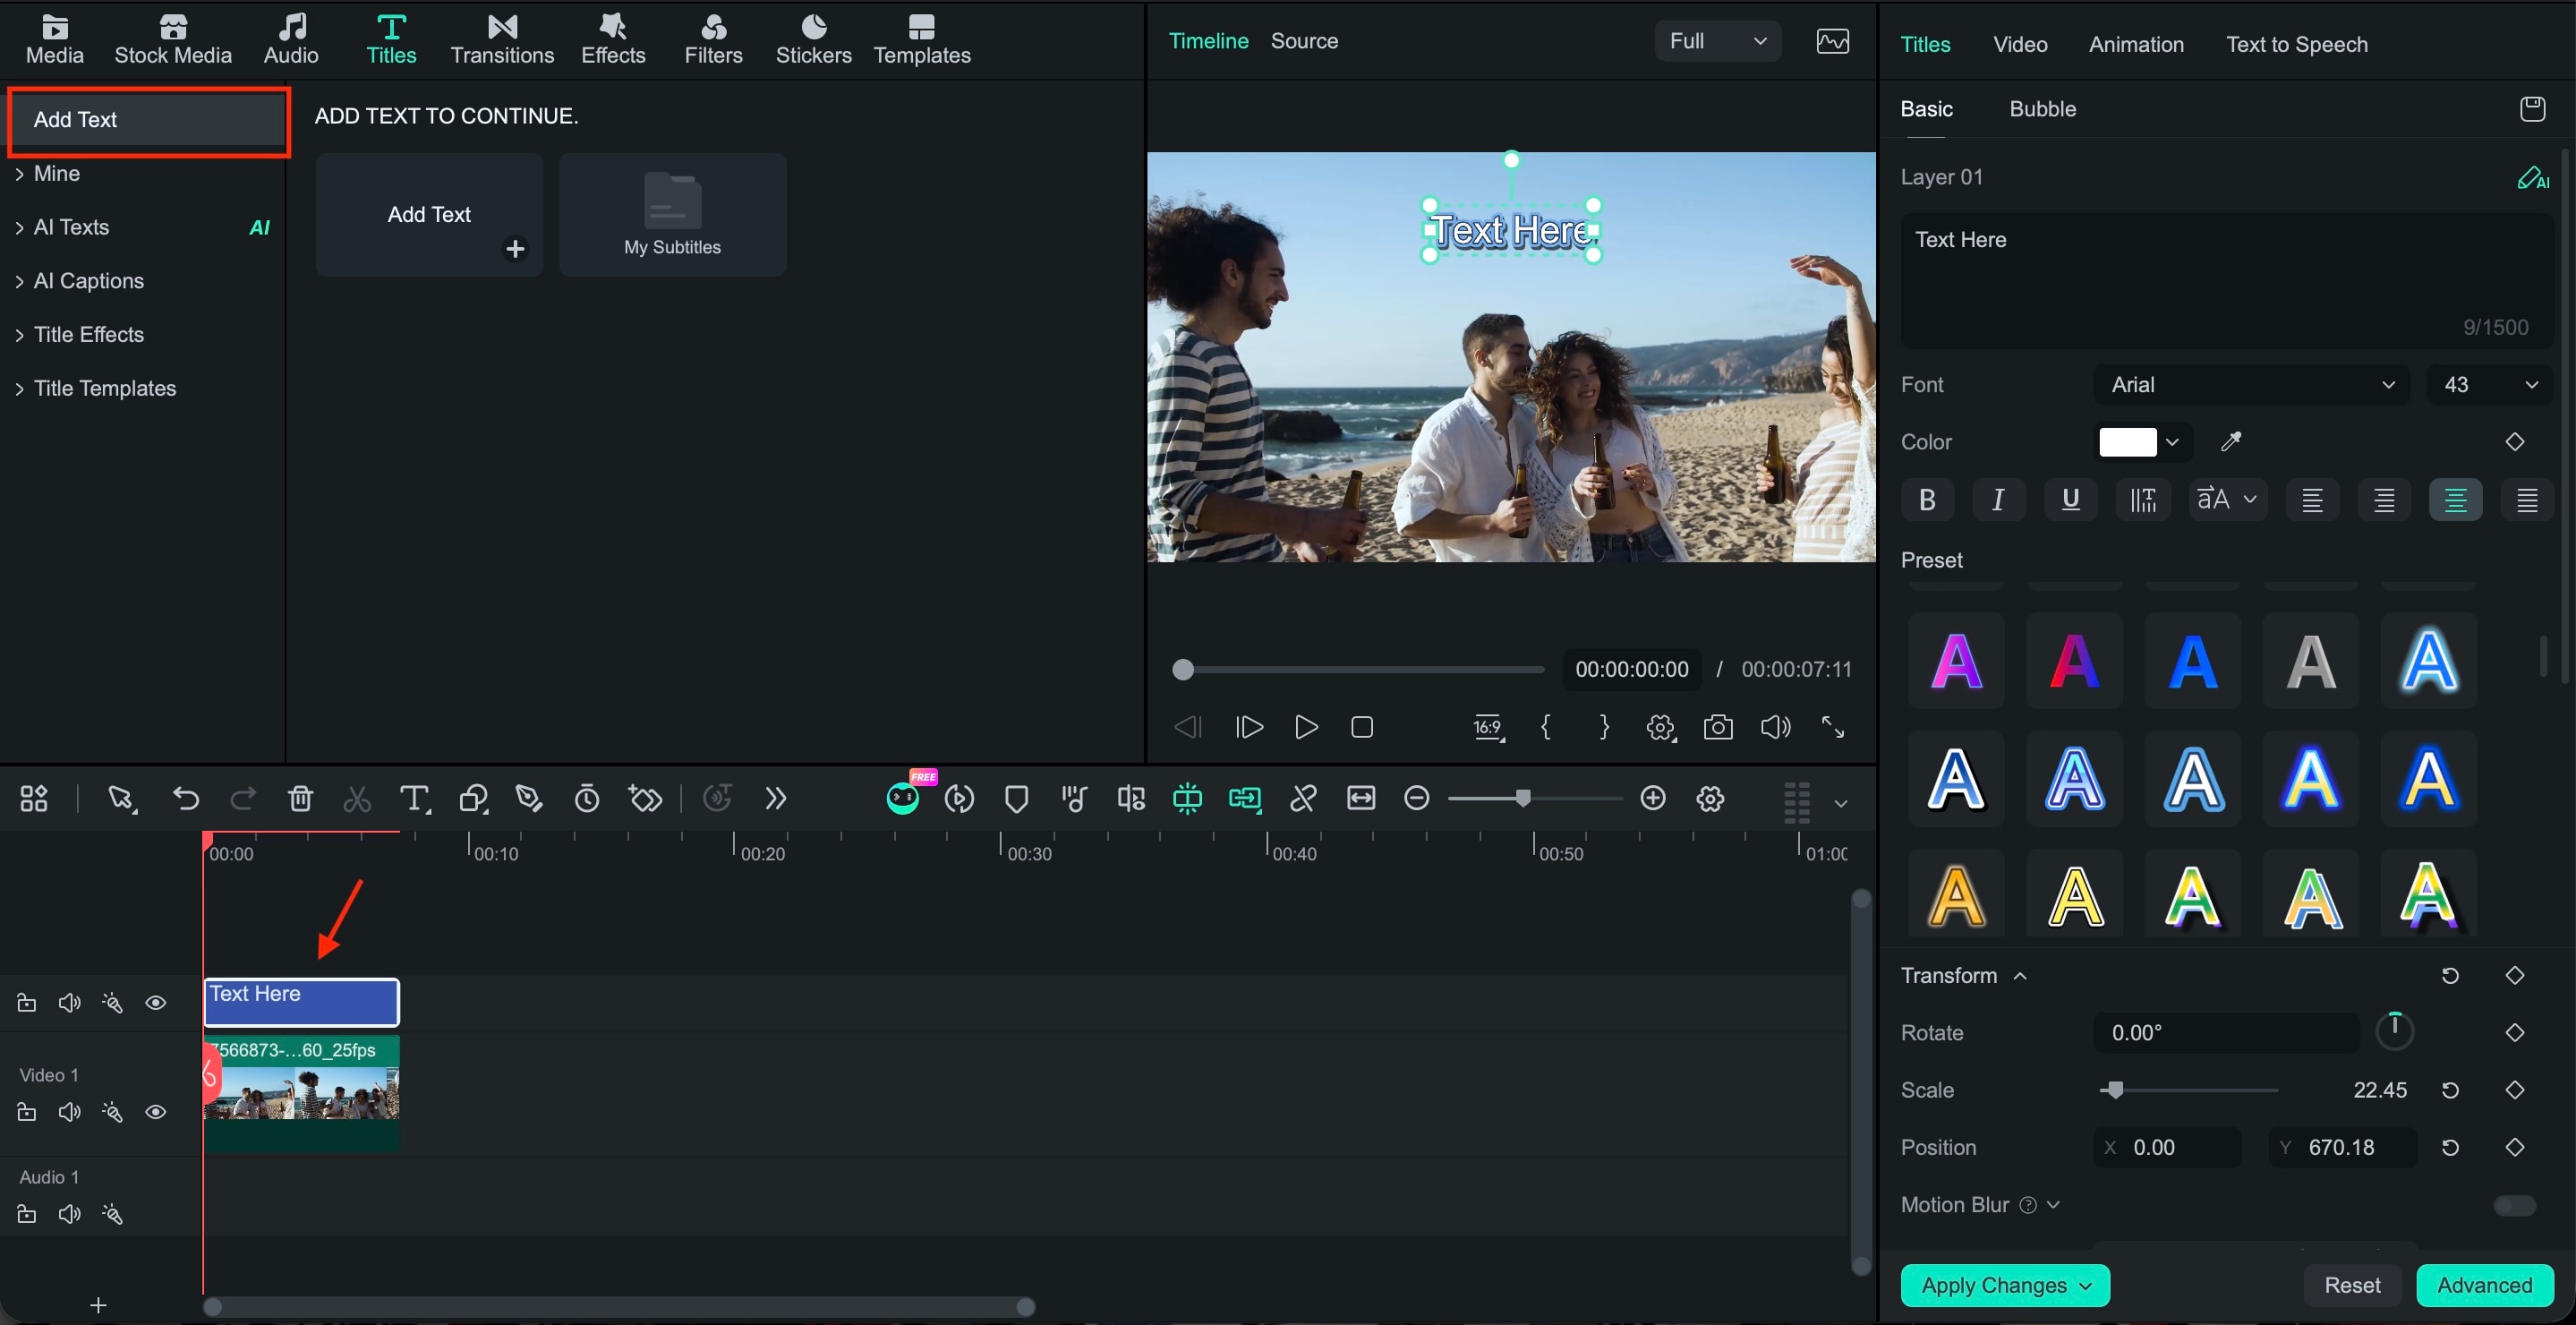
Step 1 Open Filmora, create a project, and go to Titles. Choose a text preset and drag it to the timeline. Double-click the title to enter your text.
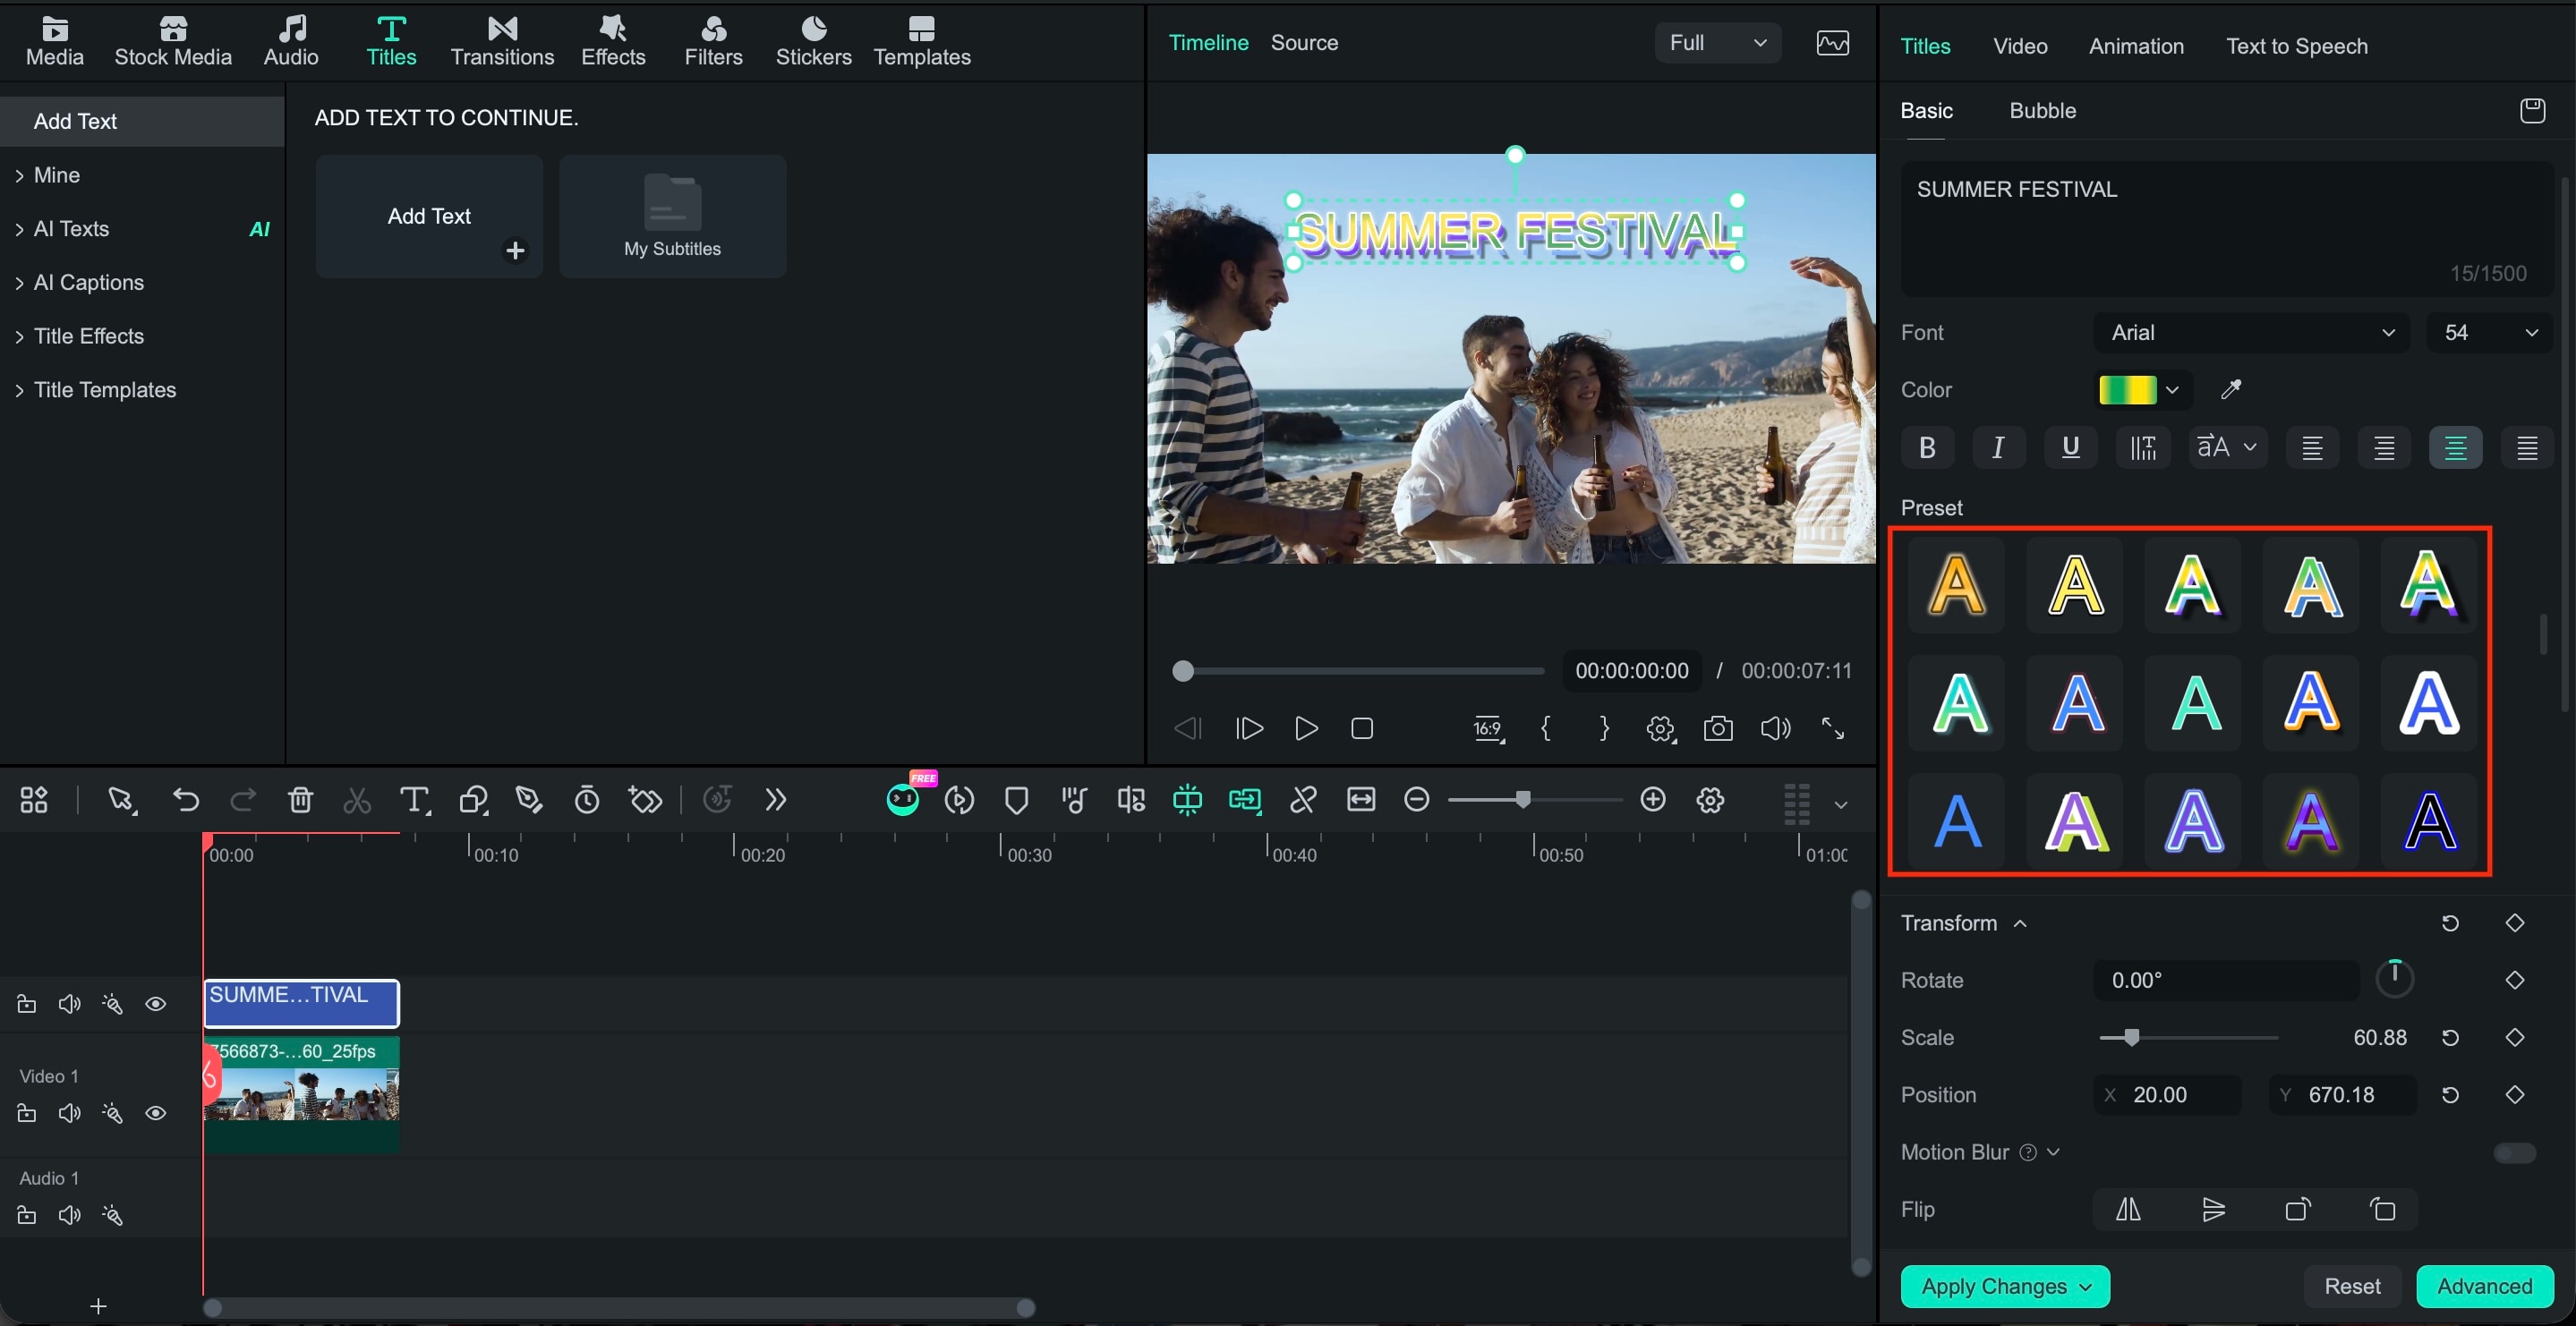
Step 2 Use the text editing panel to adjust the font, size, color, fill, outline, and shadow. Pick a style that gives your text the WordArt-like look you want.
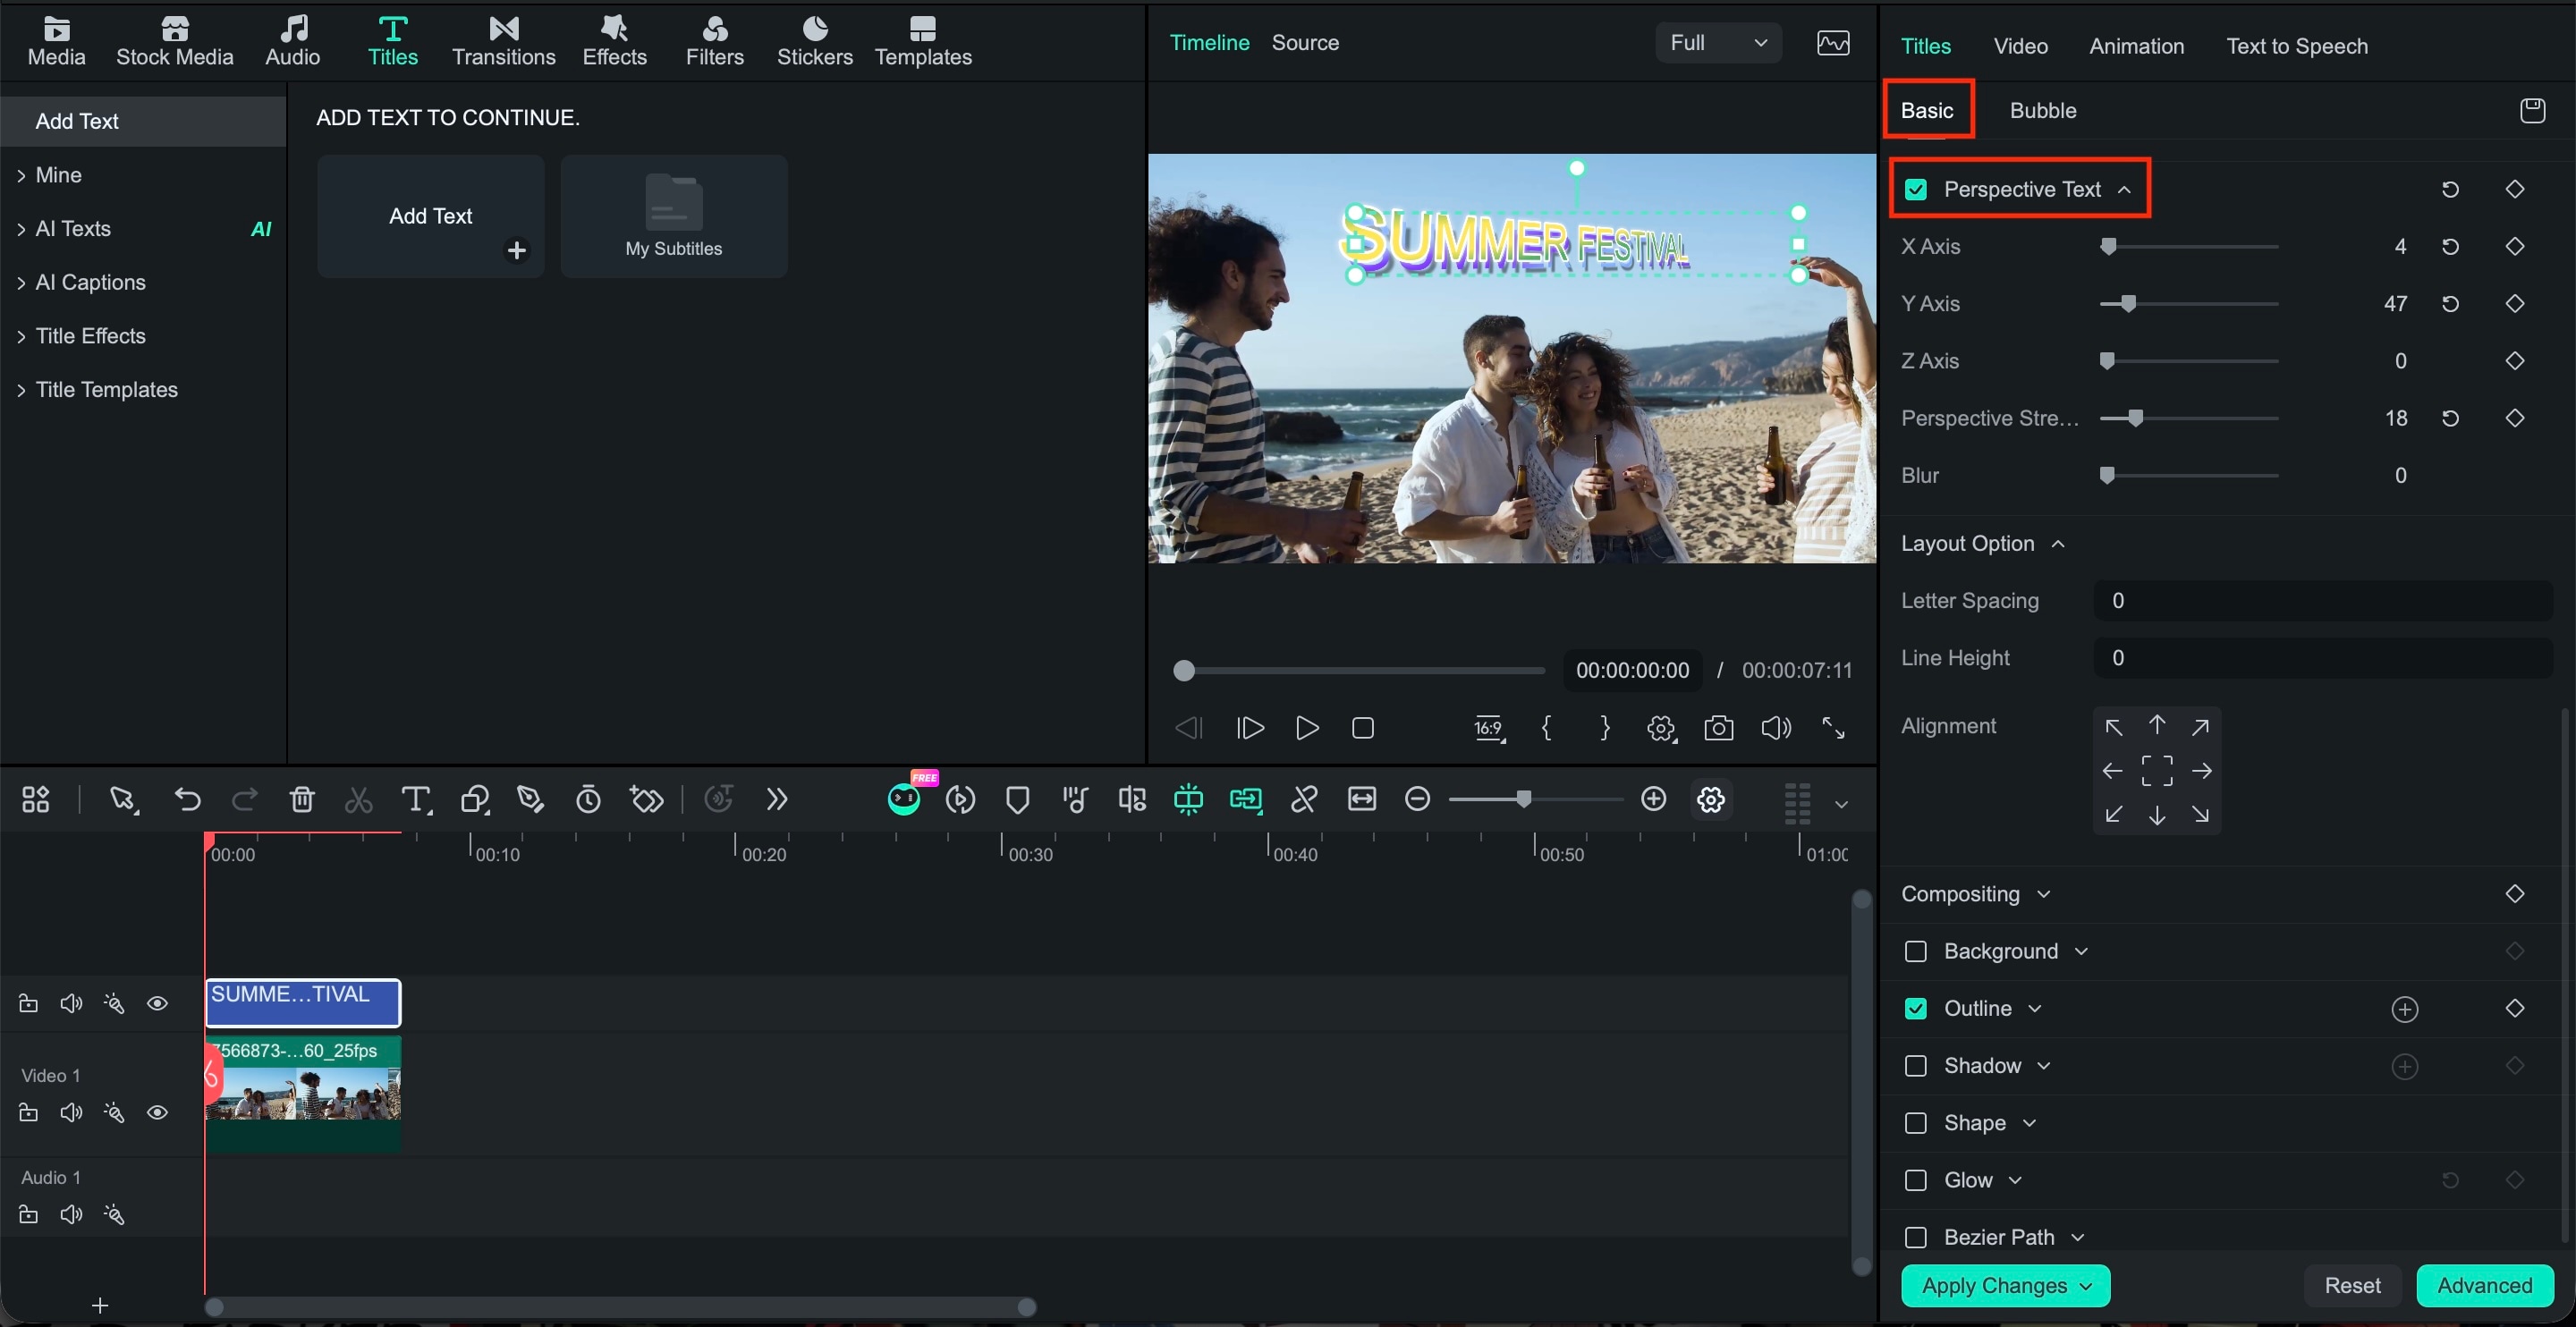
Step 3 Select the text and open the Perspective Text controls. Adjust the perspective and X, Y, and Z positions to tilt or reposition the lettering, creating a more dimensional look.
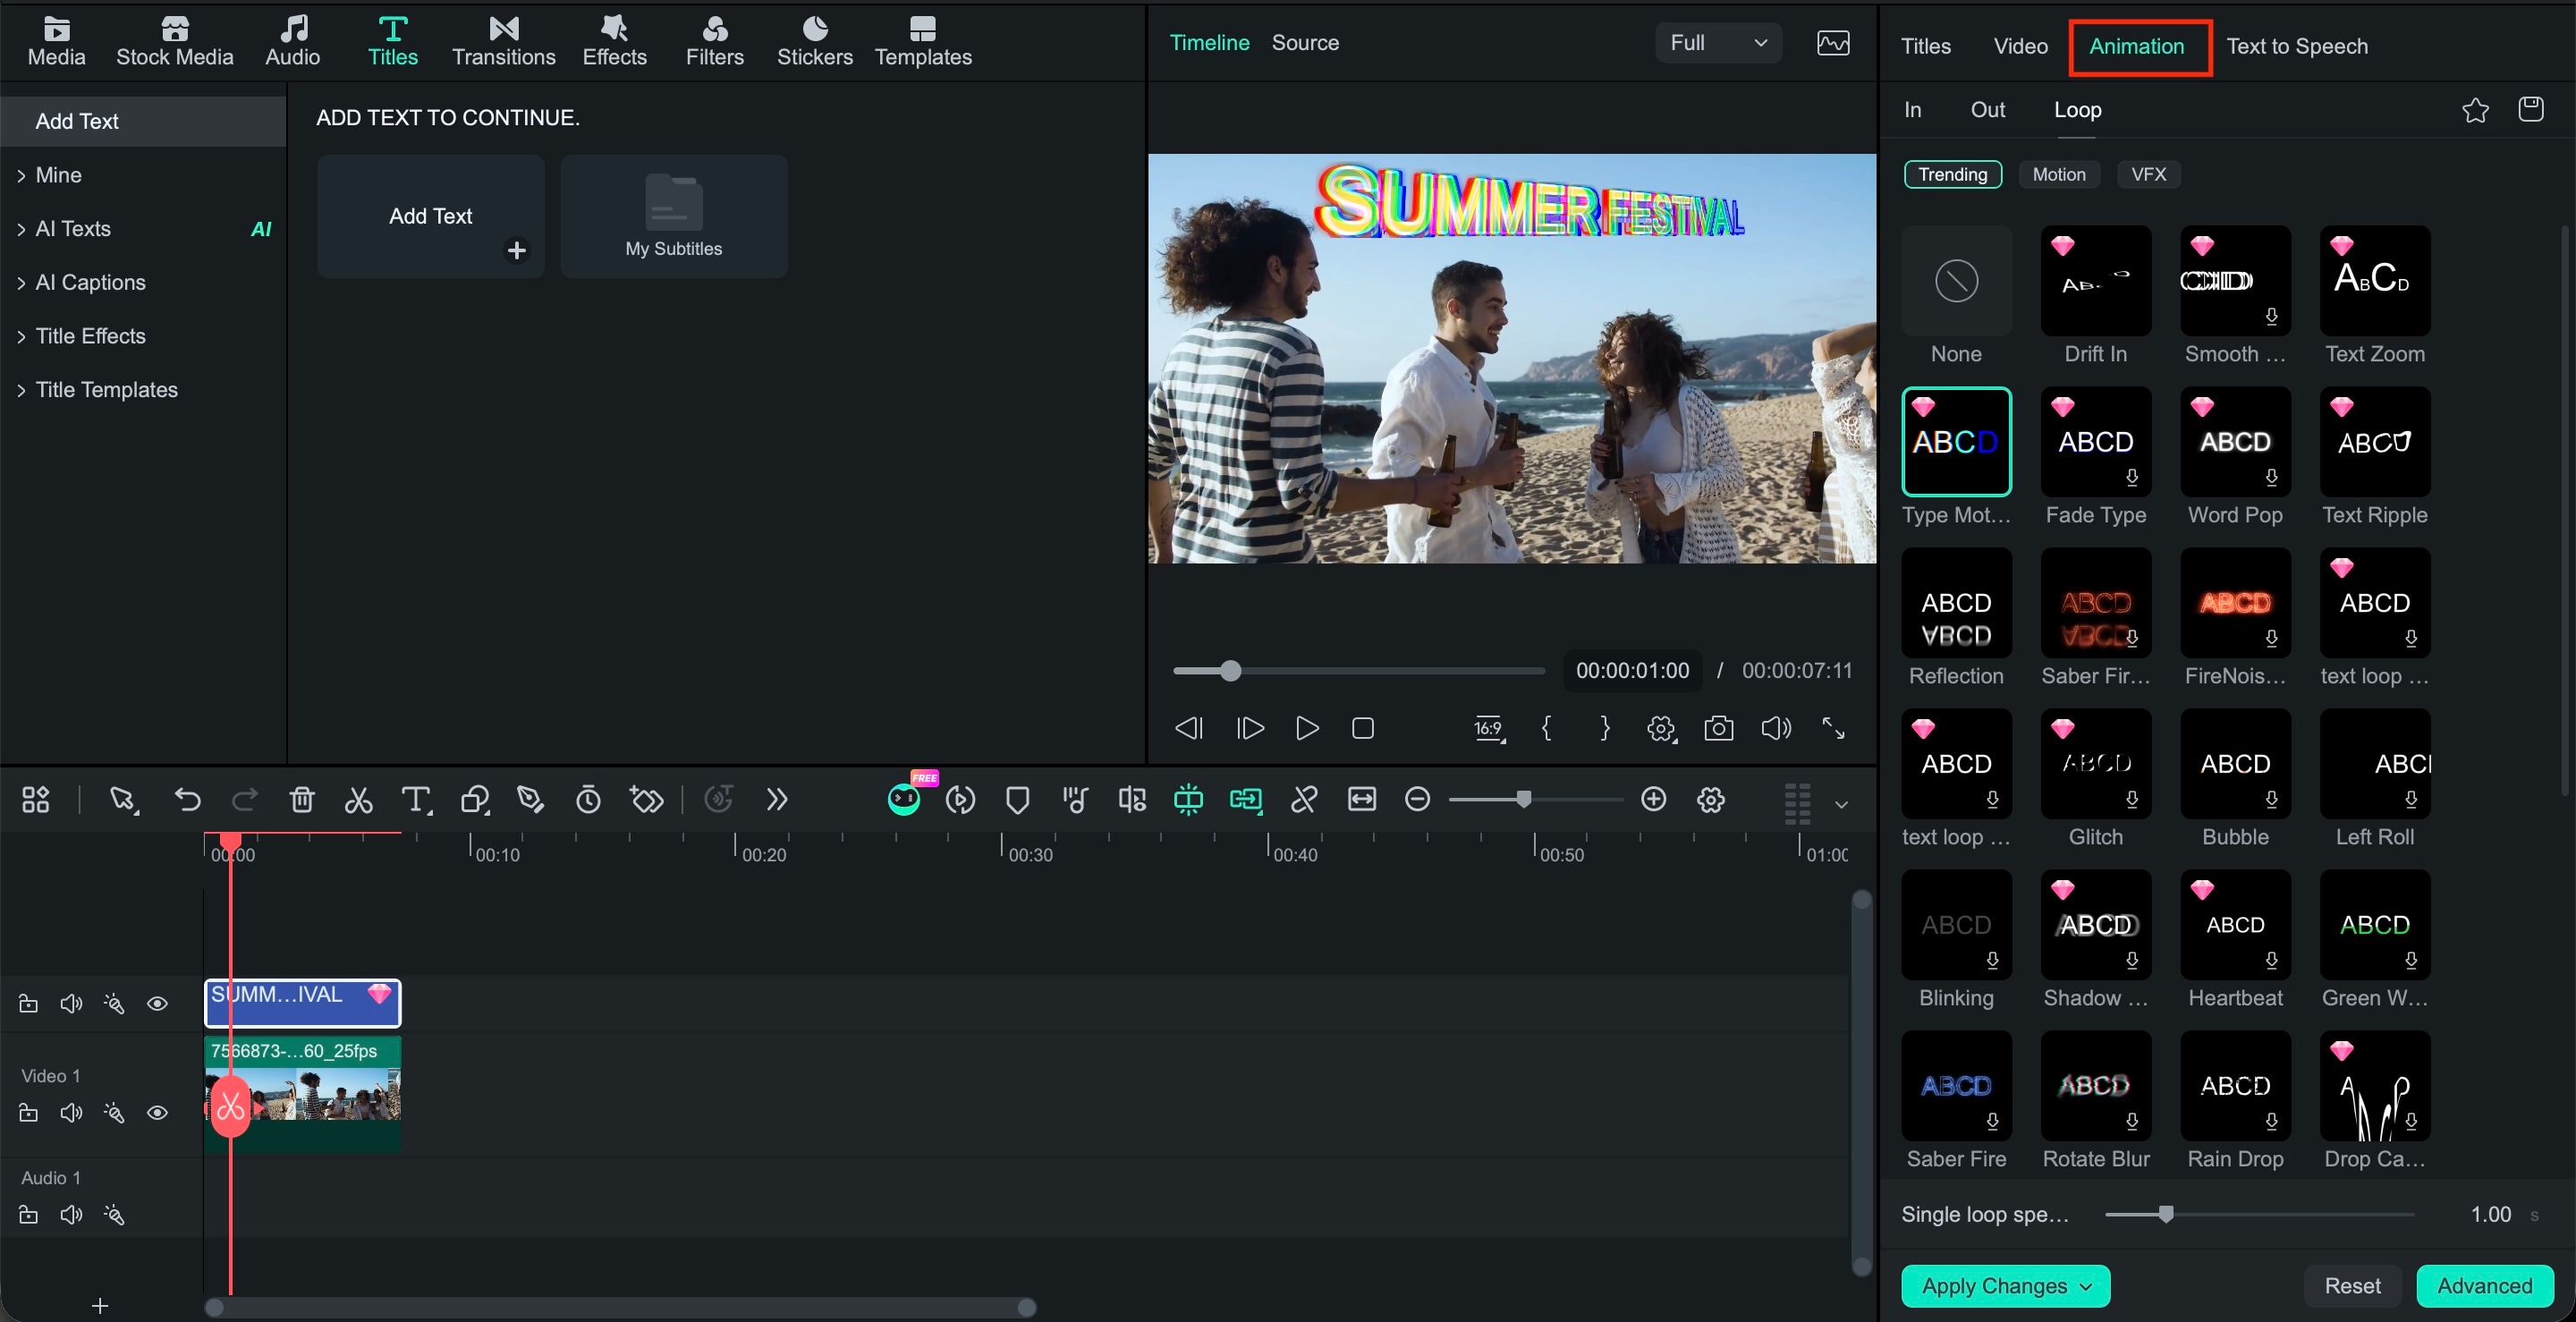
Step 4 Open the Animation tab and choose an In, Out, or Loop animation. Preview the presets and pick one that matches your clip's pace.
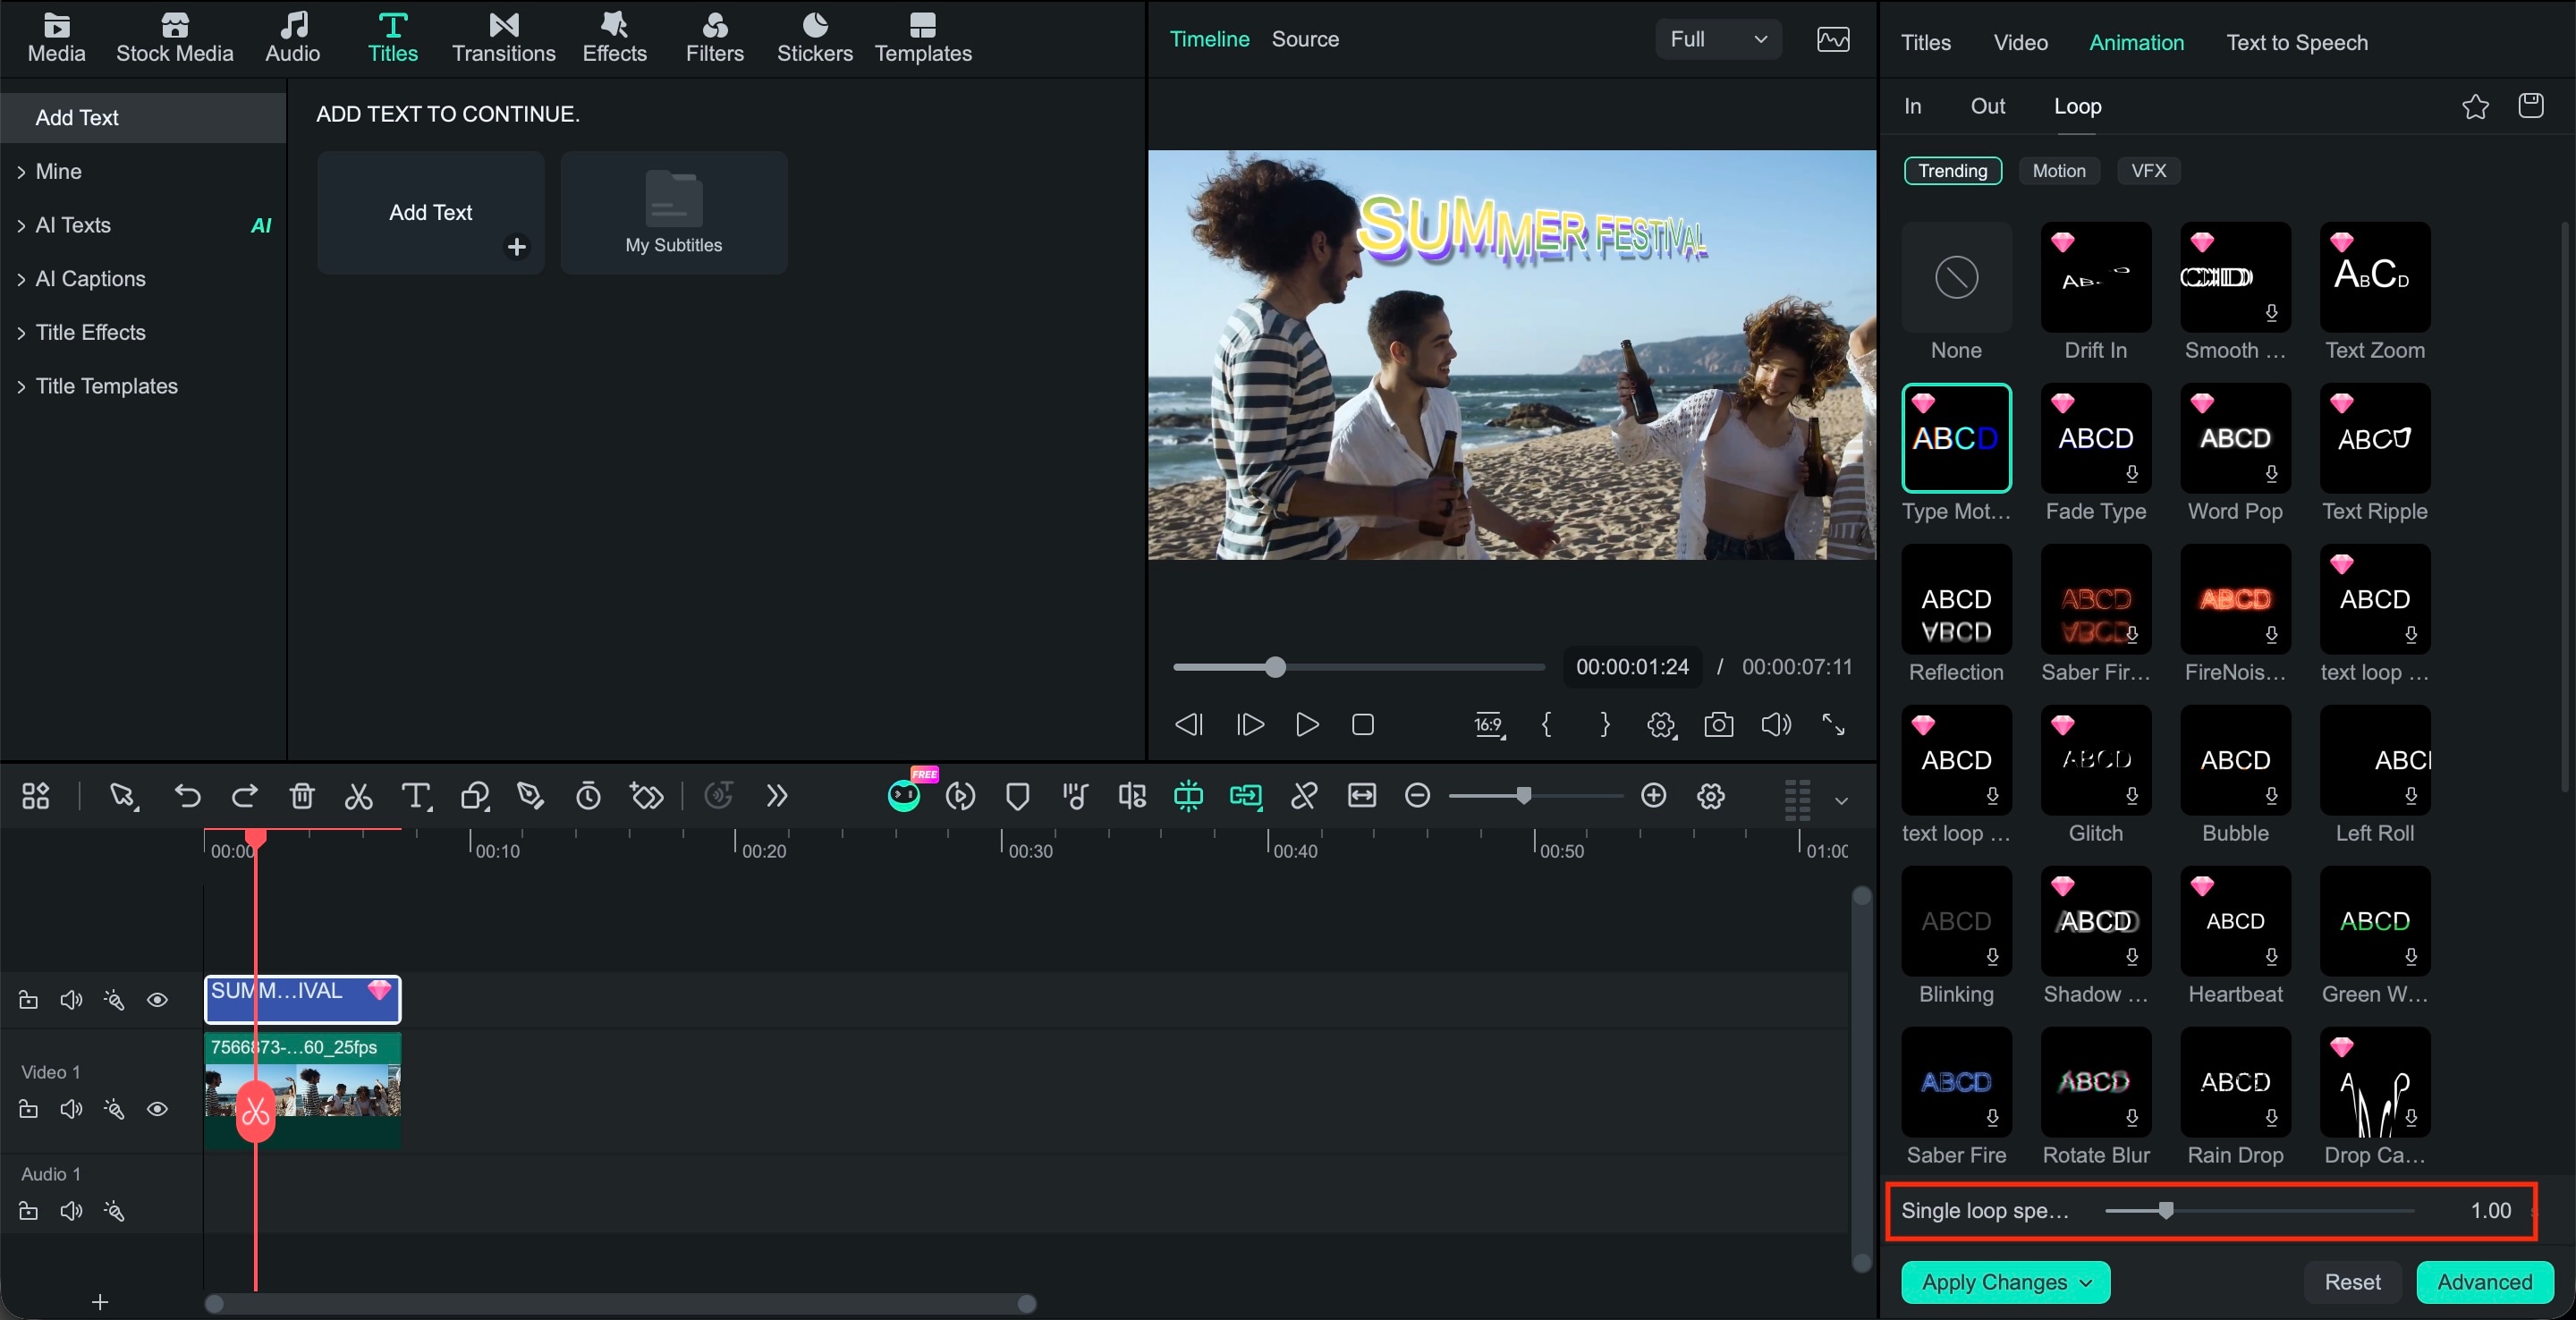
Step 5 Adjust the title clip on the timeline to control when the animation starts and how long the text stays visible.
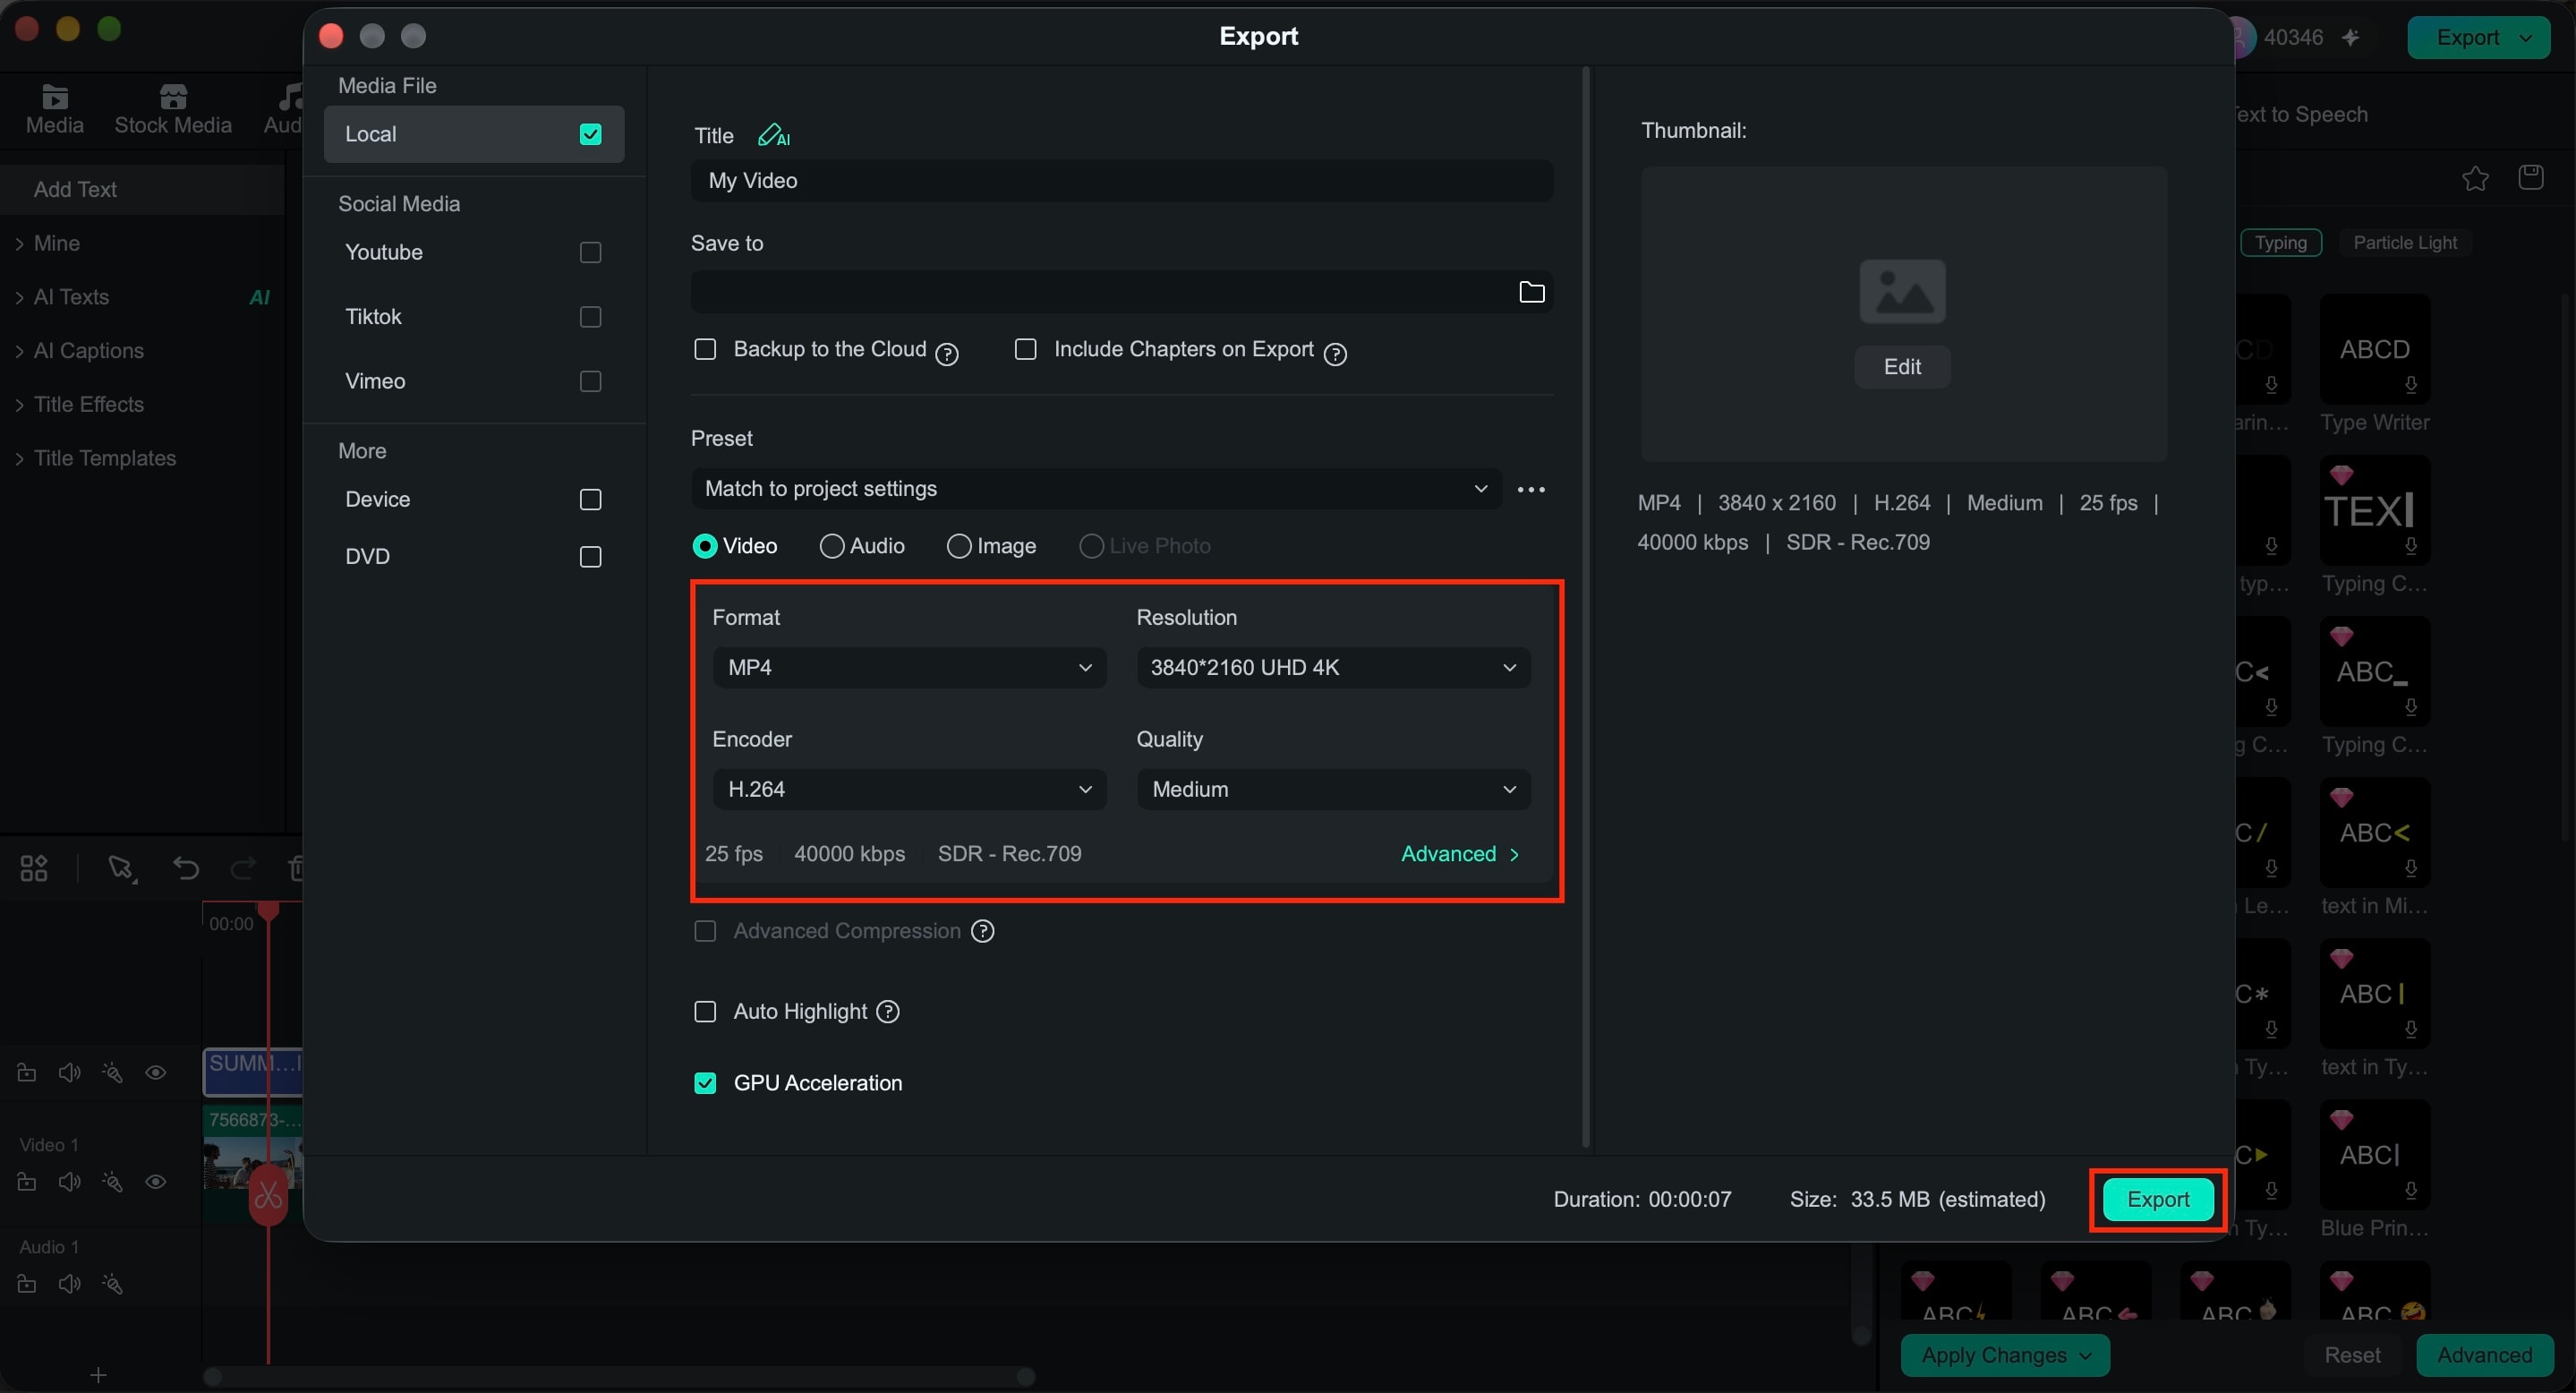
Step 6 Click Export and choose a video format such as MP4 for a standard animated clip. Select GIF when you need a short looping animation.
Conclusion
By learning how to create WordArt in Word, you can easily turn ordinary text into a more eye-catching design. Start with Word's built-in WordArt styles, then experiment with gradients, outlines, shadows, reflections, and curved text to match your layout. For a school project or document, that may be all you need.
For animated titles, clips, or GIFs, Filmora offers Microsoft word art generator with more control over text styling and movement, including Perspective Text for angled, dimensional designs. From a curved event title to an animated video intro, the right text styling can give a few words a much stronger visual impact.
FAQs
-
Is WordArt available in all versions of Microsoft Word?
WordArt has been part of Microsoft Word for years and remains available in current desktop versions, including Word for Microsoft 365 and Word 2024. Older versions may have a different WordArt gallery or formatting interface. -
Can I save WordArt as an image?
Yes, although Word doesn't offer a direct Save as Image option for WordArt. Copy the WordArt, paste it into an app that supports images, and save it as a PNG or another image format. For a transparent background, PNG is usually the better choice.
