


 100% Security Verified | No Subscription Required | No Malware


 ChatGPT
 Perplexity
 Gemini
 Claude
 Grok
Grok
Screenshots are important tools in this digital era to enhance online content creation. Capturing an entire screen is easy, but capturing what you want can be complex. This is where specialized snapshot software comes into play, providing a feature-rich solution to those requiring more than just a simple screenshot. Let's look into simple and convenient ways to take a screenshot on an HP laptop.
In this article
Part 1. How to Screenshot in HP Laptop: The Direct Ways
HP stands among the most well-known laptop brands in the global market. Being a first-time user of HP, you might need to learn how to take screenshots. With the guide presented below, look into the multiple techniques of taking screenshots with HP laptops under different user preferences.
1. Capture Using PrtSc/PrtScn
If you look at the keyboard you currently use, you most likely see a button labeled "PrtSc" or "PrtScn" on laptop keyboards. There is only one purpose for this keyboard button: it allows you to capture a screenshot of your HP desktop or laptop. You can use the following methods to capture whole screen snapshots with your HP laptop:
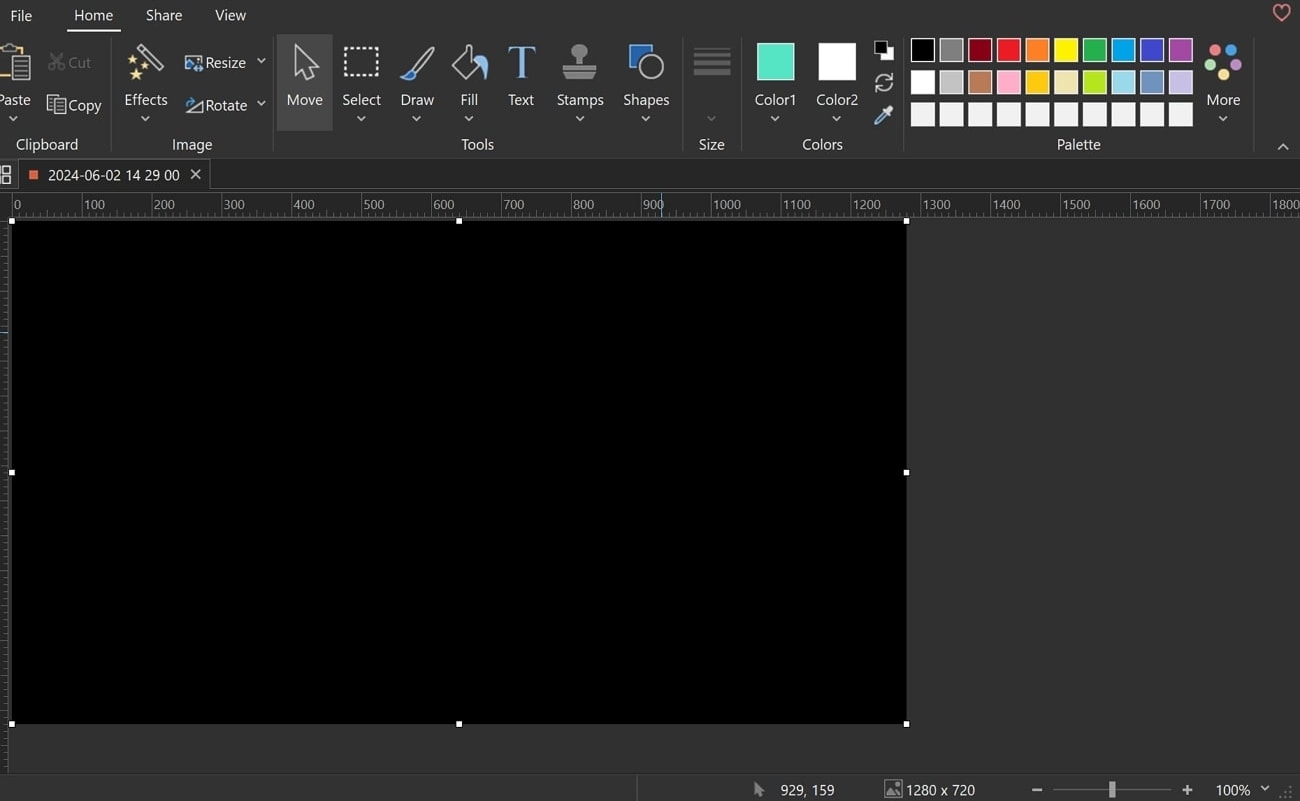
Step 1.Once your content is ready for a screenshot, press the "PrtSc" button key on your keyboard. This will take a screenshot automatically and save it to the clipboard. You can open any editor program like Paint and paste your captured image by pressing "Ctrl+V." You can save your snapshot as it is or edit the image in Paint.
2. Capturing With "Win+PrtSc"/ "Win+PrtScn"
The above-mentioned method doesn't save the captured images to the default screenshot directory. Taking screenshots using "Win+PrtSc" has two benefits: it automatically saves images to your device and is quicker than the "PrtSc" method.
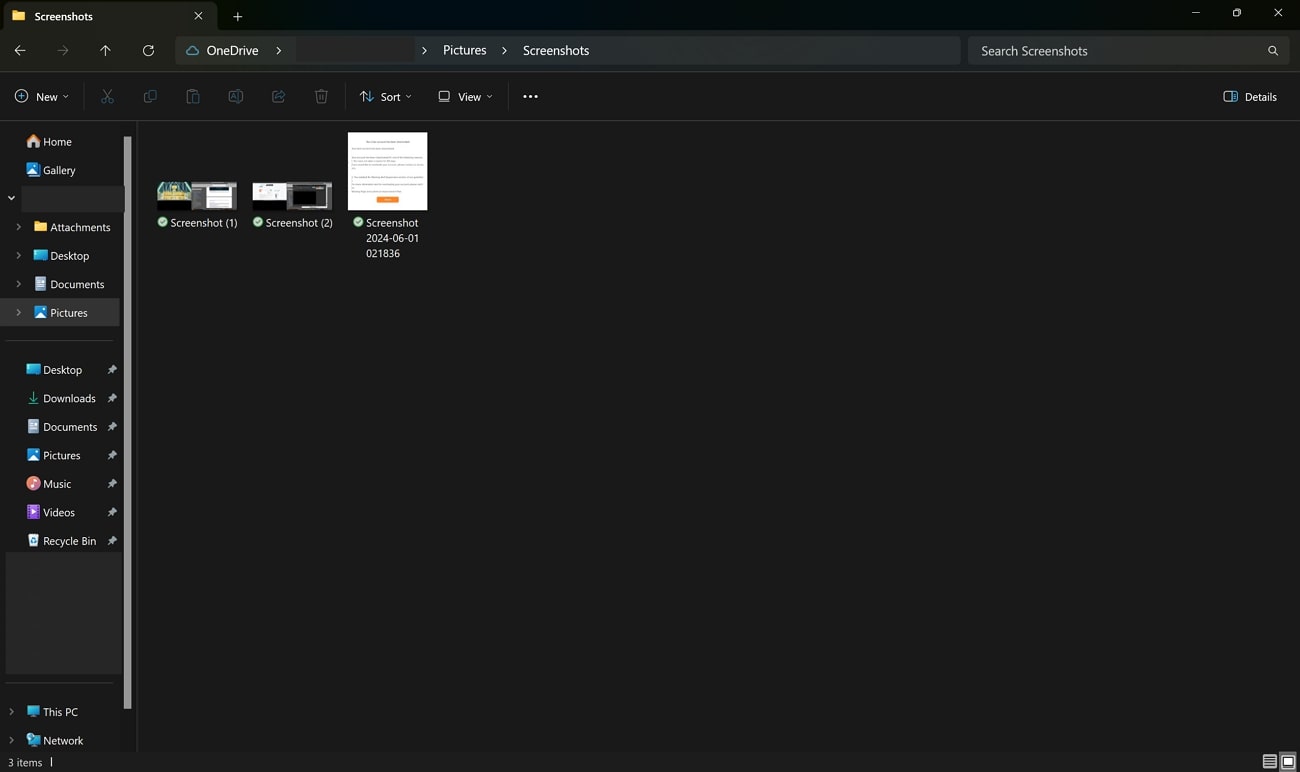
Instructions.To start, open the screen you wish to capture a screenshot of. Press the keyboard shortcuts "Win+PrtSc" or "Win+PrtScn" simultaneously. You will now see a single flicker on your screen, indicating that your screenshot is successful. Your device will immediately save your image, which is automatically stored in the "Screenshots" folder.
3. Capture the Whole Screen Using "Win+G Key"
Xbox Game Bar is an essential feature available for Windows 10 users and above. While this improves gaming experience, this feature also helps in taking simple screenshots. Look into how to take proper screenshots using this feature on your HP laptop:
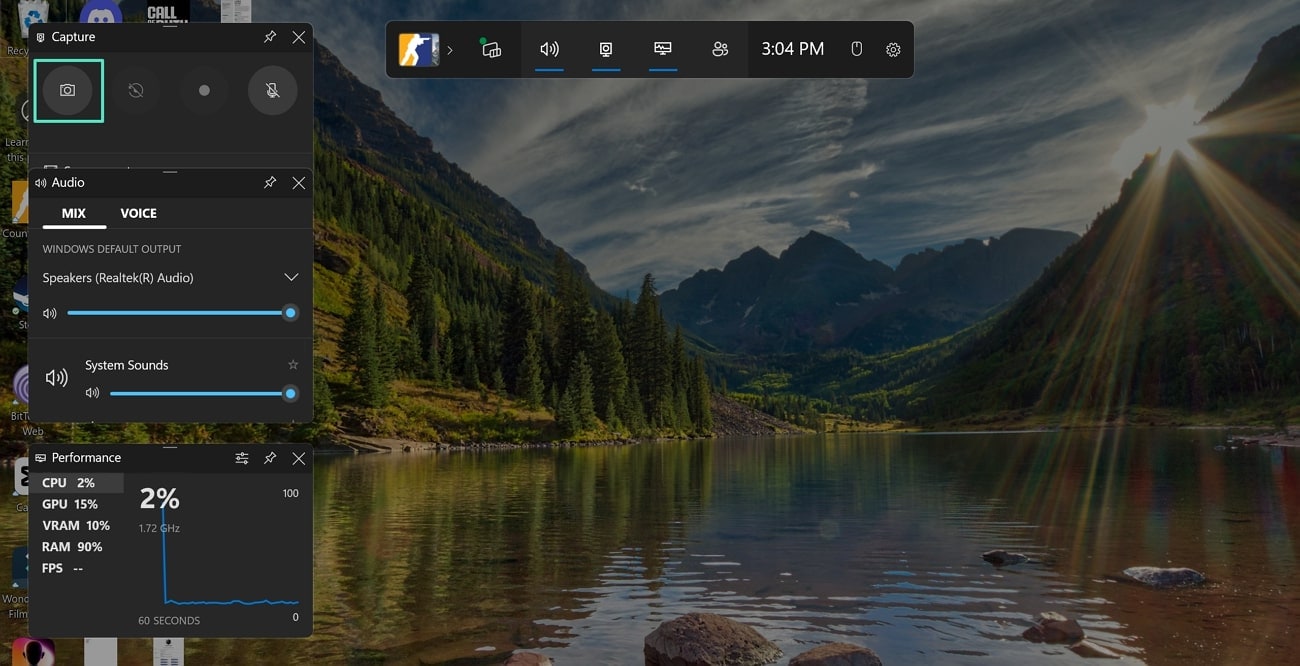
Step 1.Press the "Win+G" keys simultaneously to access the game bar. Hit the "Camera" button across the Capture bar.
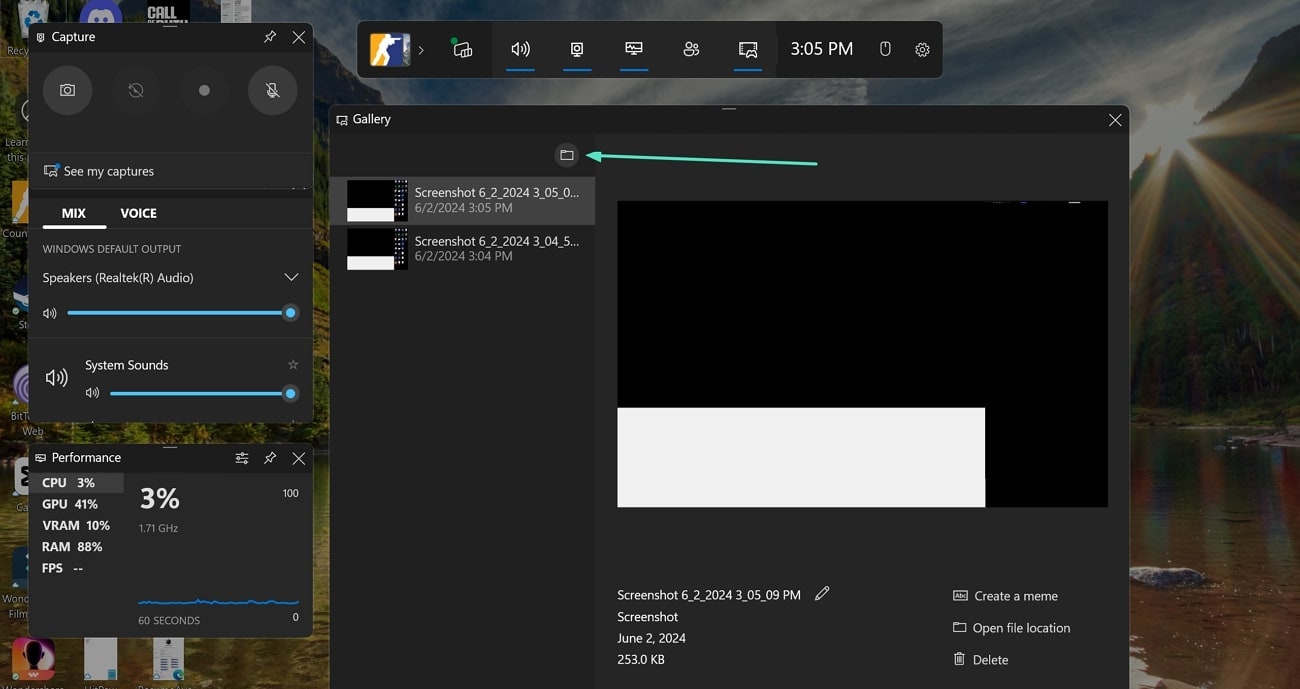
Step 2.A pop-up message shows the screenshot was successfully captured. On clicking it, a new window opens where you can select the "Folder" icon to check the saved location of the screenshot.
4. Capture the Partial Screen With "Win + Shift + S"
The content that you want to save often appears on the screen. However, if you take a full-screen screenshot, you also capture the part of the frame that needs to be edited before you can use the image. To prevent that, you can also take partial screenshots with an HP laptop using the following method:
instructions..Navigate to the screen's frame with the content you wish to save as a screenshot. Then press the "Win + Shift + S" keys simultaneously. The current screen will dim, and your cursor will convert into a "+" sign, allowing you to crop the image precisely. The cropped photo will be instantly saved to the clipboard which can be edited or saved using any editing software.
Part 2. Snipping Tool: A Windows Snipping Solution for Easy Screenshot
In addition to the shortcut methods described above, Windows 10 includes a specialized screenshot tool called the "Snipping Tool." It is primarily a screenshot-capturing tool and has numerous additional techniques and settings for taking screenshots. As the shortcut keys are difficult to remember, you can easily access this diverse tool to capture screenshots.
The application's intuitive design and simple functionality make it an excellent option for users who want to capture and edit screenshots effortlessly. Users can access the Snipping Tool through the Start menu, search for it by name, and take a screenshot on an HP laptop.
- This tool provides a feature to email the captured snips directly.
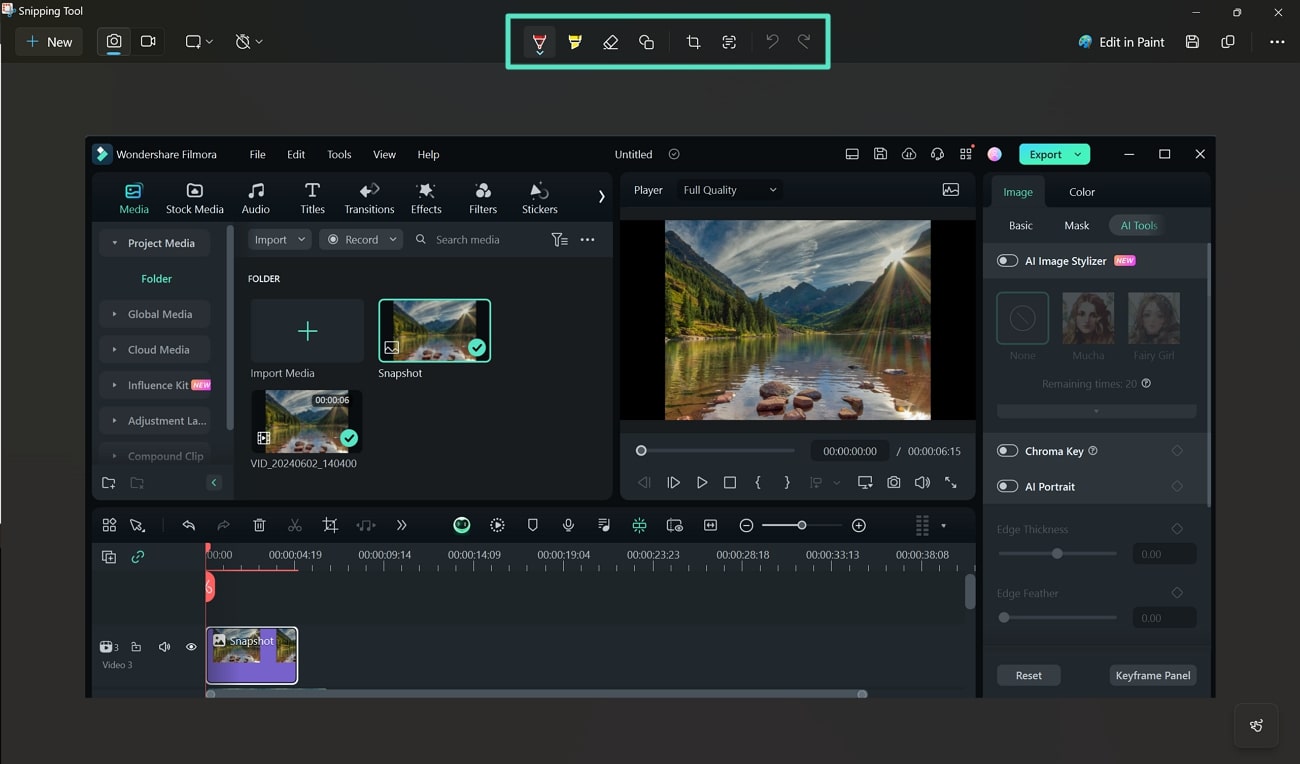
- After you capture screenshots, you can annotate them with colored pens, 3D paints, erasers, or highlighters.
- The captured image can be saved in different image file formats, such as GIF, PNG, HTML, or JPEG.
Step-By-Step Guide To Take Screenshots With Snipping Tool
Wondering how to take a screenshot with a snipping tool? Let's look into the easy step-by-step guide to using this tool to take perfect screenshots:
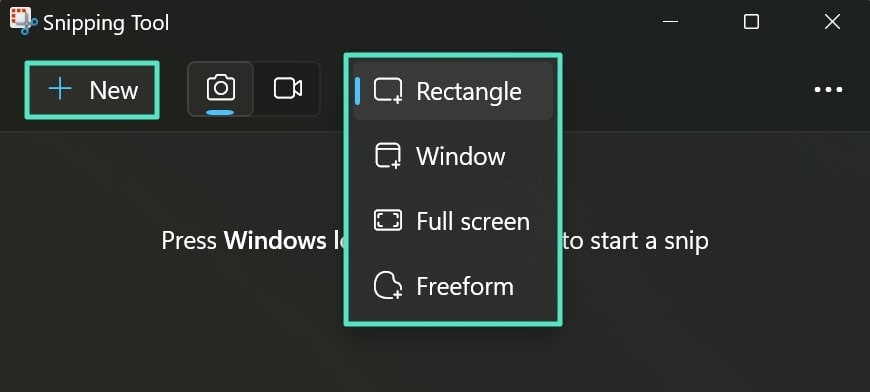
Step 1. Search "Snipping Tool" from the window’s search bar to access the tool. On opening it, you will observe that the "Rectangular mode" is selected by default. You can select your desired capture mode from the "Mode" button in the toolbar. Now, click the "New" button to select the screen for taking a screenshot.
Step 2.After clicking on it, you will notice a white blur on the screen with a "+" cursor. Drag the cursor around the area you want to capture. Once you crop the frame, the tool will show your captured image in an editing interface within the app, where you can annotate it.
Part 3. 3 Top-Rated Alternatives To Snipping Tool for HP Laptop
In an era dominated by information exchange and visual communication, the Snipping Tool is regarded as a digital hero. However, this tool lacks advanced editing functionalities compared to other tools. There are many better alternatives to snipping tools available in the digital market. In this article, we will look for some of the best Snipping tool alternatives to take a screenshot on an HP laptop.
1. ShareX
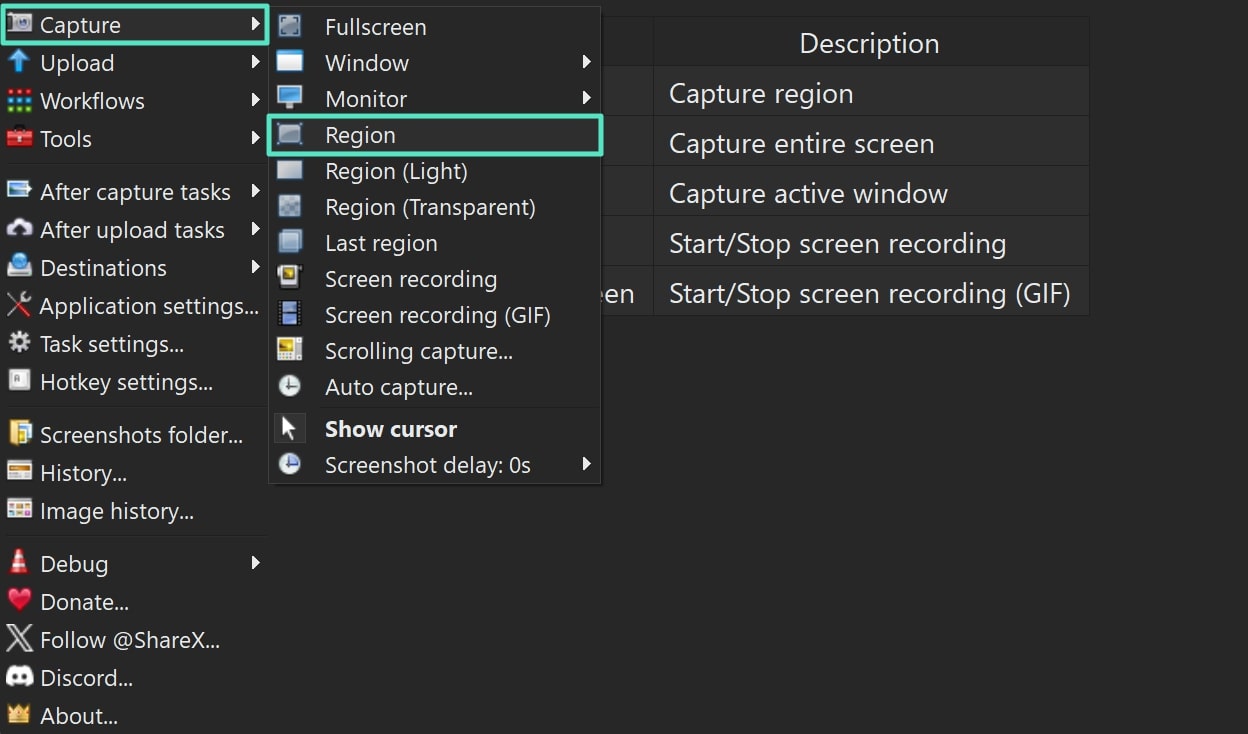
ShareX is one of the best alternatives to snipping tools due to its versatile features and ease of use. This application offers screen capture modes for taking screenshots, such as "Fullscreen," "Window," "Monitor," or "Region." It also has an in-built screen recording feature to record your onscreen activity as a video.
Moreover, this application also has an image editor with advanced features for professional editing. Let's learn how to take screenshots with ShareX in the following step guide:
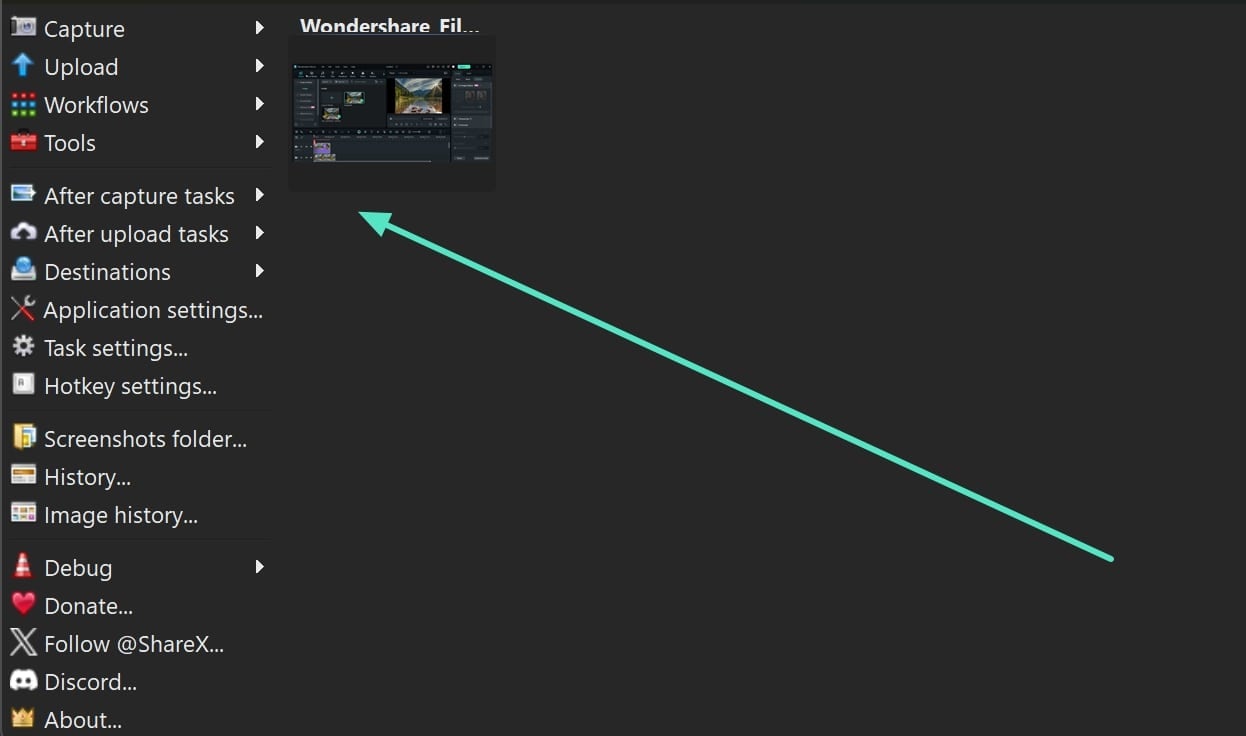
Step 1. After downloading ShareX on your device, open the ShareX main menu. Hit the "Capture" button from the top of the menu bar and click on the "Region" option. Select the region you want to capture with the rectangular box.
Step 2.As the screenshot appears on the interface after successful capture, you can use other features available in the "Tools" tab to make respective changes.
2. PicPick
PicPick is a great tool for taking screenshots for Windows. It's a snapshot generator and remarkably feature-rich, including an extensive list of editing functions usually seen in professional snapshot software. It provides a Pixel Ruler feature to measure the size of desktop objects and images.
This screenshot-taking tool also includes a whiteboard tool to draw or write anything on the screen. Let's learn how to take screenshots with PicPick by following the basic steps mentioned below:
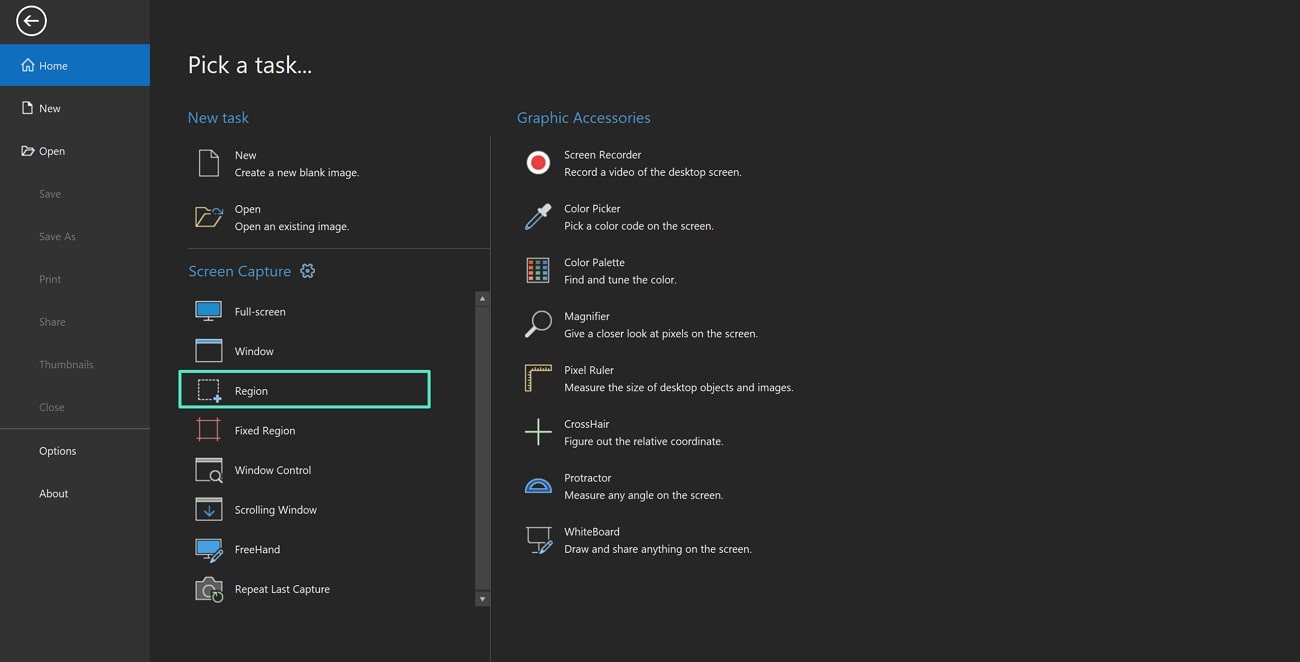
Step 1.Open the PicPick application and click the "Region" option under "Screen Capture" settings.
Step 2.When choosing the region, successfully capture the screenshot. Your captured image will be displayed across PicPick, and you can use the editing features to annotate it.
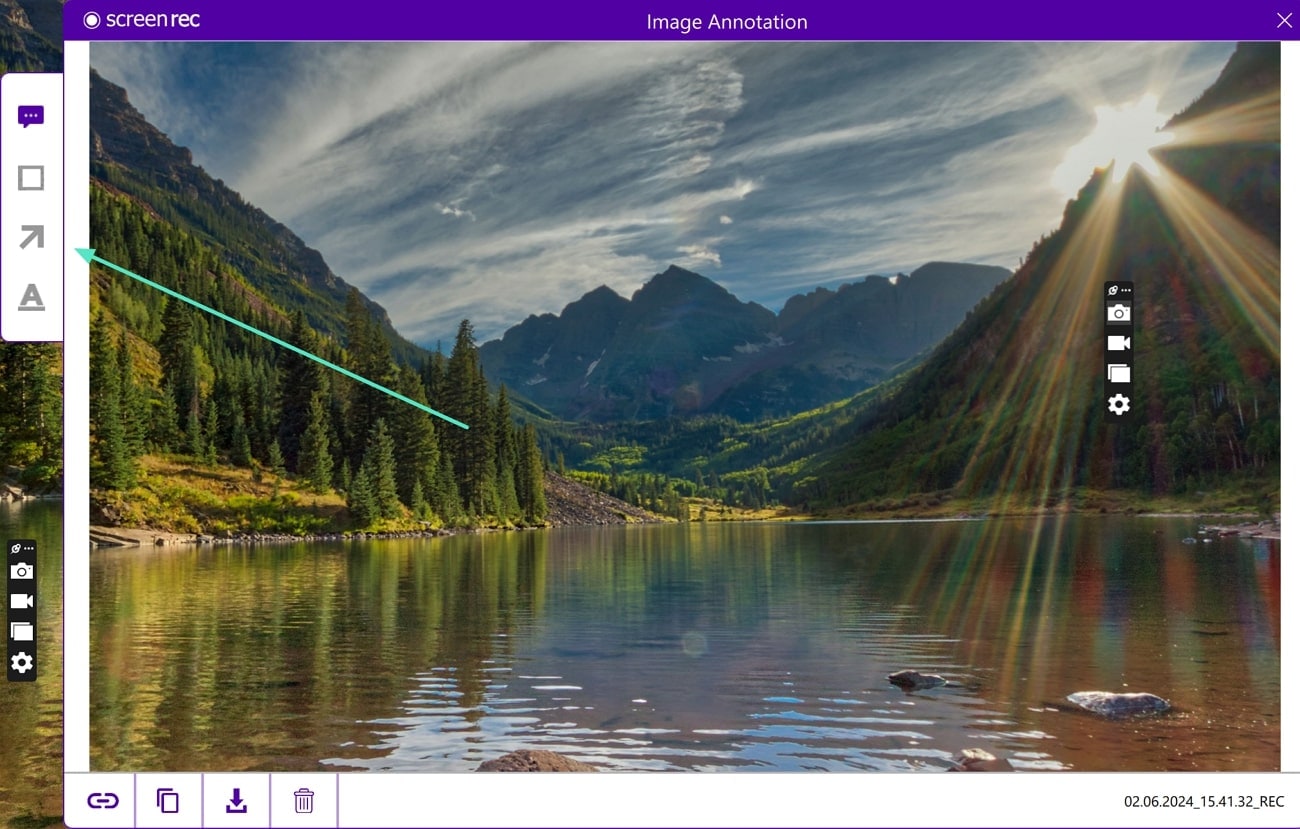
3. ScreenRec
When it comes to having a good screen-capture tool developed to enhance productivity, ScreenRec is a good option. Its intuitive interface and extensive feature set allow users to efficiently capture, edit, and share screenshots. This tool is a decent alternative to the snipping tool to take screenshots on an HP laptop Windows 10. A step-by-step guide to using the ScreenRec application for capturing screenshots is presented as follows:
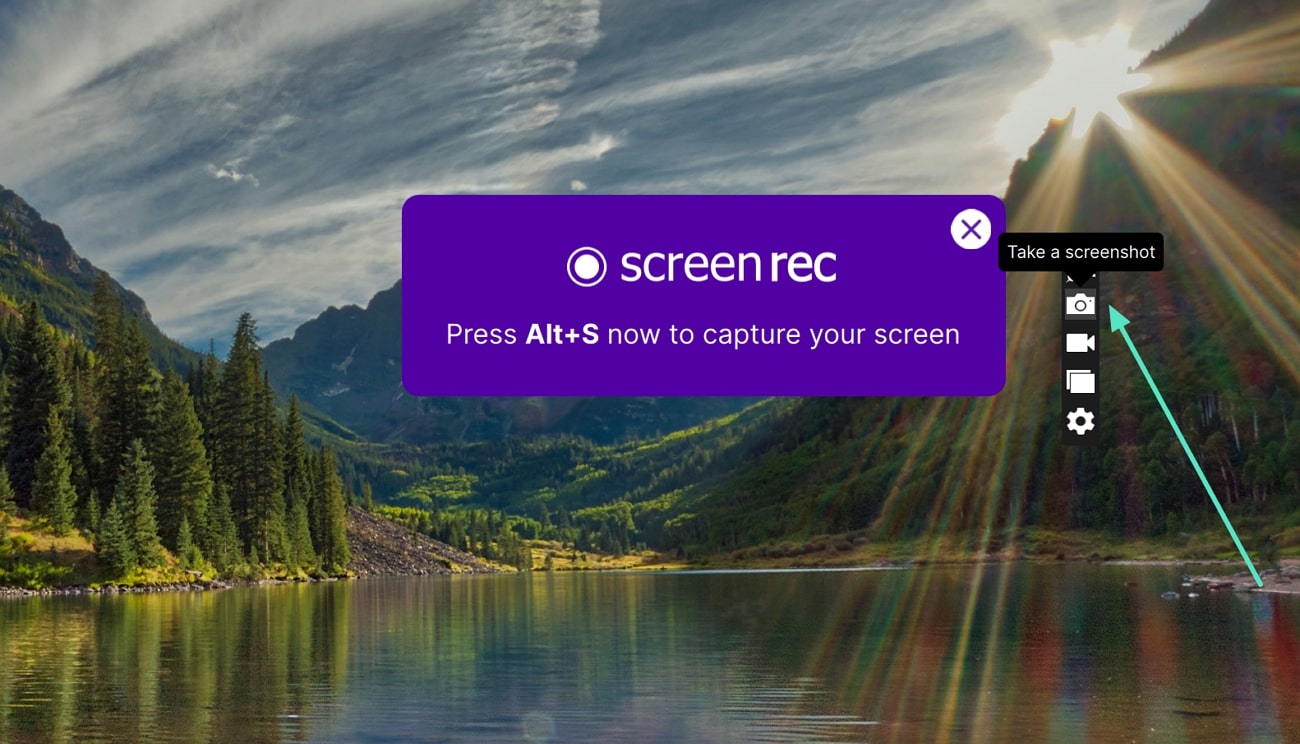
Step 1.Run the ScreenRec application on your device. A protruding toolbar will appear on the right side. Click on the "Camera" icon from the right toolbar.
Step 2.Click and drag the "+" sign to take a screenshot. Your image will be displayed, and you can annotate it by adding text or directly save it to your device.
Top Bonus Recommendation. How To Take Video Snapshots While Editing on Wondershare Filmora
Although there are multiple screenshot tools available, they seem ineffective when taking snapshots of videos. One major issue associated with this process involves low-quality screenshots. To generate high-resolution snapshots, you need a video editor like Wondershare Filmora. This tool offers an inbuilt feature for capturing perfect video snapshots. With this tool, you can simply pause the video and click to capture a specific frame.
Easy-to-use screenshot tool for everyone

A Comprehensive Guide To Taking Video Snapshots on Filmora
Although Wondershare Filmora presents a diversity of video editing features, let's look at the step-by-step guide for taking snapshots of your videos:
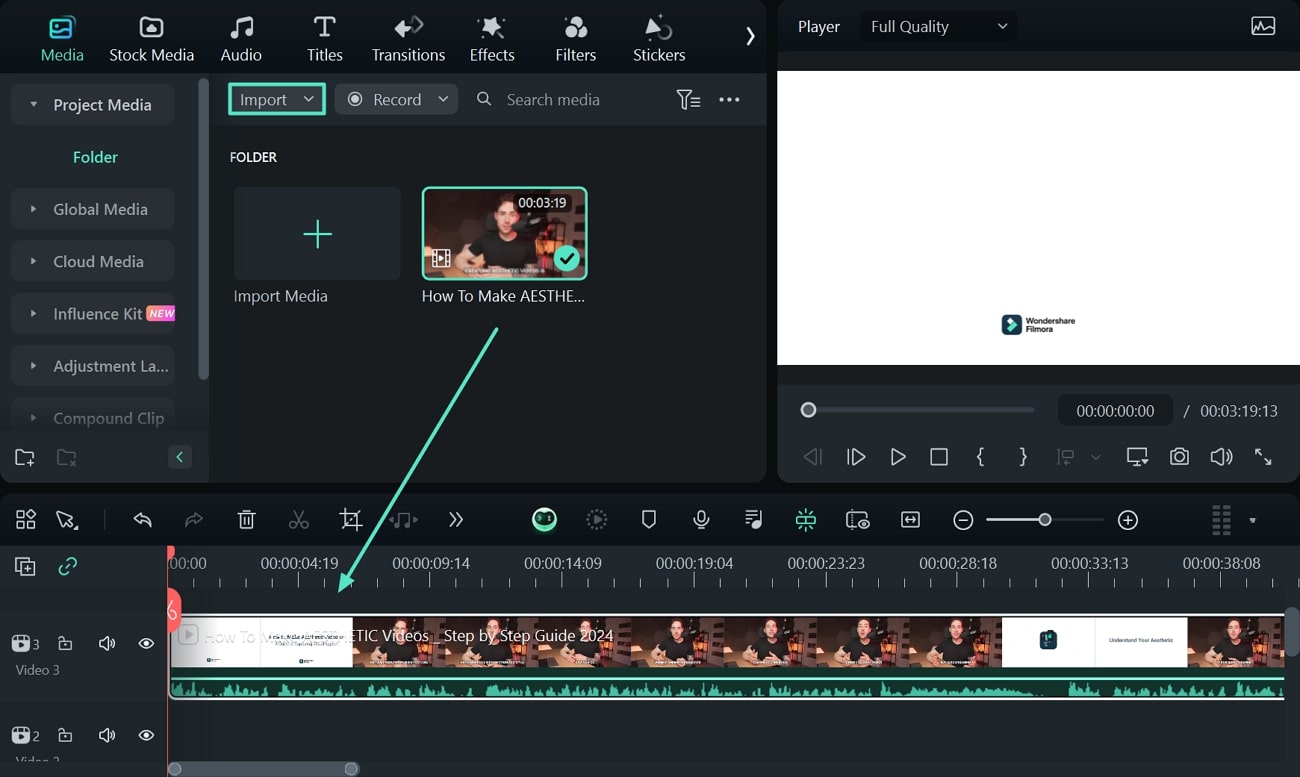
Step 1. Import Video to Filmora and Drag to Timeline
Launch the Filmora desktop application on your computer and tap the "New Project" button. Navigate to the editing interface and click on the "Import" icon to import your video. Upon successful importing, drag the video to the timeline panel.
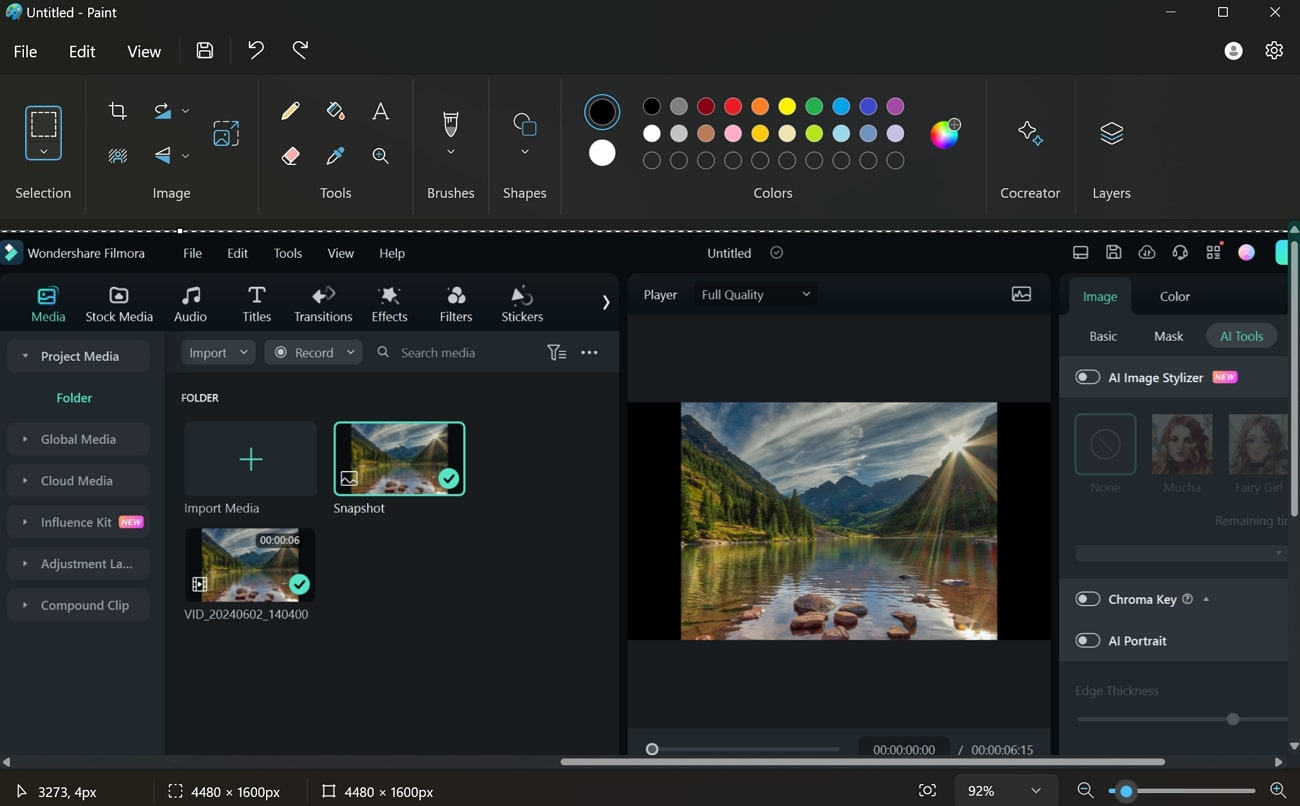
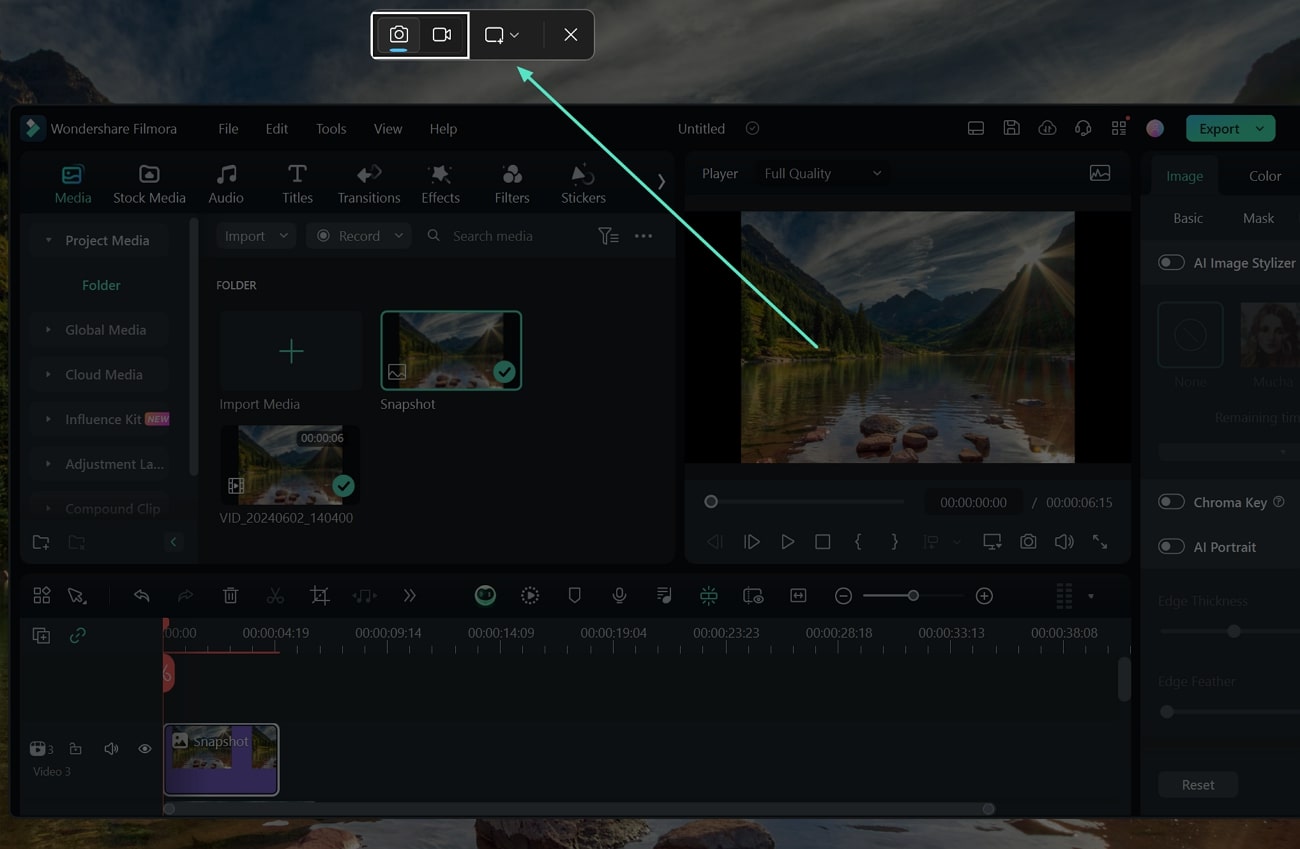
Step 2. Capture the Snapshot of Video
Your video will be presented in the preview window. From the timeline, drag the play head to the point of the video where you wish to take the screenshot. Then, click on the "Camera" icon on the preview panel to take a snapshot.
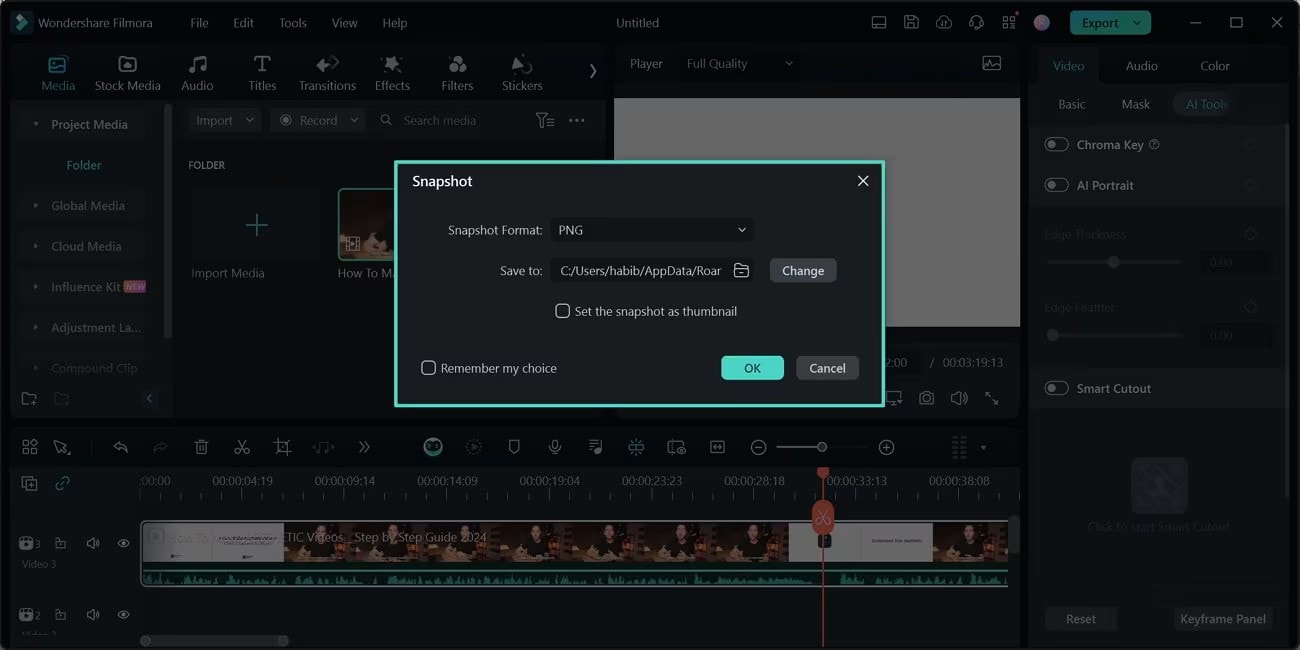
Step 3. Export Snapshot To Defined Location
On hitting the icon, a pop-up window will appear on the screen asking to define the format and location of the snapshot. Provide the respective details and hit "OK" to save the snapshot. This will also directly import the snapshot across Filmora's media panel.
Conclusion
We have provided a complete guide about effectively taking screenshots with an HP laptop using various screenshot-capturing applications. As you can see, all software has a different set of features that are suitable for different preferences. This article also provides a bonus recommendation about using Wondershare Filmora to take high-quality video snapshots while editing.
