


 100% Security Verified | No Subscription Required | No Malware


 ChatGPT
 Perplexity
 Gemini
 Claude
 Grok
Grok
Are you a vlogger without a professional and often expensive gimbal? Are you a content creator without a tripod for stabilization? Do your videos appear shaky regardless of how still you try to be while filming?
Don’t worry, you’re not the only one, and there’s a quick solution for shaky footage.
In today’s guide, you’ll learn about CapCut stabilizer, a quick and easy-to-use video stabilization feature in one of the world’s best-known online video editors. We’ll first teach you how to stabilize videos with CapCut and then provide an alternative desktop video editing software that can also stabilize videos.
In this article
What is a CapCut Stabilizer?

Most users in the video editing industry are aware of CapCut, a free, cross-platform, all-in-one video editing tool with dozens of valuable features. The CapCut video stabilizer is one of these editing features, and this powerful tool can automatically stabilize your shaky videos, transforming them into high-quality, professional clips in a few clicks.
How to Use the CapCut Stabilizer?
As CapCut has dedicated software for desktops, smartphones, and a web-based app, the following section will show you how to stabilize videos with CapCut on all three platforms.
For Desktop CapCut Stabilizer
We’ll kick things off with the desktop version of CapCut. Here are the steps you can follow:
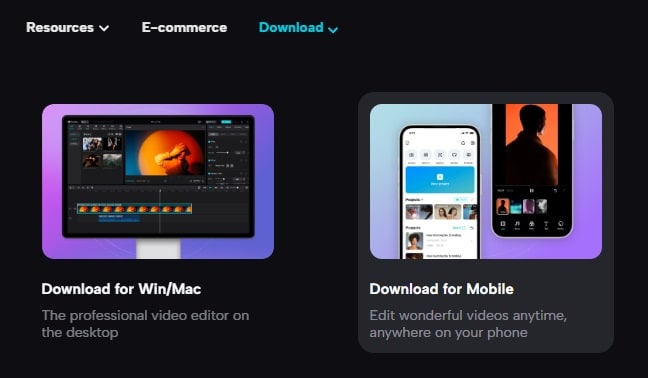
Step 1: Head to the official CapCut website, tap the Download tab, and select the Download for Win/Mac option.

Step 2: Follow the instructions to install the CapCut video editor for desktops. Then, sign in.
Step 3: Once you launch CapCut, tap the Create project button at the top.
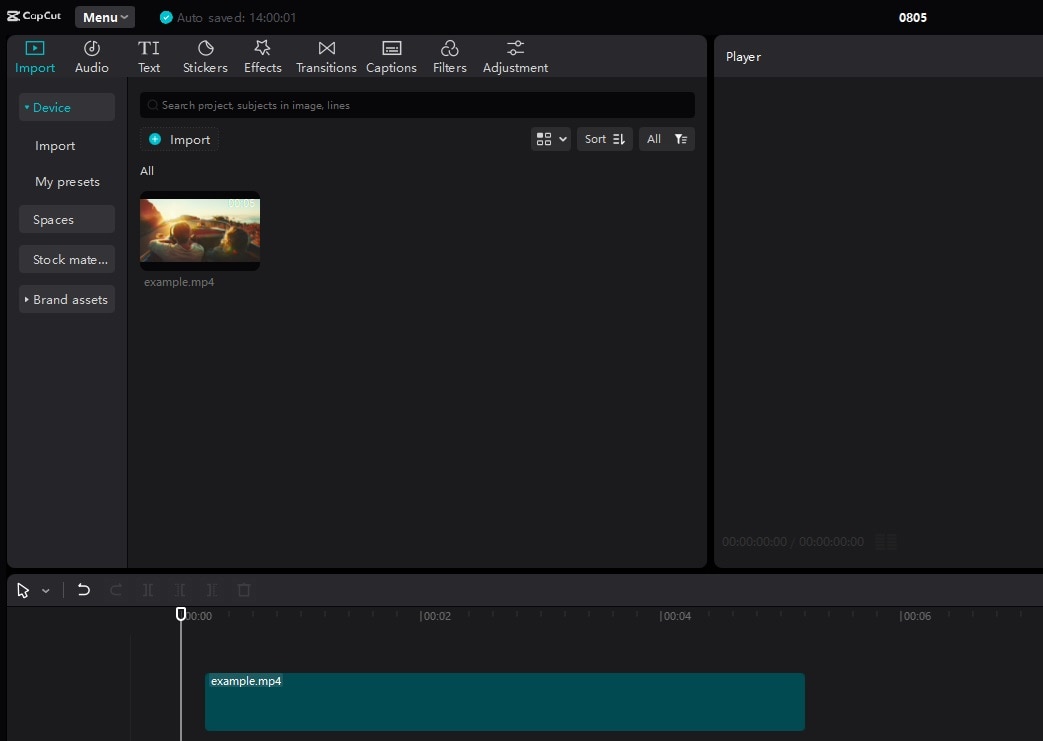
Step 4: Click the Import button and add your shaky video. Then, drag it into the Timeline at the bottom and click on it to select it.
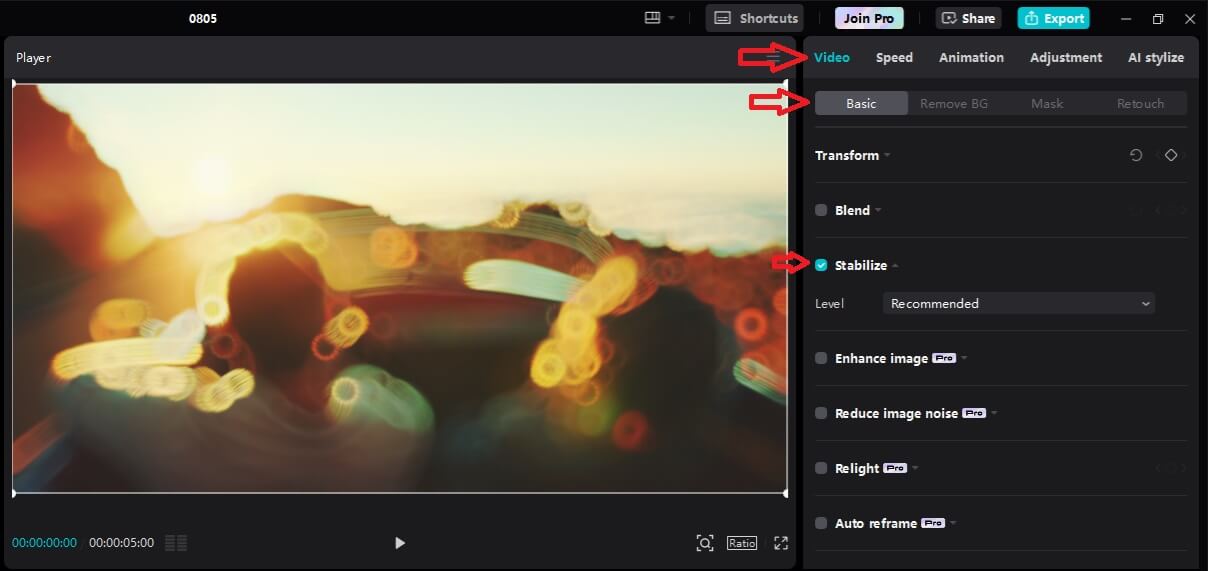
Step 5: Head to the Video tab on the right. Then, find and enable the Stabilize option under the Basic tab.
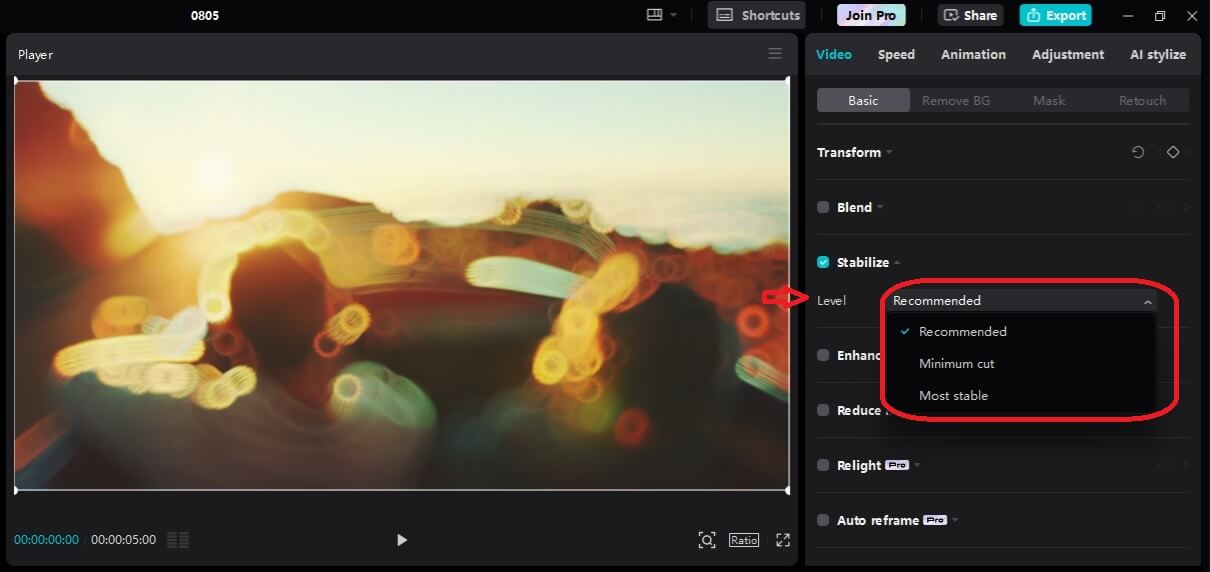
Step 6: Adjust the Level of the video stabilizer in CapCut by choosing one of the three options.
While the abovementioned steps show CapCut for Windows, it’s worth noting that there’s also a CapCut for Mac version, with the steps for these two desktop tools being similar.
For Mobile CapCut Stabilizer
If you’d prefer to edit shaky footage on a phone or tablet, CapCut also has a dedicated mobile app. Here’s how you can use it:
Step 1: On CapCut’s website, select the Download for Mobile option, or download the CapCut mobile app from the Google Play Store or the Apple App Store.
Step 2: Install the app, open it, and log in.
Step 3: Hit the big New project button at the top of the screen.
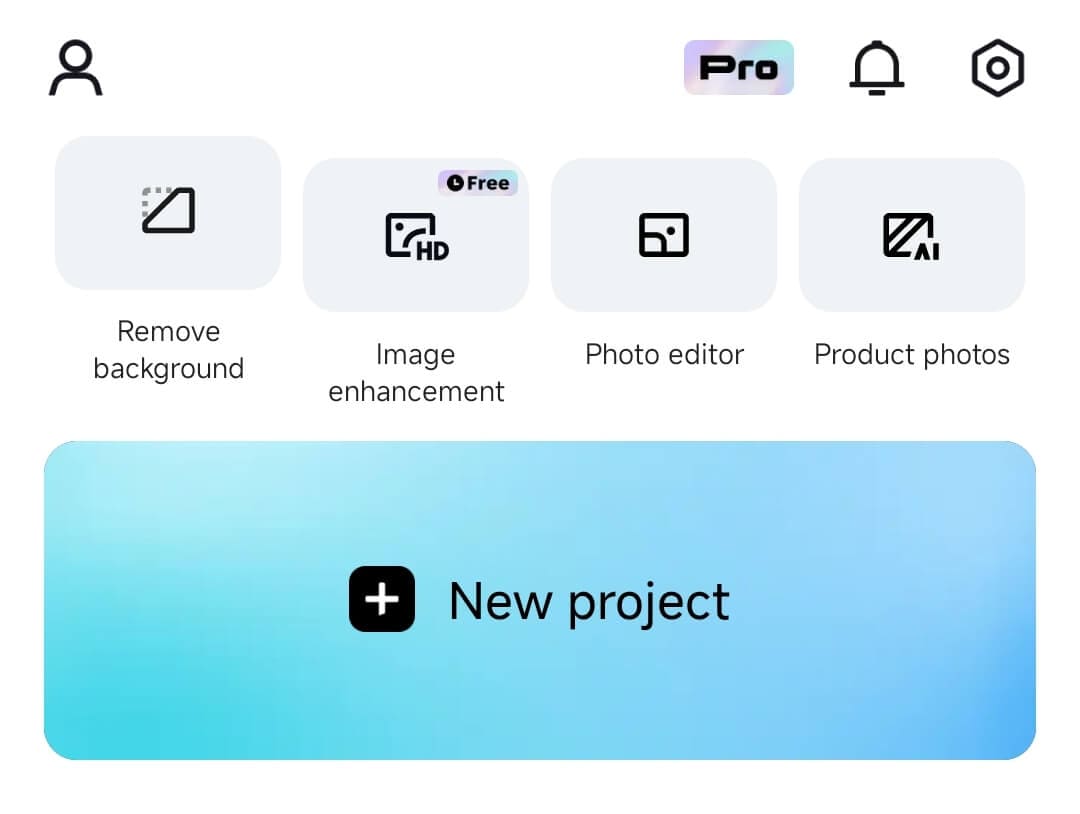
Step 4: Select a video from your Gallery, and press the Add button in the bottom right corner.
Step 5: Tap the video in the Timeline, then scroll the bottom bar until you find the Stabilize option.
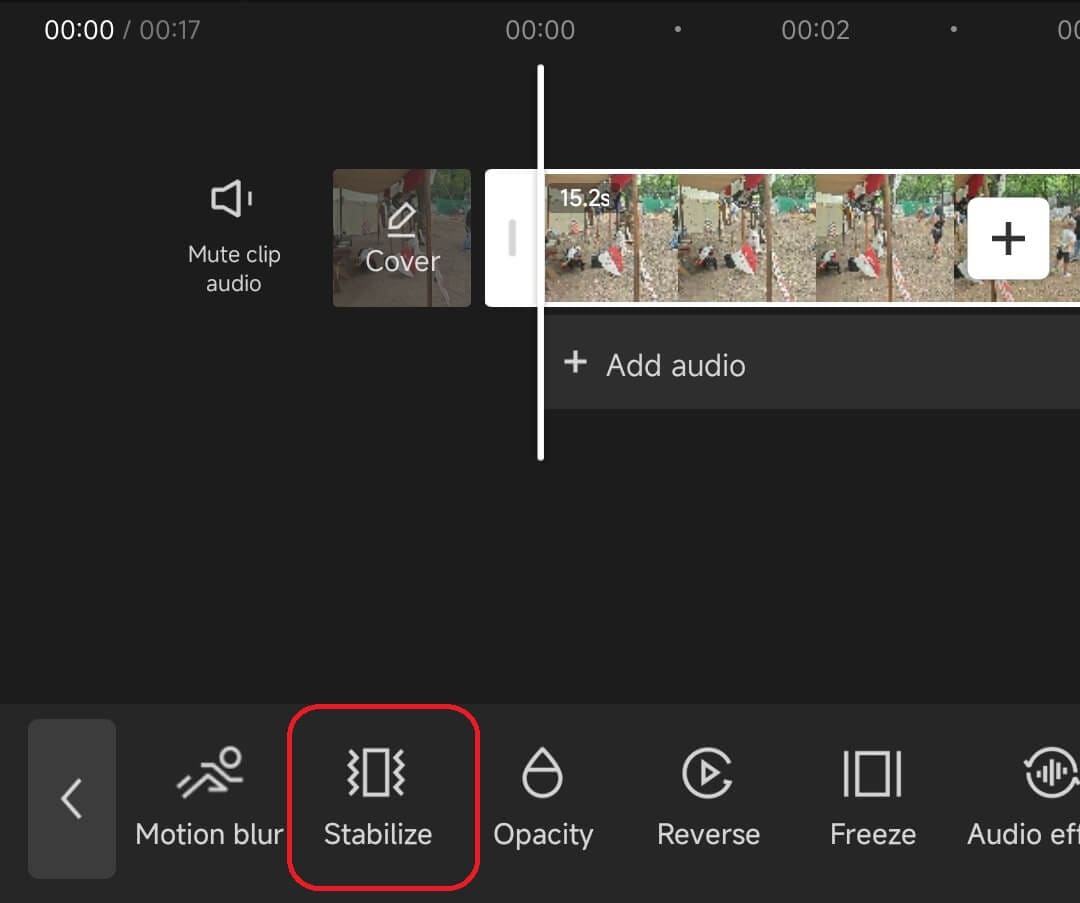
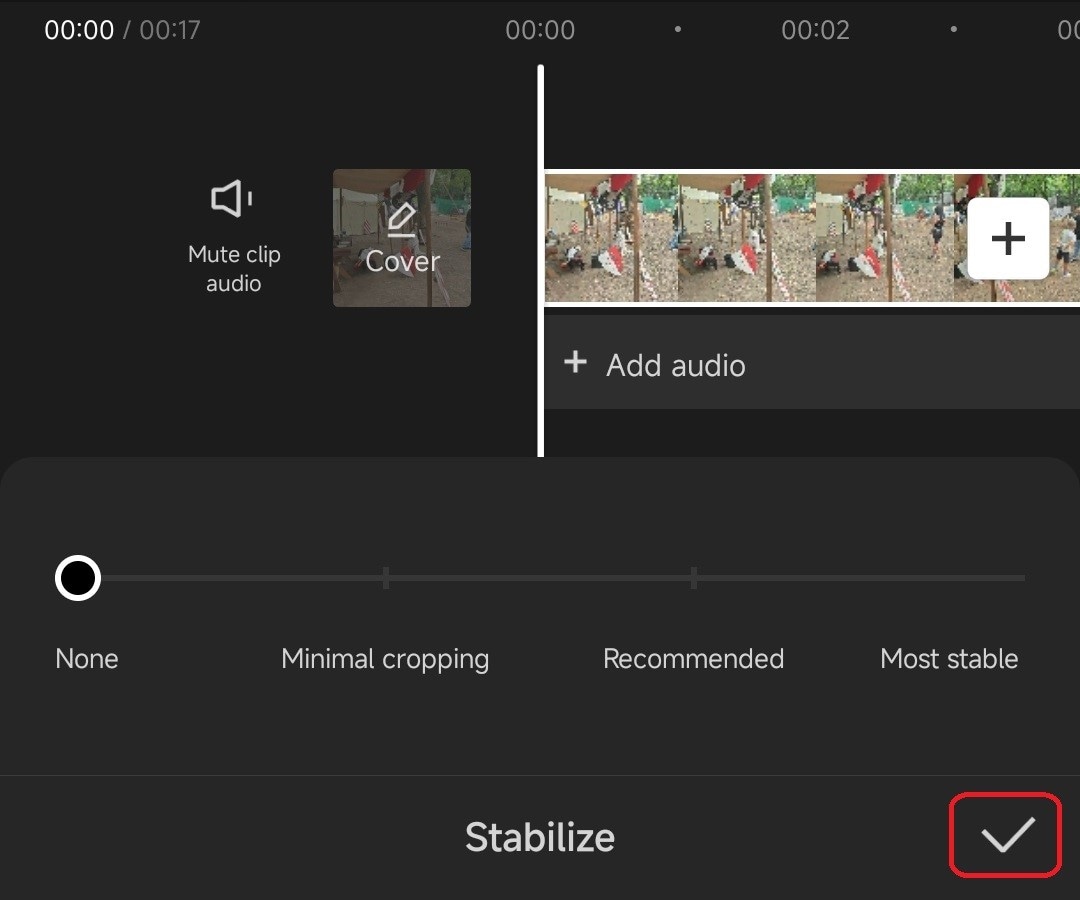
Step 6: Click the option to enable it. Then, pull the dot to choose a level of stabilization and tap the Checkmark button in the bottom right.
For Web CapCut Stabilizer
Finally, there’s the fully online CapCut version, a web-based app that requires no downloads or installations. It can be used directly from the web browser, and here’s how:
Step 1: Head to the CapCut website and tap the Try CapCut Online option in the top right.
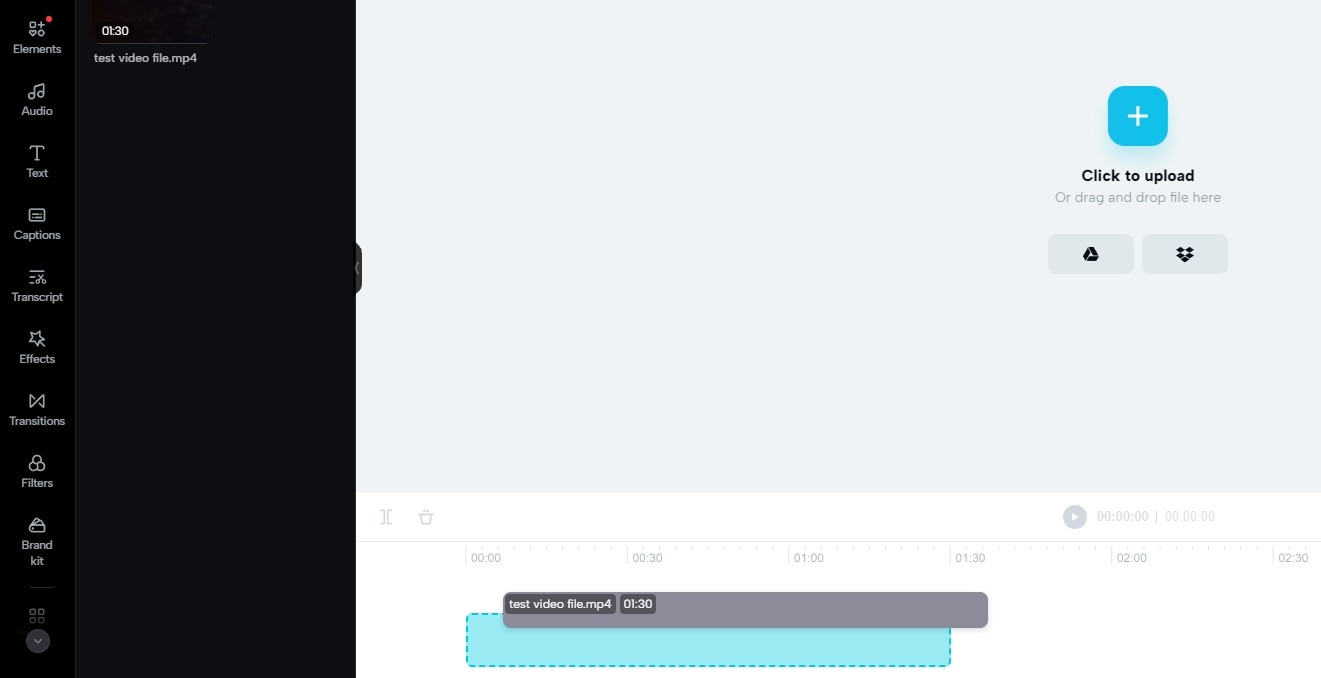
Step 2: Log into it and upload your video by clicking Media > Upload in the left sidebar.
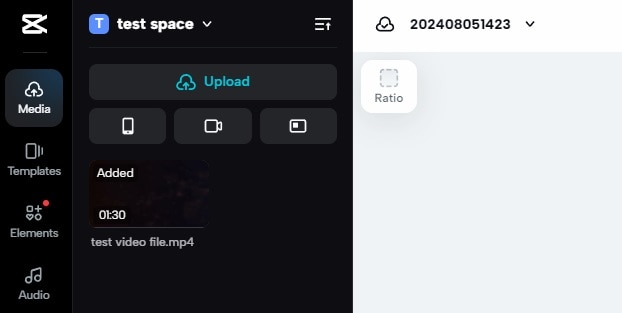
Step 3: Drag and drop the video from the Upload section into the Timeline at the bottom.
Step 4: Head to the sidebar on the right and choose Basic > Stabilize.
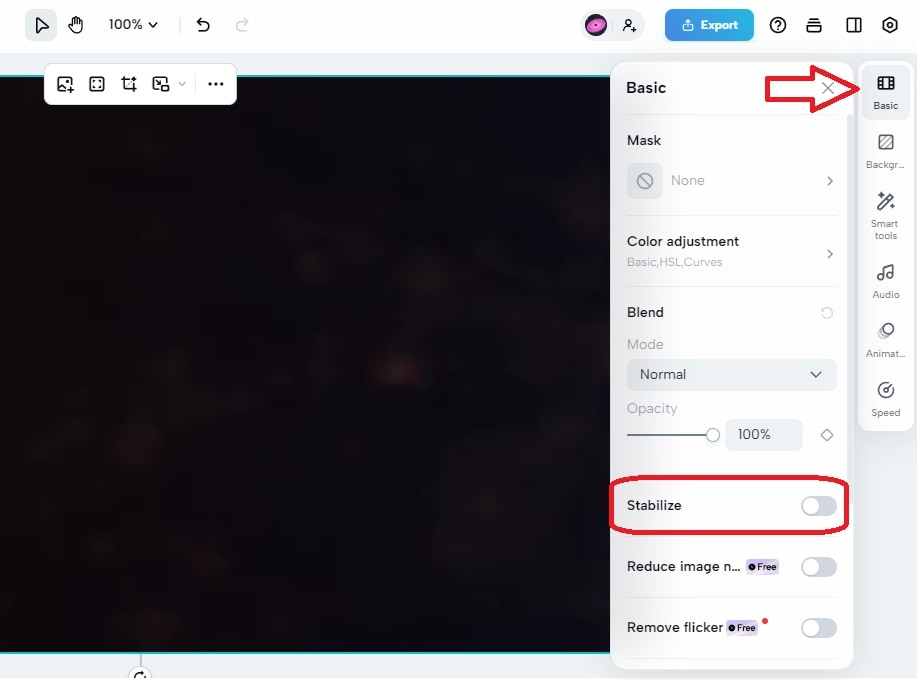
Step 5: Adjust the Level by choosing between Recommended, Minimal cut, and Most stable options and wait for the effect to be applied.
Once you’re done, regardless of whether it was the desktop program, the mobile video editor, or the web app, hit the Export button in the top right corner and save your stabilized video.
Advantages and Disadvantages of Video Stabilizer in CapCut
Like most editing tools and their effects, the CapCut stabilizer isn’t perfect. With that said, let’s explore its strengths and weaknesses together.
Pros:
- It’s a beginner-friendly editing tool, making applying the CapCut video stabilizer effortless;
- As a cross-platform tool, using CapCut and its features is a breeze, making it one of the most accessible video editors;
- CapCut stabilizer is fully automated, requiring zero effort on the user’s end.
Cons:
- CapCut video stabilizer is relatively slow, especially in the web version of Capcut;
- It’s a beginner-oriented feature with no advanced customization options found in pro tools;
- The video editor only supports MP4 and MOV export formats and is slow at exporting.
By understanding the editing tool’s advantages and disadvantages, you can make a well-informed decision on whether this app suits your needs.
Want to Get More Out of Your Experience? Try Wondershare Filmora

CapCut vs. Filmora
While CapCut is known for its simplicity, Filmora offers advanced features like AI Text-to-Video, multi-cam editing, and more precise control over editing options. Filmora supports more formats and provides a wider range of creative tools, making it ideal for both beginners and professionals.
For CapCut users transitioning to Filmora, simply download the software and explore its intuitive interface. Filmora’s built-in tutorials will guide you through the features, and you can easily import your existing projects to continue editing with enhanced tools and flexibility. Filmora ensures a smooth and efficient transition, unlocking more creative possibilities.
Despite being one of the most well-known online video editors, CapCut isn’t the best tool for those who want to stabilize their shaky footage. It struggles on lower-end devices, leading to long wait times for uploading, applying effects, and exporting the clip. Moreover, users can only export MP4 and MOV files.
Unlike CapCut, Wondershare Filmora doesn’t have performance issues or export limitations. This cross-platform video editor has an even friendlier user interface, an easy-to-apply video stabilizer, and vastly more video export options, making it a formidable alternative to the CapCut stabilizer.
Using Filmora to stabilize shaky footage is a breeze, and here’s how you can go about it, too:
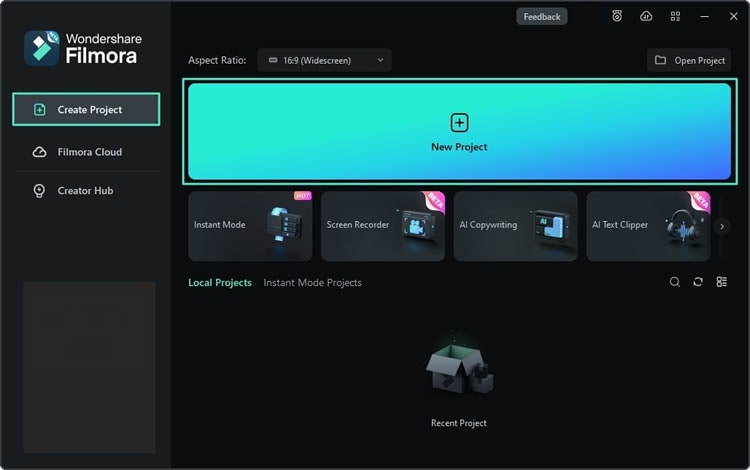
Step 1: Open Wondershare Filmora and click New Project.
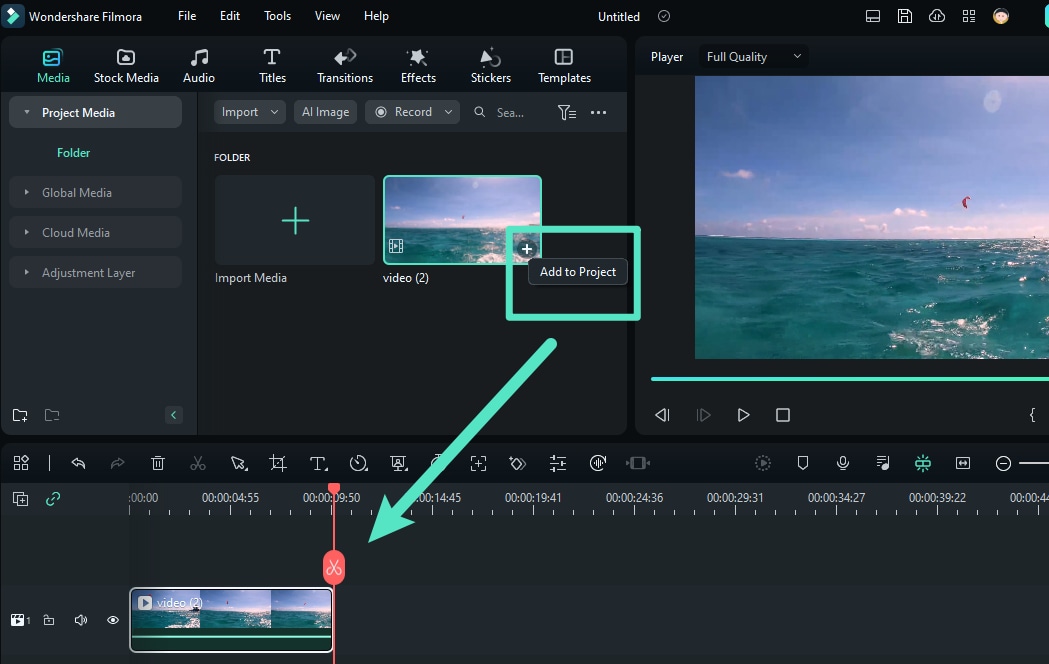
Step 2: Hit the Import button and add your shaky video.

Step 3: Drag and drop the imported file into the Timeline. Then, click on it to select it.
Step 4: In the sidebar on the right, head to Video > AI Tools and enable Stabilization.
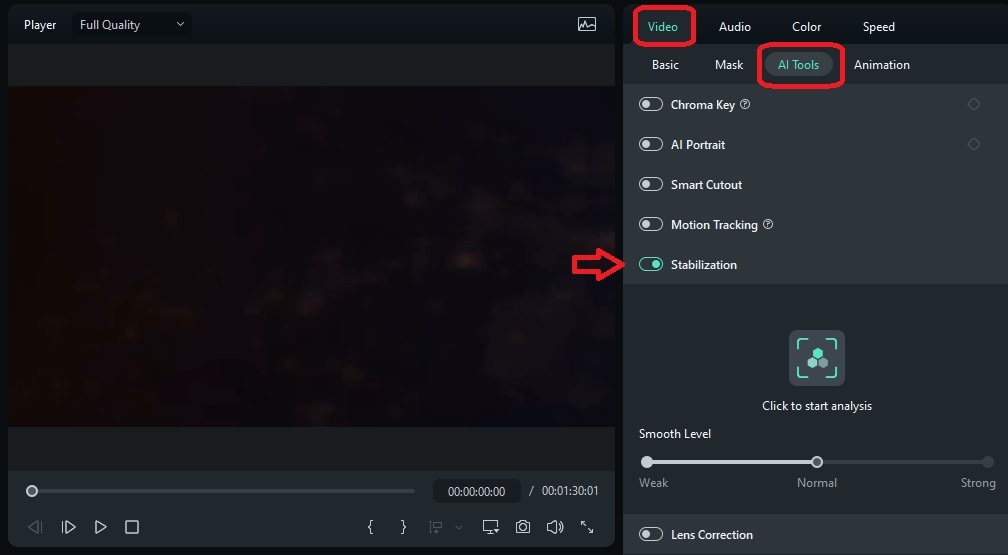
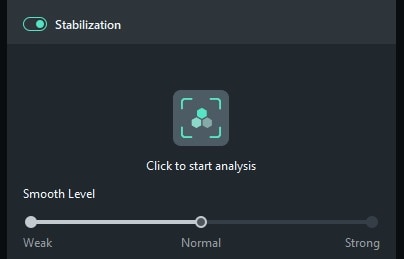
Step 5: Under Smooth Level, choose between the Weak, Normal, and Strong options and tap the “Click to start analysis” option.
Step 6: Once Filmora applies stabilization, you can preview the video in the Player field and check whether you’re satisfied with the level of stabilization.
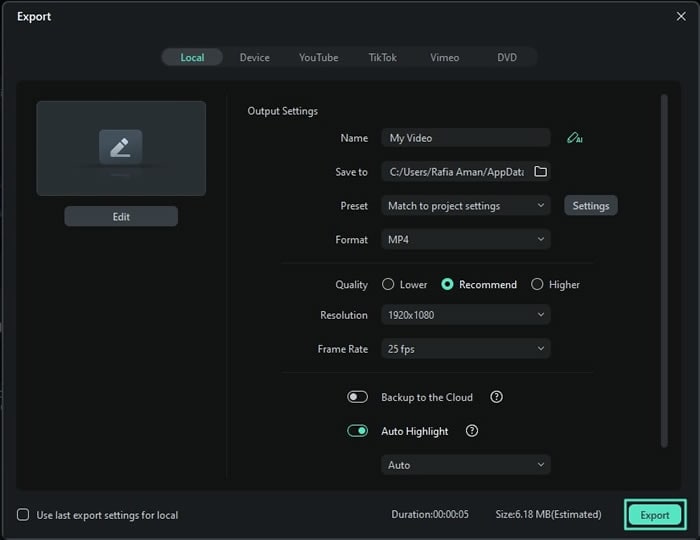
Step 7: If you’re satisfied with the stabilization effect in Filmora, hit the Export button at the top right. Then, adjust the tool’s output settings and tap Export again to save the stabilized video to your device.
It’s also worth noting that Filmora packs a heavy punch in the template and AI-powered feature department, offering many more video editing templates and AI-enhanced tools, which can make your editing process much more seamless.
Conclusion
Video stabilization is a vital part of the editing workflow. It allows users to create professional-looking, high-quality footage, even if they’ve previously shot shaky clips without a tripod or a gimbal.
That’s where the CapCut video stabilizer plays a critical role. It helps users apply video stabilization techniques in a few clicks, regardless of whether they’re on a desktop or smartphone or want to avoid downloading anything and prefer a web-based app.
However, stabilizing videos with CapCut isn’t your only choice for eliminating shaky footage. Alternative solutions like Wondershare Filmora also exist.
As you’ll see when you try Wondershare Filmora, the app’s stabilization feature is much faster than CapCut’s. Moreover, Filmora has much faster video exports and offers over a dozen formats, making it vastly superior to Capcut, which only supports two video formats.
