

 ChatGPT
 Perplexity
 Gemini
 Claude
 Grok
Grok
Video editing and colors go hand in hand. While editing a simple video for friends and family, we still make some changes to its colors. Colors are like the lifeline of a video, and it is obvious because it provides the right context to a video. However, color grading a video to perfection is more challenging than it seems because it requires skills.
Video color grading is important to give your video a finishing touch, and you can learn the right skills from here. You will learn about color grading histograms and waveforms in this article. Moreover, you will learn tips to color grade a video perfectly. This article will also help you understand the differences between light and dark videos.
In this article
The best editor helps you color grading histograms and waveforms.

Part 1: How to Color Grade a Video Perfectly?
The process of adjusting and correcting color in a video is called color grading. With the perfect color-grading video, you’ll get the right look, mood, and style in your video.
1. Analyze Project Requirements
At first, you need to familiarize yourself with your video's narrative, context, theme, and emotion. In this way, you can easily make decisions regarding color grading.
2. Pick a Relatable Color Palette
After that, choose the color palette that fits your video's mood. You can choose warm, cool, desaturated, and other specific looks from the palette.
3. Select an Advanced Software
Other than choosing the correct color palette, selecting the right video editor also matters a lot. Professional video editing software provides you with versatile options for color grading. For instance, to correct the light or dark parts, you can experiment with options under “Light.”
4. Stabilize Exposure Levels
The first and foremost important task is to adjust the exposure of your video content. You can change the contrast to highlight your video's shadows and other portions. Moreover, it can enhance the visibility of some visuals.
5. Identify the Light and Dark Points
Change the black and white points to balance your video's dull and bright portions. In this way, you can set these points and enhance your video with better color composition.
6. Manage the Color Balancing
Another important step of color grading is to correctly balance all the colors in your video. You can use the color wheels or change the temperature settings to remove color casts. There are no right values to do so; they vary according to your video and context.
7. Secondary Color Adjustments
While playing with other color adjustment options, you can also add LUTs or other overlays to improve the color tone. You can modify secondary colors and adjust the vibrance of your video’s colors.
8. Preview Before Finalizing
Once you are done with your video color grading, make sure to preview the final look of your video. Observe keenly to correct any left-out flaws. After that, show your final output to your friends and family to get feedback for improvement.
Part 2: What is the Difference Between a Light Video and a Dark Video?
The terms "light video" and "dark video" relate to the overall brightness and contrast in a video. Moreover, these characteristics determine the luminance values of your video. The term "Light Video" may be directed toward the fact that video has positive tones and is relatively bright.

When we talk about "Dark Videos," the idea of high shadows and contrasts comes to mind. Look through the table to understand the difference between light and dark video:
|
Light Video |
Dark Video |
|
Brightness: In a light video, the brightness levels appear to have a higher rate. |
Dimmed Lighting: The brightness levels of dark videos are relatively lower than light ones. |
|
High-Key Lighting: These videos use high-key lighting techniques. Such techniques include well-illuminated colors, low contrasts, and soft effects. |
Low Key Lighting: Dark videos use low-key lighting techniques with shadows appearing more highlighted. |
|
Colors: Colors in these videos appear to have more vibrance and are vivid with popping colors. |
Colors: Colors in the dark videos appear more muted and subdued in the footage. |
|
Atmosphere: In addition, the atmosphere of the light video appears to have a sense of positivity and openness. |
Atmosphere: Videos with darkness convey a sense of mystery, intensity, or drama. |
|
Tone: Light exposure tends to be used in genres like comedy, romance, and family movies. |
Tone: Additionally, the tone in your videos will look similar to the ones in horror or thriller films. |
|
Visibility: Details such as shadows and highlights will properly be laminated in light videos. |
Contrast: Lastly, the contrast in dark videos will have a higher contrast rate and values. |
Part 3: Wondershare Filmora and Color Grading: Understanding The Dynamics
Wondershare Filmora is the name to remember when it comes to color grading videos. This tool has provided almost everything from basic color adjustments to advanced color grading. You might think that color grading videos require skills, but Filmora has a solution, too. Not only does it allow you to do manual color corrections, but it also offers overlay options. Selecting a built-in overlay will auto-adjust color and lighting.
With so many options and tools for color grading videos, Filmora stands out from others. It has changed the dynamics of how we used to color-correct our videos. You can even color grade your videos using masking techniques. That's not the end because you can color grade the entire video footage using an adjustment layer in Filmora.
Guide To Use Color Grading Waveforms
You need to understand it before using color grading waveform to enhance your visuals. Color grading through waveforms refers to editing light or brightness levels across a horizontal axis. You can experiment with the waves to adjust the values of different elements. Here is a guide to doing this type of editing with Filmora:
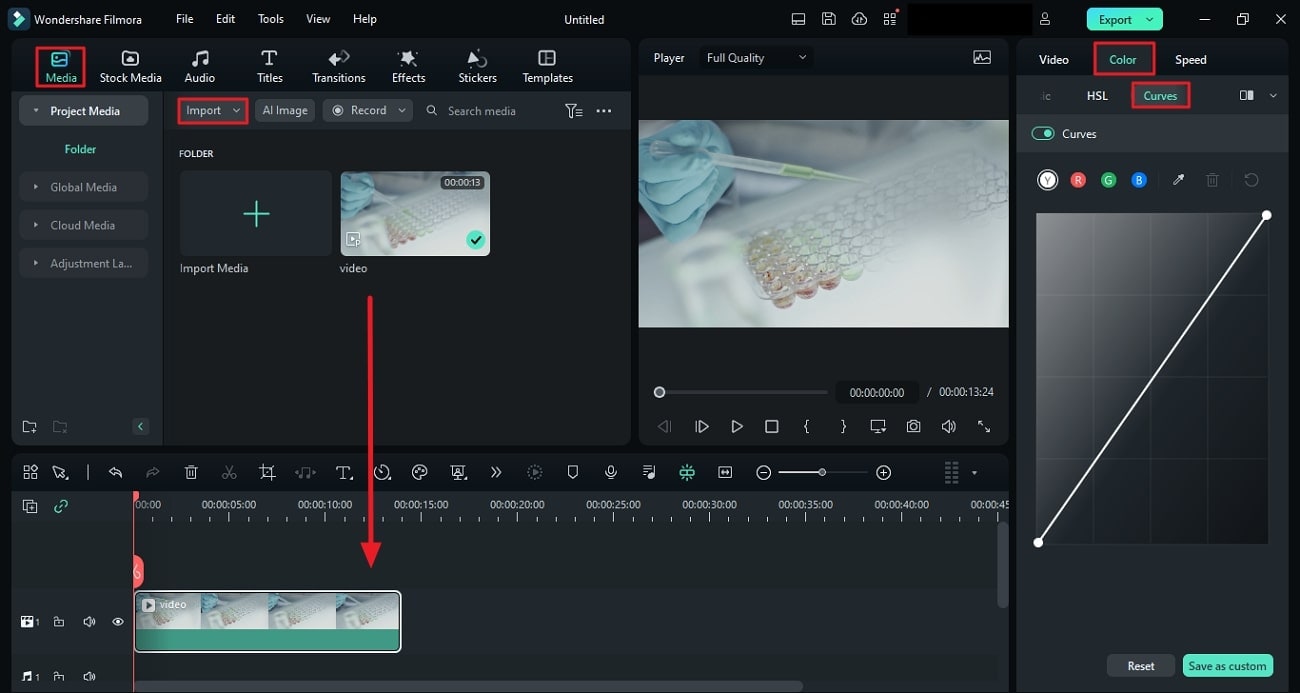
Step 1Import Video and Access Curves
Upon reaching the editing interface of Filmora, create a "New Project" and press “Import” to import your video files. Make sure to drag and drop your video into the timeline. After that, access "Curves" by selecting the "Color" tab from the settings panel in the right corner.
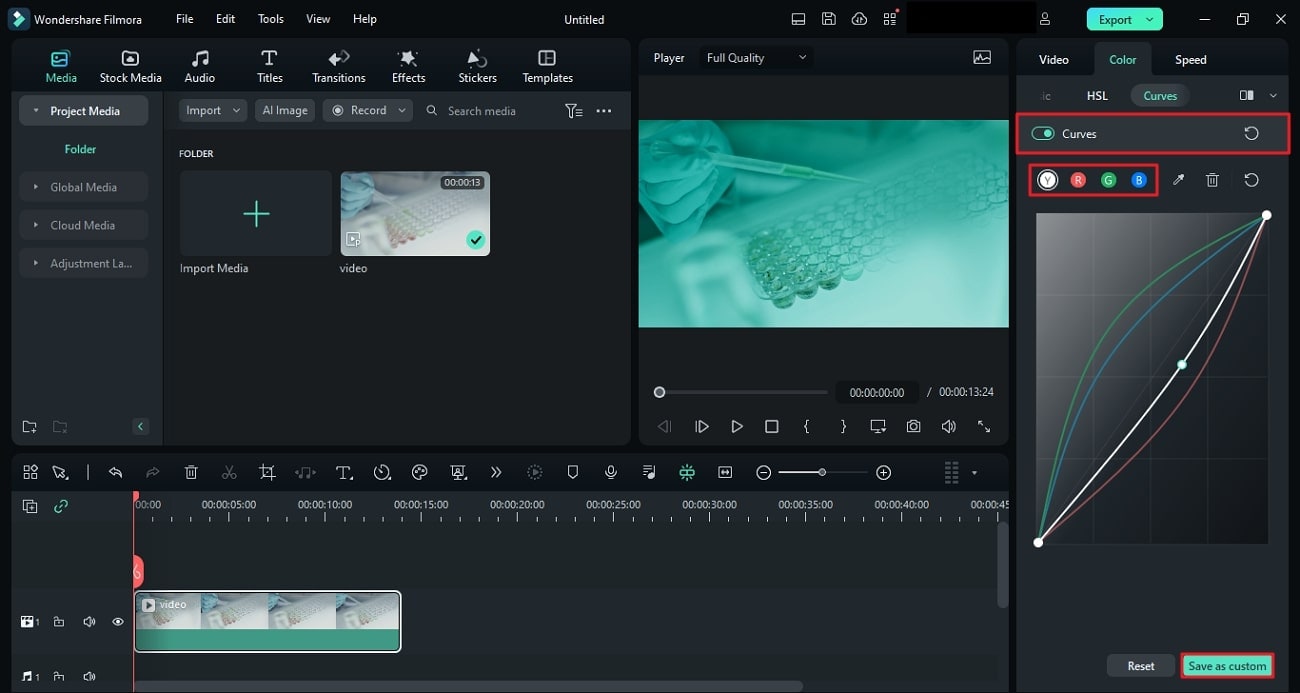
Step 2Customize Using Waveforms
You will find 4 different buttons labeled "Y," "R," "G," and "B." Press each one of them as per your liking, and change the waveform from the graph screen. From the Preview Screen, see the changes, and when you're done with editing, save your video clip by hitting "Export." You can also save these settings to use further by clicking “Save as custom” and adding a name.
Instructions To Use Color Grading Histogram
A histogram is a visual illustration of changes you make in your color-grading video. It helps you understand and adjust the color enhancements you make. This section is going to discuss how you can access a histogram on Filmora for color grading:
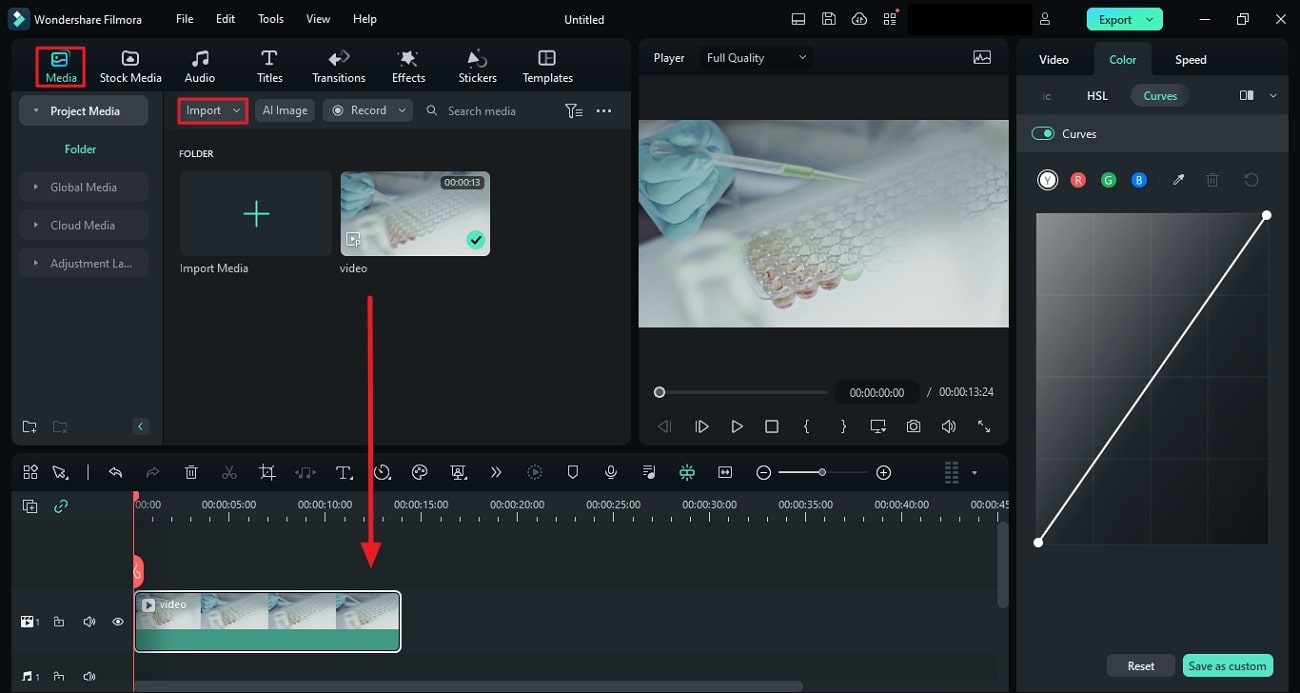
Step 1Create a “New Project” and Import Media in Project Media
Download and install Wondershare Filmora, and double-tap the icon to open the tool. You’ve landed in the Startup Interface of Filmora, and from there, click the "New Project" button. Since you have created a new project, drag and drop your video files into Project Media.
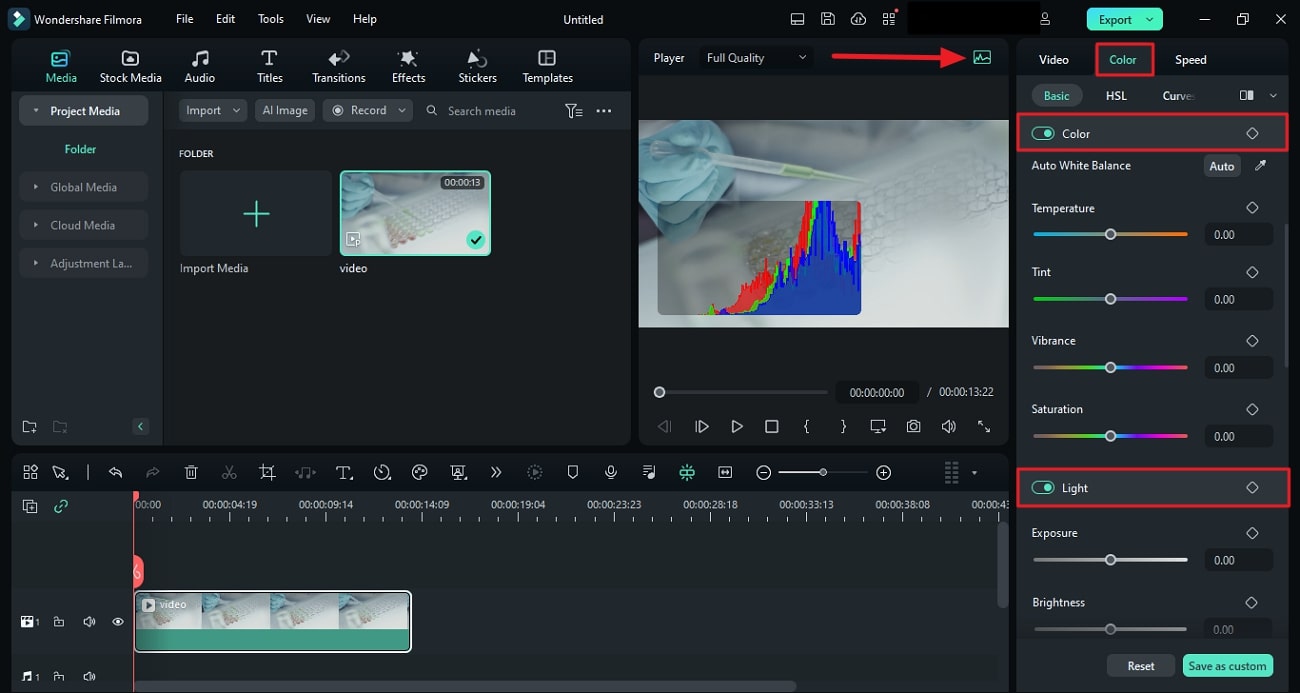
Step 2Access the Histogram To Make Changes
Hold your video file by clicking and dropping it on Filmora's timeline. As your video clip is selected, access the "Histogram" button from the top right corner of the Preview Window. After selecting the "Histogram" option, you will notice waveforms of different color channels. You can change these color channels by accessing the "Color" panel once you change color.
Conclusion
To summarize this article, color grading is as essential as adding effects and other adjustments to the video. Moreover, color correction provides context and depth and adds perspective to your video. You’ve learned about the methods to color grade your video using histogram and waveform. Additionally, you’ve discovered how good Wondershare Filmora is for color correction and grading.
