
 100% Security Verified | No Subscription Required | No Malware


 ChatGPT
 Perplexity
 Gemini
 Claude
 Grok
Grok
Is Anchor truly the easiest way to make a podcast? This question may arise in the minds of many aspiring podcasters like you who are seeking simple, hassle-free solutions for recording and editing podcasts. Now, no need to stress about this, as we are here for you.
In this article, we dive deep into Anchor recording, shedding light on its user-friendly features and how it can streamline your podcasting journey. Whether you are an expert or just starting out, this guide will help you make your podcast dreams a reality!
Without any delay, let’s get into the details!
In this article
Part 1: Anchor Podcast Recording Platform: Introduction and Key Features!
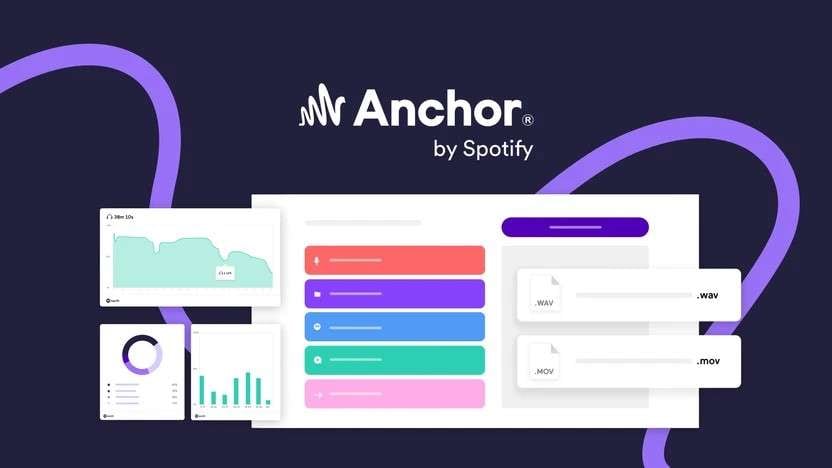
We will start our discussion with what exactly the Anchor recording (now rebranded as “Spotify for Podcasters”) platform is and what its key features are. At its core, it’s a one-stop shop for recording, editing, and distributing your podcasts—all for free! No need for pricy equipment or complicated software; Anchor simplifies the process, allowing you to focus on what you love: sharing your voice with the world.
Now, let’s have a look at some of the key features that make Anchor stand out:
In-app Recording: Record your podcasts right on your phone, computer, or tablet. Anchor enables this, allowing you to record podcasts whenever and wherever. And it syncs seamlessly across devices, so you never miss a beat.
Episode Building: With Anchor, you can build episodes with ease by assembling audio segments, including transitions, and adding music within the platform. It's as if your podcast is taking shape effortlessly.
Collaboration: Want to create a podcast with others? Anchor allows you to record and build podcasts with up to five users in a group call, with the host serving as the moderator. This feature makes it easy to create engaging discussions with friends or co-hosts.
Audio Segments: Your podcasts can be constructed using modular audio segments that can be sequenced together. This means more creativity when you mix and match content to deliver a polished final product.
Distribution: Once you’ve completed recording your podcast, why not share it with the world? Anchor simplifies distribution with just a click, automatically sending your podcast to Spotify and other major platforms like Apple Podcasts and Google Play.
With the above key features, Anchor podcast recording sets a strong foundation for a smooth and enjoyable podcasting experience. Let’s move to the next part now.
Part 2: How to Get Started with Anchor Podcast Recording?
Now the main question is, how to get started with the Anchor podcast recording? We have simplified the steps for starting your podcast recording over Anchor, which you can just check below:
Step 1: Create an account on Anchor by clicking on “Sign Up” in the upper right corner. You can do this using an email address, Google account, Facebook account, or phone number.

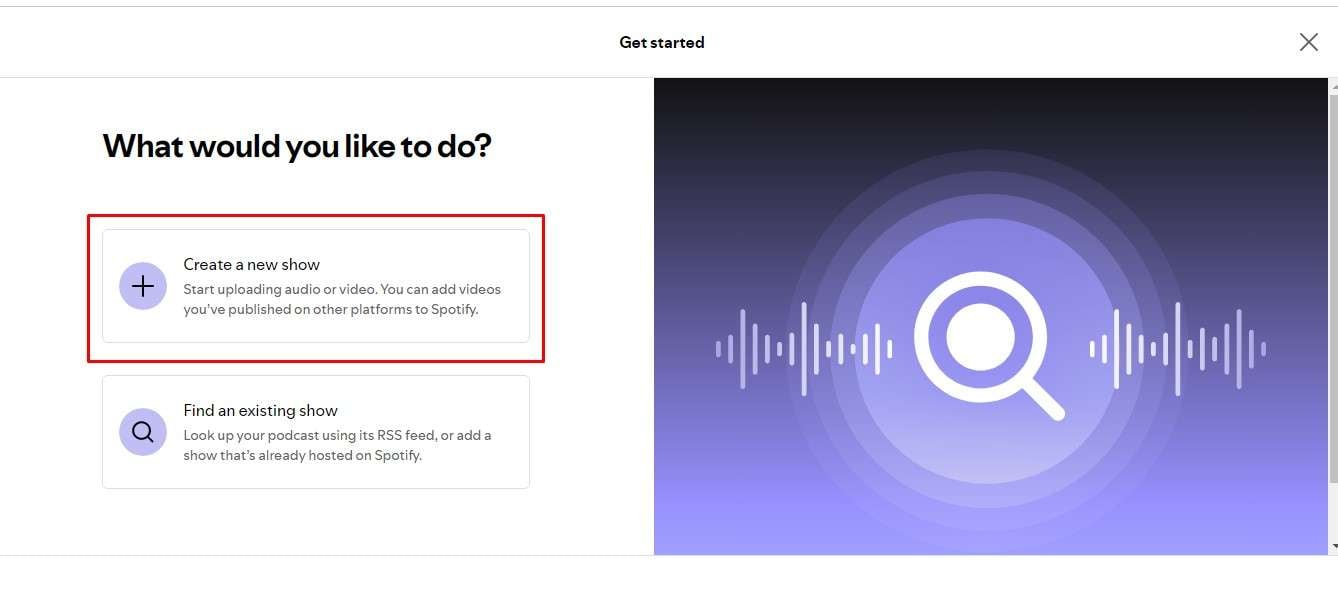
Step 2: Now, you will see two options, one is "Create a New Show” and the other is “Find an Existing Show." Go with the first option if you want to record a podcast.
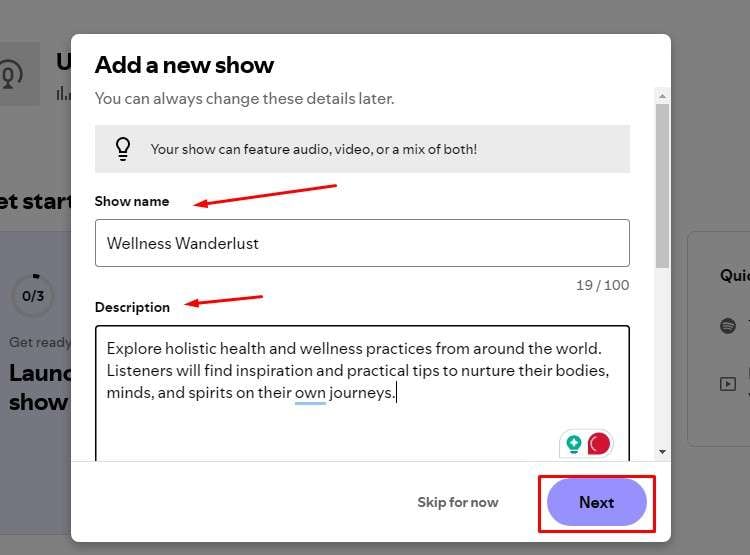
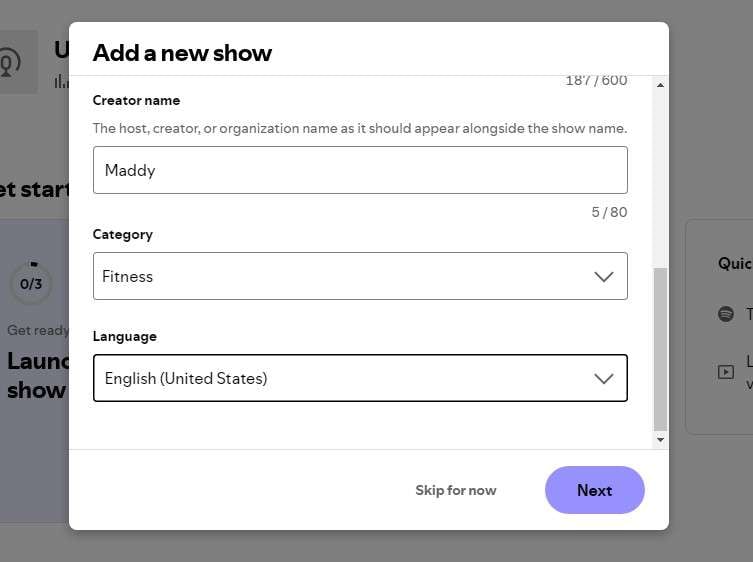
Step 3: Add the desired name of your show and its description, like why fans would love it. After entering the show name and description, tap on "Next.”
Step 4: Now, select the category and language of your show, then hit "Next.”.
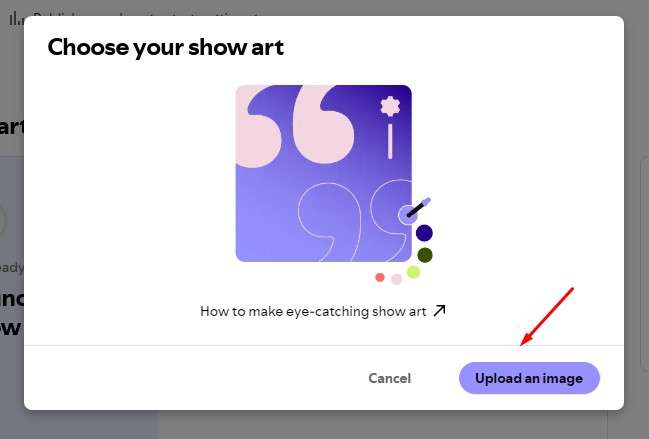
Step 5: Choose your show art by uploading an image. If you do not have any idea about it, you can check it out through a guide provided there named “How to make eye-catching show art.”.
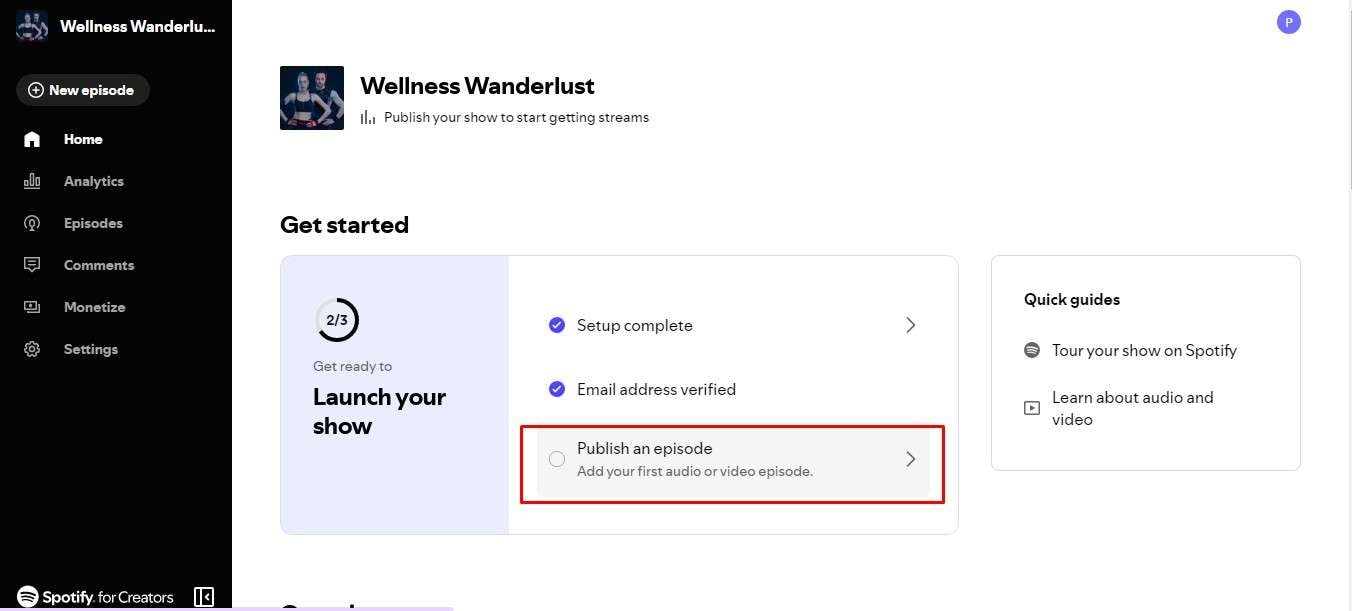
Step 6: Now that you are done with the initials, it is time to add your first audio or video. For that, tap on “Publish an Episode.”
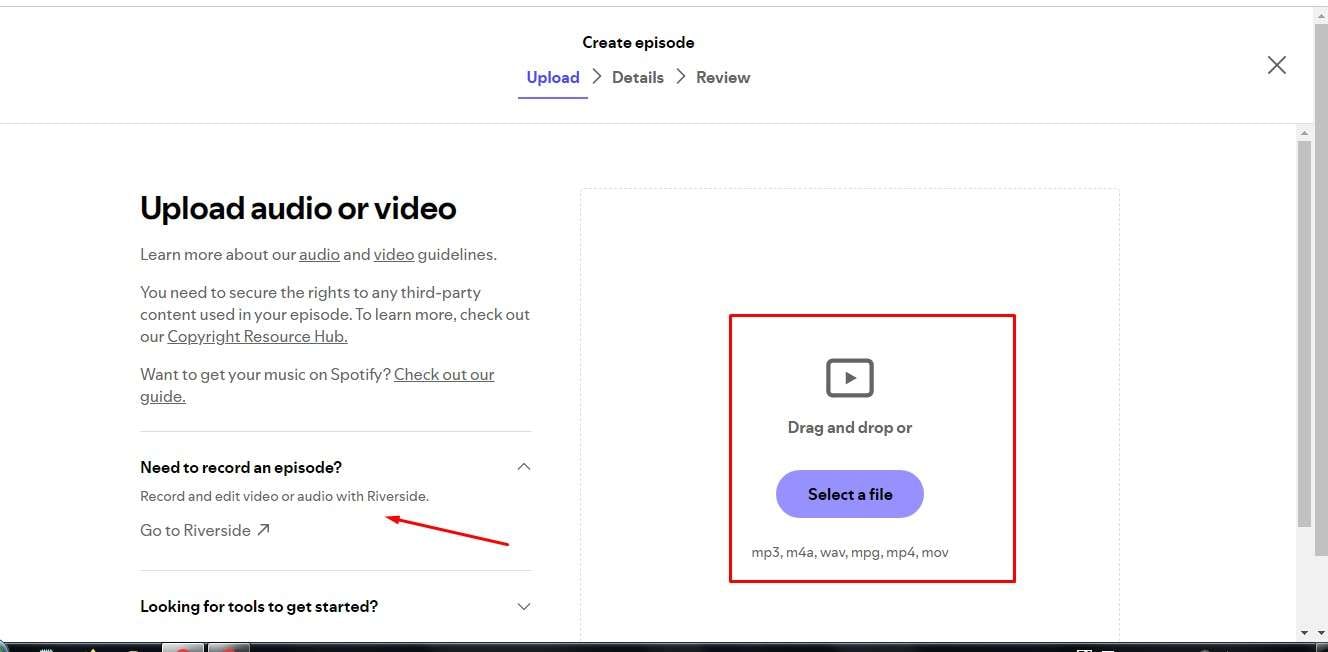
Step 7: You can upload your audio or video right here. There is also an option to record an episode with Riverside.
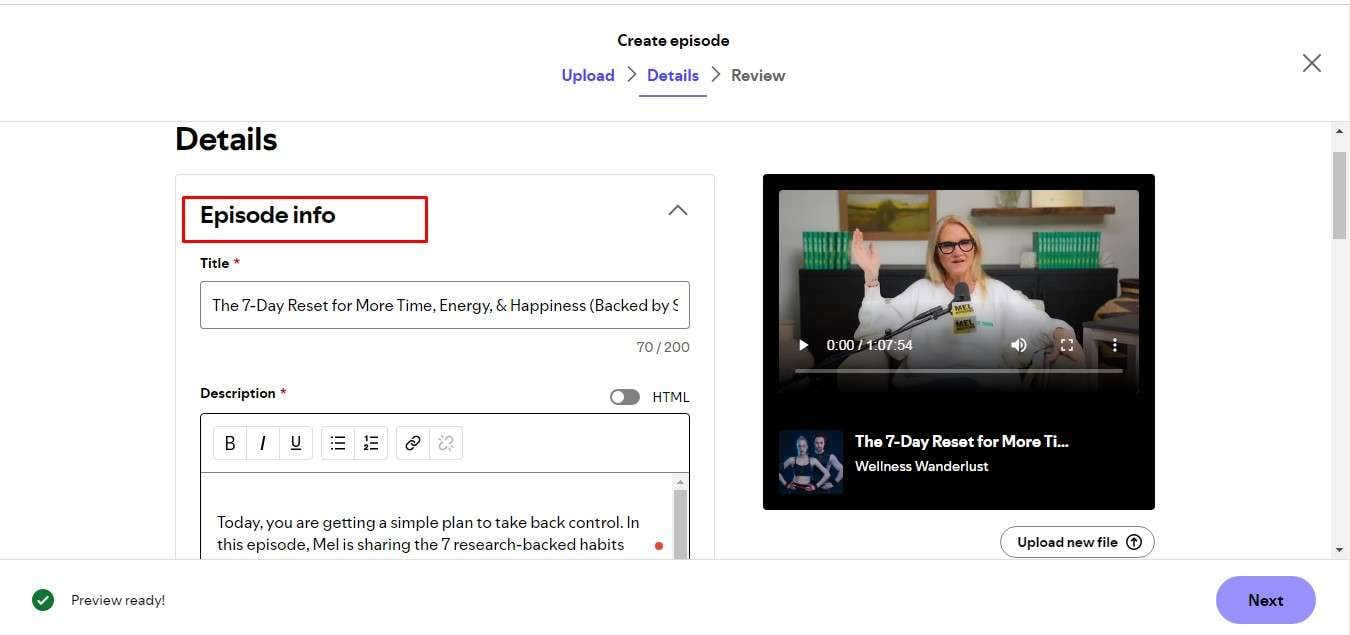
Step 8: Add the title and description of your episode and other additional details that you will see when scrolling down on the Details page. Tap “Next.”
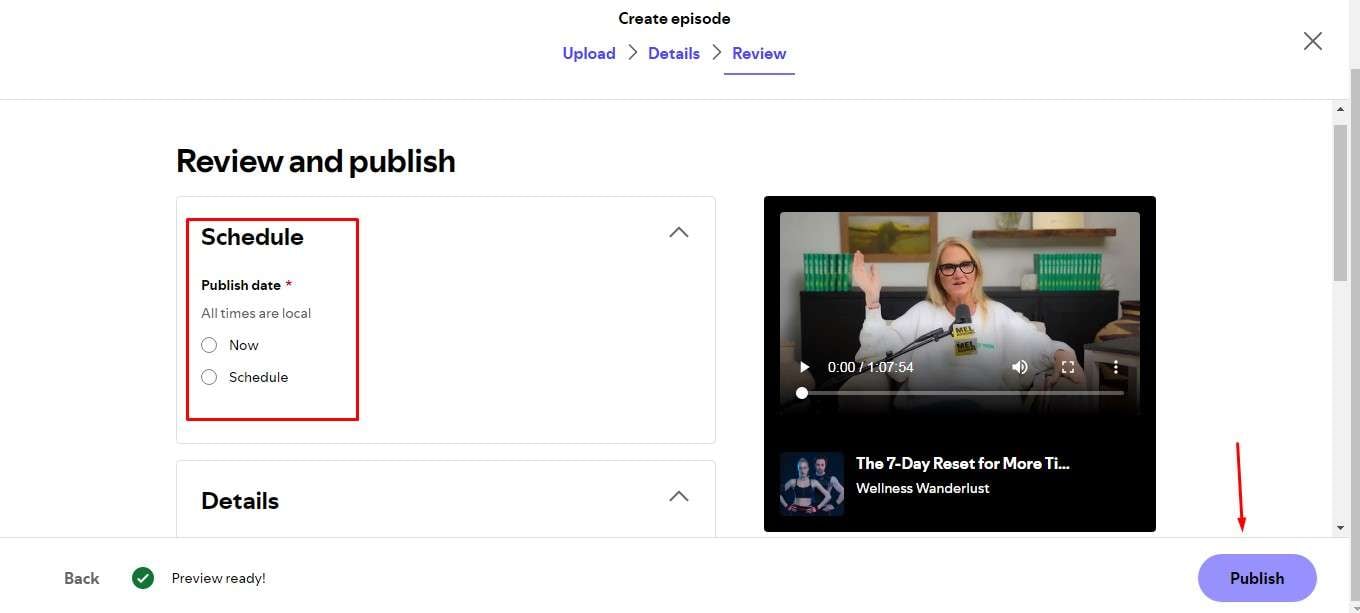
Step 9: Your podcast is ready to publish now. You can publish it now or schedule it for later.
We hope the steps above will help you record your first podcast episode over Anchor with ease. This was all about Anchor’s capabilities for recording your podcast. Now, you must be aware that there are some limitations to using Anchor recording, described in the next part.
Part 3: Limitations of Using Anchor for Podcast Recording

Anchor is a fantastic tool for podcast recording, no doubt, but it’s not without limitations, which are mentioned below:
Audio Quality Constraints: Although user-friendly, some podcasters have found that Anchor's audio quality isn't always the best, especially compared to professional software.
File Size and Upload Limits: You’re restricted to a 250MB limit for each audio file. It means if you’ve got bigger clips, you’ll need to compress them or split them into smaller segments—a bit of extra work for your creative flow!
Recording Time Restrictions: When using the web interface, you can only record for 30 minutes on Google Chrome and just 5 minutes on Safari. So, have your thoughts organized before hitting the record!
Single Show per Account: Each account is limited to one podcast, which is the biggest drawback according to us. You can upload as many episodes as you want, but keep in mind they all belong to that single show.
Basic Editing Tools: While Anchor provides simple editing options, you might find them lacking if you're after professional-level cuts and enhancements. For such needs, we would suggest Wondershare Filmora, an incredible video editing tool.
Part 4.Better Option for Podcast Recording and Editing: Wondershare Filmora
As we know, Anchor has some video editing limitations, which is why you need a more creative solution. Here comes Wondershare Filmora! This software offers incredible podcast recording and editing tools that elevate your content and creativity. It’s like having a professional studio at your fingertips that’s super easy to use.

 secure download

Check out the superior features of Filmora for your podcast editing:
AI Audio to Video: This AI feature allows users to perfectly transform their audio into video, which saves tons of time.
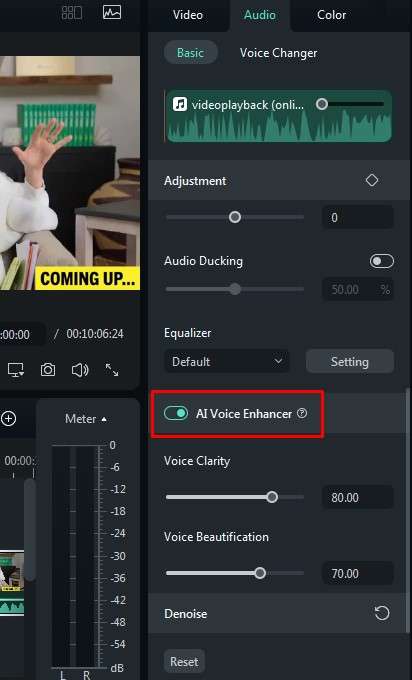
AI Voice Enhancer: Want your voice to shine throughout the podcast? Filmora’s AI voice enhancer will do it for you by cleaning up background noise, giving your podcast that polished sound your listeners will love.
Multi-Camera Editing: This feature lets you switch between different camera angles during your recording. It keeps your audience hooked and adds a fun twist to the listener experience!
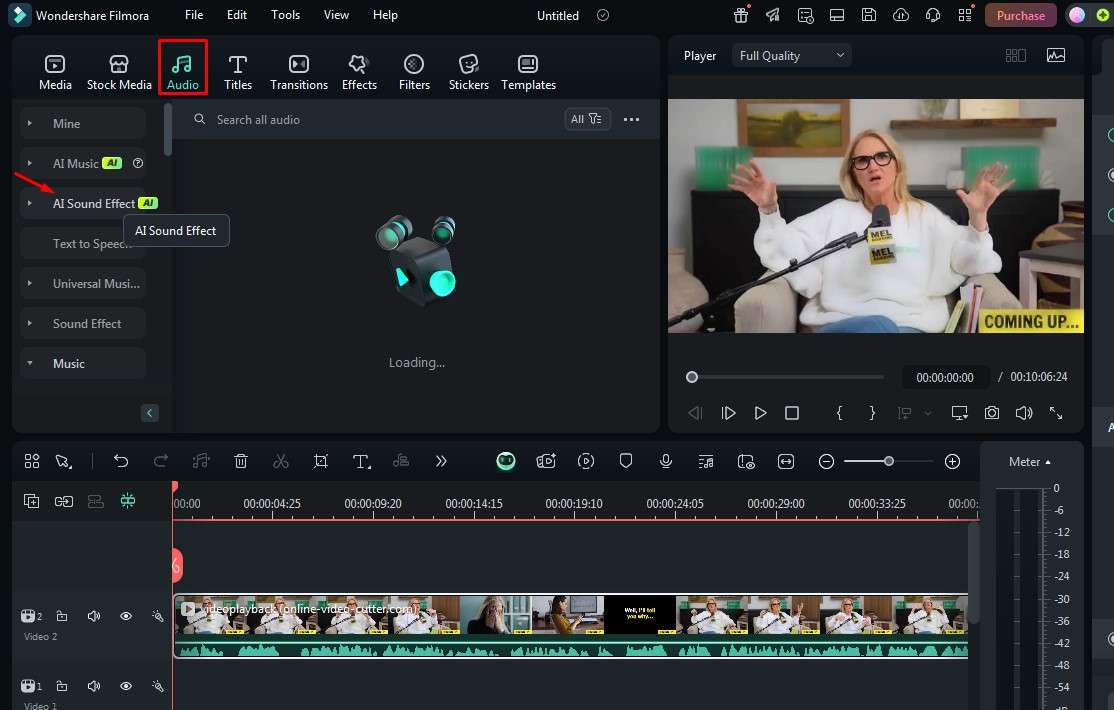
AI Sound Effect Generator: Add unique sound effects like laughter, applause, etc. to your podcasts for more engagement with the AI sound effect generator.
Getting started with Filmora is quite easy; just follow these steps:
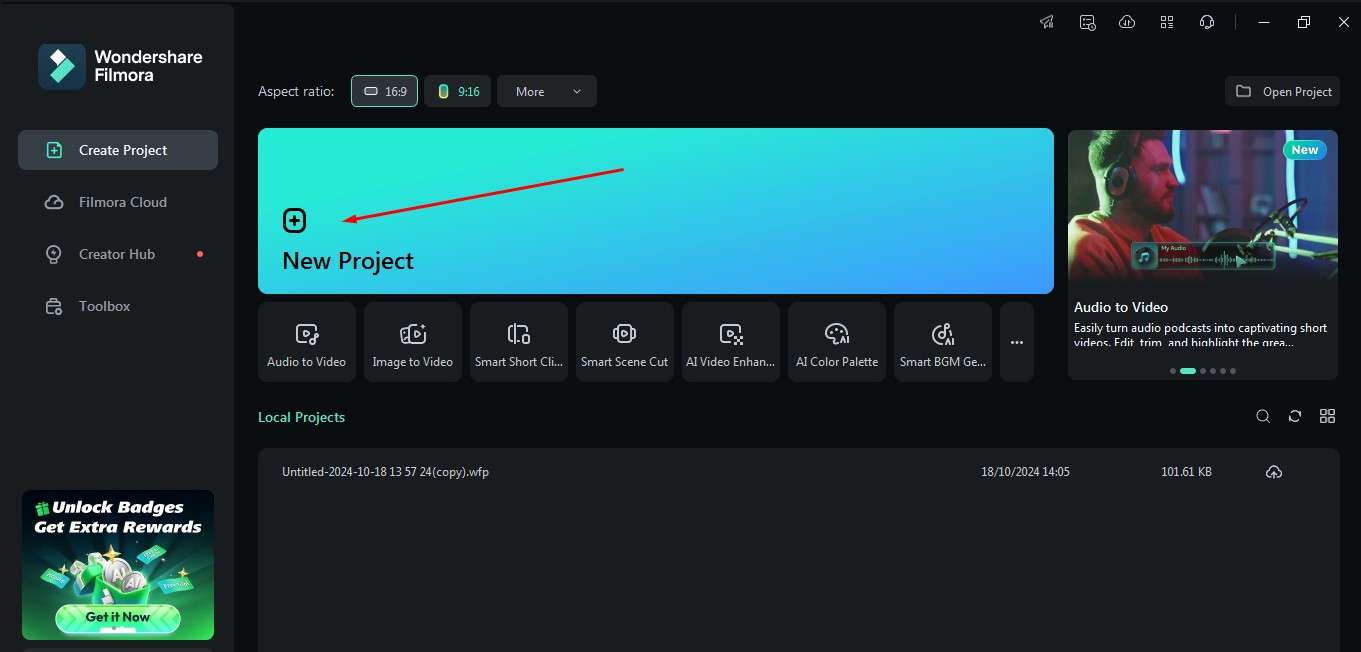
Step 1: Go to the official website of Filmora and download this amazing software. Install it and start a new project by tapping on “New Project.”
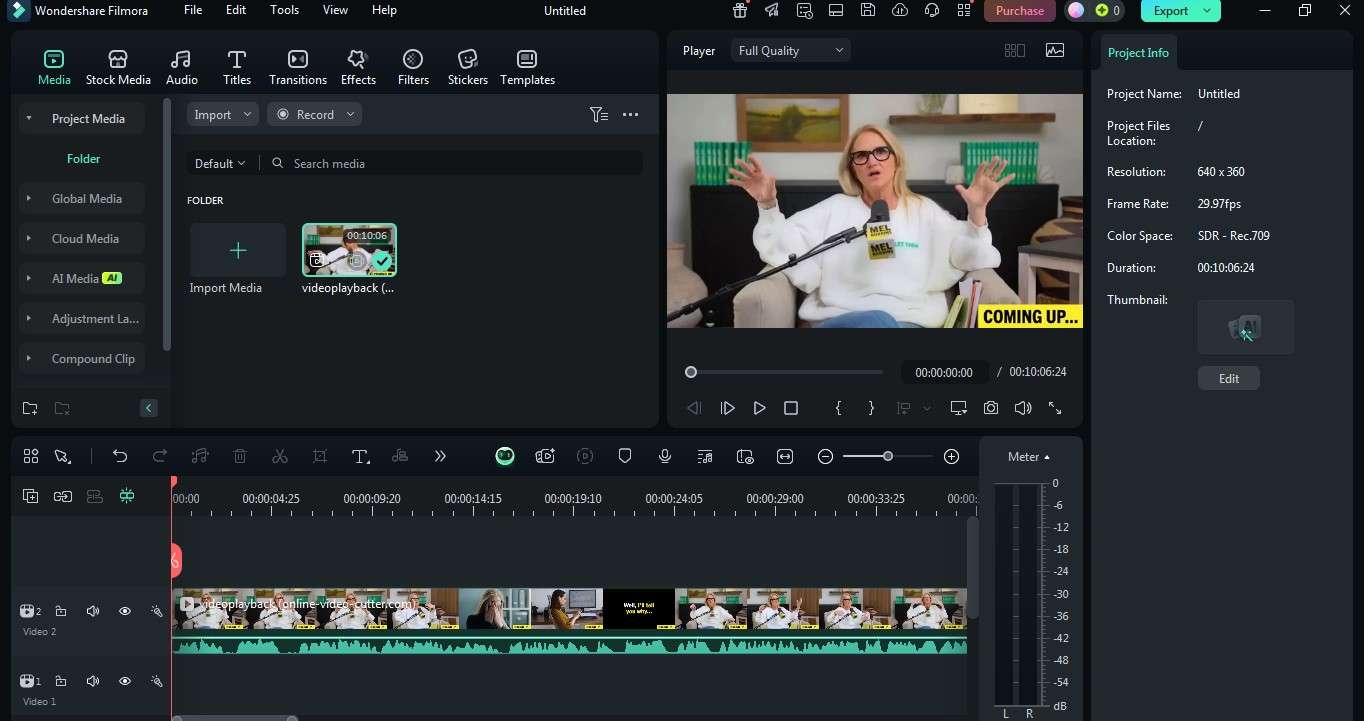
Step 2: It's time to import your video and audio here using the “Import” option. After importing is done, drag and drop media to the timeline.
Step 3: Double-click on the timeline video to enable the audio adjustment features in the top right corner.
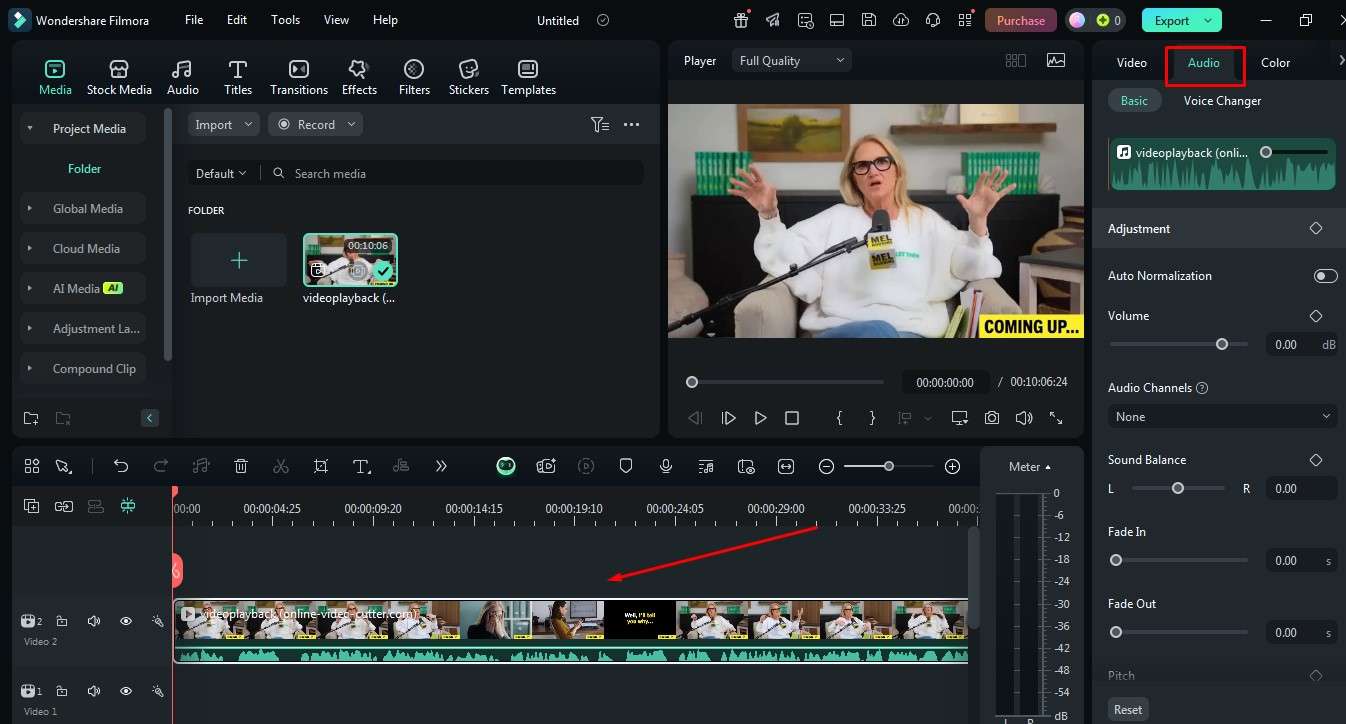
Step 4: Turn on the AI voice enhancer for better voice clarity and beautification.
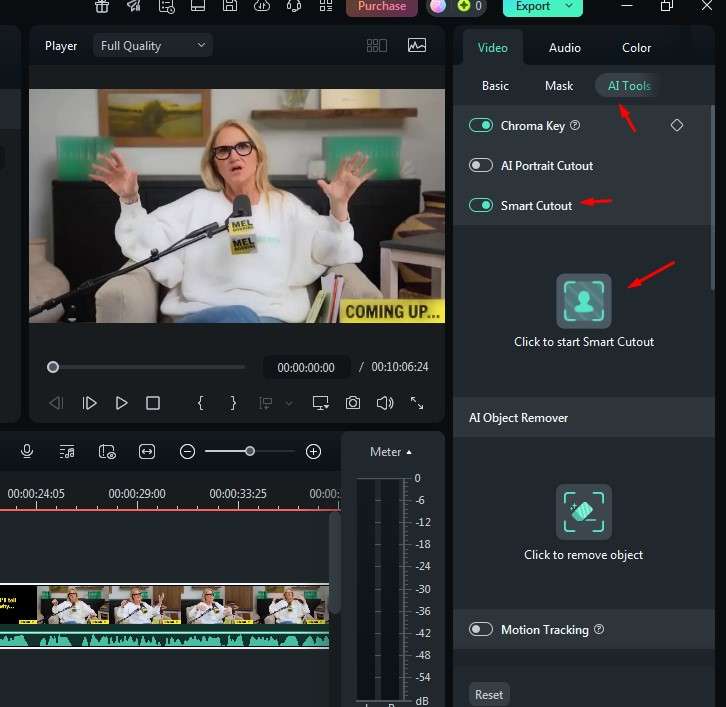
Step 5: You can remove or cut out unwanted objects from the podcast video. For this, you have to click AI Tools in the Video tab, and after clicking the button to launch Smart Cutout, click the bust icon.
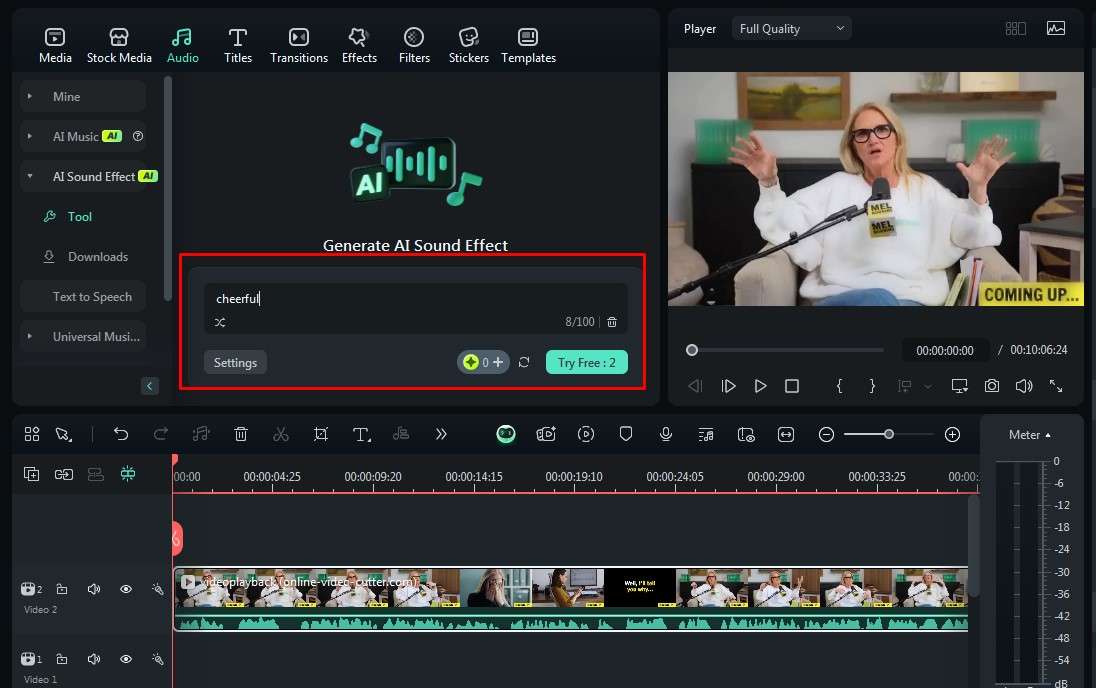
Step 6: Now, come to the music part. You will see an audio option at the top of the left side. Tap on it and get various options, out of which you have to select AI Sound Effect.
Step 7: You can generate an AI Sound Effect by describing what kind of effect you want for your podcast video.
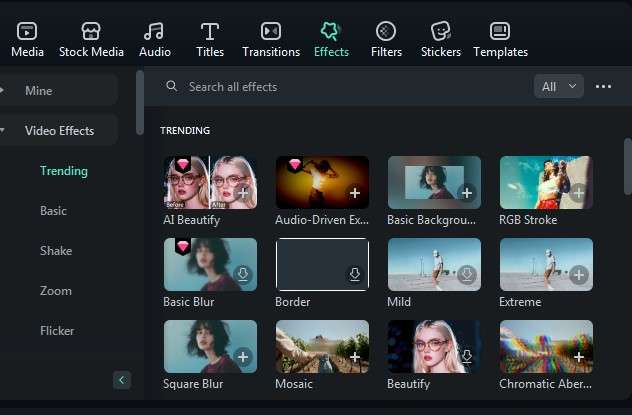
Step 8: In this way, you can add titles, transitions, effects, filters, and stickers of your own choice to the video for better results.
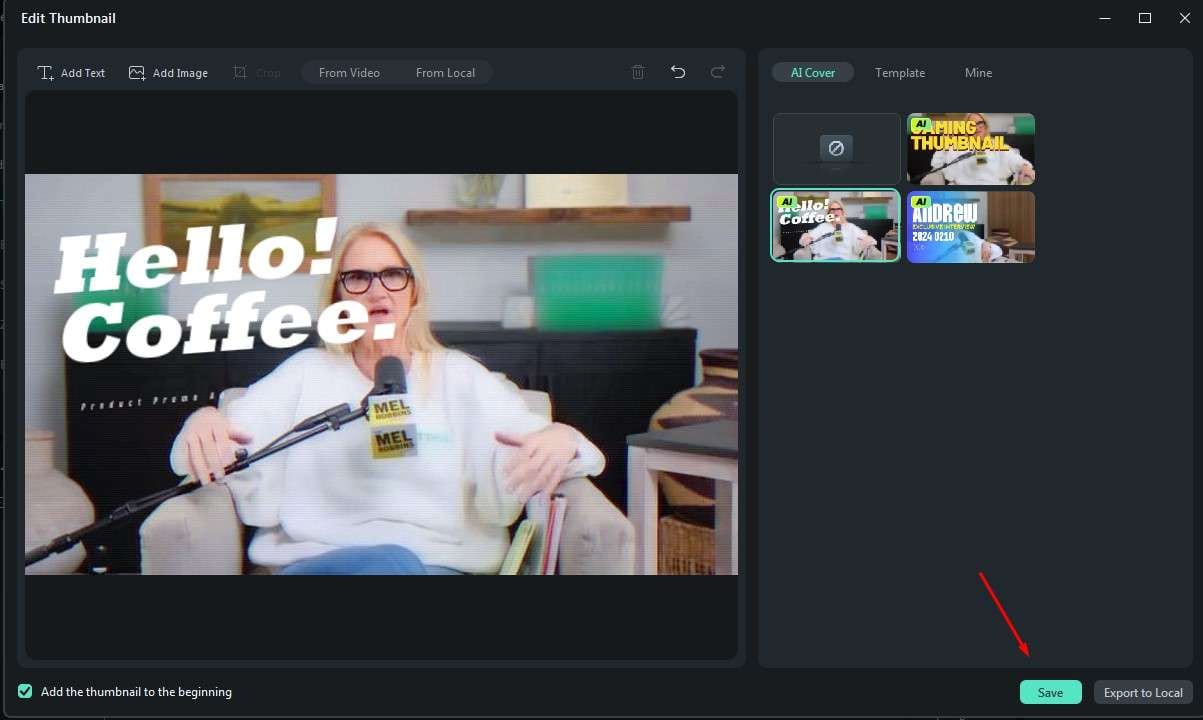
Step 9: Now go to Export and find an AI Thumbnail for your video podcast here, right after tapping on the Edit Thumbnail option. You can choose any from the AI suggestions or the templates given here. Finally, save it.
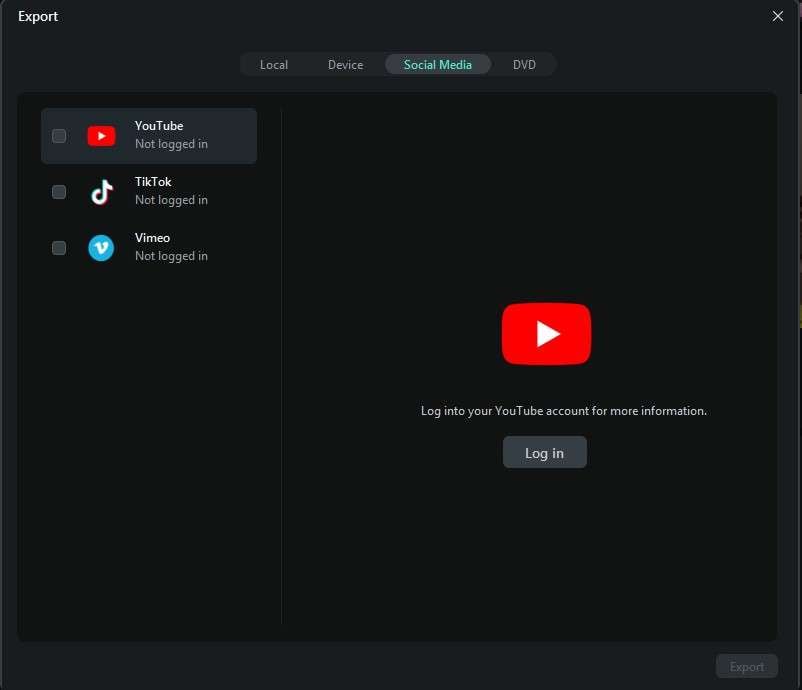
Step 10: Directly upload your podcast on any social media account now by logging in to your account.
How amazing and practical these steps were, right? Using these steps, you can edit your podcast in such an amazing quality that everyone will praise. The main thing about Filmora is that it doesn’t have a complicated interface. So, why not give it a try today?
Conclusion
To sum it up, Anchor truly offers an easy and accessible way to get started on your podcasting journey. Its user-friendly features allow you to record and collaborate effortlessly. However, don’t forget about Wondershare Filmora for those times when you need advanced editing power. When you combine Anchor recording with Filmora’s professional tools, your podcasting journey will go to its peak. So, download Filmora, start recording and editing, and let your voice be heard!
