
Whether you want to condense lengthy videos into a few memorable seconds or create exciting fast-motion video effects, speeding up videos in Premiere Pro can be a valuable skill that drastically influences your storytelling abilities. By mastering this editing technique, video editors can seamlessly create dynamic effects and ensure a smooth video flow.
Today’s guide will explore these effects further and show you how to speed up a clip in Premiere Pro using three different methods. Stick around, as we’ll also provide an alternative editing solution, which offers an even more straightforward approach to video speed adjustments. So, let’s get started.
In this article
Speed up a Clip in Premiere Using Speed/Duration Control
The first and most straightforward method for speeding up videos in Premiere Pro involves using Adobe’s Speed/Duration tool, which editors can quickly access from the Timeline with a few simple taps. With that said,
Step 1: Launch Adobe Premiere Pro, import your video, and drag and drop it into the Timeline at the bottom of the app’s screen.
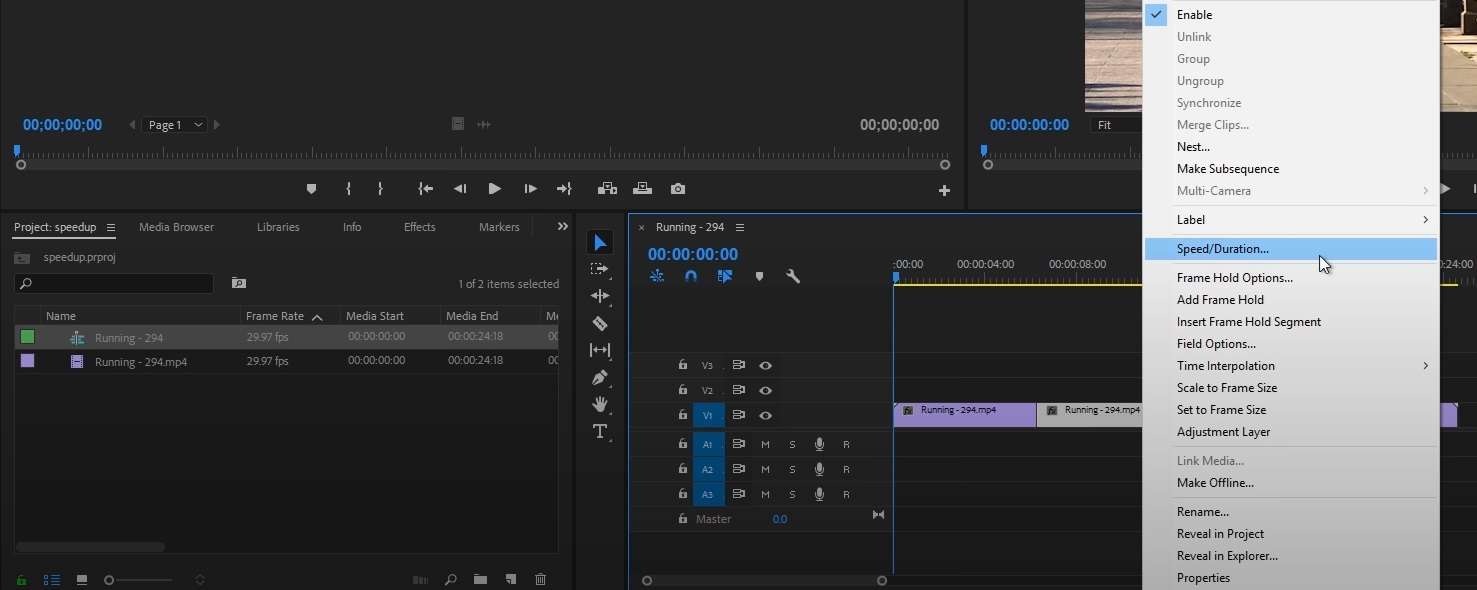
Step 2: Right-click the clip in the Timeline and select Speed/Duration.
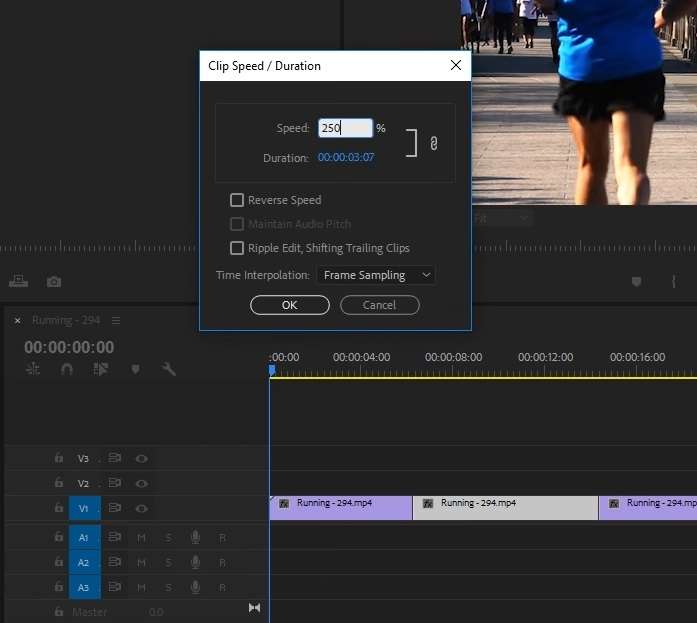
Step 3: Speed up a video in Premiere Pro by changing the percentage in the Speed box.
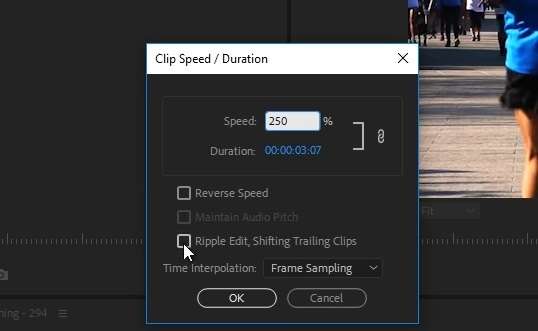
Step 4: Tick the box next to Ripple Edit to ensure additional clips after the sped-up part move along the segment you’ve just sped up and don’t leave a gap in the Timeline.
The downside of the Speed/Duration tool in Adobe Premiere Pro is its use of percentages, which can become confusing for some video editors. It’s also why many Adobe enthusiasts prefer using a different method to speed up videos in Premiere Pro.
Speed up a Clip in Premiere Pro Using the Rate Stretch Tool
Suppose you’d like to avoid dealing with percentages and prefer relying on your senses during editing. In that case, Adobe’s Rate Stretch tool might be a better way to speed up videos in Premiere Pro, and you can use it by following these simple steps:
Step 1: With the clip selected in the Timeline, tap the R key on your keyboard to use the Rate Stretch tool. Alternatively, hit the third button next to the Timeline and select the Rate Stretch tool.
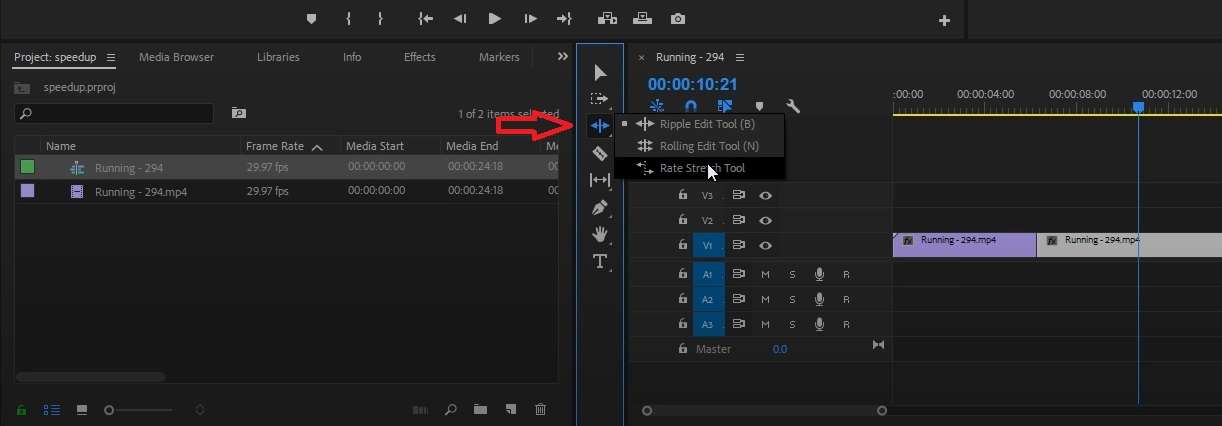
Step 2: Position the Rate Stretch tool at the end of the clip you want to speed up.
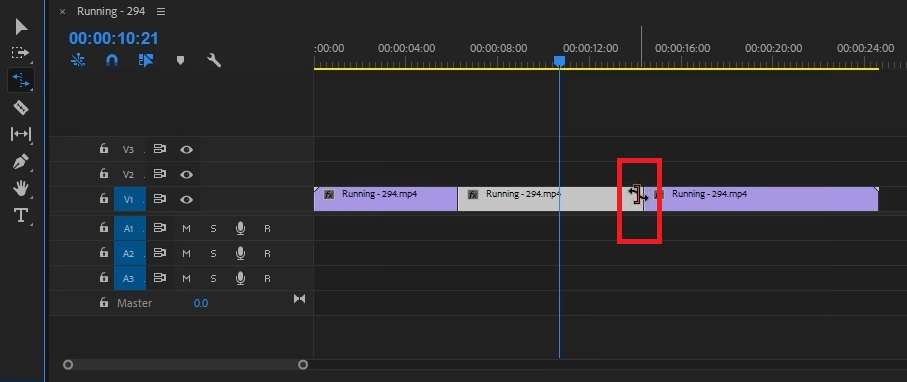
Step 3: Drag the clip inward to shorten it and, thus, speed up a video in Premiere Pro.
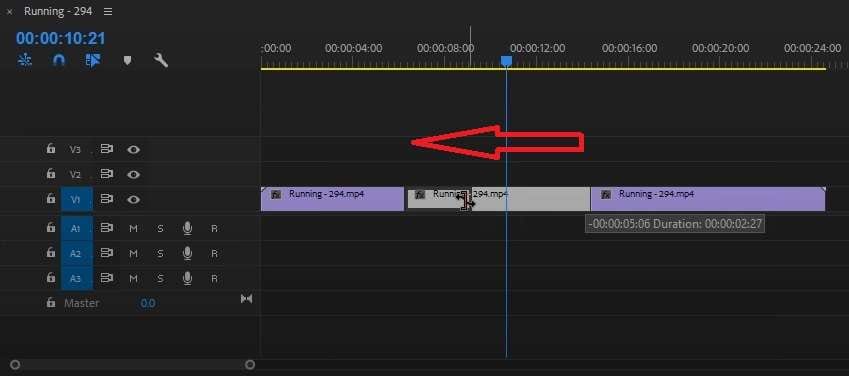
Step 4: Drag additional Timeline clips and reconnect them with the sped-up video.
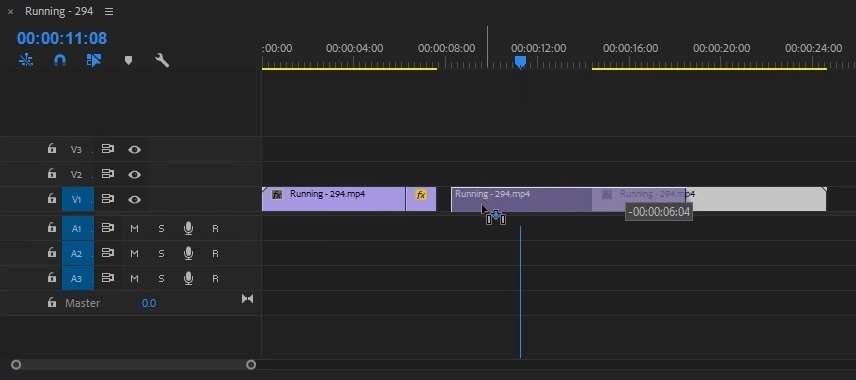
After completing the steps, you can render the clip and play it in the Preview panel above the Timeline to check whether you’re satisfied with the speed adjustments.
Speed up a Clip in Premiere Pro With Time Remapping
Although speeding up videos in Premiere Pro with the two abovementioned methods is relatively straightforward, the resulting sped-up clip can appear harsh and choppy. To fix that, you’ll want to use the Time Remapping tool, which can gradually increase the speed, resulting in a much smoother and professional-looking video.
Step 1: Right-click your clip’s FX badge in the Timeline and select Time Remapping > Speed.
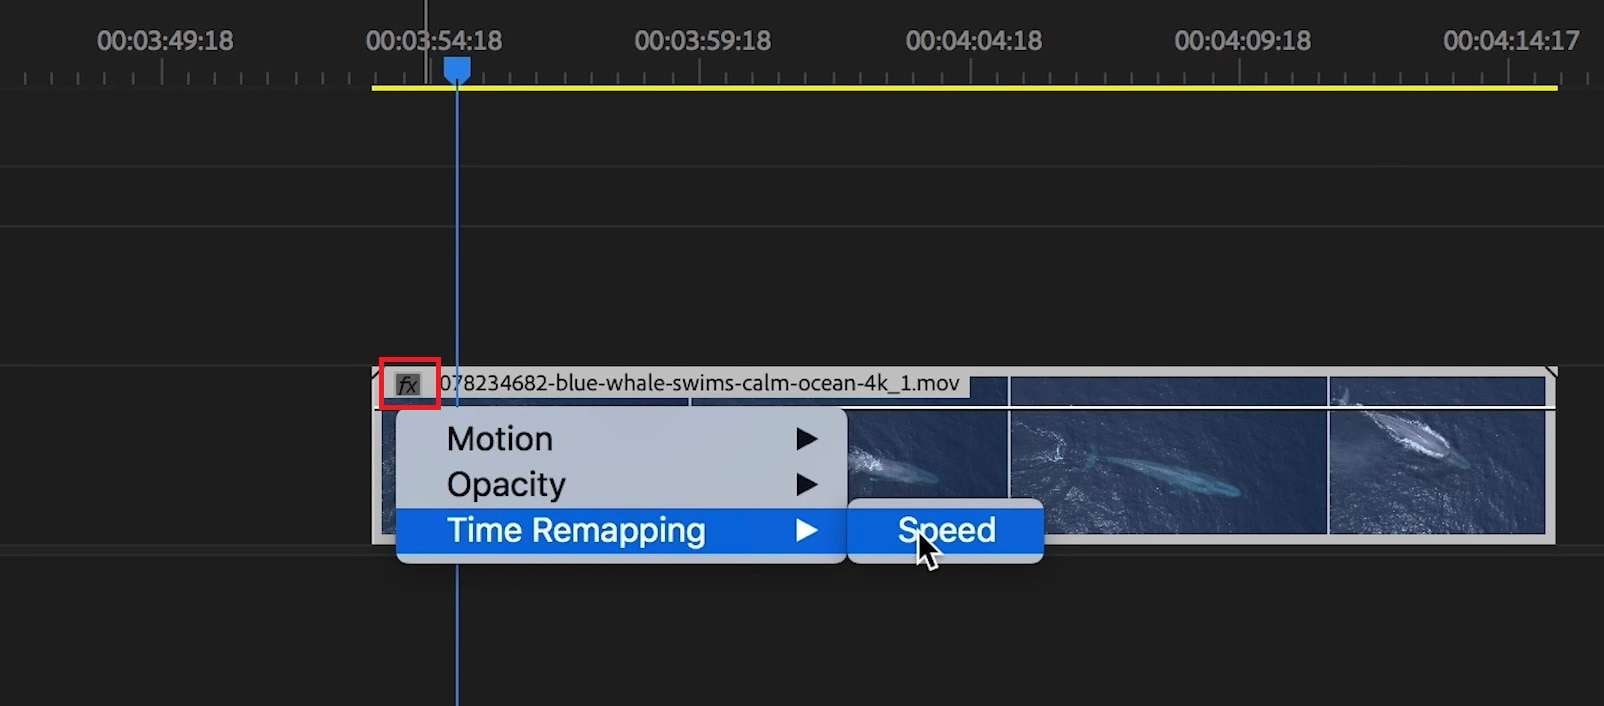
Step 2: Position the Playhead where you want the speed change to start and use the Pen tool to mark the start point.
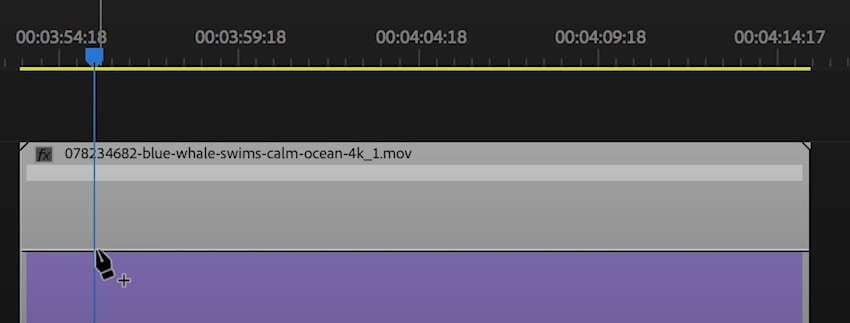
Step 3: Drag the Playhead to where you want the speed change to end and create another keyframe to mark the transition’s end.
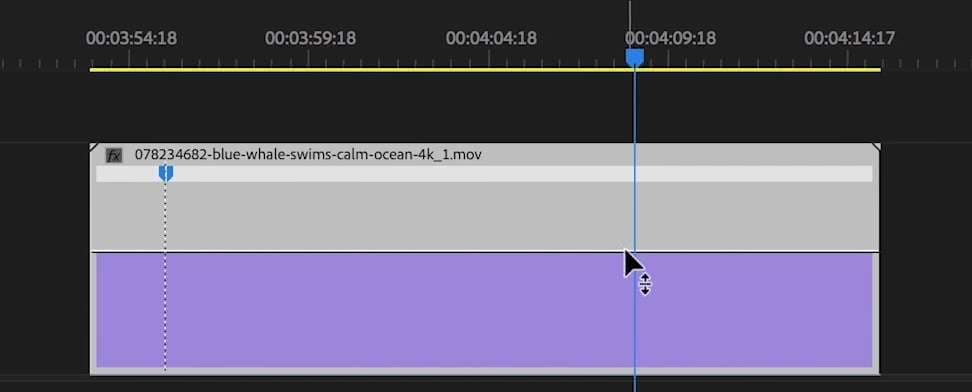
Step 4: Drag the white rubber band between the keyframe and drag it up to increase the speed. You can increase it up to 1,000%.
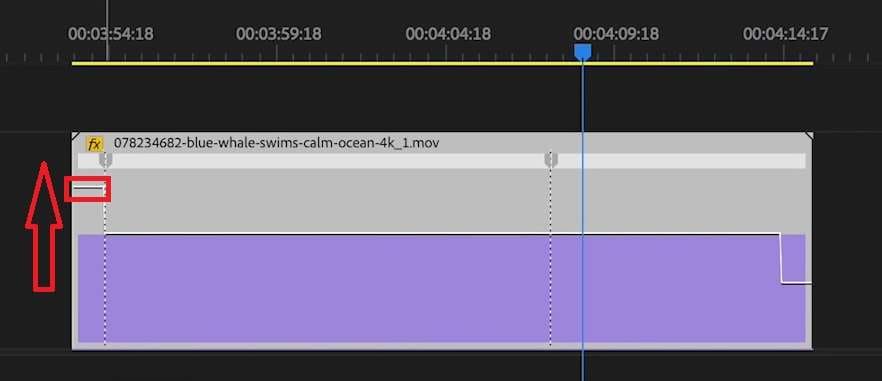
Step 5: With the keyframes created, you can click and drag one of the sides of the keyframe to make a gradual speed adjustment.
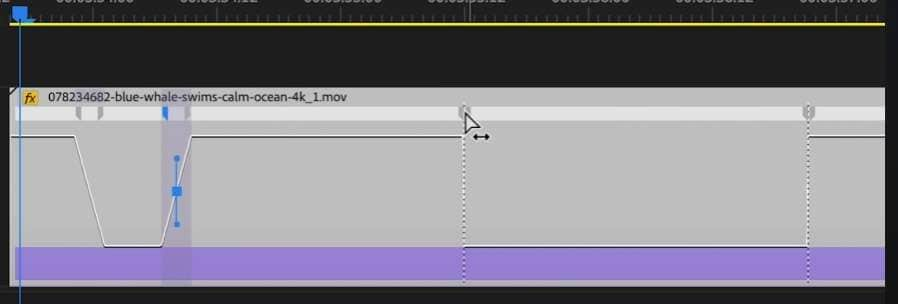
Step 6: To make the speed changes even smoother, click on the keyframe’s blue box to bring up bezier handles, which you can rotate left or right to smooth out the change.
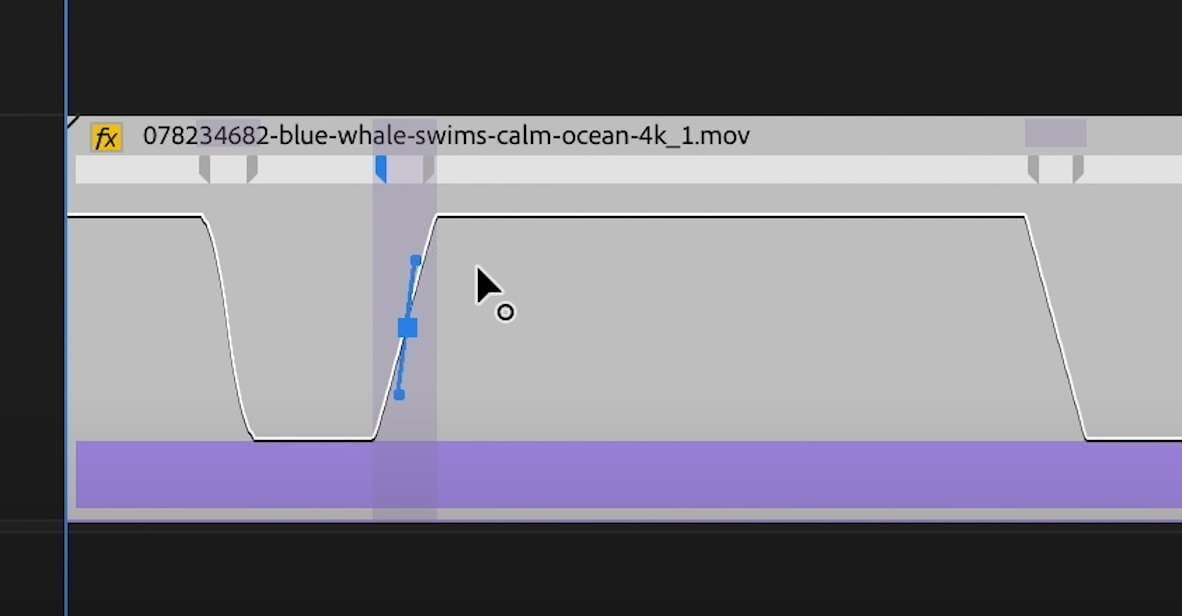
As you can see, Adobe’s Time-Remapping tool involves many manual adjustments. While it prevents jarring speed changes, it requires much work to set up correctly on the user’s end.
How to Speed up a Clip Easily Using Wondershare Filmora
While Adobe Premiere Pro’s Speed/Duration and Rate Stretch tools can be easy to use and adjust speed, the app’s Time Remapping tool is much more challenging to master, as it’s intended for skilled video editors and professionals.
However, speeding up videos doesn’t have to be challenging, and with Wondershare Filmora, that’s certainly not the case. The app’s beginner-friendly interface and remarkably straightforward features make speeding up videos effortless and accessible to editors of all skill levels.
Unlike Premiere Pro, you won’t have to worry about checking Ripple Edit boxes, moving other clips in the Timeline, or manually adjusting every aspect of a speed-ramping keyframe. The remarkably intuitive app takes care of everything for you, making it a vastly superior option to Adobe’s video editing software.
Here’s how you can use it:
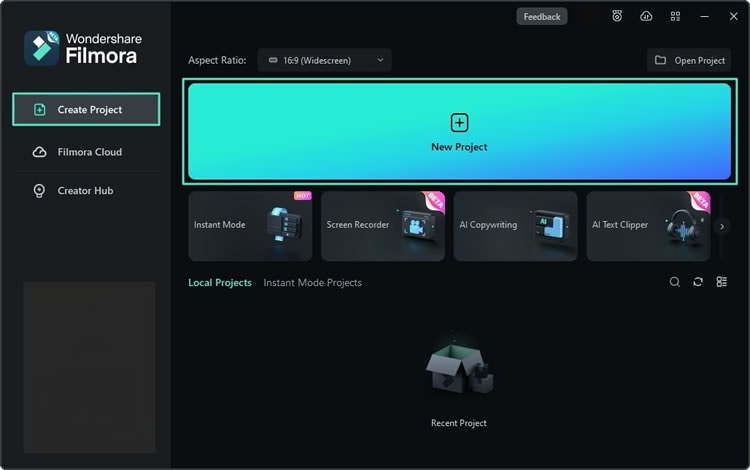
Step 1: Launch Wondershare Filmora and hit the New Project button on the startup screen.
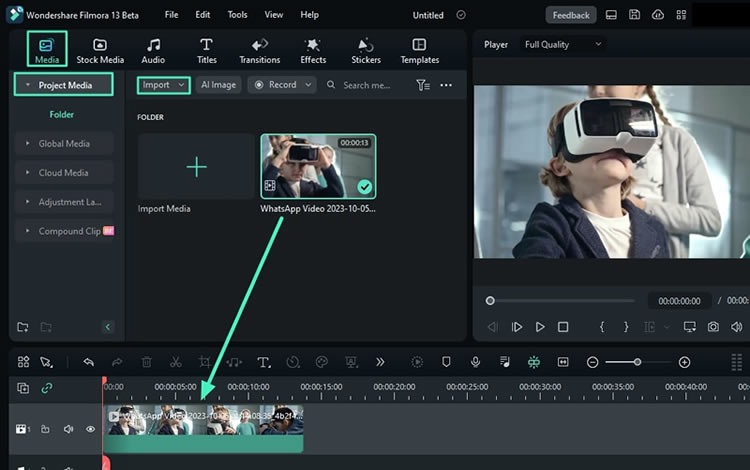
Step 2: Tap Import to add the video file you want to speed up. Then, drag and drop it into the Timeline.
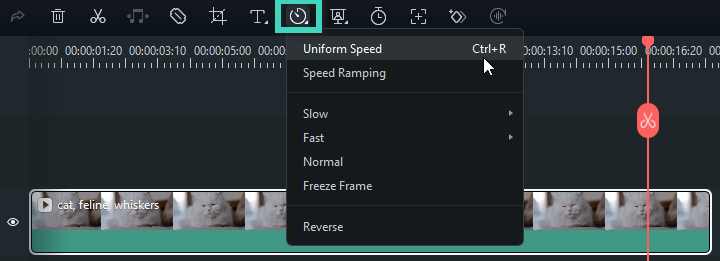
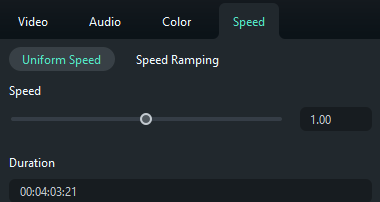
Step 3: Access the speed adjustment menu by clicking the Speed button above the Timeline and selecting the Uniform Speed option. Alternatively, press CTRL + R.
Step 4: Drag the Speed slider and speed up your video.
Additional Tips for Changing Speed in Video Clips
Although speeding up videos in Premiere Pro is relatively simple and an even more straightforward process in Wondershare Filmora, there are a few things you should keep in mind before doing it:
- Consider the Audio – Speeding up a clip also affects its audio, despite the many options like Maintain Audio Pitch. Therefore, you should detach the audio track from the video and edit it separately or replace it with music if you’re doing heavy speed-ups and slow-motion effects.
- Plan Ahead – While speeding up videos can condense lengthy footage into a few memorable moments or create an exciting-looking fast-motion effect, it can also negatively affect your storytelling. Thus, planning what you’ll speed up or slow down is crucial, and you shouldn’t go overboard with such effects.
- Use Time Interpolation – Simple speed increases are straightforward but can lead to jarring speed changes. That’s why time interpolation speed adjustments done with keyframes and options like Optical Flow or Frame Blending are a much better method of speeding up videos.
By following these valuable tips, changing your clip’s speed is much more likely to lead to a smooth and professional-looking transition instead of disrupting the flow of your video and ruining your storytelling.
Conclusion
Figuring out how to speed up a clip in Adobe Premiere Pro is an excellent editing skill. It can help you make exciting, fast-motion effects or condense long videos into a few interesting moments, creating dynamic videos that enhance your storytelling.
Premiere Pro has three tools for speeding up videos: the Speed/Duration tool, the Rate Stretch tool, and the Time Remapping method. Unlike the first two, which handle simple speed effects, the third tool deals with dynamic speed changes and gradual clip accelerations or decelerations.
Mastering it can be challenging, so many video editors prefer Wondershare Filmora, an intuitive and beginner-friendly editing tool with a much more straightforward clip speed-up process.
Filmora also offers an array of speed ramping presets, and its dynamic and gradual speed changes are undeniably easier than with Premiere Pro, making Filmora a much better alternative.
FAQ
-
Can Premiere Pro speed up/slow down videos?
Absolutely! Adobe Premiere Pro is one of the most popular video editing programs for speeding up videos and creating slow-motion effects. You can apply these speed adjustments to the Speed/Duration tool, the Rate Stretch tool, and the Time Remapping method. -
Can I speed up Premiere Pro clips without audio quality loss?
Unfortunately, you can’t maintain top audio quality during video speed-ups, as speeding up videos in Premiere Pro will inevitably lead to audio distortions. While checking the Maintain Audio Pitch box does help, your audio will still have a bit of reverb, especially compared to the audio from the original clip. -
How can I speed up videos in Premiere Pro to create a time-lapse effect?
Creating a time-lapse effect in Premiere Pro requires drastically increasing a video’s playback speed, and you can increase this value to 1,000%. Moreover, the Time Remapping tool can also help for such videos, giving you precise control over the clip’s acceleration. -
Can I preview speed changes in Premiere Pro before applying them?
Yes, you can pre-render a clip in Premiere Pro, which lets you preview speed changes before you apply them. Doing that is also beneficial when working with high-res videos and other complex effects, enabling you to play the clip without slowing down your system.


 100% Security Verified | No Subscription Required | No Malware

