


 100% Security Verified | No Subscription Required | No Malware


 ChatGPT
 Perplexity
 Gemini
 Claude
 Grok
Grok
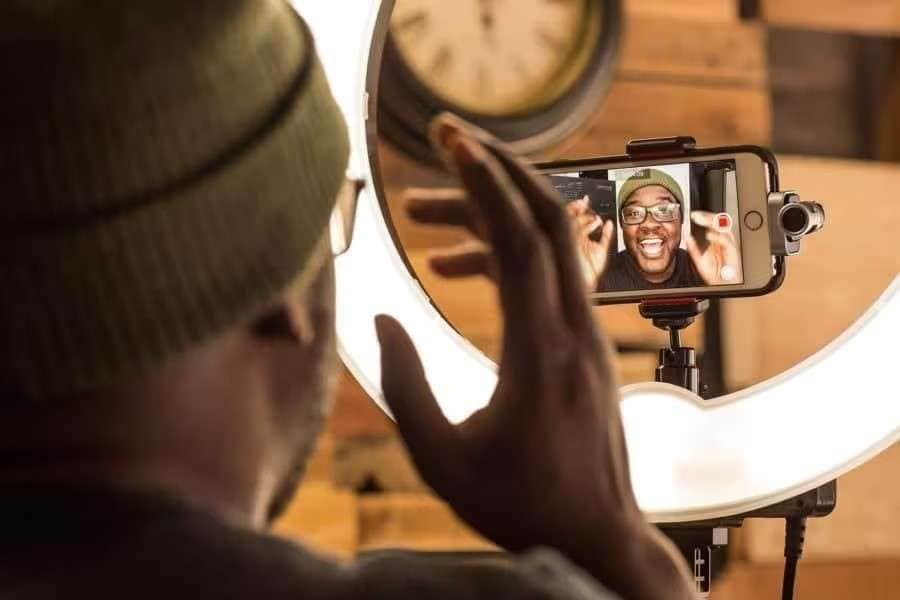
Planning on starting your vlogging journey but have no clue where to begin? We can guide you better on this. If you have an iPhone and also a spark of creativity inside you, what else do you need? Nothing! But only the best vlog app for iPhone, so that you can turn boring moments into something that is more captivating.
In this blog post, we’ll show you how to turn your passion into influence, step by step, using the Vlog app for iPhone. Get ready to turn your everyday moments into amazing videos that you can share with the world!
In this article
Part 1: Essential Settings Before Starting a Vlog on the iPhone
Ready to start your vlogging journey on an iPhone? Wait! Before you start rolling your camera, you should go through a few essential settings to enhance your content quality:
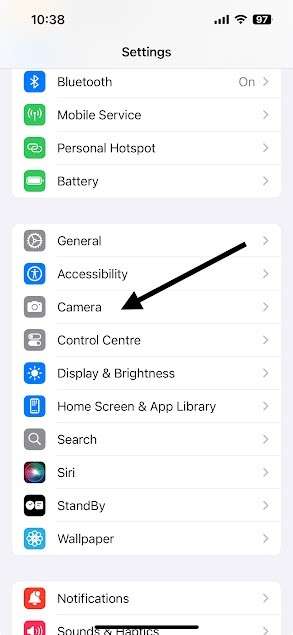
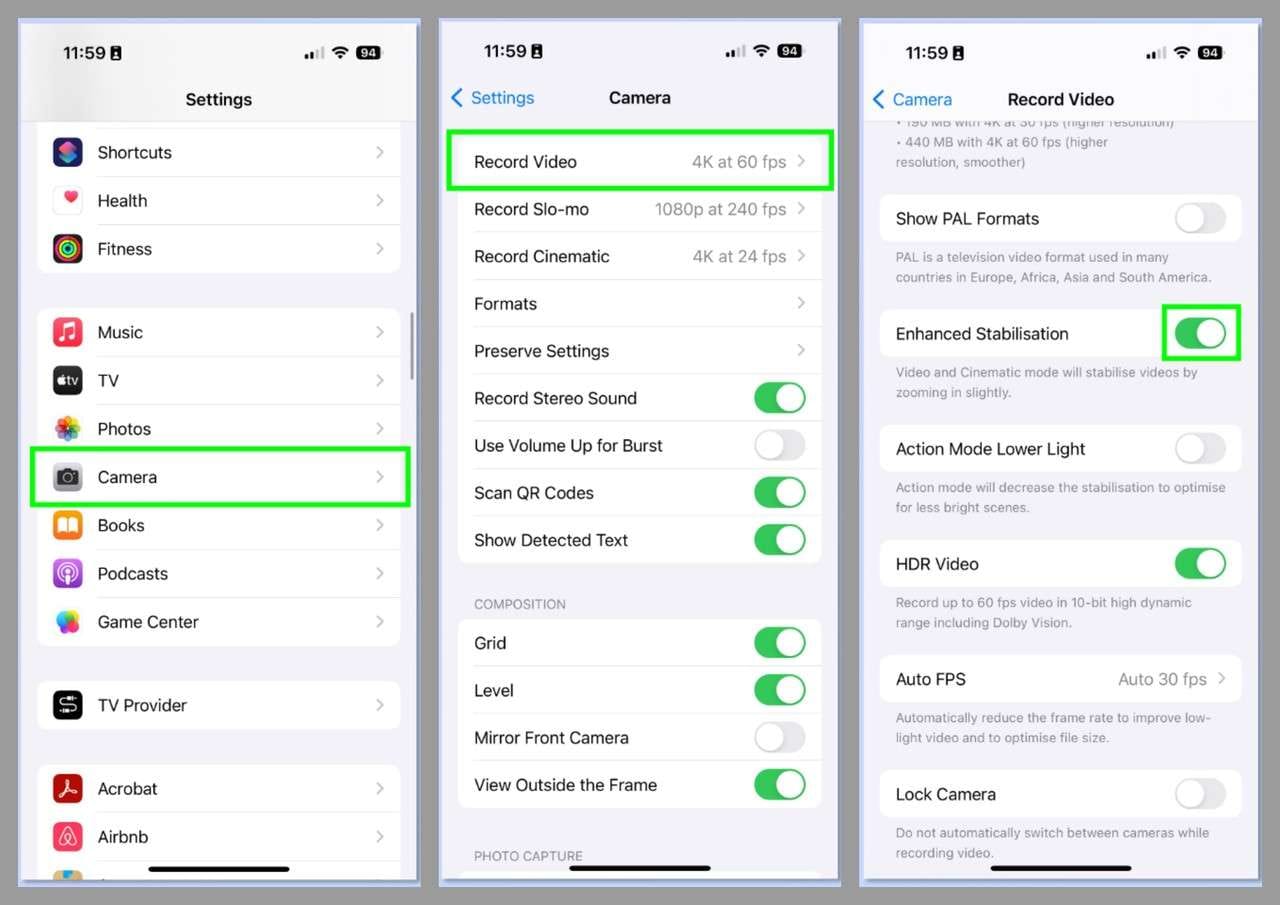
First, pick up your iPhone and go to the "Settings" app. Swipe down to "Camera," where amazing settings lie in wait.
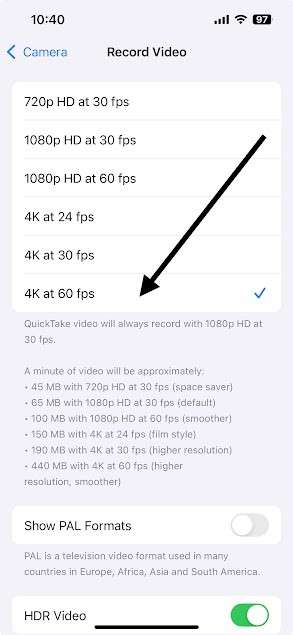
Choose 4K resolution at 60 fps in the "Record Video" section. This will revolutionize your footage, recording rich details and smooth motion that engage viewers.
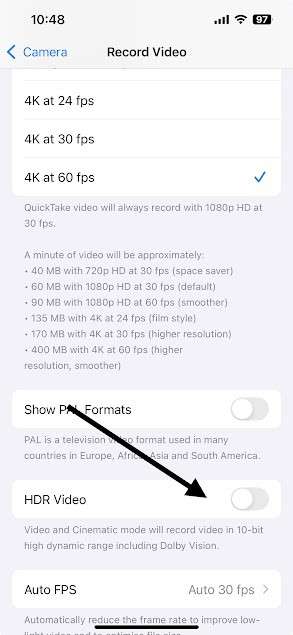
Down there, you will see the HDR video option. Now turn it off. Seems strange, right? But believe us, HDR can complicate the editing process of your vlog and may not flatter skin tones.
Now, come back to the main camera settings interface and turn on the “Grid” option. It will ultimately help you to frame each shot perfectly.
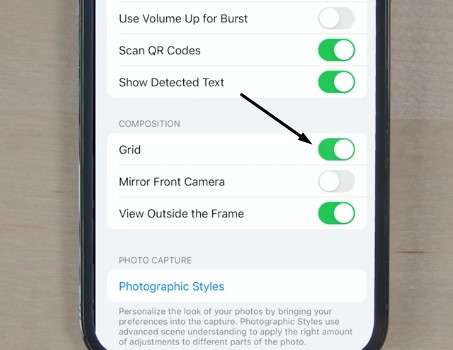
Scrolling down further, you will see the " View Outside Frame” option. It is wise to disable it to eliminate distractions from your screen so that you can focus solely on the subject.

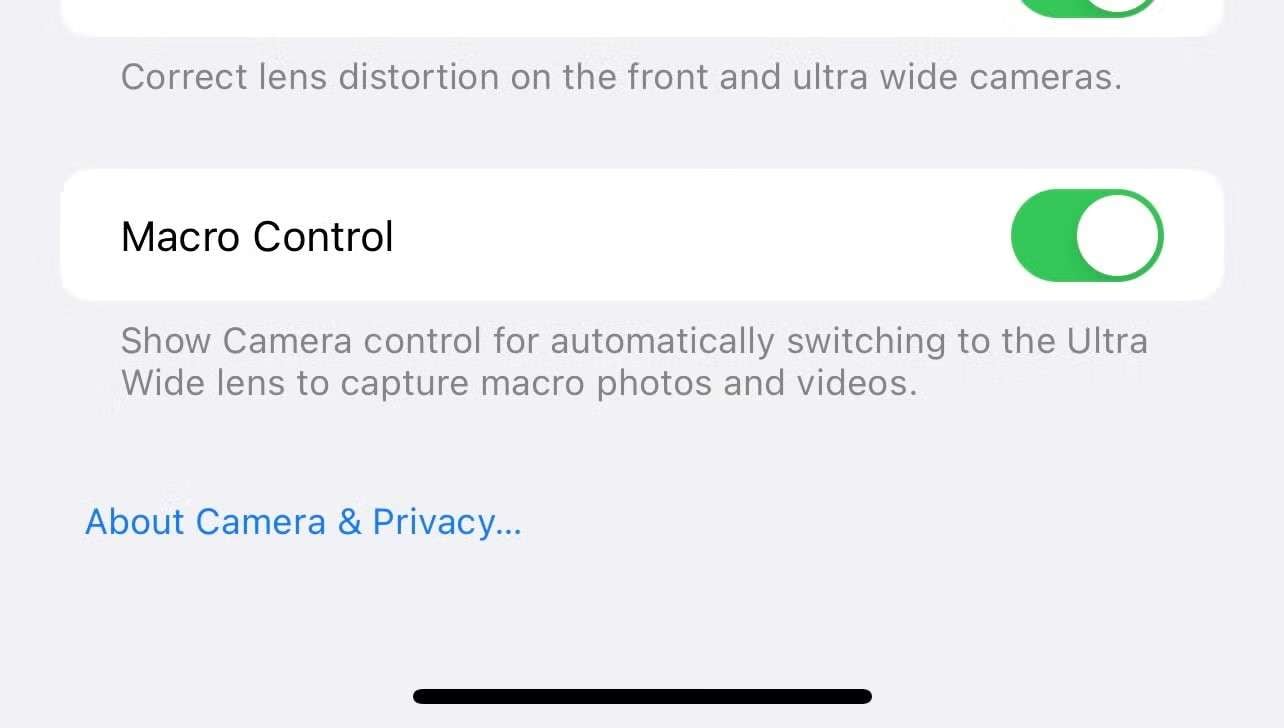
Lastly, for the detailed close-ups, turn on “Macro Control.". You will find this option on the same page; just scroll down a little.
You are already on your way to becoming a successful vlogger when you follow the above-mentioned settings on your iPhone.
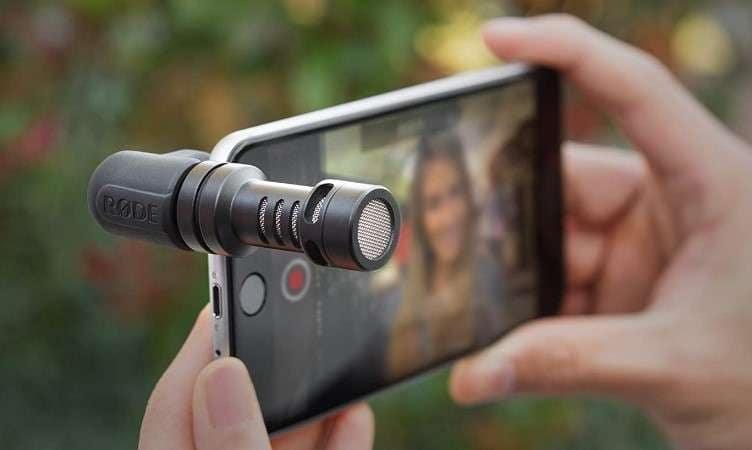
Now, if you want to bring your vlogging on an iPhone to the next level, take some essentials into consideration. A good tripod will stabilize your shots, and an external mic provides you with that clear sound—it's one of those things that people always forget. Add some good lighting, a gimbal, and some external lenses for perfect close-ups, and you're set.
Every one of these steps enhances your video quality and enables you to create your own vibe. Go deeper, find your niche and produce quality content. More to come in the next section!
Part 2: How to Make a Vlog with iPhone: Start Filming Yourself
You are all done with the essential settings on your iPhone and have collected all necessary accessories. Should we move now to the fun part, which is recording a vlog on an iPhone? Here are simplified steps to guide you on how to make a vlog with an iPhone:
Plan Your Content: So, think about what you want to tell in the vlog. Note down key points so you don't forget key things when you're filming. This will keep your vlog on track and interesting!
Activate Video Stabilization: Ensure video stabilization is on in your settings. It is a huge help in stabilizing your shots, particularly if you're filming handheld.
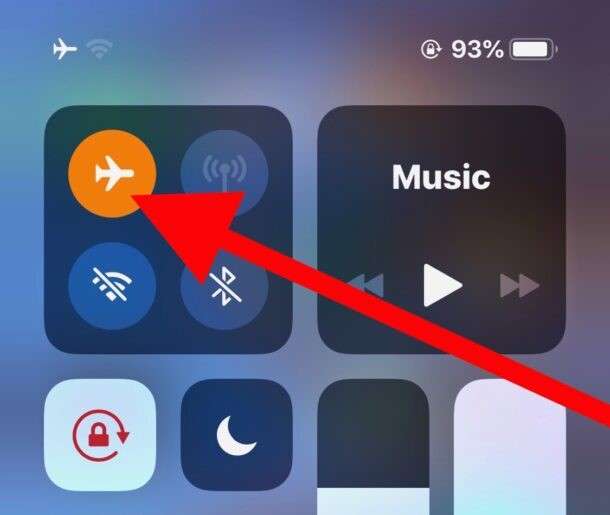
Turn on Airplane Mode: Turn on the flight mode on your iPhone. Nothing can spoil a good shot more than calls or notifications. Guard your vlogging experience.
Record in Landscape Mode: Set your iPhone horizontally. That way, you won't get those pesky black bars on the sides and you'll be able to capture more of the beautiful scenery.
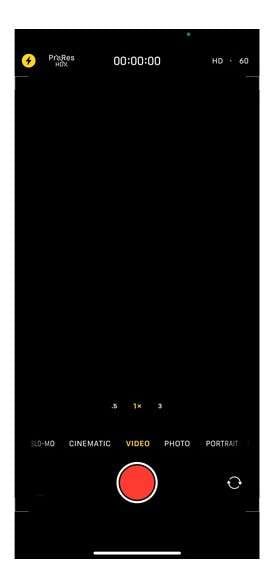
Start Recording: Finally, you can start vlogging on your iPhone by opening up the Camera app, switching to the video mode and tapping on the red Record button. To focus on the main content, simply tap on the specific area of your screen.
Now you have successfully recorded your first vlog. Nothing is missing except that all-important editing phase. For this purpose, you need a perfect video editor like Wondershare Filmora. In the next part, we will talk about using Filmora, a vlog app for iPhone, for adding that final touch to your recorded vlogs.
Part 3: Perfect Your Vlogging on an iPhone with Filmora
If we talk about Filmora, then it is a number one go-to tool for vloggers who prefer vlogging on an iPhone. The reason behind its popularity among beginners and experienced editors is its user-friendly interface and numerous AI features.
The amazing features offered by Filmora help convert boring footage into engaging ones that capture the audience’s attention.
Have a Look at Its Standout Features:
- Social Content Planar: Your vlogs should reach the right audience at the right time. For that, a social content planar feature of Filmora will help you organize and share your content on multiple platforms from one place.
- AI Image to Video: If you want a clear shortcut to viral content, then the AI Image to Video feature of Filmora will prove best. You can create eye-catching videos for social media from images in a blink of an eye using AI-powered effects.
- Smart Scene Cut: Cut your videos into multiple smart clips using the smart scene cut feature. Moreover, you can remove the scene easily that you find interesting or that can’t catch the viewer's interest.
- AI Video Enhancer: No need to worry about problems like low video quality or blurriness. AI video enhancers from Filmora will automatically detect flaws in videos and fix them.
- AI Sound Effect Generator: Why manually search for the perfect audio clip when the AI sound effect generator can do it in no time? AI generates desired sound effects that resonate with your video from text directly.
- AI Video Object Remover: Simple brush strokes will help you remove unwanted objects from video. You can remove anything, be it watermarks, text, logos, or even people.
- AI Thumbnail Creator: Thumbnails are what make an audience click your video. You can choose from 270+ customized templates for making a visual impact.
Step-by-step guide to editing your vlog on iPhone using Filmora:
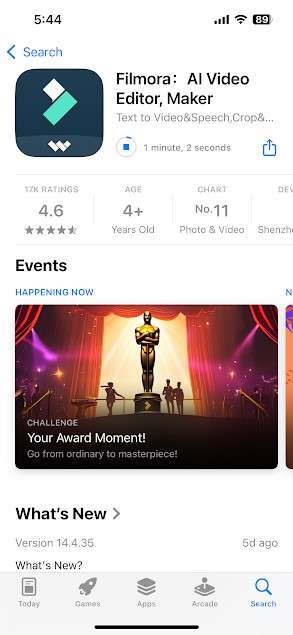
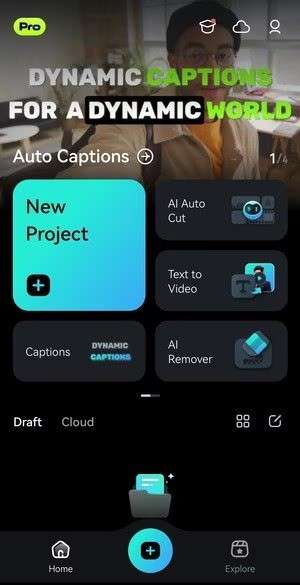
Step 1: Go to the App Store and find “Filmora: AI Video Editor, Maker," which is a mobile version of Filmora, available for iOS and Android both.
Step 2: Launch it and you will see its amazing interface. Here you will see the “New Project” option; tap on it to start the editing of your vlog.
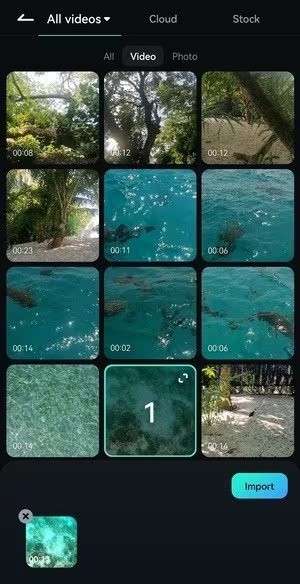
Step 3: Choose your desired video clips and tap “Import.”
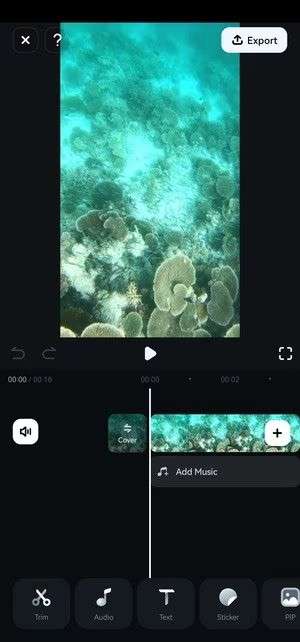
Step 4: You can go through the whole features presented at the bottom. We will first start with the “Trim” option; as you guys know, vlogging clips need trimming.
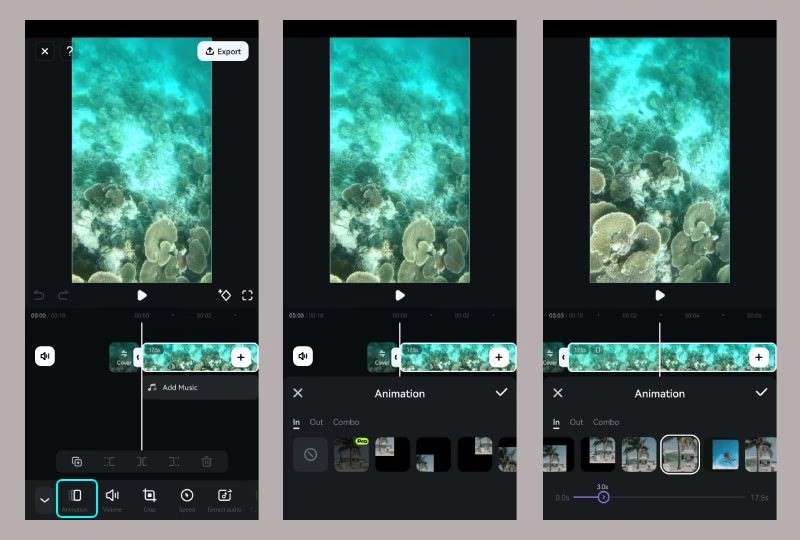
Step 5: After tapping on Trim, you will have access to additional editing tools. The first one is “Animation.” Tap it to select one, modify its duration, and tap the “Checkmark” to save it.
Don't worry if you need to go back to them; Filmora has an Undo button in the Player panel.
Step 6: Head to the Speed to speed up or slow down your clip. Proceed to the Curve tab to apply speed ramping and emphasize certain portions.
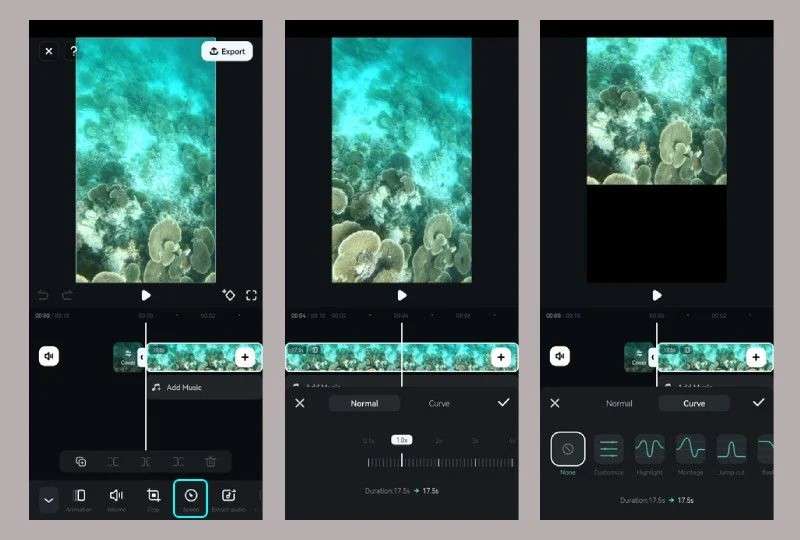
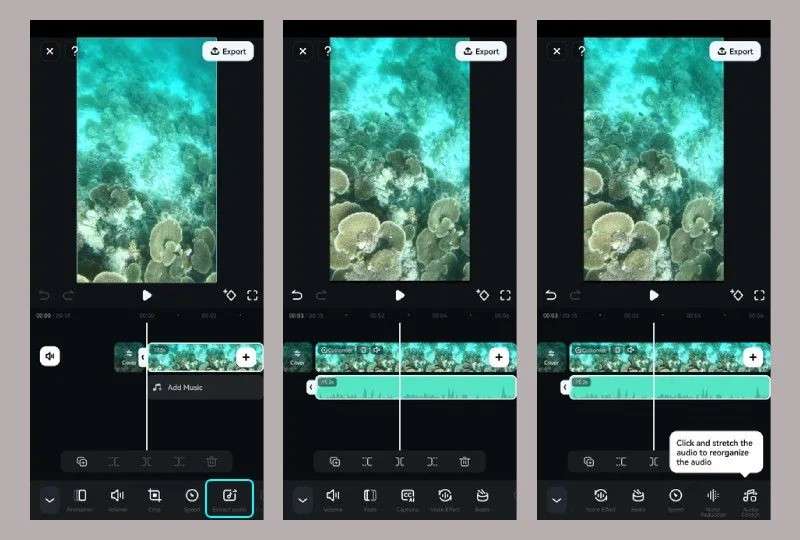
Step 7: Tap Extract Audio to isolate it from the video track. You can now apply voice effects, beats, captions, denoise, and stretch audio. You can tap Recover Audio, too.
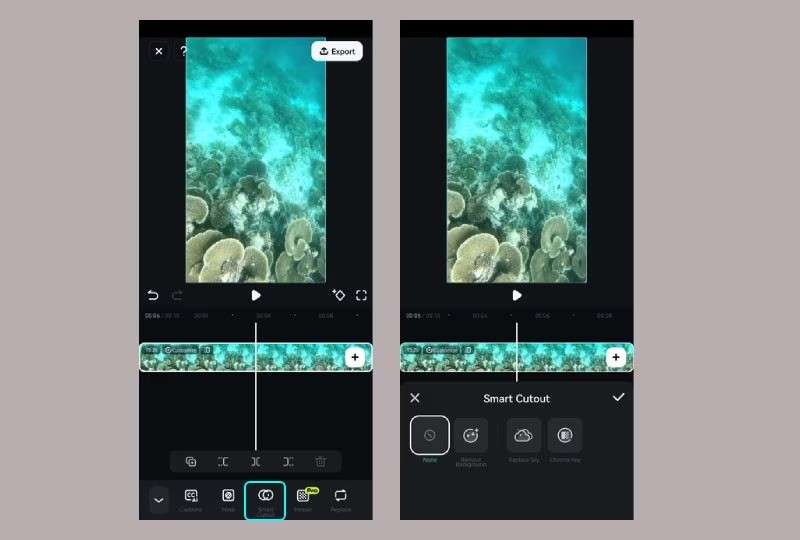
Step 8: There is a Smart Cutout feature also, using which you can replace the background.
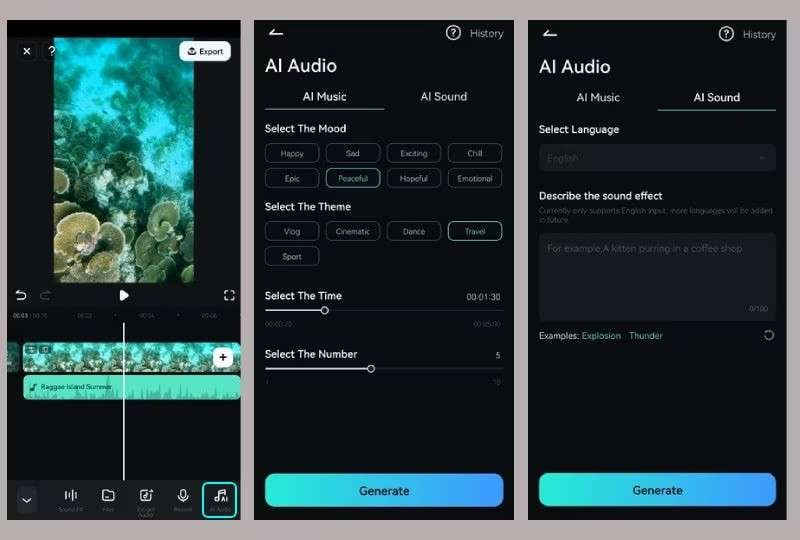
Step 9: Filmora's AI can create original music for your video. Go to AI Audio, choose the mood, theme, time, and track number under AI Music, and generate. You can also input text prompts under AI Sound to tell the AI to create sound effects.
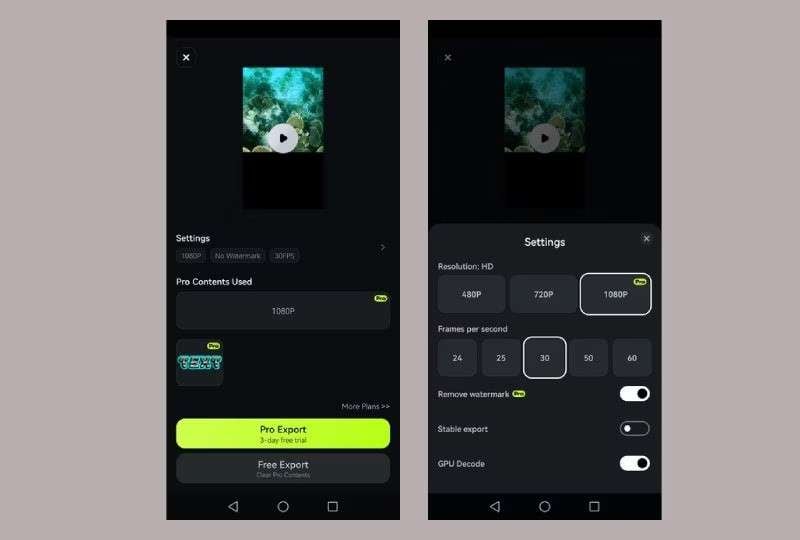
Step 10: Lastly, tap the Export button and select the settings you desire.
We hope the steps described here helped you edit your first recorded vlog on an iPhone quite easily. However, you can also try other popular AI features of Filmora, like the AI thumbnail creator to make your vlog a superhit.
Conclusion
To sum it up, we can clearly say that video editing acts as magic for successful vlogging on an iPhone. By combining the powerful recording features of your iPhone with the video editing features of Filmora, your content will go to new heights.
So, why delay? Grab your iPhone, start recording and let Filmora be your trusted partner in creating engaging vlogs.
