
 100% Security Verified | No Subscription Required | No Malware


 ChatGPT
 Perplexity
 Gemini
 Claude
 Grok
Grok
Talking through PowerPoint (PPT) is one thing. Recording yourself while presenting it is another. You want your video to look clear, sound good, and hold the audience’s attention. Maybe you’re making an online course, a work presentation, or content for your audience. So, what tools should you use? How do you make it look good?
This article will show you how to video record yourself presenting a PowerPoint with your face and voice. Stick around, and you’ll learn how to do it directly in PowerPoint. Plus, Filmora offers an alternative with more editing options to enhance recorded videos.

In this article
Part 1: How To Record a Presentation With Your Face in Filmora
Wondershare Filmora makes it easy to record yourself giving a PowerPoint presentation while showing your screen, face, and voice all in one go. Choose the recording area, set a timer for automatic start and stop, and highlight mouse clicks and sounds. You can record your screen and webcam track together or separately, giving you more control when editing.And once you’re done, you can fine-tune everything with Filmora’s built-in video editor. You can then upload it directly to YouTube, share it with your team, or use it for training sessions.
Here’s how to video-record yourself presenting a PowerPoint using Filmora:
Step 1: Download and launch Filmora and log in or sign up with your account.
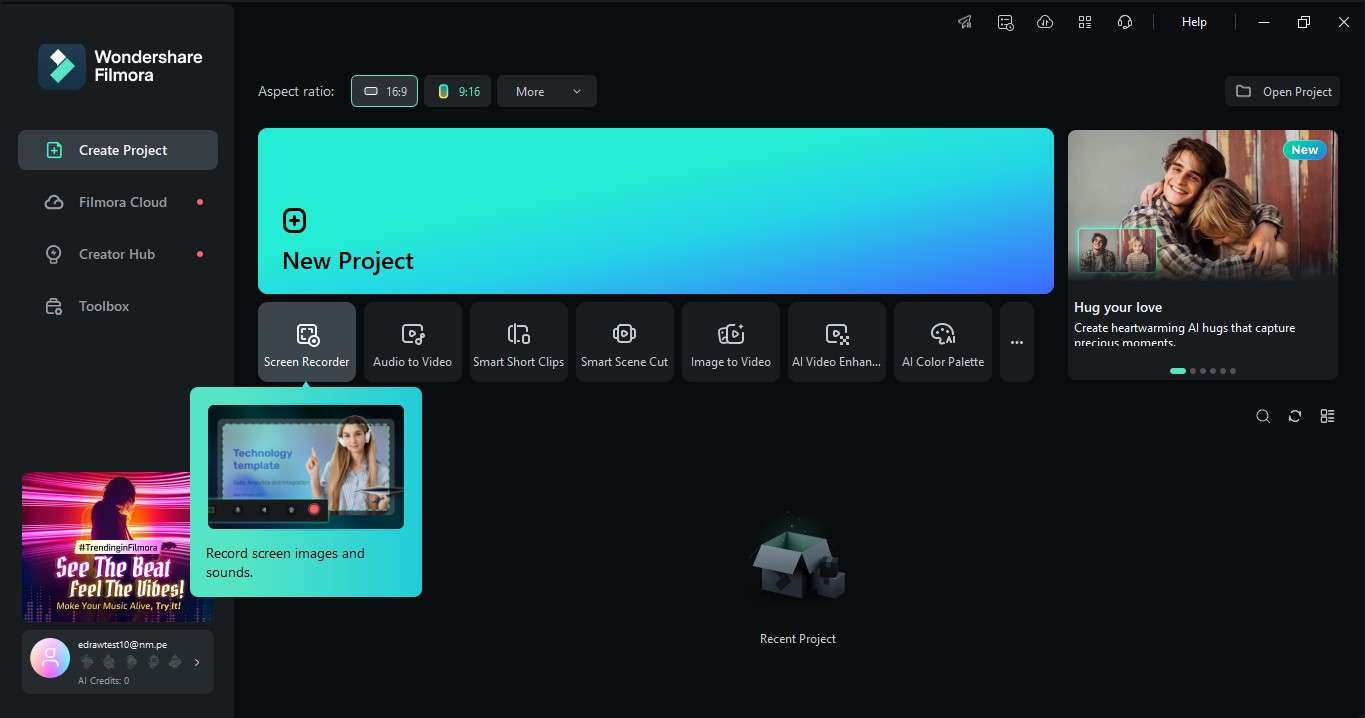
Step 2: Go to Screen Recorder
Click Screen Recorder under the Create Project window on the start window. If it's not visible, go to Toolbox on the left panel, scroll down, and select Screen Recorder. The Wondershare Screen Recorder window will appear with customization options.
Step 3: Enable the Webcam and Microphone
Open your PowerPoint slides and adjust the recording area to fit the presentation window. Turn on the Camera to record a presentation with your face. You can also turn on the Microphone to record your voiceover PowerPoint. If you want to include system sounds, enable System Audio too.
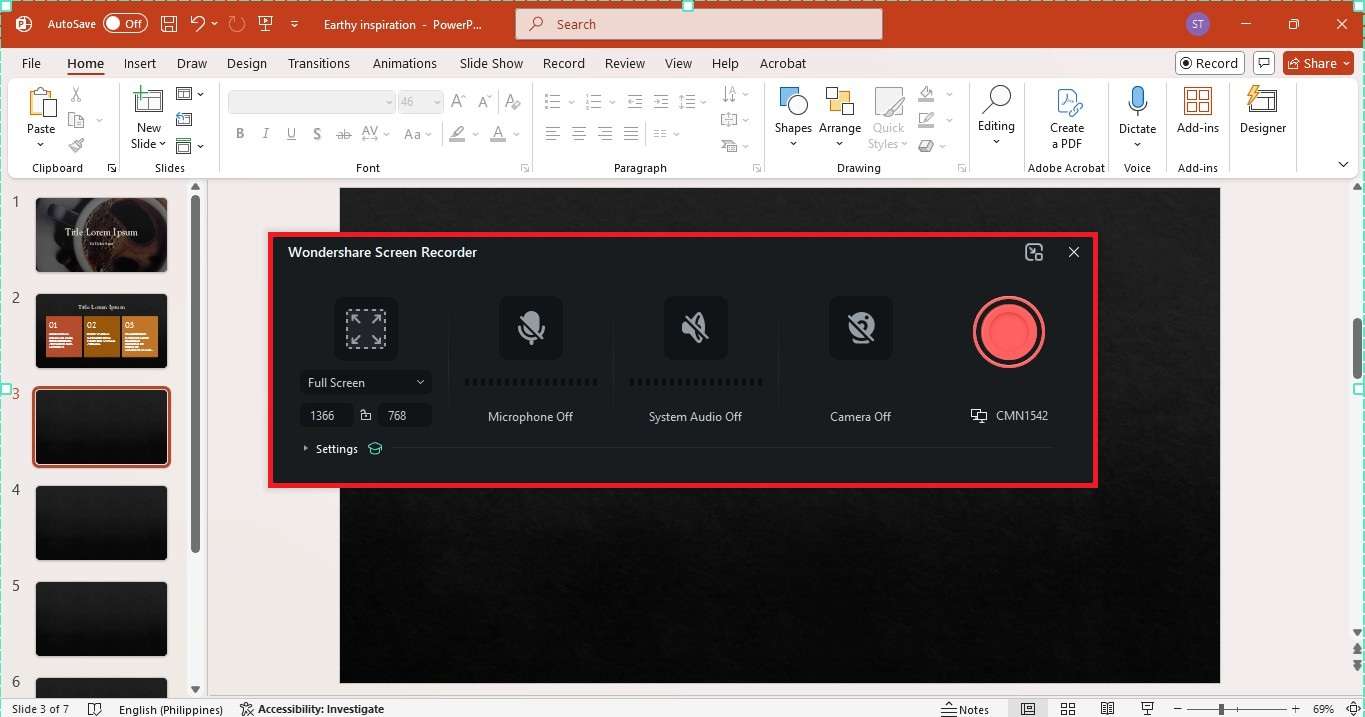
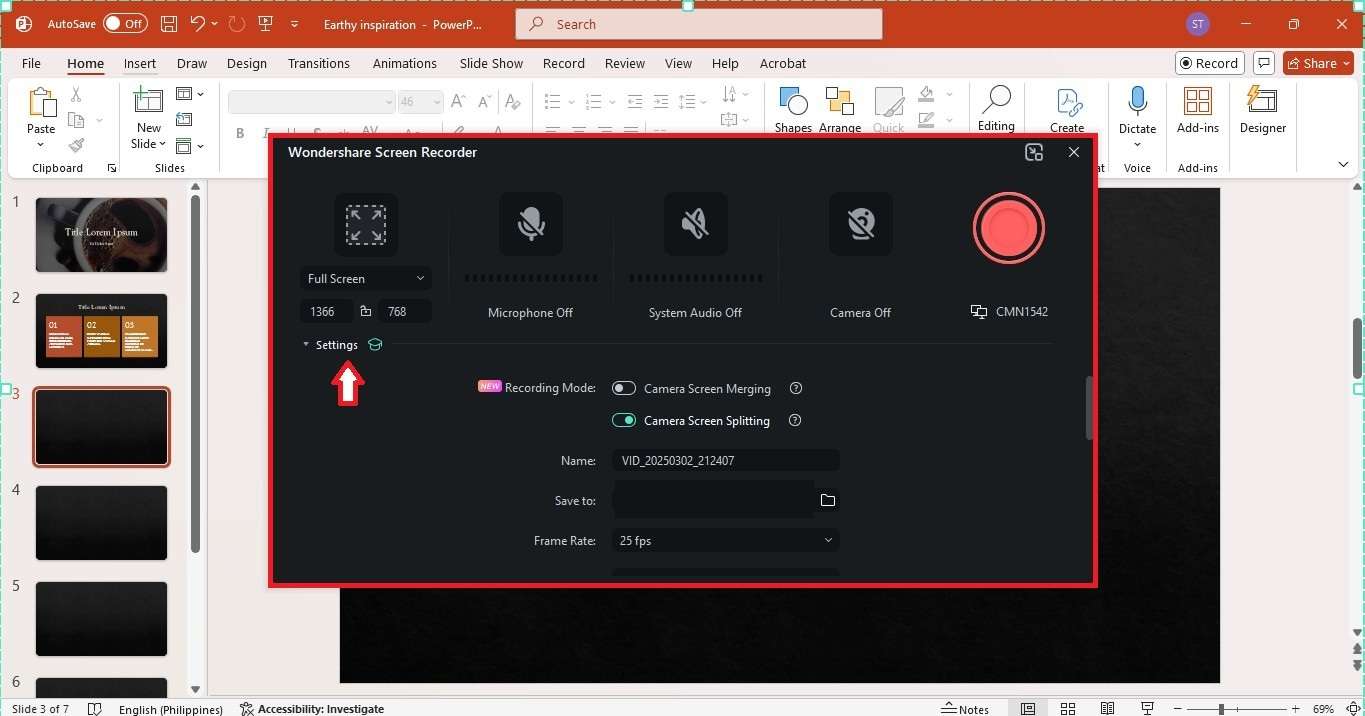
Click Settings on the pop-up window to access additional recording customization options.
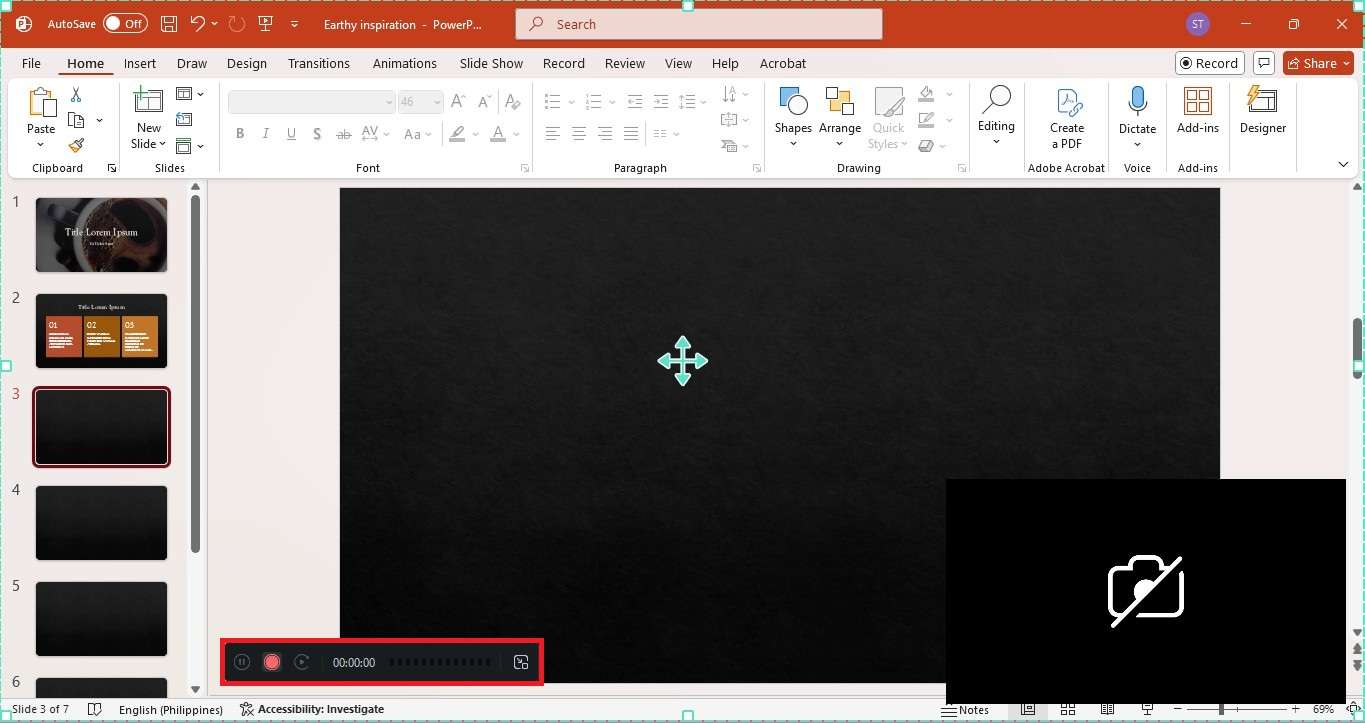
Step 4: Start Recording Your PowerPoint Presentation
Click the red record button, wait for the countdown, and start recording yourself presenting a PowerPoint. Filmora captures everything in real-time. Use the floating toolbar to pause or resume. If the toolbar isn’t visible, press F9 on your keyboard to stop recording.
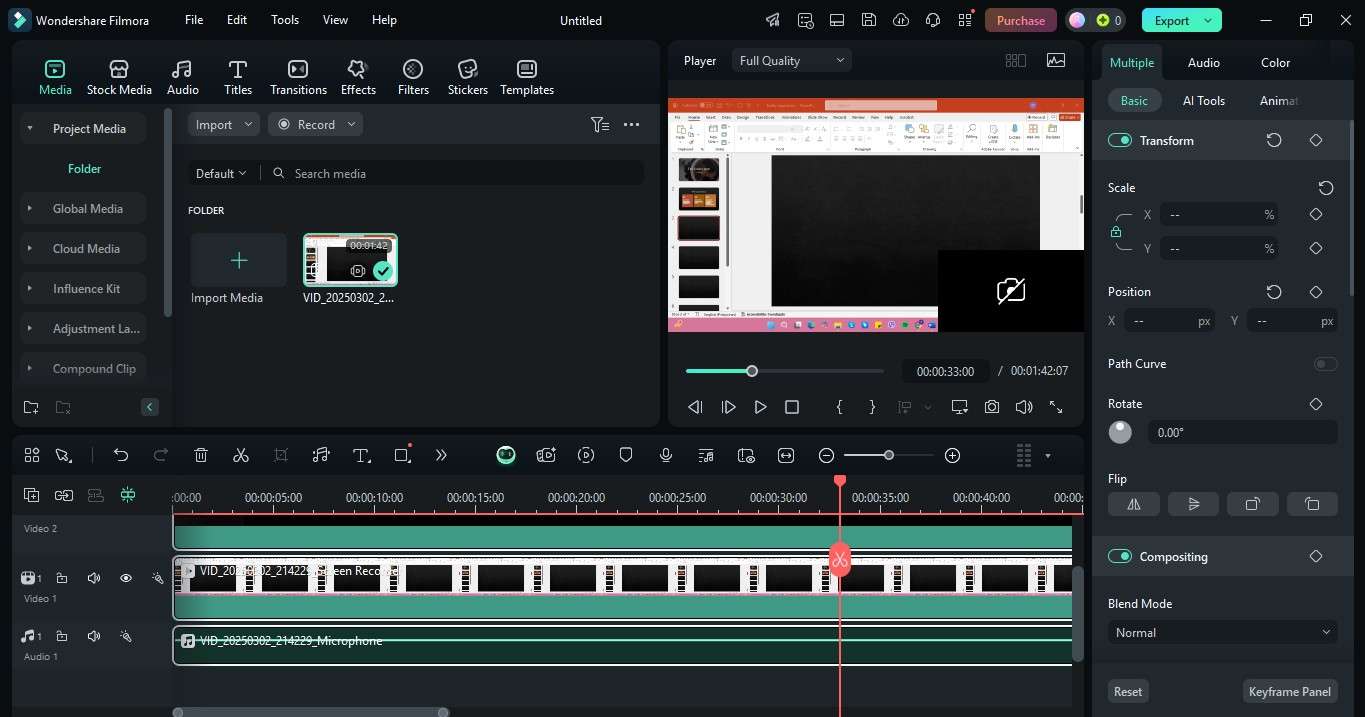
Step 5: Edit the Recorded Presentation Video
After recording, you can open the video in Filmora’s editor. Close the screen recorder window and start editing your video. Here, you can trim mistakes, enhance audio, add text, transitions, and more.
Step 6: Export and Share Your Video
Click Export at the top right corner, choose a format, and save it. You can also upload it directly to YouTube or other platforms.
Part 2: How To Record Yourself Presenting a Powerpoint Directly
PowerPoint has a built-in recording feature. It lets you capture your slides, voice, and your camera. You can also use ink annotations and a laser pointer to highlight key points. This works well for video recording yourself presenting a PowerPoint without installing another software.
Here’s how to record a presentation with your face and voice in PowerPoint software:
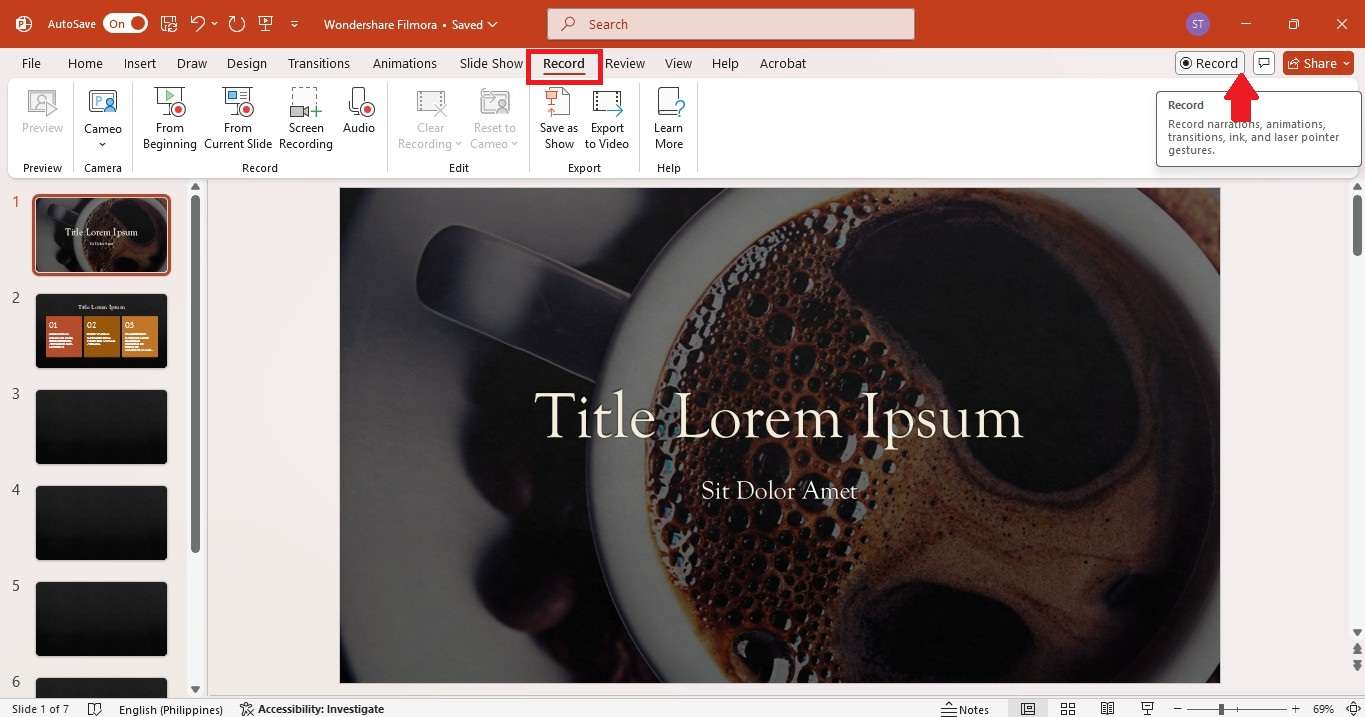
Step 1: Open the Recording Tab
Open your PowerPoint presentation and go to the Record tab at the top. Select where you want to start recording. Or, click Record in the top right corner to access recording settings.
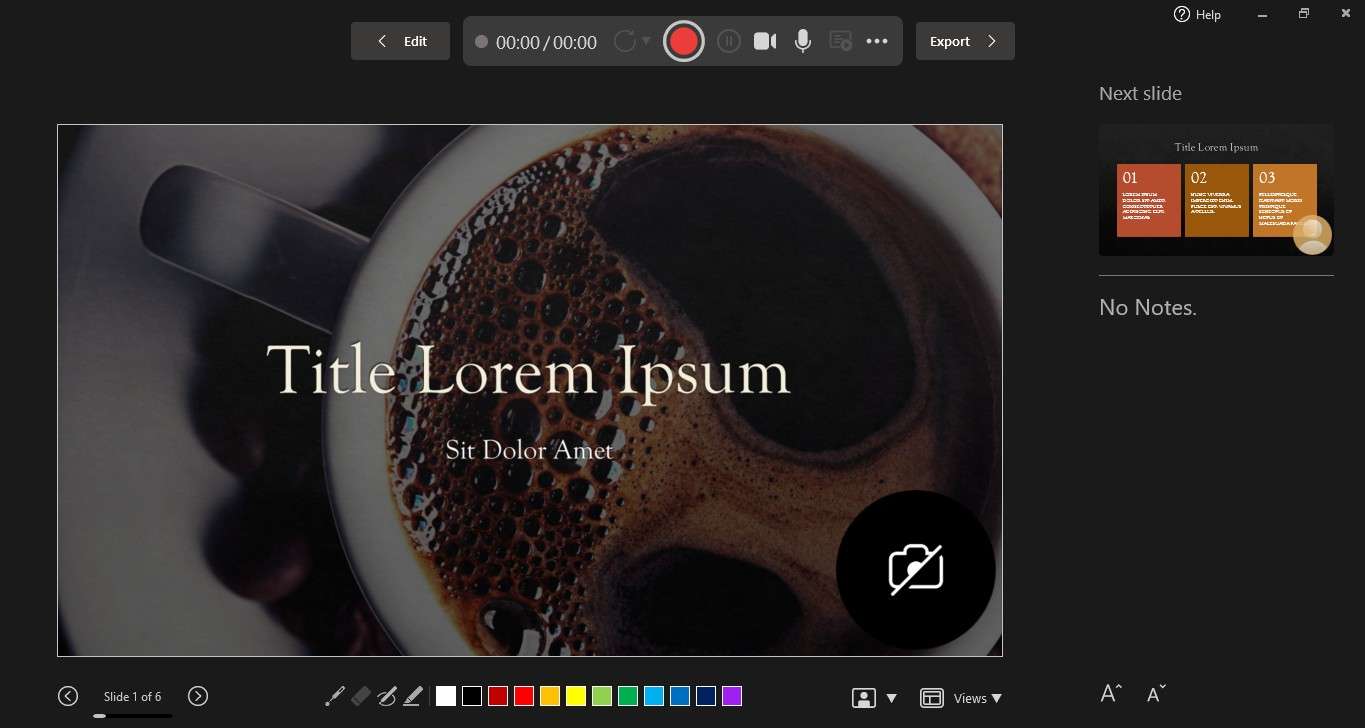
Step 2: Enable Your Camera and Microphone
Turn on the Camera if you want your face shown in the recording. Enable the Microphone to record your voiceover PowerPoint. Use the laser pointer or ink tools at the bottom menu to make your presentation more engaging. Click the red record button, then begin speaking and presenting.
Step 3: Save and Share
Once done, click Export at the top right corner and enter a Image name to save it.
Part 3: Resize Your Recorded PPT Presentation Video for Any Platform
Once you record yourself presenting a PowerPoint, the next step is sharing it. However, each platform has different video size requirements. A YouTube video needs a widescreen format, while Instagram and TikTok prefer vertical videos. Uploading the wrong size can cut off important details.
Instead of recording everything again, you can resize your video of yourself giving a PowerPoint presentation in Filmora. This saves time and keeps your content looking professional.
Follow these steps to change the aspect ratio of your recorded PowerPoint presentation video in a few steps:
 secure download

Step 1: Open Filmora and import your recorded PowerPoint video, with or without webcam footage and audio. Then, drag it to the editing timeline.
Step 2: Go to File > Project Settings at the top navigation menu.
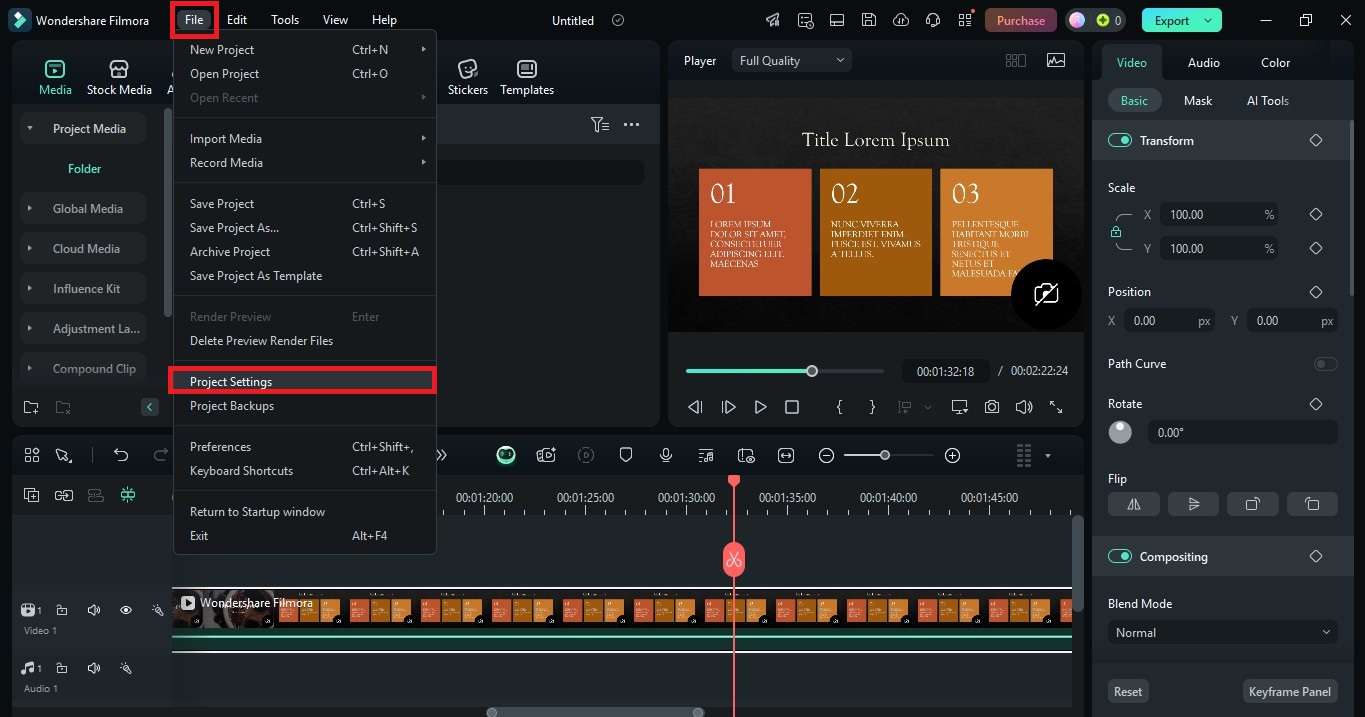
Step 3: From the Project Settings pop-up window, choose a suitable Aspect ratio. You can also change the video Resolution and Frame Rate.
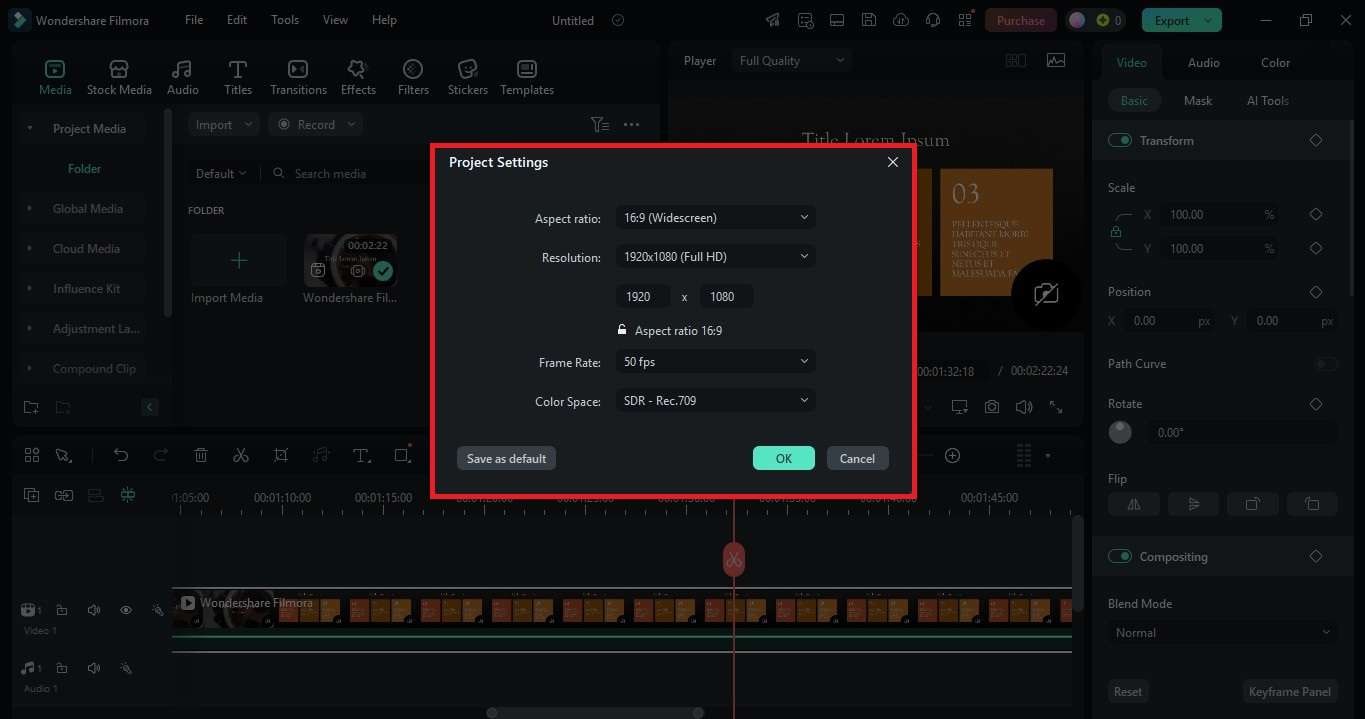
Step 4: Click OK to save the changes and check the preview to make sure your video looks good.
Part 4: More Ways To Record Yourself Giving a PowerPoint Presentation
Need more options? Different apps can help make a video recording of yourself presenting a PowerPoint in ways you might not have thought of.
Filmora Mobile App
Filmora Mobile’s Picture-in-Picture (PIP) feature lets you appear on screen while presenting. First, screen record your PowerPoint slides. Then, use its Camera feature to record yourself speaking and overlay it on your first video.
secure download
Zoom
Sharing a PowerPoint presentation in Zoom is easy. You can present on one screen and view notes on another. You can also let others control the slides or use Virtual Background mode.
Loom
Loom’s desktop app lets you record yourself giving a PowerPoint presentation with a camera bubble that stays visible across slides. It’s quick and works with any application.Part 5: Tips for a Good Recording and Editing PPT Presentation Video
These small adjustments can make your recorded PowerPoint presentation video more professional and easier to follow:
- Check your lighting. Natural light works best, but a soft desk lamp can help if needed. Avoid harsh shadows.
- Frame yourself well. Keep your face centered and at eye level. Too much headroom or awkward angles can be distracting.
- Trim unnecessary parts. Remove pauses, mistakes, or long silences to keep it engaging.
- Insert captions. Not everyone watches with sound. Captions help viewers follow along in noisy environments or when audio isn't an option.
secure download
- Use annotations. Use arrows, highlights, or callouts to emphasize key details. You can also circle important text or add pop-up notes for extra context.
- Balance your audio. Ensure your voice is clear and at a consistent volume. Reduce background noise if needed.
Conclusion
There are plenty of ways to create a video recording of yourself presenting PowerPoint slides. You can use the recording feature in PPT, Zoom for live presentations, Loom for quick recordings, or Filmora for an all-in-one solution. Each method works, and it depends on what you need.
If you're recording often and want more control over editing, Filmora makes it easier. You can record a presentation with your face and voice and customize the video. However, whatever method you choose, the key is finding what saves you time and gives you the best results.
