

 ChatGPT
 Perplexity
 Gemini
 Claude
 Grok
Grok
If you’re new to video editing, you might not know what “multicam editing” is yet. That’s okay, but you’re missing out on a really fun way to make your videos look more exciting by using different camera angles, like what you’d see at a concert or live event.
Since it’s such a great technique, many video editing software now includes multicam editing options, and some of them are even free! One of the best multicam editing software is Wondershare Filmora. It’s popular because it has simple tools that make editing videos from multiple cameras really easy.
In this guide, we’ll show you how to use Filmora for multicam editing in step-by-step. Let’s get started and learn how to make amazing videos with cool camera angles using Filmora!
In this article
Part 1. Difference Between Multicam Editing and Single Camera Editing
To see how multicam and single-camera editing are different, let’s look at each one closely. Single-camera editing means you’re using footage from just one camera. It’s simple and works well when you only need one angle. For example, if you’re making a vlog or recording an interview, you might use a single camera to film everything from one spot.
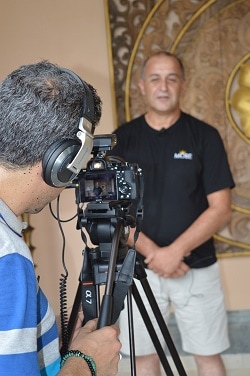
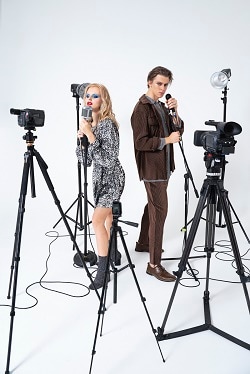
Meanwhile, multicam editing refers to the process of editing footage captured from multiple cameras to create a cohesive video. This technique is often used in live events or complex scenes where different angles are needed. For activities such as live streams, you can use Multicam recording software to capture and switch between different camera angles in real time.
Single Camera Editing vs Multicam Editing
Deciding whether to use one camera or several cameras can change how your final video looks. Besides the benefits of each option, there are a few things that can make the editing process different.
Let’s take a look at the comparison table below how editing with a single camera is different from editing with multiple cameras in a few key ways.
| Key Factors | Single Camera Editing | Multi Camera Editing |
| Synchronization | You don’t need to sync different videos, so editing is simpler. Just make sure the sound matches the video. | Requires syncing multiple video clips, especially when switching angles. |
| Post-Production Time | Faster, as there’s only one video to work with. No need to choose between angles. | Slower, due to more footage to organize and sync. Must choose and switch between angles. |
| Versatility | Offers only one view or angle, which may make the video less exciting. | Provides different angles, making the video more dynamic with close-ups, wide shots, and side views. |
| Cost | Cheaper, as it only requires one camera and less equipment. | More expensive, as it involves buying multiple cameras and extra gear. |
In short, editing with one camera is easier, faster, and cheaper since you only have one video to work with. But you only get one view, which can make your video less interesting. Editing with multiple cameras gives you more cool angles to use, but it takes longer and costs more because you need more cameras and equipment.
Part 2. Why Choose Filmora for Multicam Editing?
For single multicam editing, there won’t be much of a problem since standard video editing programs will work just fine. However, if you're dealing with multi-camera editing—where you have footage from several cameras—you'll need software designed for that purpose.
Fortunately, there are several options out there. You can even get some of these multicam software for free. But if you are just starting out, Wondershare Filmora stands out as a great multicam editing softwarefor making your videos look fantastic without getting overwhelmed by complex features.
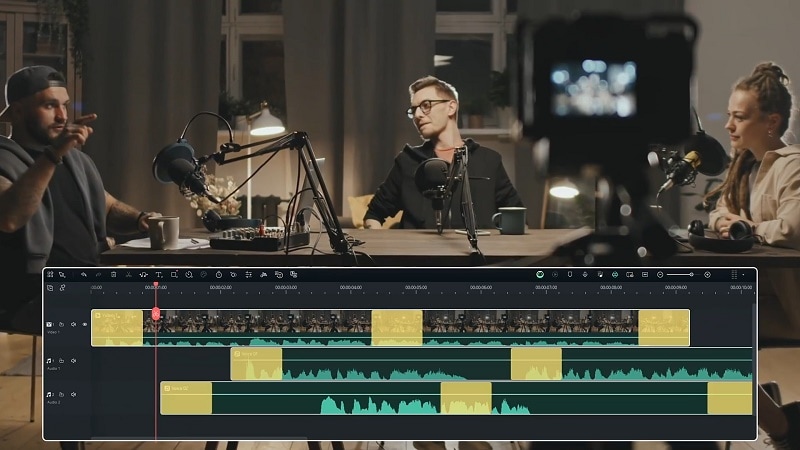
The latest version of Filmora, V14, is packed with impressive tools for editing videos with multiple cameras. You can easily synchronize footage from different angles using automatic alignment based on audio waveforms and the first frame. This means you don’t have to manually adjust each angle—Filmora handles it for you.
Not only does it let you easily switch between different camera angles and keep everything in sync, but it also offers other advanced features to make your videos even better. From basic edits to more complex adjustments, you can perform tasks such as color grading and fine-tuning the audio.
Other advanced features in Filmora:
- Audio Ducking: Lowers background sound so the main audio is clearer.
- Color Correction: Adjusts colors and adds vibrancy to your clips.
- AI Copilot Editing: Uses AI to suggest edits and speed up the editing process.
Even with all its cool features, Filmora is an easy-to-use Multicam software, so you don’t need to be a pro to make great videos with multiple cameras. It’s also more affordable than other fancy editing software. You can start with the free version to try it out, and if you like it, there are different plans you can pick based on what you can spend.
- Sync multiple cameras and allow quick angle switches
- Vast video/audio effects and creative assets.
- Powerful AI for effortless content creation.
- Intuitive, professional yet beginner-friendly.
- Works on Mac, Windows, iOS, and Android.


Part 3. Getting Started with Filmora for Multicam Editing
Now that you've chosen the right Multicam software for your editing needs, let's get started with Filmora. It’s super easy and fun to use. You don’t have to be an expert to make your videos look great. Let’s walk through the easy steps to start editing your videos with Filmora.
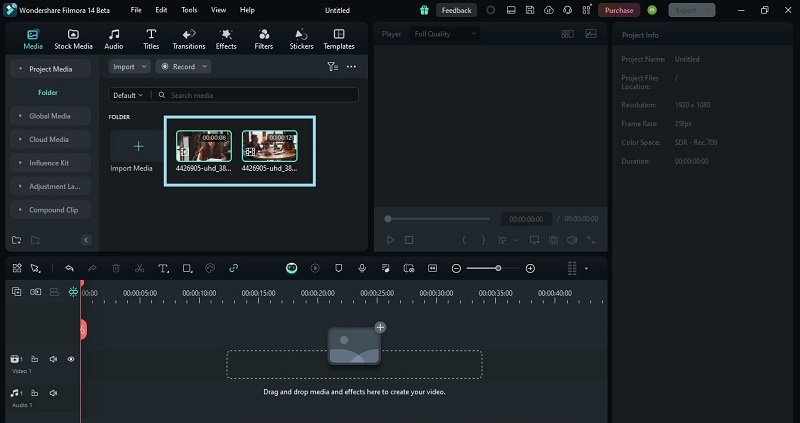
- Step 1. Open Filmora and upload your videos
For the best multicam editing experience, make sure to download the latest version of Filmora, V14. It includes all the newest features and improvements for editing with multiple cameras.
After installing Filmora on your computer, open it by double-clicking the icon. Start a new project, then add all the video clips from different cameras that you want to use.
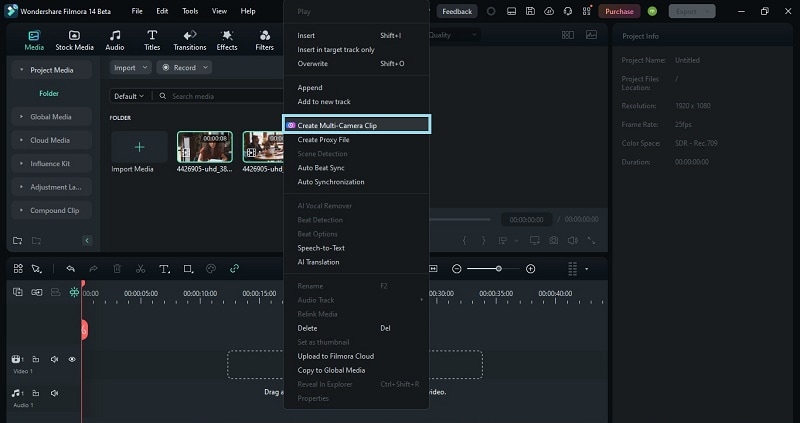
- Step 2. Access the multi-camera editing feature
After you add all the clips you want to use, right-click it and choose “Create Multi-Camera Clip” from the list of menu that appears.
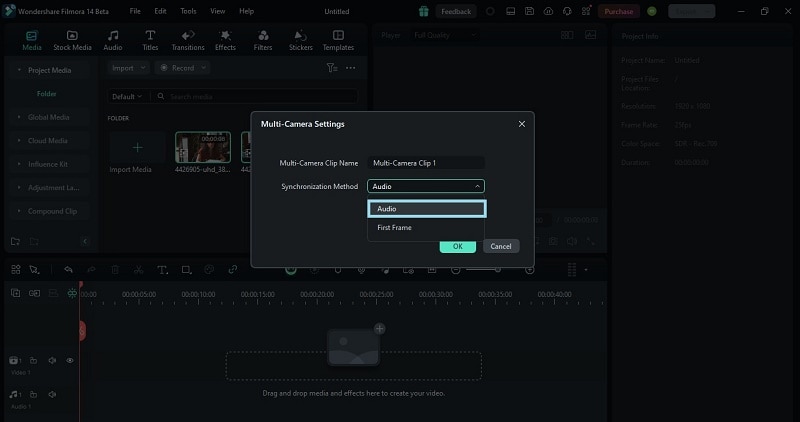
Then, name your multi-camera clip and choose the “Synchronization Method”. You can choose Filmora’s Auto Synchronization method to align all the clips based on “Audio” or “First Frame”. In this case, choose “Audio” and click “OK” to create the multi-camera clip.
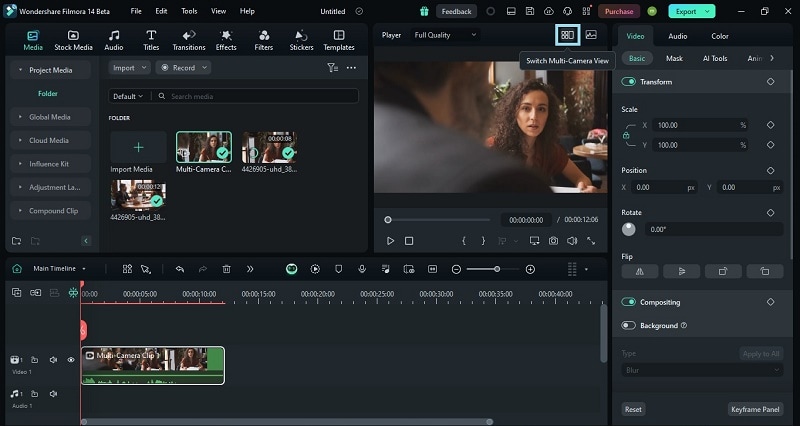
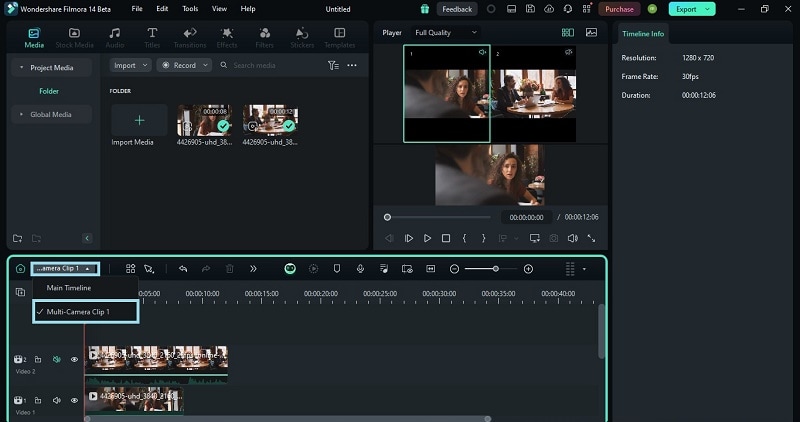
- Step 3. Switch to multi-camera view
Now that your multi-camera clip is created, it’s time to edit your multicam video. To do this, simply change to a multi-camera view by clicking on the “Switch Multi-Camera View” option on the upper side of preview video.
- Step 4. Edit Your Multicam Video
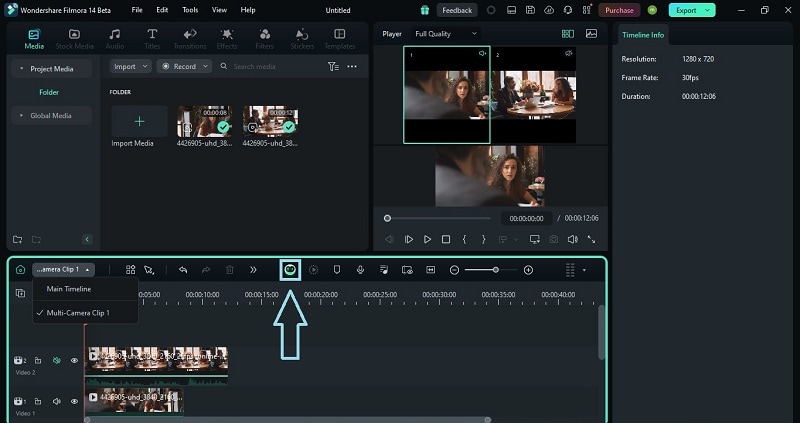
Here, you can switch between different camera angles by clicking on the various angles as the video plays. You can also cut between angles in real time. This is called your “Main Timeline”.
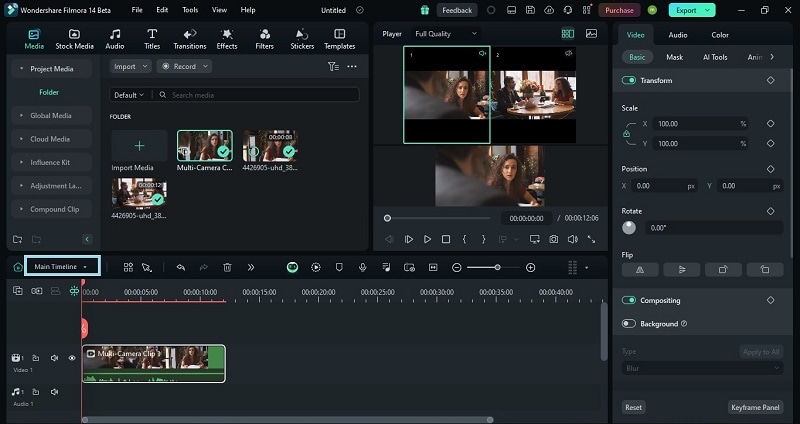
If you want to edit the clip separately, you can do so by switching from the “Main Timeline” to your multi-camera clip, which in this case, is “Multi-Camera Clip 1”. You can apply changes like color correction or adjust audio to the clip that you selected.
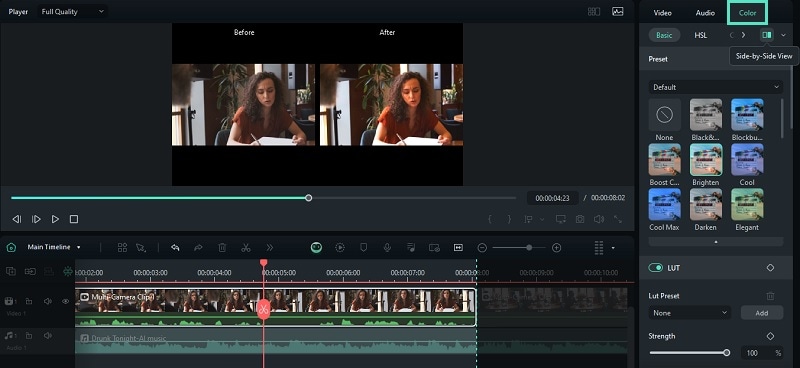
- Step 5. Use the color correction tool
To improve the color of your clips, use the color correction tool in Filmora. Start by selecting the video clip in your timeline. Next, navigate to the Color tab in the properties panel. Here, you have several options for adjusting your video's appearance.
- Basic Color Editing: Adjust fundamental settings such as applying presets, adjusting exposure, contrast, temperature, and saturation.
- HSL Settings: Fine-tune the Hue, Saturation, and Lightness for specific color ranges.
- Color Wheels: Use color wheels to adjust the shadows, midtones, and highlights of your video.
You can select "Side-by-Side View" to preview the before and after of your video.
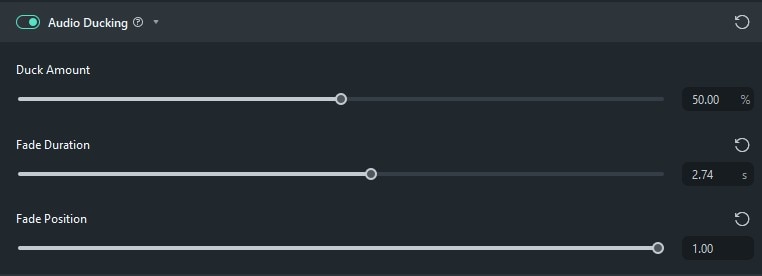
- Step 6. Apply Audio Ducking
When working with multiple clips, you can use Audio Ducking to lower the volume of one track so another track stands out more. To use it, select the video you want to edit, then go to Tools > Audio > Adjust Audio. In the "Audio Ducking" section, the default setting is 50%, but you can adjust it as needed. Then, click "OK" to apply the changes.
- Step 7. Ask AI Copilot for further edits
If you’re unsure how to improve your video, try Filmora's AI Copilot Editing. It lets you use functions by simply clicking a button in the chatbot. It suggests the best edits based on your needs and helps you get results easily. To use it, find the timeline toolbar and click on the "AI Copilot" feature.
Click the "Ask AI" button to ask questions about Filmora's features. The AI will provide answers and guide you on what to do next.
Once you’re happy with your edits, click on “Export” on the upper right of your screen to save your edited video.
Conclusion
Multicam editing is a fantastic feature that lets you use footage from several cameras to create a more exciting and engaging video. With different views and close-ups, your video becomes more dynamic and fun to watch.
Among the available multicam editing software, Wondershare Filmora is one of the best options. Filmora multicam editing feature makes it super easy to switch between different camera angles and keep everything in sync.
