
 100% Security Verified | No Subscription Required | No Malware

Do you want to remove fisheye GoPro distortion from your footage? GoPro cameras use wide-angle lenses that often create a curved, barrel-like effect. While this style works well for action shots, it can make horizons bend and regular footage look unnatural.
GoPro fisheye correction can be done in two ways: adjusting camera settings before recording or applying editing tools afterward. Both approaches help straighten horizons and improve shots for vlogs, drone footage, or casual videos.
This guide will explain the practical methods for GoPro lens correction. It'll also share pro tips to make your videos look balanced. Let's get started!
In this article
Part 1. Pre-Production & In-Camera Settings
The simplest way to remove fisheye GoPro distortion is to adjust your settings before you even press record. The fisheye look usually comes from wide options like SuperView. But GoPro also gives you other lens options that reduce distortion right from the start.
1. Use Linear Field of View (FOV)
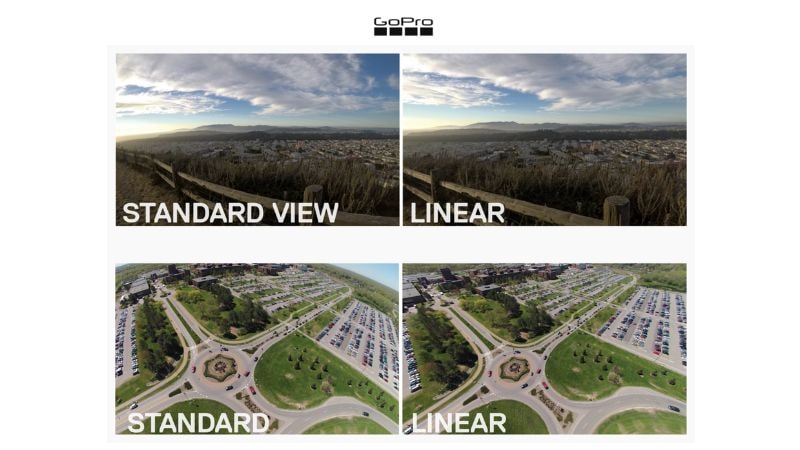
Linear FOV is the quickest way to avoid GoPro lens distortion in-camera. Instead of the curved "fisheye" perspective in SuperView mode, Linear mode straightens lines and keeps horizons flat. This setting is ideal for vlogs, landscapes, or drone footage where you want a more realistic perspective.
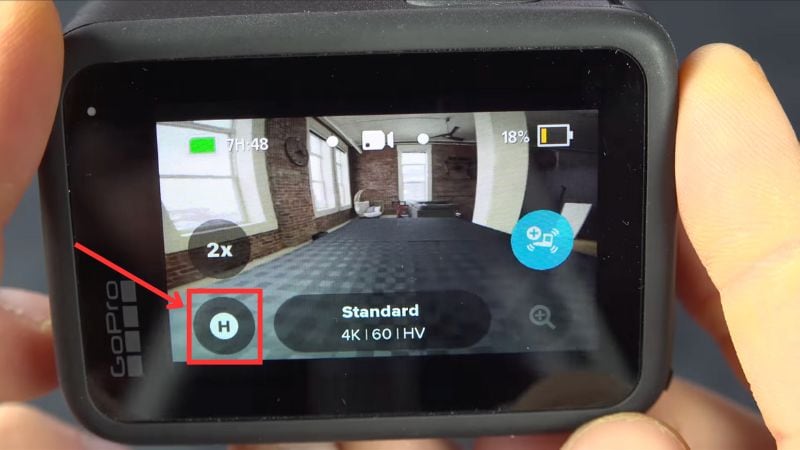
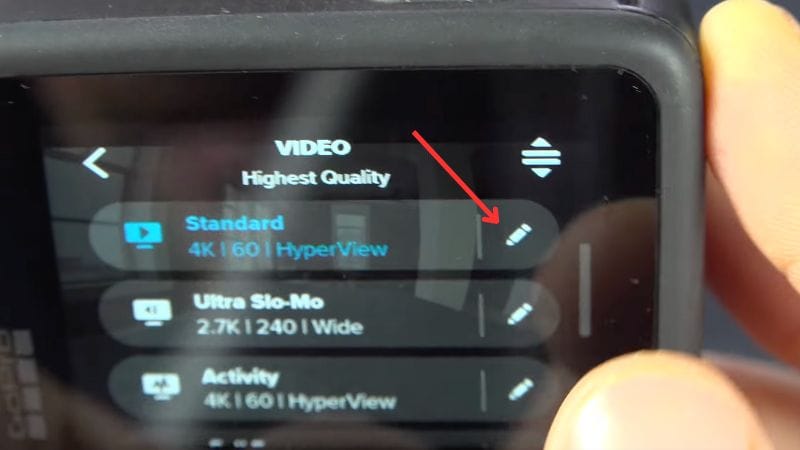
How to Enable Linear FOV on GoPro
Step 1. Power on your GoPro and look at the camera screen.
Step 2. At the bottom-left corner of the display, tap the Lens/FOV option.
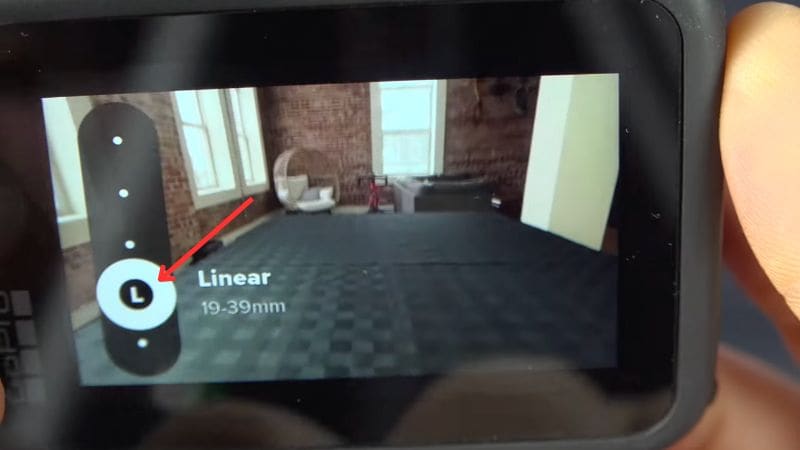
Step 3. From the list, choose Linear or Linear + Horizon Lock (depending on your model).
Step 4. Go back to the camera screen, and your footage will now record with straighter lines and less distortion.
Limitations of Linear FOV:
- Slight crop, which reduces the overall field of view.
- Not available in every resolution or frame rate.
- You can't restore the original wide or fisheye look later during editing.
- You can't capture photos in RAW format while using Linear FOV.
2. Choosing Narrow / Medium / Wide Over SuperView
If your GoPro model or resolution doesn't support Linear, you can switch from SuperView to Medium or Narrow FOV. These modes won't provide complete GoPro fisheye correction, but they reduce the curve enough for vlogs, travel footage, or casual clips.
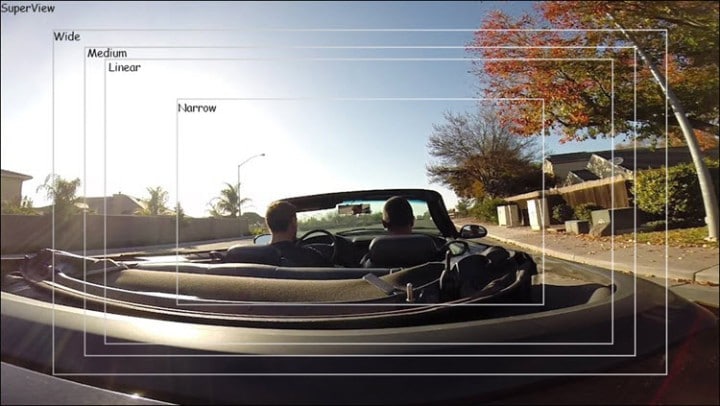
Wide or SuperView still works best for action scenes like biking or surfing, where the fisheye effect can add a sense of speed and intensity. For general shooting, though, Medium or Narrow gives a cleaner frame that needs less adjustment later in editing.
Part 2. Post-Production Solutions for Fisheye Removal
If you didn't adjust your settings before recording, you can still correct GoPro lens distortion during editing. Post-production tools give you more flexibility, and you can do it with Wondershare Filmora video editing software.
 secure download

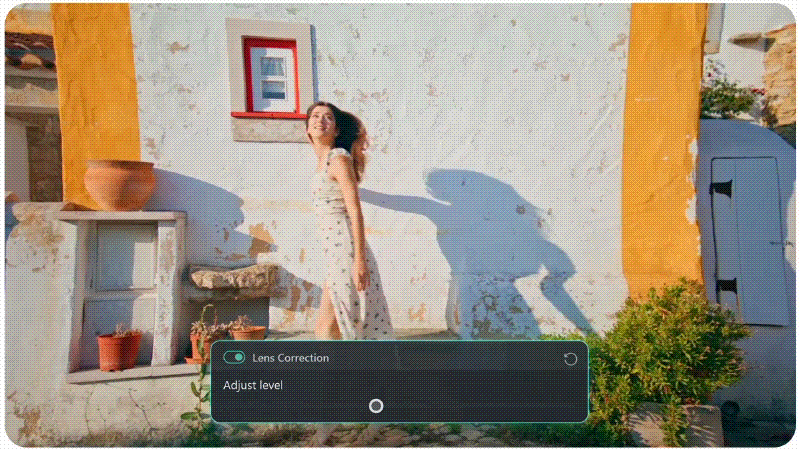
Filmora, a powerful GoPro Video Editor, features a built-in Lens Correction tool designed for action cameras. Instead of manually fixing distortion, you can apply presets tailored for various GoPro models. This GoPro distortion correction method is perfect for maintaining the wide-angle look of your footage while eliminating unwanted curves, ensuring professional-quality results with minimal effort.
Key Features
- Quick Setup and Preview: Toggle correction on and see instant results, no rendering required.
- Built-In Presets: Profiles designed for GoPro HERO models and other action cameras save editing time.
- Multi-Camera Support: Works with GoPro, Sony, Panasonic, Ricoh, and iON for wider compatibility.
- Resolution-Specific Calibration: Automatically adjusts for 4K, 2.7K, 1080p, 720p, and other formats.
- Flexible Adjustment: Use the slider to control distortion level for a more natural look.
- Works for Photos and Videos: Apply consistent correction across both still images and clips.
How to Use Lens Correction for GoPro Videos in Filmora
Here's the step-by-step guide on how to use Filmora's GoPro lens distortion correction tool:
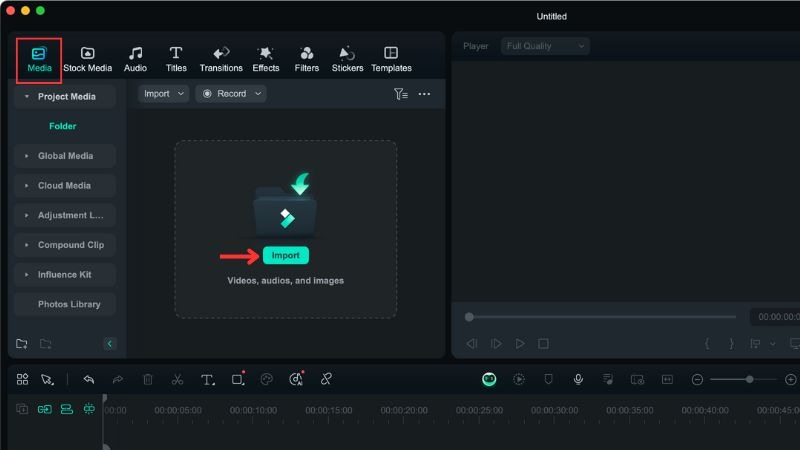
Step 1Open Filmora and Add Your Footage
Launch Filmora on your desktop, start a New Project, go to the Media tab → Project Media → Import, then select your GoPro clips and drag them onto the timeline.
secure download
Step 2Open Lens Correction Settings
Click the clip in the timeline to open the Editing panel, then go to Video → AI Tools and enable the Lens Correction tool.
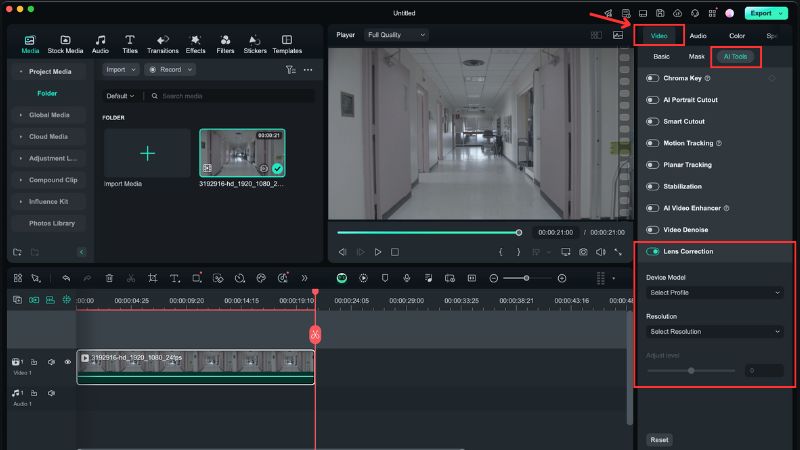
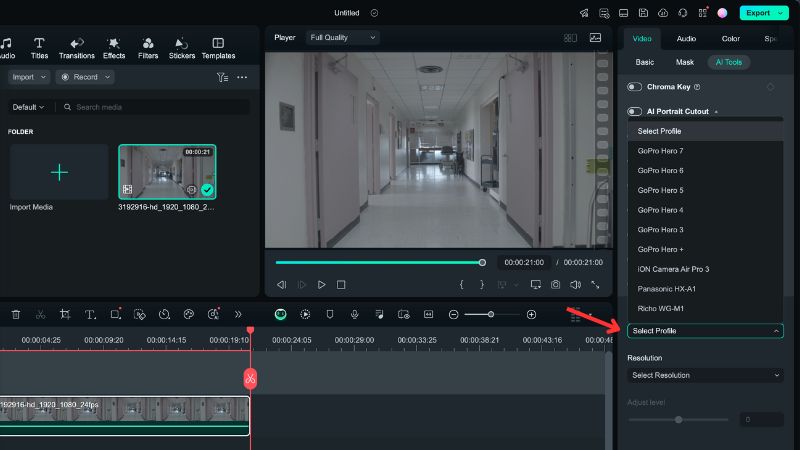
Step 3Choose Camera Model
From the Device Model dropdown, select your GoPro model to apply the right lens correction profile.
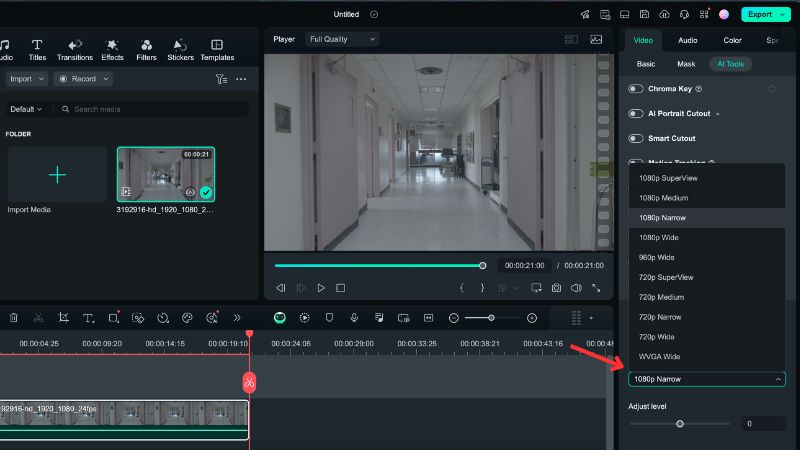
Step 4Match Capture Resolution
Select the Resolution that matches your recording settings, check the preview for accuracy, and Filmora will apply the correction automatically so you can keep editing smoothly.
Part 3. Pro Tips for GoPro Lens Distortion Correction
Learning how to remove fisheye from GoPro videos doesn't stop there. Small adjustments during editing and shooting habits can make your footage look more natural. These tips will help you correct distortion while avoiding unnecessary loss of detail.
- Keep Original Files: Always save a backup of your raw clips. GoPro distortion correction often involves cropping, and having the originals ensures you can re-edit if needed.
- Avoid Extreme Adjustments: Heavy corrections can crop too much of the frame or make edges look soft. Apply gradual changes instead of pushing the correction to the maximum level.
- Use Mild Correction for Drone or Landscape Shots: Wide landscapes and aerial clips look better with subtle correction. Strong adjustments may straighten lines but can stretch objects unnaturally.
- Know When Fisheye Works: Not every shot needs GoPro fisheye correction. For action sports, underwater clips, or immersive first-person footage, keeping the curved perspective might be the better choice.
Conclusion
Learning how to remove fisheye GoPro distortion can make a big difference in the look of your videos. By adjusting in-camera settings or using editing tools like Filmora, you can correct GoPro lens distortion. Try it out on your next project and see the results for yourself.
secure download
Frequently Asked Questions
-
Wasn't there a GoPro Studio option for fisheye correction?
GoPro Studio used to include a lens correction tool, but the program has been discontinued. Now you can use in-camera settings or video editors like Filmora for the same result. -
Does correcting lens distortion lower video quality?
Some correction involves cropping, so you may lose a bit of the field of view. As long as you avoid extreme adjustments, overall video quality stays sharp. -
Can you correct GoPro lens distortion in free software?
Yes. Free editors like Shotcut or Blender include lens correction filters, though they may require more manual setup than Filmora's presets.
