
 100% Security Verified | No Subscription Required | No Malware


 ChatGPT
 Perplexity
 Gemini
 Claude
 Grok
Grok
Ever wondered how you can turn images into readable text using AI without complex coding? ComfyUI makes this process simple by offering a flexible, node-based workflow that even beginners can understand. With the right setup, you can extract text from images, analyze visual content, and integrate it into creative or productivity tasks in just a few steps.
This beginner-friendly guide will walk you through the ComfyUI image-to-text workflow step by step, helping you understand how each node works and how to connect them effectively.
In this article
Part 1. Understanding the ComfyUI Image to Text Workflow System
The ComfyUI image-to-text workflow is built on a structured node-based system where each component plays a specific role in processing visual data. Instead of handling everything in a single step, ComfyUI breaks the process into interconnected nodes that gradually transform an image into meaningful text output.
How Nodes Process Image Input
In this system, nodes act as individual processing units. The image input node first receives the visual file and prepares it for analysis by resizing, normalizing, or encoding it into a machine-readable format. Each subsequent node refines this data step by step.
Role of Image Encoder Models
Image encoder models are responsible for converting pixel information into high-dimensional feature representations. These features help the system understand patterns, objects, and contexts within the image.
Conversion of Visual Data into Descriptive Text
Once features are extracted, a language model interprets them and generates natural language descriptions. This is where visual information is translated into readable and structured text.
Connection Between Image-to-text and Prompt Generation
The generated text can also be reused as prompts for AI image generation or editing. This creates a powerful loop where images are analyzed and then transformed into creative instructions for further AI workflows.
Part 2. Step-by-Step ComfyUI Image to Text Workflow Guide
Now that you understand how the ComfyUI image-to-text workflow system works behind the scenes, it's time to move from theory to practice. In this section, we'll walk through a step-by-step guide to building your own workflow inside ComfyUI.
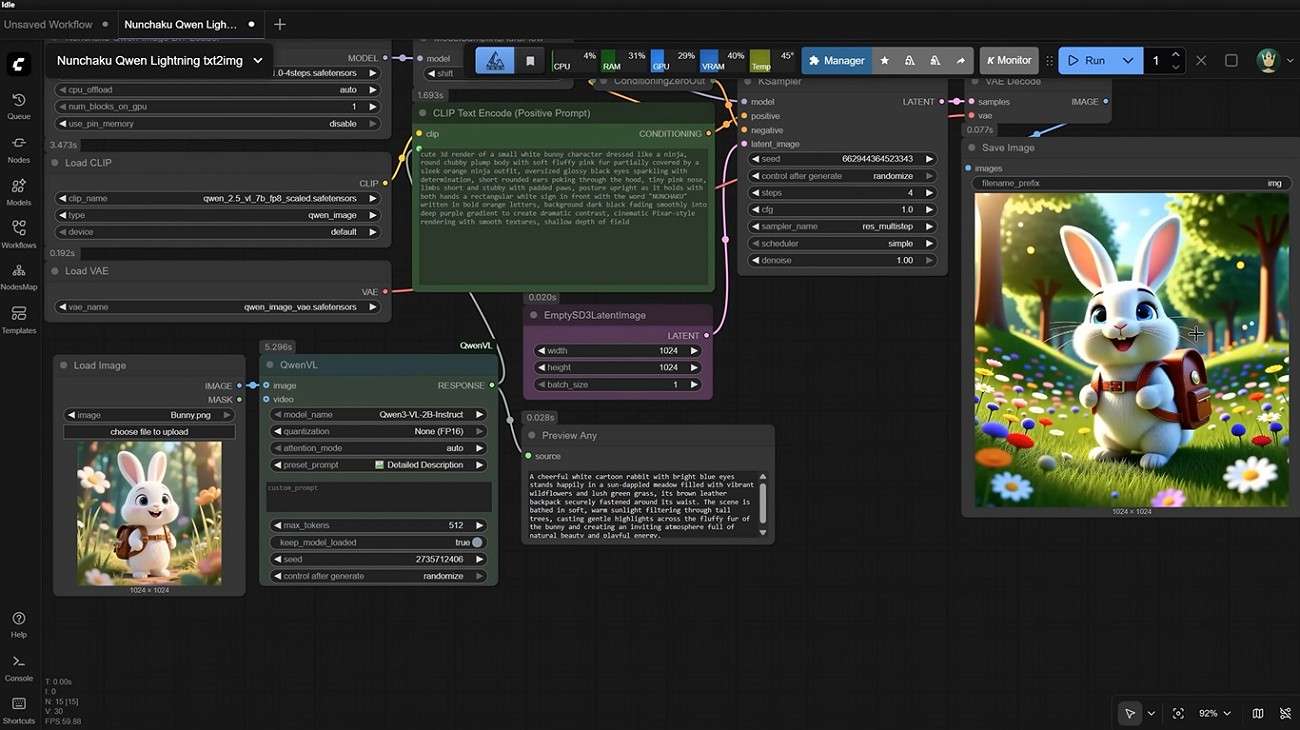
Step 1. Load Image Into ComfyUI Workflow
Once the node is installed, adjust its settings, including model name, quantization level, and attention mode, for optimal performance. After that, add a "Load Image" node to import your input image. Connect both nodes to ensure the image data flows properly into the model.

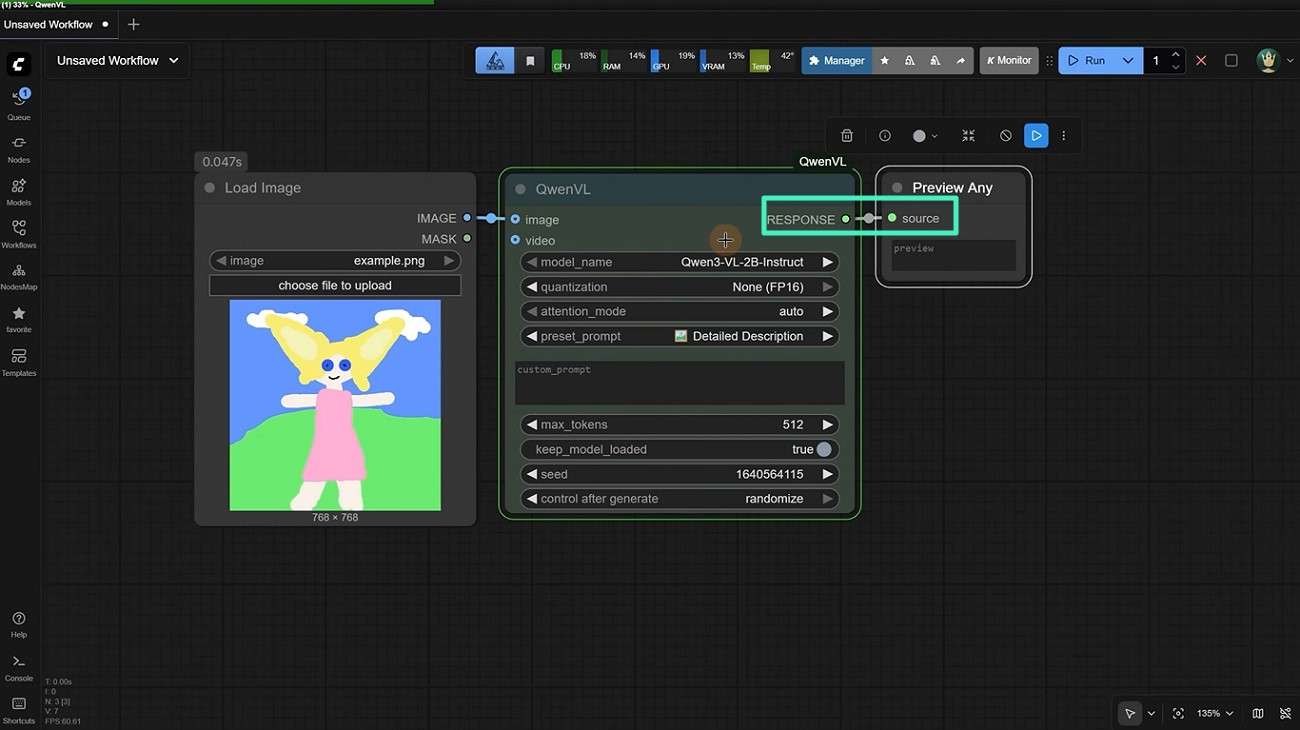
Step 2. Apply Image Encoder or Caption Node
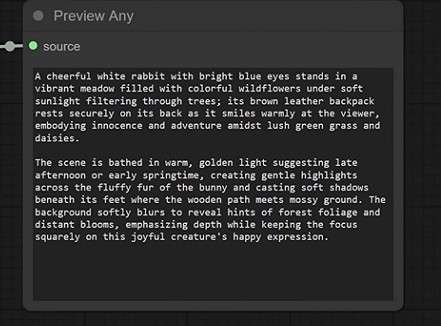
Next, insert a "Preview Any" node into your workflow. Connect it to the caption node so you can visually inspect the generated output in real time before finalizing it.
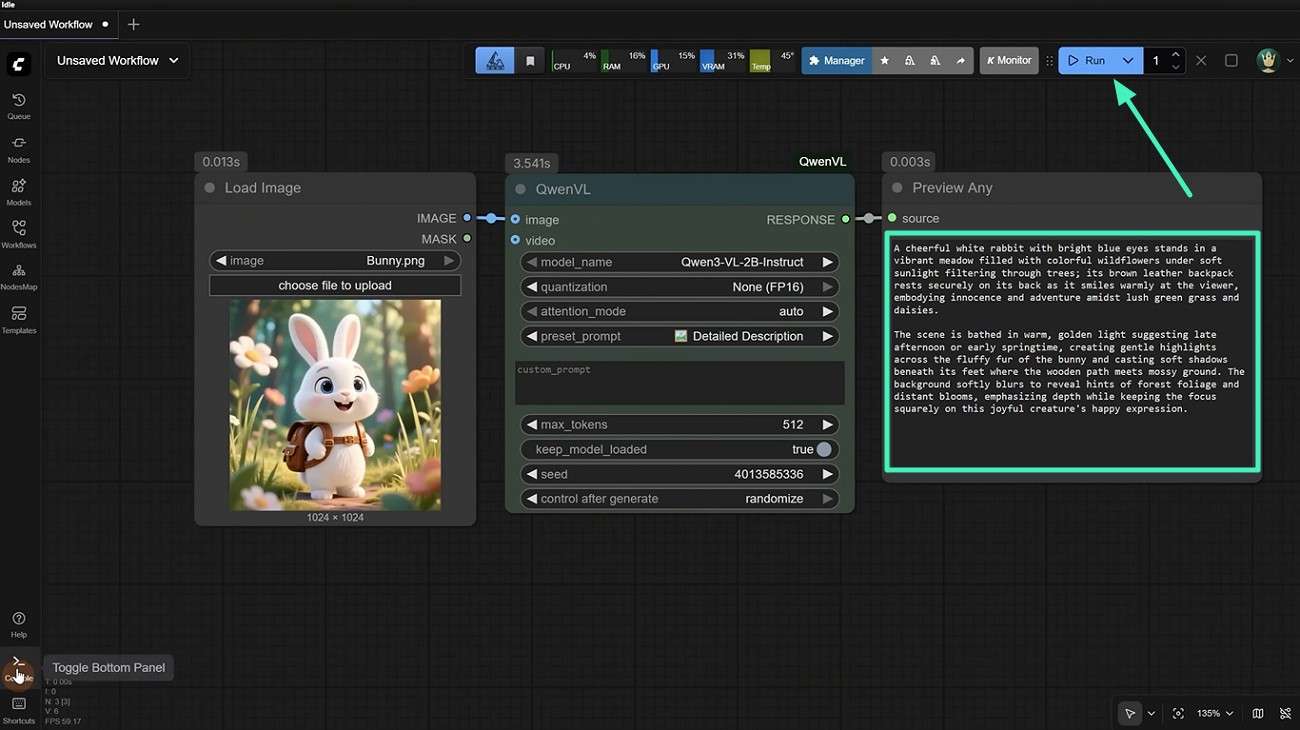
Step 3. Generate Text Description From Image
After all nodes are properly connected, upload the image you want to analyze and click the "Run" button. Once the prompt is generated, it will appear in the Preview Any node, where you can review it and copy it for use in your desired application.
Step 4. Refine Output Using Prompt Nodes
After generating the initial description, use prompt refinement nodes to adjust tone, detail level, or style for more accurate and usable text output.
Step 5. Use Generated Text for AI Image Creation
Finally, you can reuse the generated text as a prompt for AI image generation tools by adding a "Save Image" node. Press the "Run" button to generate the picture.

Part 3. 5 Common Issues in ComfyUI Image to Text Workflow
Using the basic ComfyUI image-to-text workflow, you'll often hit a few recurring issues that slow you down or ruin consistency. Here are 5 common issues in ComfyUI image-to-prompt workflows:
- Overly Complex Node Structures: Tangled or deeply nested node graphs make it hard to follow the workflow and track down problems when something goes wrong.
- Unstable or Inconsistent Results: Small changes in prompts or sampling settings can produce wildly different images if parameters like CFG scale, steps, or seed are not carefully balanced.
- External Model Compatibility Problems: Requiring separate models or custom nodes can lead to version mismatches, broken workflows, or issues after updates or reinstallations.
- Performance Bottlenecks from Model Load: Running large or multiple models at once can consume heavy GPU/CPU and RAM, slowing down previews, iterations, and overall workflow speed.
- Lack of In-App Guidance for Beginners: Minimal on-screen explanations make it confusing for new users to set up and understand image-to-prompt workflows.
Part 4. Why ComfyUI Image to Text Is Not Ideal for Most Users?
While ComfyUI's image-to-text (image-to-prompt) workflow offers powerful control for advanced creators, it is not ideal for most everyday users who want a fast, reliable, and beginner-friendly experience. Mentioned below are sme of the reasons why this tool is not beginner-friendly:
- Steep Learning Curve: Users must understand node-based logic and basic model concepts before they can run a stable image-to-text workflow.
- Unpredictable and Inconsistent Results: Minor changes in prompts, seeds, or model settings can produce very different descriptions.
- Heavy Dependency on External Models: It requires downloading and managing separate vision-language models, which can create version conflicts, broken nodes, or compatibility issues.
- Performance and Resource Intensity: Running large models for image understanding can slow down the system and hamper real-time experimentation.
Part 5. Try Filmora: The Best Alternative for Image to Text Workflow
If you're exhausted by ComfyUI's image-to-text workflow complex node-based setups, Filmora offers a clean, beginner-friendly way to turn images into usable prompts quickly. Built inside an all-in-one video editor, Filmora automatically analyzes your image while detecting objects, lighting, colors, and composition. It then generates a clear, descriptive AI prompt in seconds.
 secure download

You can then edit the text, refine details, and reuse it across projects without worrying about broken models or tangled workflows. Unlike ComfyUI, Filmora requires no manual node wiring, model management, or deep technical knowledge. With drag-and-drop simplicity, real-time previews, and integrated editing tools, Filmora streamlines the entire process from image to text to final video. This helps you stay focused on creativity instead of configuration.
Comprehensive Steps to Use Filmora Image to Prompt
After exploring Filmora's Image-to-Prompt feature, let us learn how to use it. Follow these steps to use the ComfyUI image to text alternative smoothly and get professional-looking results:
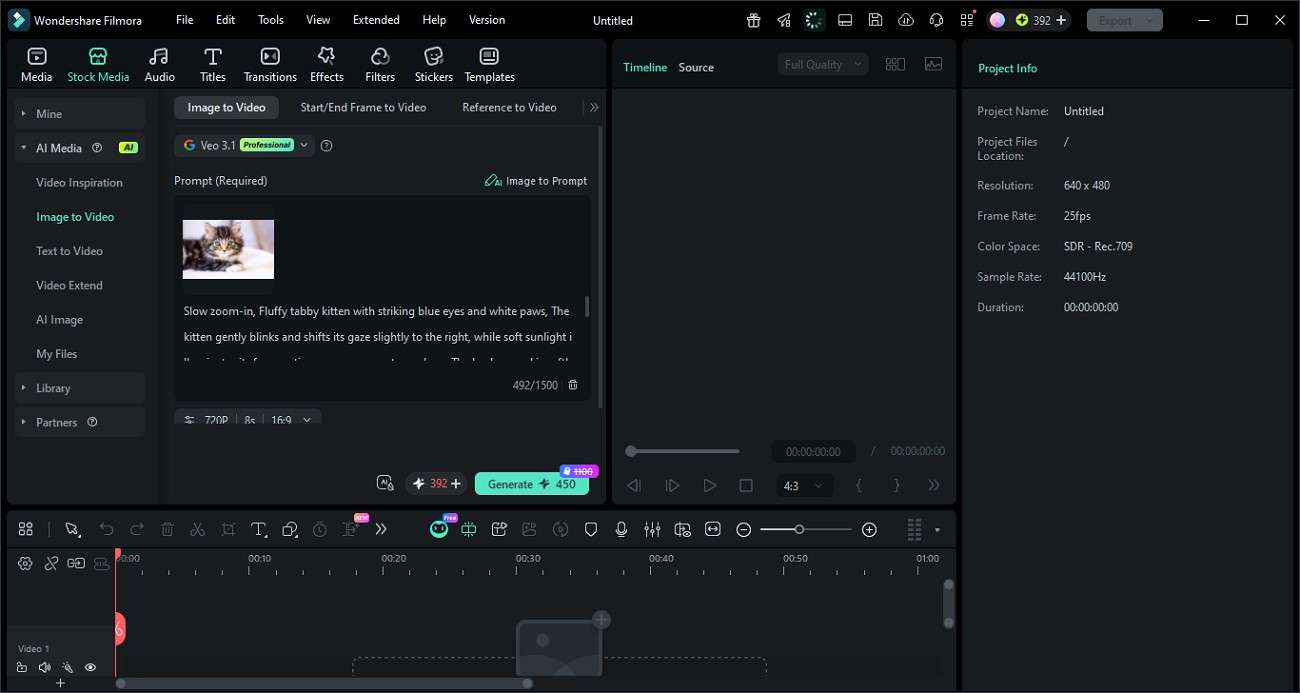
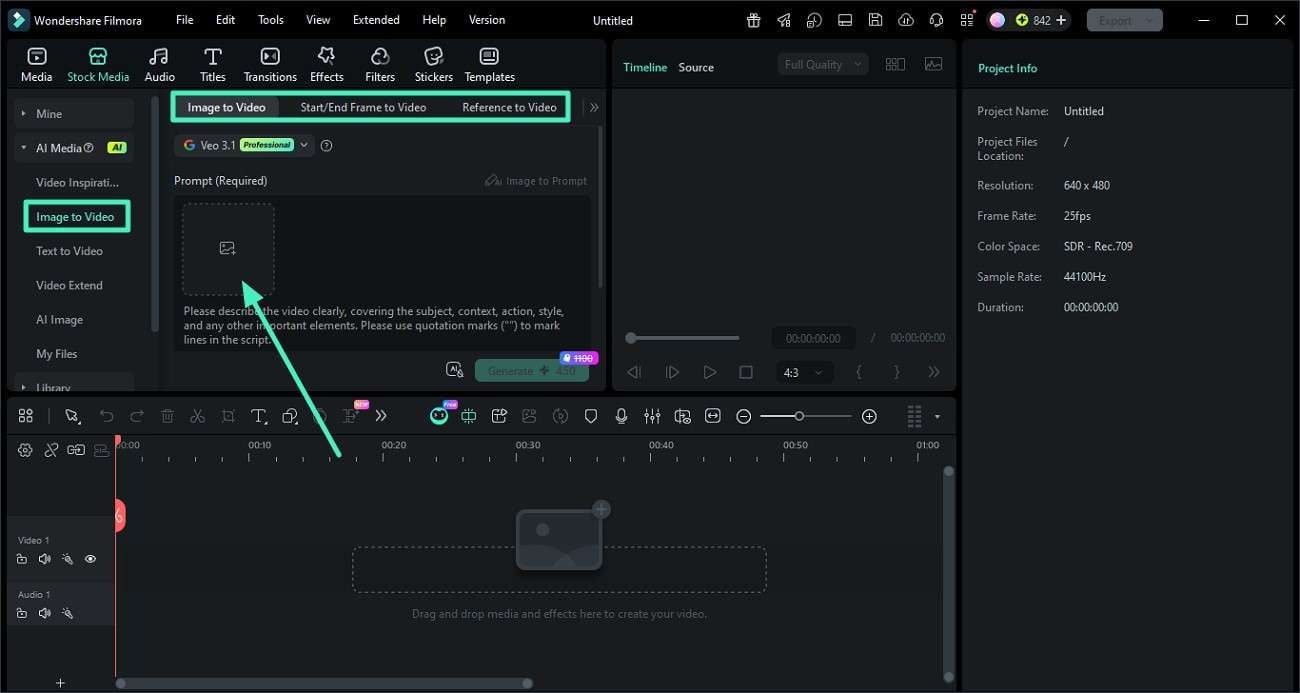
Step 1. Add Your Image to Filmora
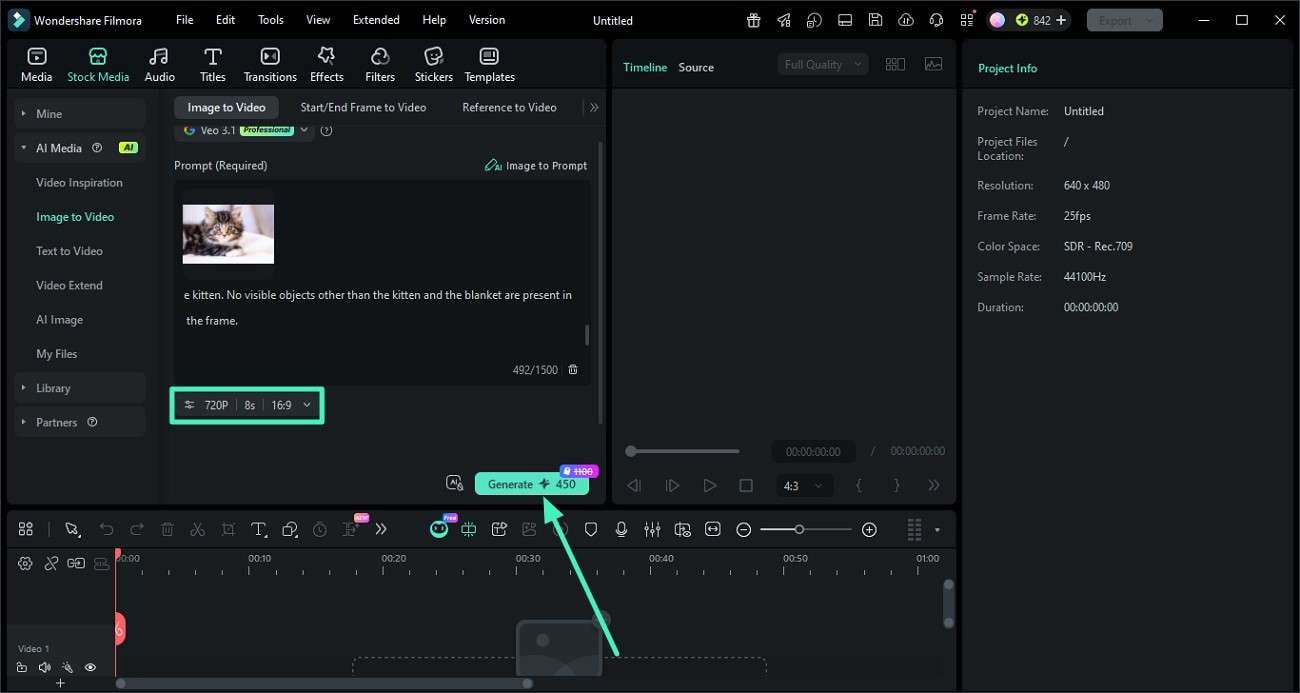
Create a new project in Filmora, then go to the "Image to Video" section in the left-hand panel. Select your preferred mode and drag or browse to upload your chosen image into the workspace.
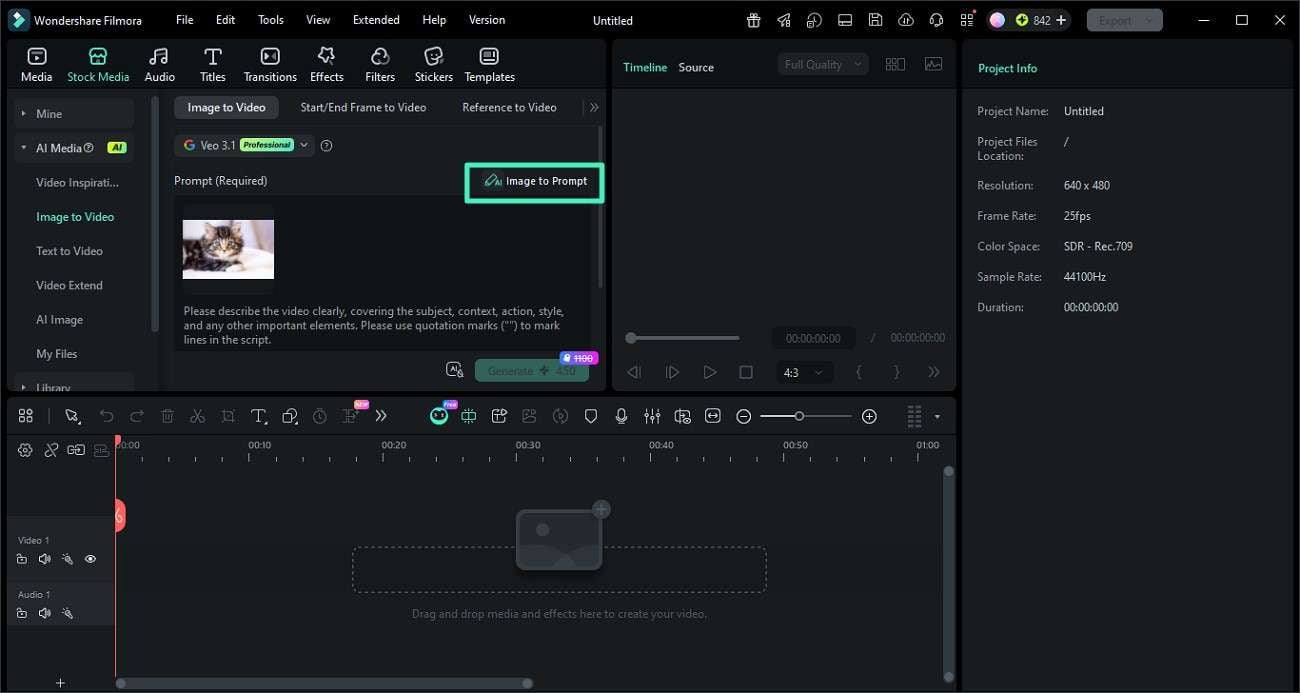
Step 2. Create an AI Prompt from the Image
With the image loaded, find the "Image to Prompt" button and click it. Filmora will analyze the image's key elements and generate a descriptive AI prompt automatically.
Step 3. Refine the Prompt and Generate the Video
Review the generated prompt, then edit any details you want to change, such as style, mood, or specific elements. When you're satisfied with the text, click the "Generate" button to render a video based on that prompt.
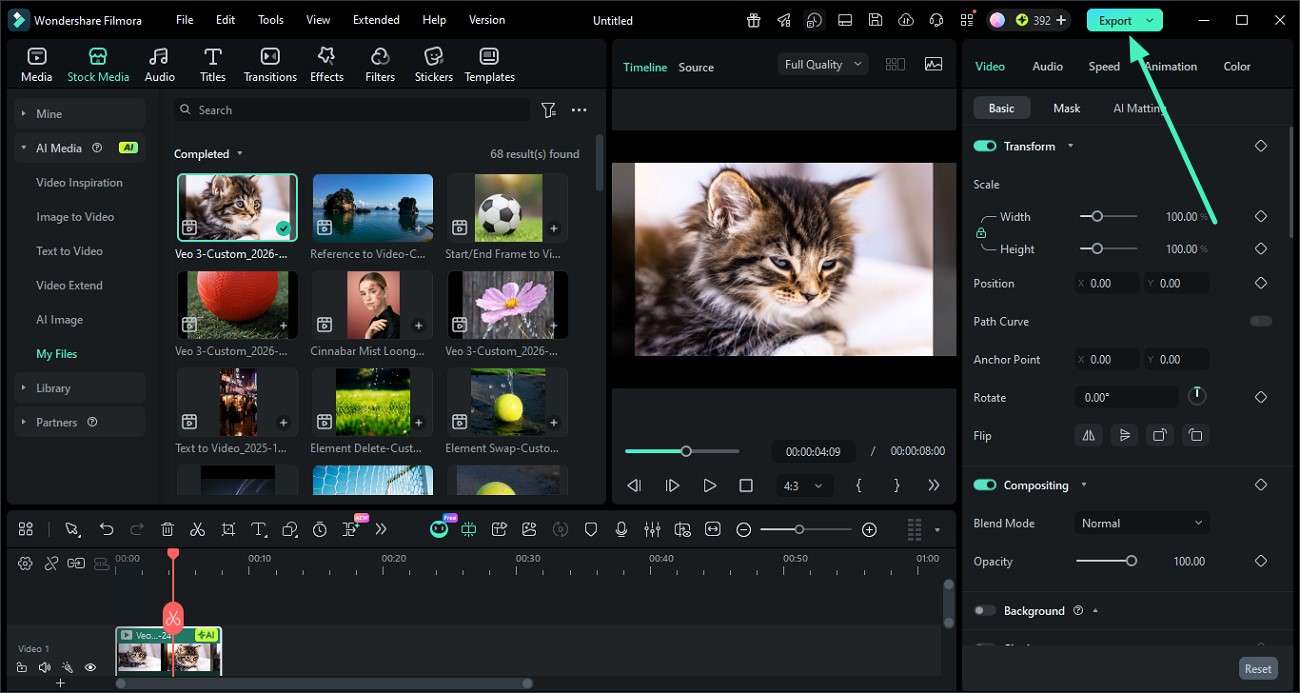
Step 4. Preview and Export the Video
Once the video is created, watch it in the preview window to check timing, motion, and style. If everything looks good, click the "Export" button in the top-right corner to save your final video in your preferred format and resolution.
Conclusion
To sum it up, this article provided a detailed guide on how ComfyUI's image-to-text workflow works, its strengths, and its common pitfalls. While ComfyUI offers powerful control, its complexity often slows down everyday creators. For a faster, smoother, and more beginner-friendly experience, Filmora is highly recommended. It offers image-to-prompt creation, combining AI analysis, easy editing, and one-click export in a single, intuitive interface.
secure download Frequently Asked Questions
-
1. What is an image-to-prompt workflow?
An image-to-prompt workflow lets you upload a visual and have an AI automatically generate a descriptive text prompt. It is based on its objects, colors, lighting, and composition, which you can then reuse or refine. -
2. Is ComfyUI good for image-to-prompt beginners?
ComfyUI can produce powerful results, but its node-based interface and model management make it hard for beginners. For a simpler, more intuitive alternative, Filmora is strongly recommended. -
3. How can Filmora improve image-to-prompt workflows?
Filmora streamlines the process with an "Image to Prompt" tool that analyzes your picture and creates a clear AI prompt in seconds. It then lets you edit it and generate or animate the result directly inside the editor. -
4. Which tool is easier than ComfyUI for creating AI prompts?
Filmora is much easier than ComfyUI for AI prompts, offering a beginner-friendly interface, no node wiring, and built-in AI tools. It also handles image analysis, text generation, and video creation in one place.
