


 100% Security Verified | No Subscription Required | No Malware


 ChatGPT
 Perplexity
 Gemini
 Claude
 Grok
Grok
Audacity is a powerful, free audio editing software that is popular among beginners and experts in audio editing alike. This open-source tool offers recording, editing, and enhancing audio features. What sets Audacity apart is its accessibility because it’s completely free to use.
In this article, you’ll learn how to enhance vocals with Audacity. Suppose you want to start recording a podcast, creating a voiceover, or polishing a music track. In that case, these techniques will help you learn how to do them with Audacity and another tool – Wondershare Filmora, especially if you’re dealing with videos. Read through to learn more.
In this article
Part 1. Basic Techniques To Enhance Voice and Vocals Through Audacity
Improving voice and vocal recordings in Audacity doesn’t have to be complicated. With a few tricks up your sleeve, you can enhance the quality of audio in Audacity. Here are some basic yet effective tools Audacity offers to polish your vocal tracks.
Noise Reduction Effect
Background noise is annoying enough in any vocal recording. Audacity’s Noise Reduction tool helps eliminate unwanted ambient sounds, creating a cleaner audio track.
Here is a quick guide of using Audacity’s Noise Reduction feature:
Step 1: Select a portion of the audio that contains only background noise.
Step 2: Go to Effect > Noise Reduction. Then, click Get Noise Profile.
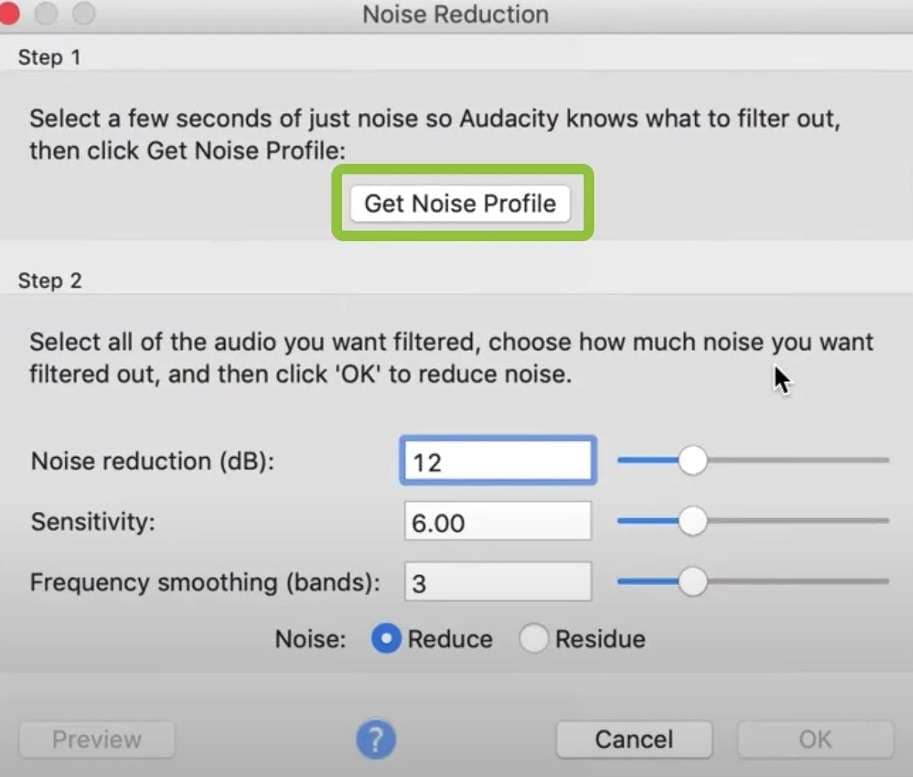
Step 3: Select the entire track. Go to Effect > Noise Reduction again. Click OK after adjusting the settings.
This tool samples the background noise and removes it from the entire track. It will leave your vocals in a more transparent state.
Equalization (EQ)
EQ allows you to adjust the balance between frequency components in your audio. It helps enhance vocal clarity and warmth.
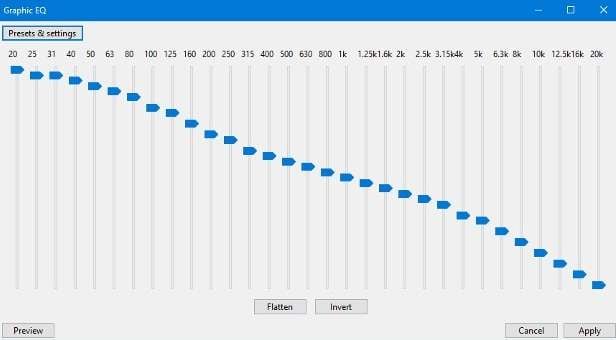
Here’s how to use it:
Step 1: Select your vocal track. Go to Effect > Equalization.
Step 2: Choose a preset or manually adjust the frequency bands.
Step 3: Boost slightly around 2-5 kHz for clarity. Cut low frequencies below 80 Hz to reduce rumble.
Step 4: Preview and apply when satisfied.
EQ can help your vocals cut through the mix and sound more professional.
Compression
Compression evens out the volume levels in your recording, making quieter parts louder and louder parts quieter. This creates a more consistent vocal track.
Follow the steps below to use it:
Step 1: Select your vocal track. Go to Effect > Compressor.
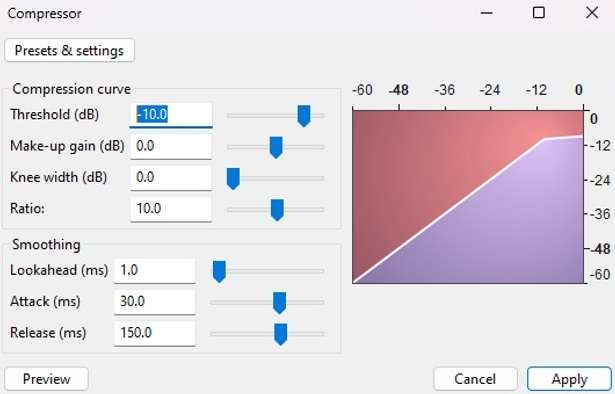
Step 2: Set the threshold to around -12 dB and the ratio between 2:1 and 4:1.
Step 3: Adjust attack and release times (start with 10 ms and 100 ms, respectively). Enable Make-up gain to boost the overall volume.
Step 4: Preview and apply.
Compression helps achieve a more balanced and professional-sounding vocal track.
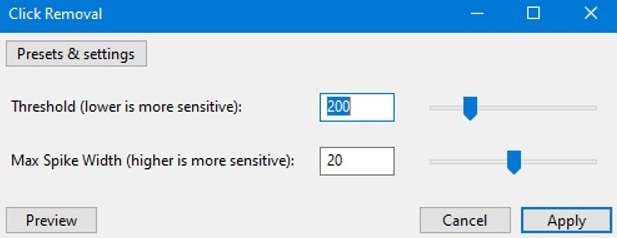
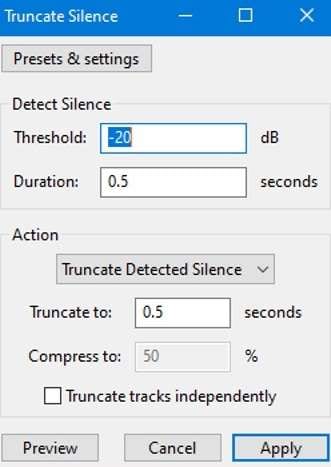
Click Removal and Silence Effects
These tools help clean up your audio by removing unwanted sounds and silence.
This Click Removal tool helps eliminate pops and clicks in your recording. To use it:
Step 1: Select your entire track. Go to Effect > Click Removal.
Step 2: Adjust the threshold and max spike width. Click OK to apply.
On the other hand, to use the Silence Effects:
Step 1: Select any unwanted sections of silence or noise. Then, go to Truncate Silence.
Step 2: Click Apply to replace the selection with true silence.
Use this to remove breathing sounds or pauses between sentences for a cleaner recording.
Apply these basic Audacity techniques to improve the quality of your vocal recordings significantly. Always work on a copy of your original file and make small, incremental changes. Listen carefully after each adjustment to ensure you achieve the desired result without over-processing your audio. You’ll develop an ear later on to determine what sounds best for your voice or recording setups.
Part 2. Advanced Techniques To Enhance Voice and Vocals Using Audacity
Audacity offers several advanced techniques for those looking to take their vocal enhancement skills to the next level. These methods can help you achieve a more polished, professional sound. You will explore some advanced tools and how they can elevate your audio quality.
De-essing
De-essing, like its name, removes excessive “s” and “sh” sounds in vocal recordings. While Audacity doesn’t have a built-in de-esser, there are several tools that can be used as workarounds. Here’s an idea to replicate the de-essing effect to enhance audio in Audacity:
Step 1: Identify the problematic frequency (usually 5-8 kHz).
Step 2: Use the Equalization tool to create a narrow dip at this frequency. Apply compression to this specific frequency range.
This technique helps soften harsh sibilant sounds, making vocals smoother and more pleasant.
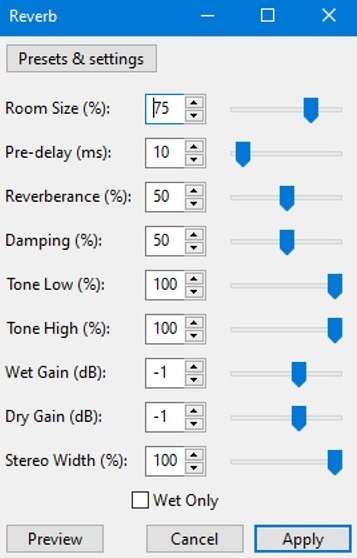
Reverb and Echo Effects
Reverb and echo can add depth and space to your vocals, making them sound more natural or creating specific atmospheric effects.
To use reverb or echo effects, select your vocal track. Then, go to Effect > Reverb or Effect > Echo.
For Reverb, adjust parameters like Room Size, Reverb Time, and Damping. Then, use the dry/wet mixer.
For Echo, set the Delay Time and Decay Factor accordingly.
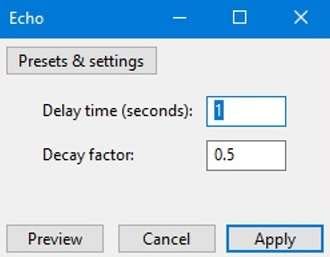
Both effects can help your vocals sit better in a mix or create a specific ambiance. Use them subtly for a natural sound or more intensely for creative effects.
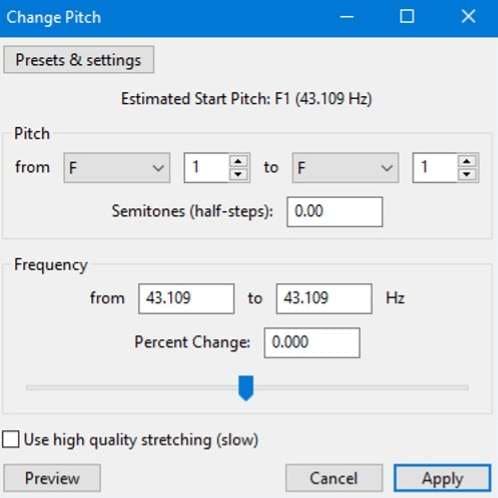
Pitch Correction and Tuning
While not a substitute for good vocal technique, pitch correction can help fine-tune your recordings.
Try following these steps to introduce pitch correction or tuning to your vocals:
Step 1: Install the Nyquist Analyze Pitch plugin for Audacity.
Step 2: Select a portion of your vocal track. Use the plugin to analyze the pitch.
Step 3: Go to Effect > Change Pitch. Adjust the pitch based on the analysis results.Consider using dedicated pitch correction software in conjunction with Audacity for more advanced tuning.
These advanced techniques require practice and a good ear. Make subtle adjustments and frequently compare your processed audio with the original to ensure you’re enhancing, not degrading, the sound quality. Remember, the goal is to improve your vocals while maintaining their natural character and emotion.
Part 3. Enhancing Voice and Audio in Videos With Wondershare Filmora
While enhancing vocals in Audacity is easy with audio tracks, working with videos presents new challenges. A dedicated video editor can help you streamline your workflow if you’re dealing with video content. This approach eliminates the need to export audio to a separate program like Audacity before enhancing it.
Enter Wondershare Filmora is a powerful yet user-friendly video editing software with robust audio editing capabilities and video features. It provides a wide array of tools for video editing, special effects, and audio enhancement, all within a single, intuitive interface. Filmora stands out for its powerful features and ease of use. It’s ideal for content creators, YouTubers, and anyone looking to produce high-quality videos with polished audio.
Filmora offers several features specifically tailored to enhance and control audio in your videos:
- Audio ducking. Audio ducking lets music volume get a bit lower when there is dialogue or narration in the video. This helps ensure that the voice is always clear and prominent.
- Audio equalizer. Similar to Audacity’s EQ tool, Filmora’s equalizer allows you to adjust various frequency bands to enhance vocal clarity, reduce unwanted noise, or shape the overall tone of your audio.
- Audio mixer. This tool gives you precise control over multiple audio tracks, perfectly balancing dialogue, music, and sound effects.
- Noise removal. Filmora includes a noise removal tool to help eliminate background hums, hisses, or other unwanted ambient sounds from your audio tracks.
- Pitch shift. This feature allows you to adjust the pitch of your audio, which can help correct minor pitch issues or create special vocal effects.
- Audio fade. Easily add fade-ins and fade-outs to your audio tracks for smooth transitions between scenes or at the beginning and end of your video.
- Audio effects. Filmora offers audio effects, including reverb, echo, and more, allowing you to create the perfect ambiance for your video’s audio.
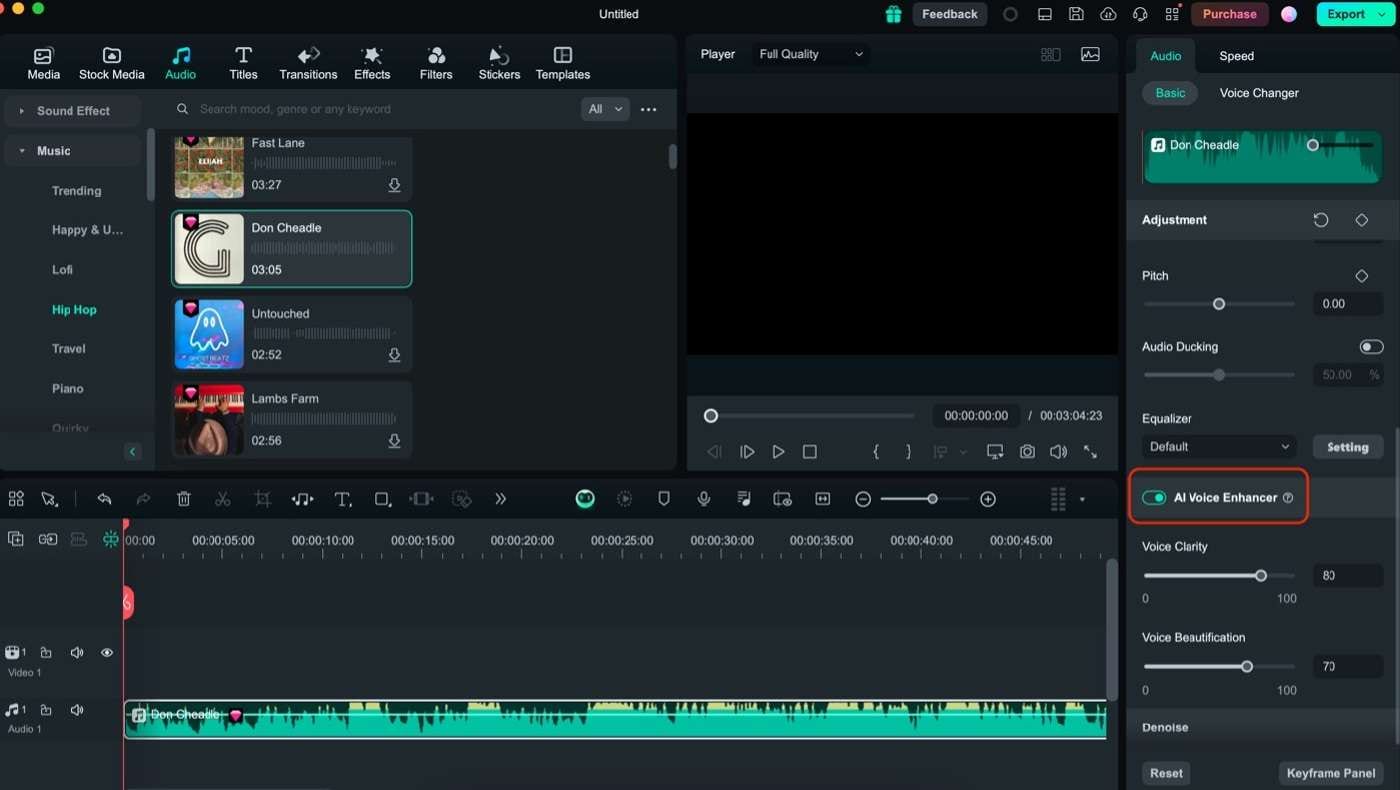
Wondershare Filmora’s AI Voice Enhancer
One of Filmora’s standout features is its AI Voice Enhancer. This cutting-edge tool uses artificial intelligence to improve the quality of voice recordings in your videos automatically. The AI analyzes your audio to identify areas that need improvement, such as background noise, unclear speech, or volume inconsistencies.
Based on its analysis, the AI applies multiple enhancements simultaneously, including noise reduction, EQ adjustments, and volume normalization. The AI is specifically trained to enhance human voices, making it ideal for vlogs, interviews, or the like.
How To Use Wondershare Filmora’s AI Voice Enhancer
Excited to try out Filmora? Here are some of the steps you need to follow to enhance your vocals with this tool:
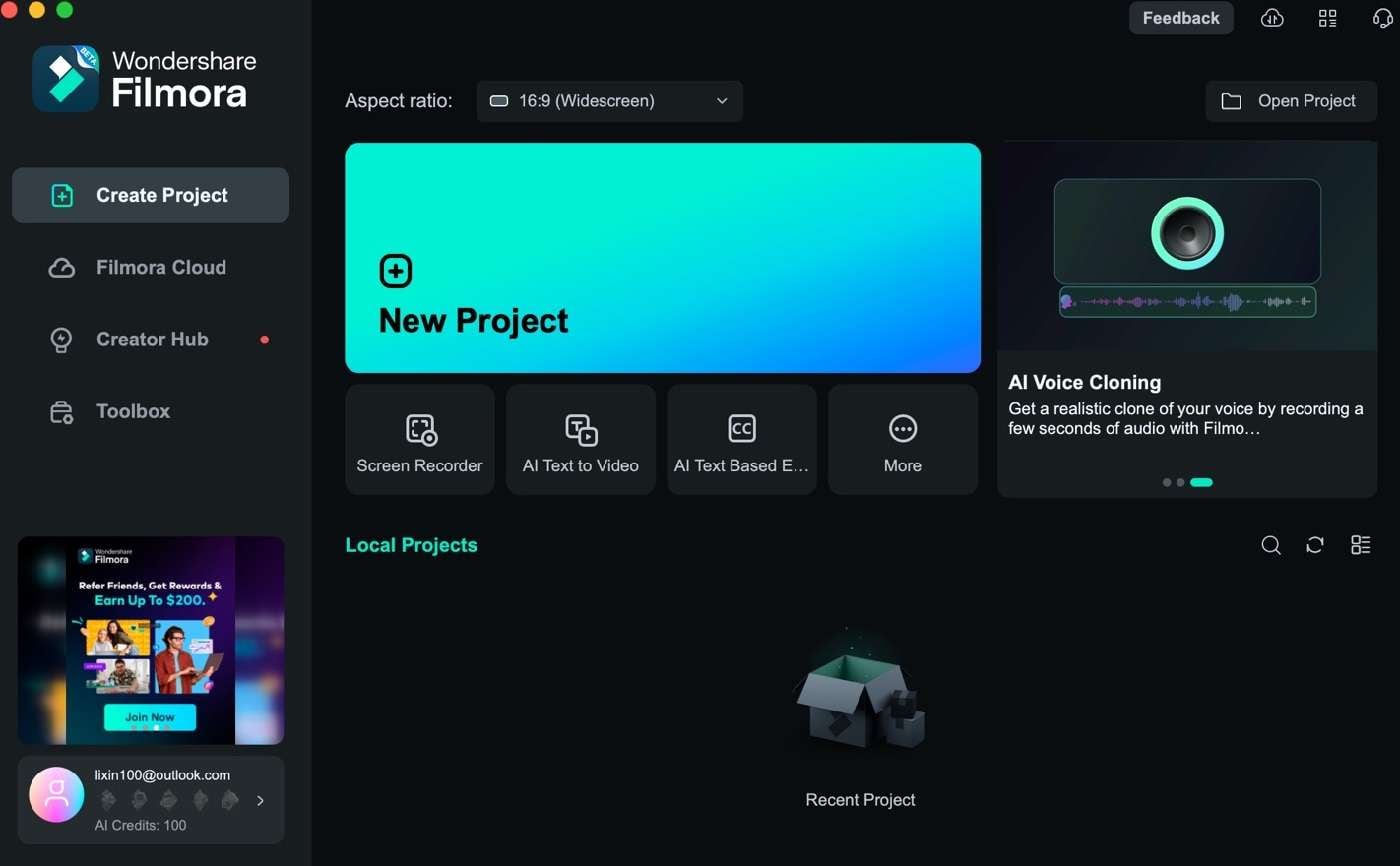
Step 1: Download, install, and launch Filmora. Then, log in or sign up with a Wondershare, Facebook, Apple, Google, or X account.
Step 2: Start a New Project from the homepage.
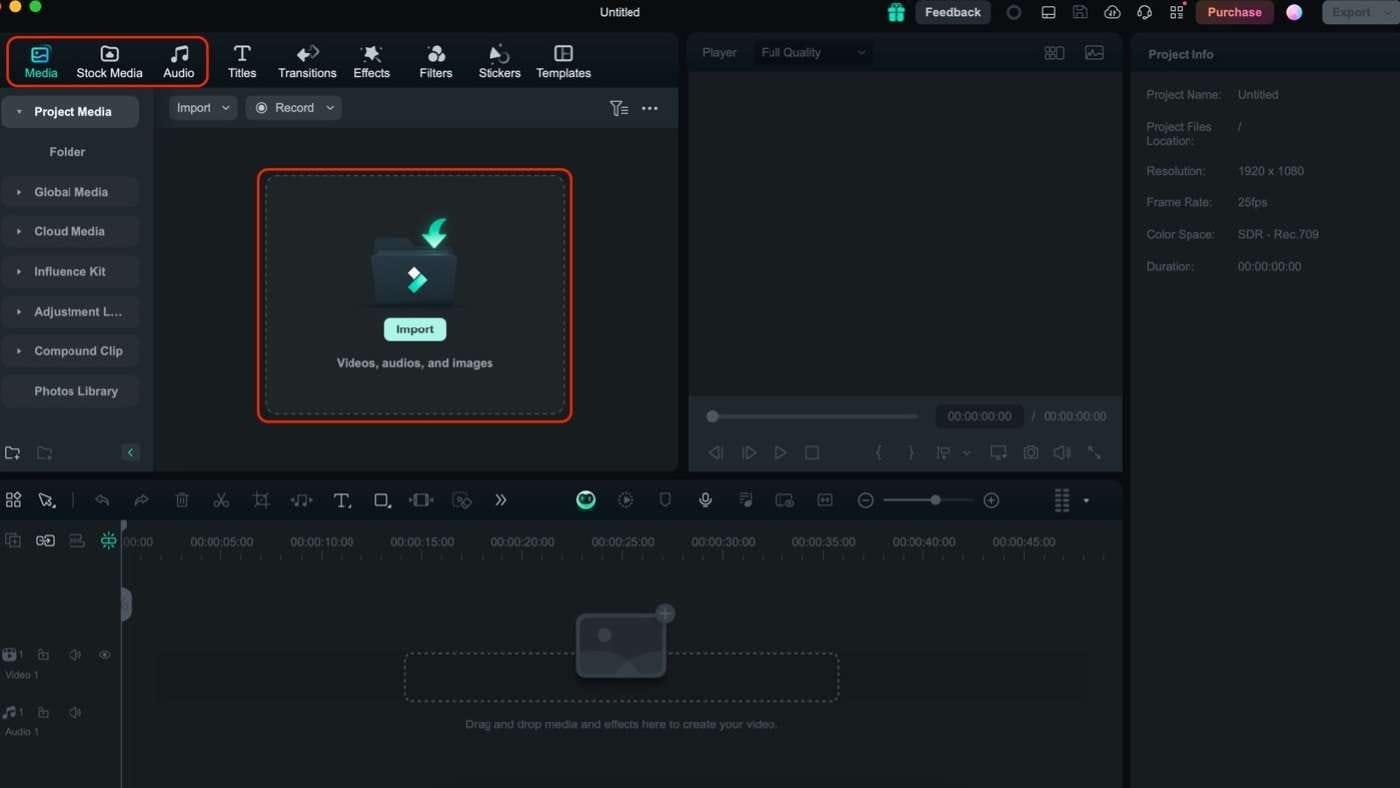
Step 3: Add your audio or video to the app by clicking Project Media > Import. Drag them to the timeline afterward.
Step 4: Lastly, select your audio. Then, look for AI Voice Enhancer under the Audio panel and toggle it.
Conclusion
This article covered several ways to enhance vocals in Audacity. Whether recording a podcast or creating a video, these methods can help your vocals sound more precise and professional.
For video creators, it is recommended to try Wondershare Filmora. It’s a user-friendly tool that lets you edit your video and enhance audio all in one place. With features like the AI Voice Enhancer, Filmora makes it easy to improve your audio without needing to be a sound expert. Try to make your videos sound as good as they look.
FAQ
-
How can I edit audio to hear better voices?
To improve voice clarity in audio, reduce noise to remove background sounds. Then, equalization (EQ) is applied to boost frequencies around 2-5 kHz, which enhances voice intelligibility. Use compression to even out volume levels, making quieter parts more audible. Finally, consider using a de-esser to reduce harsh sibilant sounds. These steps, combined with proper microphone technique during recording, can significantly improve voice clarity in your audio.
-
How can I make my voice clearer in audio?
To make your voice more straightforward in audio recordings, start with good recording practices: use a quality microphone and record in a quiet environment. In post-production, noise reduction is used to eliminate background noise. Apply EQ to boost frequencies that enhance clarity (usually around 2-5 kHz) and cut frequencies that muddy the sound (often below 100 Hz). Use compression to balance volume levels, and consider adding a touch of reverb for a more natural sound. Remember, subtle adjustments often yield the best results.
-
How to fix muffled voice in Audacity?
To fix a muffled voice in Audacity, there are several options:- Use the Equalizer tool to boost high-mid frequencies (around 2-4 kHz) and cut low frequencies (below 100 Hz).
- Apply the High Pass Filter to remove unnecessary low frequencies that can cause muddiness.
- Use the Compression effect to even out volume levels and bring out quieter parts of the speech.
- If needed, apply subtle noise reduction to clean up any background noise.
- Finally, normalize the audio to ensure consistent volume throughout the track.
