
 100% Security Verified | No Subscription Required | No Malware


Whether you want to draw attention to a particular scene or action, create suspense or a dramatic effect that highlights a specific moment, or insert a voiceover into a video that otherwise has no room for one in the timeline, Camtasia's freeze frames should be your go-to video editing technique.
In Camtasia, editors can apply this highly beneficial video effect in three ways. So, stick around; we'll show you these three methods to freeze frames in Camtasia and even provide an alternative video editor to help you achieve outstanding freeze/extend frame results.
In this article
How to Freeze and Extend Frames in Camtasia: Complete Guide
To freeze or extend frames in Camtasia, there are three simple and effective methods you can use. Each technique offers a slightly different approach to hold a frame longer on the timeline, whether by exporting it as an image, directly extending its duration, or quickly adding an exported frame with a single click. Below, we’ll guide you step-by-step through these three ways to create freeze frames, helping you choose the best method for your editing needs.
How to Add a Freeze Frame in Camtasia With the "Export Frame As" Option
There are three ways to freeze frames in Camtasia. The first uses the Export Frame As feature, which saves a video moment as an image that you can add back to the timeline and stretch to match your audio or voiceover.
Step 1: Launch Camtasia on your device and import media into the video editor.
Step 2: Drag and drop media files into the timeline and edit the video as usual.
Step 3: In a spot where you want to extend a frame in Camtasia, highlight the clip you want to extend.

Step 4: Head to the Export menu in the top left corner of the app and select the Export Frame As option. Alternatively, hit CTRL + F on your keyboard.

Step 5: Save the image onto your device.
Step 6: In the import section, tap the Plus icon and select the Import Media option.

Step 7: Locate the saved image and import it back into Camtasia. Then, add it to the timeline after the clip you want to extend.
Step 8: Extend the image to fill the space in the timeline.

How to Extend Frames in Camtasia Using the "Extend Frame" Option
Another great way to add freeze frames in Camtasia is using the Extend Frame option in the timeline. With this method, you manually set how long the frame stays still by entering its duration in seconds.
Here are the steps you should take:
Step 1: In Camtasia's timeline, place the playhead at the beginning of the empty spot you want to fill by extending frames.

Step 2: Drag the playhead marker to the end of the empty spot and mark the duration you'll need to fill up.

Step 3: Place the playhead back onto the frame you want to extend. Then, right-click on it and select the Extend Frame option. Alternatively, hit SHIFt + E on your keyboard.

Step 4: Input the duration you've measured in step two in seconds and hit OK.

How to Add Freeze Frames in Camtasia With the "Add Exported Frame" Icon
The third and easiest way to freeze frames in Camtasia involves using the Add Exported Frame feature. It functions similarly to the first method since it adds a new frame as an image in the timeline, allowing you to make the same image duration adjustments.
Let's see how you can use it:
Step 1: With the video edited to your liking and the frame ready to be frozen, place the playhead onto the frame you want to extend.

Step 2: Click the Add Exported Frame button, which you'll find right above the video editor's timeline. Alternatively, hit the CTRL + SHIFT + E buttons on your keyboard.

Step 3: This will add an image to the timeline, and you can then stretch its duration to perfectly fit the space you want to fill.

How to Extend or Freeze Frames Using a Better Alternative: Filmora
While Camtasia is undeniably a fantastic video editing tool, it's nowhere near perfect, and the app has a few drawbacks that can affect how you add freeze frames in Camtasia. For example, its interface isn't intuitive, and the learning curve can be rather steep, especially for beginner video editors. As a result, manipulating frames can be challenging for novice users.
If you share the same sentiments about Camtasia as most users, you'll be pleased to learn that there is a better video editing alternative: Wondershare Filmora. Unlike Camtasia, Filmora packs an extensive array of video editing tools and AI-driven features in a well-thought-out and remarkably beginner-friendly interface.
That makes Filmora the perfect solution for novice users and intermediate editors while also addressing the needs of its power users and giving everyone the creative freedom to isolate, extend, and Freeze Frame in a few clicks. You can try this robust editing solution yourself by following the steps below:
- Superb video stabilization with low distortion.
- Vast video/audio effects and creative assets.
- Powerful AI for effortless content creation.
- Intuitive, professional yet beginner-friendly.
- Works on Mac, Windows, iOS, and Android.


Step 1: Launch Filmora and tap the New Project button on the startup screen.

Step 2: Click Import and add your media files into Filmora. Then, drag and drop these clips into the Timeline at the bottom of the screen.

Step 3: Hover the playhead to the position where you want to add a freeze frame.
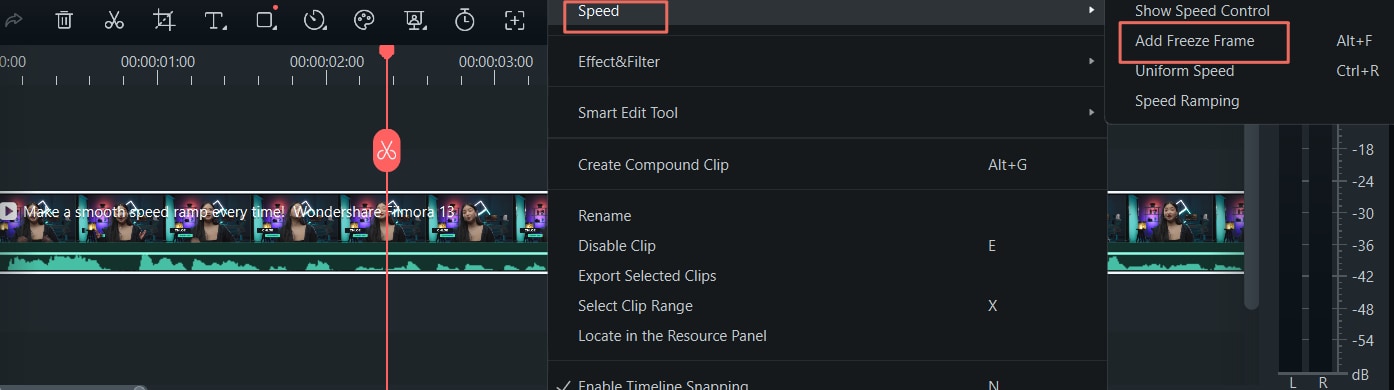
Step 4: Right-click the clip in the Timeline and select Speed - Add Freeze Frame. Alternatively, hit your keyboard's ALT + F keys for quicker access.

Step 5: Drag the sides of the gray freeze frame bar above the inserted section to adjust its duration.

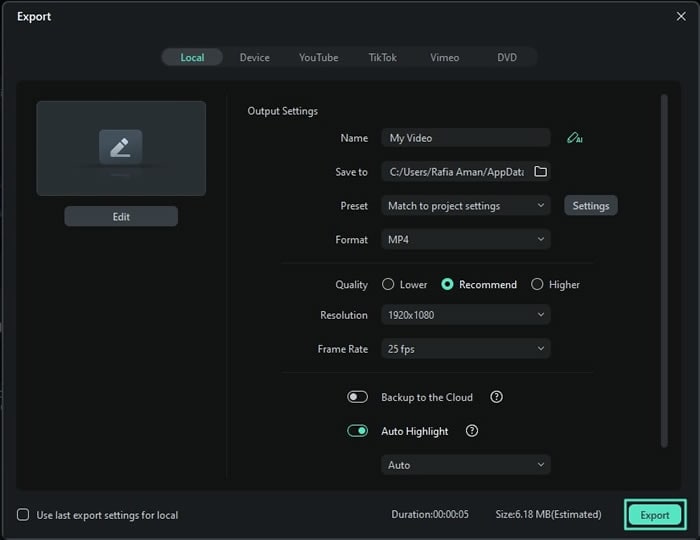
Step 6: Once done, tap the Export button in the top right corner to save the video with the freeze frame. You can then choose a name and save location, adjust the quality, resolution, and frame rate, and select one of many available formats to save your video.
Besides the various export options for saving your freeze-frame videos locally and numerous available video formats, Filmora can also export your projects directly to connected YouTube, Vimeo, and TikTok accounts, making it an ideal tool for social media content creators.
Applying Freeze Frame in Filmora Mobile App
Now that you’ve learned how to add freeze frames on Filmora’s desktop version, let’s take a look at how to achieve the same effect easily on your mobile device. The mobile app provides a streamlined way to create and adjust freeze frames, perfect for quick edits on the go.
Step 1: Launch Filmora on your phone and tap the New Project button on the startup screen, then add your media files into the project.
 secure download
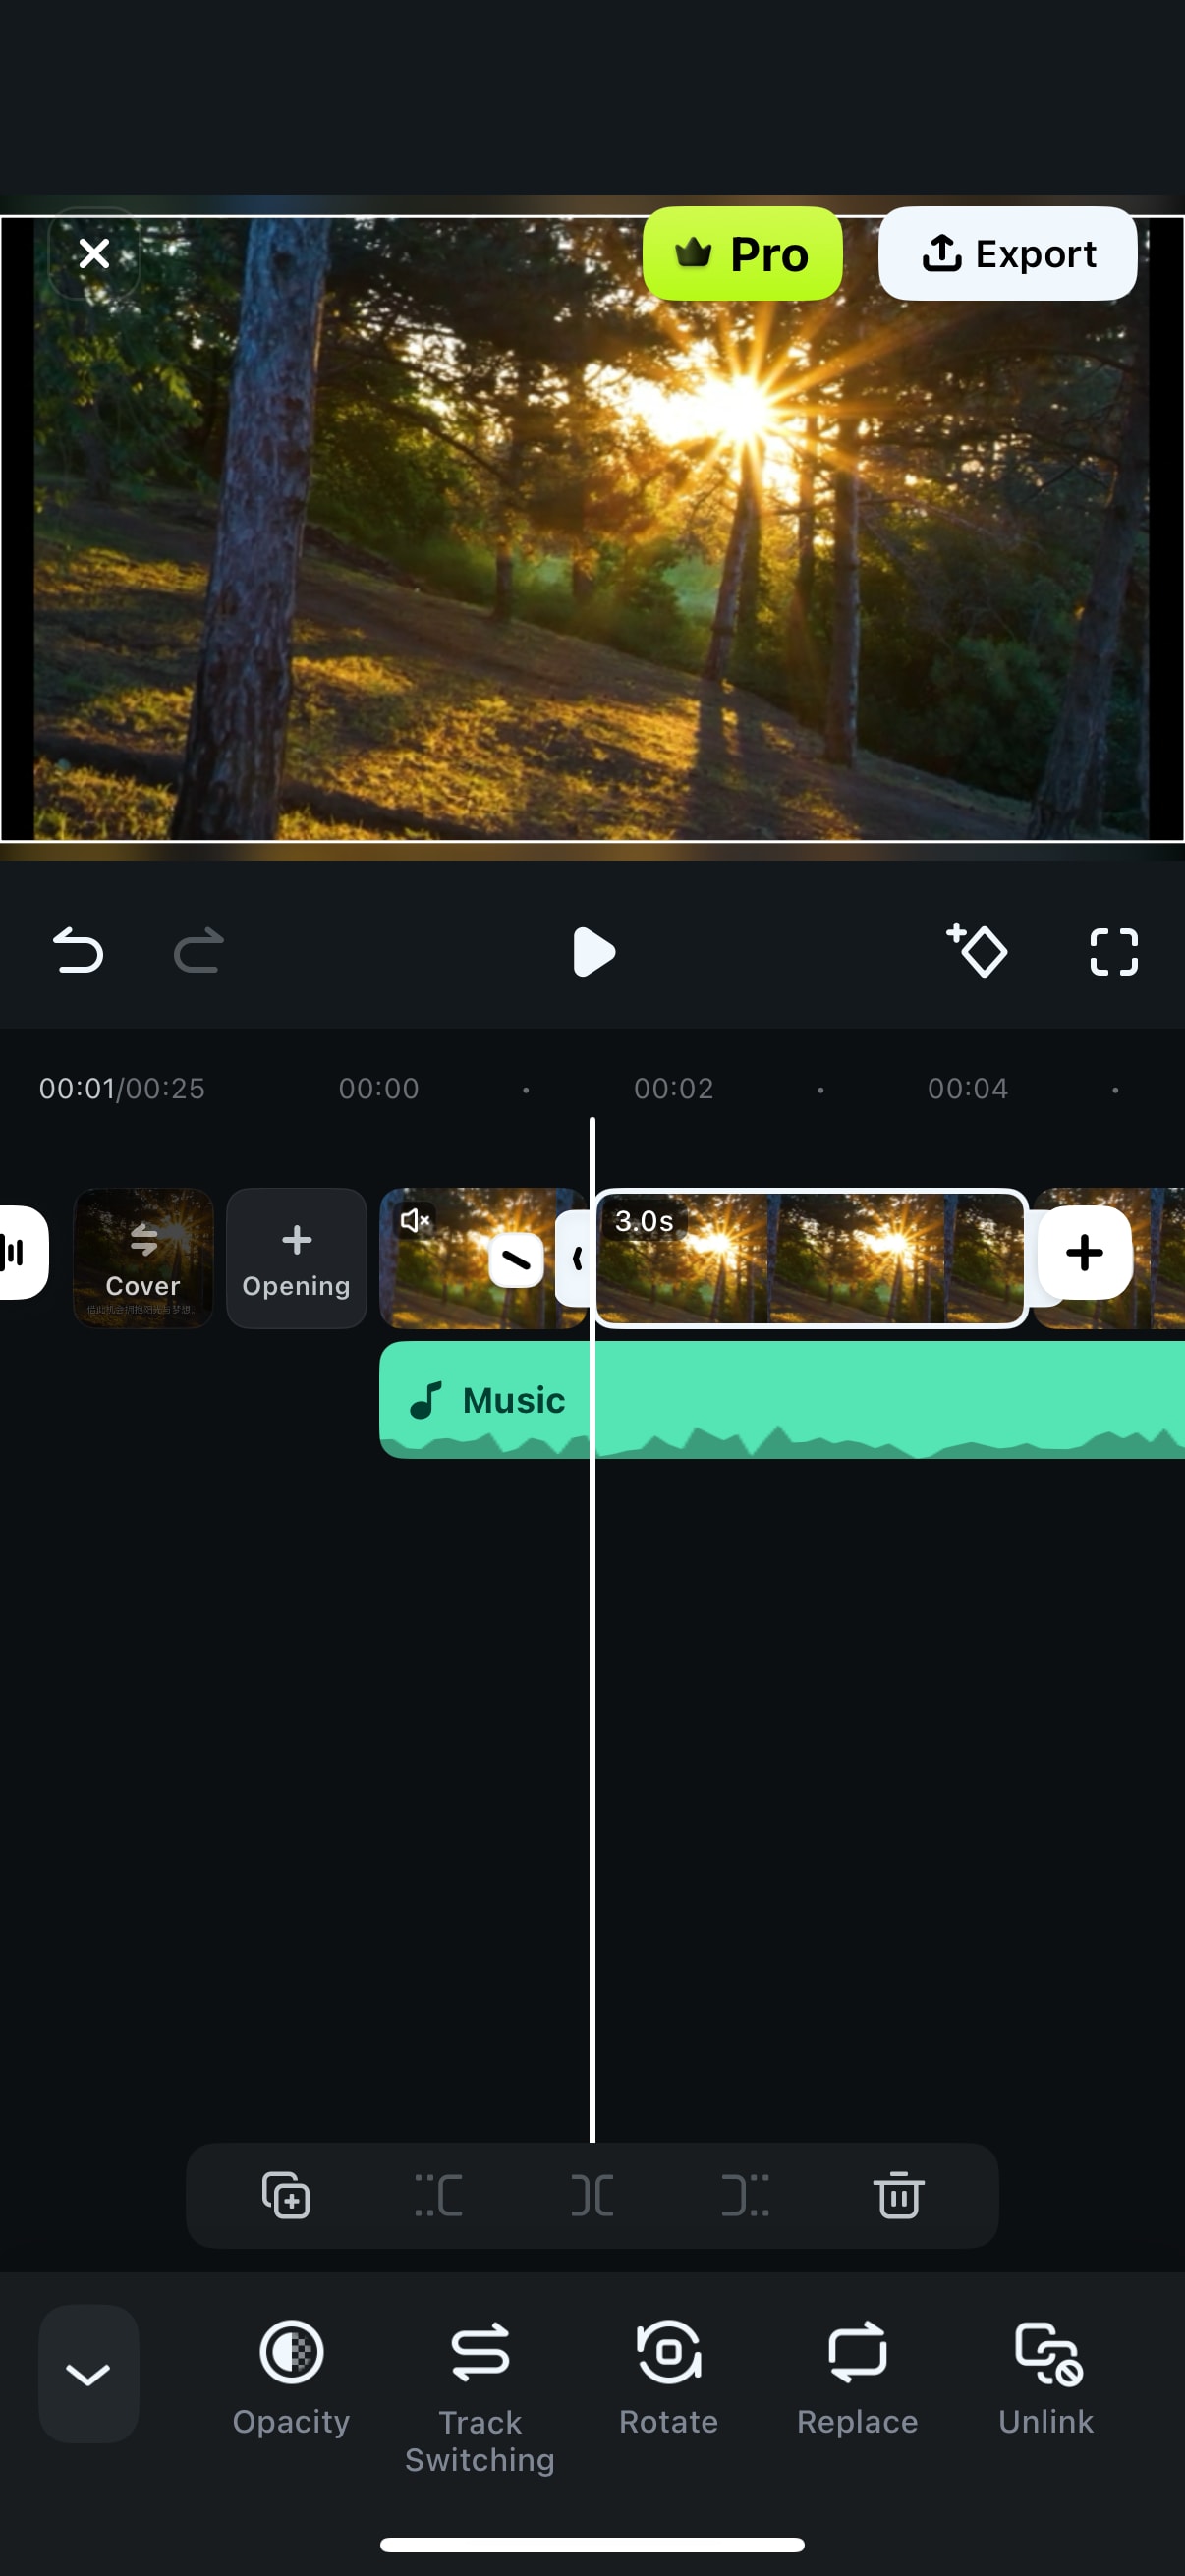
 Step 2: Select the video clip, swipe the feature options to the right until you find the Freeze option, tap it, and then drag the white box edges to adjust the freeze frame duration or use other available controls below.
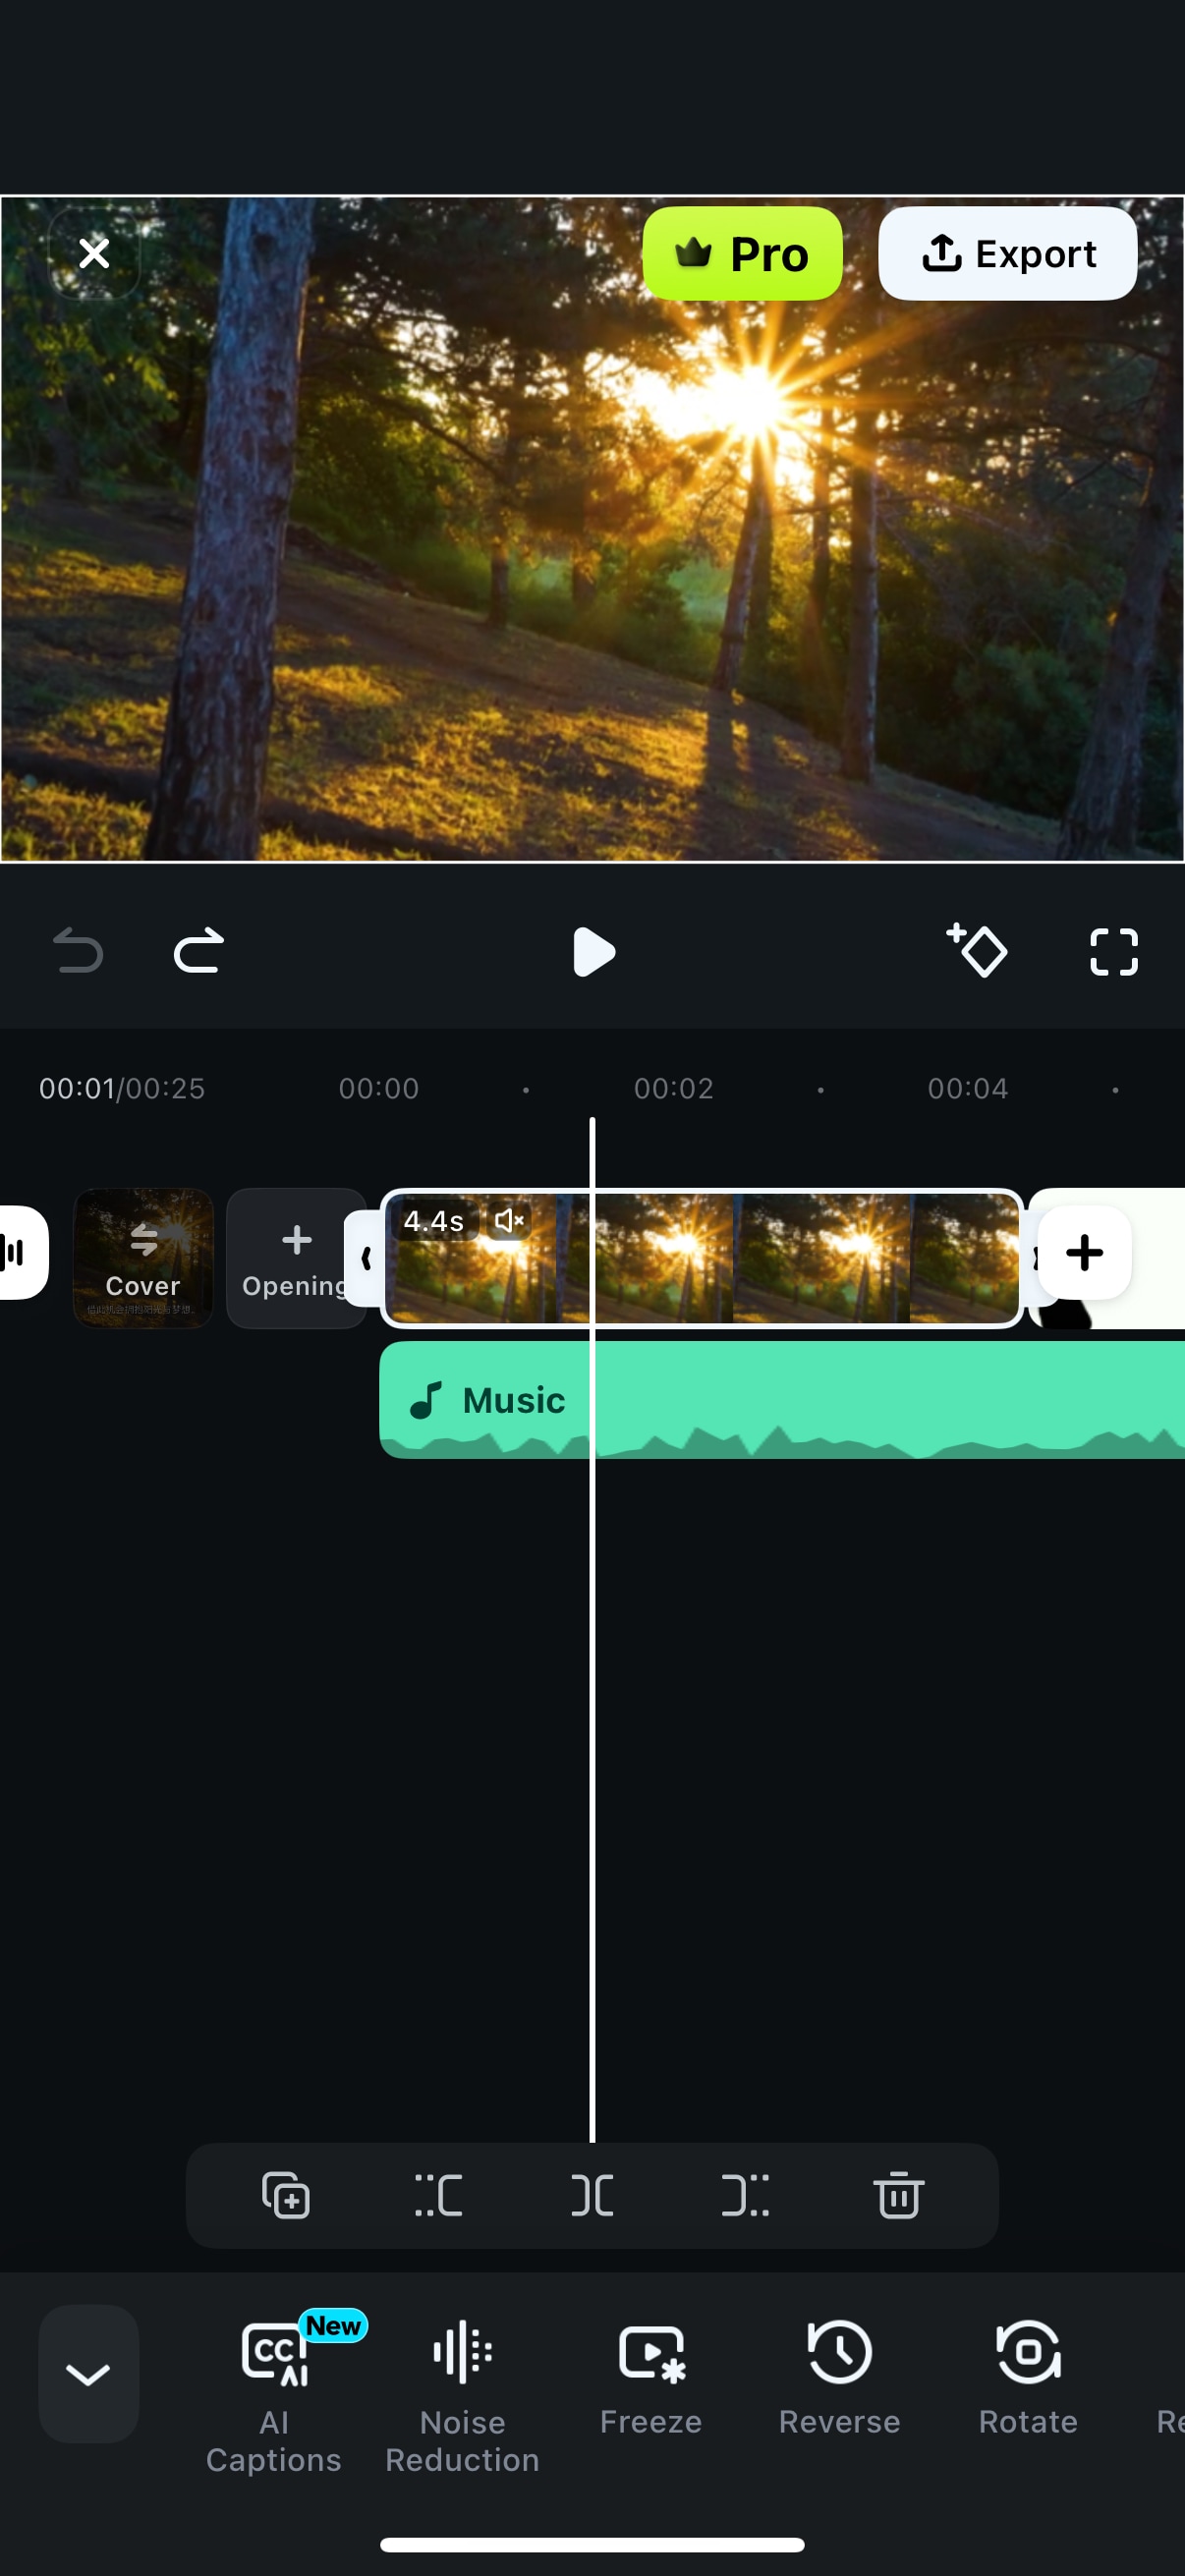
Step 3: Drag the white box edges to adjust the freeze frame duration or use other available controls below.
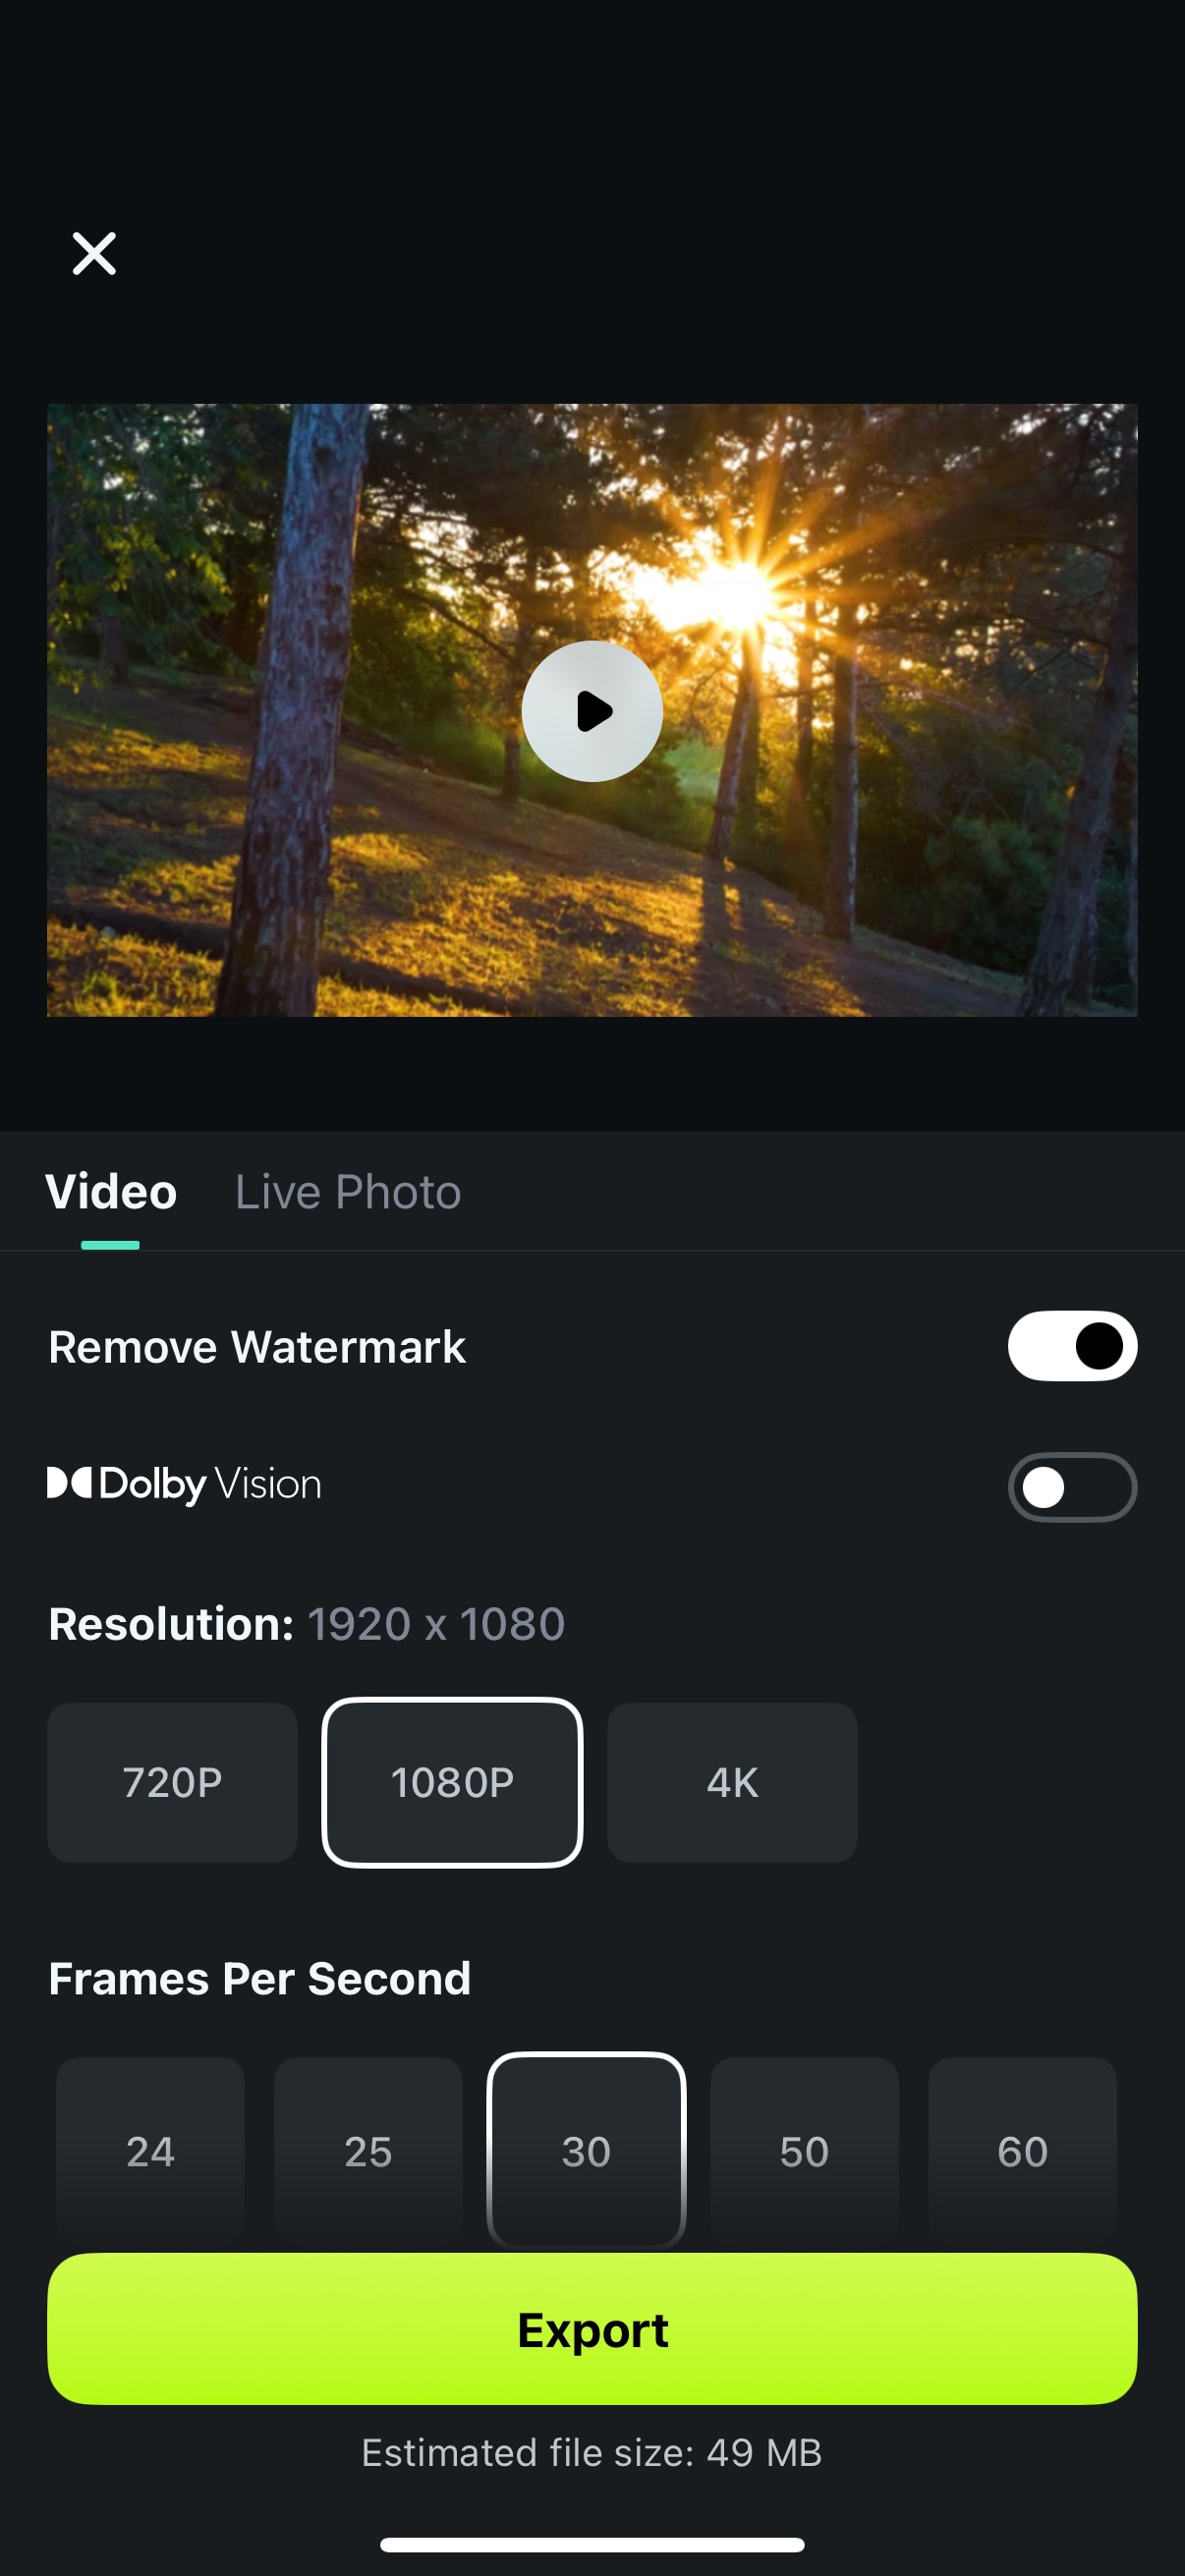
Step 4: When finished, tap the Export button in the top right corner to save your video with the freeze frame; you can adjust quality, resolution, frame rate, and choose the format before exporting.
Conclusion
Camtasia's freeze frames are an excellent video editing technique for adding depth and clarity to your videos, creating a dramatic effect that emphasizes a particular moment, or adding voiceovers even when there's no room for them in the timeline. There are three ways you can add freeze frames in Camtasia, including the Export Frame As option, the Extend Frame tool in the timeline, and the Add Exported Frame feature. Plus, we've provided detailed step-by-step instructions for each of these methods.
For those looking for a more beginner-friendly and feature-packed video editing solution, Filmora offers the perfect alternative to Camtasia. Its streamlined interface, a more exhaustive range of editing tools and creative assets, effortless-to-add freeze frames, and AI-powered features make Filmora the ideal tool for unleashing your true editing creativity.
secure download 