Watching a video in a bustling cafe or at a library, with zero clue of what is being said because there are no captions? Frustrated? Captions are beyond an accessibility feature, increasing user interest and understanding.
Do you think this can happen with your video, too? Fortunately, there is a free and fast way to add captions to a video on Canva. Canva can create captions for your videos and help your content pop without blowing your budget. Hang in there as we walk you through a guide through it.
In this article
How To Add Captions with Canva
Adding captions to images or videos in Canva is straightforward. Here's how you can do it:
Video Guide on Putting Texts or Captions in Canva
Using Canva is incredibly easy. The accessibility to tools and intuitive interface make it equally inclusive for professionals and beginners.
Here is a video guide on how to add captions on Canva:
Next, we will break down the tutorial in detail to show you how to add captions with Canva.
Step-by-step Guide to Add Captions with Canva
Adding captions to your video can improve understanding and engagement. With Canva, you can write perfectly tailored captions for your video for free.
Here is a step-by-step guide on how to add captions with Canva:
1. Open Canva
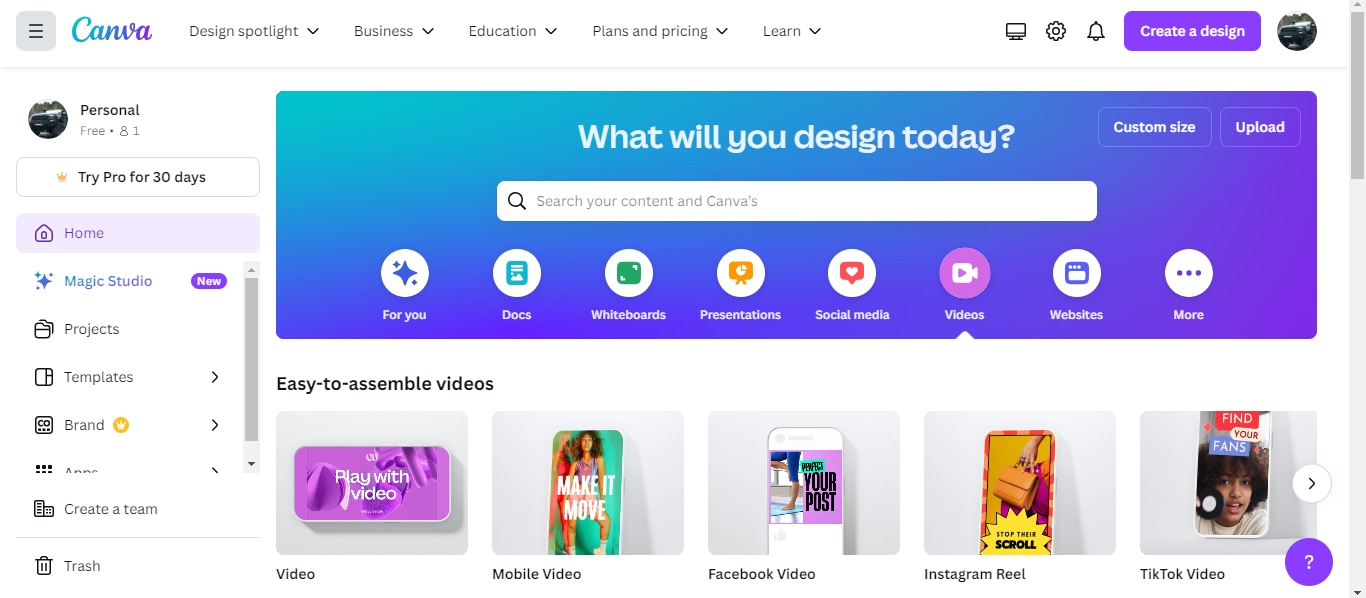
Open the Canva web application on your PC's browser. Sign up or log in to get started. Click on the Video icon to explore different video options. Choose an option based on the type of video you want to create.
2. Upload Your Video
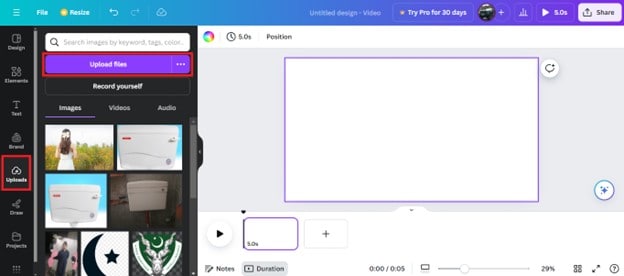
Based on your video dimension selection, Canva workspace will open. Click Uploads and select Upload files to add video from your device. Alternatively, click Record Yourself to live document a video.
3. Add Captions to Video
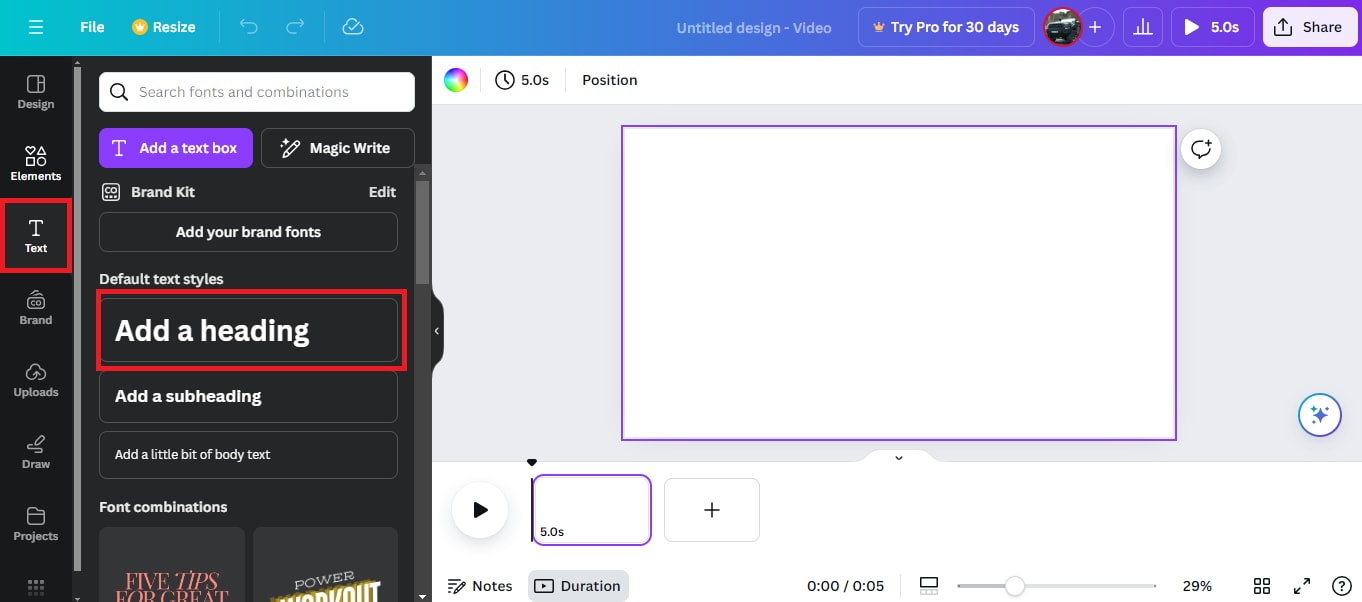
Next, add captions to your video. Move the cursor to the Text icon on the panel on the left. Click Add a Heading and type in text as the caption for the video.
4. Edit the Caption
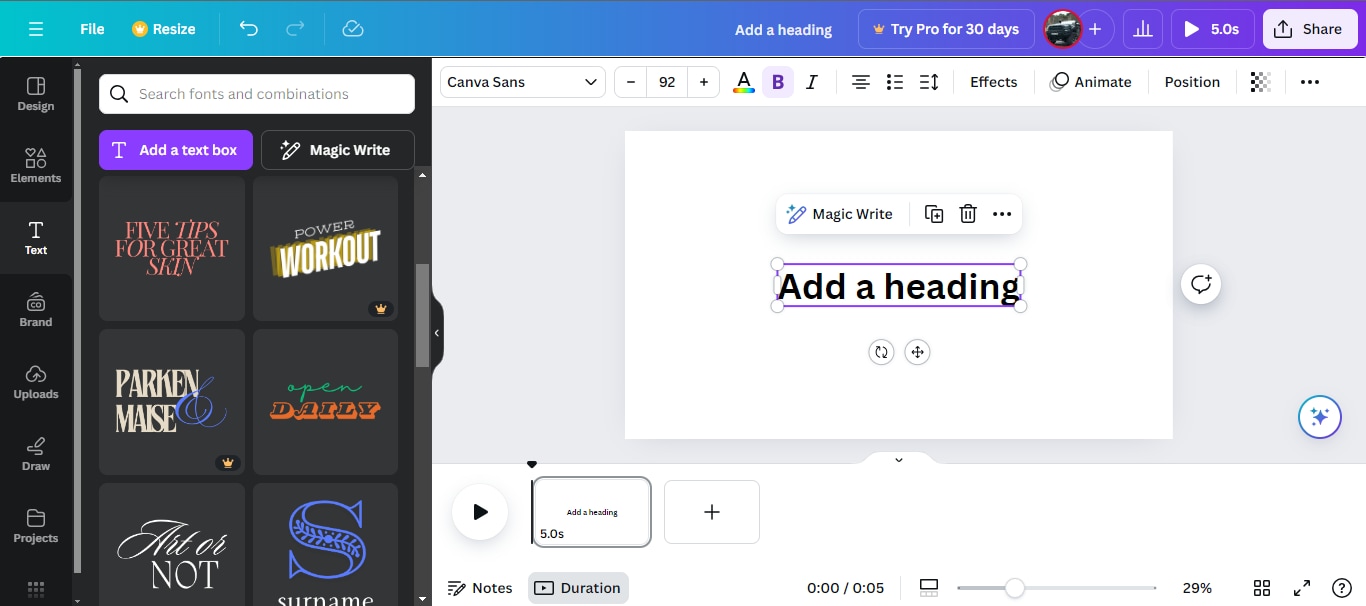
Now, edit the added caption to match the video style. Choose a text style, size, color, bold, and italics. Canva also offers text templates to choose from and apply.
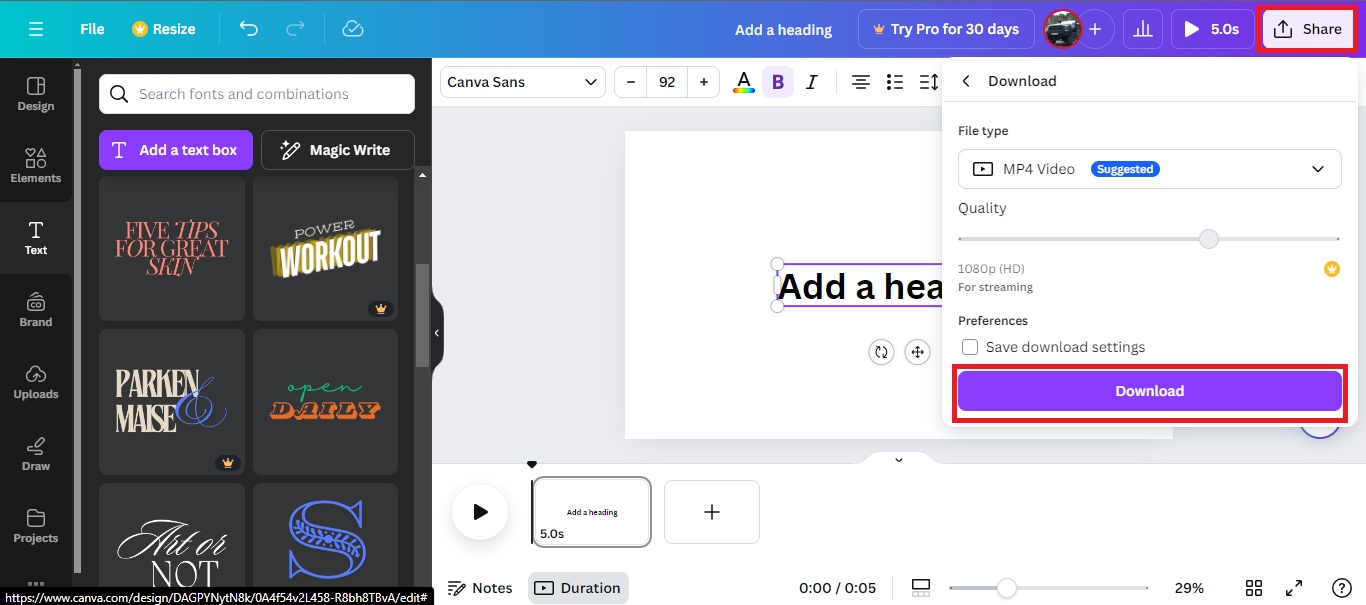
5. Download the Video
Once you've finished, save the video. Click Share > Download. Choose a video resolution and file type, and click Download to save it on your device.
When to Use Canva Caption Tool?
The freedom to add and edit captions makes Canva very easy to use. Here is a list of cases where Canva’s caption feature is supported:
- Videos for Social Platforms: Caption your videos effortlessly for Instagram, Facebook, YouTube, and other social media sites. Design stylish captions that match the vibe of your video.
- YouTube Thumbnail: Generate a catchy thumbnail for your YouTube video in seconds. Attract viewers with pleasing video covers.
- Facebook Videos: Add written content for Facebook videos to enhance engagement even without sound.
- LinkedIn Portfolio: Create captions for LinkedIn videos and improve your professional profile.
Captioning a video on Canva is a child’s play. With an extended collection of text templates, effortlessly add write-ups for your videos.
But how cool would it be if Canva offered automatic subtitles?
Can you Add Automatic Subtitles in Canva?
How easy would it be if Canva could magically generate subtitles for all your videos? Fantasizing to manifest it?
Yes. Canva is a one-stop tool that offers auto-captioning features for all videos. Turn on the feature to automatically add subtitles to your video. Here is a step-by-step guide to adding automatic subtitles in Canva:
- Open the Canva application. Switch to the homepage and click the settings icon at the top right of the screen.

- Under the Your Account settings, drag the scroll to the Captions. Turn on the toggle to auto-generate captions for all your videos.

Now, Canva will automatically generate written text for your project's audio. However, Canva’s AI does not pick up on details very sharply. Expect a lot of errors and mistakes, and get ready to correct them.
Best Video Captions Editing Alternative to Canva: Filmora
Canva is an excellent tool for smoothly captioning your video. However, the automated subtitling can be a little taxing. The AI does not generate captions accurately, so you will likely miss out on content.
An impressive software like Wondershare Filmora is a powerful and robust alternative. Integrated with an intelligent AI, Filmora offers precise auto-captions for video. The professional-grade tools offer seamless video editing.
Filmora is an all-inclusive software that impresses with stellar features and outstanding user-friendliness.
Key Features of Wondershare Filmora
- Highly accurate AI-powered auto-captioning.
- Supports up to 23 languages.
- Upload external SRT caption files.
- Add, remove, or merge subtitles.
- Apply pre-made subtitle presets and templates.
Filmora VS. Canva, Which is the Best Tool for You to Add Captions
| Feature | Filmora | Canva |
| Automatic Captioning | Support 23 languages | Support 18 languages |
| Manual Caption Editing | Allows manual editing of captions | Requires manually typing each caption |
| Caption Customization | Extensive options for font, color, size, animation | Basic text formatting options |
| Caption Timing | Provides tools to precisely time captions | Captions must be manually timed |
| Export Options | Multiple formats including SRT subtitles | Limited export options |
| Platform Availability | Windows, macOS, iOS, Android, and iPadOS | Web-based, works on any platform |
| Cost | Paid with a free trial | Free with paid plans |
How To Automatically Add Captions to Videos with Filmora
Filmora’s workspace accommodates all. Whether professional or amateur, here is a quick step-by-step guide on how to automatically add captions to videos with Filmora:
- Download the Wondershare Filmora
Download and install Filmora software on your computer. Launch the application and set it up to get started.
- Import Your Video
Click New Project to open a new workspace. Click Import and select your video from a local destination on your desktop. Alternatively, you can simply drag and drop your video into the library.

- Speech-to-Text Tool
Next, navigate to the Tool tab on the menu and choose Audio from the drop-down. Select Speech-to-Text for auto-captioning.

- Choose Language
In the caption pop-up, select a preferred language for audio transcribing. Select the clip and click Ok.

- Edit the Captions
Let the AI generate captions for the audio. Find a ‘CC’ file attached to your video. The generated subtitles will play on the screen. Click to edit them or change the style and theme.

- Export the Video
Once you're done, click Export to save the video. In the pop-up, choose name, location, and resolution, then click Export.

Filmora’s powerful AI can convert speech to text almost accurately within minutes. With multiple language options, it is easier to engage a broader audience.
Filmora also supports captioning with external files instead of AI-based captions. Upload an SRT file and see how it cohesively displays subtitles with the respective audio.
How To Custom Captions with Filmora
Filmora is very versatile. In addition to offering two automated captioning modes, users can also manually insert them into the video. Here is a tutorial on manually creating captions in Filmora:
- Import your video to the library and drag it to the timeline. Click on the Tile tab on the top. Choose a subtitle template and drag and drop it anywhere on your video. It will appear as a ‘T’ icon on the text timeline.

- Double-click the ‘T’ icon to add in text. Edit the style, size, animation, and color from the text properties. Click the Advanced button to add text animations, borders, shapes, fill and shadow.

- Add captions manually to your video. Click download to save the video to a local destination on your PC.
Whether manually or bot-generated, captioning in Filmora is easy. The simple interface eases the task of professional editing with easy tool accessibility.
Why Add Captions to a Video
This article discusses various methods of captioning a video. But is captioning really essential? Here is an insight into some of the key benefits of captioning:
-
Engagement: Captions encourage user understanding and engagement. They draw viewers' attention even with muted audio. Written text on the screen attracts viewers and helps them focus.
-
Hear Impaired or Deaf: Create an inclusive environment for people with special needs, such as deaf and hard-of-hearing individuals. Captions help them easily understand the context of a video.
-
Highlight Key Details: By adding subtitles, focus on the essential details of your video. Add stylizing effects in a promotional video to grab the attention of a potential customer.
Adding subtitles or closed captions seems daunting, yet it offers crucial incentives. It ensures content clarity and better user engagement on your videos.
🤩 Post You Might Be Interested In:
Conclusion
Wrap Up! Canva offers a versatile platform for graphic designing and editing. By the end of this article, you know how to add captions on Canva in just five simple steps. With easy captioning effects and simple text styling, it is a convenient way to improve your videos. However, its limited auto-captioning effect restricts users from more complex working modes.
Nevertheless, try Wondershare Filmora. It offers three subtitling modes and supports over 16 languages. Convert speech to text with a single click!


