

 ChatGPT
 Perplexity
 Gemini
 Claude
 Grok
Grok
Captions make your videos more understanding and engaging. What is the best tool for adding captions to videos? How to add captions to videos? Different tools offer varying sets of customization flexibility. We shall discuss two of the best tools for this purpose - iMovie and Filmora. Let's start with iMovie.
In this article
Part 1. How To Add Captions to videos in iMovie?
If you are an iPhone or Mac user, iMovie is the best tool to add captions to videos. The iMovie app is built to suit the Apple users. The interface is basic. It is easy and free to use. It is designed to be accessible to users with no or little experience of video editing.
Step-by-Step Guide To Add Caption in iMovie on Mac
Step 1. Download and Install the iMovie
- Download and install the iMovie from the Mac App Store.
- Launch the software after installing it.
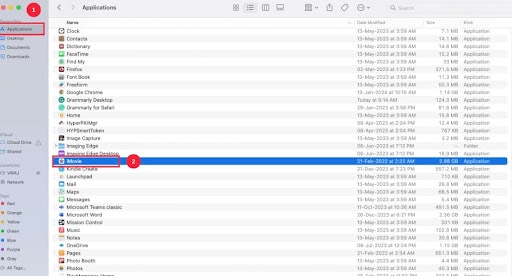
- To find the installed app, go to Finder and then Applications.
Step 2. Create a new project
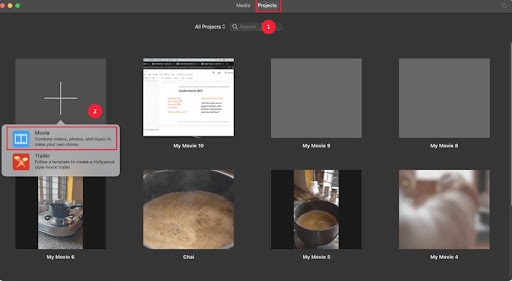
- Find and click on Projects.
- Then, select Create New.
- Click on the Movie option.
- Upload the video you wish to edit.
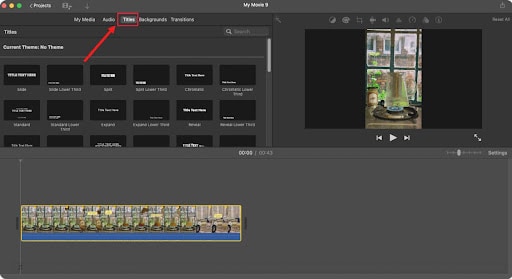
Step 3. Add Titles
- Find and select the Title.
- Choose the Title from the Titles type like Split, Focus, Expand, and Slide.
- Double-click or drag the Title to the point of the timeline you want to add to.
Step 4. Type the text you want to add as caption
- Place the Title on the timeline at the point of time you want it to be visible. .
- Click on it and start typing text into it.
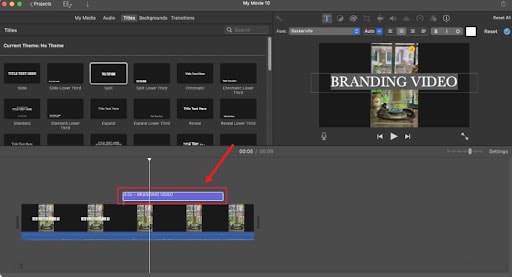
You can customize your captions using the customization bar in the upper right corner.
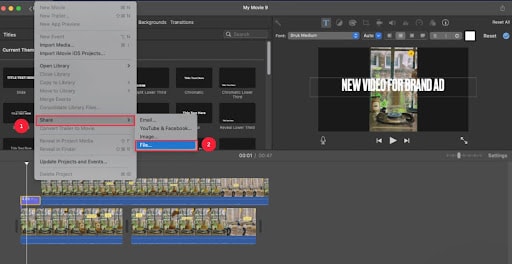
Step 5. Save the video file
- Select Files and then Share.
- In the Share menu, choose the File.
- Name the video and click on Save.
Step-by-Step Guide To Add Caption in iMovie on iPhone/iPad
Step 1. Download and Install the iMovie application
- Download the iMovie app from the App Store.
- Wait for it to download and install.
- Launch the application once it gets downloaded and installed.
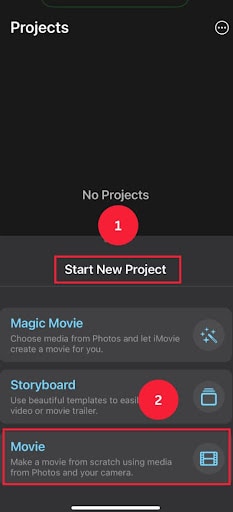
Step 2. Create a new project
- After launching the application, tap on the Start New Project option.
- Tap on the Movie icon.
- Import the video from the Photos.
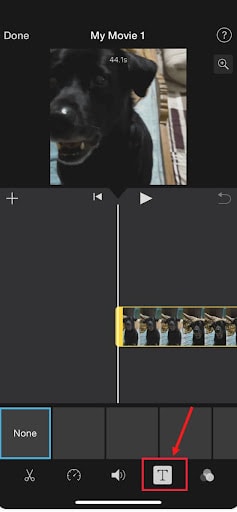
Step 3. Add the Titles
- Select the video.
- Then, find and tap on the T button.
- Select the Title from the Titles library.
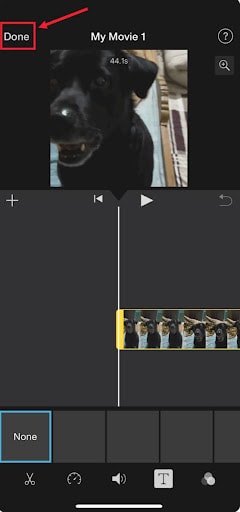
Step 4. Save the video file
- Tap on Done.
- Tap on Share to save.
Part 2. Limitations of Adding Captions to Video in iMovie
iMovie is super easy to use. The interface is user-friendly. However, there are some limitations. Like, You cannot generate auto captions in iMovie.
- The customization tools are limited.
- Animations and effects are simple, with no advanced options.
- No support for third-party plugins.
- You cannot import SRT files in iMovie.
- No auto-caption feature.
- No AI integration
Let's introduce you to software that solves all these problems.
Part 3. Filmora - The Best Alternative to iMovie for Adding Captions
Having been through the caption-adding functionality of iMovie, it’s time to explore a user-friendly alternative that supports Windows devices as well. Wondershare Filmora is a robust video editor that has enhanced its usability with the release of its 15th version. This platform has now added the caption-generating tab on the main interface for enhanced ease. Besides, this feature can be accessed from various other locations as well.
This tool offers a speech-to-text feature that detects the speech in your videos and transforms it into editable captions. These captions can be edited to achieve perfection. Besides changing the textual content, users can enhance the visual appeal by using the built-in presets. These presets can also be customized to deliver a personalized result. Users can also extract an SRT file from their captions to download it for easy integration.
Follow the guide below to learn how you can generate automatic captions for videos using Wondershare Filmora:


Generating Automatic Captions Using Wondershare Filmora
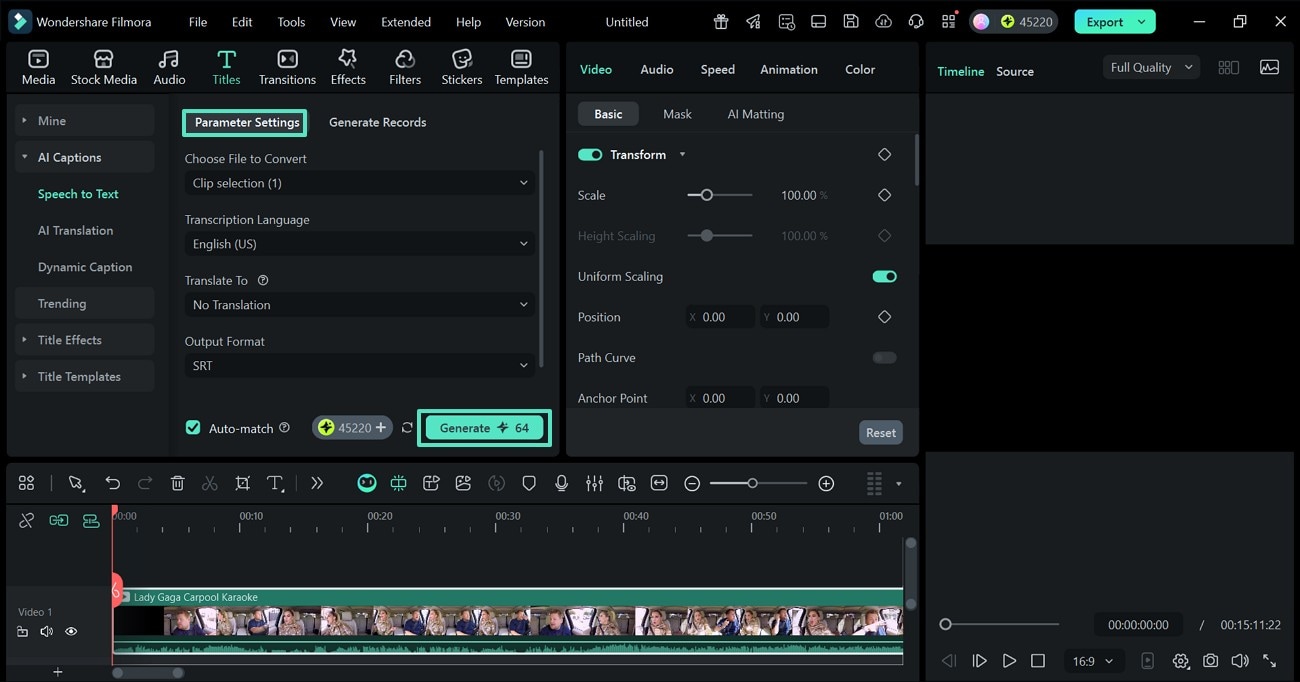
Step 1. Access the AI Captions Feature from the Homepage. To begin with, select the “Add Captions” tab from the homepage of the tool. Now, import a video from your device to continue.

Step 2. Enter Captions Specifications. Once the video is fetched, use the “Preview Settings” window to enter the specifications for captions. When done, press the “Generate” button to start this AI task.
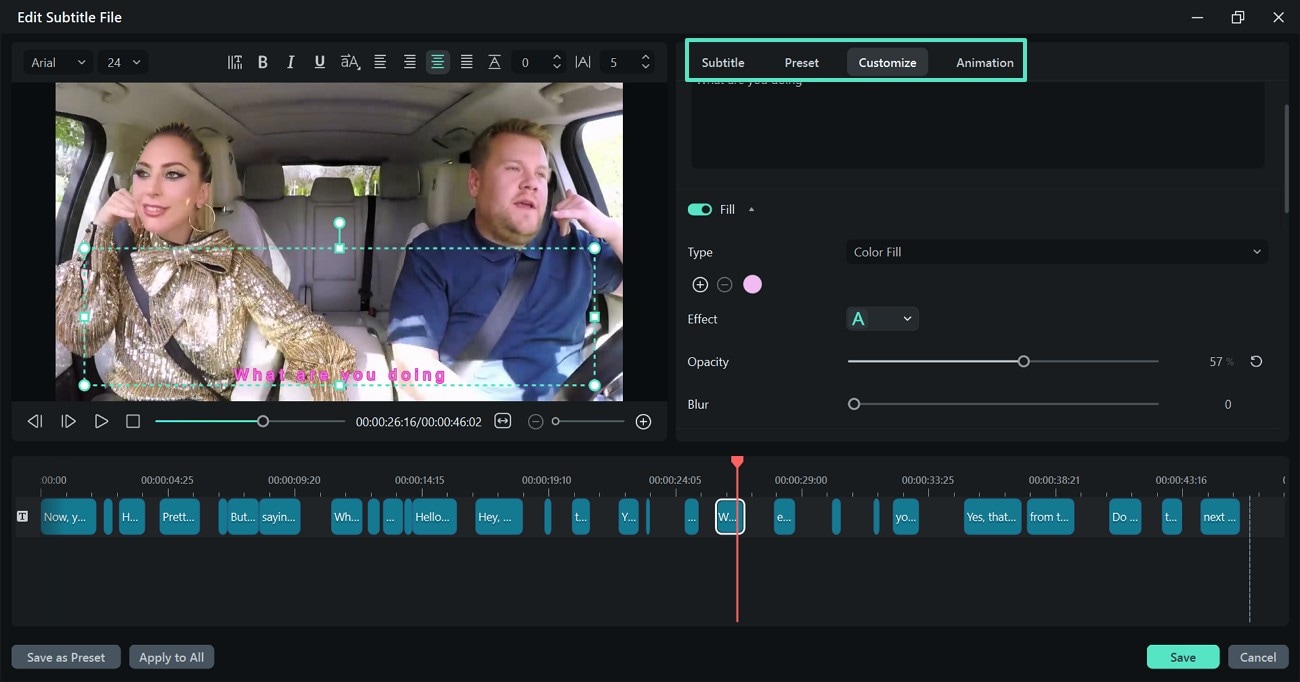
Step 3. Style the Subtitles Manually. As the captions are generated, double-click the text track on the timeline to reveal a customization window. Using this window, you can edit “Subtitle,” add a “Preset,” “Customize” the preset, or add “Animation.”
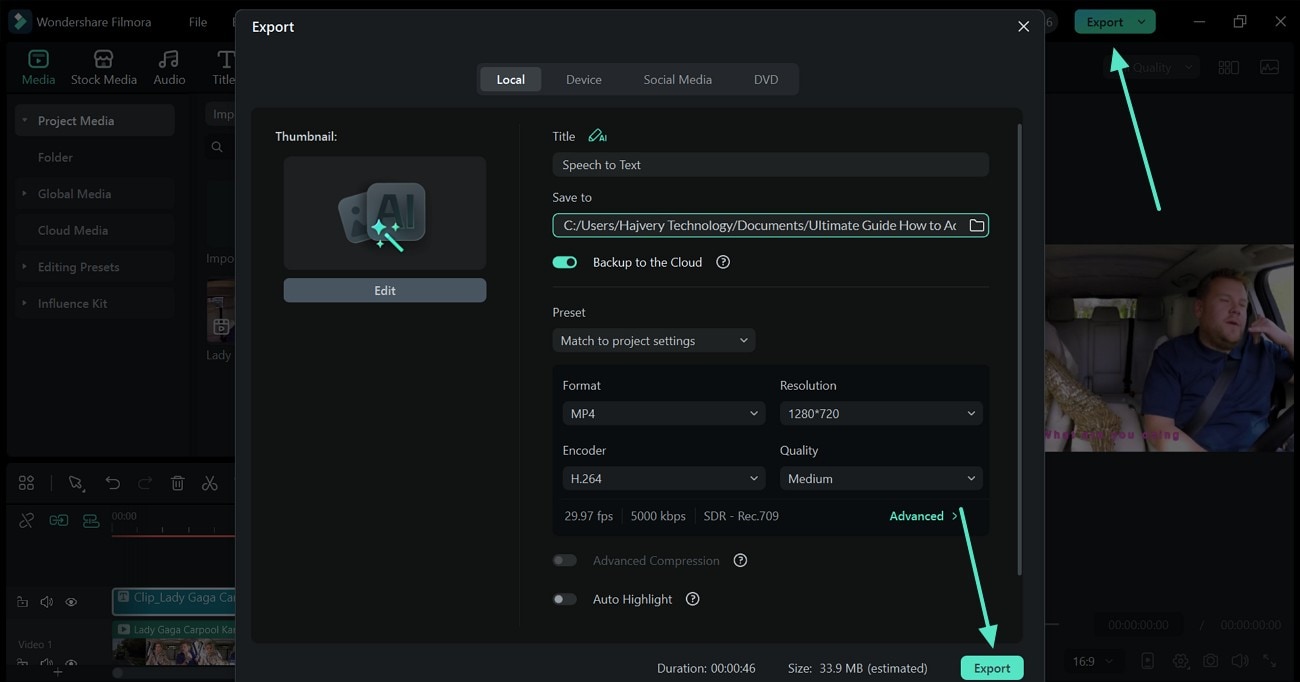
Step 4. Save the Video with Subtitles. Once you are done editing, select the “Export” button at the top right to save the video using the following interface.
Let's see the differences between iMovie and Filmora to help you decide what suits you best.
How To Choose the Best Tool to Add Captions to Video
| iMovie | Filmora | |
| Supported OS | MacOS and iOS | Windows, MacOS, Android, iPadOS and iOS |
| Pricing | Free | Free trial and paid plans |
| Text templates | Basic text templates and styles | Extensive range of templates and style |
| Custom effects and animations | Simple text effects and predefined animations | More text effects and animations like motion graphics and dynamic transitions. |
| Text positioning | Basic positioning | Flexible positioning |
| Auto Captions | ||
| Target audience | Apple device users | Complex editing options for developers across all platforms. |
Conclusion
Adding captions helps engage your audience. Captions enhance the interest of viewers in your content. iMovie is ideal for Apple users. It is very simple to use. Perfect for basic editing.
Wondershare Filmora is the go-to tool for all kinds of users from beginners to developers. Add auto-captions to your video within seconds. This is all about how to add captions to videos. We hope you find the given information complete and helpful.
