
 100% Security Verified | No Subscription Required | No Malware


 ChatGPT
 Perplexity
 Gemini
 Claude
 Grok
Grok
A camera may record a moment, but the postproduction process is what makes that moment extraordinary.
Many creators use Canva as a straightforward solution to improve their clips, which is why they start learning how to edit videos in Canva to cut the extra footage, add music, or change out the background to fit the story. These minor differences affect the way viewers experience your work.
A step-by-step guide to the editing process is laid out clearly and simply in this article. From fundamentals to full projects, you’ll learn how to give your videos a polished finish.
Part 1: Getting Started with Canva Video Editing
Canva accepts the most popular file types for smooth editing:
- Videos: MP4, MOV, GIF, MPEG, MKV, WEBM (under 250MB)
- Audio: MP3, M4A, OGG, WAV, WEBM (under 250MB)
- Images: JPEG, PNG, HEIC/HEIF, static WebP, and SVG
- Fonts (Pro, Teams, Education, Nonprofits): OTF, TTF, WOFF
1.1 Resolution and Size Limits
- Images (JPEG, PNG, etc.): Max 50MB, with total pixels capped at 250 million
- SVG Files: Must be under 3MB, saved with SVG 1.1 profile, and sized between 150–200 pixels wide
- Audio/Video: Must not exceed 250MB per file
- Design Canvas: Minimum of 40 × 40 pixels, maximum of 8000 × 3125 pixels
1.2 Storage Basics
- Free Accounts: 5GB
- Education & Nonprofits: 100GB
- Pro/Teams: 1TB
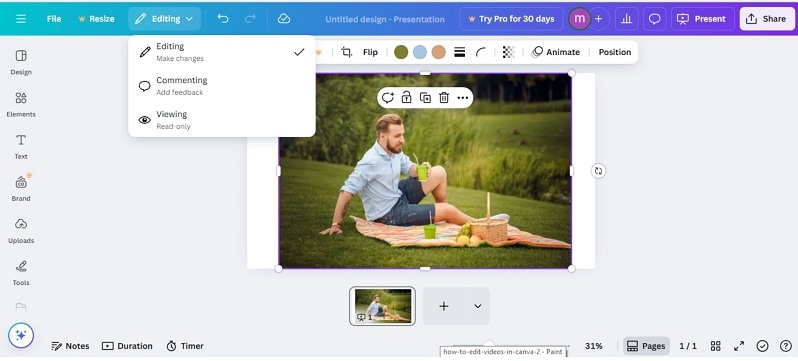
1.3 How to use Canva video editor
Before you dive into trimming or adding effects, it helps to know the basics of Canva’s editing space. This section covers the setup so you’re ready to create.

- Create an account: Sign up for a free Canva account or log in. Once inside, choose “Video” from the design options to open the editor.
- Start a new project: Pick a layout that fits your goal. Canva offers presets for platforms like YouTube or Instagram, along with standard 1080p designs. Free templates are available, but those marked with a crown need a Pro subscription.
- Explore the interface: The editor has three key areas:
- - The top bar manages project-wide settings.
- - The left sidebar gives access to uploads, templates, and design elements.
- - The timeline at the bottom is where clips, images, and audio are arranged.
- Import your media: Upload video, images, or sound files from your computer. You can upload more than one file at a time to save time. Now you have everything set up.
The following part will detail how to actually edit - how to cut a video in Canva, how to add an overlay, text, music, and much more.
Part 2: Essential Editing Functions in Canva
Once you're project is a go, you can start composing your clips. Canva allows you to quickly cut, trim, and add other wacky creative elements that will bring your video to life.
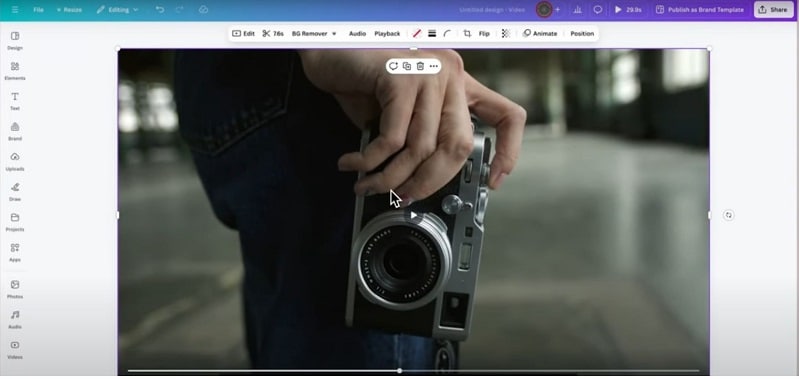
2.1 How to Cut/Trim Videos in Canva
- Choose the clip you want from the timeline.
- To cut it, move the playhead to the right spot and select Split.
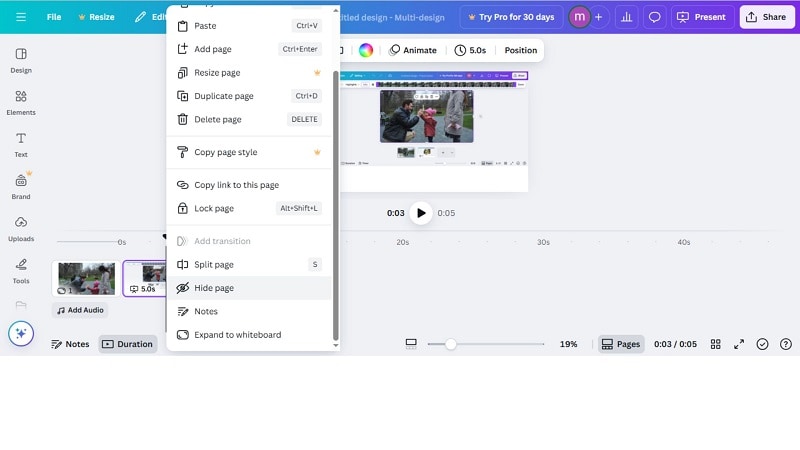
- To trim, drag the start or end handles of a clip so that only the segment you want remains.
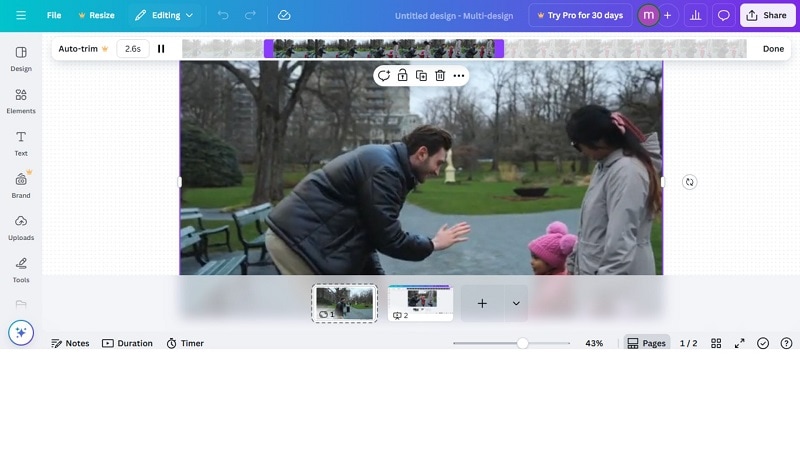
- Depop unwanted parts by clicking and pressing Delete.
2.2 How to use B-roll or overlay footage
- Drag additional clips or images to the timeline.
- Drag them onto your primary track for a setup overlay.
- Change the size and location for full-screen or picture-in-picture effects.
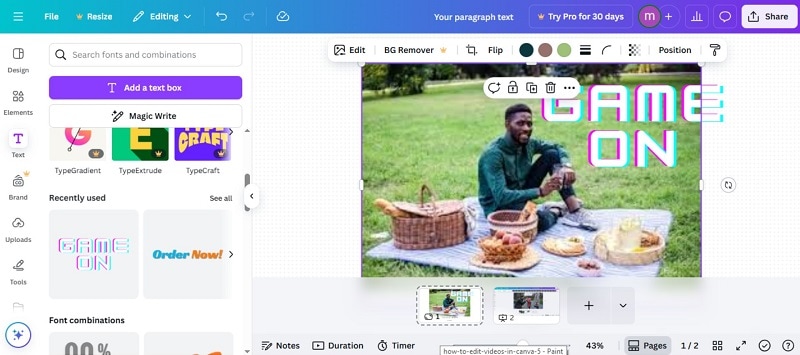
2.3 How to add text and images to video
- Click Text, choose a Style (heading, subheading, or one of your own presets).
- Type your message in the box.
- Personalize with the toolbar, adjust the font, size of font, font color, distance between letters, and text positioning.
- Click on the Elements tab in the left panel.
- Browse Canva’s stickers, icons, and other graphics. Click to add it, then drag and drop, resize, crop or animate the image.
- To delete, click the element and press Delete.
2.4 How to incorporate effects and transitions
Adding motion and smooth scene changes makes your video feel polished. Canva gives you both options with a few clicks.
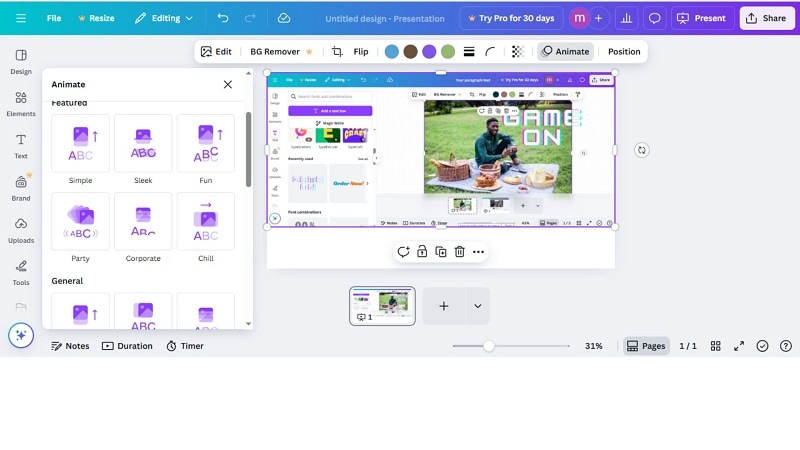
To Apply effects:
- Select a clip on the timeline.
- Click Animate from the top toolbar.
- Preview the available animations and pick one you like.
- You can also animate text or elements by selecting them and choosing Animate.
- Adjust style and duration for a more dynamic look.
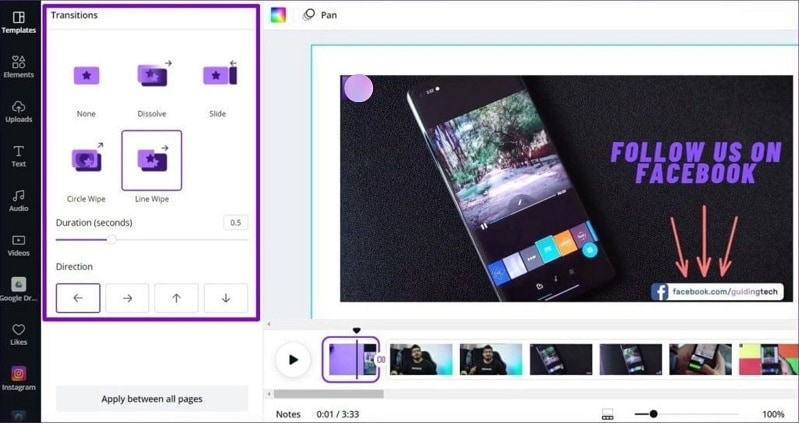
To add transitions:
- In the timeline, click the + icon between two clips.
- Choose Add transition.
- Pick a style such as fade, slide, or wipe.
- Set direction and duration.
- Use Apply between all pages if you want the same transition across the whole video.
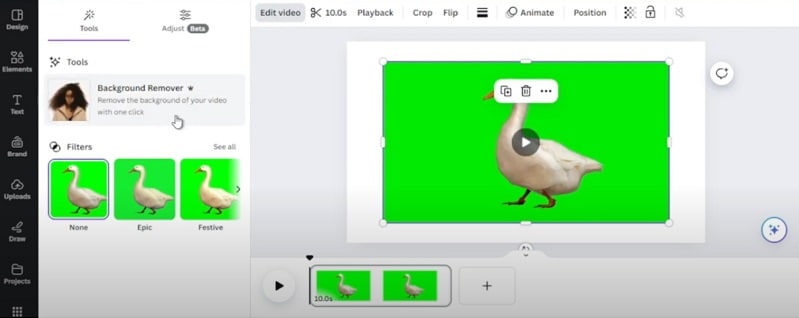
2.5 How to edit green screen in Canva
- Open Canva, and a blank page will open where you can start editing.
- Add your green screen video by uploading your own file through the Uploads tab
- Drag the chosen video onto your page. Select the video and click Edit video from the top menu.
- Choose Background Remover. Canva will erase the green area, leaving your subject clean and ready for a new backdrop.
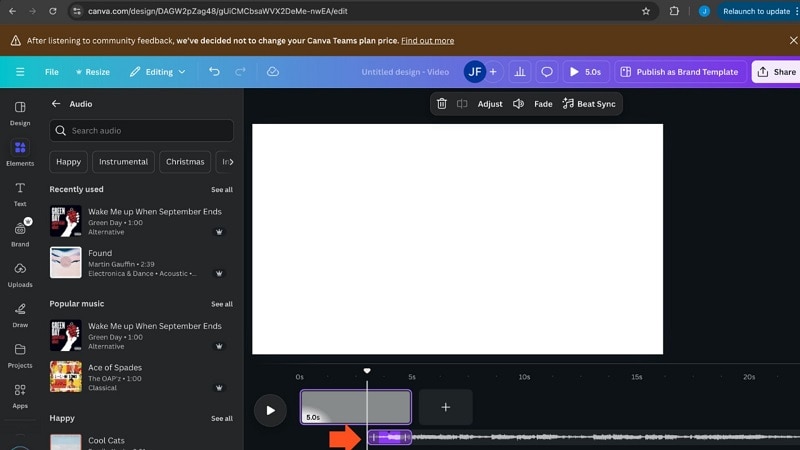
2.6 How to Add Background Music to a Video
Music can shape the feeling of a video and resonate with viewers. With Canva, adding the perfect song is easy:
- Click the Elements tab on the left and choose See all under audio.
- Search the library, then tap a track to add it to your timeline.
- All you have to do is drag it in, cut if necessary, and turn up the volume for a seamless fit.
Now, you know how to use Canva to edit videos at a beginner’s level. But what if you need a more cinematic effect, better audio tools, or full creative control? That’s when many creators turn to more powerful options.
Part 3: The Limitations of Canva Video Tools
Canva makes editing simple, but its video tools have strict limits. These can slow you down when working on longer projects or more complex edits.
- Audio beat detection only works between 5 seconds and 10 minutes.
- Enhance audio, Smart trim, and Highlights are capped at 10 minutes each.
- Background removal also cannot go beyond 10 minutes of footage.
- Video auto-adjust requires a poster frame, since the tool calculates corrections based on that single point.
These make Canva ideal for simple clips but not for creators needing precision. That leads us to a stronger solution.
Part 4: A Complete Video Editing Alternative for More Control
Canva’s limits make it best for short and simple clips. Longer projects or polished edits can feel restricted. Wondershare Filmora is the natural next step. It goes beyond the basics of how to edit videos in Canva. You get more precision, better audio and video tools, and freedom to create professional results while keeping the workflow easy.


4.1 Canva vs Filmora - Feature Comparison
| Feature | Canva | Filmora |
| Interface | Drag-and-drop, simple timeline | Intuitive timeline with multi-track editing |
| Cutting & Trimming | Basic trim and split | Instant Cutter, Smart Scene Cut for precision |
| Audio Editing | Add/trim music only | AI Vocal Remover, Noise Reduction, Audio Ducking, Mixer |
| Green Screen / Background | Background remover (10-min limit) | Full Chroma Key, AI Portrait, Smart Cutout |
| Effects & Transitions | Basic fades and slides | 500+ transitions, Motion Tracking, Keyframing, FX packs |
| AI Tools | Limited (basic background removal, resize) | AI Copilot, AI Music Generator, Text-to-Video, Auto Captions |
| Export Options | Limited to standard formats | 4/8K export, Advanced Compression, Cloud sync |
| Use Case | Social media posts, quick marketing clips | Professional video editing, vlogs, tutorials, business content |
4.2 Canva - Pros and Cons
4.3 Filmora - Pros and Cons
Part 5: Step-by-Step Guide to Editing with Filmora
Filmora's editing capabilities are straightforward but effective. Here is a step-by-step workflow to get polished videos.
Step1Launch Filmora
Open Filmora from your desktop. On the welcome screen, choose to start a new project. Here, you can also pick an aspect ratio before editing begins.
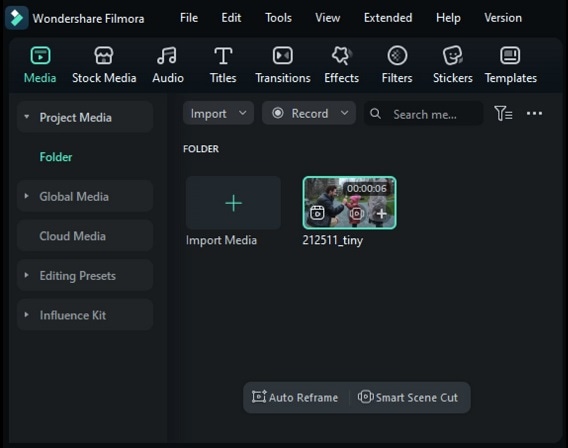
Step2Create a project and import files
Choose New Project and select an aspect ratio to open the editor. Then tap Import and select your video, audio, or image files.

Step3Organize your media
Imported files appear in the Media tab. For large projects, create folders using My Album. This keeps clips sorted and saves time when searching for the right file.
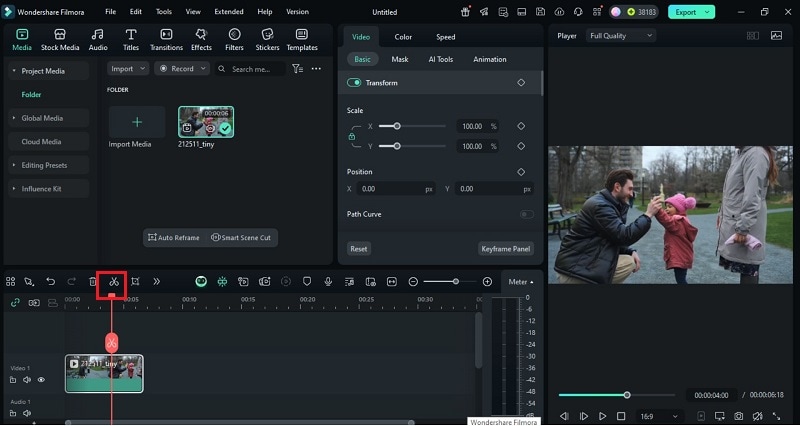
Step4Place and trim clips on the timeline
Drag files from the Media tab to the timeline. Trim by pulling the edges of a clip. Place the playhead to set in and out points, and then cut to delete unwanted sections. You can also re-order clips by performing a drag-into-place.
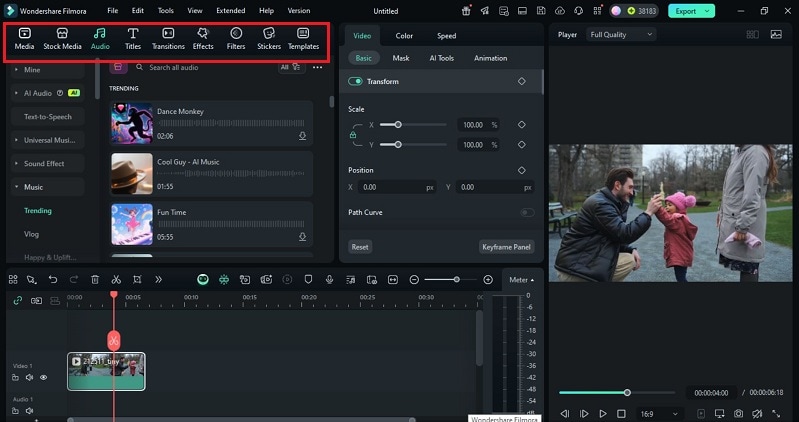
Step5Add effects, titles, and transitions
Filmora offers a wide library of creative assets.
- For text: Click the Text/Credit icon and drag a template to the timeline. Insert titles, captions, or credits, and change fonts and styles.
- For transitions: Select the Transitions icon. Browse hundreds of options and drag your choice between clips.
- For effects: Open the Effects panel to add filters, overlays, or animated elements that enhance your story.
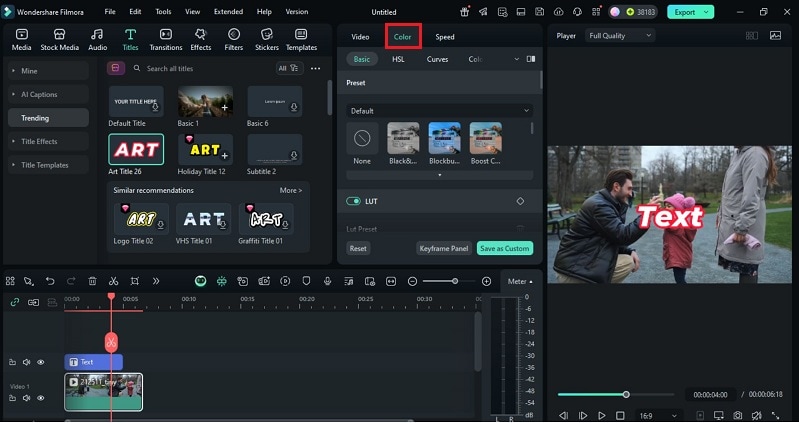
Step6Adjust colors
Fine-tune your content with Filmora’s high-end color controls. Filters and overlays add vibrancy; more advanced options like color tuning or 3D LUTs balance tones between clips. This guarantee uniform colour throughout your project.
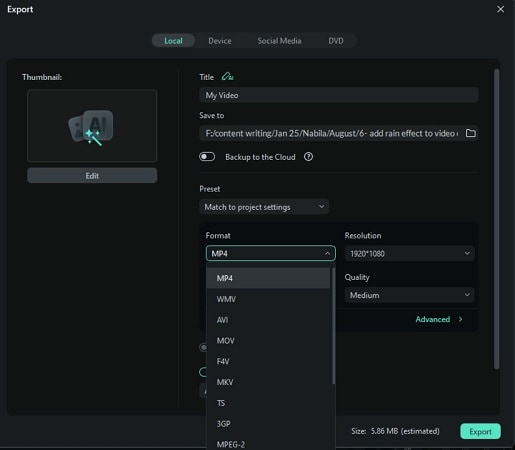
Step7Export and share
When you’re done, click Export. Select a format and adapt the output to your device through its native settings, i.e., phones, tablets, consoles. You can save locally or share to YouTube, Vimeo, or Facebook.
With features such as Smart Short Clips, Filmora can also help you easily create content for platforms and plan posts.
Conclusion
Editing is not just cutting; it’s the art form that guides how people feel your story. This guide showed you the four foundations of how to edit videos in Canva: cutting, adding music, transitions, and effects. Canva’s tools are quick and simple, but for more complex projects, you might want more options.
Filmora caters to that desire, with high precision editing, AI-powered tool,s and an intuitive workflow that’s optimized for both speed and creativity. For creators who first learn to edit videos on Canva, Filmora makes the jump into professional storytelling without making it too hard.
