


 100% Secure | No Subscription Required | AI-Powered Photo Fix

Do you ever take a photo, then realize it looks way too bright or washed out? That’s an overexposed photo.
It can ruin a great shot by wiping out important details in the highlights. This issue is more common than you might think. Even with advanced phones, cameras, and automatic settings, tricky lighting often leads to overexposed photos.
The good news is you can still save those overexposed pictures. This blog will show you three simple methods on how to fix overexposed photos. You’ll also learn tips to avoid overexposure in future shots. Let’s get started!
Part 1. Understanding Overexposure
An overexposed photo happens when too much light hits the camera sensor. As a result, bright areas lose detail, colors fade, and highlights appear blown out. Instead of seeing texture or depth, you get flat white patches that look unnatural.

These problems often show up in outdoor shots or scenes with strong light sources. Here’s how you can tell your photo is overexposed:
- Washed-out skies that lose their blue tones.
- Faces that look too pale or lack definition.
- White clothes that show no folds, shadows, or texture.
So, what causes overexposed photos?
- Bright sunlight: Direct light can overpower your camera’s exposure settings
- Backlighting: Shooting toward a light source can make your subject look faded
- Reflective surfaces: Bright surfaces like water, snow, or glass bounce light back into the lens.
- High ISO settings: Raising ISO boosts brightness but also risks blowing out highlights.
- Slow shutter speed: The camera stays open too long, letting in too much light.
Part 2. How to Fix Overexposed Photos: 3 Methods for Any Skill Level
Got an overexposed photo you want to fix? This section covers three methods on how to fix overexposed photos. You’ll learn how to do it using your phone’s built-in editor and also with professional software.
Method 1: Using Your Phone’s Built-in Photo Editor
Most smartphones nowadays come with a built-in photo editor that can handle basic exposure fixes. While it might not recover every detail, it can help tone down the brightness.

Follow these steps to learn how to fix overexposed pictures using your phone:
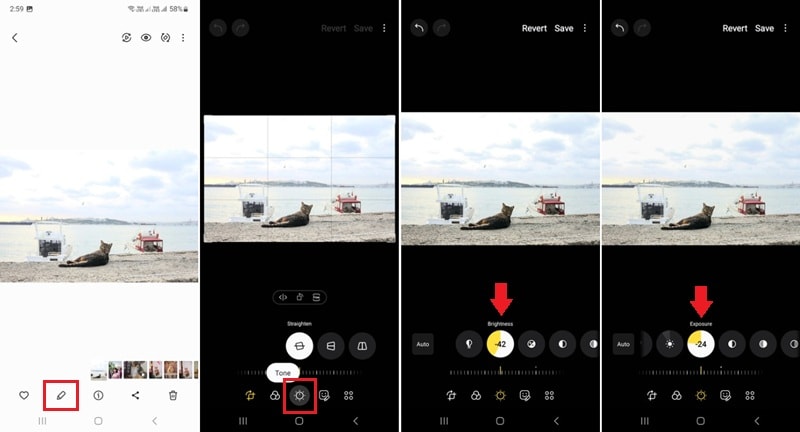
Step1Open your photo gallery and select the overexposed photo you want to fix.
Step2Tap Edit or the Pencil icon to access the photo editing tools.
Step3Head to Tone settings and adjust the Brightness and Exposure sliders to reduce the overall light. Lower the value until the bright areas look more natural.
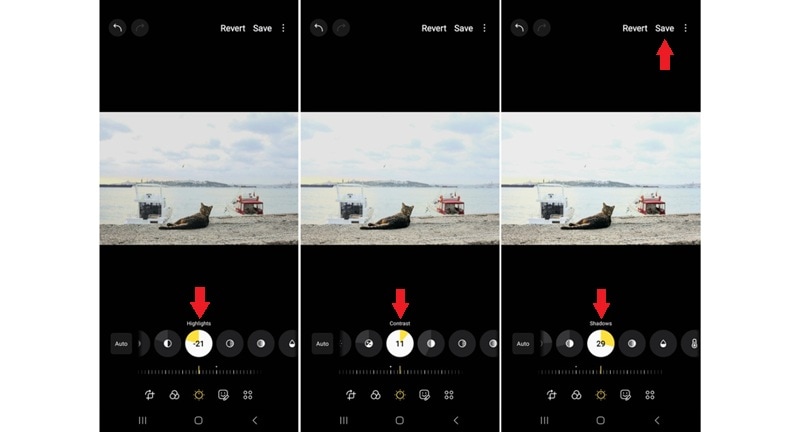
Step4If available, adjust the Highlights to recover texture in the bright areas.
Step5Increase the Contrast and Shadows to bring back some depth.
Step6Save your edited photo by clicking the Save button at the top of your screen.
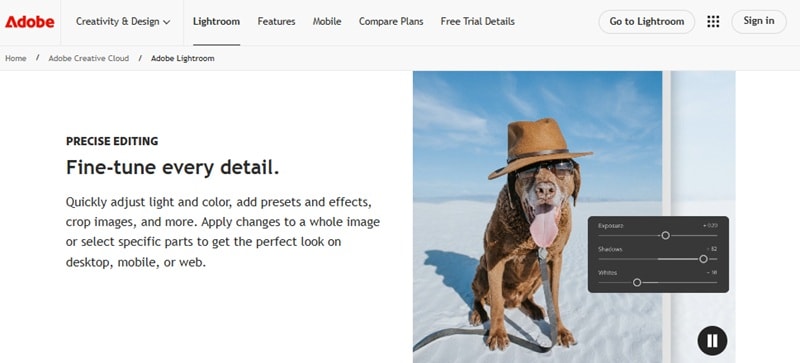
Method 2: Using Adobe Lightroom
Adobe offers two versions of Lightroom: Lightroom Classic and Lightroom (formerly known as Lightroom CC). Lightroom Classic runs on desktops and works with local files, while Lightroom syncs across devices through the cloud.
Both versions work well for fixing exposure and give you more control, especially with RAW images. They can recover detail in highlights and help keep the photo balanced.
Here’s how to edit overexposed photos with either version:
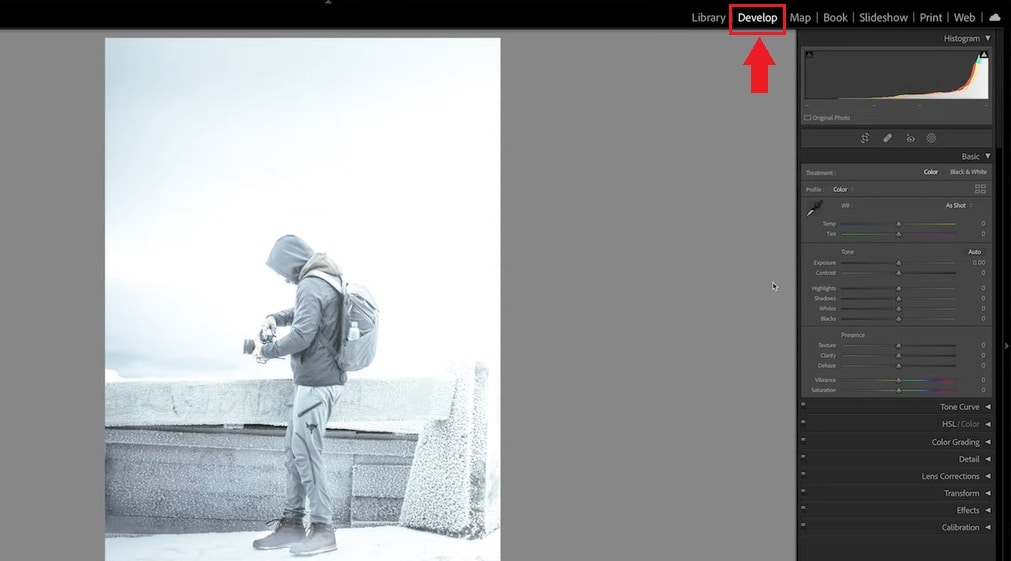
Step1Import your photo and head to the Develop tab (Lightroom Classic) or Edit panel (Lightroom).
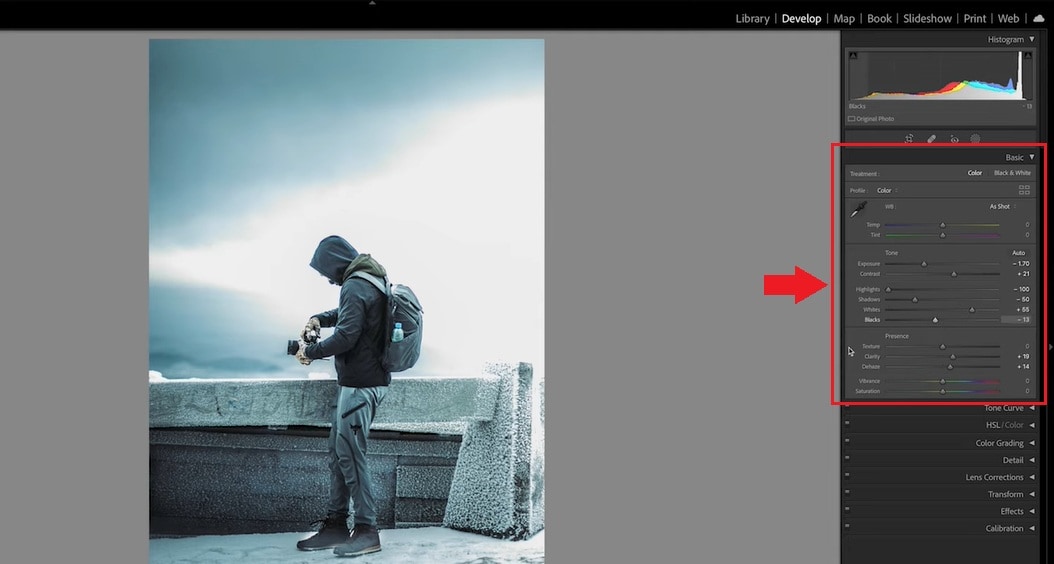
Step2Lower the Exposure and Highlights sliders to bring back lost details.
Step3Adjust Shadows, Blacks, Whites, and Contrast to improve overall balance.
Step4Use the Tone Curve for extra fine-tuning if needed.
Step5Export your photo when you’re done.
Method 3: Using Photoshop
Photoshop is another Adobe tool, but it offers more advanced and layer-based editing compared to Lightroom. While Lightroom focuses on photo adjustments, Photoshop gives you full control to fix specific areas of an overexposed photo with the Generative Fill tool.

Follow the steps below to fix an overexposed photo in Photoshop:
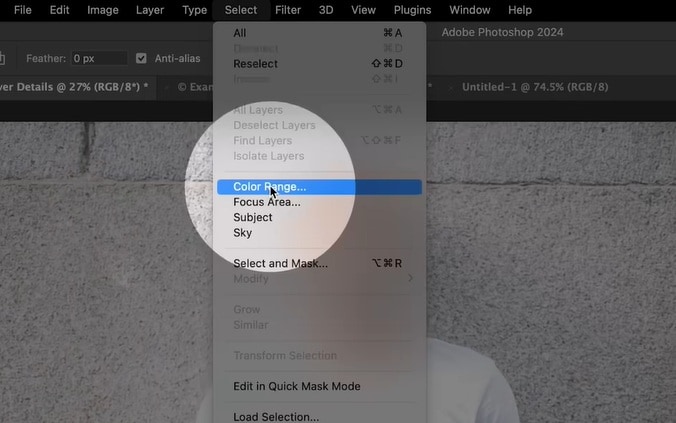
Step1Open your image in Photoshop and duplicate the layer by pressing Ctrl/Cmd + J. Then, go to the Select > Color Range panel.
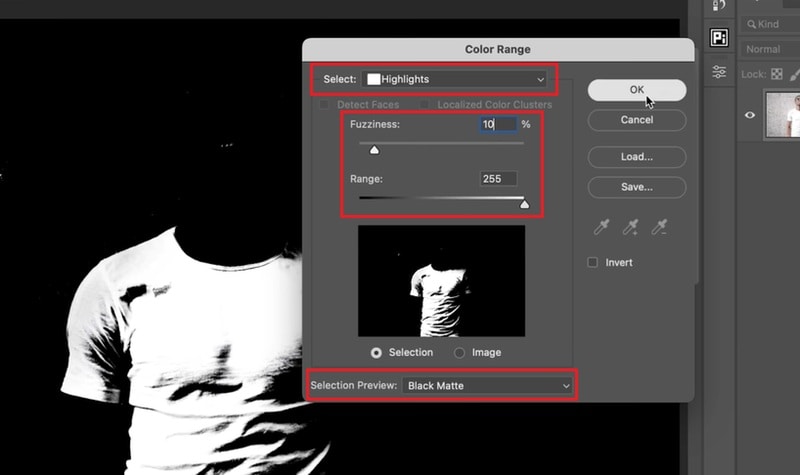
Step2On the Select drop-down menu, choose Highlights to target the areas.
Step3Set Selection Preview to Black Matte; adjust the Fuzziness and Range until only the overexposed area stays white. Click OK to save the selection.
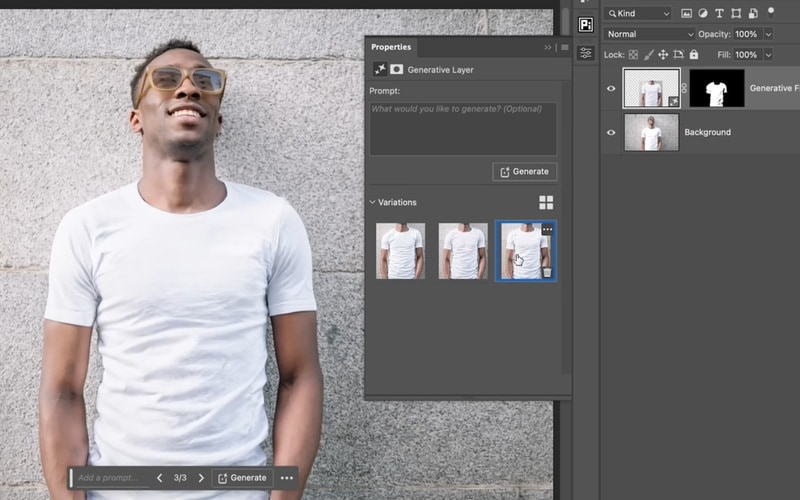
Step4Hit Generative Fill, you can leave the prompt blank, and click Generate to create texture where none existed.
Step5Once you’re happy with the result, click Export to save your image in your desired format.
Part 3. How to Avoid Overexposed Photos in the First Place
You can fix an overexposed photo with the methods mentioned before. But, avoiding the problem from the start saves time, and you’ll get better image quality. With a few small adjustments when taking a photo, you can reduce the chance of getting overexposed photos.
Here are some simple ways to avoid overexposed photos:
- Lower the Exposure Before You Shoot
On smartphones, tap to focus, then slide the brightness slider down. On cameras, switch to manual mode and lower the ISO, use a faster shutter speed, or choose a higher f-stop. Do these settings to reduce brightness before taking the shot.
- Shoot in RAW Format
RAW files capture more image data than JPEGs. Even if you overexpose a shot slightly, RAW gives you more room to fix it during editing.
- Use Neutral Density (ND) Filters
When shooting outdoors in bright light, ND filters help block excess light from entering the lens. This keeps your exposure under control without changing settings too much.
- Avoid Shooting Directly Into Harsh Light
Backlit scenes or midday sun can easily cause overexposure. Change your angle, wait for softer light, or add shade to protect your subject from blown highlights.
With these tips, you can prevent most overexposure issues before they happen—and keep your editing time to a minimum.
Bonus: Is Your Video Overexposed? Here’s the Fix
Overexposure doesn’t just affect photos; it can also ruin your video footage. Bright sunlight, auto lighting, or poor camera settings can blow out details in your footage.
If you want to fix an overexposed video without diving into complex software, try Wondershare Filmora. It’s a video editor that lets you adjust brightness, contrast, and exposure with just a few clicks. You can fix overexposed clips or even correct bright still images you plan to use in your video.
Watch this quick tutorial to learn how to fix overexposed videos using Filmora:
Conclusion
An overexposed photo can ruin the details and mood of an otherwise great shot. But with the right tools, you can bring balance back to your image.
This guide has shown you how to fix overexposed photos using your phone, Lightroom, and Photoshop. Each method helps restore texture, depth, and contrast in your shots.
Now that you know how to fix overexposed pictures, try editing your own and see the difference. Don’t forget to apply the prevention tips during your next shoot for better results right from the start.
FAQs
-
What’s the difference between exposure and brightness?
Exposure controls how much light your camera lets in when you take a photo. Brightness is something you adjust after the photo is taken to make it lighter or darker. -
Is it better to shoot underexposed or overexposed photos?
It’s usually better to take a photo that’s a little too dark than too bright. You can brighten dark areas more easily than fixing parts that are too bright and lose details. Shooting in RAW also helps you recover more from both sides. -
Can I fix an extremely overexposed photo?
You can recover some detail if the photo was shot in RAW. But, the bright areas turn pure white, it’ll be hard to fix as the detail may be gone. Still, tools like Photoshop’s Generative Fill can help recreate missing areas. -
How do I fix an overexposed face in a photo?
Use selective editing tools like the Brush tool in Lightroom or masking in Photoshop. Lower the exposure and highlights in that area only, then adjust shadows and contrast to match the rest of the image.
