Do you enjoy capturing your most memorable moments with live photos? Surely, it is a fantastic feature of the iPhone that brings life to your special occasions. Live photo is the most popular feature on iPhones among photo enthusiasts. Unlike still images, a live photo includes a brief video clip 1.5 seconds before and after the shot, allowing the audience to experience memories in motion. Somehow, when people like to make those captured events into a video, they struggle and are unaware of how to save live photo as video. So, no need to worry here; we have discussed how easily anyone can save a live picture as a video.
In this article
Part 1: What Are Live Photos and Why Convert Them into Movies?
As you know, live photos are the most amazing feature of the iPhone for capturing a moment. It offers you a moving clip that looks fantastic. These photos include a few seconds of video and audio before and after the photograph is taken. The photos are saved to the Photos app's photo library.
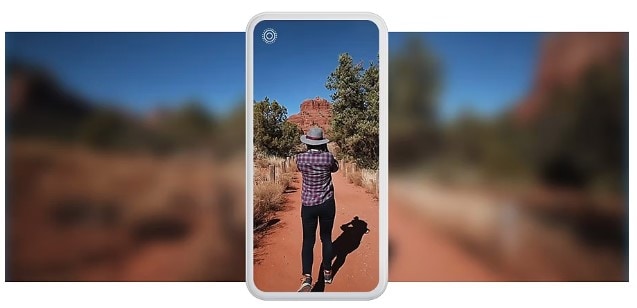
Take a look at why they need to be converted into movies.
Limited Compatibility: Sharing your live photos with other phones may cause issues due to differences in operating systems. To make your unique events accessible to others, you should be required to transform them into video format.
Editing Capabilities: Even though live photos include elements of movement, they lack video editing capabilities. Transforming them into videos allows you to add effects and transitions of your choice.
Smooth Storytelling: To create smooth storytelling, you need to bring live videos into video. It allows you to share an engaging story with friends and family.
That's the reason you should save live picture as video. Let's learn how to transform them with Wondershare Filmora.
Part 2: Step-by-Step Guide to Converting Live Photos into Movies
You know how much fun it is to take live photos with your iPhone. However, you can make those clips more interesting by transforming them into videos. Fortunately, the Wondershare Filmora makes everything easy for you. Let's have a look at how to save multiple live photos as a video.
- Superb video stabilization with low distortion.
- Vast video/audio effects and creative assets.
- Powerful AI for effortless content creation.
- Intuitive, professional yet beginner-friendly.
- Works on Mac, Windows, iOS, and Android.

Step 1: First download the Wondershare Filmora from the official website to your system. Now go to the New Project and start the project.
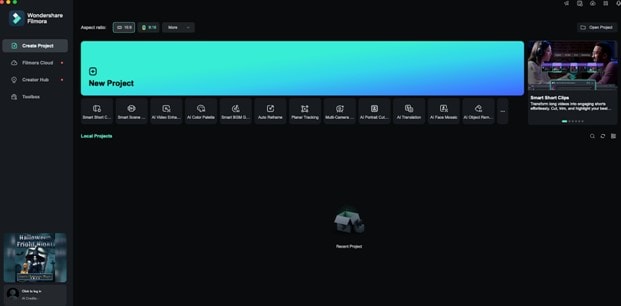
Step 2: Connect the iPhone and your system with the help of a data cable. Now import the live photos to the system by clicking on "import from camera or a phone."
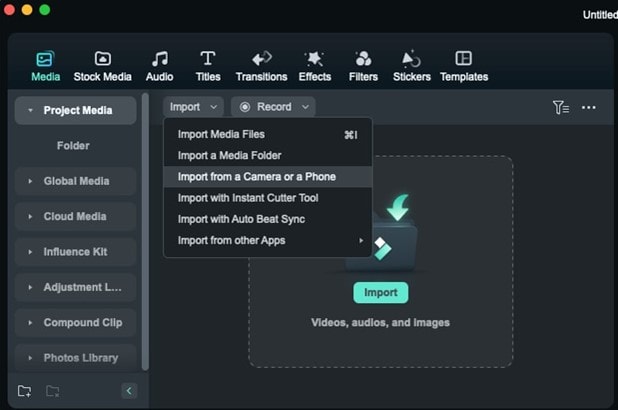
Step 3: Next, select the phone device and live photo option. Select the live photos and click on Import.
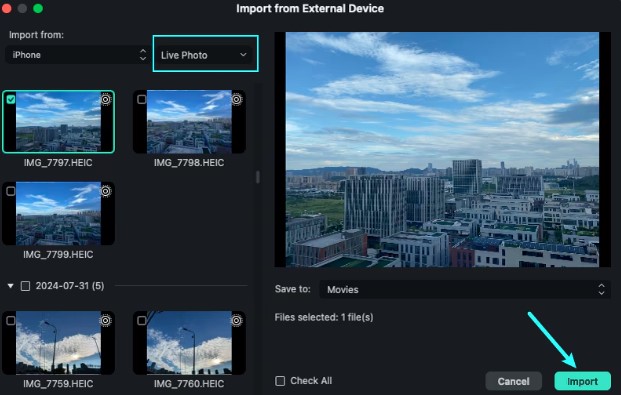
Step 4: The selected clips will now be added to the project media area. Filmora merges the imported live photos into a single video.
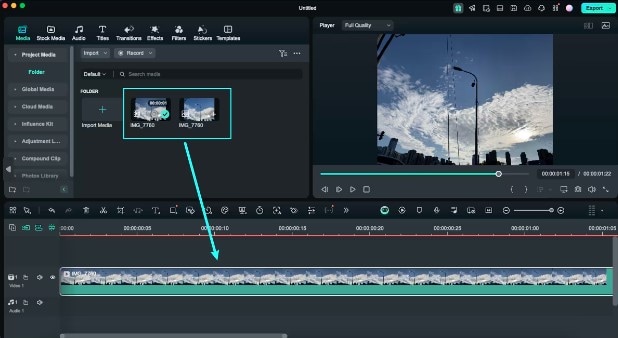
Step 5: After adding a video to the timeline, you can edit it as needed. You can now continue editing the video by adding music, effects, texts, and filters to your liking, or you can export live photos.
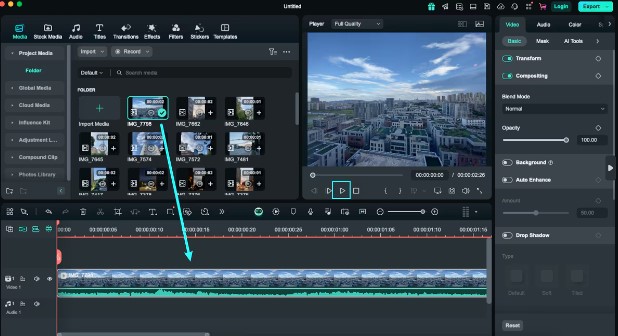
Step 6: When you have finished editing, click Export in the upper right corner. You can alter the export format or upload directly to a social media platform.
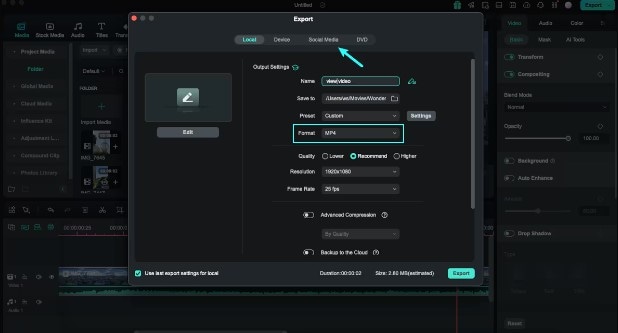
Look how smooth and convenient it is to edit live photos on Filmora. All of this demonstrates how to save multiple live photos as a video and give them a more professional appearance.
Part 3: Transform Live Photos into Engaging Movies with AI Video Editor
One feature that sets Wondershare Filmora apart from others is the availability of numerous AI editing options. This also makes it easier for people to create videos using Live Photos.
Now, let us look at some of Filmora's AI-driven features that can improve your live photos:
AI Smart Cutout: Using this tool, you can separate individual people or any objects from the rest of your live photo video. Thus, you can accentuate the main object in the center while the background can be softly out of focus. This is an effective method of emphasizing the significant aspects of a particular moment.
AI Audio Denoiser: In case your Live Photo film has an audio component, you can make use of the audio denoise tool included within Filmora's AI capabilities that eliminates unwanted background sounds to allow the key sounds to come out distinctly.
Auto Reframe: The auto-reframe feature of Filmora guarantees that any video you create fits into the screen ratio of various devices. No matter whether you wish to share it on Instagram, TikTok, or any other social media platforms, you can trust Filmora to center the most important character and complete the video composition around it with the required framing.
Because of such AI capabilities, Wondershare Filmora allows users to make appealing videos without having to be adept at video editing. The tools are aimed at expediting the process, enabling the easy creation of interesting and good-quality movies from your Live photos.
Conclusion
Making live photos into videos provides a whole new range of creative possibilities to you. It not only makes it easier to remember and share memories with close friends and family, but it also allows you to add personal touches that make each memory distinct and unique. Somehow, Wondershare Filmora is one of the most useful tools that allows you to edit and improve live photos as per your demand. It offers more professional effects to your iPhone footage. So, give it a try at Wondershare Filmora and share fantastic events professionally.


 100% Security Verified | No Subscription Required | No Malware

