
 100% Security Verified | No Subscription Required | No Malware

Do you want to start as a YouTuber but aren’t sure how to manage your channel? Learning how to use YouTube Studio helps you organize uploads, edit videos, and monitor engagement. You can also see which content performs best through analytics.
If you’ve been looking for a clear guide on how to use YT Studio, this article walks you through every step. You’ll learn how to handle monetization, connect with your viewers, and prepare your videos before uploading.
Read through this guide to finally answer your question, “How do I use YouTube Studio?” Let’s begin with the basics and see what you can do inside YouTube Studio.
Part 1. Getting Started with YouTube Studio
YouTube Studio is the main dashboard where creators manage their channels. It keeps all the tools you need for managing your account in one place. When you understand YouTube Studio and how to use it, you can upload videos, track performance, reply to comments, and handle monetization.
Key Features of YouTube Studio
- Content Management: You can upload, schedule, and organize videos right inside YouTube Studio. It also lets you edit video titles, descriptions, and tags to make your content easier to find.
- Built-In Video Editor: YouTube Studio has a simple video editor inside the platform. You can use it for trimming, cutting, or blurring parts of your uploaded videos. It’s useful for quick fixes or removing small errors.
- Brand Customization: You can adjust your banner, profile photo, and watermark to align your channel’s look with your brand identity.
- Comment and Community Management: The Comments section helps you stay connected with your viewers. You can read, reply, filter, or pin comments to manage conversations and build a stronger community.
- Analytics and Metrics: YouTube Studio tracks performance through data like views, watch time, audience demographics, and retention rates. These insights help you measure performance and plan your next videos based on the results.
- Monetization Tools: The Monetization tab lets you check ad eligibility, manage memberships, and see your estimated revenue. It helps you monitor how your content earns money over time.
How to Access YouTube Studio
Before you start learning how to use YouTube Studio, you need to know how to access it. The platform works on both desktop and mobile, so you can manage your channel wherever you are.
On Desktop:
- Open YouTube in your web browser, then sign in with your YouTube account.
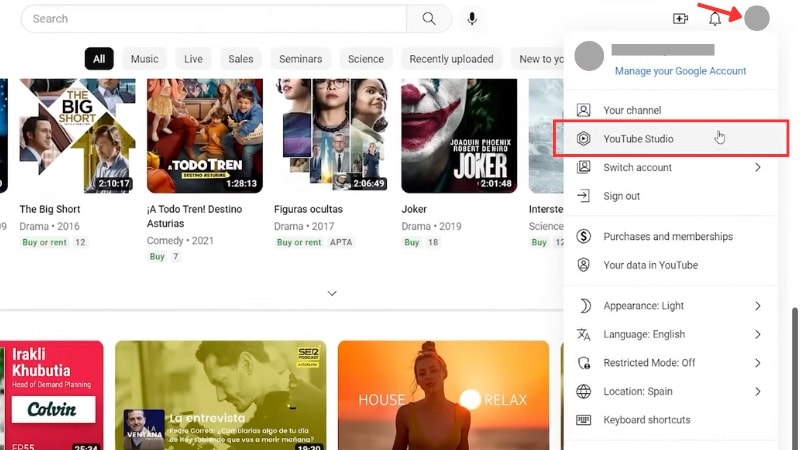
- In the top-right corner, click on your Profile icon > select YouTube Studio from the menu.
- Then, you’ll enter the dashboard where you can view analytics, manage videos, or upload new ones.
On Mobile:
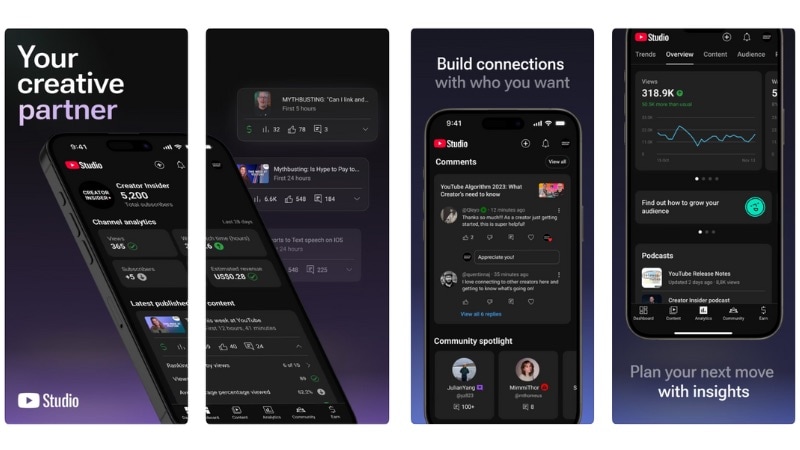
- Download the YouTube Studio app from Google Play or the App Store.
- Sign in with your YouTube account.
- The app shows your main dashboard, giving you quick access to analytics, comments, and uploads.
Part 2. Core Tasks in YouTube Studio: Uploads, Editing & Content Management
By learning how to use YT Studio, managing your content feels more organized. In this section, we’ll discuss the core tasks in YouTube Studio, where most of your day-to-day tasks happen.
1. Uploading a Video
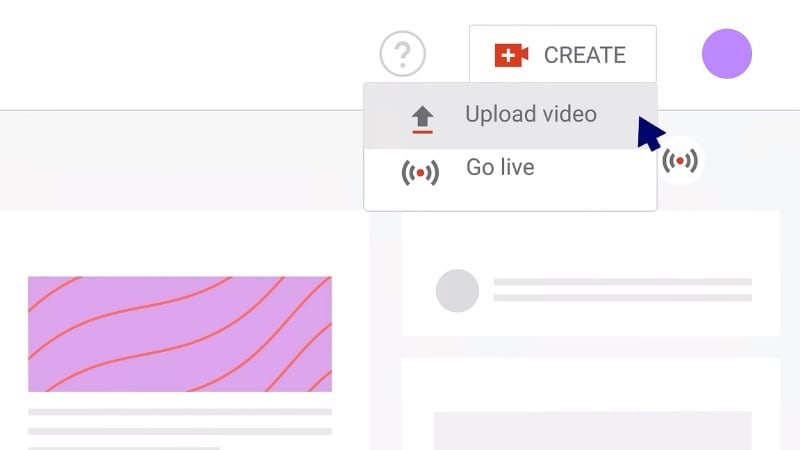
To upload a new video, click Create > Upload Video at the top-right of your dashboard. Choose one or several files from your computer. Once the upload starts, you can close the window anytime, and your videos will be saved as a draft on your Videos page.
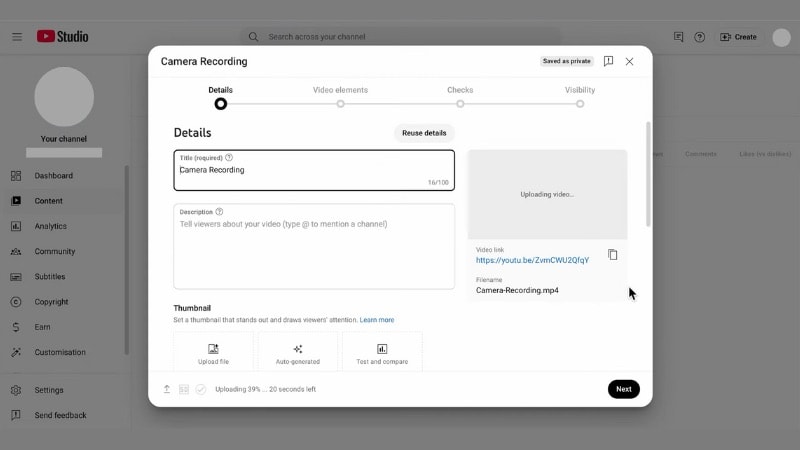
Next, fill out the main details of your video in the Details page:
- Title and Description: Write what your video is about and add key details or links.
- Thumbnail: Upload a custom image that fits your content.
- Playlist and Audience: Add your video to a playlist and set the audience (for example, “Made for Kids” or “Not Made for Kids”).
- More Options: Here you can also manage tags, language, recording date, and other details.
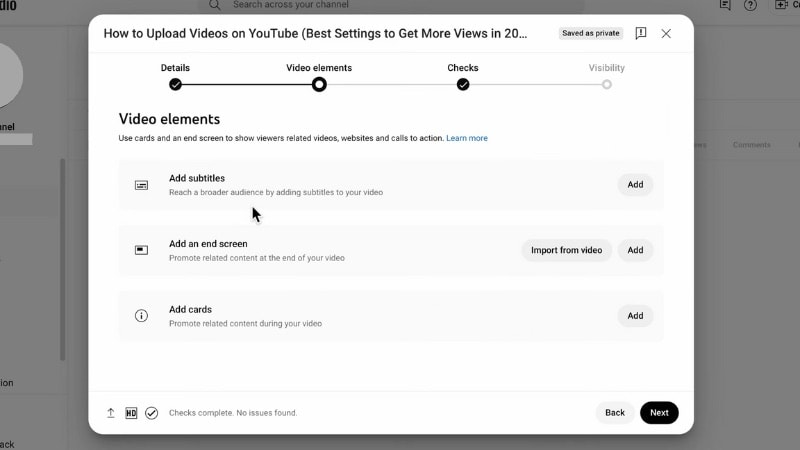
After that, you’ll enter the Video Elements page, where you can add:
- Subtitles or Captions for accessibility and clarity.
- End Screens to promote other videos, playlists, or channels in the last 5-20 seconds of your video.
- Cards to link related videos, playlists, or external pages during playback. Cards can appear at specific timestamps to keep viewers engaged or direct them to more of your content.
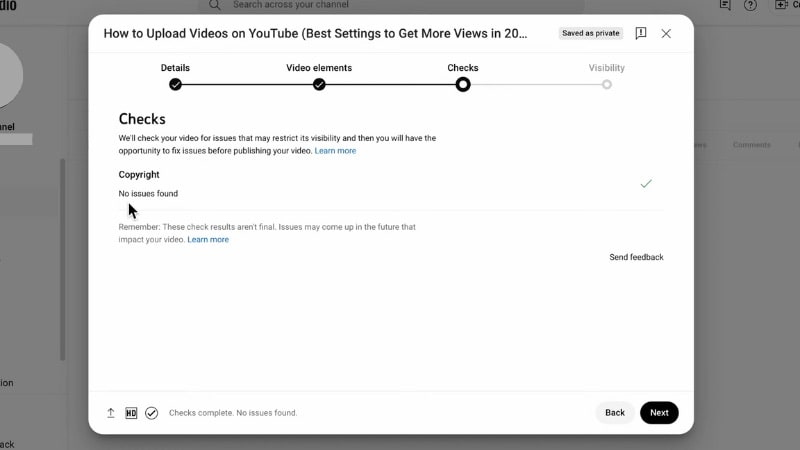
YouTube Studio then runs a copyright and ad suitability check if your video is monetized. This helps you spot issues and fix them before publishing.
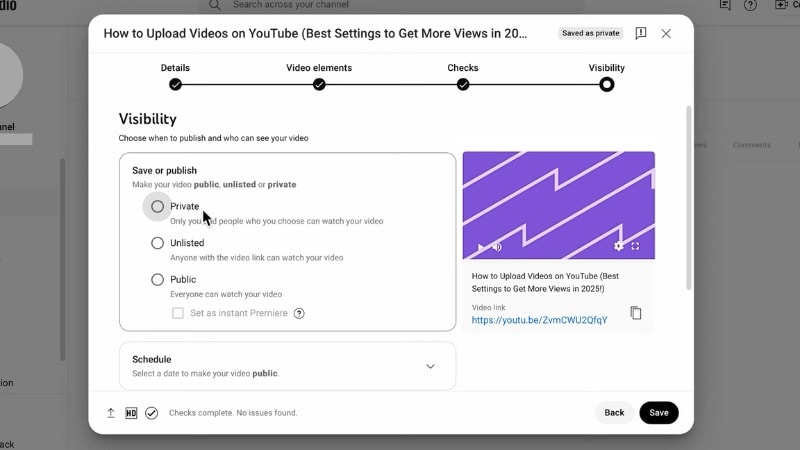
Finally, under Visibility, choose how you want your video to go live:
- Public to publish immediately.
- Unlisted or Private to keep it hidden.
- Schedule to publish at a later date or set it as a Premiere.
Click Publish, Save, or Schedule depending on your choice, and your video will be ready on your channel.
2. Video Editing in YouTube Studio
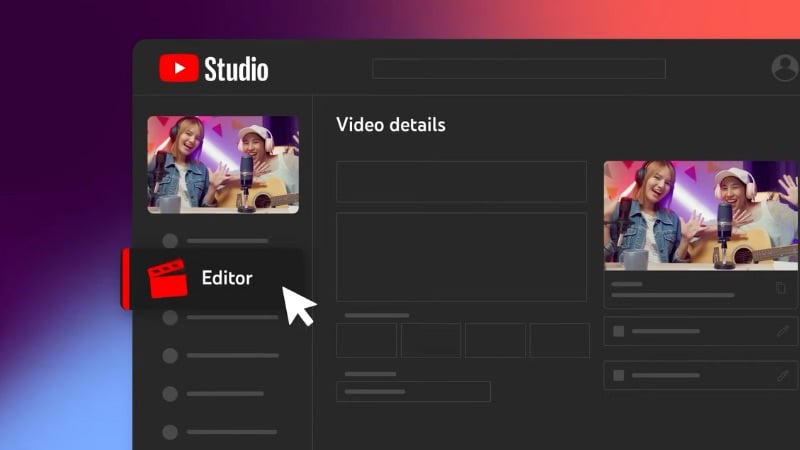
Next, you might be curious about, “How do I use YouTube Studio to edit my video?” Fret not, you can use the Editor tab in YouTube Studio once your video is uploaded. Your video keeps the same URL, views, and comments, so you can fix mistakes or shorten sections without losing engagement.
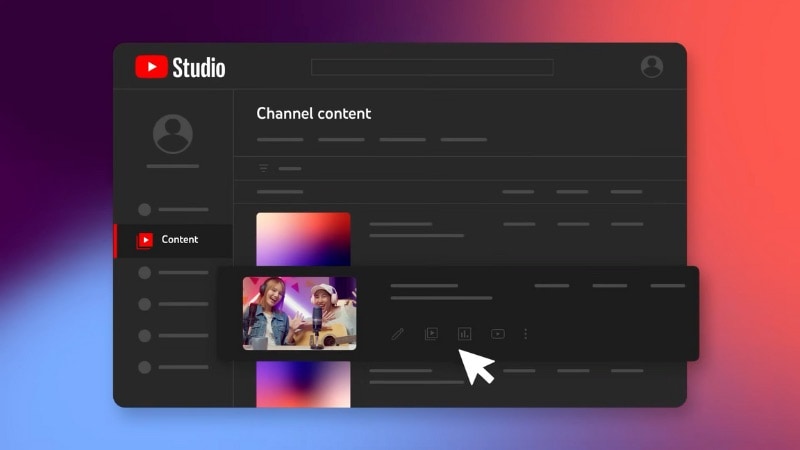
To edit an uploaded video, go to YouTube Studio > Content tab and select the video you want to edit. Then, head to the Editor tab to start editing.
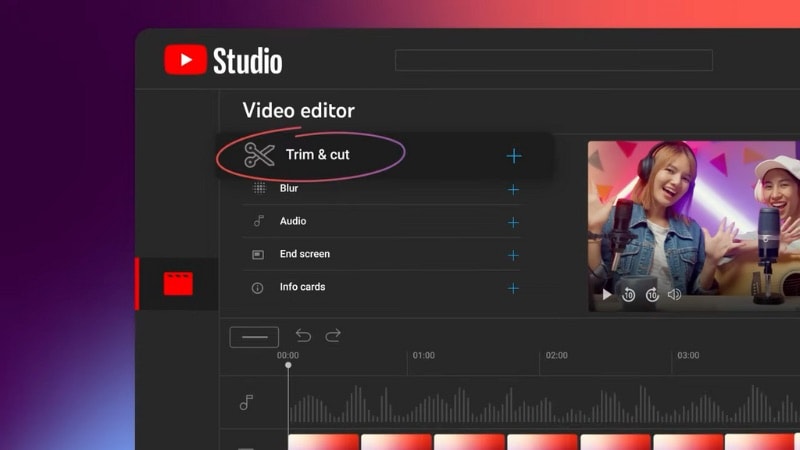
Here’s what you can do inside the built-in editor:
- Trim or Cut: Remove unwanted parts from the beginning, middle, or end of your video to tighten pacing or fix mistakes.
- Split and Remove Sections: Cut specific clips to shorten pauses or delete sections that don’t fit.
- Blur Tool: Hide faces, objects, or private details by adding adjustable blur boxes anywhere in the frame.
- Add Music: Use the Audio tab to include royalty-free tracks from YouTube’s audio library.
- Cards and End Screens: Add links to other videos, playlists, or subscribe buttons. Cards appear during playback, while end screens show up in the last seconds of your video to promote your next upload.
If your channel has monetization enabled, you can also make sure your edits align with YouTube’s ad-friendly guidelines before saving.
Once done, click Save to apply your changes. You can also preview them before saving to confirm that your edits look right.
Tip: YouTube Studio’s built-in editor is perfect for quick fixes. But if you want to polish your video further before uploading, try editing it in Wondershare Filmora. It includes tools like multitrack editing, motion tracking, and AI-powered features for smoother workflow and more creative control.
3. Organizing and Managing Your Videos
Learning how to use YouTube Studio helps make your content organized. There, you can keep your content library structured and easy to manage as your channel grows.
Inside the Content tab, you can handle most of your daily organization tasks:
- Filter and Sort: Find videos by upload date, views, or engagement rate to track what performs best.
- Bulk Edit: Update titles, descriptions, or tags across several videos at once to keep your branding consistent.
- Playlists: Group related videos into playlists so viewers can binge similar content.
- Sections on Homepage: Arrange playlists or featured videos on your channel homepage to create a clear layout.
- Visibility Updates: Adjust visibility or scheduling anytime to align with your content plan.
- End-of-Cycle Maintenance: Refresh thumbnails, replace outdated information, or update metadata to keep your channel current.
Part 3. Analytics, Engagement, and Monetization on YouTube Studio
Once your videos are uploaded and organized, the next step is tracking how they perform and connecting with your audience. If you’ve ever asked, “How do you use YouTube Studio to measure results or grow your channel?” This section covers exactly that.
This section will guide where you can read performance data, engage with your viewers, and manage monetization.
1. Performance Metrics
YouTube Studio offers both quick insights and deep analytics to help you understand your video and channel performance.
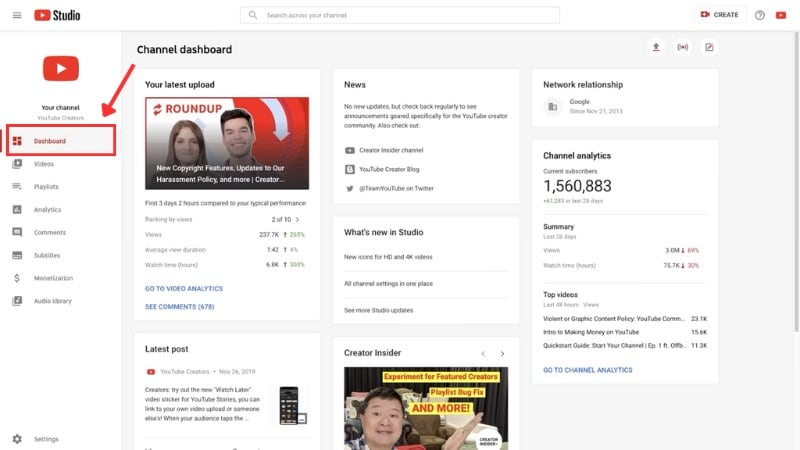
For quick insights, you can head to the Dashboard tab. There, you can see how your latest video performs compared to your last ten uploads. You’ll find data like views, watch time, and average view duration, as well as a summary of your channel’s overall stats.
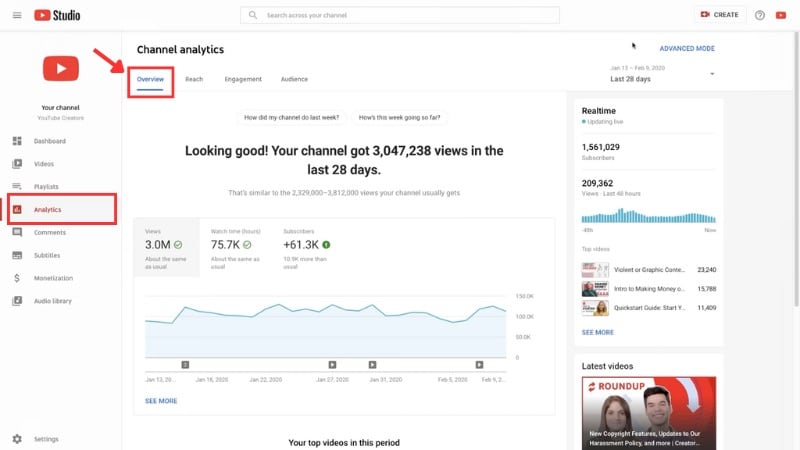
For a more detailed look, open the Analytics tab. You can view data for your entire channel, a specific video, or a group of videos. You can also adjust the date range to track trends over time. Selecting 90 days or more gives a clearer picture of long-term growth.
The Analytics section is divided into several tabs:
- Overview: Displays key numbers such as views, watch time, and subscriber change. If you’re monetized, you can also see estimated revenue.
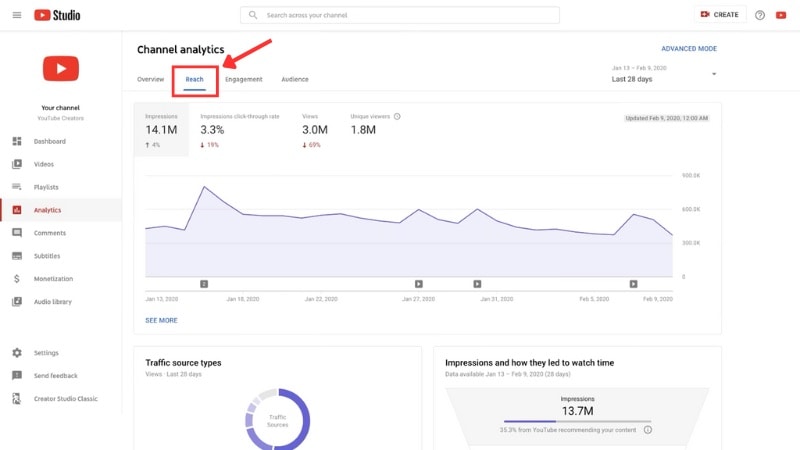
- Reach: Shows how viewers find your videos through impressions, search results, or external links. It also tracks your click-through rate (how often people watch after seeing your thumbnail) and unique viewers.
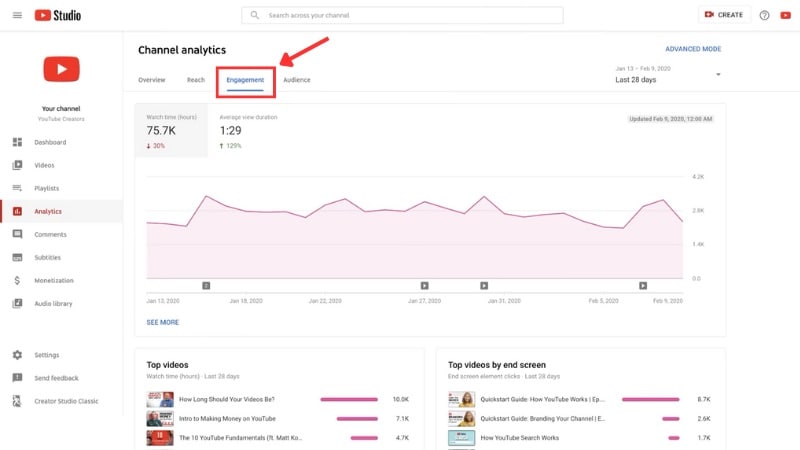
- Engagement: Highlights watch time, average view duration, and audience retention. You can also see how effective your end screens and cards are at keeping people watching.
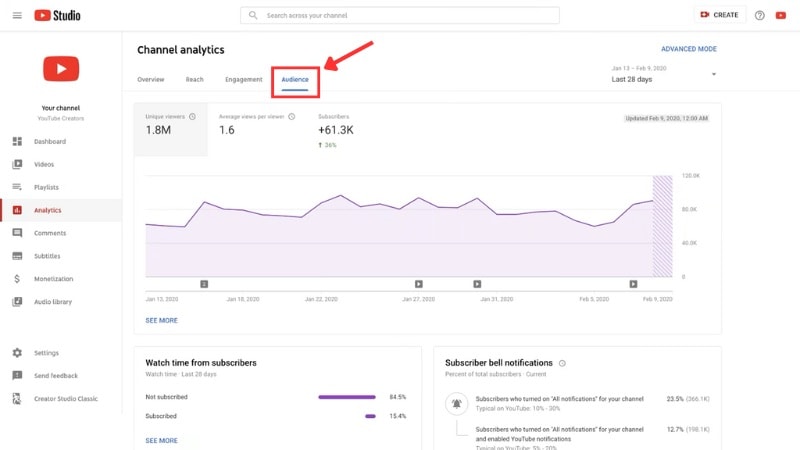
- Audience: Tells you who watches your content. You can see unique viewers, average views per viewer, and subscriber activity. It also includes audience details like age, gender, and location, as well as how many subscribers have turned on the bell notifications.
Checking these tabs regularly helps you make better decisions for your upcoming uploads. They show when to post, what content resonates most, and how to keep your audience engaged.
2. Managing Comments and Community Interaction
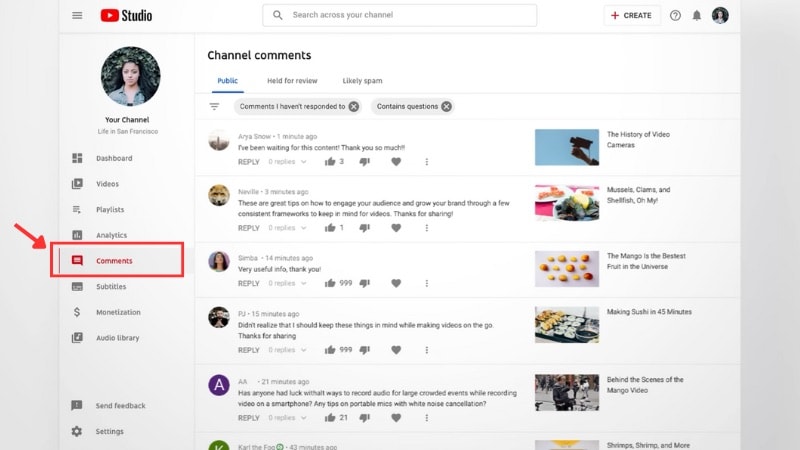
The Comments tab in YouTube Studio helps you manage viewer feedback in your video and Community page. Use it to build relationships with your viewers. Inside the Comments tab, you can:
- Review Comments: Check new comments and filter by type, such as “Held for review” or “Likely spam.”
- Reply, Like, or Pin a Comment: Respond to viewer feedback and pin thoughtful comments to highlight positive engagement.
3. Monetization & Channel Growth Tools
You need to meet the YouTube Partner Program (YPP) requirements before you can start monetizing your channel. You’ll find all monetization tools under the Earn tab, where you can apply, track progress, and manage your income.
To qualify for the program, make sure you:
- Follow YouTube’s monetization policies.
- Have no active Community Guideline strikes.
- Turn on two-step verification for your Google account.
- Set up or link an AdSense account for payments.
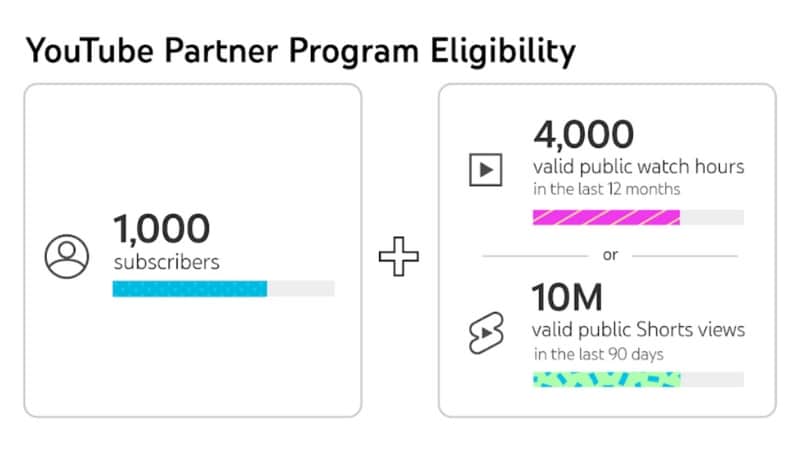
Your channel also needs to meet one of the following sets of requirements:
- For long-form videos: Have at least 1,000 subscribers and reach 4,000 public watch hours in the past 12 months.
- For Shorts-focused creators: Have at least 1,000 subscribers and get 10 million public Shorts views in the past 90 days.
Once your channel meets these requirements, you can apply for monetization from the Earn tab in YouTube Studio. YouTube will review your channel to confirm it follows monetization policies and send a decision within a few weeks.
If approved, you’ll unlock several earning features inside YouTube Studio, including:
- Advertising Revenue: Earn from ads that appear before, during, or beside your videos, and in the Shorts feed.
- YouTube Premium Revenue: Receive a share of subscription fees when Premium members watch your content.
- Channel Memberships: Offer exclusive badges, perks, and content to paying subscribers.
- Super Chat, Super Stickers, and Super Thanks: Let fans support you through paid messages or stickers during live streams and premieres.
- Shopping Tools: Feature your products or partner brands on your channel for viewers to browse and purchase.
Learning how to use YouTube Studio helps you track performance, stay compliant, and build a steady income while growing your channel. Regularly check Revenue Analytics to review earnings, top-performing videos, and RPM (Revenue Per Mille).
Bonus: Use Filmora to Edit Your Video Before Uploading to YouTube Studio
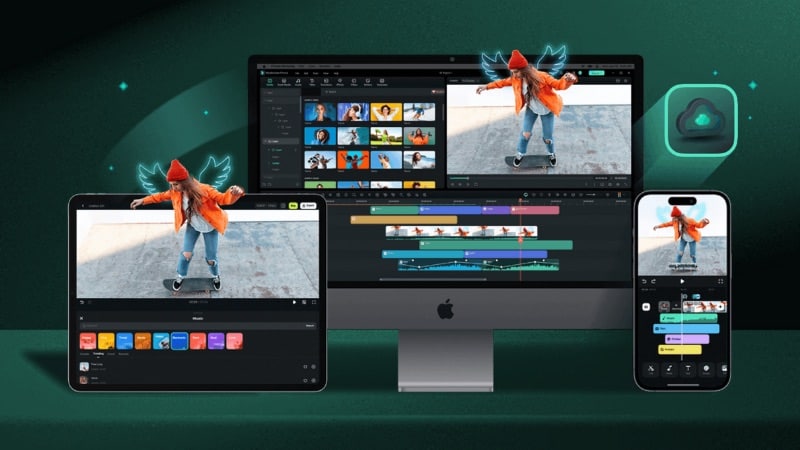
Learning how to use YouTube Studio helps you manage and grow your channel. But the quality of your video starts before you upload it. In this case, Wondershare Filmora provides all the editing tools you need to prepare and edit your video before uploading it to YouTube Studio.


Filmora’s Key Advantages
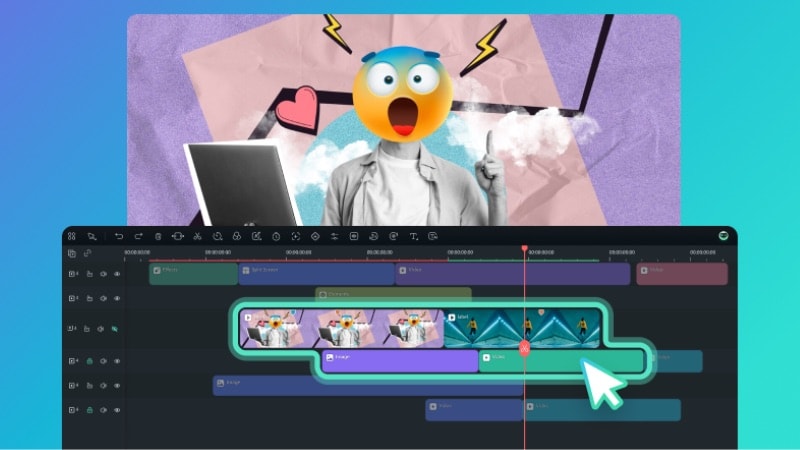
- Full Editing Toolset: You can trim or split clips, combine different shots, and arrange layers through multitrack editing. This makes it easy to balance visuals, audio, and effects together in a structured timeline.
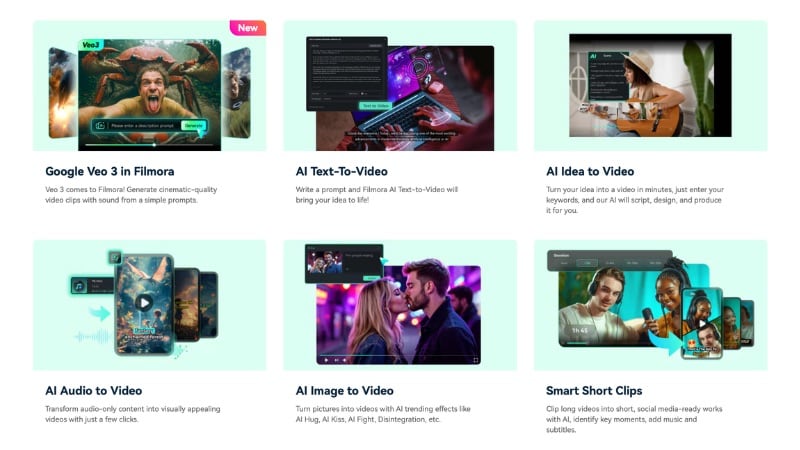
- AI Tools for Faster Workflow: Filmora includes several AI-powered features that help simplify time-consuming tasks. Create voiceovers with AI Text to Speech, add AI Subtitles, clean audio using AI Audio Denoise, or generate background music with AI Music Generator.
- Creative Assets Library: Inside Filmora, you’ll find built-in access to templates, stock videos, stickers, and animated titles. These creative elements allow you to design intros, outros, or transitions that make your videos more appealing.
- Direct YouTube Upload: Once your project is complete, you can export and upload it straight to your channel without leaving Filmora. This feature saves time and ensures that your video keeps its quality and settings without extra conversions.
Once you upload your video, you can start managing its performance and tracking analytics in YouTube Studio. If you want to edit your video before uploading, check out the following video. It walks you through Filmora’s AI video editing tools to help you create vlogs with less editing time.
Conclusion
Learning how to use YouTube Studio helps you manage, edit, and grow your channel efficiently. From uploading videos to checking analytics, every feature can help improve your content. It also helps you connect with your audience.
Once you understand how to use YT Studio, you can track performance and engage with your viewers. You can also manage monetization through clear insights once eligible. The tools inside help you maintain consistency and plan better videos over time.
If you asked, “How do I use YouTube Studio to grow my channel?” The answer starts with consistent uploads and quality editing. Try Filmora to prepare your videos. Then use YouTube Studio to publish, analyze, and keep improving your channel.
FAQs
-
Is YouTube Studio free to use?
Yes. YouTube Studio is free for all YouTube users. Every creator with a YouTube account can access it to upload, edit, and manage videos without any extra cost. -
Does YouTube Studio work offline?
No. You need an internet connection to use YouTube Studio. But, you can prepare your videos offline with an editor like Wondershare Filmora, then upload them once you’re online. -
Can I manage multiple channels from one YouTube Studio account?
Yes. You can switch between different channels under the same Google Account. To do this, click your profile icon in the top-right corner and select the channel you want to manage. -
How long does it take for analytics to update in YouTube Studio?
YouTube Studio updates most analytics data within 24 to 48 hours. Go to your dashboard to see real-time metrics such as views from the last 48 hours.
