The iPhone's impressive photo and video capabilities make it an excellent tool for shooting 4K videos, which is why many content creators rely on it for high-quality content. But while they go for editing and want to transfer large videos to Mac, they find it challenging. It is not the issue only with creators, but sometimes when people enjoy their favorite movies from iPhone to Mac, they also encounter how to send large videos from iPhone to Mac. Apple’s unique ecosystem allows for the seamless transfer of small files and photos, but when it comes to large videos, users often face issues such as degraded quality, blurry videos, or system errors.
Do not worry; there are a few unique methods for transferring large iPhones conveniently. Let us dive in and show you how it is done!
In this article
Part 1: 5 Ways of Transfer a Large Video Between iPhone to Mac
Transferring large files from an iPhone to a Mac is simple if you know how to do it correctly. Get relaxed; here we have covered versatile ways to send large videos from an iPhone. So let’s begin!
Using iCloud
iCloud is one of the simple ways to send large videos from an iPhone to a Mac or other Apple device. Your iPhone's iCloud photo library stores your videos and photos in the cloud, where you can access them from any Apple device. Let’s look at how to transfer a large video from an iPhone to Mac with iCloud.
How to transfer a large video from iPhone to Mac Using iCloud:
- Step 1: First, ensure that iCloud is set up on your devices. If it is not, then enable the iCloud Drive feature from your iPhone's settings.

- Step 2: Next, log in with the same Apple ID on your Mac system.

- Step 3: Connect the iPhone with WiFi for fast data transfer.
- Step 4: Go to the Photos app on your iPhone and select the video you would like to transfer. Now click on the share button and find the option iCloud Drive.

- Step 5: At last, open the iCloud on your Mac and access the video.

Note: To transfer large videos from iPhone to Mac with iCloud, make sure your Wi-Fi connection is good and there is enough storage space in your iCloud.
How to transfer videos from mac to iPhone with Google drive:
Google Drive is another amazing option to transfer large videos from iPhone to Mac, especially when you don't want to rely on iCloud. Google Drive offers up to 15 GB of free storage, which makes it an easy way to share large files across devices. Let’s understand how to send large videos from iPhone to Google Drive.
Steps to Transfer Using Google Drive:
- Step 1: Download the Google Drip app from the APP Store. Now, open it and log in with your account.
- Step 2: Click on the “+” sign in the lower right corner to upload the videos for your iPhone to Google Drive.

That's it! You can now access the video by opening Google Drive on your Mac and entering the same ID.
Using VLC
The VLC media player is well known for its video playback capabilities. It also supports file transfers via Wi-Fi. To transfer the video files from iPhone to Mac, you can also consider this tool. Look at how to send large videos from iPhone to Mac with VLC.
- Step 1: Download the VLC app on your iPhone from the App Store.

- Step 2: Open the "Photos" app and choose the video you wish to share.

- Step 3: Click the share icon and then select "Save to Files" > "On My iPhone" > "VLC". This step imports your iPhone videos into the VLC software.

- Step 4: Open the VLC software and choose the icon in the upper left corner. After that, enable the "Sharing via WiFi" option and take note of the IP address shown.

- Step 5: On your Mac, open a browser and enter the IP address.
- Step 6: You may now see videos that have been shared from your iPhone. To download the videos to your computer, play the video, right-click the window, and select "Save Video as".
Using USB cable
If you need a simple method, then using USB cable is one of the simplest ways to transfer large videos from an iPhone to a Mac computer. However, to use it conveniently, make sure you have a USB cable that is compatible with the Mac system. Even with no internet, it is the best way when you can transfer videos to a Mac with USB. Let’s have a look at how to send large videos from iPhone to Mac using a USB cable.
- Step 1: Connect your iPhone to your Mac via a USB cable.
- Step 2: On your Mac, open Image Capture.

- Step 3: Choose the video files from your iPhone and import them into your Mac.

Use Any Third-Party App
If you want to send a long video on an iPhone without using Airdrop or other iPhone-sharing features, a third-party app is the best option. The EaseUSMobiMover and AnyTrans-like applications make it easy to transfer large files from the iPhone to other systems.
Steps to Transfer Using Third-Party Apps:
- Step 1: Download the EaseUSMobiMover software on your Mac system.
- Step 2: Run the EaseUSMobiMover and connect your iPhone to your Mac. Now select the Phone to Mac option.

- Step 3: Now select the “Video” option and click transfer.

- Step 4: Wait for a few minutes; videos take time to transform from iPhone to Mac.

That's all! All these methods make it easy to share your large videos on your iPhone to Mac or another system efficiently.
Share video from iPhone to iPhone
Now, if you just want to share large videos from your iPhone with friends, here are some special features of the iPhone you can use. The Apple ecosystem, which includes features such as AirDrop and Dropbox, makes it simple to share files between iPhones.
Use AirDrop
For sharing fast, secure, and power-efficient files to another iPhone, use Airdrop. It allows you to wirelessly transfer files between iPhones without the need for any apps or cables. It works on Bluetooth and WiFi to create peer-to-peer connections between devices.
To enable the Airdrop feature, open the video >> Click Share Button > Select Airdrop. Now select the receiving phone from the list. Make sure both iPhones have Bluetooth & Wi-Fi are ON.

- Use Dropbox
Dropbox is another great way to share files between iPhones. It is a cloud storage application. With automatic device synchronization, you can easily upload and share large video files across multiple devices.
To share the large videos from one iPhone to the other, open the Dropbox app and upload the video. Now share the link with your friends via message or email.

Part 2: The Most Efficient Way: Make Use of Wondershare Filmora Cloud Storage
The above-mentioned methods may be slow or inefficient sometimes. So just leave the slow and outdated file transfer methods behind! Use Wondershare Filmora's cloud storage allows you to quickly and efficiently transfer large videos from iPhone to Mac. Unlike other cloud storage solutions that take time to upload large videos, Filmora's innovative technology lets you upload, store, and share huge files in no time.
Follow these simple steps to take your video transfer process to the next level!
How to Use Filmora Cloud Storage:
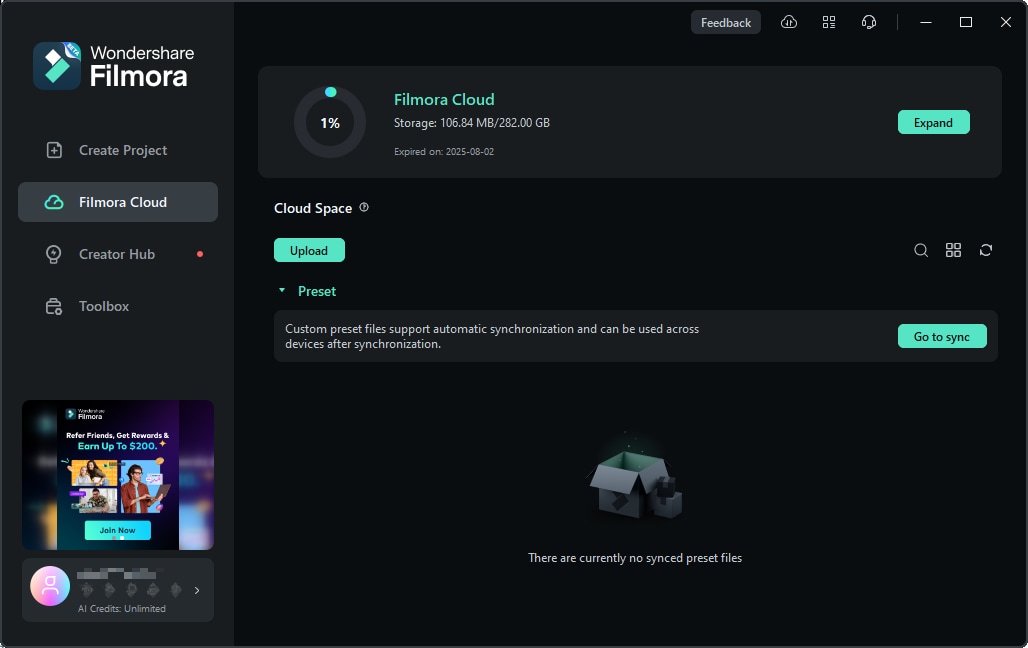
Access 1 GB Cloud Storage for Free.
- Step 1: Download Wondershare Filmora from its official website and Open Filmora.
- Step 2: Click on "Filmora Cloud" and log into your account to activate the cloud.

Note: You may now share your files from any device using 1 GB of cloud storage.
Use Wondershare Filmora Cloud
Method 1: Using Wondershare Cloud in Filmora
You may easily store and upload project files to Wondershare Drive. When you run Filmora, select Recent Video to see all local projects. Click the cloud symbol to upload and save a local video.

Method 2: Using Wondershare Cloud via a browser
You may also access Wondershare Drive at https://drive-web.wondershare.com/. To save your video and project files, click the Upload button and choose files from your device.

Share a file using Wondershare Drive
Wondershare Drive allows you to share your videos and project files with a quick link. Anyone can easily access your shared videos and make modifications as per their wish.
Step1: Back up local files to the cloud
Click the "cloud" icon to back up any saved local projects to the cloud.

Step2: Share cloud files to others
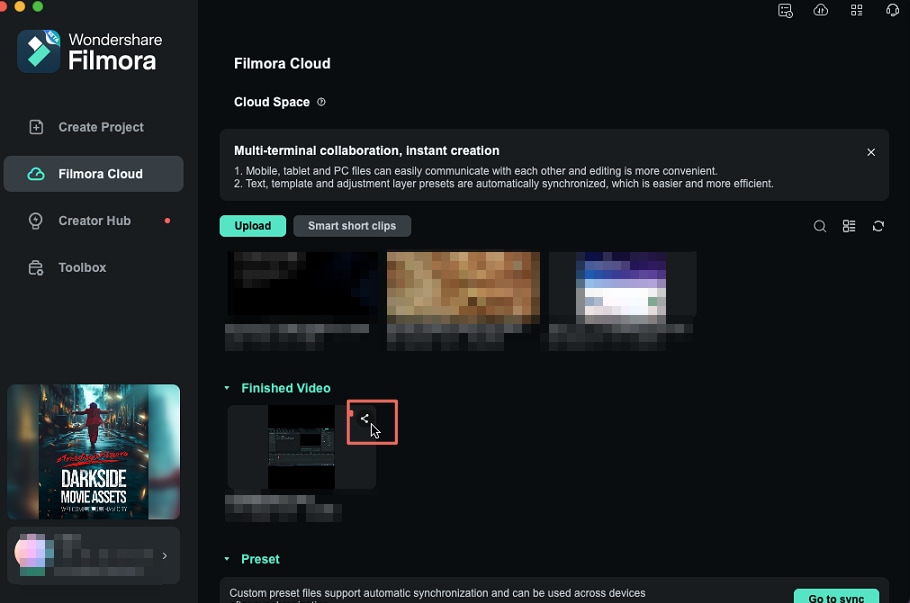
When the upload is done, find your file in Cloud Project and click the "share" icon to share your fiels.

You can also find the "share" icon in Transfer Center.

Step3: Edit your sharing option
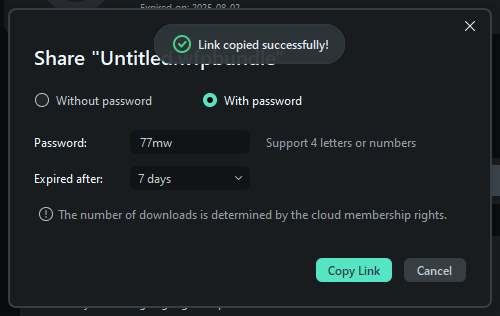
You can share your files with or without passwords. The validity period is about 1,7 and 30 days.
- If share passwords, you can set the passwords you want. Filmora supports 4 letters or numbers as passwords.
- If share without passwords, all you need to do is choose the validity period.

Step4: Create the sharing link
After setting the sharing options, you can create a link for sharing. When you see "Link copied successfully", you can copy the link to others.

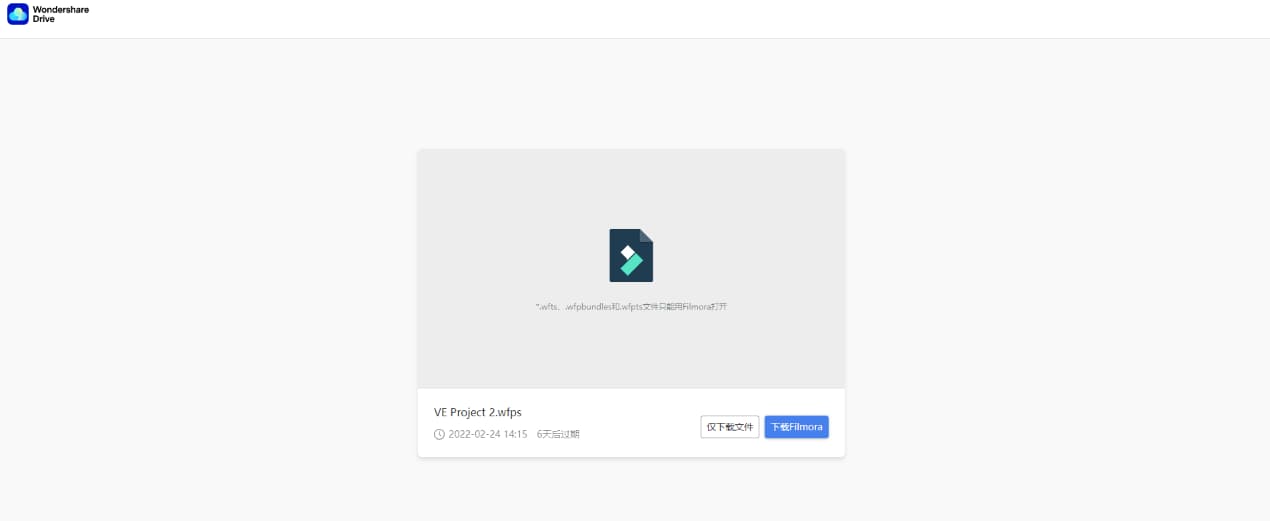
People can open the link and see what you share.

That's how simple it is to transfer large videos from Wondershare Filmora cloud storage to any device. Most importantly, Filmora lets you edit and adjust videos quickly. So try using Wondershare Filmora and learn how beneficial it is for you.
Conclusion
Finally, transferring large video files between iPhone and Mac is no longer a difficult task. You have lots of options and methods available that make it too smooth for you to transfer large videos without any hassle. Make sure not to lose the quality of videos while transferring from the iPhone to another system. The speed of the internet and quality of connectivity affect the quality. Here you have Wondershare Filmora also offers cloud storage, allowing you to easily transfer large videos while maintaining their original quality.


 100% Security Verified | No Subscription Required | No Malware

