Splitting videos on your iPhone can really up your social media game, especially when it comes to creating content that grabs attention. After all, shorter clips are the way to go on platforms like Instagram, TikTok, and YouTube, where quick, engaging segments work best to keep viewers hooked.
Luckily, splitting a video into parts on an iPhone is super easy with built-in tools like iMovie or some popular third-party editing app, like Wondershare Filmora. Here's how you can make the most of these tools to add a creative twist to your videos!
In this article
Part 1. Advanced Method to Split Videos on iPhone: Wondershare Filmora
If you're wondering how to split a long video into parts on your iPhone, you'll want a reliable, advanced video editing app to make it easy. Wondershare Filmora is a great option for this! It not only makes splitting videos into parts super easy, but it also comes loaded with all the editing tools you'll need to create eye-catching content for social media. Here's why:
- Fast Video Splitting: Filmora makes splitting videos into parts quick and easy, so you save time and skip the hassle.
- All-in-One Editing Tools: Packed with extra editing options for enhancing your clips after splitting, like trimming, adding filters, transitions, and more.
- Advanced AI Features: With AI Captions and AI Audio, you can easily add subtitles or generate custom music in just a few taps.
- Perfect for Short Videos: If you love short-form content, the AI Reels Maker is great for making eye-catching, engaging clips fast.
- Simple Sharing: Quickly share your final edits straight to social media or save them to your phone!
Plus, Filmora is budget-friendly and even offers a free trial, so you can test it out before deciding to buy. Pretty great, right? So, let's dive into how to split a video into parts on your iPhone using Filmora. Just follow this simple guide to get started:
Step 1. Open Filmora and start a new project
First, download the Filmora Mobile app from the App Store if you haven't already. Once it's installed on your iPhone, open the app and tap “New Project” to start editing.

Step 2. Upload video and move to editing timeline
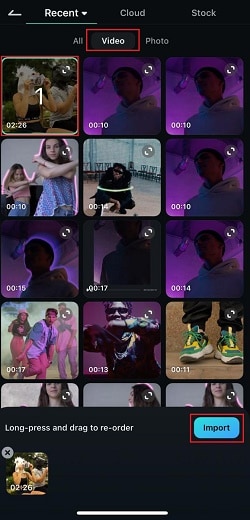
Then, choose the video you want to split from your library. Just go to the "Video" option and select the ones you like. After that, click the “Import” button. Once your video is imported, it'll appear on the editing timeline Where you can edit your video.
Step 3. Split your video
Tap on the video in the timeline to select it. Next, drag the playhead (the white vertical line) to the exact spot where you want to make the split. Then, tap the "][" icon at the bottom center to split the video at that point.

Next, move the playhead to any other spots where you want to split the video and tap the “][” icon again. Now your video is split into segments! You can repeat this process as many times as needed.

Step 4. Edit each segment
After splitting, you can add effects, or insert captions for each part separately if you'd like. For example, to add effects to a segment, just tap on the “Effects” menu at the bottom.

You can browse through the different effects Filmora offers, pick the ones you like, and they'll be applied to your video!

Step 5. Add captions
To add captions, just tap on the video segment and choose “AI Captions” from the menu.

You can select the language for your captions and pick the audio source, whether it's the video's sound or a voiceover. When you're ready, just tap “Add Captions” to generate them!

Step 6. Save your split video
And just like that, your split video now has captions! You can keep editing by adding transitions, AI music, and more—feel free to explore all the options. Once you're happy with the final look, tap the “Export” button at the top right.

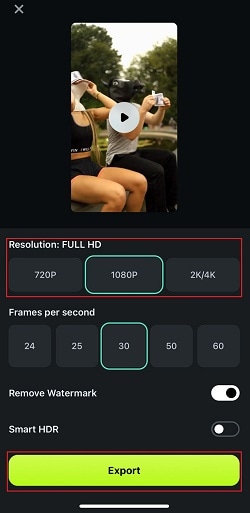
In the next window, choose your preferred resolution, then tap “Export” again to save your video. Now it's ready to share on Instagram, TikTok, or wherever you like!
Part 2. Traditional Method to Split Videos on iPhone: Using Built-In Apps
As you can see, Filmora has everything you need to easily split your long videos into parts on iPhone. It's simple to use and offers way more than just splitting, with tons of extra features to make your videos look great for social media. But if you'd prefer to stick with the built-in apps on your iPhone, that's totally doable![c]
One handy app for this is iMovie, which comes pre-installed on most iPhones. Just keep in mind that while iMovie gets the basic job done, it doesn't have some of the advanced features you'd find in Filmora, like AI tools and special effects. Still, for quick and easy video splits, iMovie does the trick!
To learn how to split a video into two parts on iPhone using iMovie, follow this simple guide:
Step 1. Open iMovie and start a new project
First, open the iMovie app on your iPhone. Then, tap "Start New Project" and select "Movie" to create a new project.

Step 2. Add your video clip
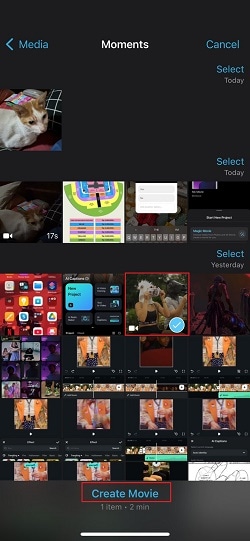
Choose the video you want to split from your Photos library, then tap "Create Movie" at the bottom of the screen. Your video will now appear in the editing timeline.
Step 3. Move the playhead to the split point
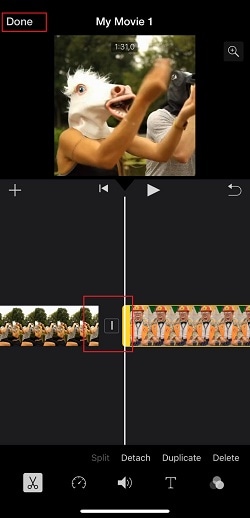
Drag the white playhead (the line on the timeline) to the exact spot where you want to split the video. You can zoom in on the timeline by pinching out to be more precise.

Step 4. Split the video
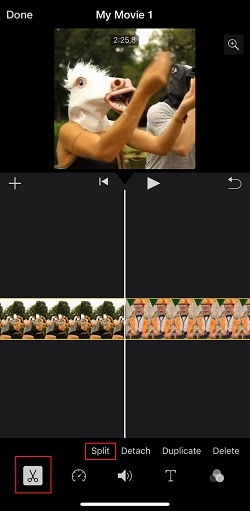
Once you have the playhead at the right spot, click the video in the timeline, tap the scissors icon at the bottom of the screen and select “Split”. This will cut the video into two parts at that point.
Step 5. Save your split video
If you want to make more splits, just move the playhead to other points in the clip and tap “Split” again each time. When you're done editing, tap “Done” in the top left corner. Then tap the Share button (a square with an arrow pointing up) to save it to your Photos or share it directly to social media.
And that's it![d] As you can see, with iMovie, splitting your videos into parts on iPhone is simple and quick.
Part 3. How to Maintain Video Consistency After Splitting
Now that you've learned how to split your video into parts on your iPhone, let's talk about keeping them smooth and engaging. After all, videos can sometimes feel a bit choppy after splitting, but with a few easy tips, you can make each segment flow naturally and keep viewers hooked. Just follow these simple tricks!
-
Avoiding Jumps with Smooth Transitions
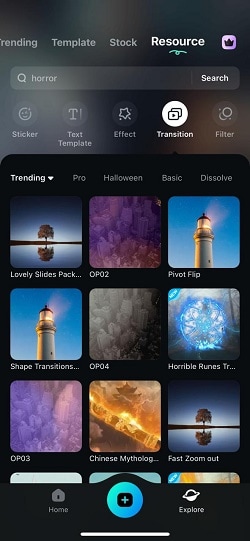
Adding transitions between segments can really help everything feel seamless. Simple fades, slides, or even fun effects can make the cuts less noticeable. But thankfully, if you're using Filmora, they have tons of transition options that are super easy to add.
-
Adding Text Overlays for Intro or Outro Parts
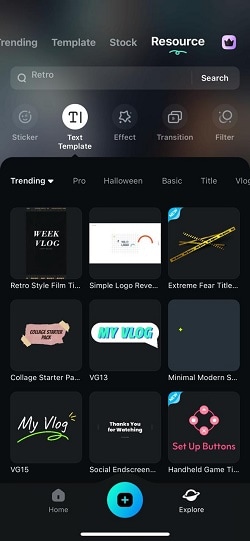
After splitting your iPhone videos, add a short title or outro at the start or end of each segment to guide your viewers. For example, you could label each part with a topic, step, or a fun intro. Filmora's text overlay feature makes this easy—you can customize fonts, colors, and animations to really make each part stand out!
-
Balance Each Clip Length for an Even Flow
Try to keep each segment around the same length for a steady rhythm. If one part drags on or ends too fast, it can throw off the flow. Luckily, trimming and timing are simple in Filmora, so feel free to adjust as needed to make everything feel balanced.
-
Add Engaging Visual Cues
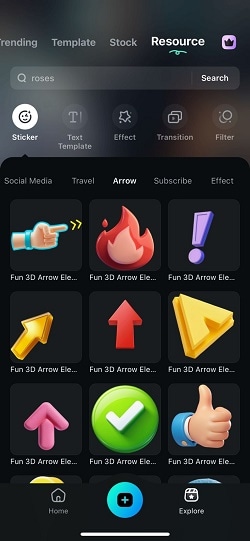
Use arrows, highlights, or icons to draw attention to important moments or transitions. These can be helpful and make the video more interactive for viewers. No need to worry, Filmora's stickers and graphic effects are perfect for adding these types of visual cues with just a few clicks.
Conclusion
For many social media purposes, many Apple users have been wondering how to split a long video into parts on an iPhone. So, this article covers different ways to do it using iPhone's built-in apps and editing software like Wondershare Filmora.
While you can definitely use apps like iMovie to split your iPhone videos, Filmora takes it up a notch. Not only does it make splitting videos super simple, but it also gets them ready to share across social media with powerful features like AI captions, video effects, and custom music. Plus, Filmora even helps keep your video consistent after splitting, with customizable transitions, stickers, text overlays, and more.


