Traditionally, people apply makeup before the shoot to appear presentable in the video. It is always recommended, especially if you’re working on professional content that will be streamed on major platforms. But what if you’re on a very tight schedule and running out of time? Should you still continue the shoot? In this case, you can still proceed. Simply ask the editors to apply a skin-smoothing filter to the final cut of the video. Yes.
Even without a full-scale glam team, you can show up looking good in your video with the help of a smooth face filter. Don’t worry. You won’t run out of choices in this regard. As a matter of fact, video editing apps like Wondershare Filmora offer tons of potential options. Just choose one accordingly.
In this article, we will suggest the best smooth face filter options available on Wondershare Filmora. We will also provide a short guide on how to apply one in quick and easy steps. Lastly, we will list some tips to help you enhance the result further. Continue reading below to learn more.
Part 1. 10 Effective Skin-Smoothing Filter Options on Wondershare Filmora
As mentioned earlier, you can easily enhance your on-screen appearance digitally. No need to glam up if you don’t have extra time to do it. All it takes to upgrade your look is a smooth face filter. In this respect, Wondershare Filmora provides access to its library of resources—including skin-smoothing filters you can apply in seconds. Do you want to give it a try? If so, check out the list below and familiarize yourself with each option provided.
1
Nature Skin
Nature Skin makes your facial complexion look velvety and glowing. It has a warm temperature and slightly boosted saturation settings that improve your natural radiance in the video.
2
Magazine Cover 01
Magazine Cover 01 noticeably has a soft matte effect with a grey-toned overlay. It decreases unnecessary shine and fixes minor blemishes without overdoing it—great for subtle enhancement.
3
Infant
Infant is your go-to smooth face filter for a porcelain finish. It softens facial details to smooth visible blemishes while keeping contours sharp for a polished look.
4
Miami
Miami offers warm, vibrant tones with a blue-dominant overtone for a moody vibe. It gives a smooth, velvety skin finish—correcting imperfections while preserving fine details.
5
Passion Play
Want luminous, glass-skin effects? Passion Play smooths texture while keeping natural radiance. Contours are enhanced, with a subtle bluish undertone for a professional vibe.
6
Choco
Choco features a silky-smooth facial enhancement with glowing, natural radiance. It pushes saturation and warmth more aggressively, with slightly lowered exposure for a darker, cinematic feel.
7
JCS Skin
JCS Skin evens out complexion and lifts exposure. Similar to Choco but cooler in vibrance and temperature—ideal for a clean, simple enhancement.
8
Pearl Tone
Pearl Tone softens contrast and increases brightness for a dreamy, perfected look. The enhancement is subtle yet effective for a clean, airy finish.
9
Light Breeze
A milder variant of Passion Play with toned-down vibrance and warmth. Clarity and depth are highlighted so facial details remain defined while smoothed.
10
Sunset Railway
Sunset Railway adds a sunlit glow by evenly lifting brightness—especially around the face—resulting in a gentle, radiant look.
Part 2. How to Apply a Smooth Face Filter to Videos Using Wondershare Filmora
We’ve learned that there are many skin-smoothing filters in Filmora. Based on your needs, you can quickly find the perfect fit. To get you started, follow the steps below.
1
Open Your Project and Find Filters
Open a new or existing project to access Filmora’s main workspace. Head to the Elements panel and click Filters.
2
Browse or Search
Choose a category on the left panel, or search a theme to quickly find your preferred skin-smoothing filter.
3
Download and Add to Timeline
Preview options, click the Download button to save to your library, then drag the filter onto the Editor Timeline for customization.
4
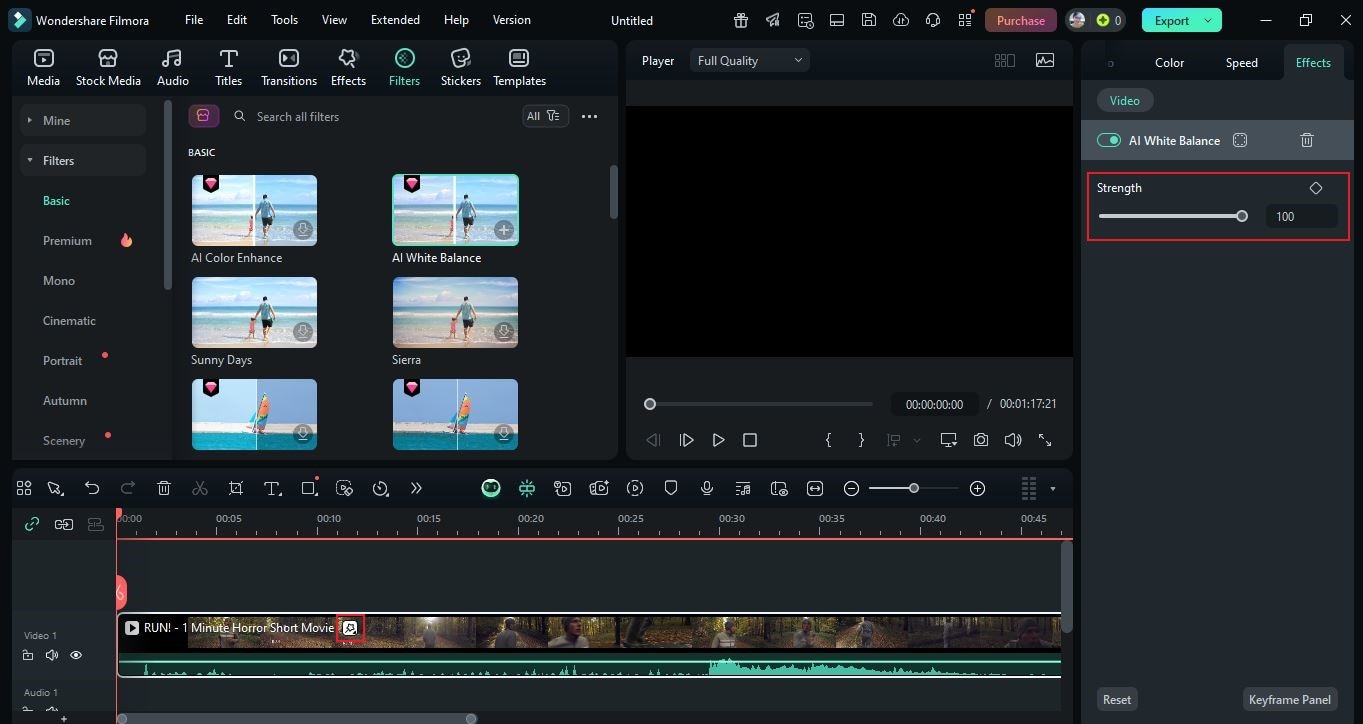
Apply and Adjust Intensity
Drop the filter directly onto a specific clip, or place it on a track above to cover a larger section. Click the filter on the timeline and adjust settings on the right panel—move the Strength slider or enter a value.
5
Review and Export
Play back the result and check if the enhancement matches your expectations. When satisfied, click Export above the preview, set Resolution, Aspect Ratio, etc., then click Export again to render.
Bonus: Download Filmora to Try These Filters

Secure Download
Tips to Make the Most of Skin-Smoothing Filters
- Prioritize the areas that need enhancement. If you wish to lighten blemishes, choose a filter that targets this effect.
- Adjust the intensity—Filmora lets you fine-tune strength for a natural finish.
- Ensure the selected filter blends with your existing color grading and edits for consistency across clips.
- Aim for a natural look. Over-editing can lead to unrealistic results.
Conclusion
If you have the means and time, prepare for your shoot with makeup and wardrobe. But when you need a shortcut, skin-smoothing filters can save the day. Wondershare Filmora offers plenty of smooth face filters to explore and try—plus full video-editing capabilities for finishing touches. Download Filmora now and elevate your content-creation workflow in a snap.


 100% Security Verified | No Subscription Required | No Malware