
 100% Security Verified | No Subscription Required | No Malware

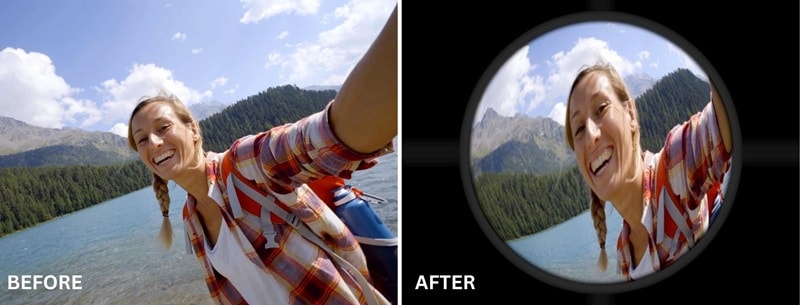
Anyone who likes to play with perspective often uses the fisheye effect to turn their footage into something extraordinary. This effect creates a bulging, circular frame that makes the center appear larger while curving the edges.
While you can capture it with a real fisheye lens, Adobe Premiere Pro has built-in effects that let you replicate the fisheye look directly in your edit. Today, you will learn how to make the fisheye effect in Premiere Pro, as well as a simpler option if you prefer a quicker route.
In this article
Part 1. What Is a Fisheye Effect?
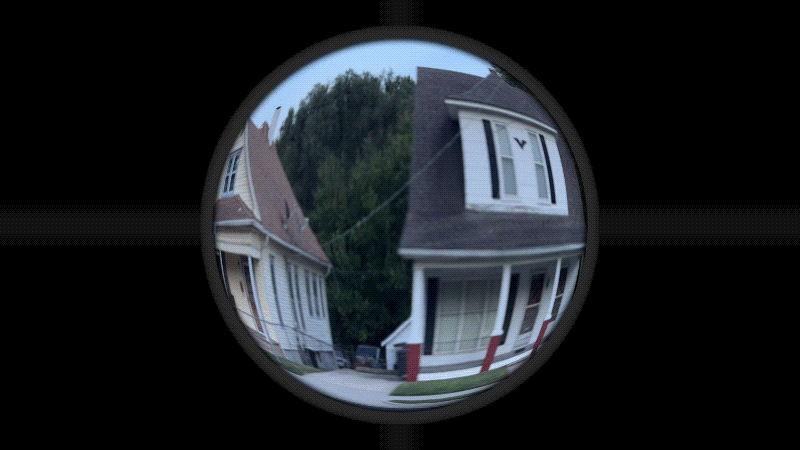
The fisheye effect has long been used in photography and videography to give an exaggerated, wide-angle view. The effect bends the edges of the frame into a curved, bubble-like shape and makes its center appear larger. It’s similar to what you see when looking through a door peephole.
The term “fisheye” comes from the idea of how a fish sees an ultrawide, hemispherical view from beneath the water. Because of this unique look, it’s usually used to give a more stylized, artistic feel instead of just a regular wide-angle shot.
How the Fisheye Effect is Used in Media
The fisheye effect has been popular since the 1960s and has appeared across different forms of media.
1. Music Video (blink-182 - The Rock Show)
One of the music videos by American rock band blink-182, The Rock Show, uses the fisheye effect in scenes where the band plays in a small square room. Normally, this kind of setup could look flat or cramped, but the fisheye perspective helps to add depth and stylization to the music video.
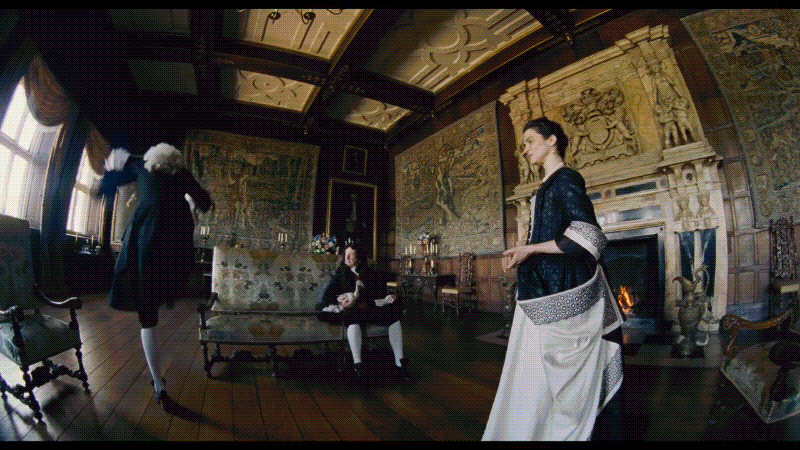
2. Film (The Favorite)
Yorgos Lanthimos’ comedy/thriller film The Favourite (2018) also makes striking use of the fisheye lens effect in some of its scenes. Besides adding an artistic look, the effect works as a storytelling device that mirrors the chaos and tension in Queen Anne’s court.
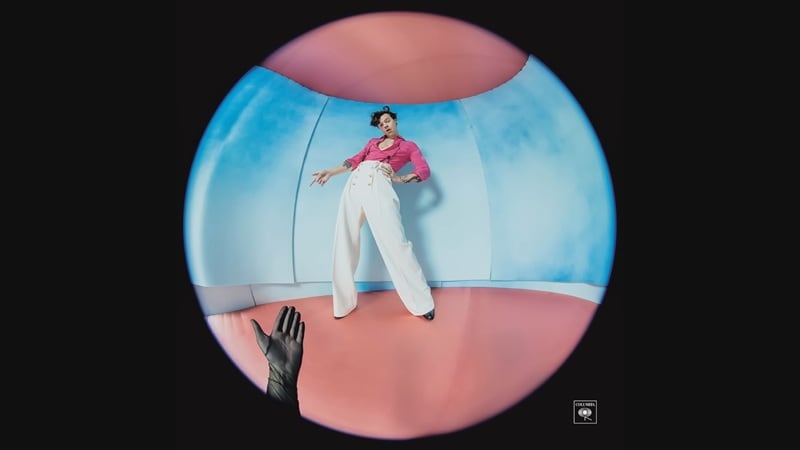
3. Cover Album (Harry Styles - Fine Line)
The fisheye effect is no stranger to the music industry. One of the samples can be seen on the cover of pop star Harry Styles’ album, Fine Line. The wide, curved look draws all the focus to him standing in the middle. It’s bold, eye-catching, and has become an iconic piece.
Part 2. How to Add Fisheye Effect in Premiere Pro
When it comes to editing videos, there are a couple of ways to create the fisheye lens effect in Premiere Pro. We will show you how to use the built-in effect to create it, and a faster option using an extra plugin.
Method 1: Using Lens Distortion Effect
The Premiere Pro fisheye effect can be achieved with the Lens Distortion effect built into the software. This effect gives you direct control over how much the image bulges or pinches.
Step 1: Import Your Video
Start by launching Premiere Pro and creating a new project. From the top menu, choose File > Import, or drag and drop the file to the Project panel.
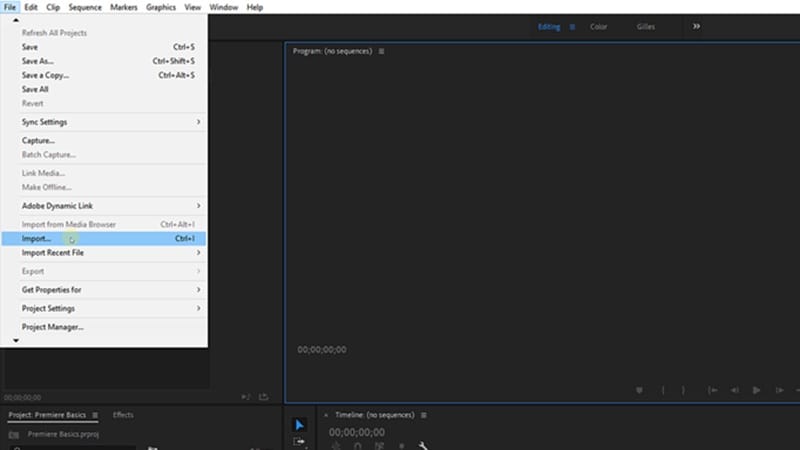
Once it’s imported, drag the clip onto the timeline so you can start working on it.
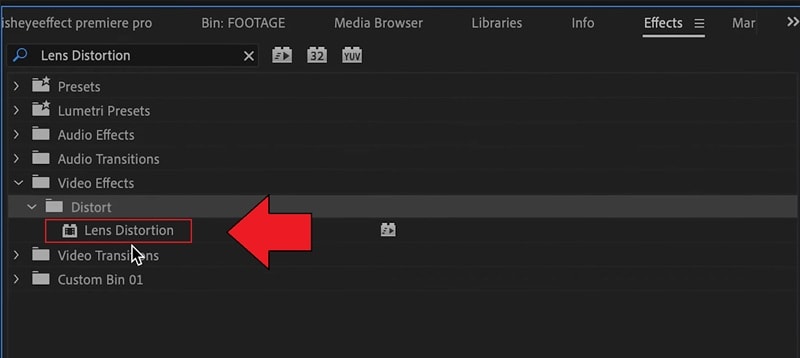
Step 2: Add the Lens Distortion Effect
Open the Effects panel (you can enable it under Window > Effects if it isn’t already open). In the search bar, type Lens Distortion. You’ll find it under Video Effects > Distort. Drag this effect onto your video in the timeline.
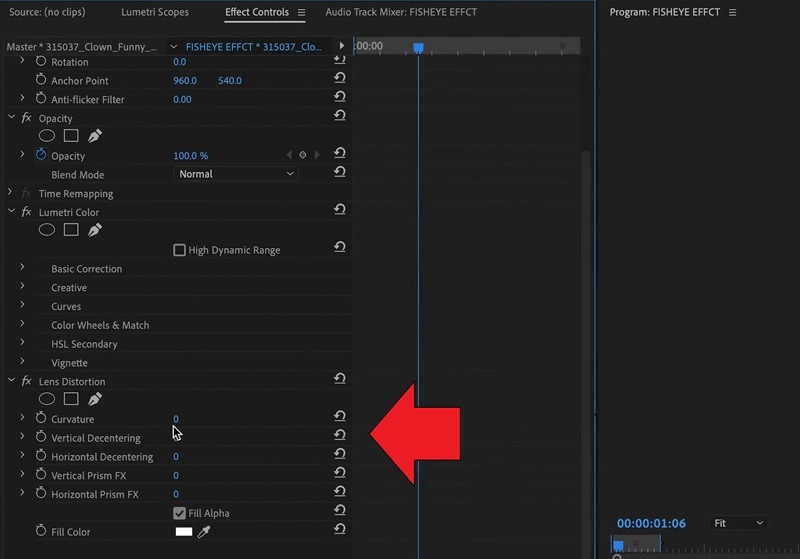
Step 3: Adjust the Settings
Click on your clip to highlight it, then open the Effect Controls panel. Under Lens Distortion, look for the Curvature slider:
- Moving the slider into negative numbers (around -50 to -100) will create the outward bulging fisheye look.
- Sliding it into positive numbers (+50 to +100) creates the opposite effect, more of a pinched center.
Adjust until you get the amount of distortion you like.
Step 4: Refine the Look
If the effect stretches the edges too much, try tweaking the Vertical and Horizontal Decentering options in the Lens Distortion settings. You can also scale the video slightly under Motion > Scale to hide any black borders that might appear.
For a more exaggerated effect, you could duplicate the clip and apply extra layers of distortion.
Method 2: Using an Extra Plugin
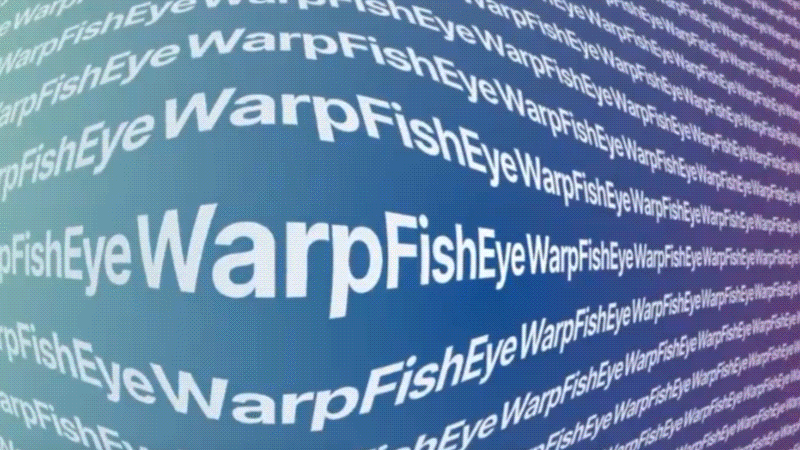
Aside from tweaking the video’s settings, you can also add a fisheye effect in Premiere Pro with the help of third-party plugins. One option is S_WarpFisheye by Boris FX, which is part of the Sapphire suite.
First, you need to download the Sappire suite from their website. This plugin requires a subscription of $80/month or $545/year. After installing and setting up the payment, you can start using it on your clip by following the steps below.
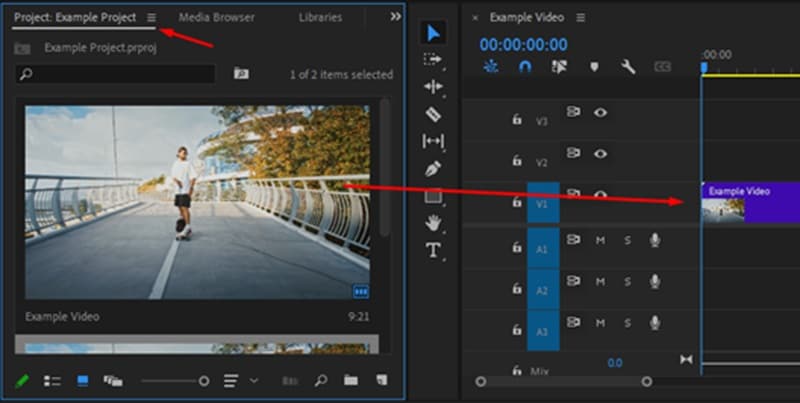
Step 1: Create a Timeline and Add the Effect
Before you can edit or apply the fisheye effect to your clip, you need to create a sequence. The quickest way is to drag your clip from the Project panel straight into the timeline. It will automatically generate a sequence that matches your video settings
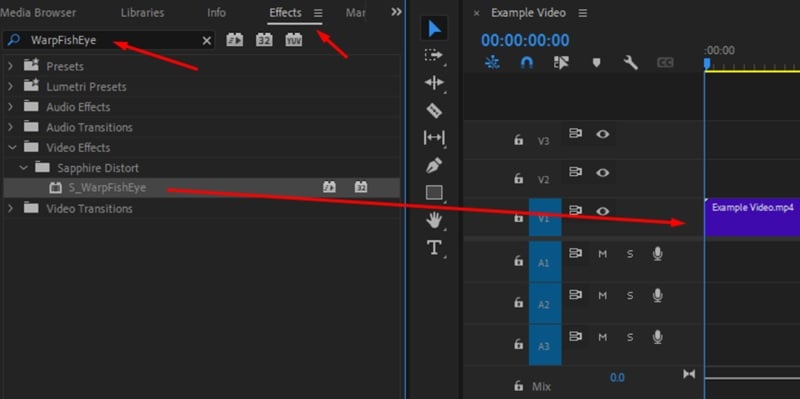
Once the sequence is set, go to the Effects panel and search for the S_WarpFisheye. Drag it onto your clip in the timeline, and you’ll instantly see the fisheye distortion applied.
Step 3: Customize in the Effect Controls Panel
If the default look doesn’t quite match what you want, open the Effect Controls panel at the top-left of your workspace. Scroll until you find S_WarpFisheye and adjust its parameters to refine the effect.
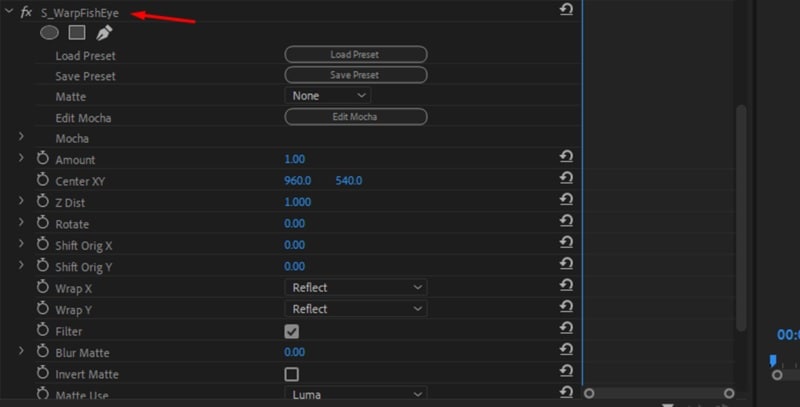
You can also click Load Preset to browse ready-made fisheye styles and apply them. After you’re happy with the adjustments, you can save and export the final video.
Part 3. One-Click Solution to Add the Fish Eye Effect
With your understanding of applying the fisheye lens effect in Premiere Pro, we have another option if you want to do it even more easily and cost-effectively, just within one platform.
Wondershare Filmora is built for ease of use, so you don’t have to spend much time setting things up. The fisheye effect is available in its library of built-in effects. You just need to download it, drag it on top of your clip, and it’s ready to go.
Even though the process is mostly automatic, you still have control. You still get to fine-tune the effect’s intensity to get the exact look you want.
 secure download

How to Add Fisheye Effect in Filmora
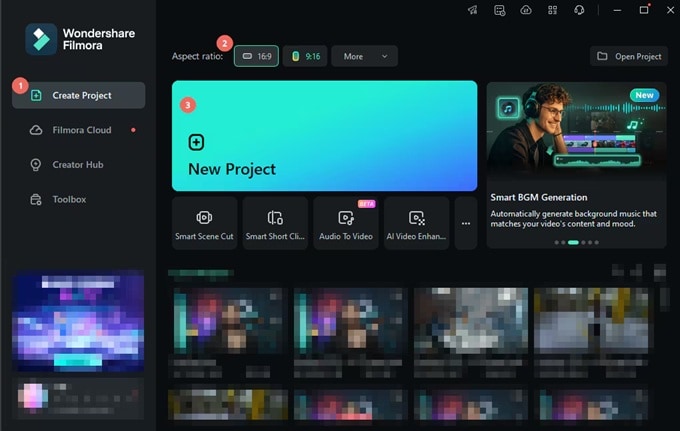
Step 1: Create a New Project and Import the Video to Edit
With Filmora installed on your computer, open the software and create a new project. Then, import your video by clicking Import or dragging and dropping it onto the interface.
 secure download
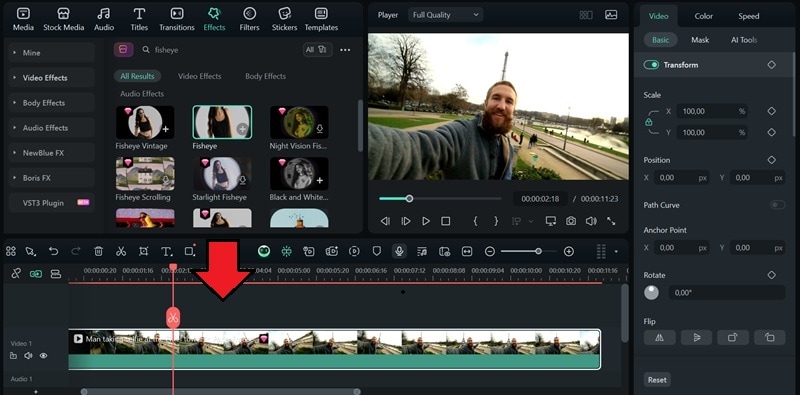
Step 2: Browse and Apply the Fisheye Effect
Select the Effect tab and search for the “fisheye” effect. You’ll see a few variations of the effect, so pick the one that you like and drag it onto your clip in the timeline.
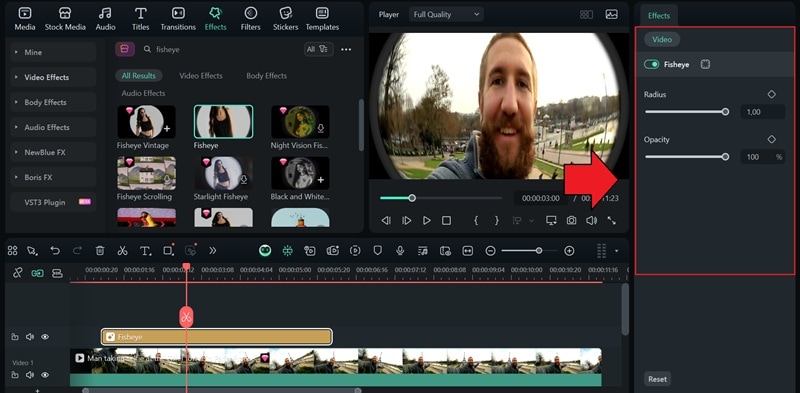
Step 3: Adjust the Effect Settings
Once applied, click on the effect layer in the timeline and head to the property panel on the right to tweak the settings. You can adjust how strong or subtle the effect looks, depending on which fisheye option you chose.
Tip: The fisheye effect is applied to the track directly below it. If you also want the text to be distorted, place your text layer between the fisheye effect track and the video clip. You can also layer multiple effects on your video.
Conclusion
The fisheye effect has been around for decades, and it’s still one of the best ways to give videos a unique look. If you are using Premiere Pro, you can apply the fisheye effect to your video with the built-in Lens Distortion effect or go for a Premiere Pro fisheye effect plugin if you want an easier option.
While we’ve covered both options, we also recommend trying Filmora. It already comes with fisheye presets built into its effects library, so you don’t need to install anything extra. It can be a more cost-effective choice if you want a simpler alternative.
