
 100% Security Verified | No Subscription Required | No Malware


 ChatGPT
 Perplexity
 Gemini
 Claude
 Grok
Grok
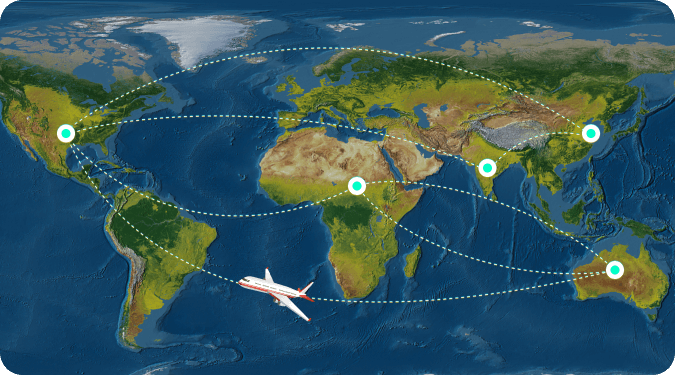
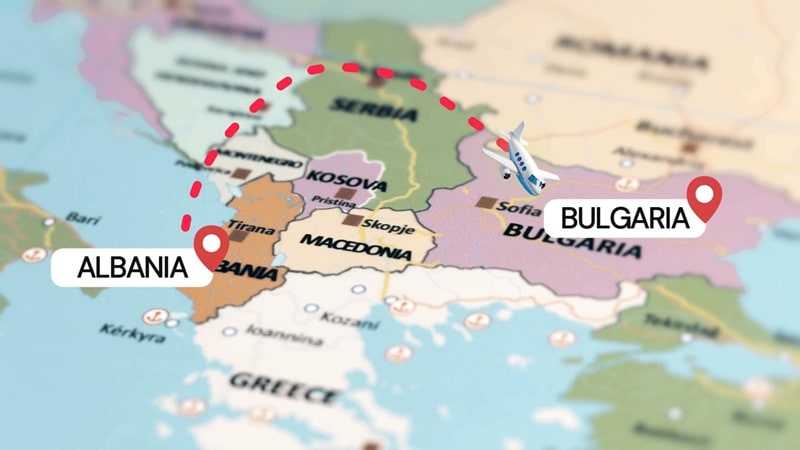
Have you ever watched travel vlogs or documentaries that start with a flight route animation? This effect visualizes the journey beautifully and makes it feel cinematic. From one destination to another, animated flight maps have become a favorite element in travel videos.
Many creators assume that creating an animated plane flying over a map requires complex software. But with Wondershare Filmora's built-in tools and ready-made assets, you can easily make one yourself.
Let's explore how you can make a plane flying over map animation using Filmora's built-in tools.
In this article
Part 1. Find All You Need for Flight Route Animations in Filmora
Say Goodbye to Complicated Multi-Software Workflows!
Creating animated flight routes used to feel like running a marathon:

- Searching multiple stock libraries for the perfect map and airplane icons
- Switching to After Effects or another motion graphics tool to animate
- Exporting and importing repeatedly into your video editor for final adjustments
All that back-and-forth is time-consuming and prone to errors.
With Filmora, everything happens in one workspace.
Now you can skip the complicated process entirely. Wondershare Filmora seamlessly combines creative design, animation, and video editing:
- ✈️ Built-in Assets - Access a massive library of maps, airplane icons, and other travel elements without leaving the software.
- 🎨 Real-Time Animation Editing - Adjust keyframes and flight paths with a simple drag-and-drop workflow; see changes instantly.
- ⚡ No Plugins Required - Design, animate, and export your video all within Filmora, eliminating format conversion hassles.
The result? What used to take hours can now be done in just 30 minutes. Spend more time focusing on your creative vision, and less time jumping between programs.
 secure download

What Filmora Has Ready for You
1. Stock Media Library (Creative Assets)
Filmora includes a built-in Creative Assets hub that gives you instant access to thousands of ready-to-use visuals and sounds. You can find what you need right inside the editor, no need to browse external sources.
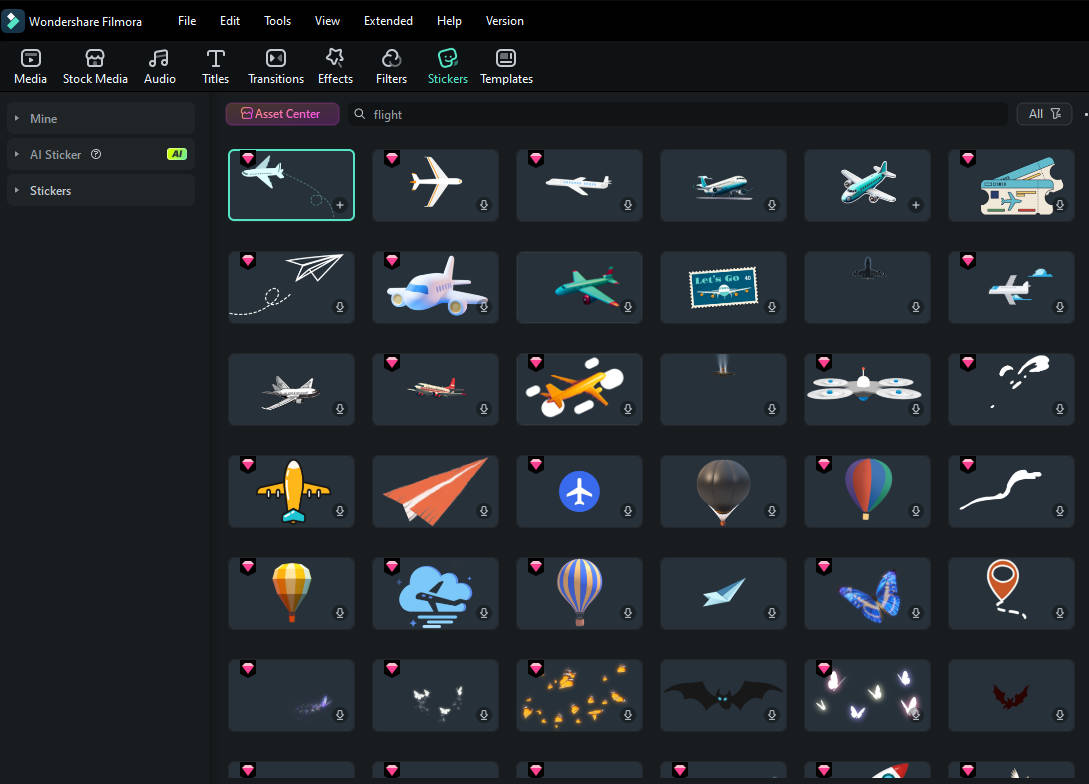
Here's what you can use for your animated plane flying over map:
- Maps and Backgrounds: Choose from a range of static or animated maps, landscapes, and textures.
- Stickers and Icons: Access plane graphics, location pins, arrows, and other travel-themed symbols to build your route visually.
- Music and Sound Effects: Add royalty-free soundtracks or ambient travel sounds that enhance your travel scenes and transitions.
2. Pen Tool and Path Animation
Filmora adds the new Pen Tool, which lets you draw and animate paths directly on your video canvas. You can create a smooth plane flying over map animation using Stroke or Trim Path effects. These tools help you simulate the feeling of a plane tracing its journey, without the need for complex keyframes or third-party software.

Part 2. How to Create a Flight Route Animation (Step-by-Step)
Now that you know what Filmora offers, let's create your flight animation on map. Use the Pen Tool with Trim Path and Stroke effects to draw your route and add a moving plane icon. The steps below show how to complete it from start to finish, all within Filmora.
Follow the guide below to learn how to create a flight map animation:
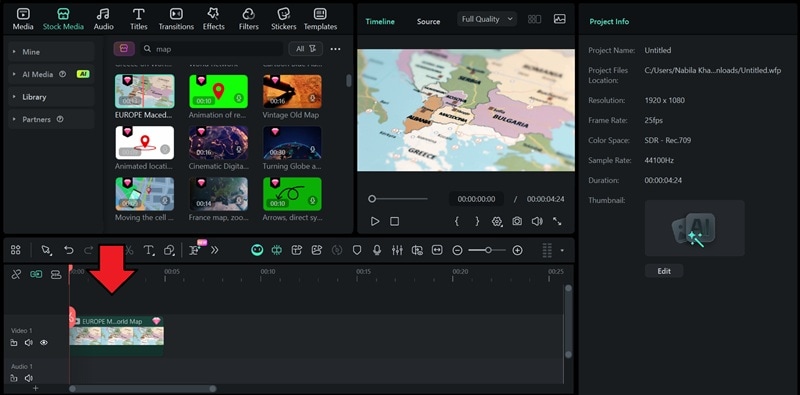
Step 1Add a Map Background
Import your map image or choose one from Filmora's Stock Media Library. Place it on the main video track to set the scene.
 secure download
 Step 2Draw the Flight Path
Use the Pen Tool to trace your travel path on the map. On the toolbar above the timeline, click the Shape icon > select Pen Tool.
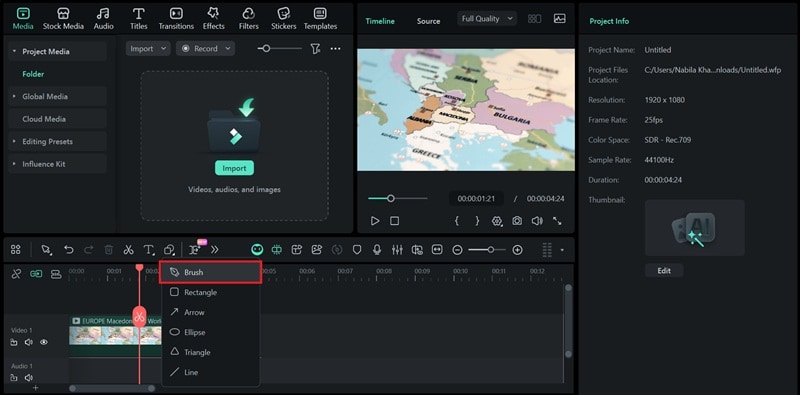
Click on the canvas to create points. You can draw straight lines for simple routes or curved ones for natural flight paths.
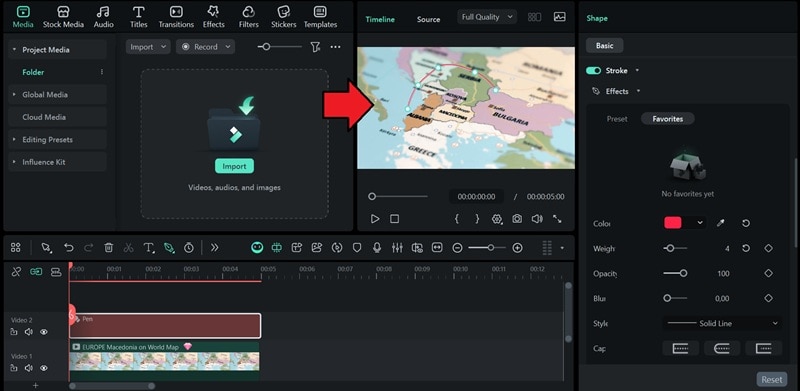
Step 3Adjust and Customize the Path
On the Property panel on the right-side of your screen, go to Shape > Basic > Stroke.
Under Effects, you can apply a preset, adjust the color, thickness, and opacity.
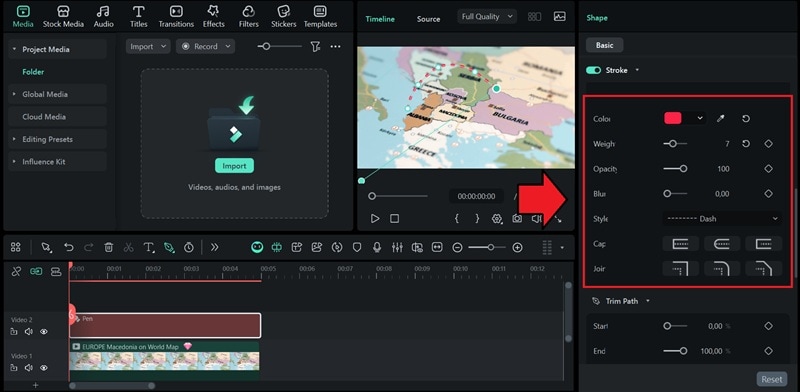
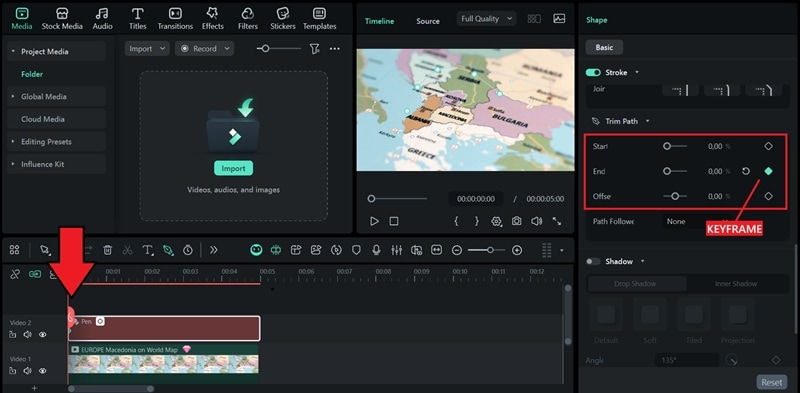
Step 4Animate with Trim Path
Open the Trim Path controls in the Properties panel to start animating your line.
Move the playhead to the beginning of the timeline, set both Start and End values to 0%, and place a keyframe for the End property.
Then, drag the playhead to where you want the animation to finish, and set the End value to 100%. If it doesn't automatically add a keyframe, you need to manually add it like before.
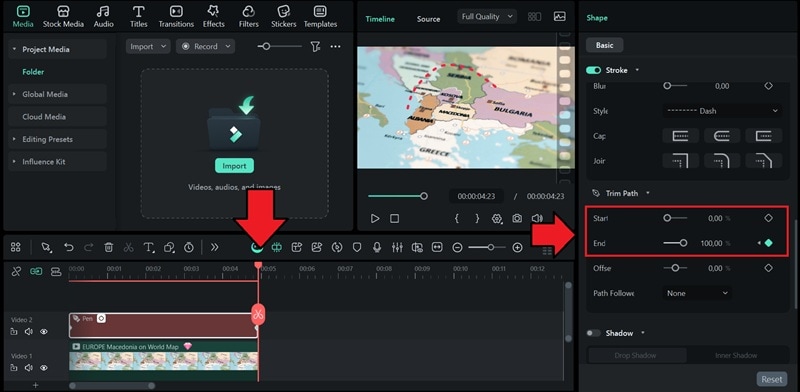
You can also tweak the Offset value to shift where the animation begins along the path.
Step 5Add the Plane Icon
Open the Path Follower menu. Then, select Preset and choose a plane sticker or icon. You can also use your own plane graphic by importing it from your computer or selecting one that's already on the timeline.
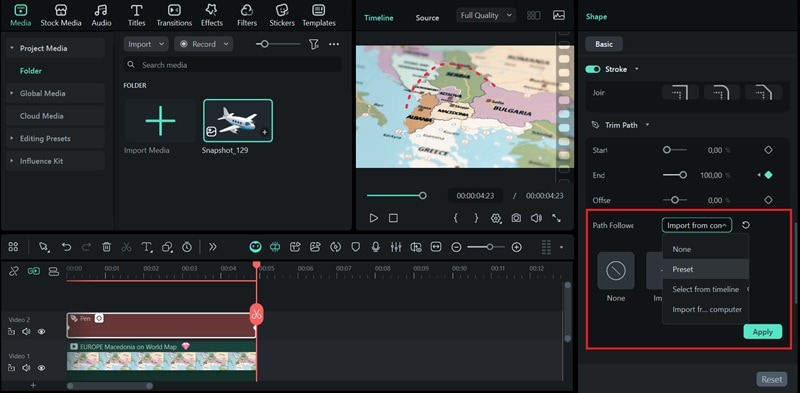
Click Apply, and the plane track will appear on the timeline.
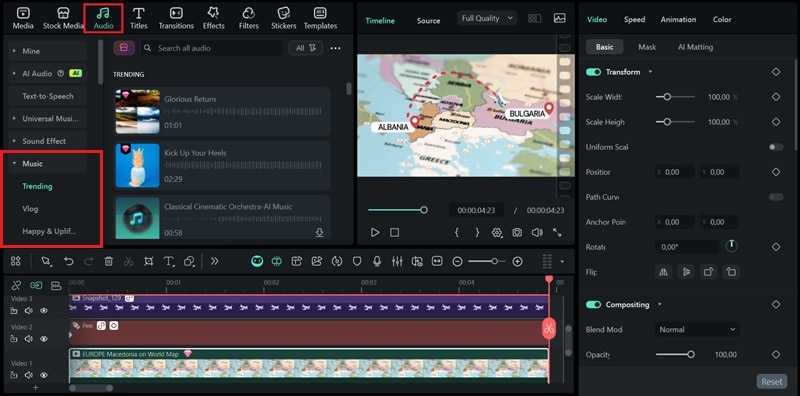
Step 6Add Sound Effect and Finishing Touches
Go to the Audio tab > Sound Effect.
Find plane or travel-themed sound effects from the built-in library. Then, drag and drop them onto the timeline.
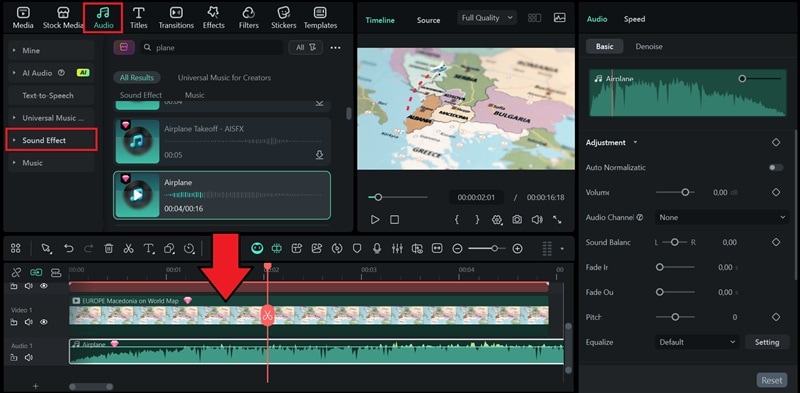
Once everything matches your timing, preview your project to ensure smooth motion before exporting.
Filmora gives you full control of the animation process without making it complex. With these steps, you can create a smooth airplane animation on a map that fits in any travel video. In the next part, let's see how to enhance the visuals to make your route look more dynamic.
Part 3. Enhance Your Flight Route Animations
Once your route and plane motion are in place, it's time to polish the details. A few touches can make your plane path animation look more natural and visually balanced. In this section, you'll learn how to enhance the final result without complicating the workflow.

Tip 1. Add Text or Location Labels
Place text or title elements that appear as the plane reaches each stop. Use fade or motion presets from the Animation tab. Choose clear fonts so the names stay visible without distracting from the map.
Tip 2. Add Map Transitions Between Scenes
When switching from one route to another, use Filmora's Transitions tab to apply map-style cuts such as zoom-in or slide effects. A quick zoom between continents or a smooth fade between regions helps maintain continuity in your story.
Tip 3. Sync Plane Motion with Music
Play your timeline with background music, then adjust the plane's speed or keyframes to match the beat. Slow moments can mark takeoff or landing, while faster beats can highlight long routes. This enhancement can make the flight route animation have a natural pace.
Conclusion
Creating a flight route animation can make any travel video feel more cohesive and story-driven. It helps viewers follow your journey from one destination to another in a cinematic way.
With Filmora, you can design an animated flight map using its Pen Tool. No extra software or plugins are needed; everything is already inside the editor.
Start using Filmora today and create your own animated plane flying over a map. Make your next travel video look more smooth and dynamic!
secure download 