
 100% Security Verified | No Subscription Required | No Malware


 ChatGPT
 Perplexity
 Gemini
 Claude
 Grok
Grok
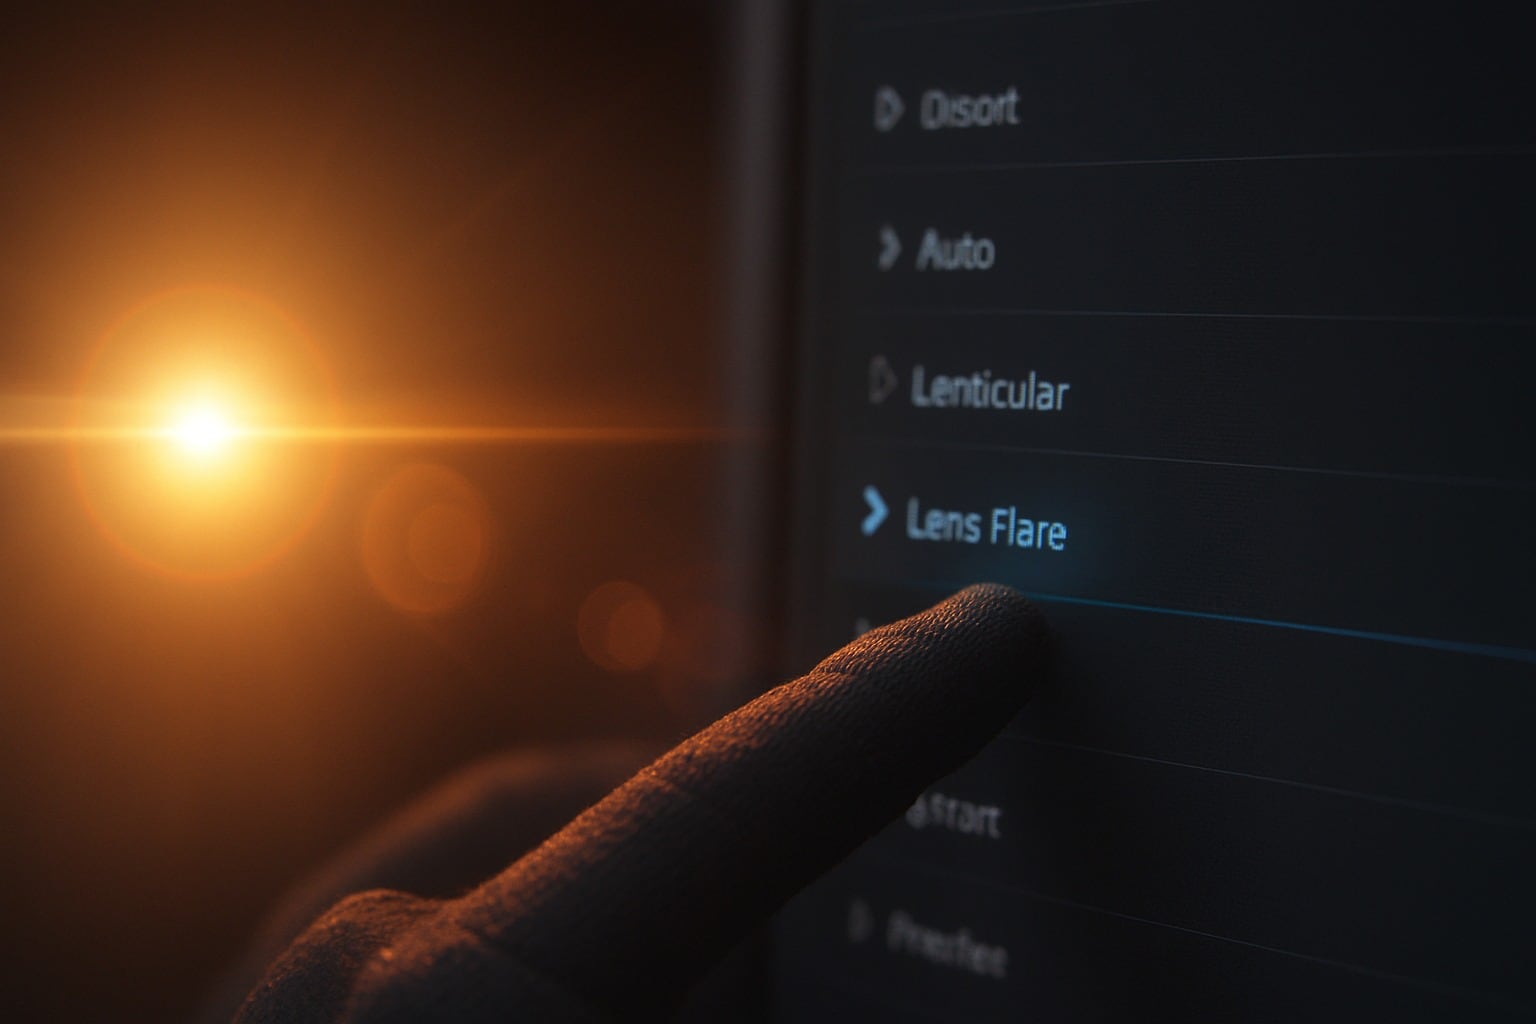
Lens flare transitions are one of the most popular effects in video editing because they instantly make clips feel more cinematic and polished. This type of transition works by mimicking the light streaks or glow that happens when a bright light source hits a camera lens. When used between two clips, it creates a smooth, stylish transition that feels natural and visually engaging.
Now, most video editors rely on Premiere Pro lens flare transition effects to achieve this look. However, Premiere Pro’s built-in options are often limited, and many users need plugins or stock effects to get more variety.
Fortunately, there are other tools you can use to achieve the same effect that don’t involve the stress of using a plugin or an extra download. In this guide, we’ll show you step by step how to add lens flare transition effects in Premiere Pro and then introduce an easier solution.
In this article
Part 1: How to Add Lens Flare Transition in Premiere Pro
Adding a lens flare transition in Premiere Pro is simple once you know where to look. Just follow the steps below to create that cinematic glow in your edits. However, keep in mind that Premiere Pro’s built-in lens flare library is quite limited, so for more variety you might need Adobe Stock or extra plugins.
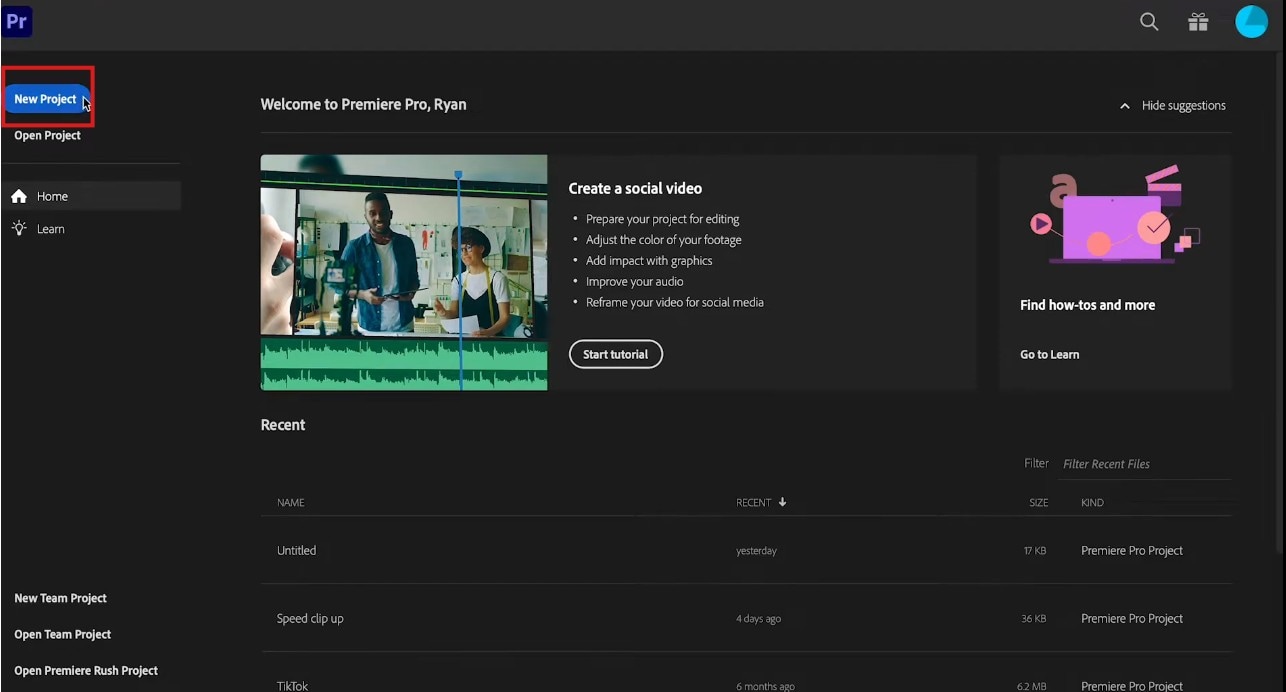
Step 1. Open Premiere Pro and Import Clips
- Launch Premiere Pro from your desktop or applications.
- On the top left corner of the home screen, select New > Project, name the project, and click on OK to open your new editing workspace.
- Now, click on File > Import, select the clips you want to edit
- Drag the clips and arrange them on the editing timeline
Step 2. Add an Adjustment Layer
- In the Project Panel, click the New Item button at the bottom.
- Choose Adjustment Layer and click OK.
- Drag the adjustment layer onto a track above your video clips on the timeline.
- Trim it so it only covers the point where one clip transitions to the next.

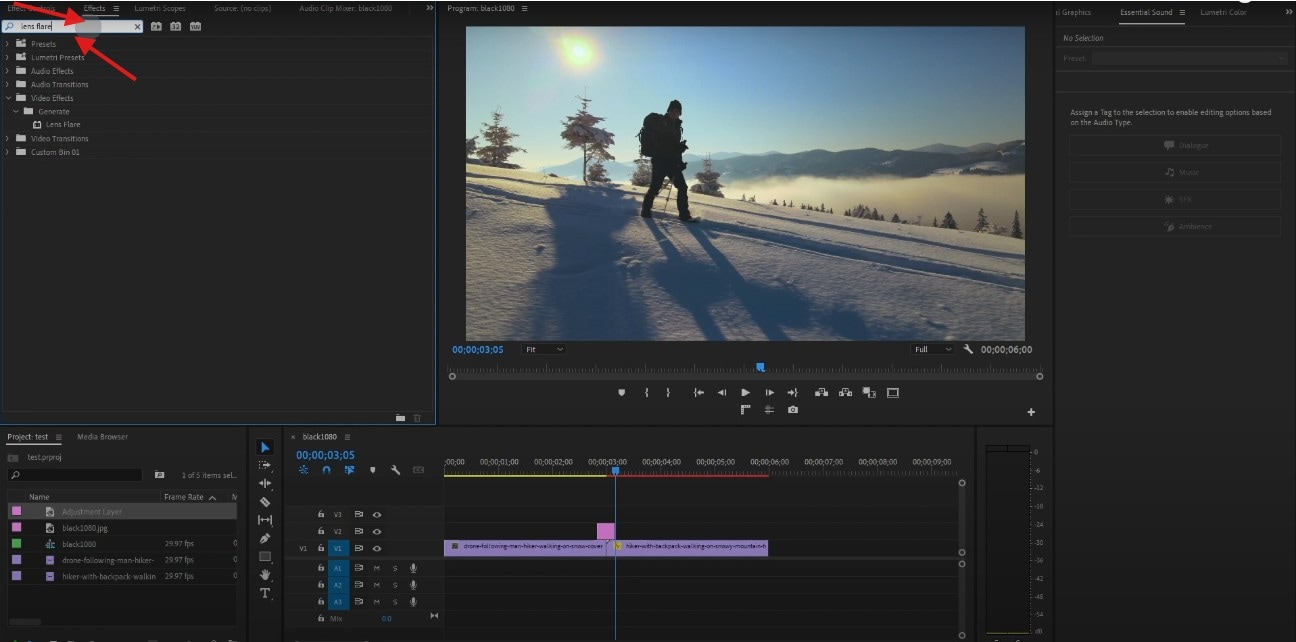
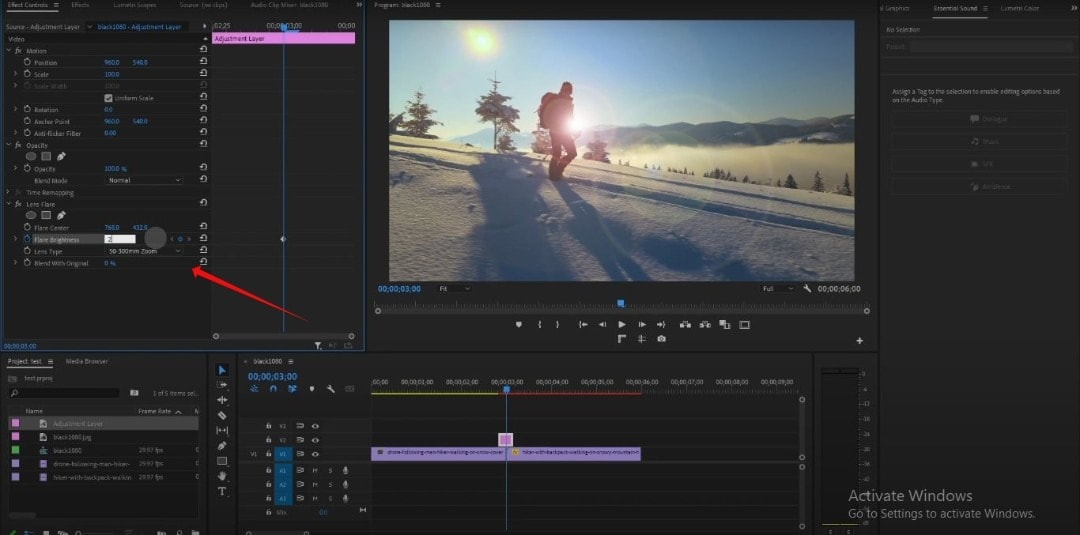
Step 3. Add Lens Flare Effect
- Click on Effects in the right-top access bar to open the Effects panel.
- Then type Lens Flare in the search bar and hit the Enter
- Select the lens flare effect and drag it onto your adjustment layer.
Steps 4. Customize the Effect
- Select the adjustment layer, then click on Effect Controls at the top of the editing window
- Expand Lens Flare to see its settings.
- From there, you can adjust B to place the flare where you want it, change Flare Brightness to control how strong the flare looks, and make other adjustments you want to make
Part 2: Easier Alternative to Adding Lens Flare Transitions to Clips
Now, as we saw in the first part, Premiere Pro does let you add lens flares. But the big limitation is that the built-in options are very limited. However, with tools like Wondershare Filmora, adding different types of lens flare transition to your video clips is much more easier.
Filmora is a beginner-friendly video editing software that has become very popular among most content creators and video editors. Its large collection of multiple collections of different transition effects is one of the features that most users of this software love about it.
Unlike Premiere Pro, you don’t have to go hunting for plugins or pay extra just to get more effects. Everything you need is already there, ready to use. With Filmora, adding a lens flare is as easy as dragging and dropping it onto your clip.
And what makes it even cooler is you can still adjust and customize it to match your video style, and the process is much faster and doesn’t feel complicated. That’s why Filmora is a great choice for anyone who wants great results without getting stuck in technical steps.
 secure download

To make things even clearer, let’s look use a table chart to do a quick comparison:
|
Feature |
Premiere Pro (Adobe) |
Filmora |
|
Lens Flare Options |
Basic, plugins or Adobe Stock needed |
Many built-in lens flare transitions |
|
Ease of Use |
Professional but takes time to learn |
Beginner-friendly, simple drag-and-drop |
|
Customization |
Very detailed adjustments |
Customizable but much faster |
|
Plugin Dependence |
Often needs extra plugins |
All-in-one, no plugins needed |
|
Cost Efficiency |
Higher subscription + plugins |
More affordable, no extra costs |
From the table above, you can clearly see the advantage that comes with using Filmora to add the lens flare transition to your clips.
Part 3: How to Apply the Lens Flare Transition to Videos Using Filmora
Follow these easy steps to add lens flare transitions to your videos using Filmora editing software:
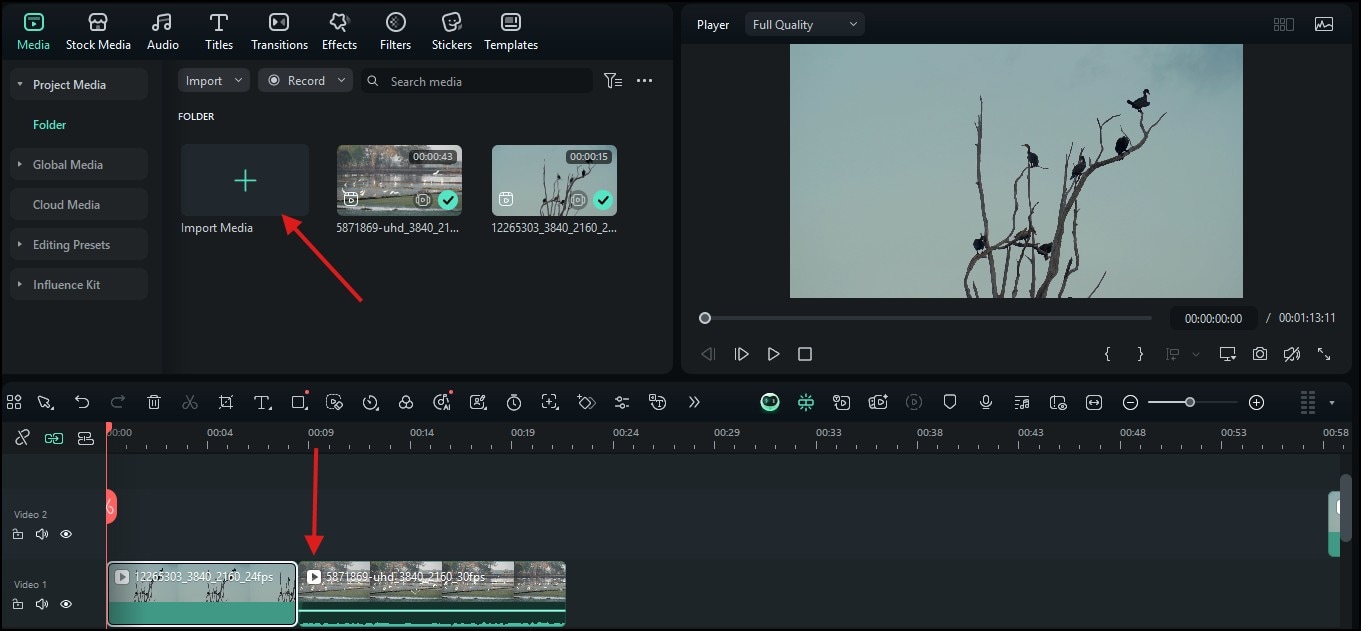
Step 1: Open Filmora and Import Clips
- Launch Filmora on your computer, and on the home screen, click New Project to open the editing dashboard.
- On the dashboard, click on Import to select the video clips you want to use.
- Drag the clips down onto the video column at the bottom of the timeline
 secure download
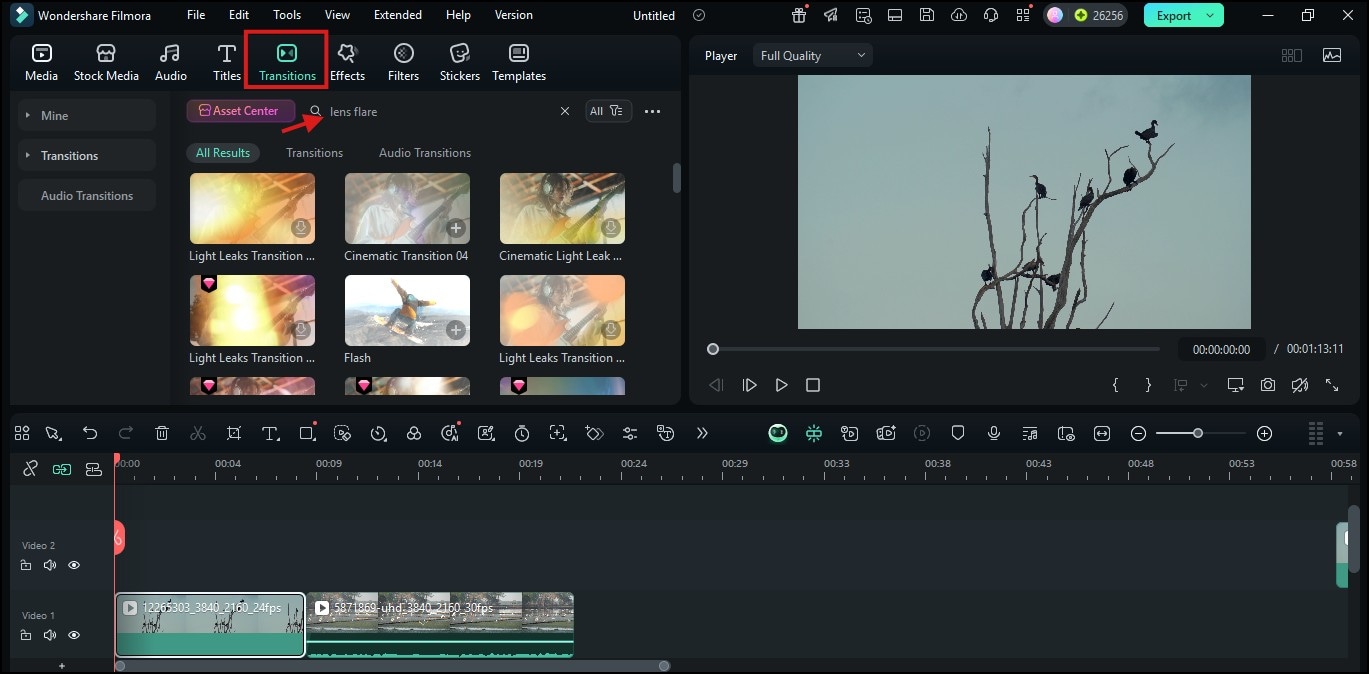
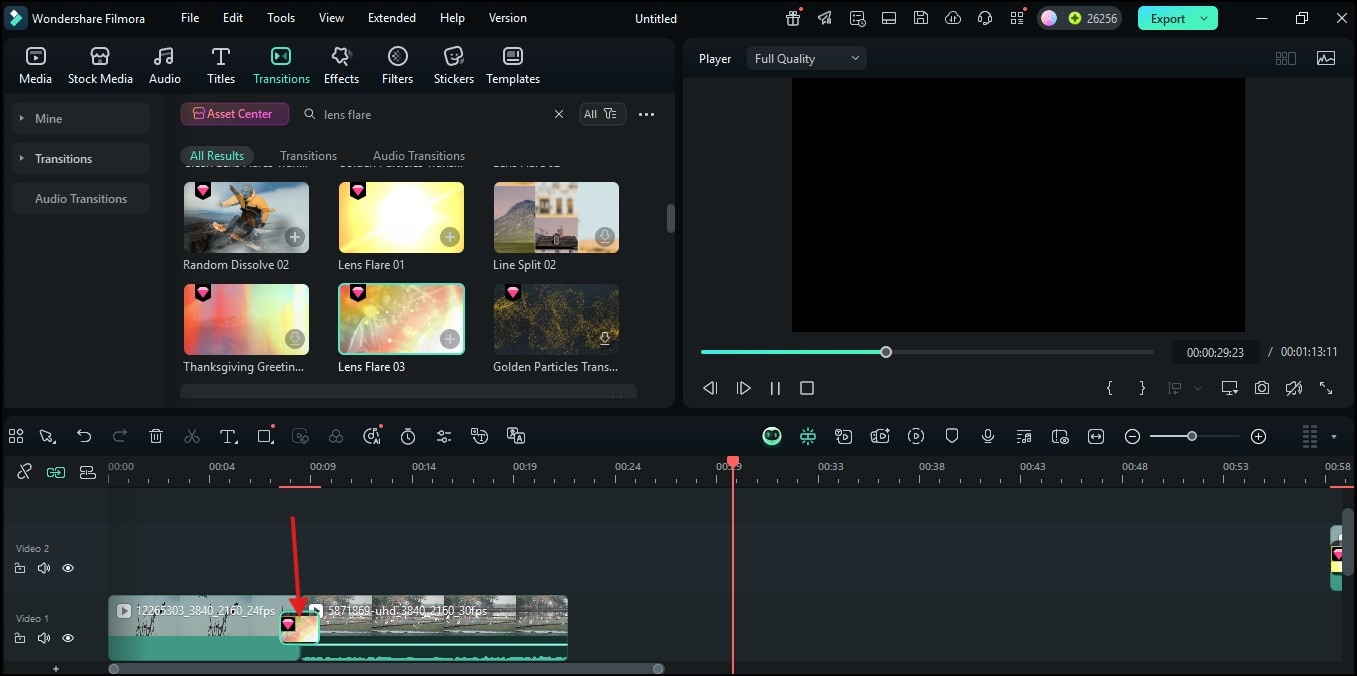
Step 2: Open Transitions and Search Lens Flare
Go to the top menu and click the Transitions tab.
In the search bar, type Lens Flare, and Filmora will show you all the available lens flare transitions.
Step 3: Drag and Drop Transition Between Clips
From the options Filmora provides you with, select the lens flare style you like.
Then, drag it down to the timeline and place it between two clips.
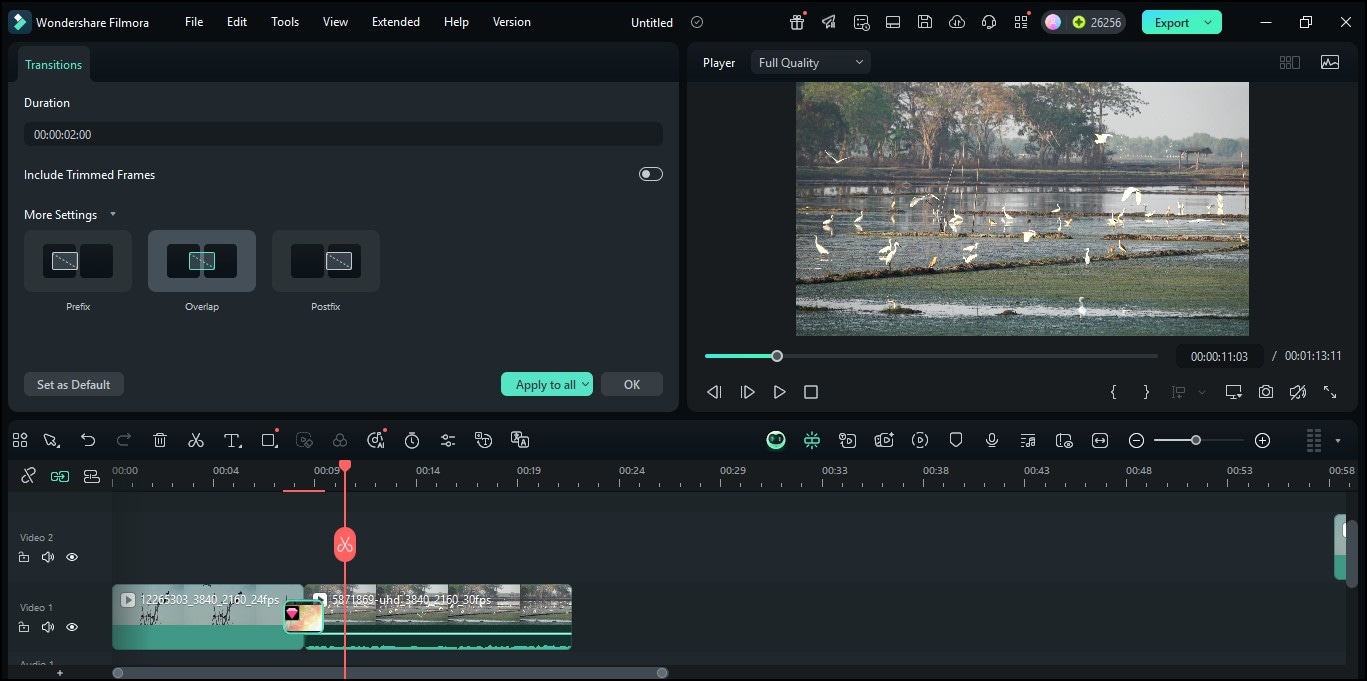
Step 4: Adjust Duration and Intensity
- Double-click the transition on the timeline.
- A settings box will appear where you can change the duration and tweak the eeeee of the flare.
- Preview your video, and adjust until it looks just right.
- Once you are done, hit the Export botton at the top-right part of the screen to save the edited video to your device.
And that’s it! In just a few steps, you’ve added a professional-looking lens flare transition without any stress.

Conclusion
Lens flares are simple yet strong enough to grab the attention of viewers. In this guide, we have shown you how to add the lens flare transition in Premiere Pro and also provided Filmora as an easier all-in-one alternative. Both have professional control; however, there are very limited lens flare transition that you can get Premiere Pro for free. On the other hand, Filmora offers you a wider range of options to choose from. And if that is what you are looking for, don’t hesitate to try out Filmora today.
secure download
