
 100% Security Verified | No Subscription Required | No Malware


 ChatGPT
 Perplexity
 Gemini
 Claude
 Grok
Grok
Whether you need to verify your identity with a government institution or are applying for a job, a portrait-style photo with your name and date of birth prominently displayed is often a key requirement. Luckily, you don't have to go to a professional studio to get new pictures taken, as there are easy ways to add a name and date to a photo within a couple of minutes.
We will show you just how efficient it can be, and all you have to do is take a photo of yourself with your phone and do a bit of editing.
In this article
Best Name and Date Photo Maker

Whether you're using a smartphone or a computer, there are countless name and date photo editors available—but not all are created equal. In the following part, we'll highlight the top two name and date photo maker tools that stand out for their ease of use, versatility, and quality results. Perfect for creating personalized memories, event photos, or timestamped images in just a few clicks.
Wondershare Filmora
Compatibility: Android, iOS, Windows, Mac
If you are looking for a great editing tool that is versatile enough to handle all your image and video editing needs, then Filmora is your best choice. It features a simple drag-and-drop interface and numerous photo editing tools, but most importantly, it offers various distinct categories of text templates to choose from.
There are lots of options in each category, so you can get a bit creative with the style of text you use, and all the options are fully customizable, allowing you to change the size, position, and color.
 secure download

How to Add Name and Date to A Photo with Filmora?
Here are the steps to put a name and date on the photos using Filmora on your computer.
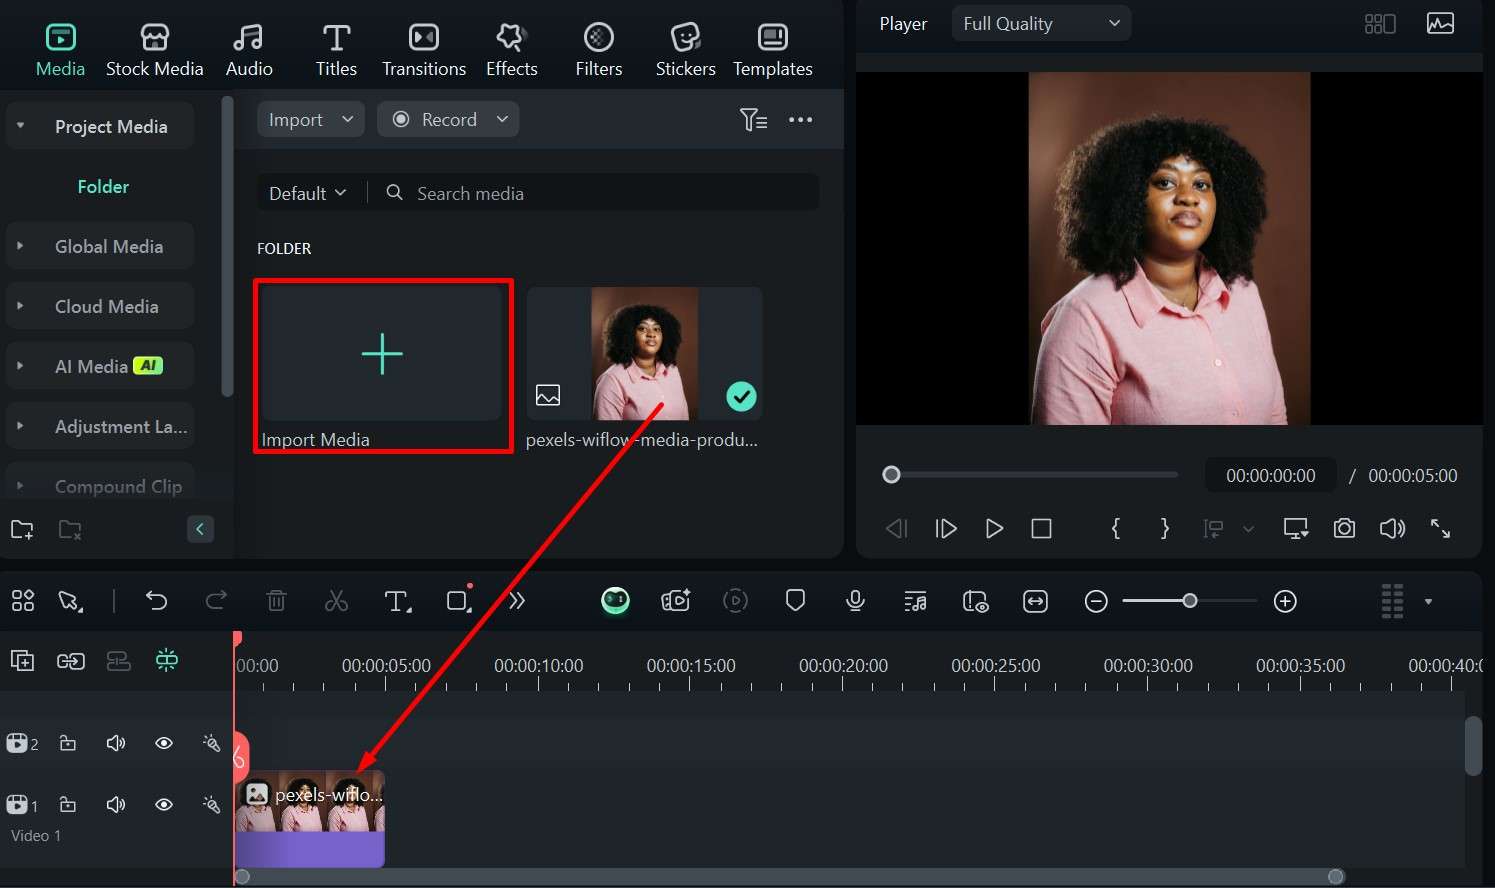
Step 1: Open Filmora and begin a New Project.
Step 2: Click on Import Media and choose the image you want to edit, then drag it to the timeline.
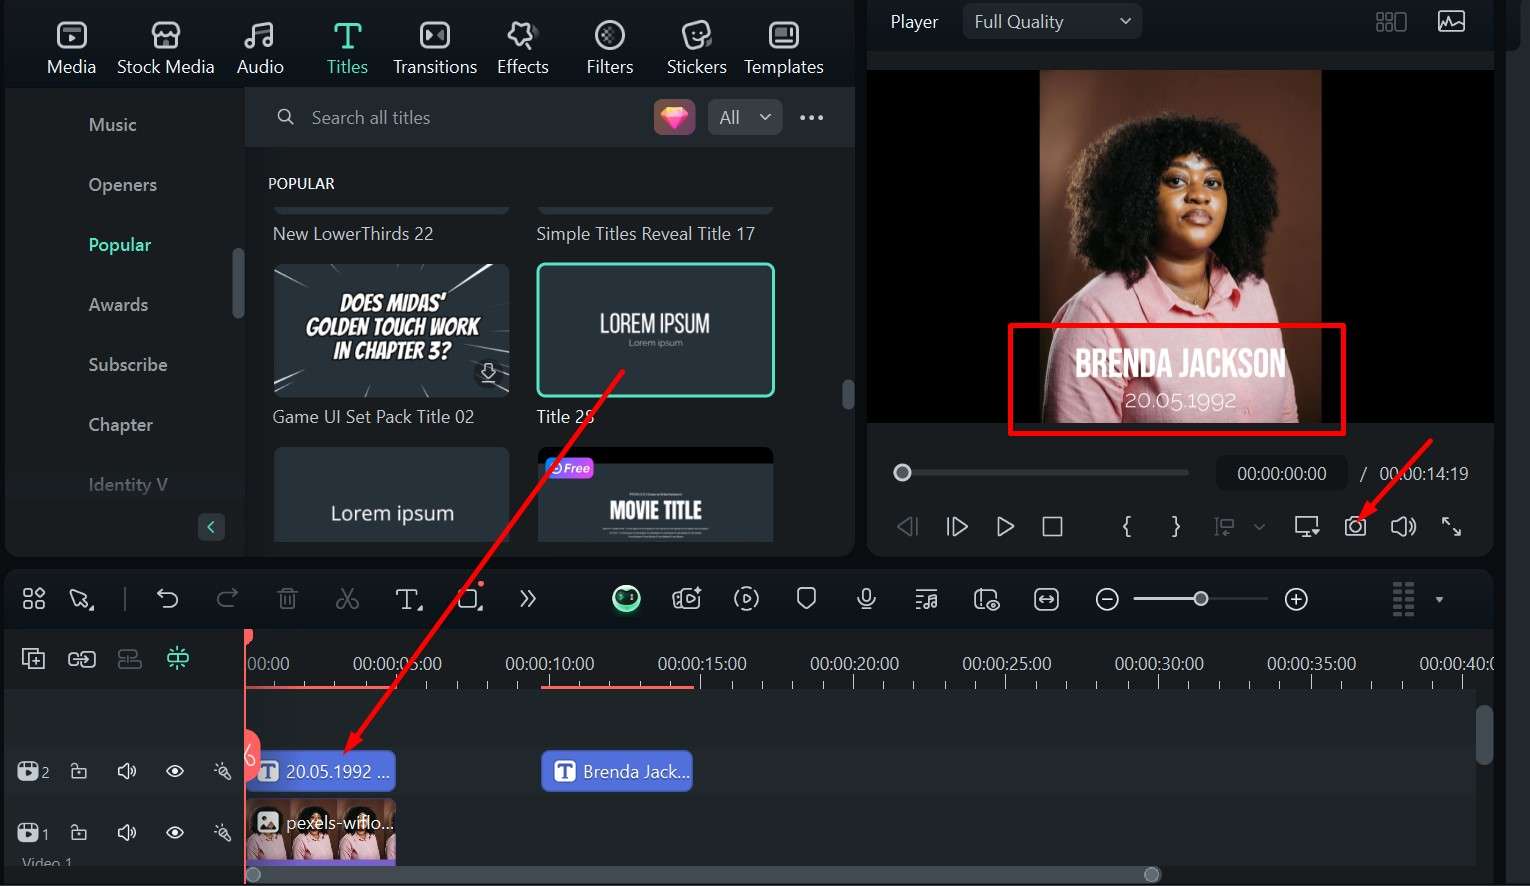
Step 3: Go to Titles > Popular and choose a style that suits you, then drag it to the timeline.
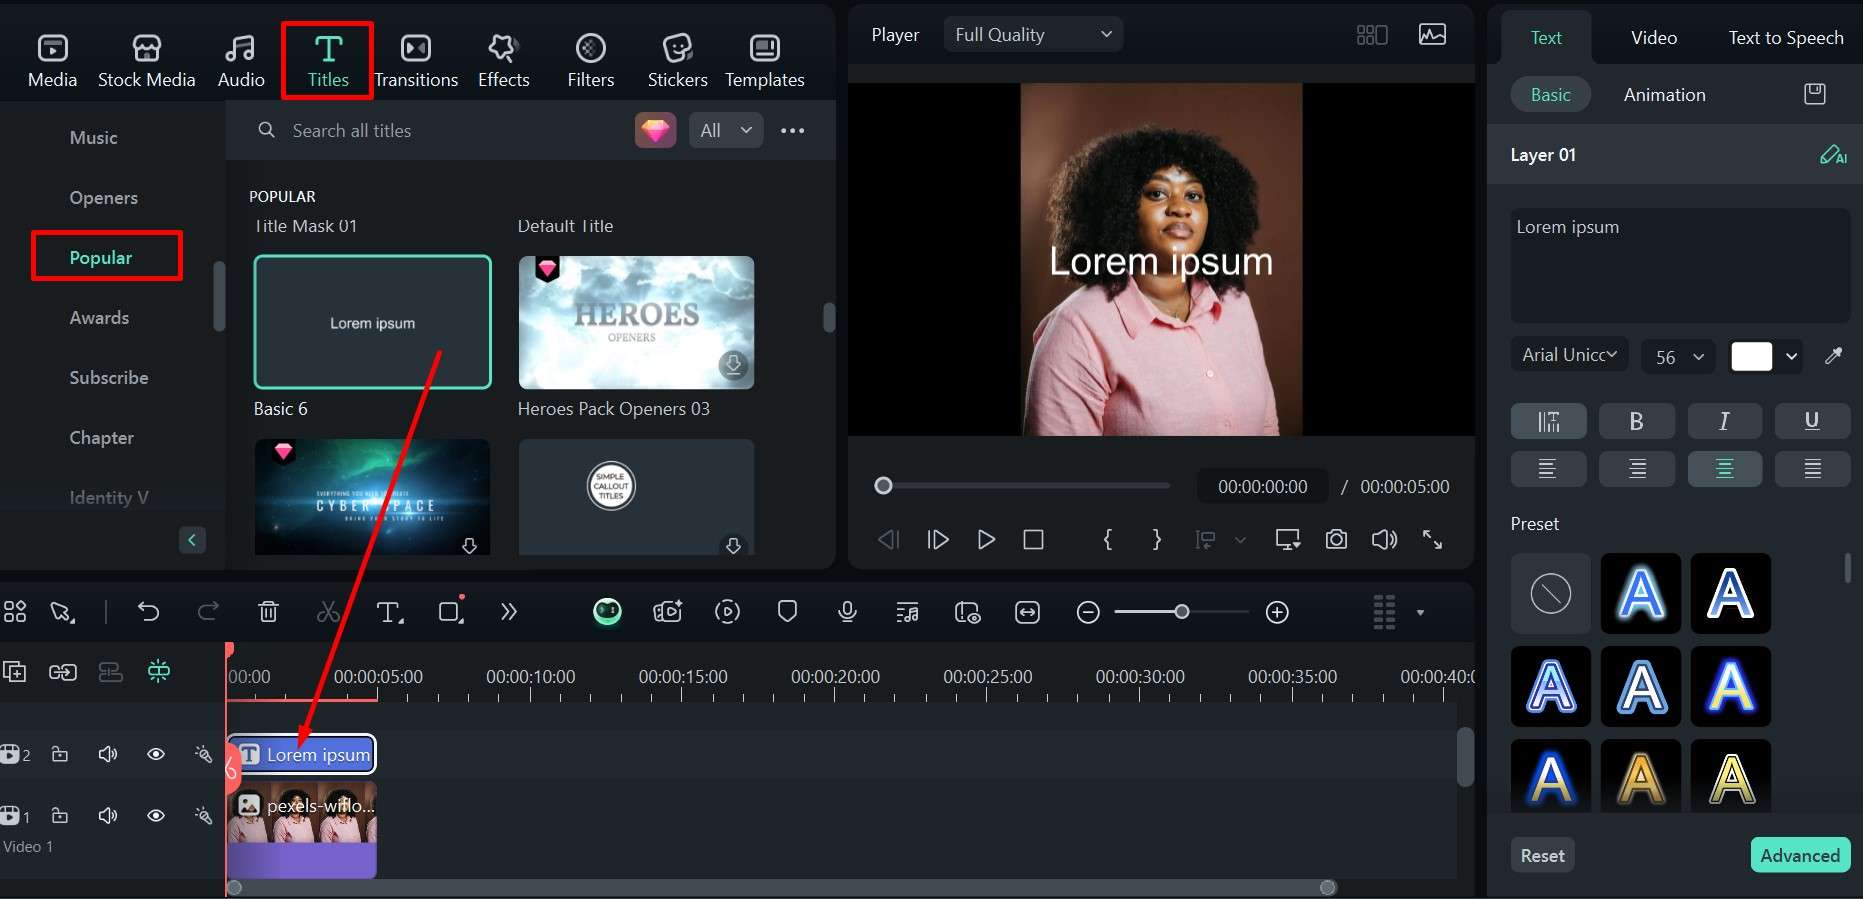
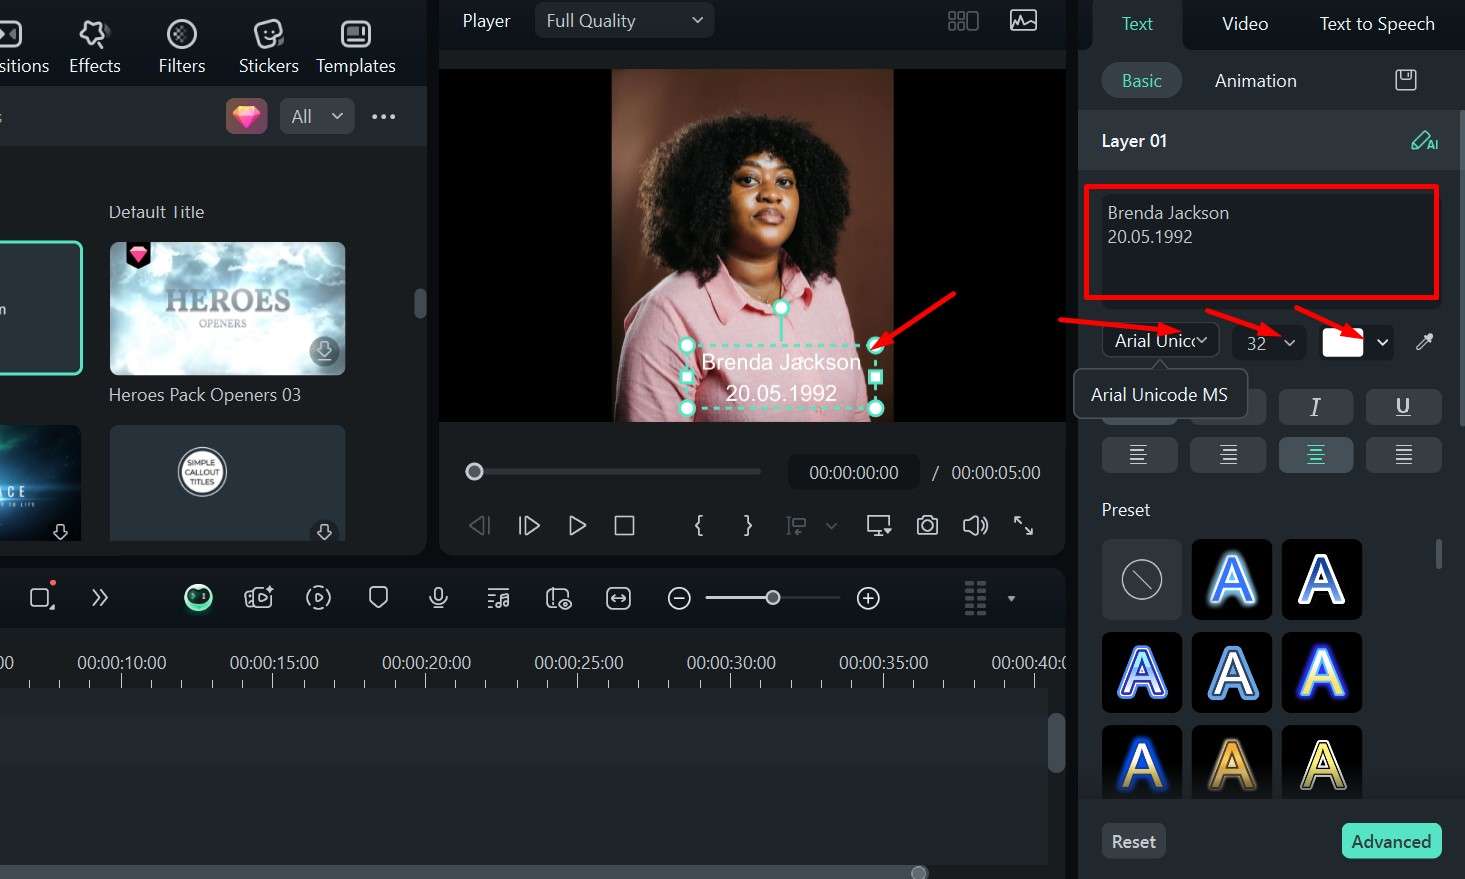
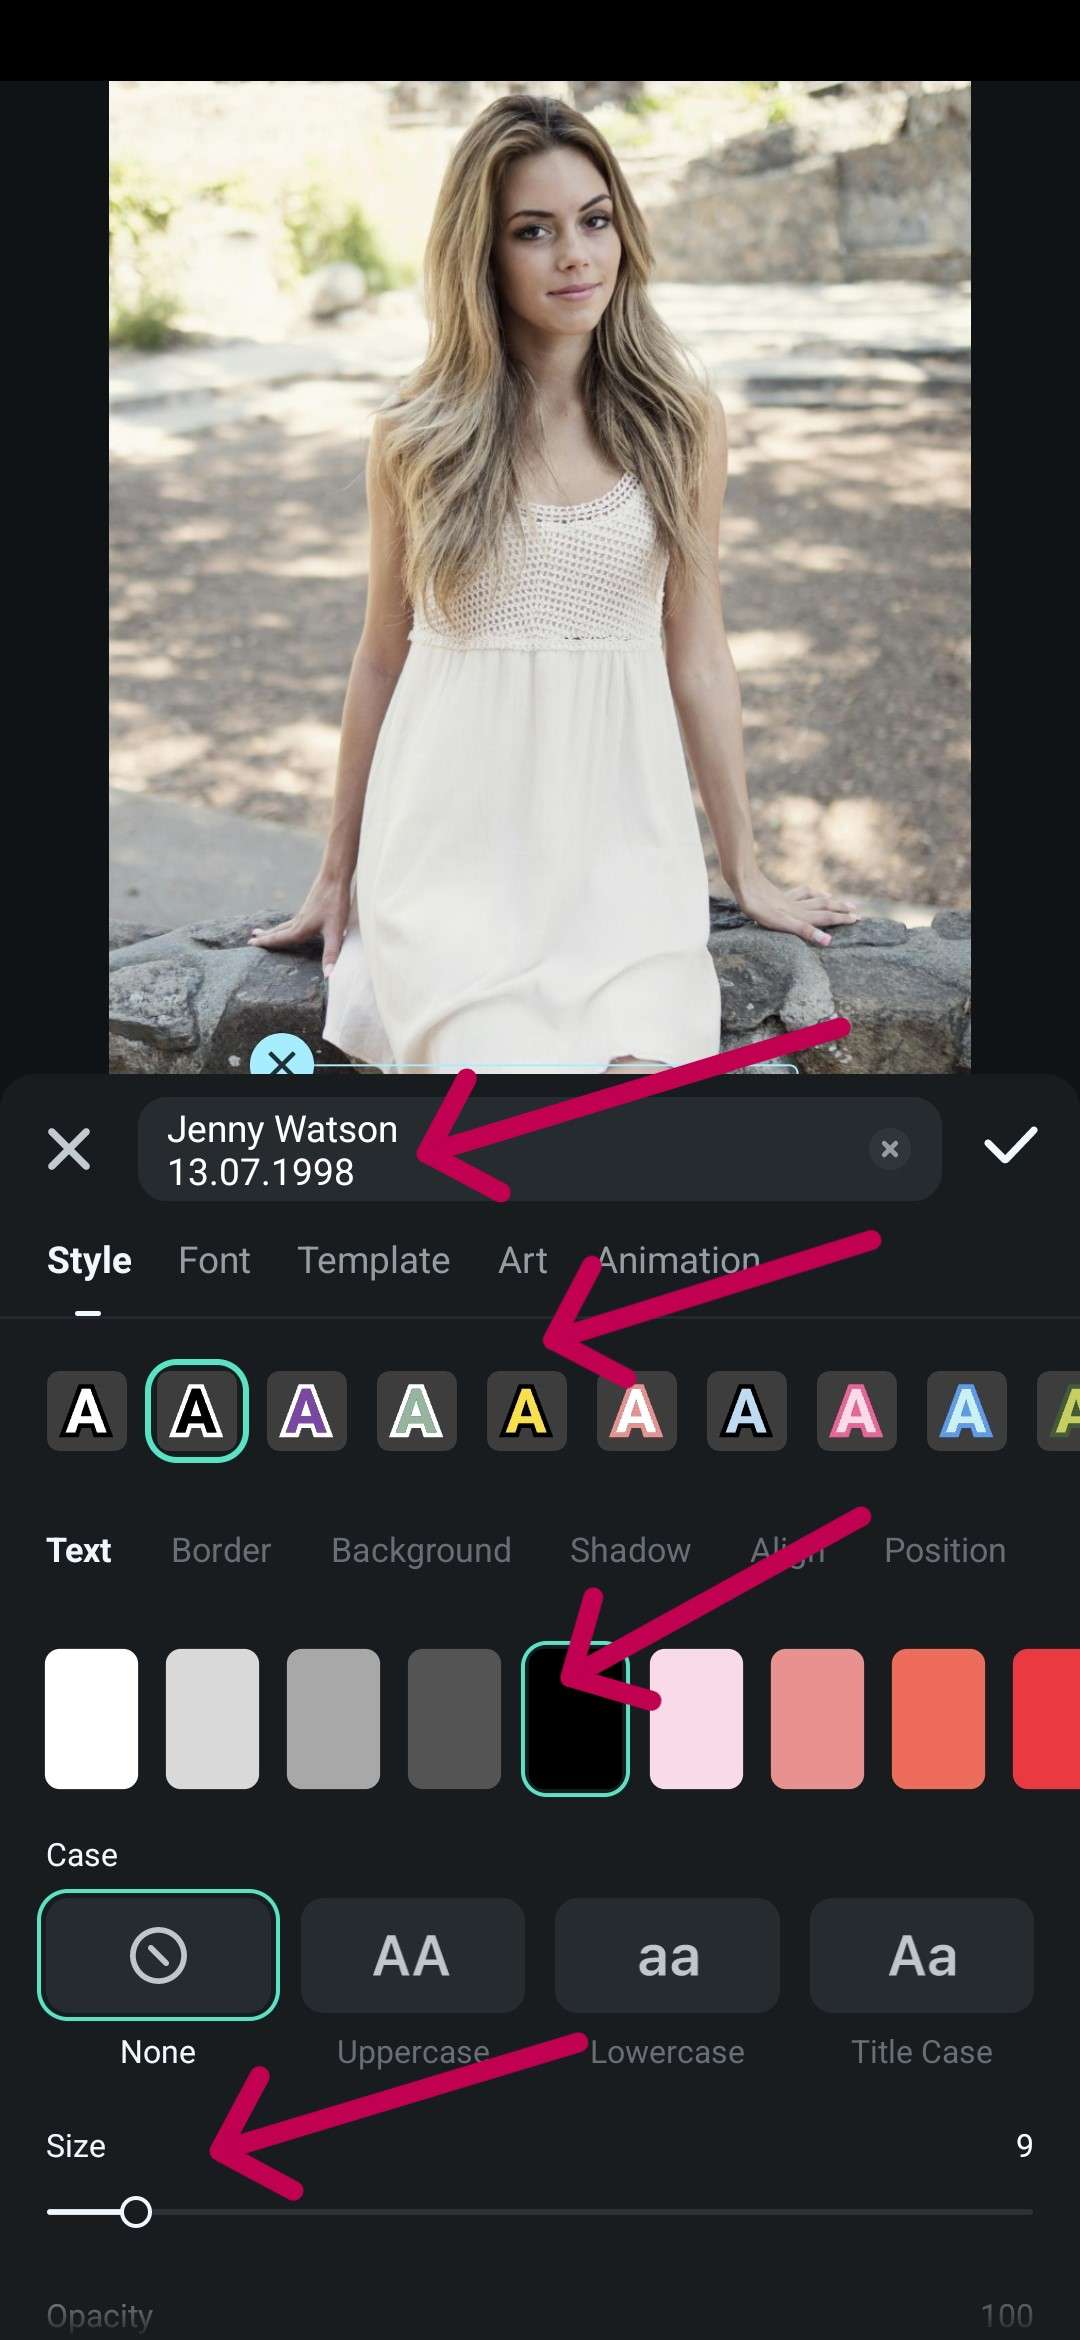
Step 4: On the right side under Text > Basic, you can enter your name and birth date, choose the font, size, and color.
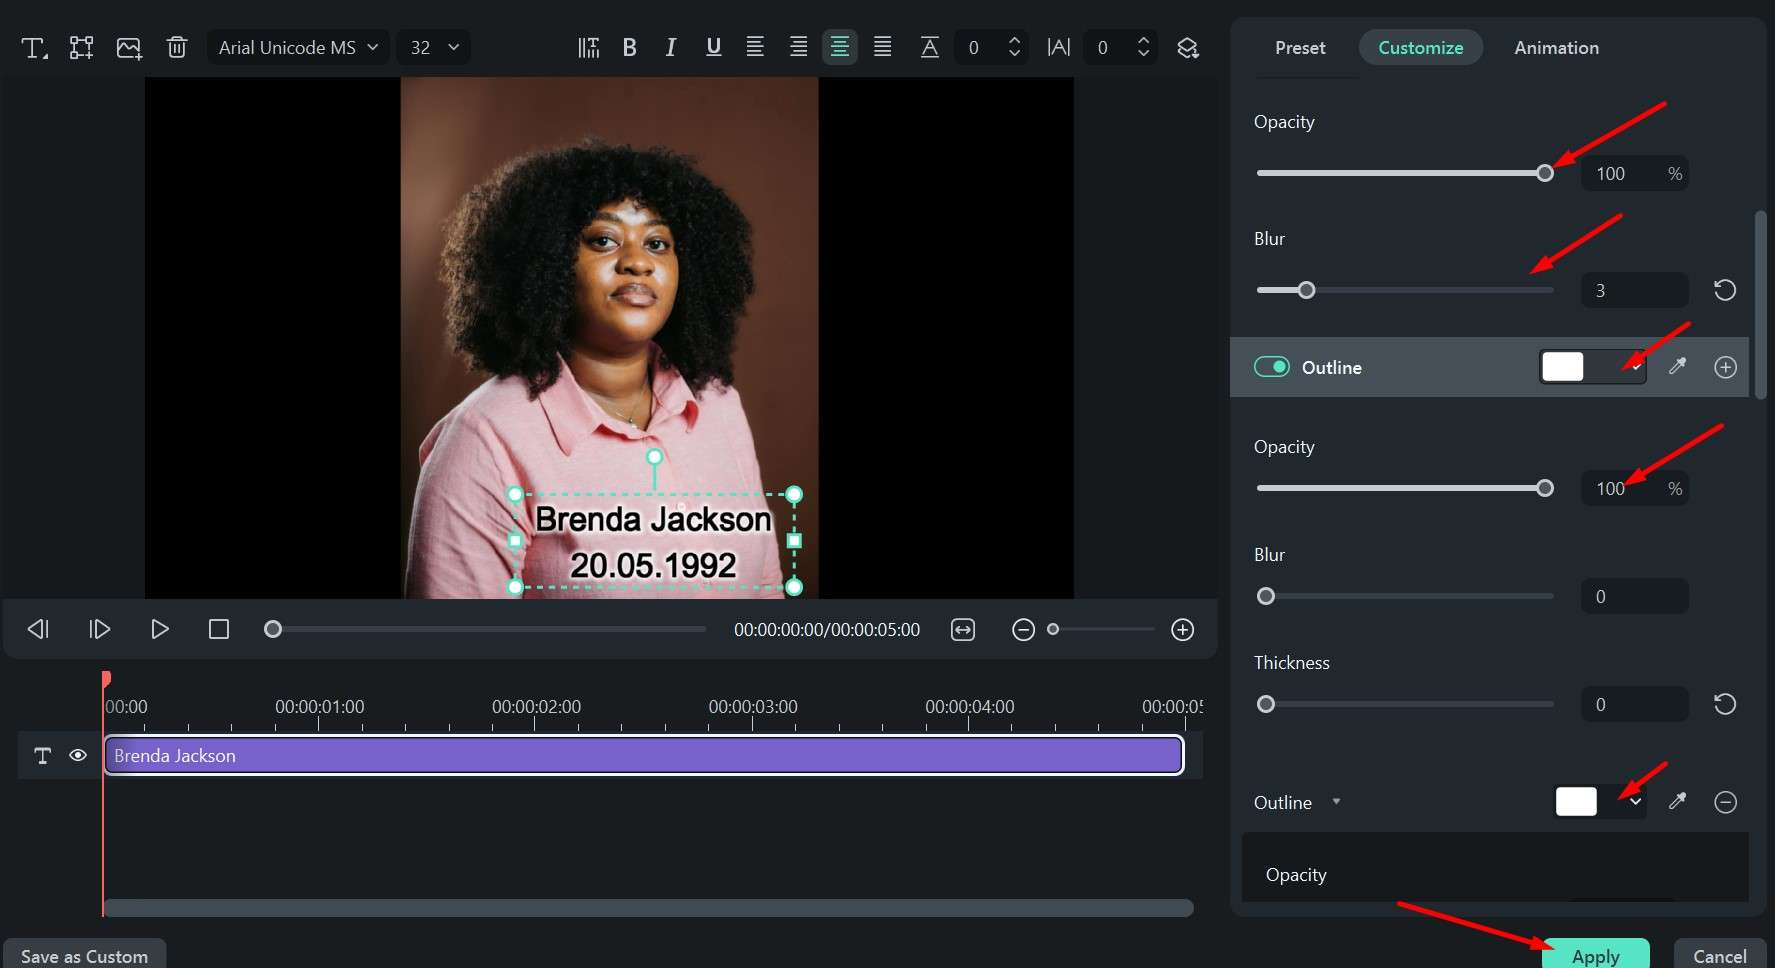
Step 5: You can also click on Advanced > Customize in the lower right corner to modify all the little details like the opacity, color, and blur of the shadows. Click Apply when you are done to save the changes.
Step 6: You can try out different options to see what fits, and then click the camera icon underneath the preview screen when you are ready to take a Snapshot and save the image.
How to Put Date and Name to Photos with the Filmora App?
Of course, as Filmora also has a mobile version, you can also write your name and date on a photo right on your phone. Here are the steps:
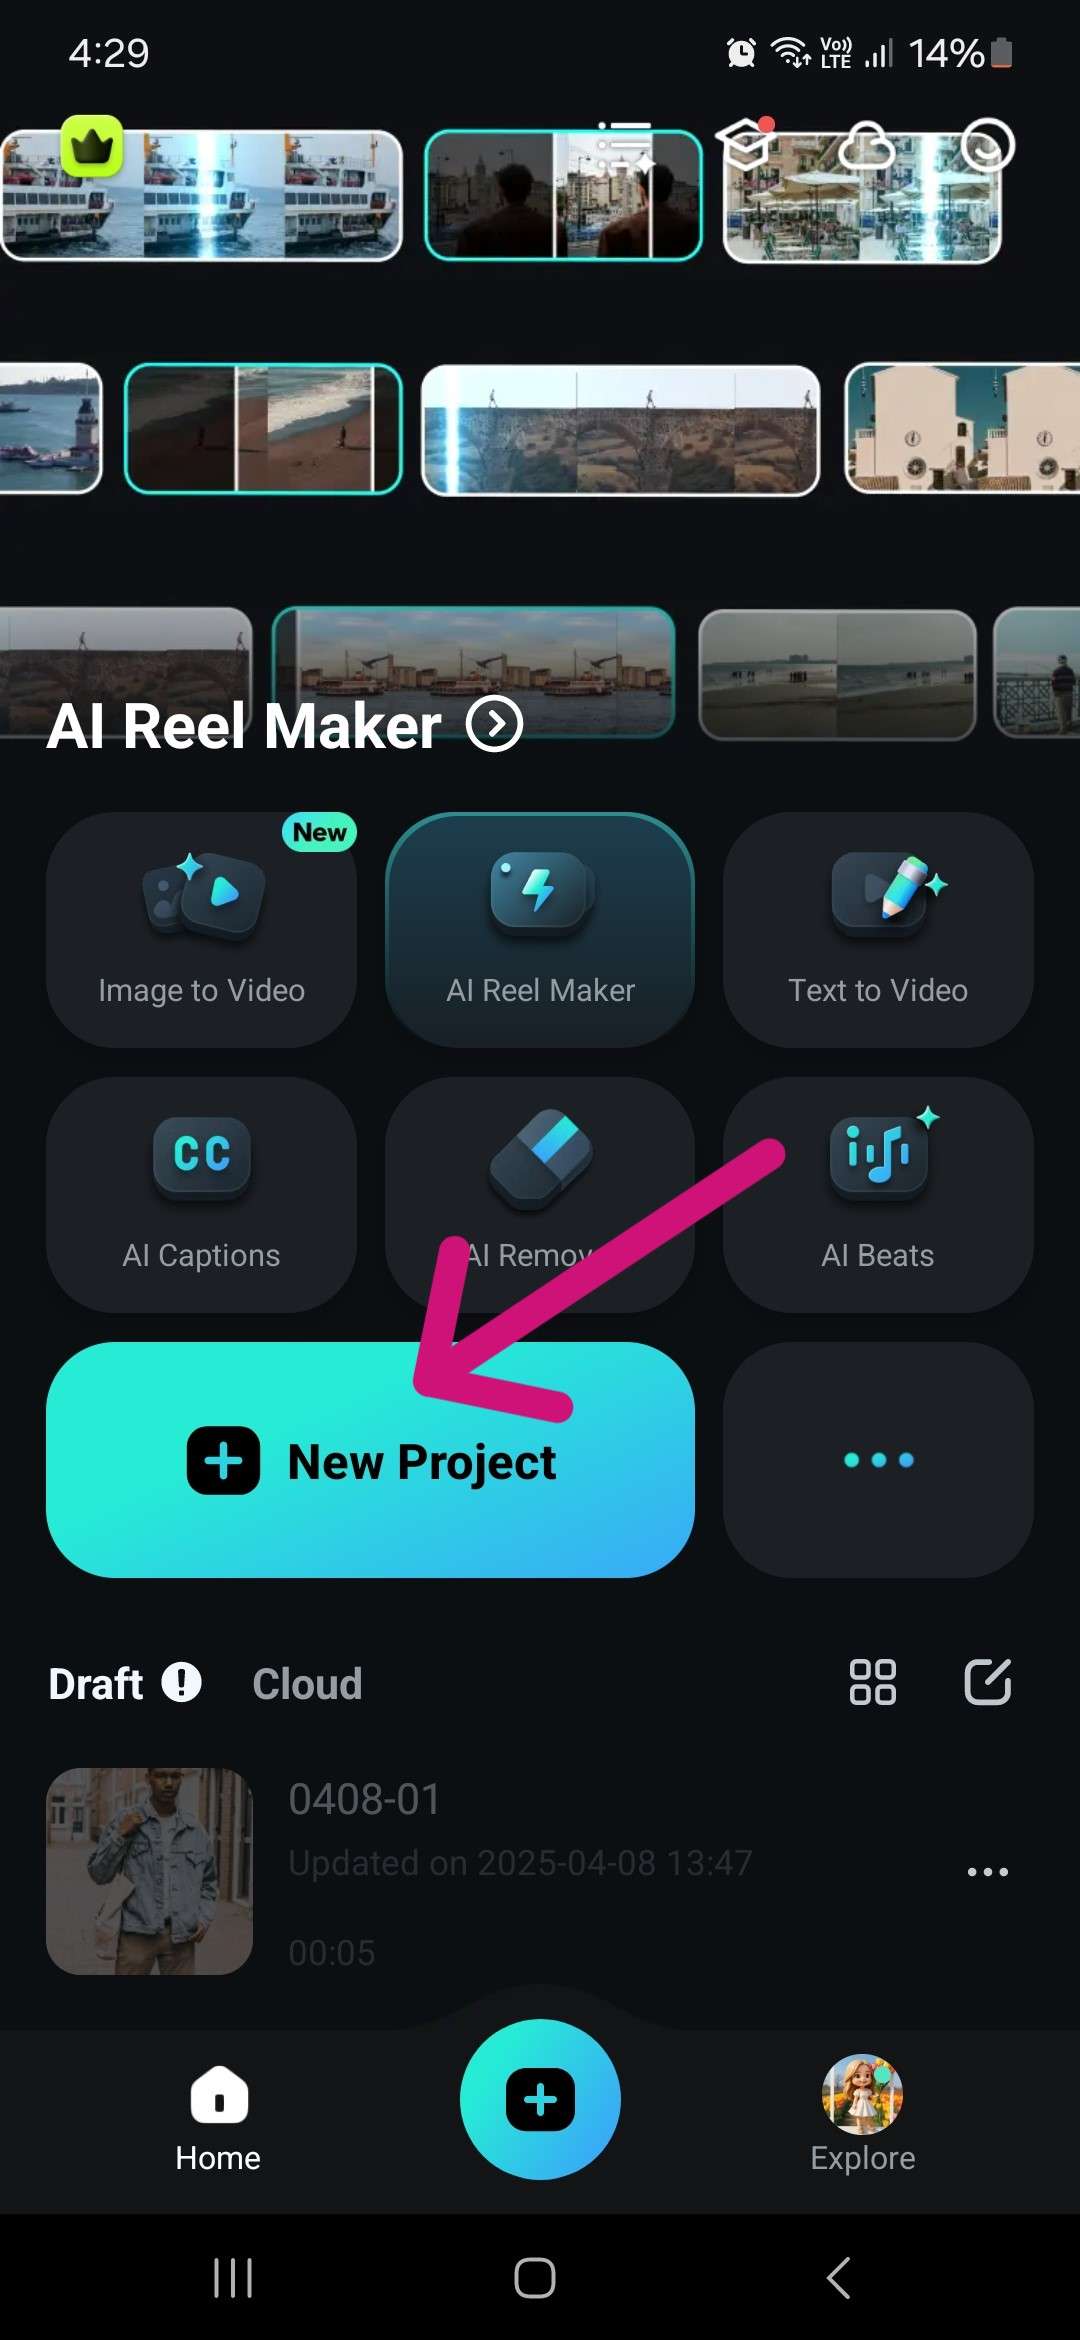
secure download Step 1: Download and open the app, then tap on New Project.
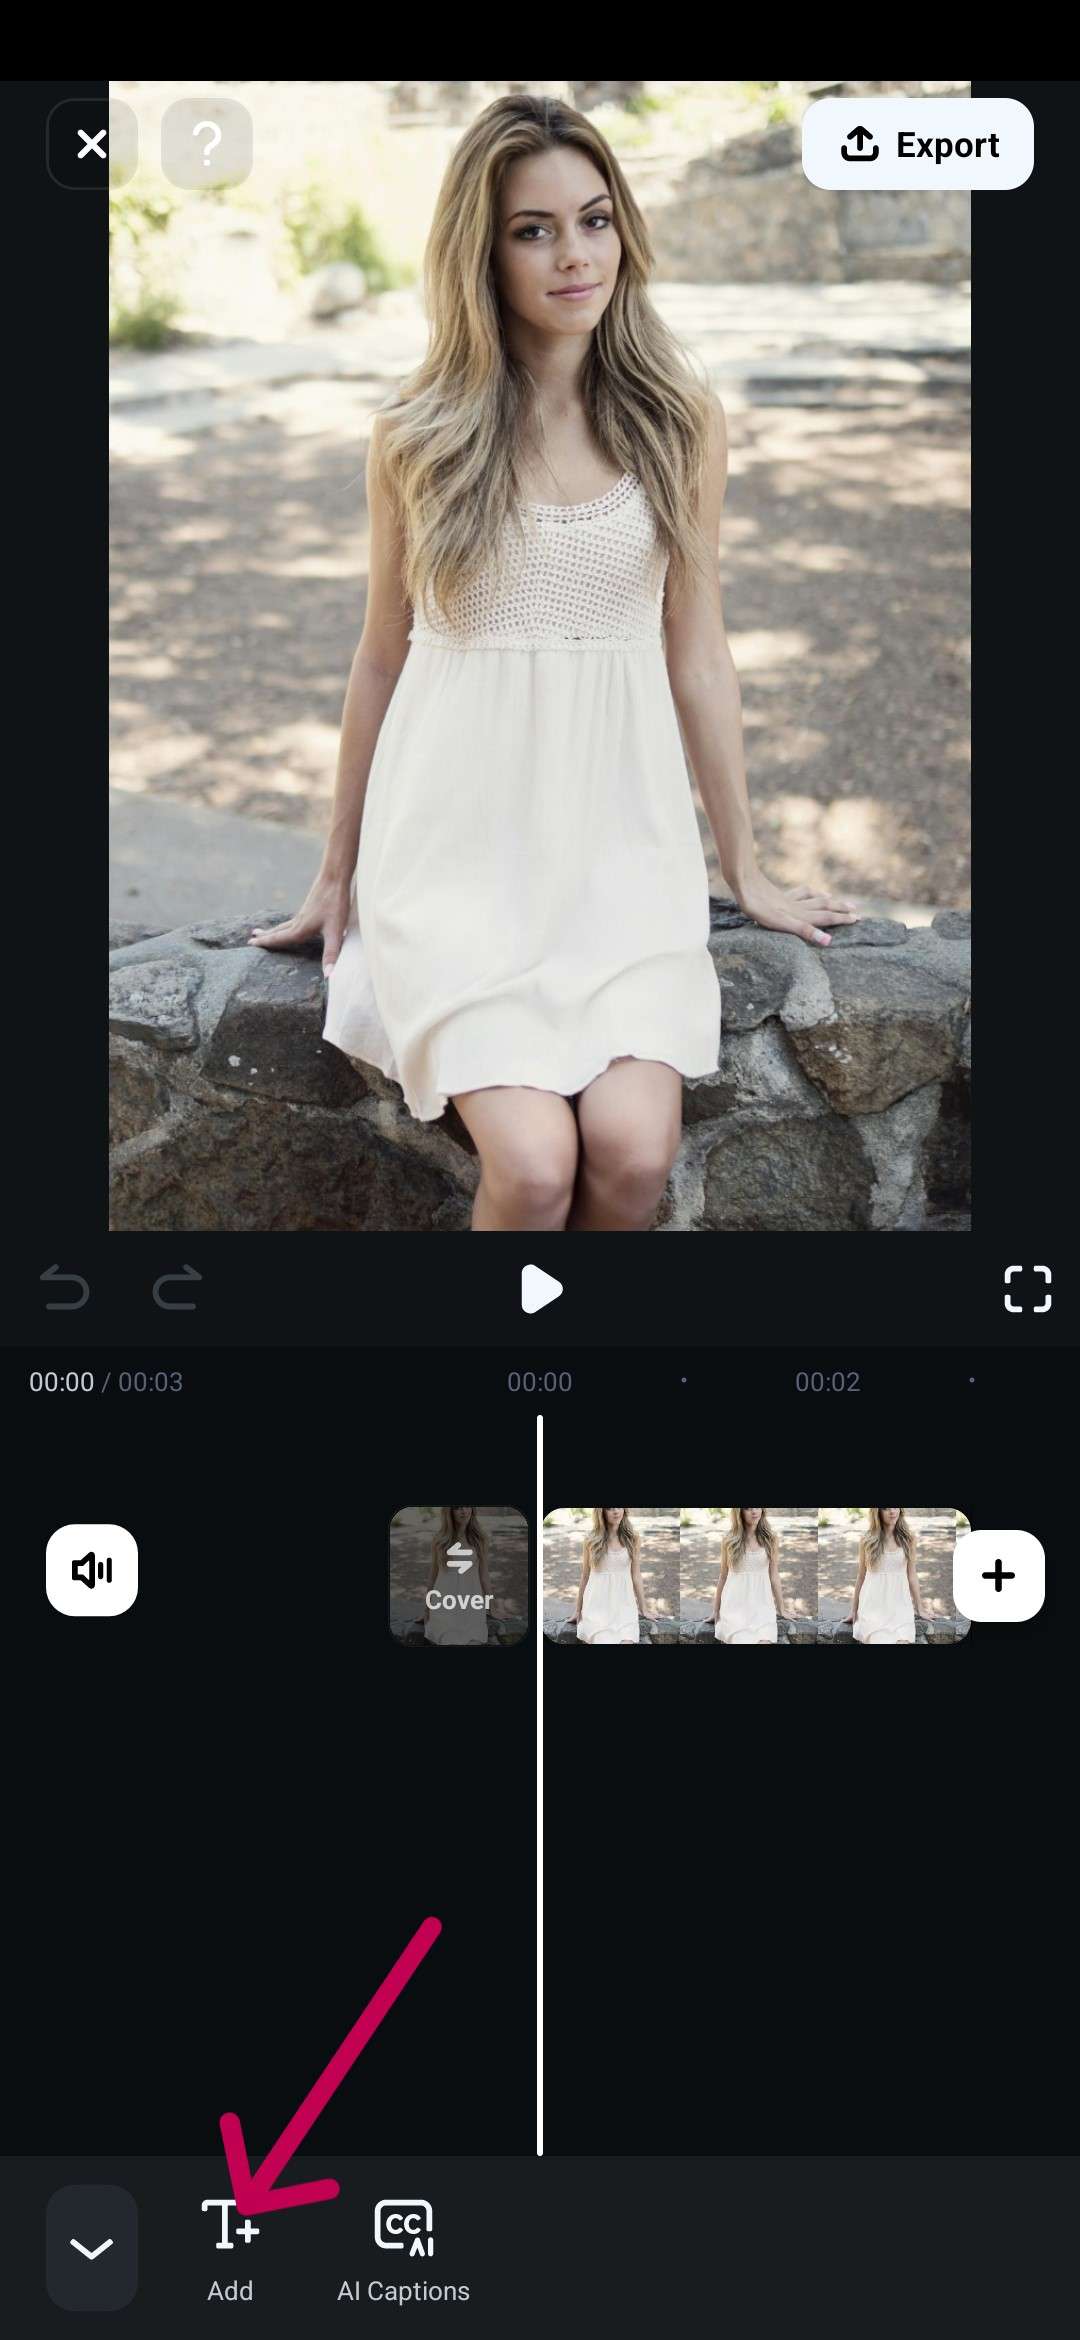
Step 2: Tap on Text > Add to open up text options.
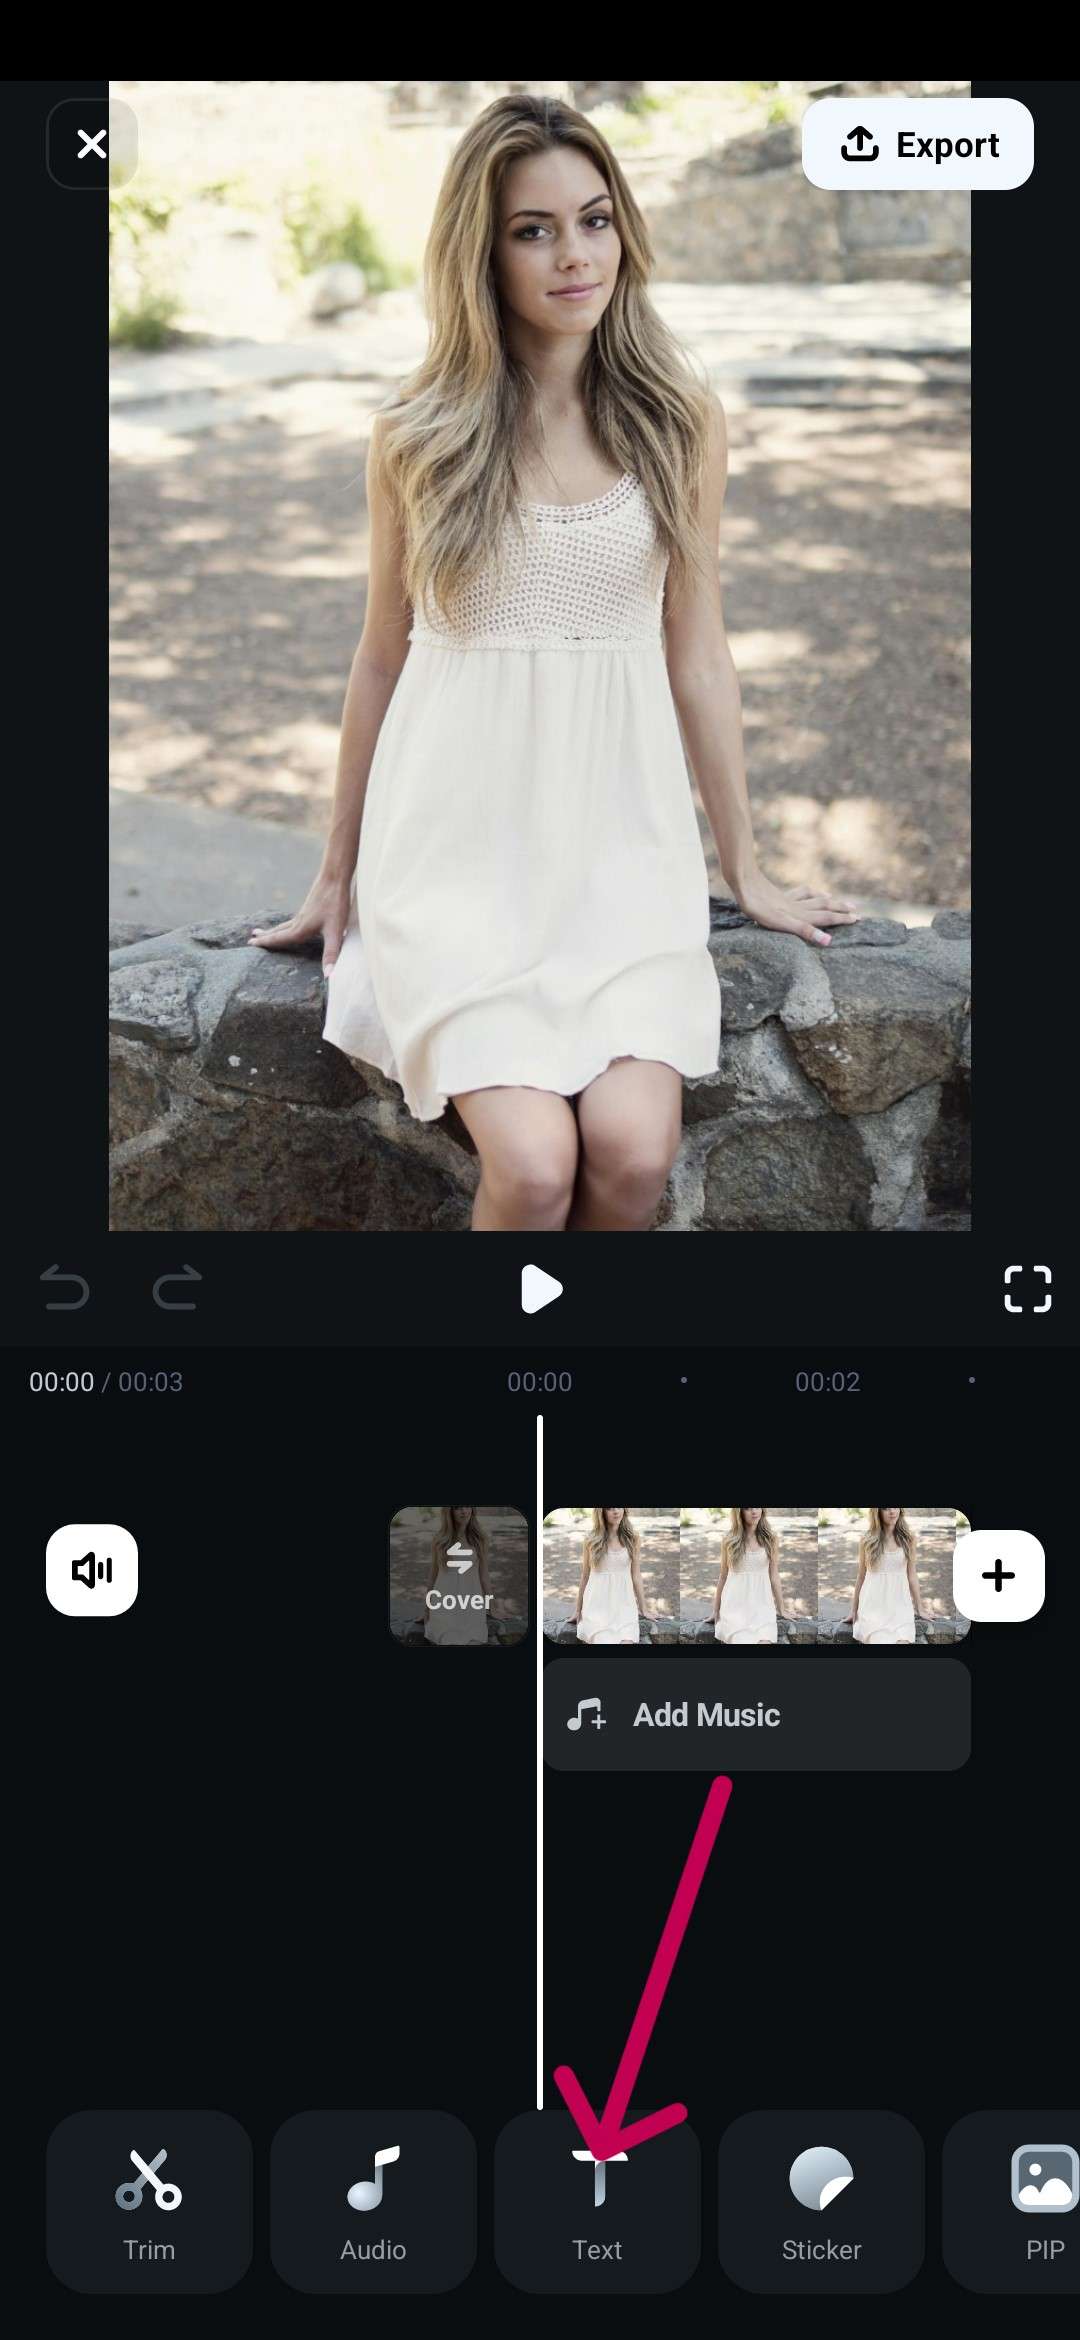
Step 3: Enter your text and choose a style, font, color, and size.
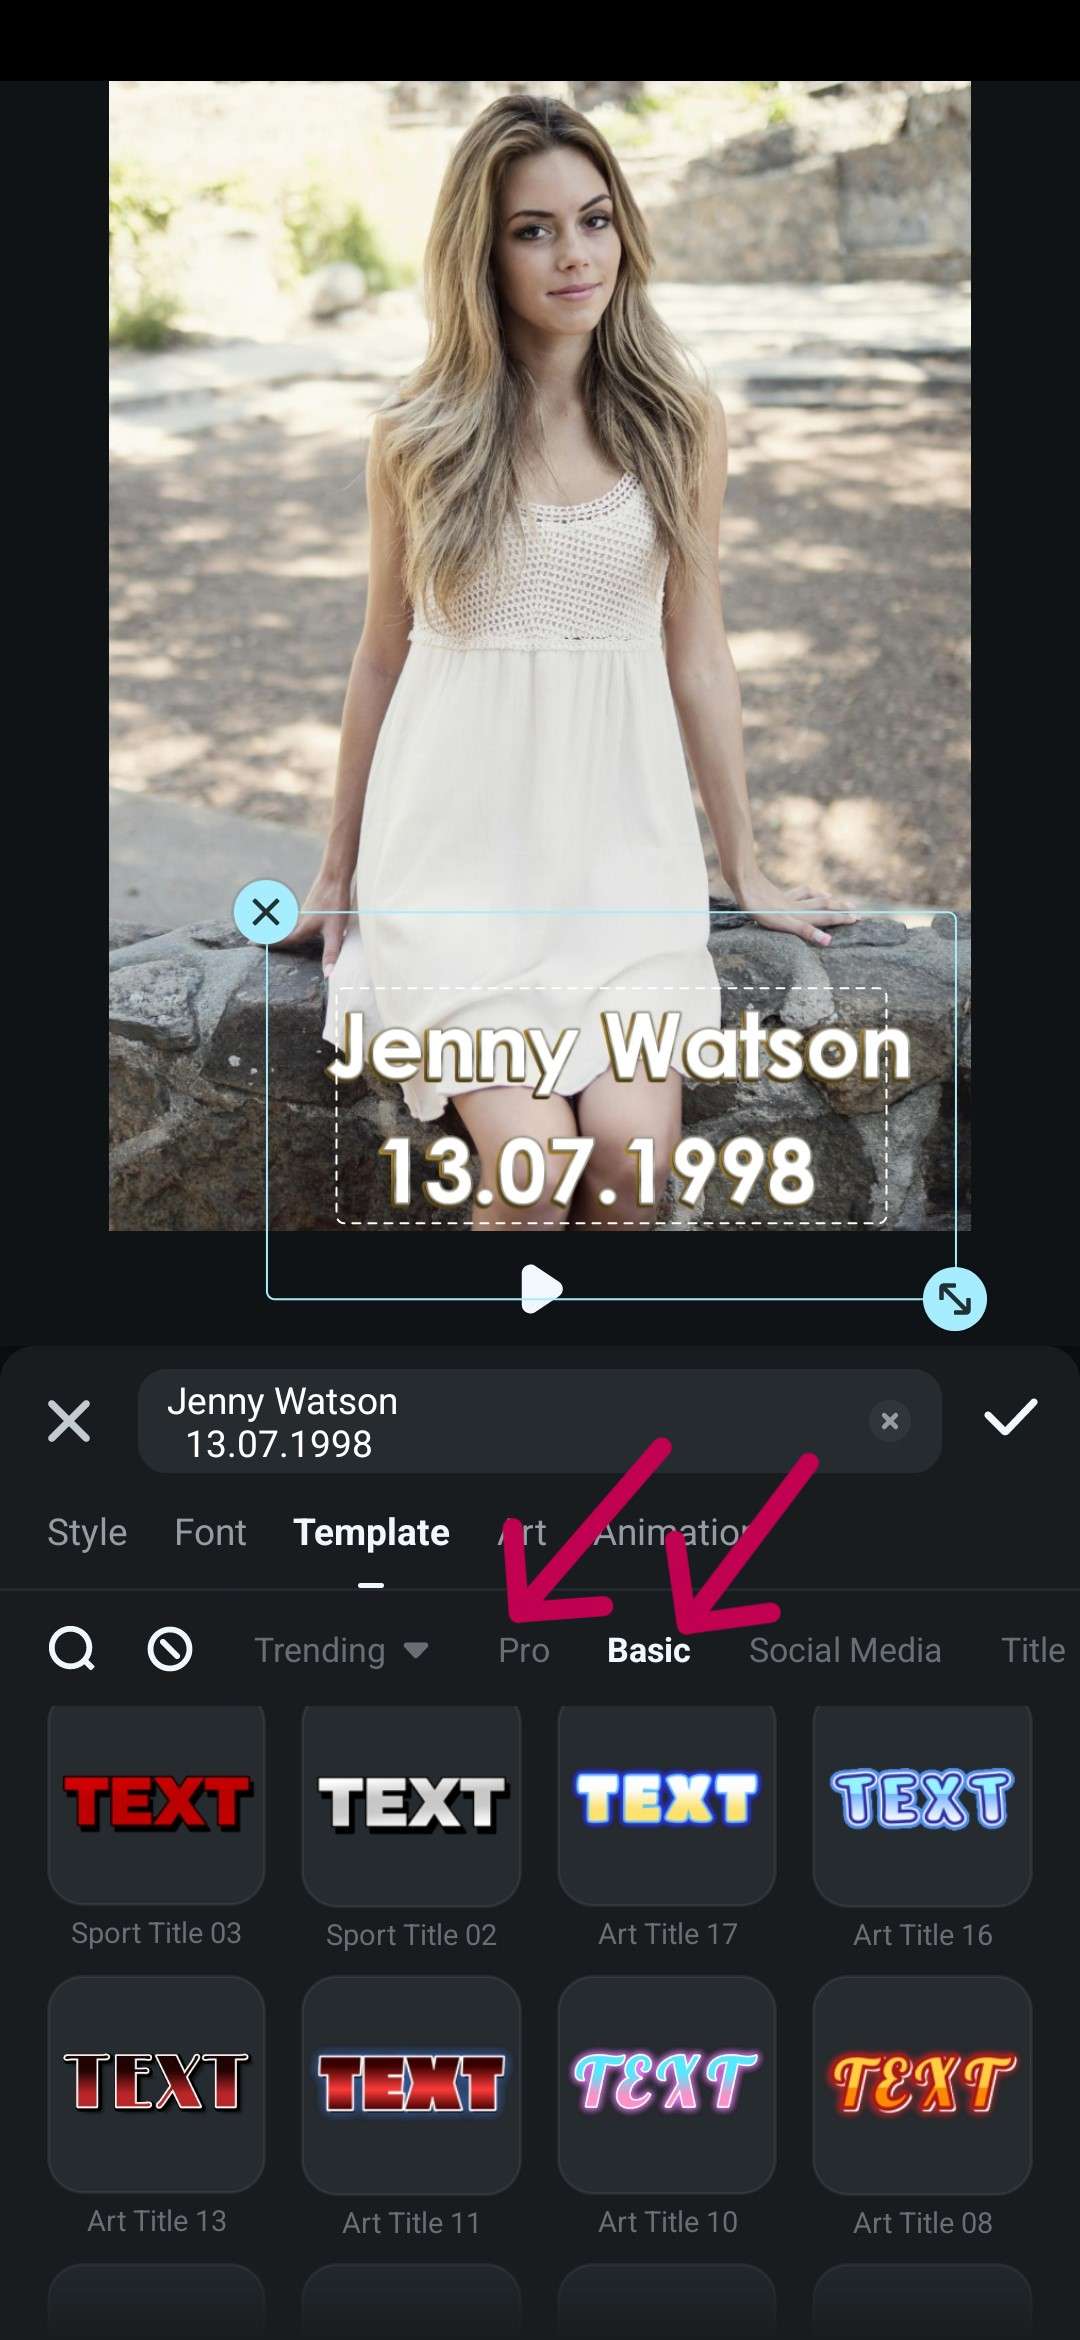
Step 4: You can also tap on Templates to find some interesting text designs you can use.
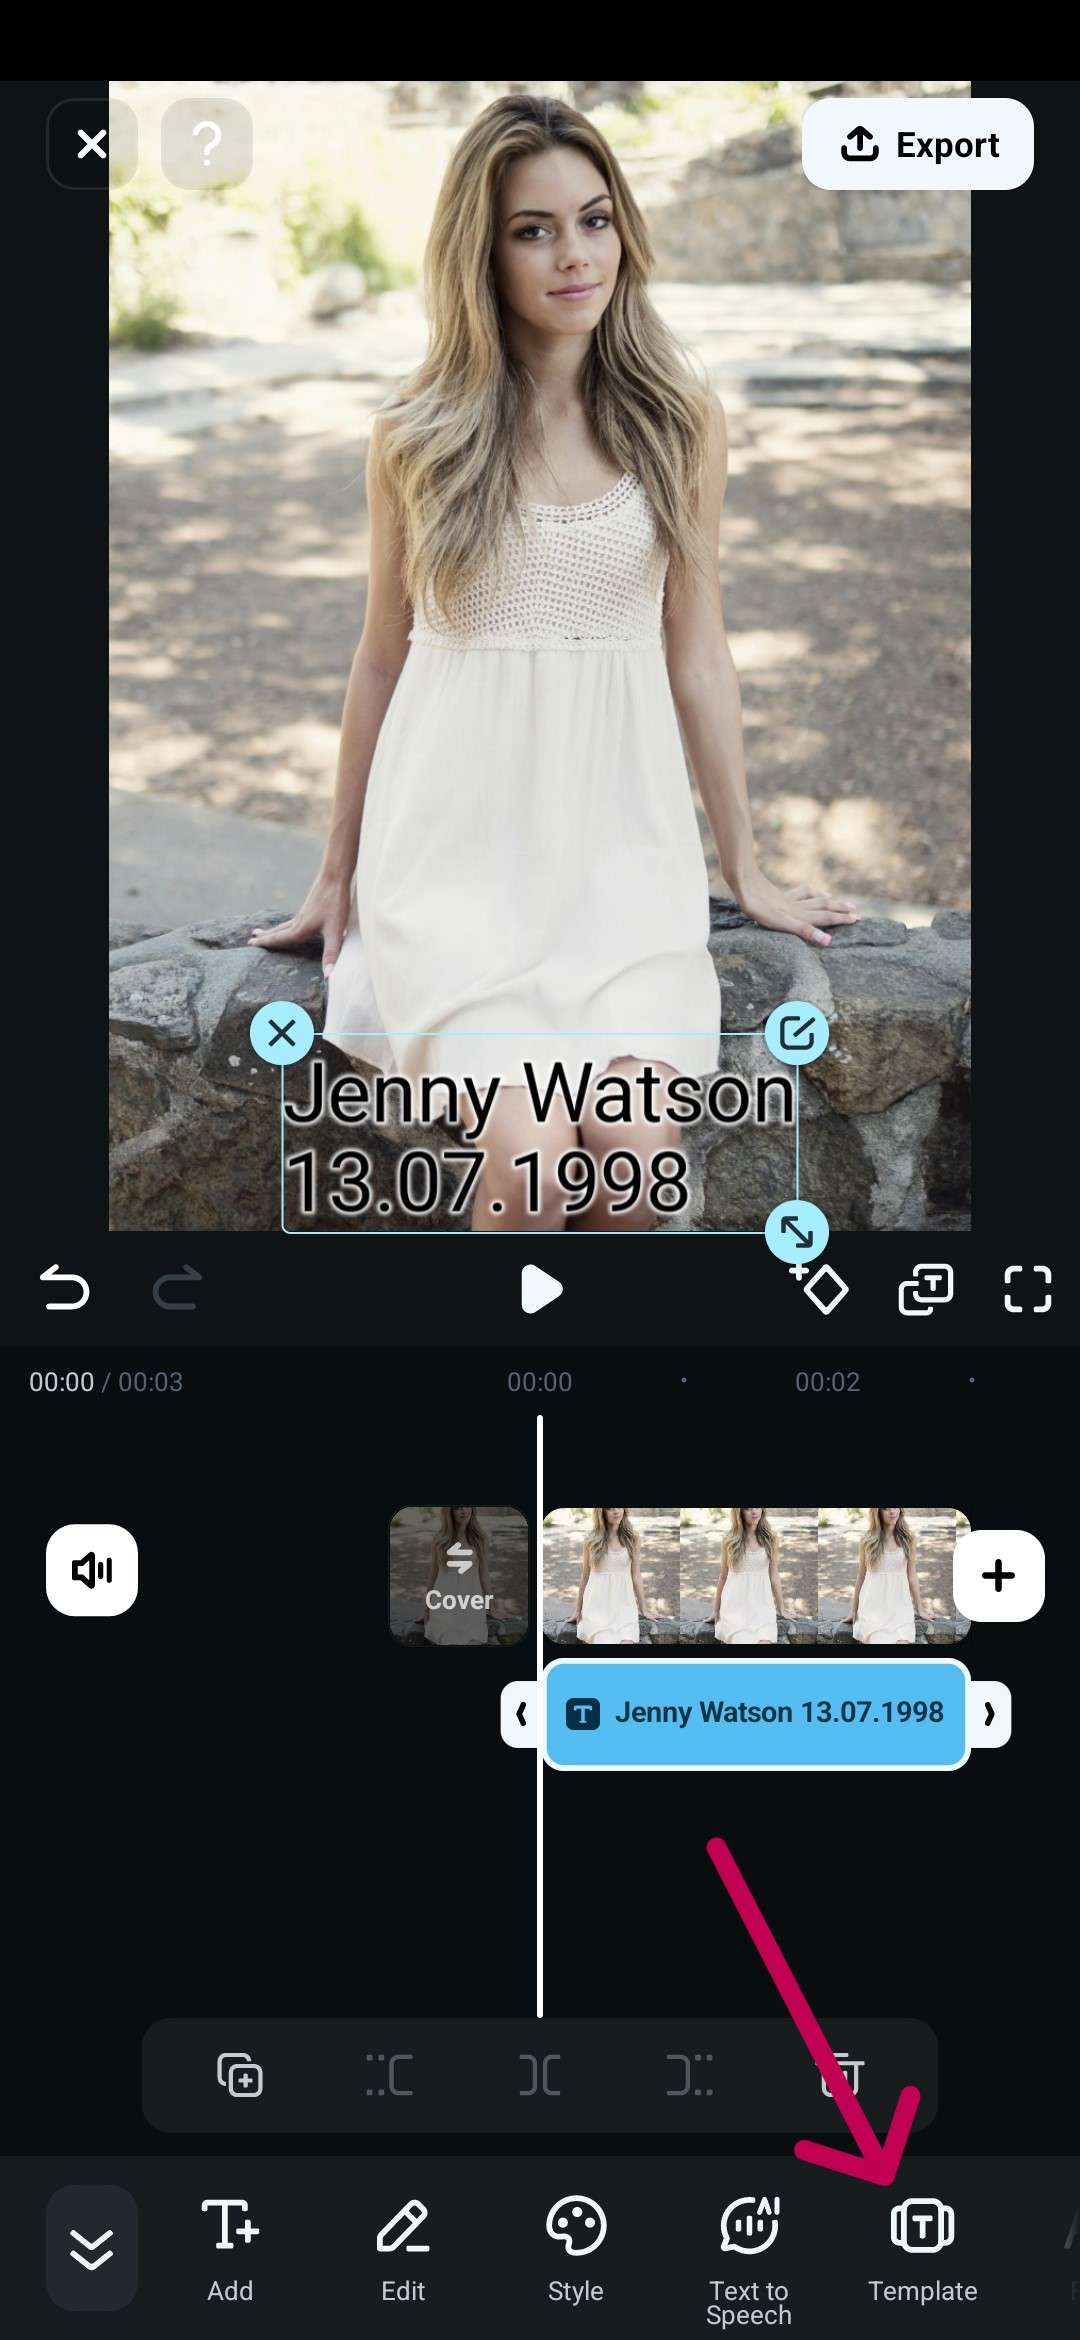
Step 5: Choose a template you like, add your text, and position it properly, then tap the check mark icon.
Step 6: Reposition the text and change the size to make it fit perfectly, and when you are finished, tap on Export to save the image.

There are lots of options to choose from here, so you can really get a unique style that suits your character and looks great.
Pi7 Image Tool
Compatibility: Web
If you want a simple online tool that offers fast results, this photo name and date maker can get the job done, just don't expect any customization options or added features. It has quite a bare-bones user interface, and you only get a very basic black letter on a white background look, but it's easy to use and will work in a pinch.
How to Add a Name and Date to Photo Online for Free?
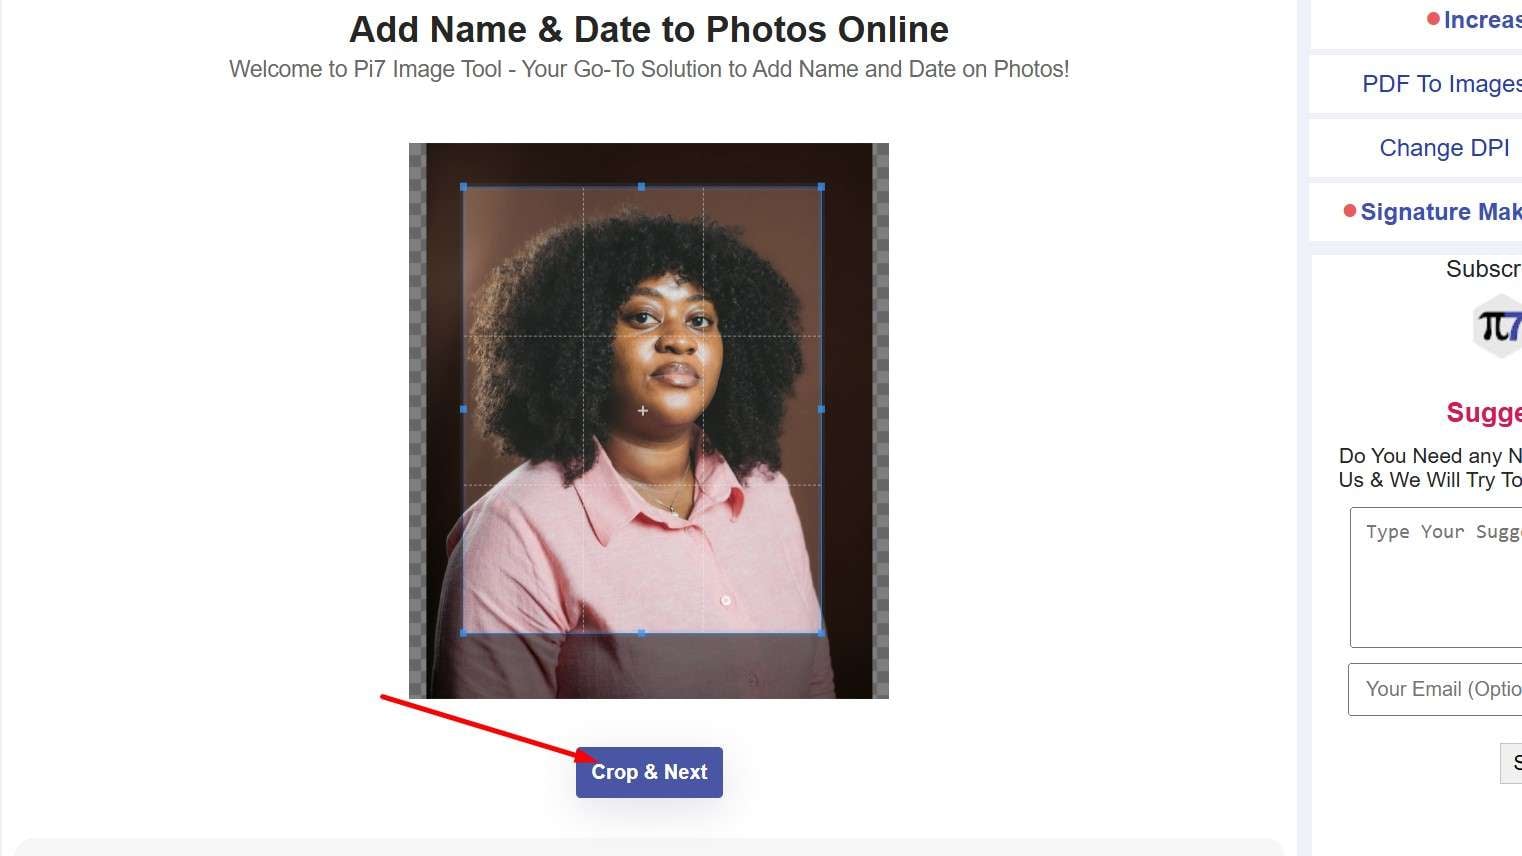
Step 1: Go to the Pi7 website and open the "Add name and date to photo" page.
Step 2: Drag and drop your image onto the designated area.
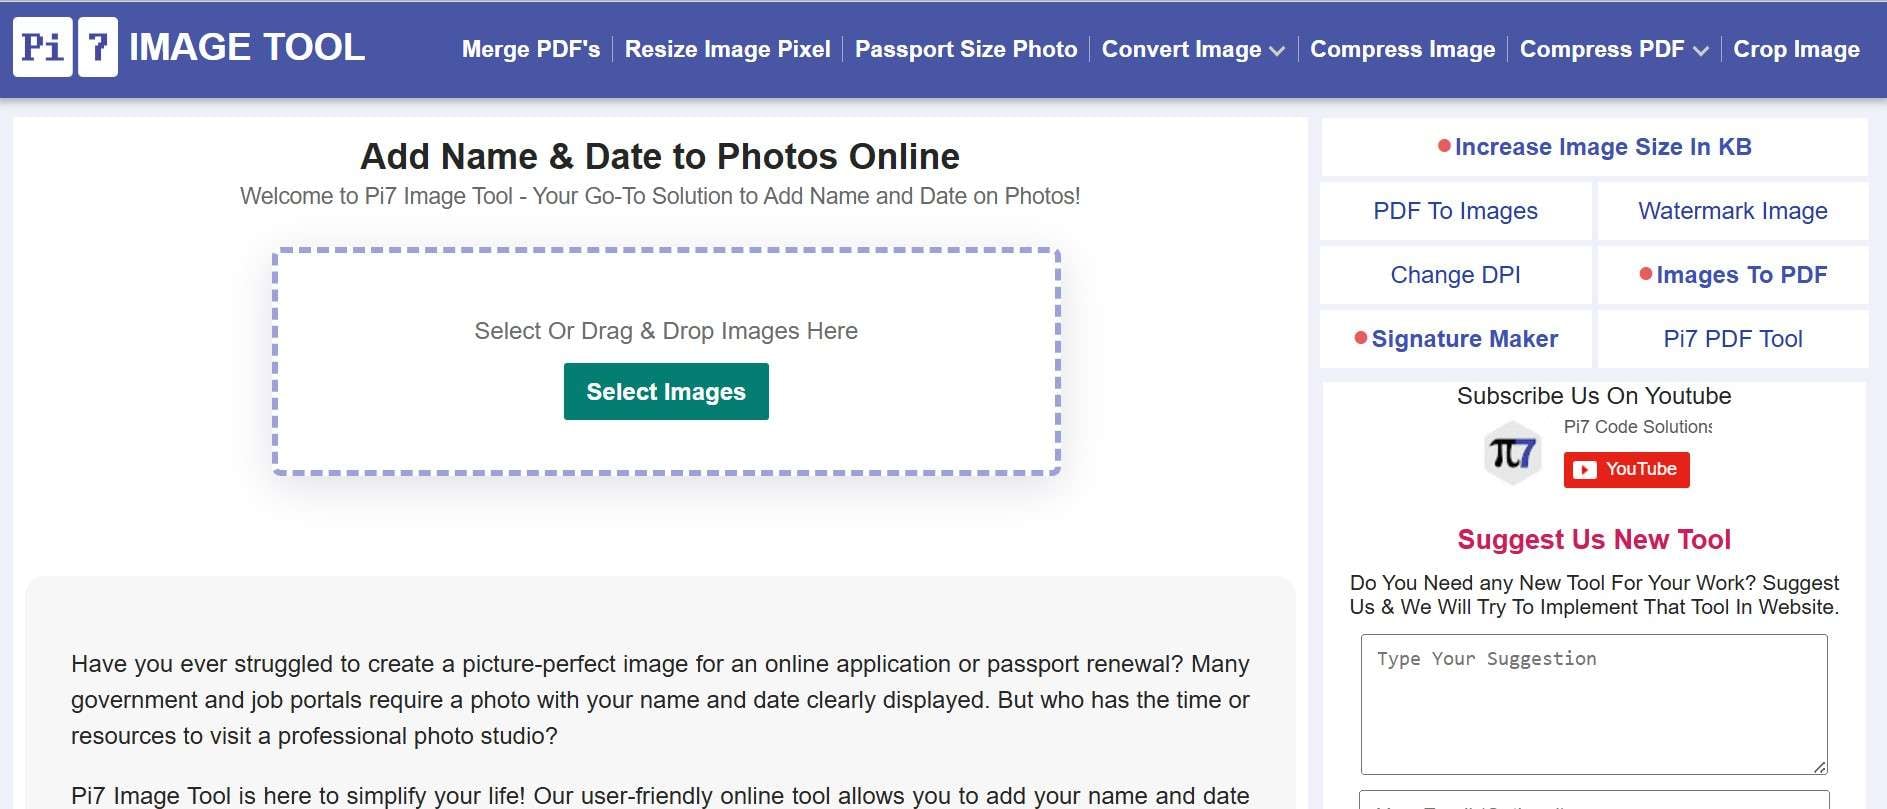
Step 3: Size it properly and click Crop & Next.
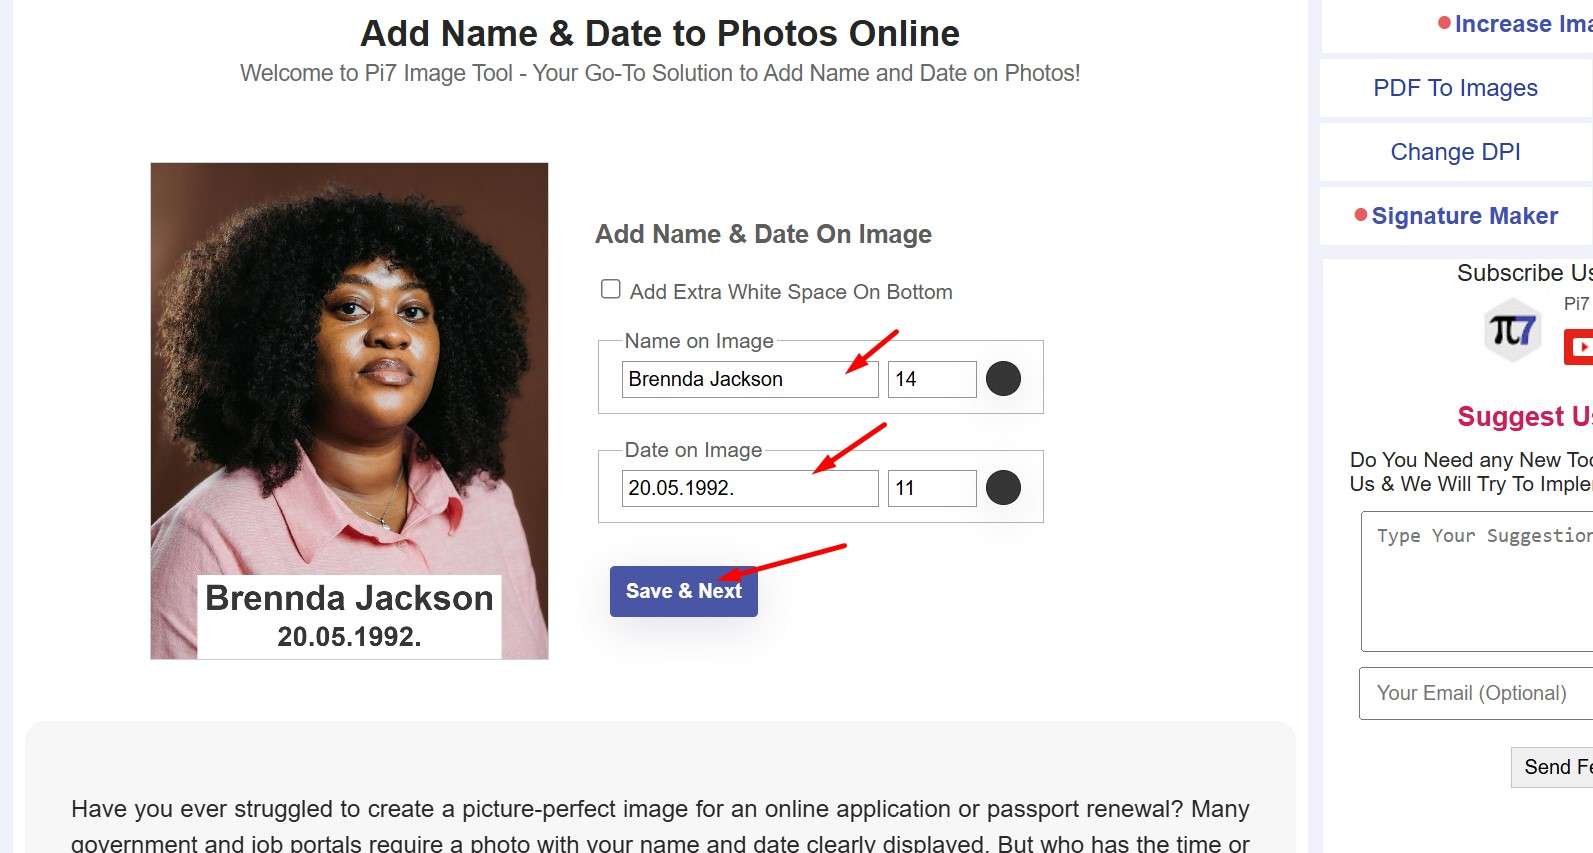
Step 4: Enter your name and date of birth and click Save & Next.
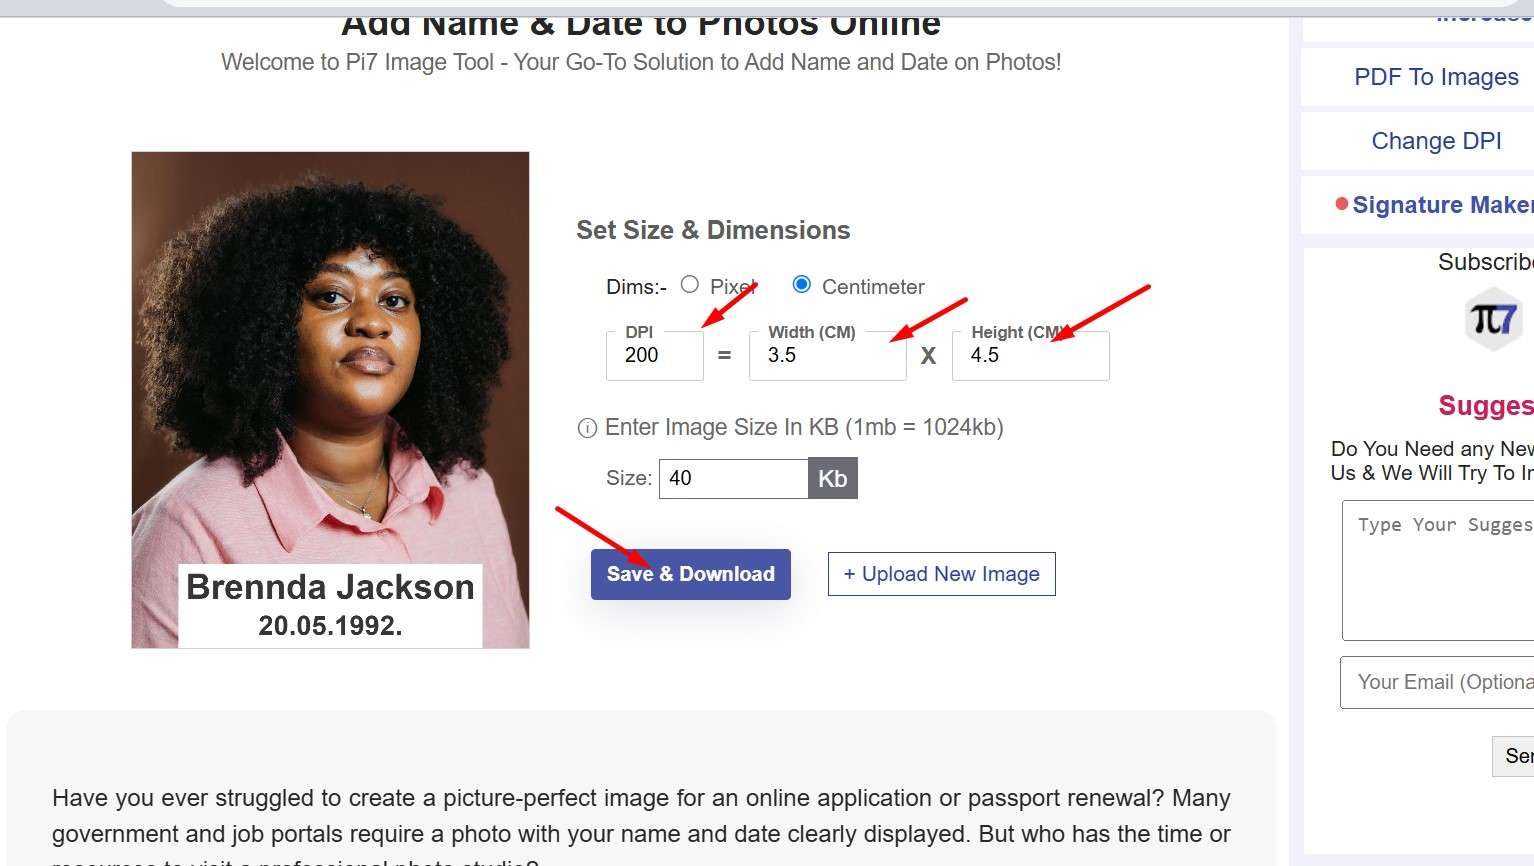
Step 5: Define the dimensions you need, depending on what you will be using the image for, and click Save & Download.
Here, we have discussed the best two photo and name date creators and given you a step-by-step guide on how to do it. Generally speaking, Filmora is a much more powerful tool than Pi7 image tool as it provides many more photo editing features, more qualified results, and gives you flexible editing features. Let's see some tips for image editing.
Bonus Tip for Photo Editing in Filmora Name and Date Photo Editor
Here are the tips for making your photo more professional.
1. Remove or Change the Image Background
Having a neutral background is best for CV images and professional headshots. To get this look, you can take any of your existing photos, use AI Portrait Cutout or AI Smart Cutout to get a clean cutout of the person in the photo, and then overlay this cutout onto a plain background image.
secure download Here is how this works in the desktop version of Filmora.
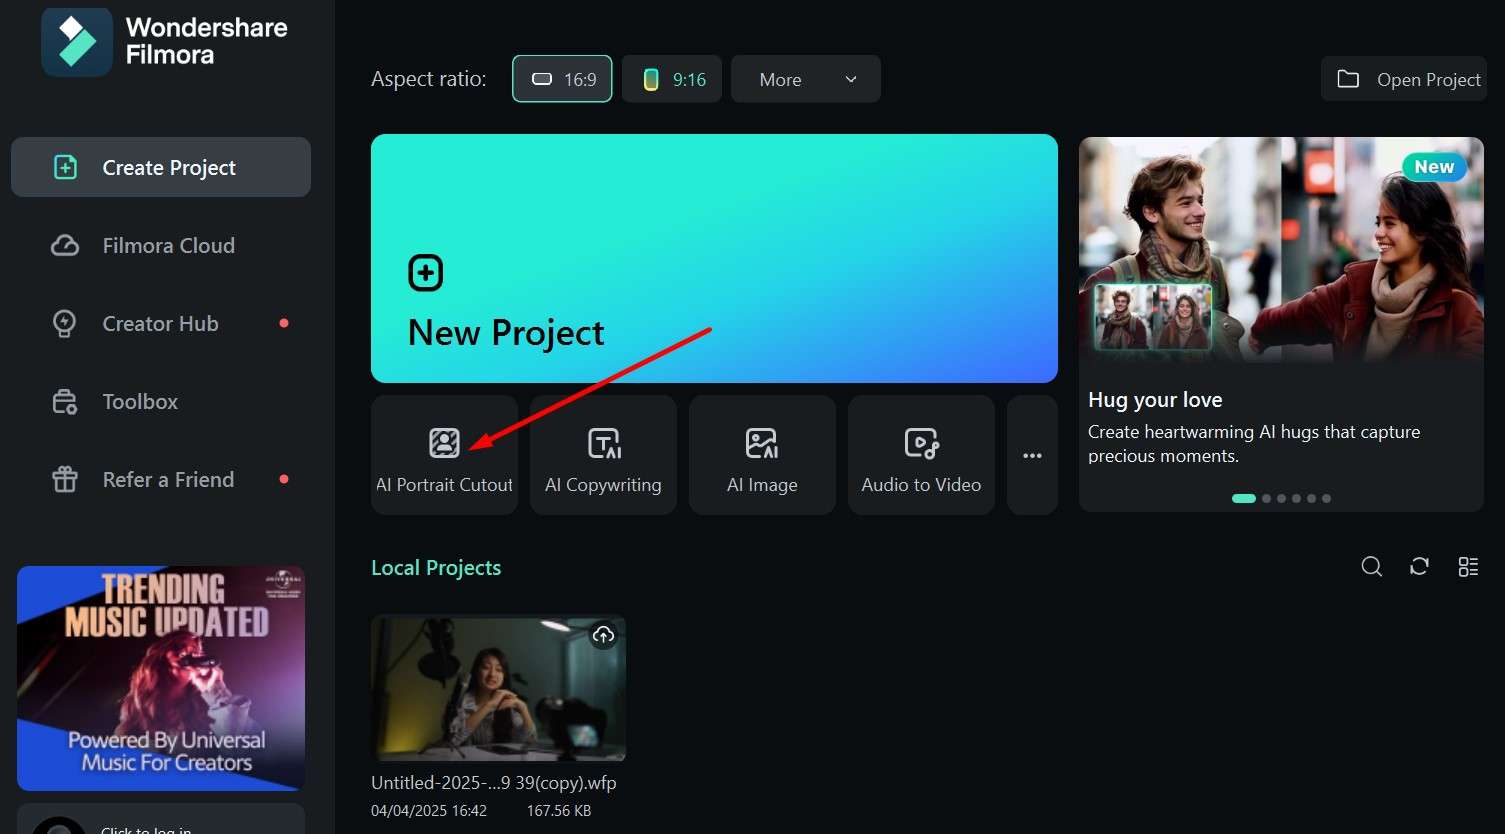
Step 1: Open the app and click on AI Portrait Cutout in the main menu.
Step 2: Choose the image you want to edit and wait for the AI to finish.
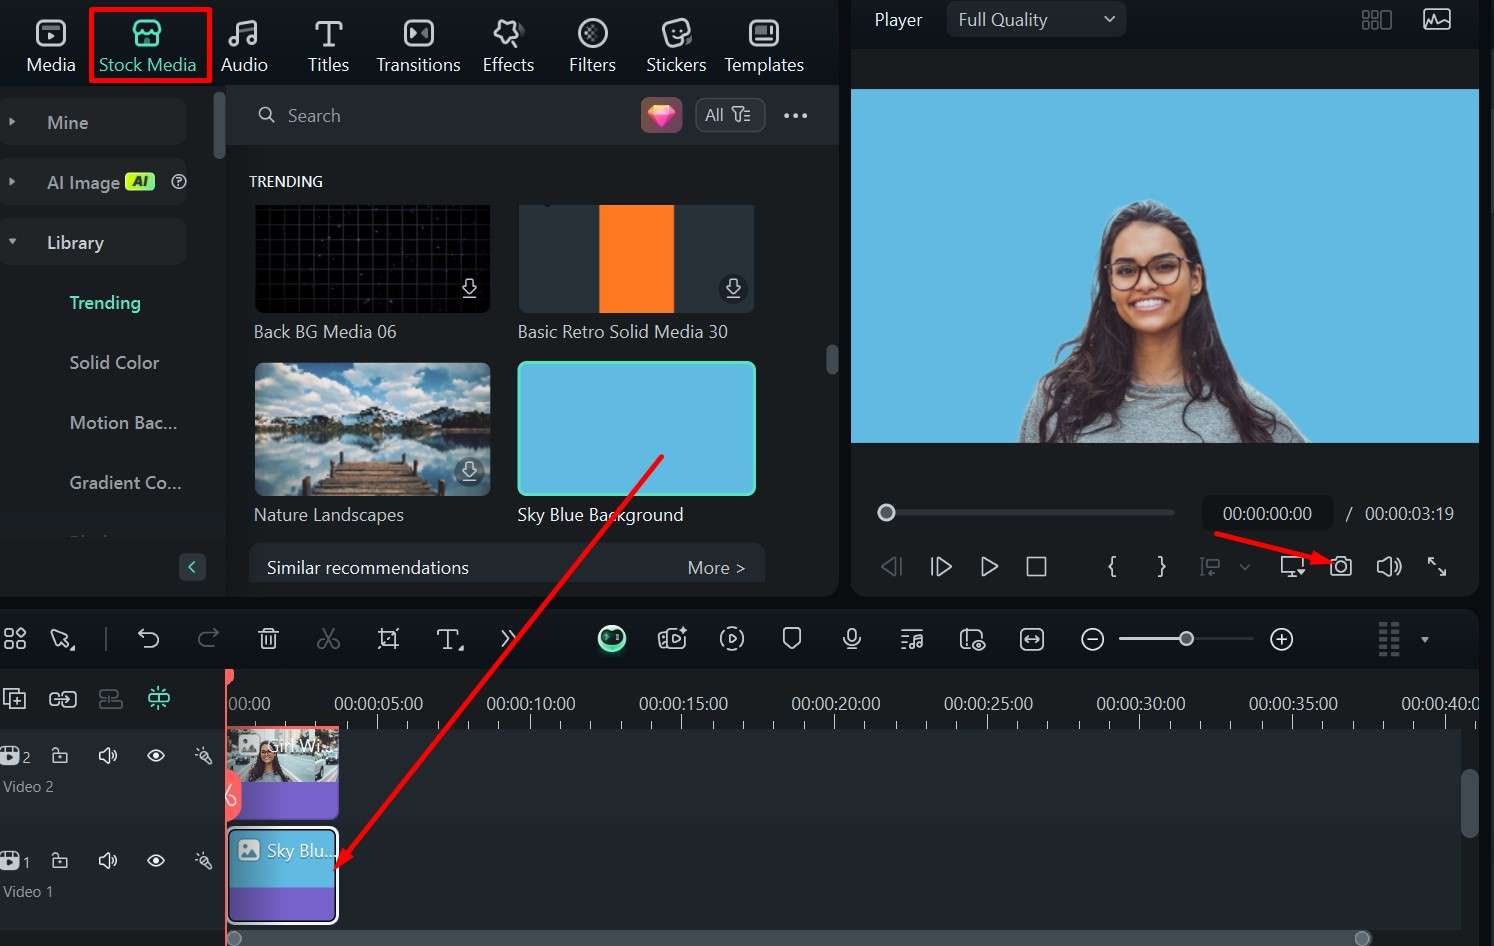
Step 3: Go to the Stock Media tab and choose a suitable background, then drag it to the timeline. Ensure the main image is on top and click the Camera icon to save the final result.
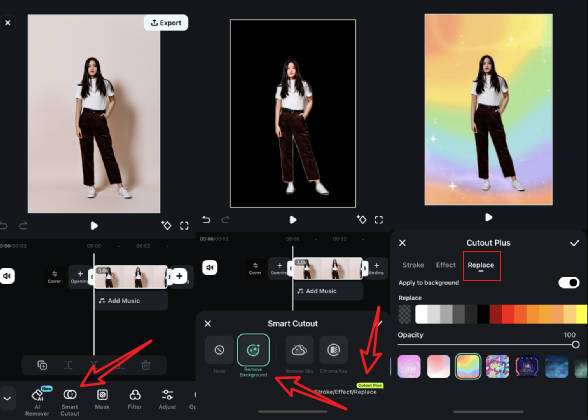
If you are using the Filmora app on your phone, you can simply select the picture > navigate to Smart Cutout > Remove Background > Click the stroke/effect/replace option to apply new background or effects.
AI Object Remover: Remove Any Name and Date from Photos
You may already have a great photo on your phone, but with some furniture, car, or other person in the background, making it unsuitable for a CV, passport, or any other document.
Well, you can still make it work because the Filmora mobile app has the AI Object Remover feature that can help you eliminate all the distractions from the backgrounds of your photos. Just follow these simple steps and let the AI do its magic:
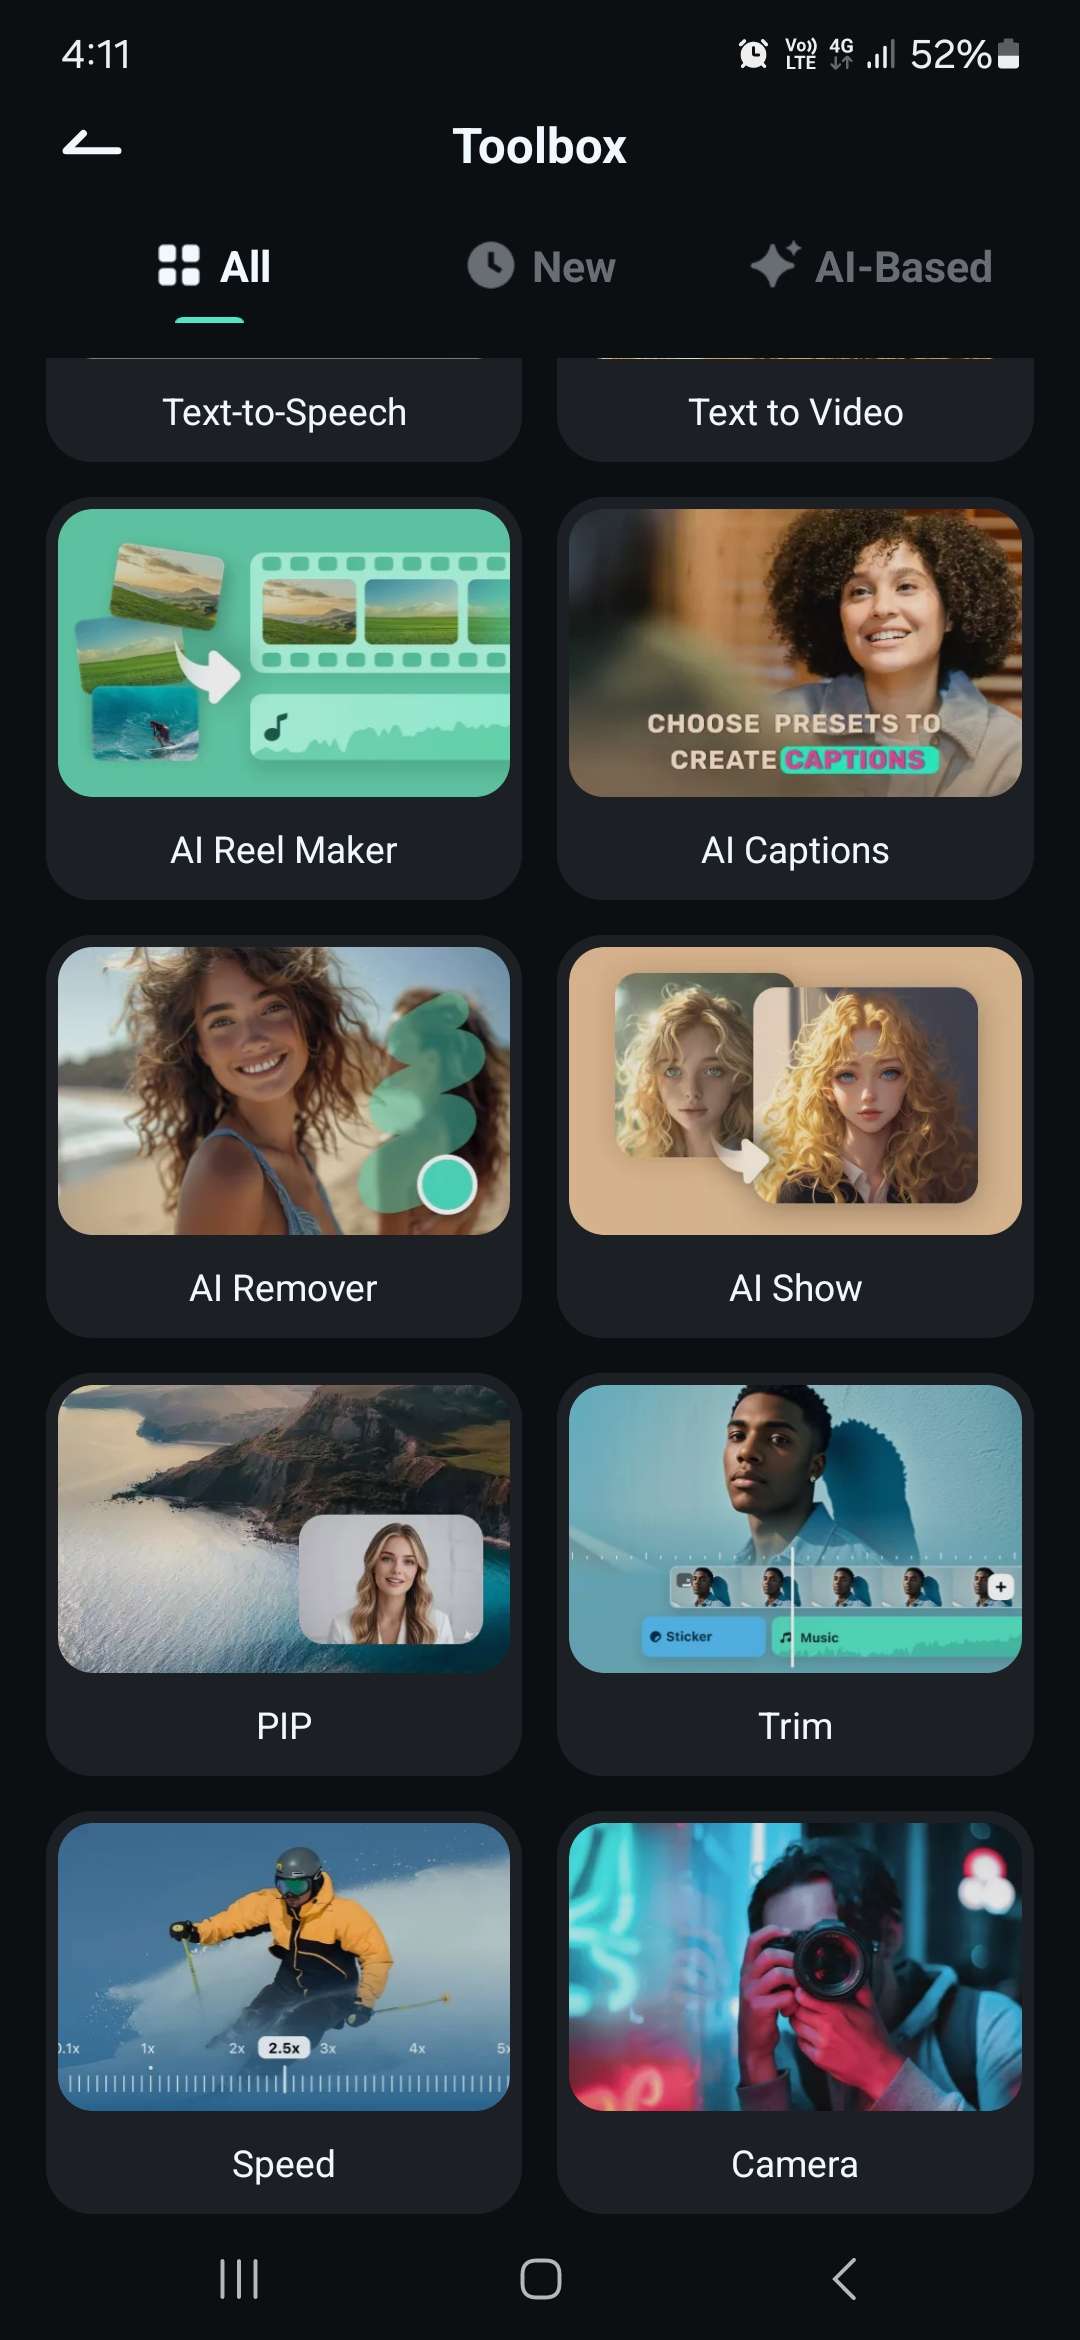
Step 1: Open the Filmora app and tap the "three dots" icon next to New Project and swipe through to find the AI Remover.
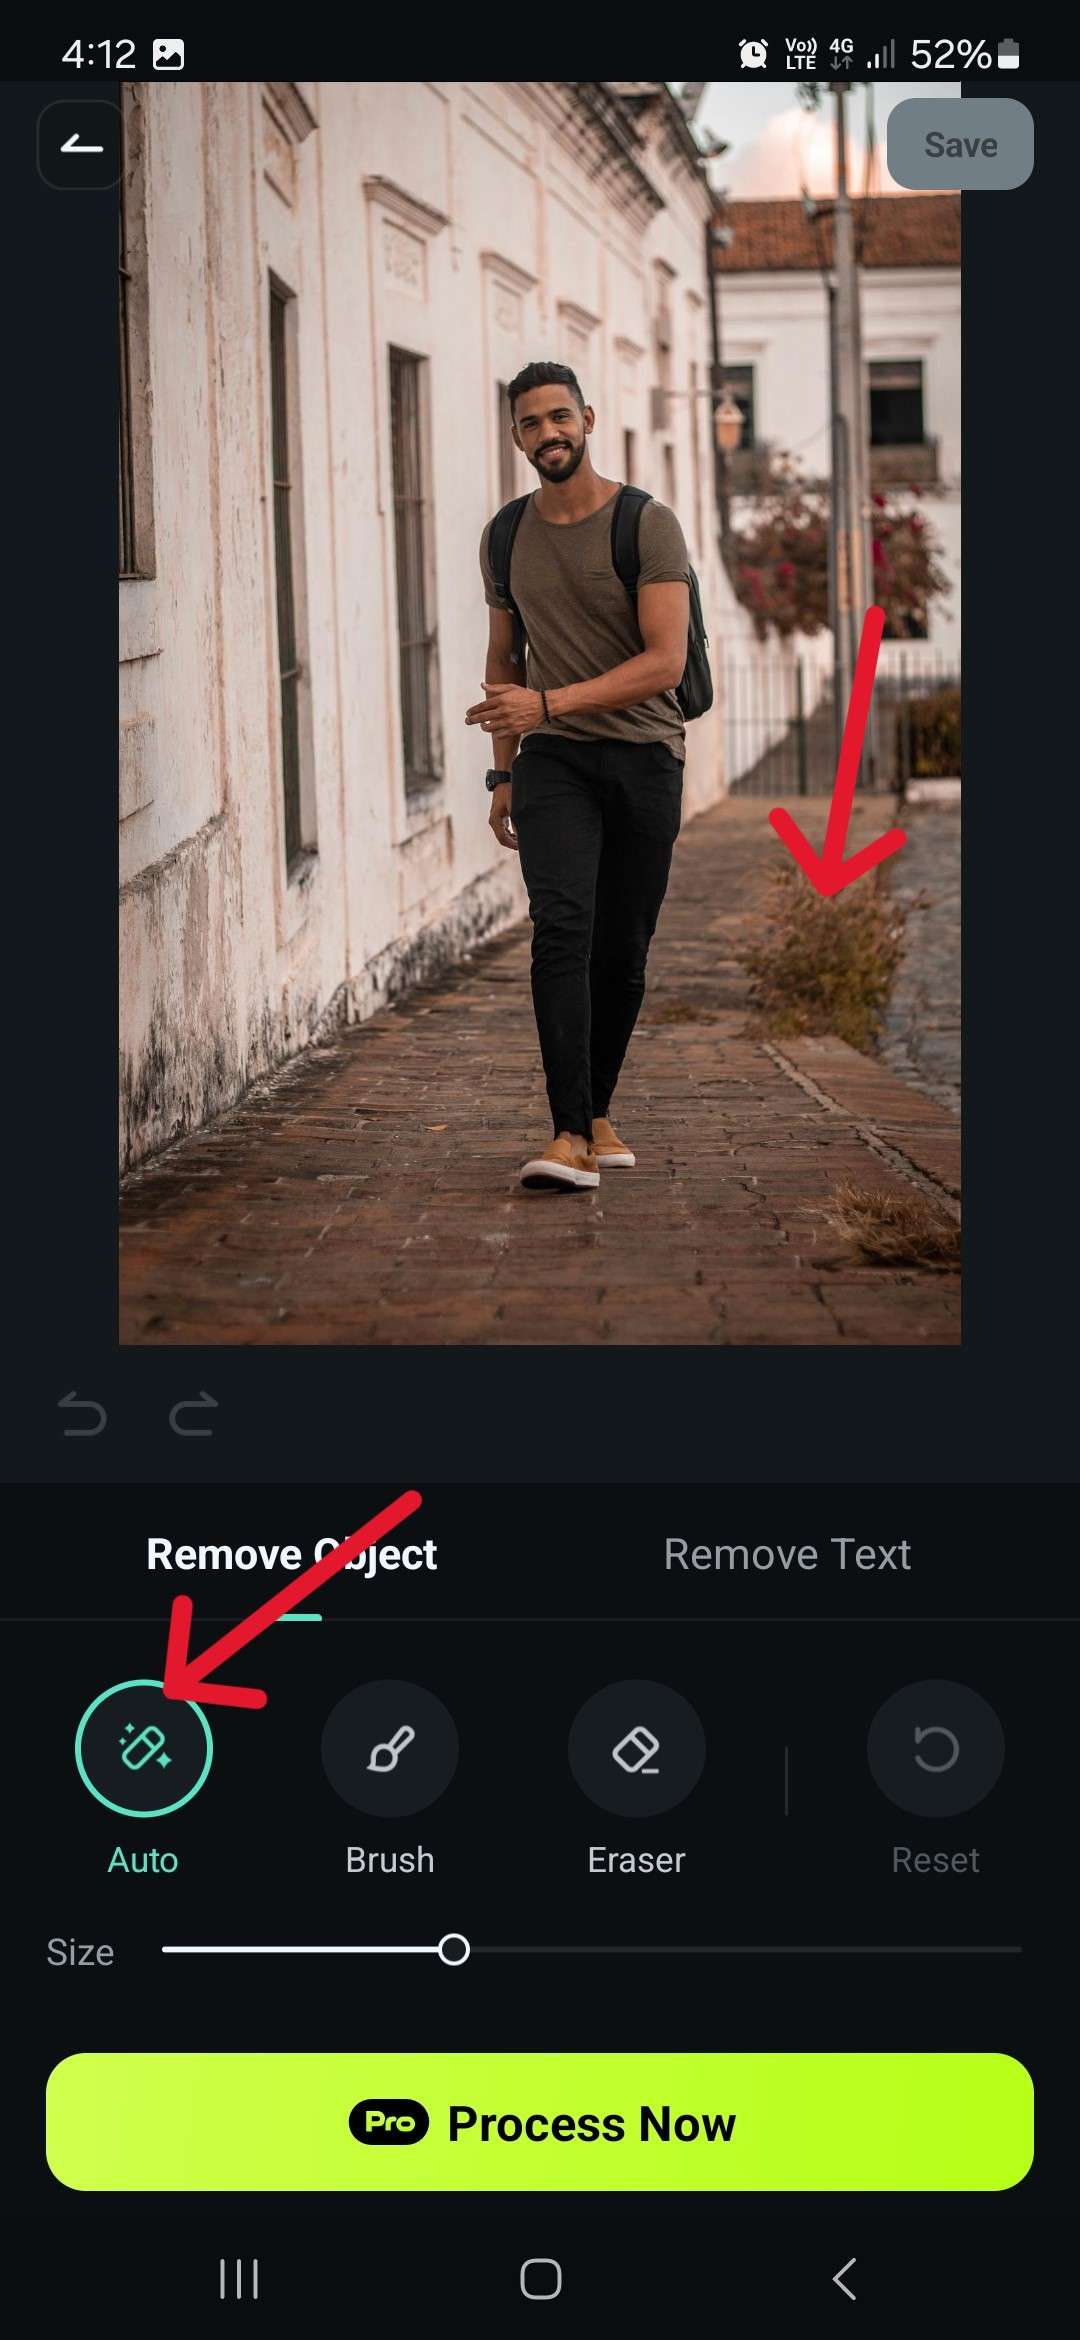
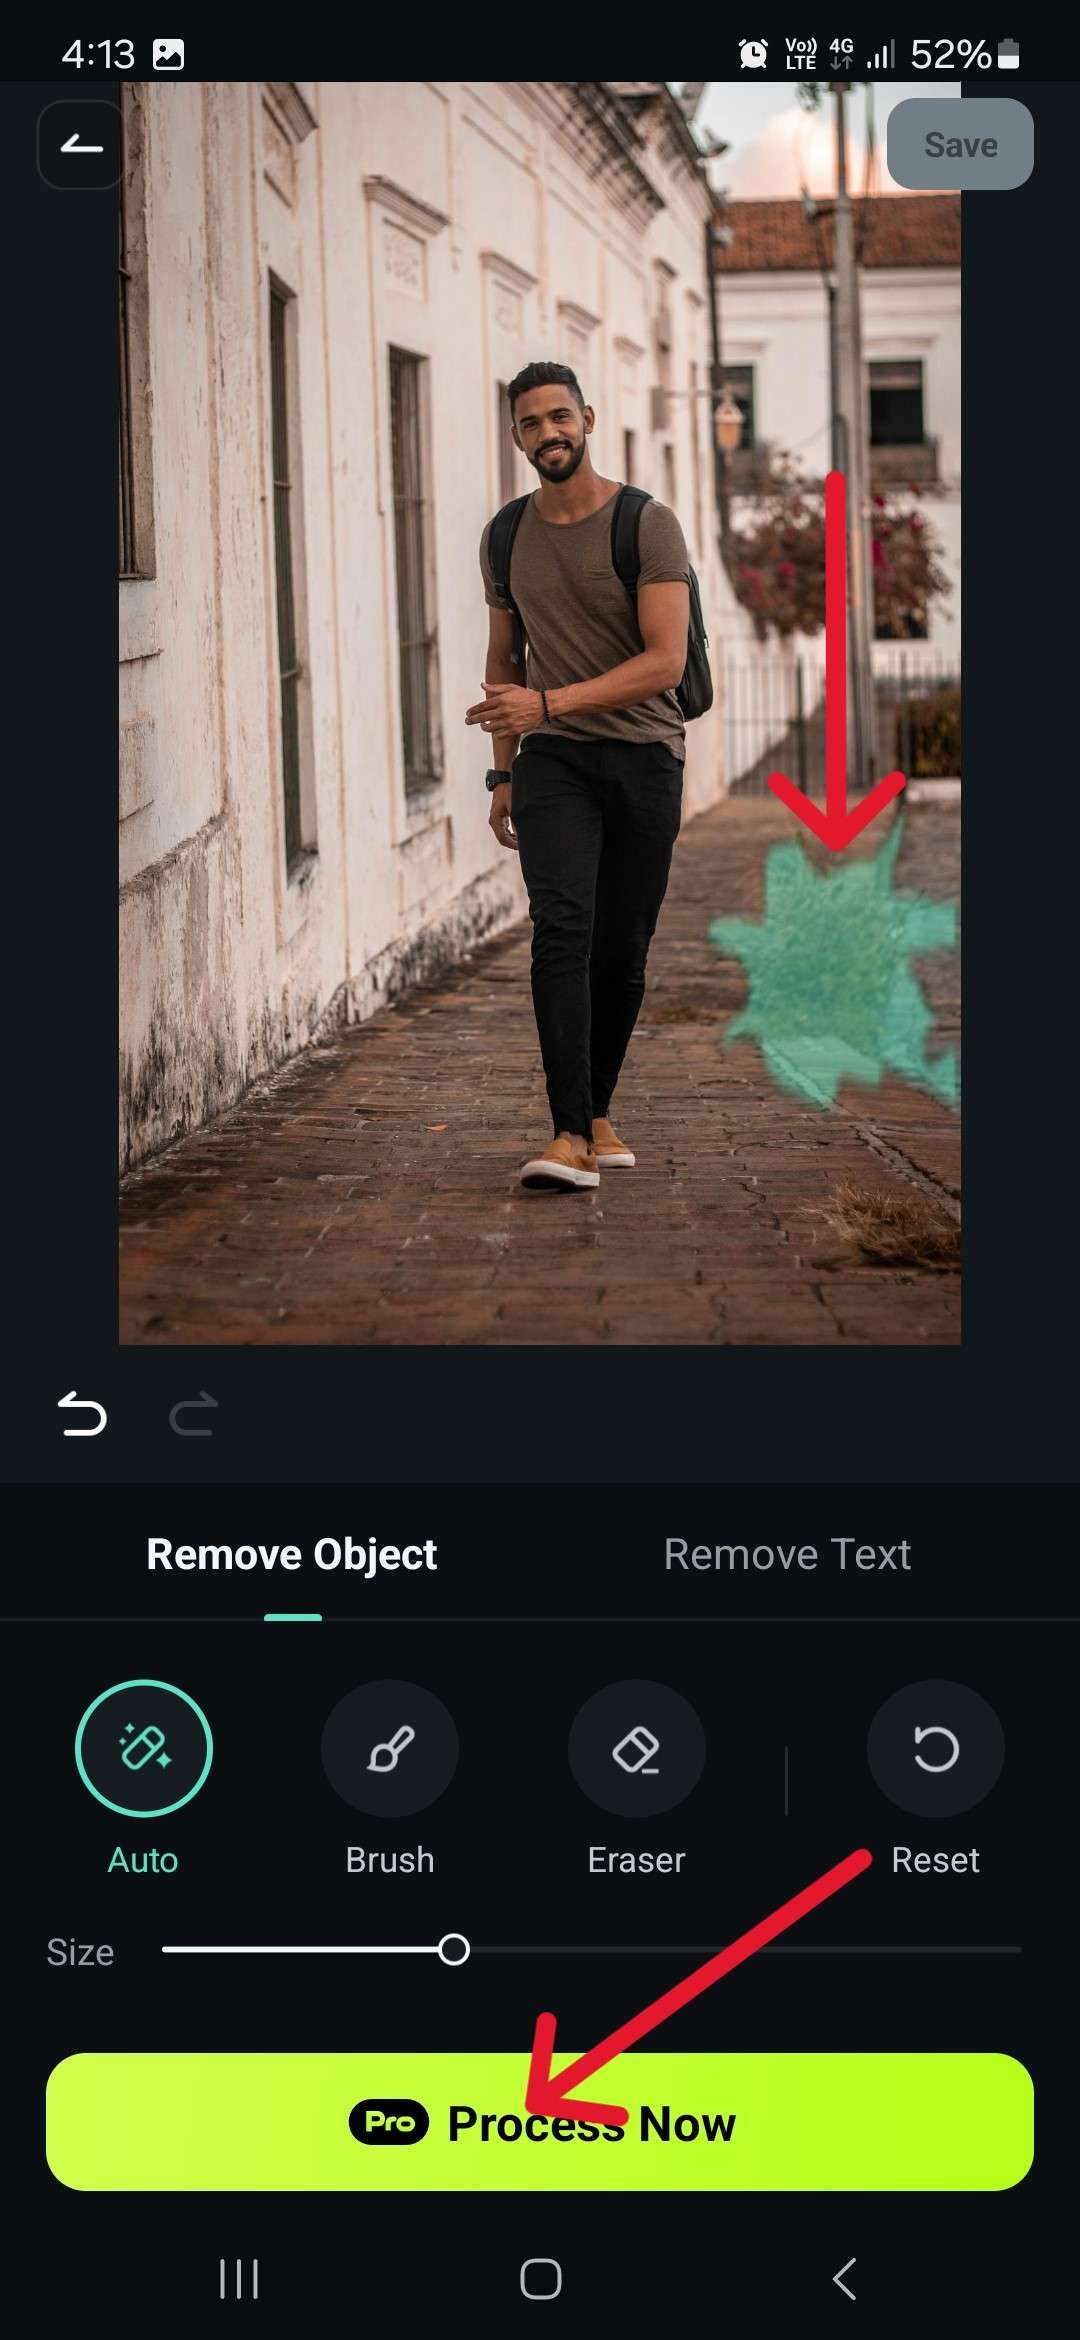
Step 2: Select Remove Object and tap Try Now.
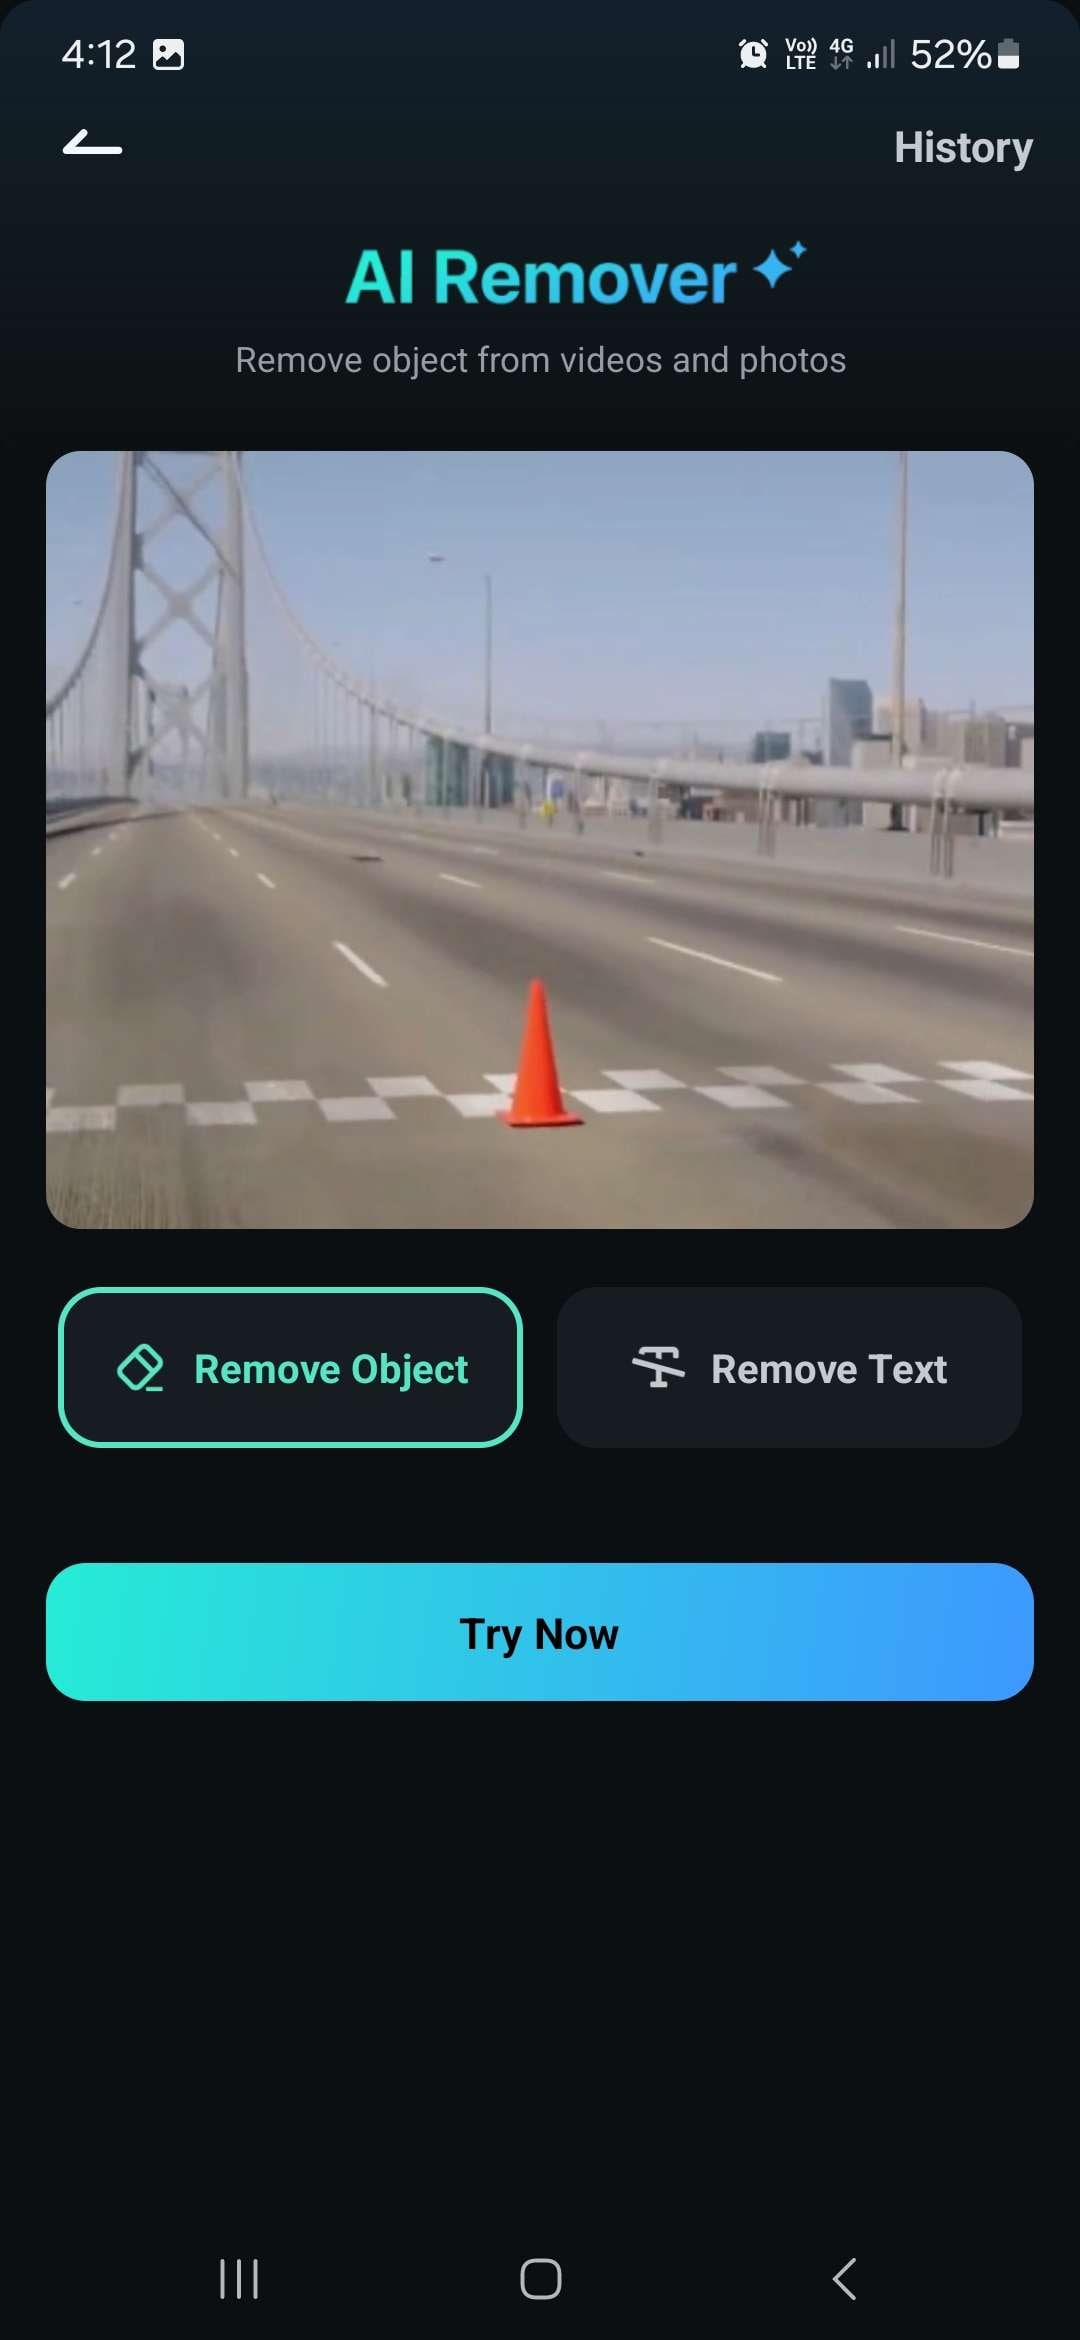
Step 3: Pick the image you want to edit and tap Auto, then draw over an object you want to remove, then click Process Now. We'll use the bush behind the main in the image as an example.
Here's how the final image looks after removing the bush.
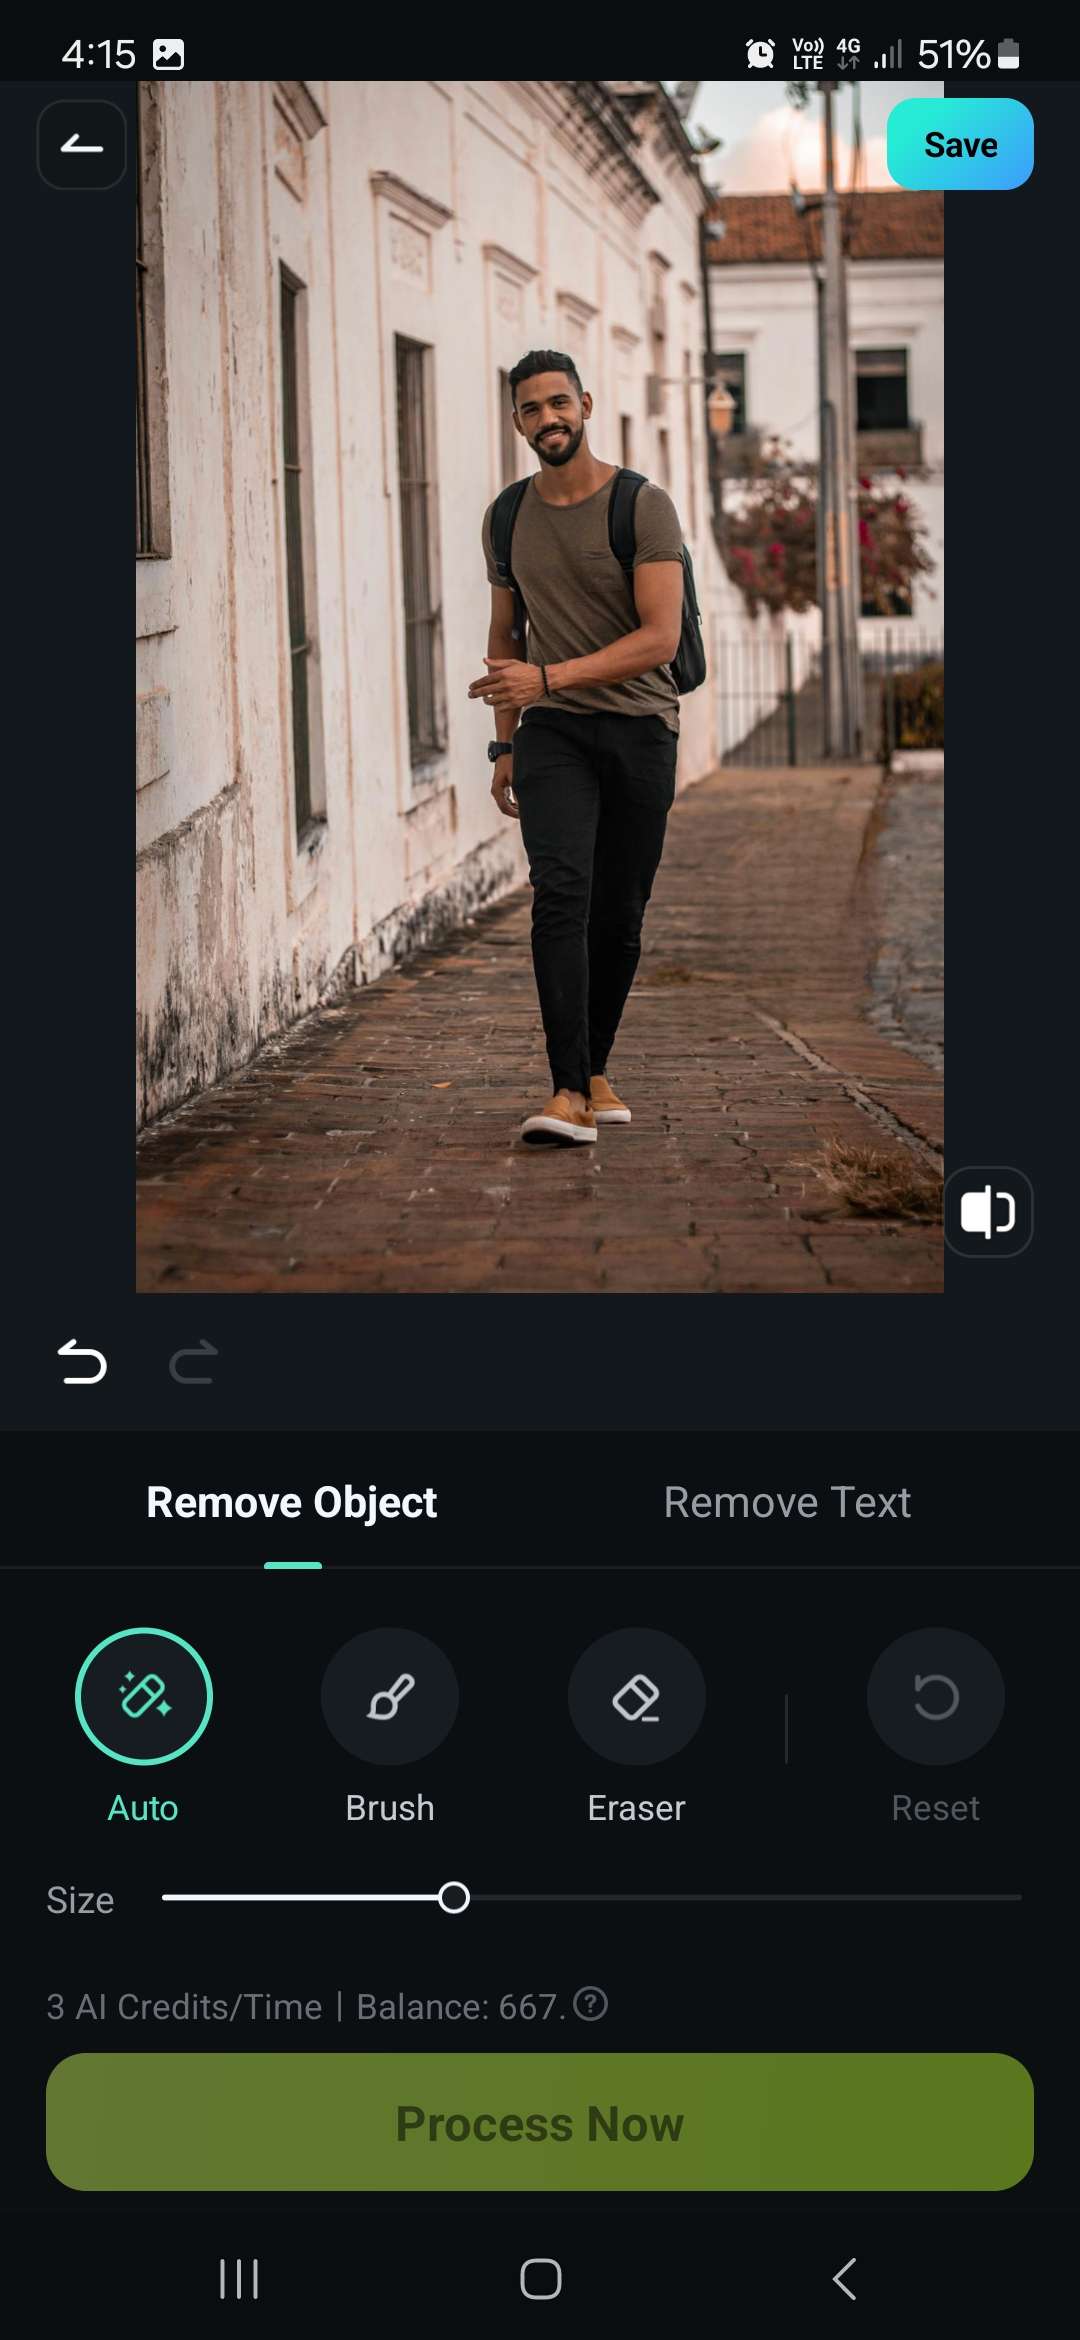
You can repeat this process several times if there is more than one object you want to remove from the picture, and you'll get a nice, clean background.
Change Image Shapes with Masks
Another thing you can do is to add a mask to focus on the person in the image and darken the background. This is how you can set it up.
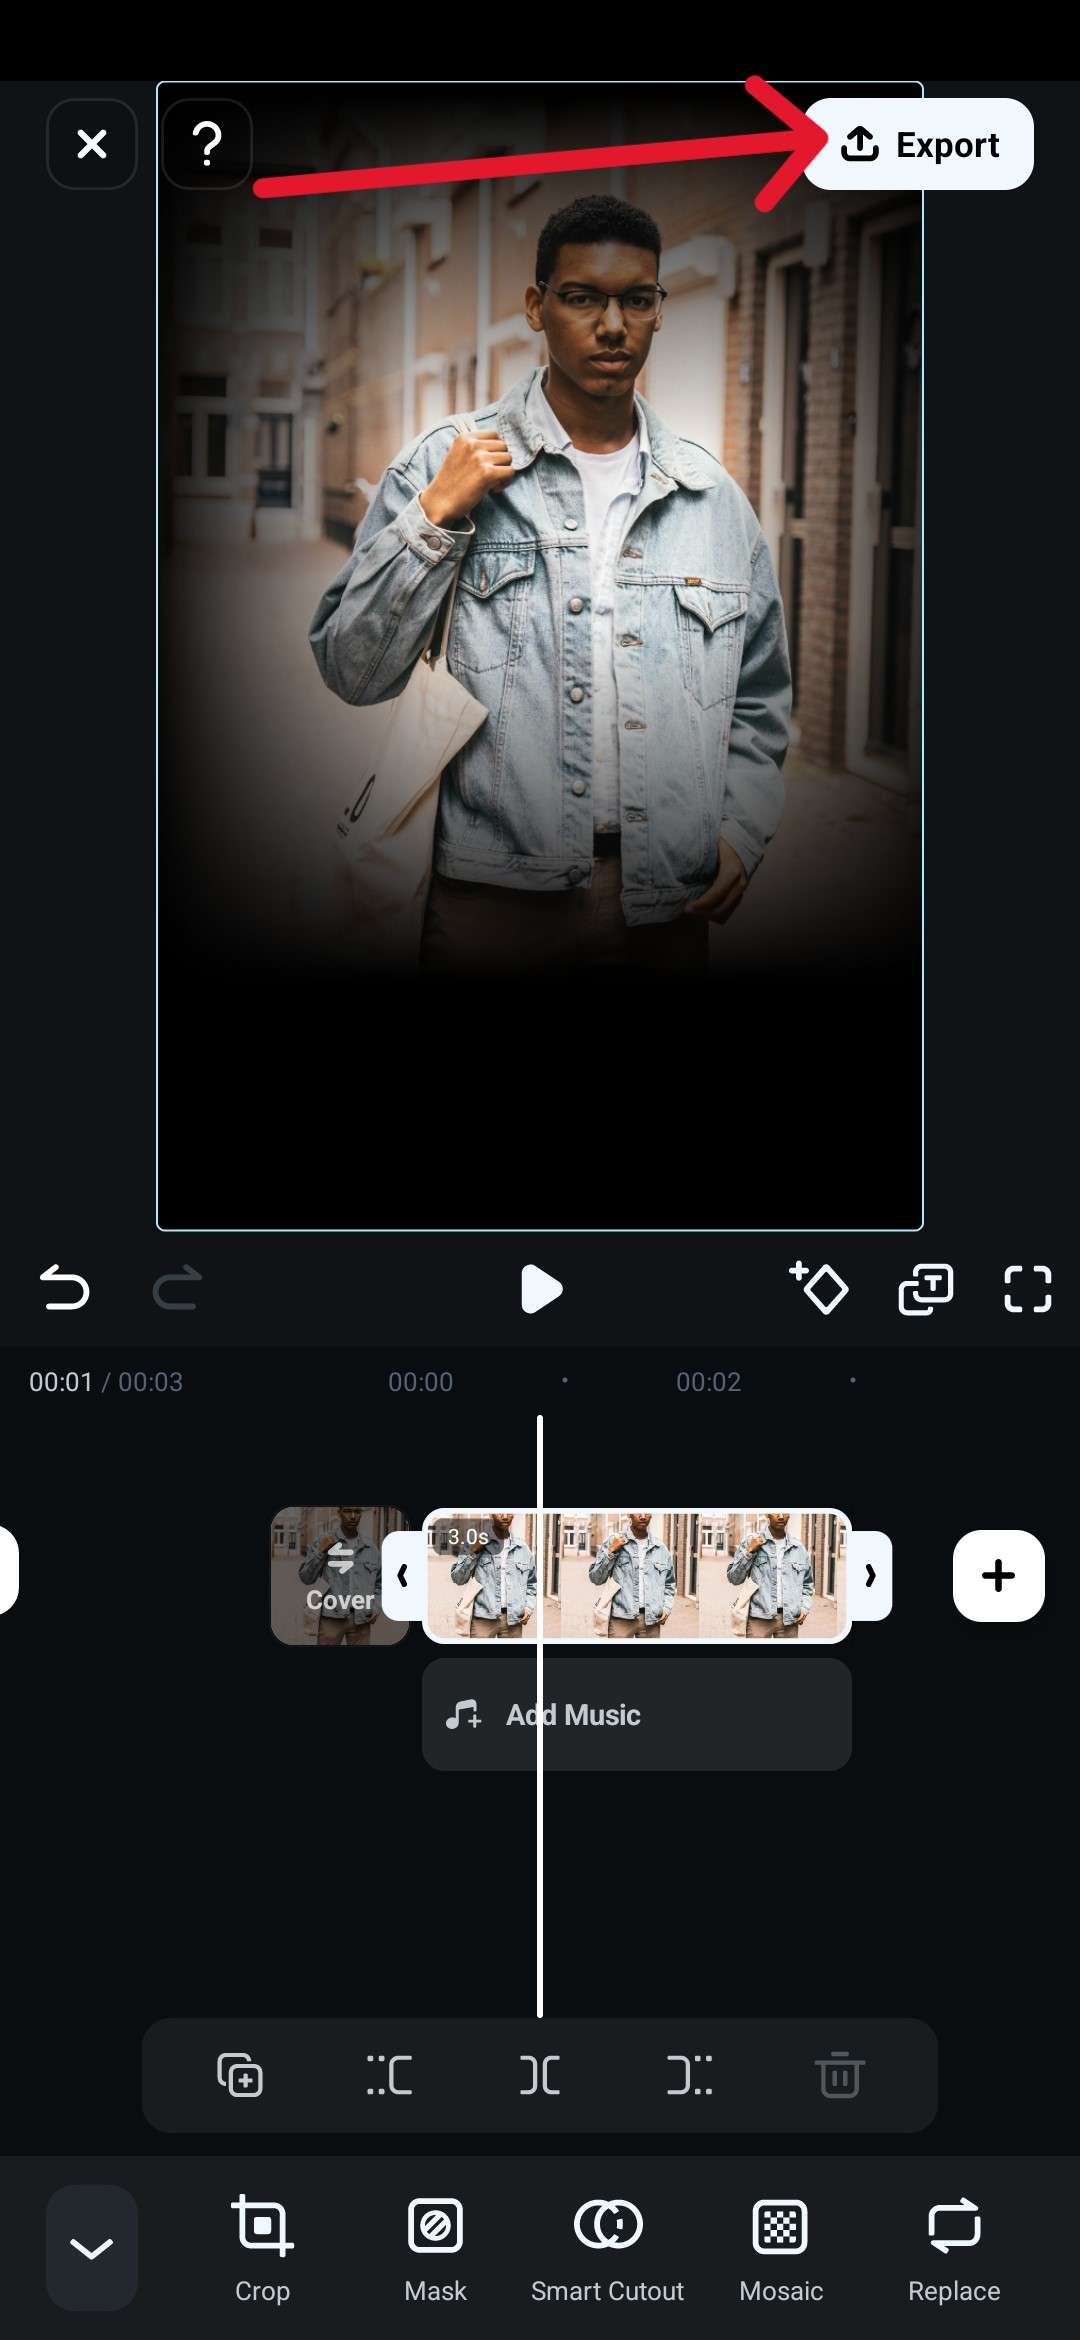
Step 1: Choose an image and then tap the Trim icon at the bottom of the screen.

Step 2: Tap on Mask to open up the customization menu.
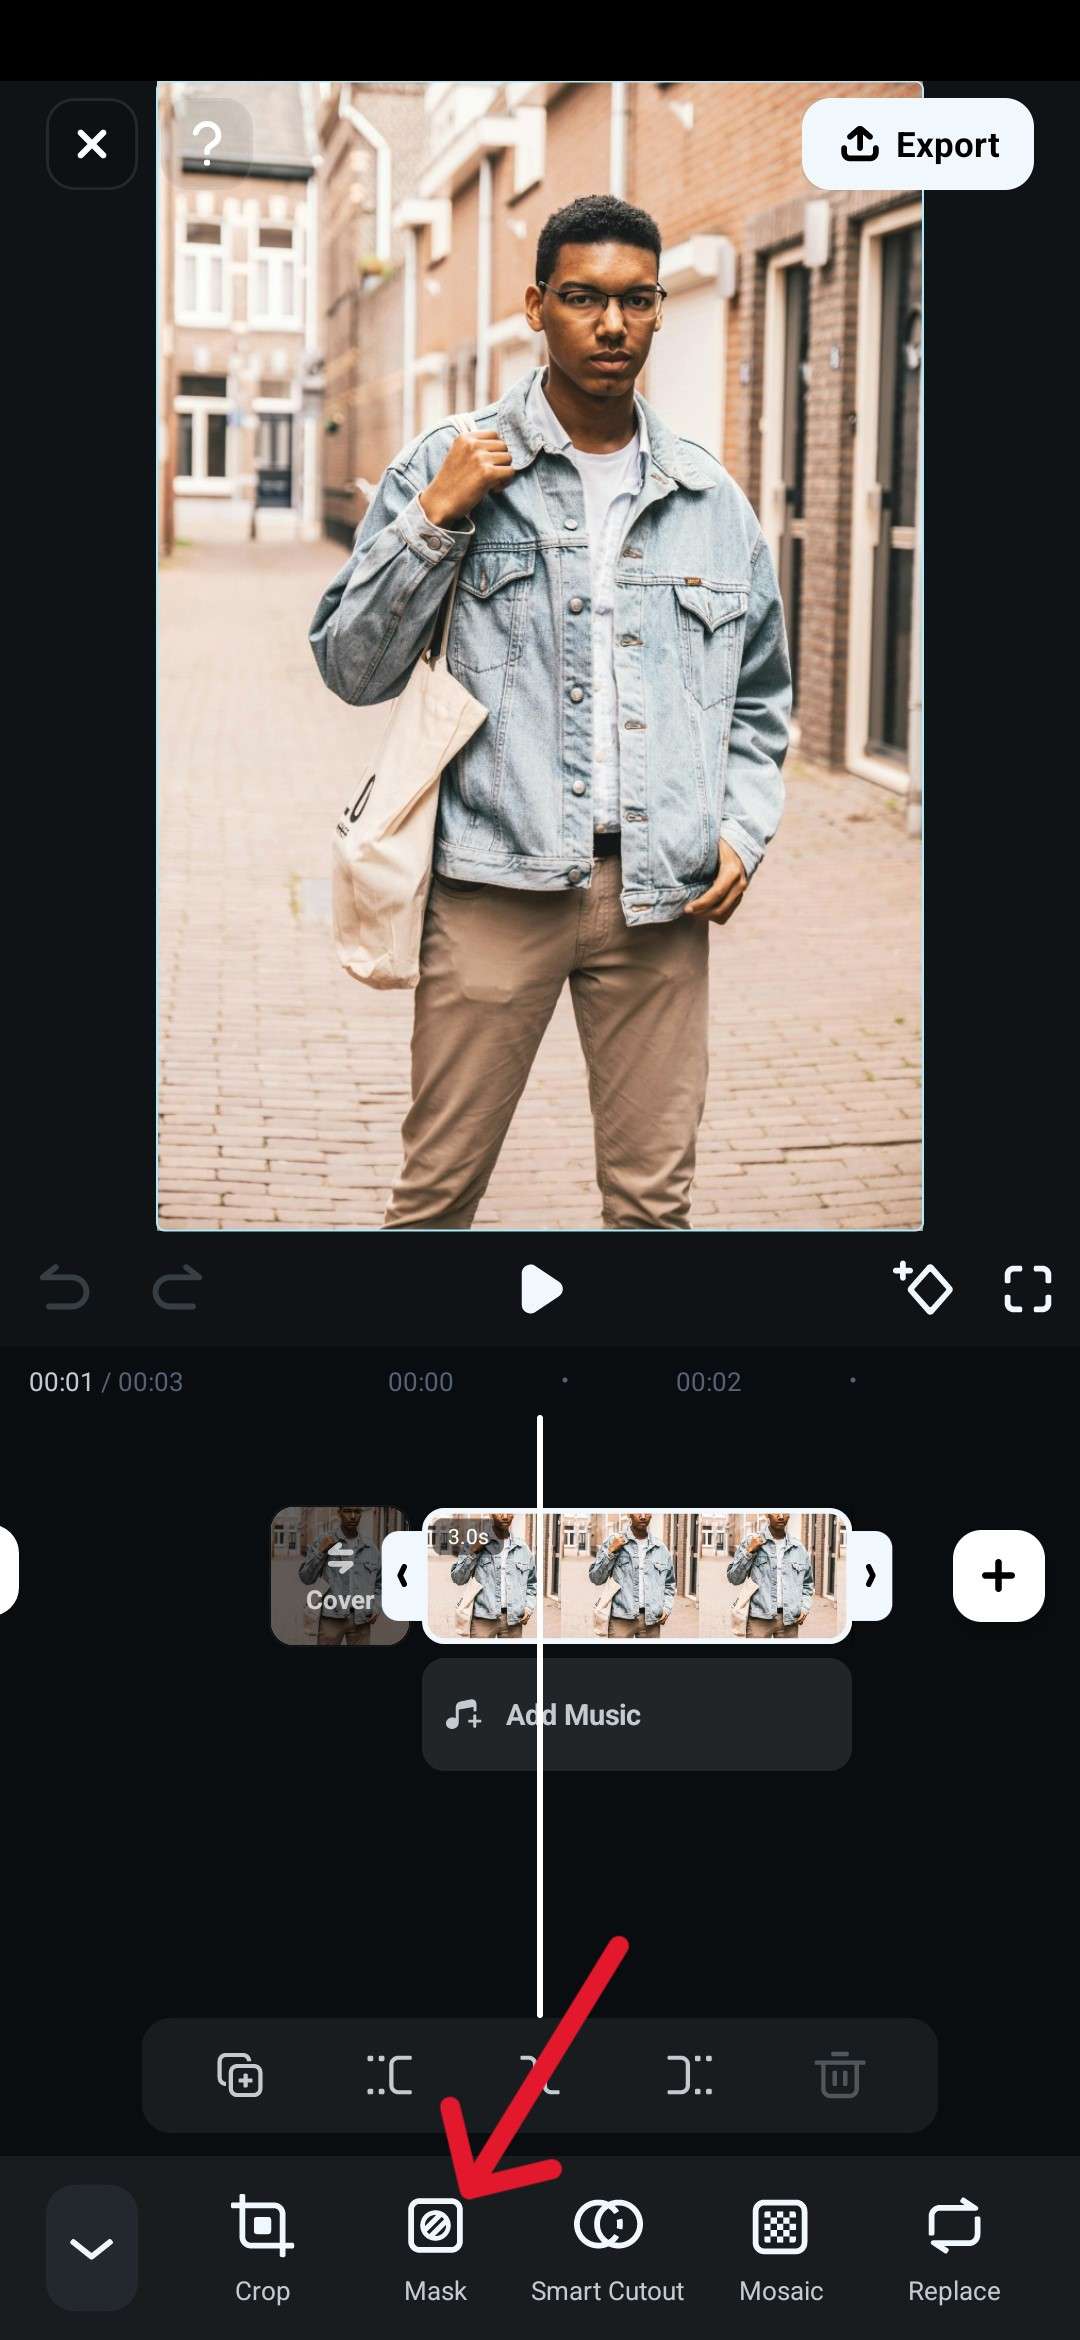
Step 3: Choose a shape and use the arrows to set the width and height of the mask, then click the check mark icon when you are done.
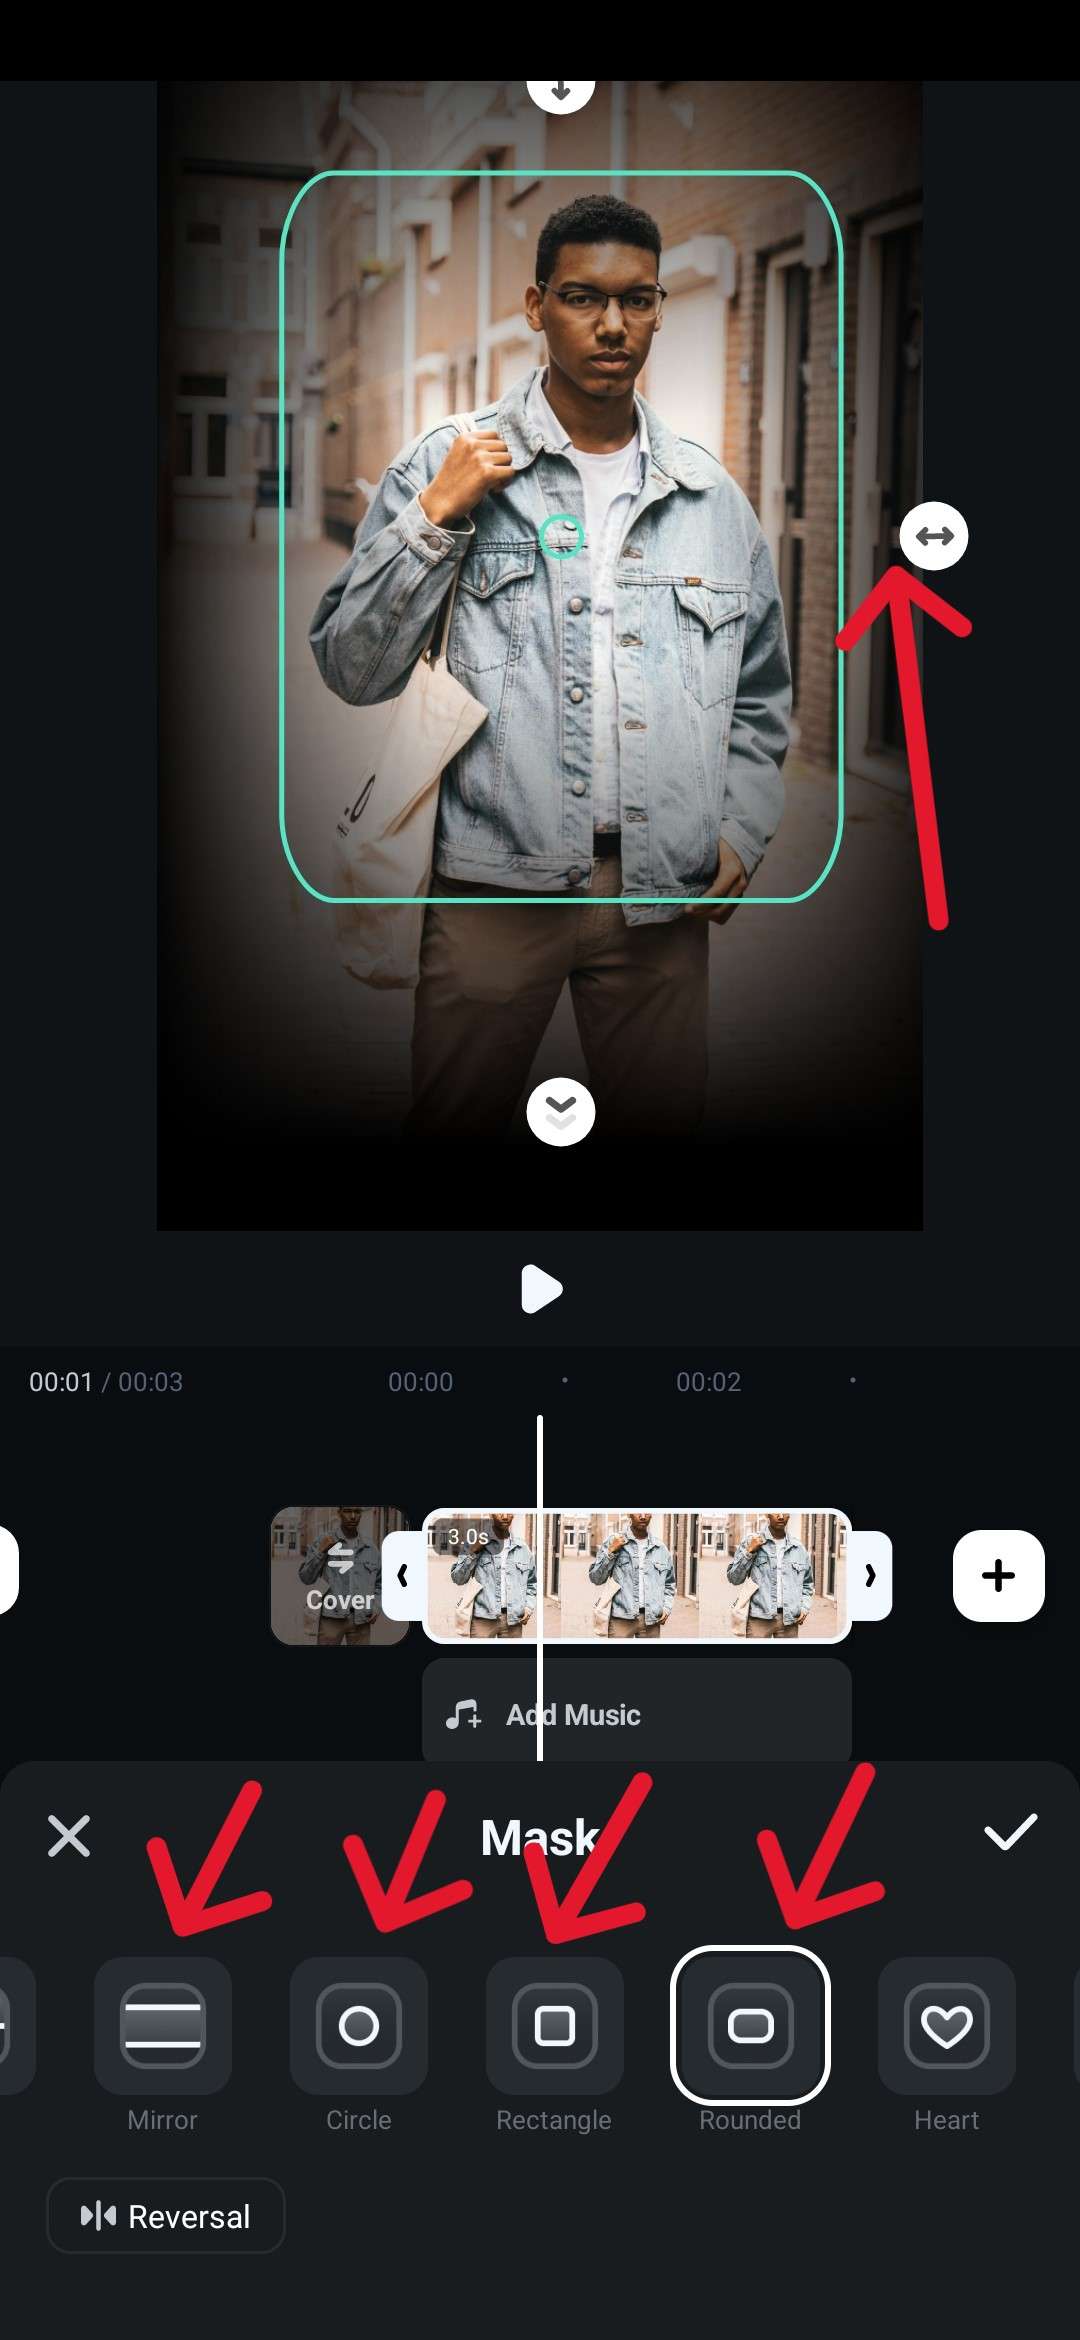
Step 4: Check to see if the image looks good, and then tap Export when you are ready to save it.
You will get a very classy photo, and you can add the name and date later on.
Conclusion
Using a photo name and date editor is the quickest way to get your image ready for different government institutions, like when renewing a passport, or when applying for job postings online.
In this article, we have the best name and date photo editor, like Filmora and Pi7 Image tool. If you prefer a comprehensive method, try Filmora.
It is an excellent video and image editor, with many customization options and several useful AI features, like the AI Object Remover we mentioned above, that can really make your photo stand out. It's perfect for when you want to take it a step further and add a more polished, professional touch.
secure download 