
 100% Security Verified | No Subscription Required | No Malware


 ChatGPT
 Perplexity
 Gemini
 Claude
 Grok
Grok
Ever tried to make glowing text in Photoshop and ended up with something that looks more fuzzy than luminous? Maybe the glow overpowered the text, or it clashed with your background, or you just couldn't get that lit-from-within effect you saw in tutorials? You're not alone.
Glowing text sounds simple, but nailing the balance between brightness, softness, and clarity takes a few key tricks. In this guide, we'll break down how to create glowing text in Photoshop that's polished, eye-catching, and tailored to your design.
In this article
How to Make a Text Glow in Photoshop: EZ Guide
Before we begin, make sure that you have Photoshop installed on your device.
- Open the app, create a new project, and use the text tool to add something. This will create a separate layer in your project. Here's how it should look.

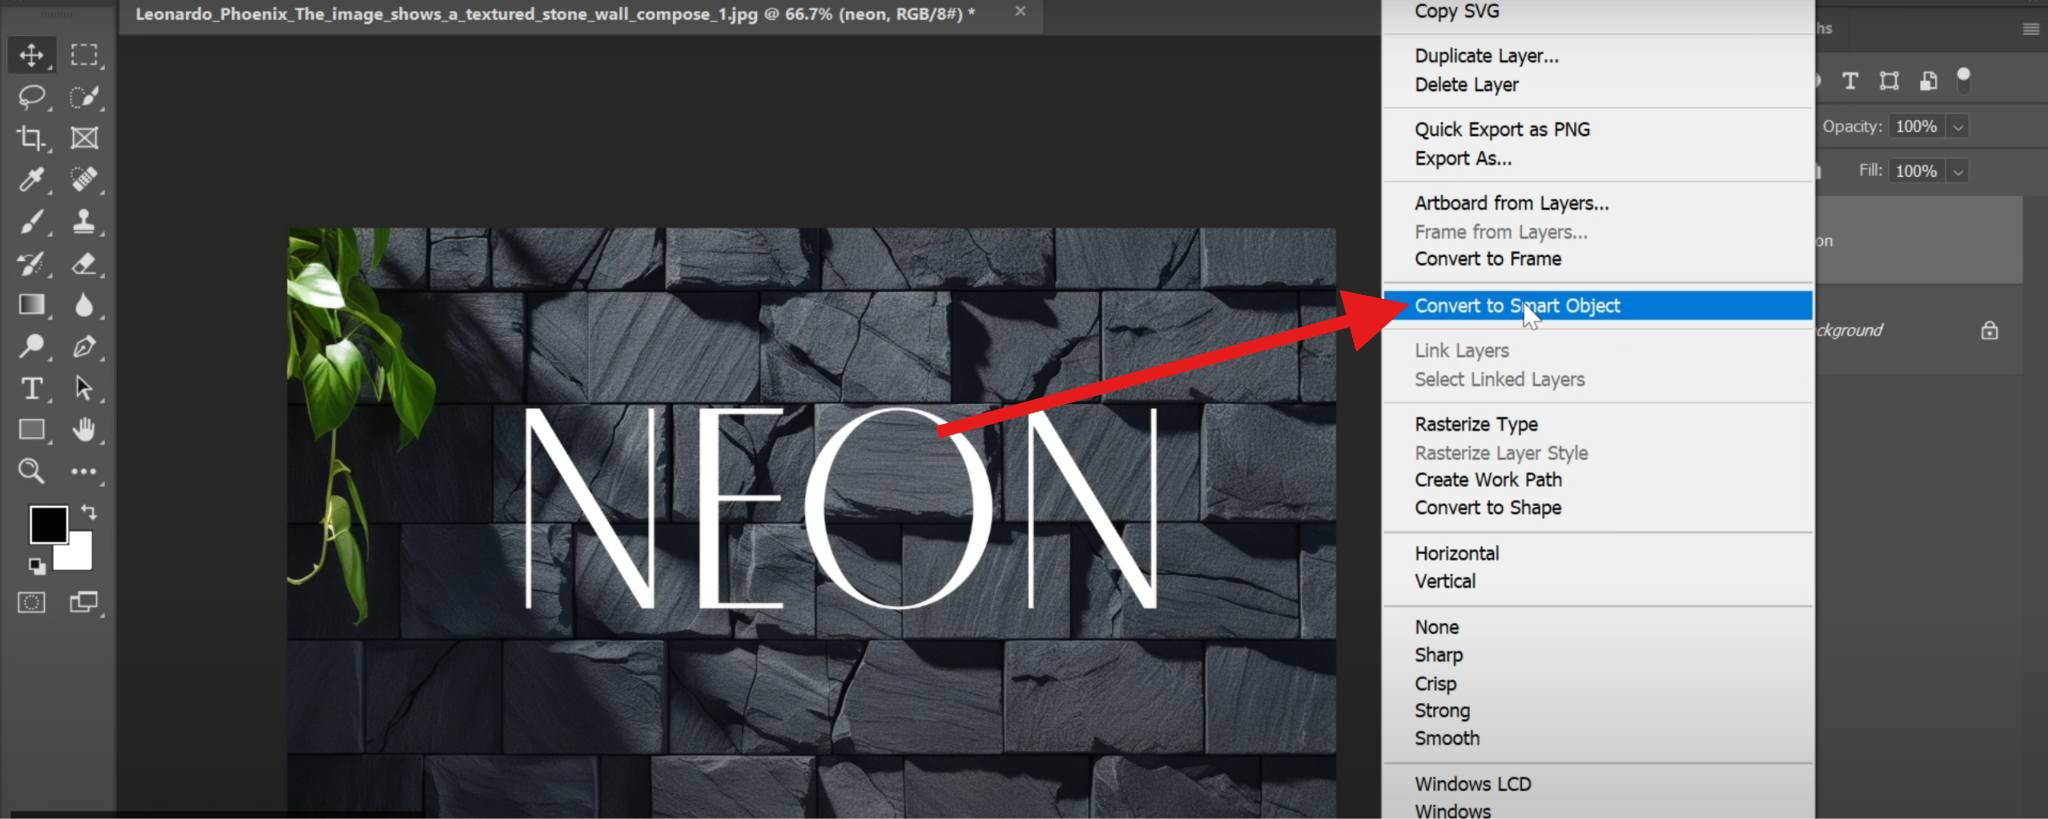
- Right-click on that layer and select the Convert to Smart Object option.
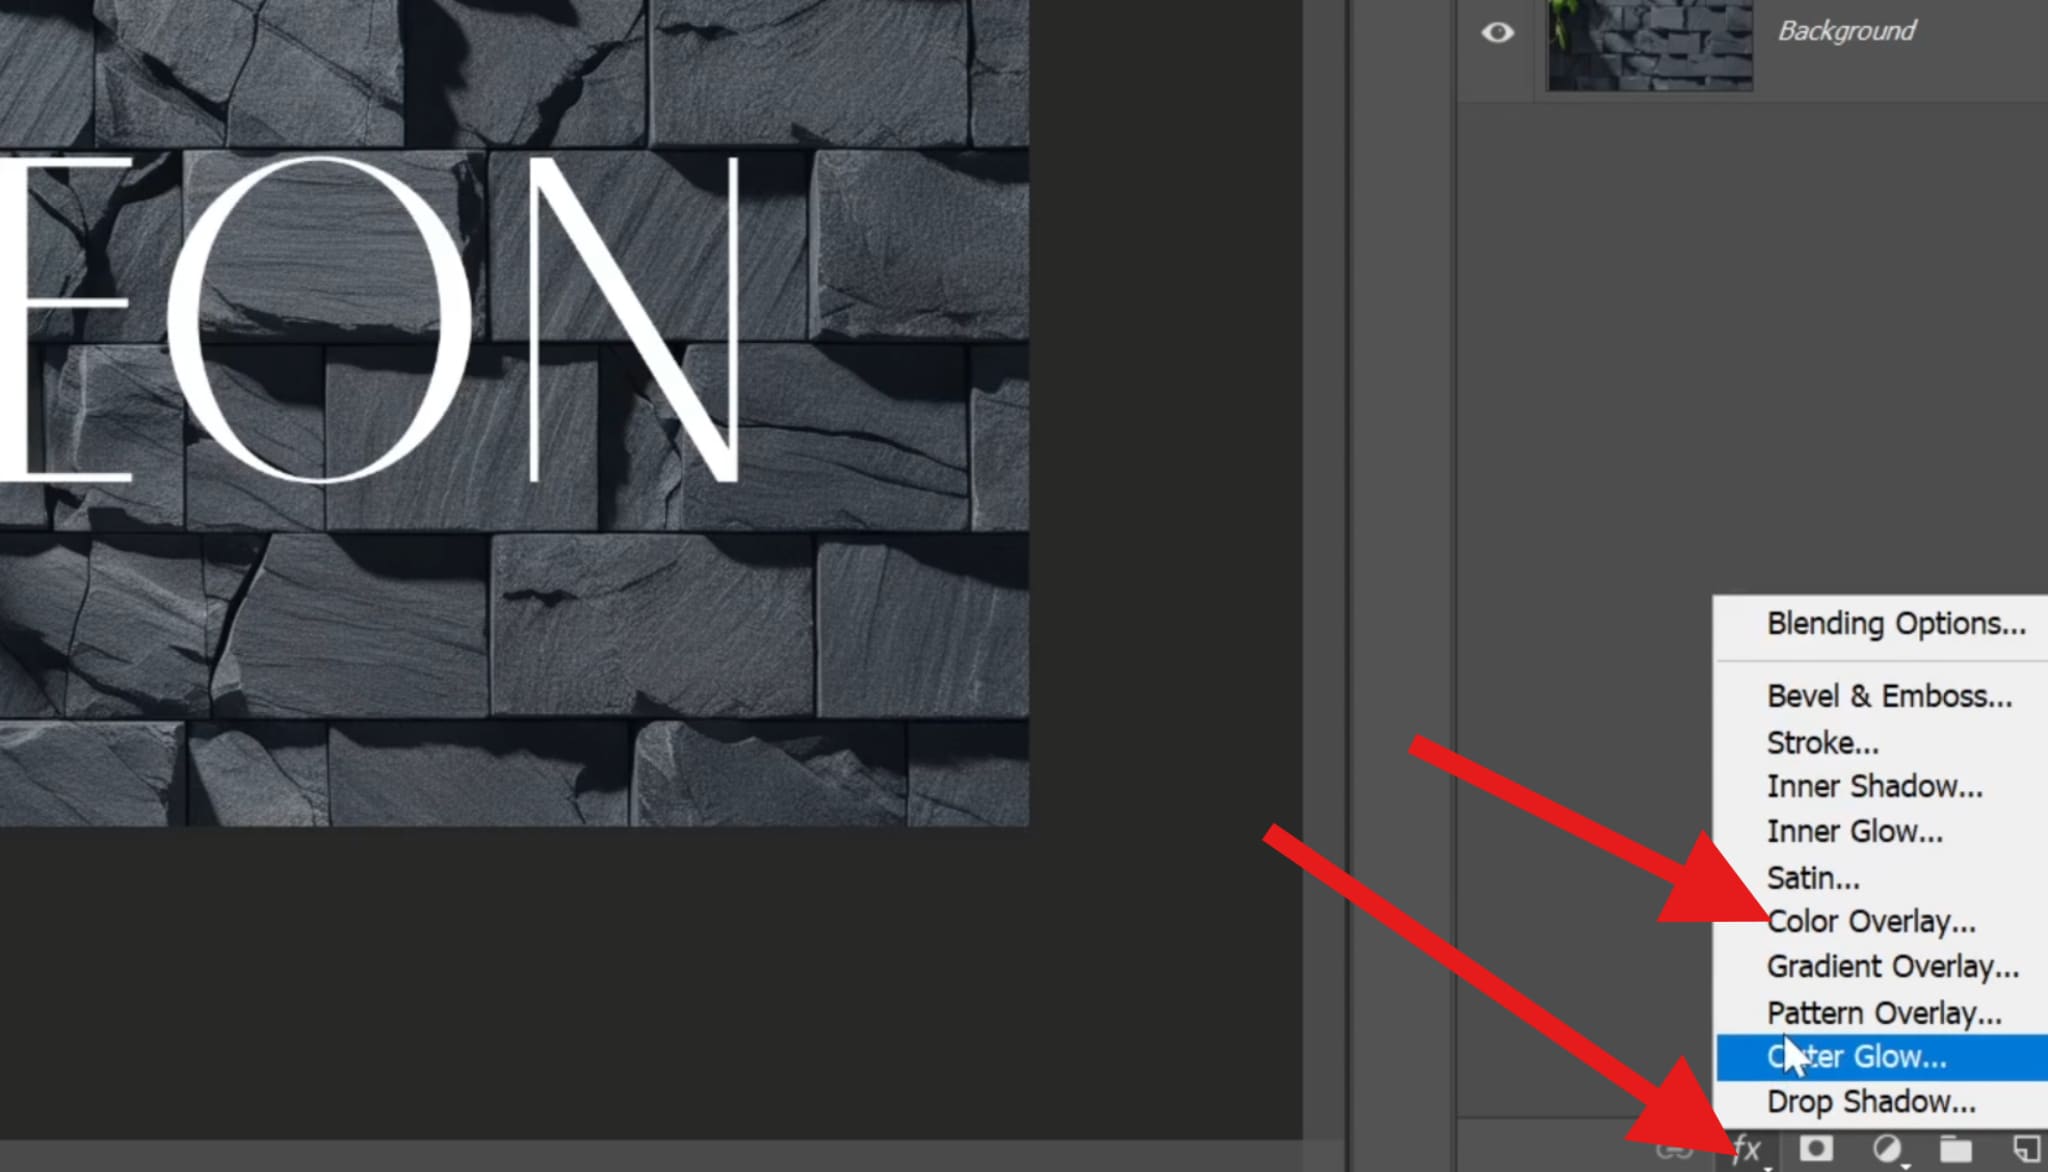
- Click on the fx button at the bottom-right corner of the screen and select the Color Overlay feature.
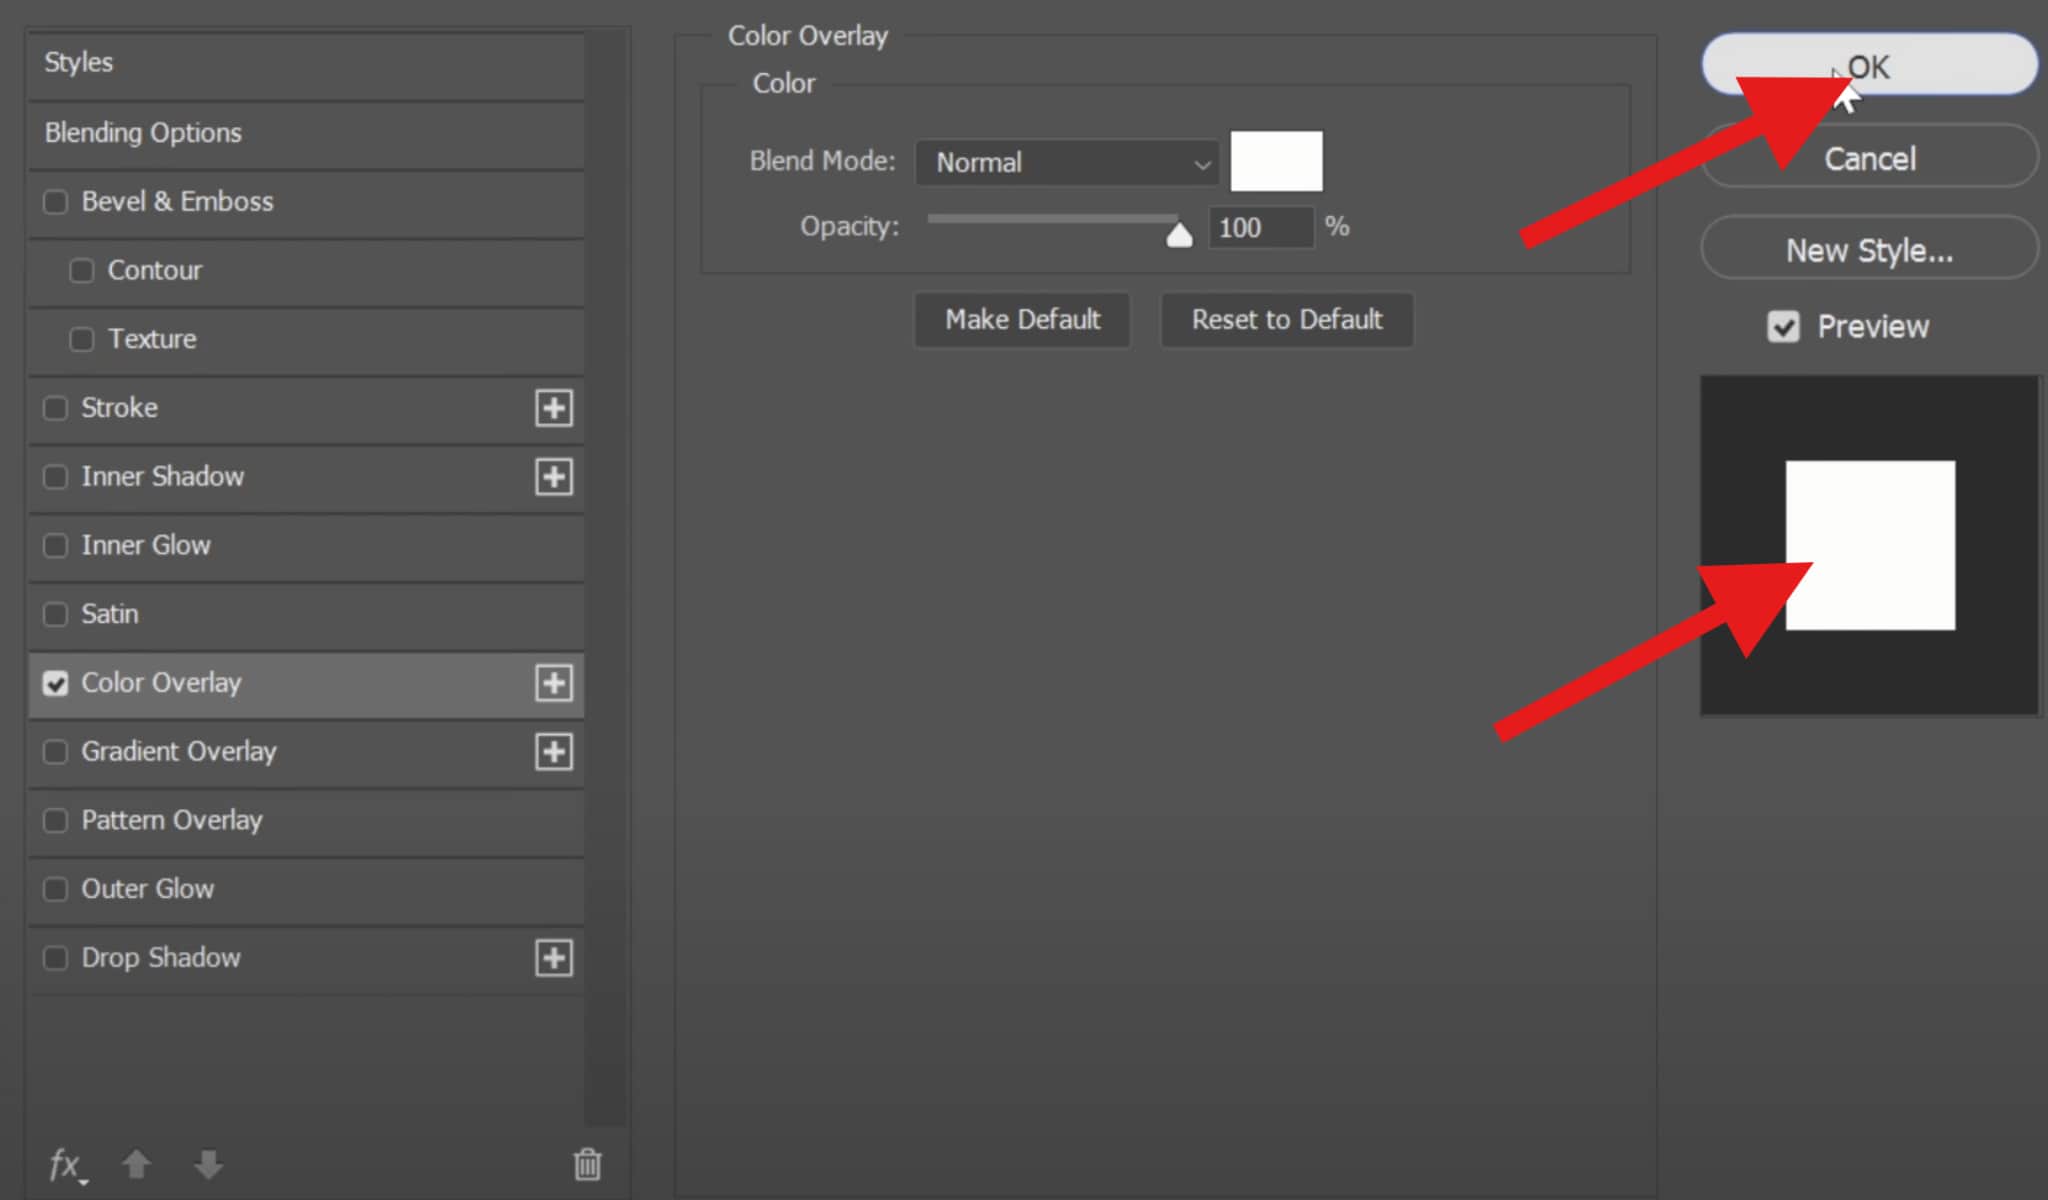
- Set the color to white and click on OK.
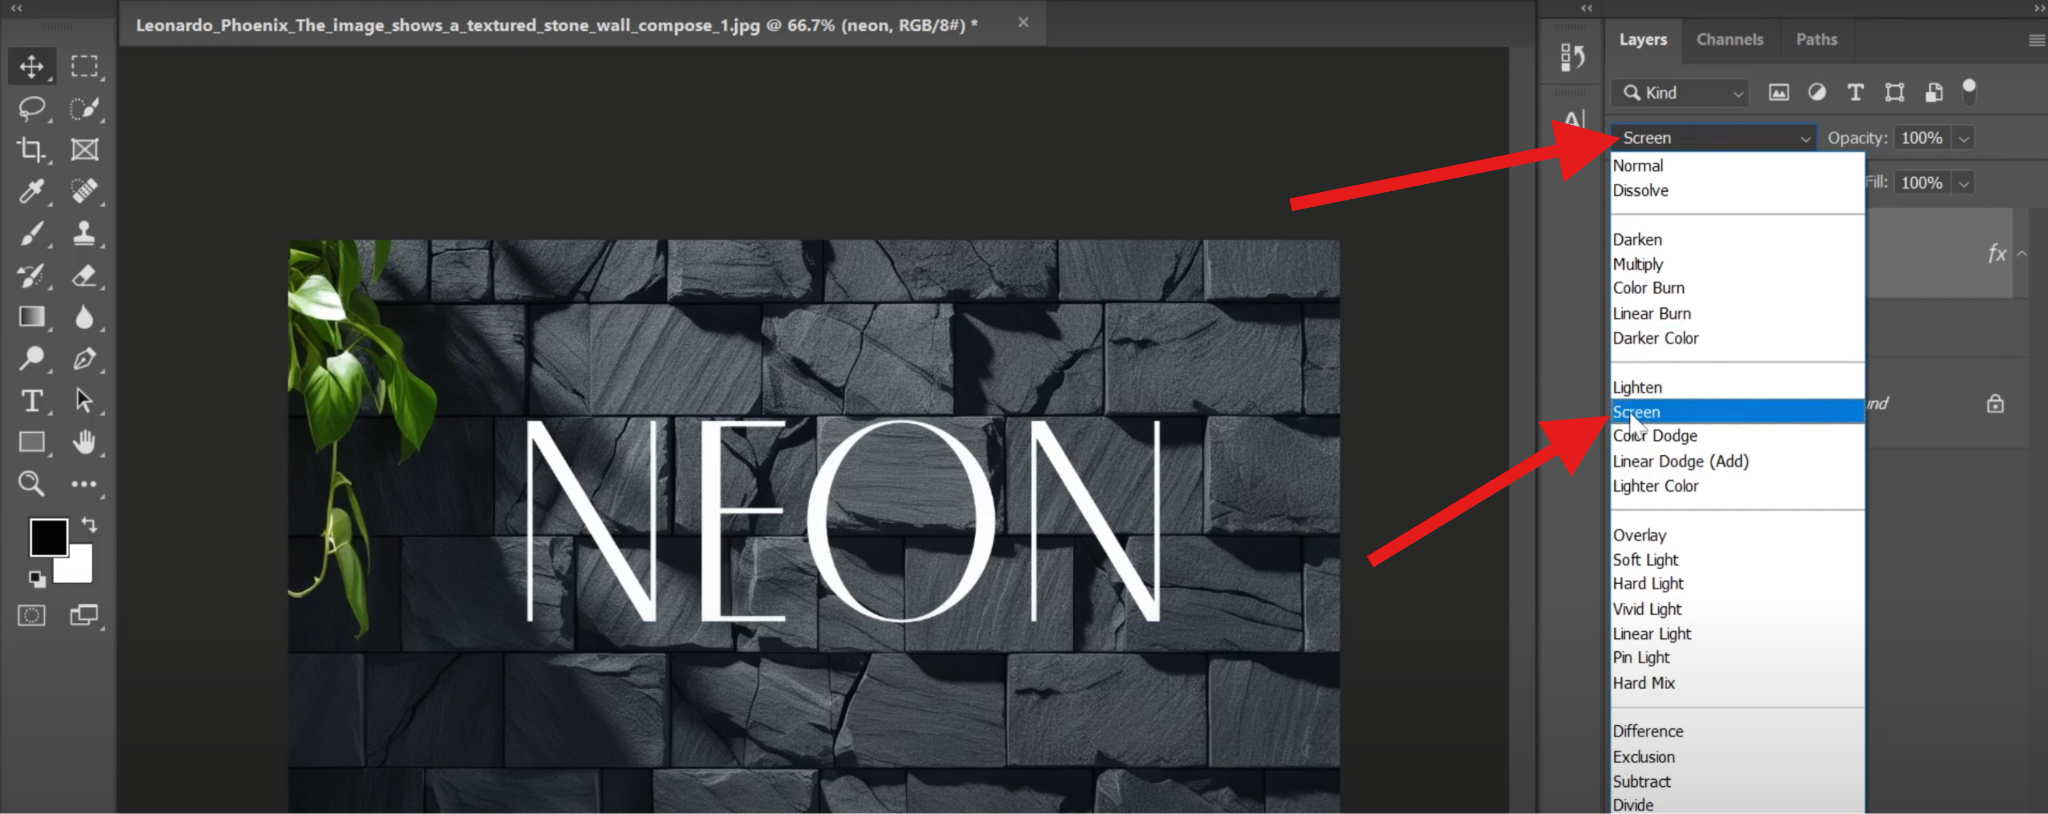
- Click to change the Blending Mode and select the Screen option.
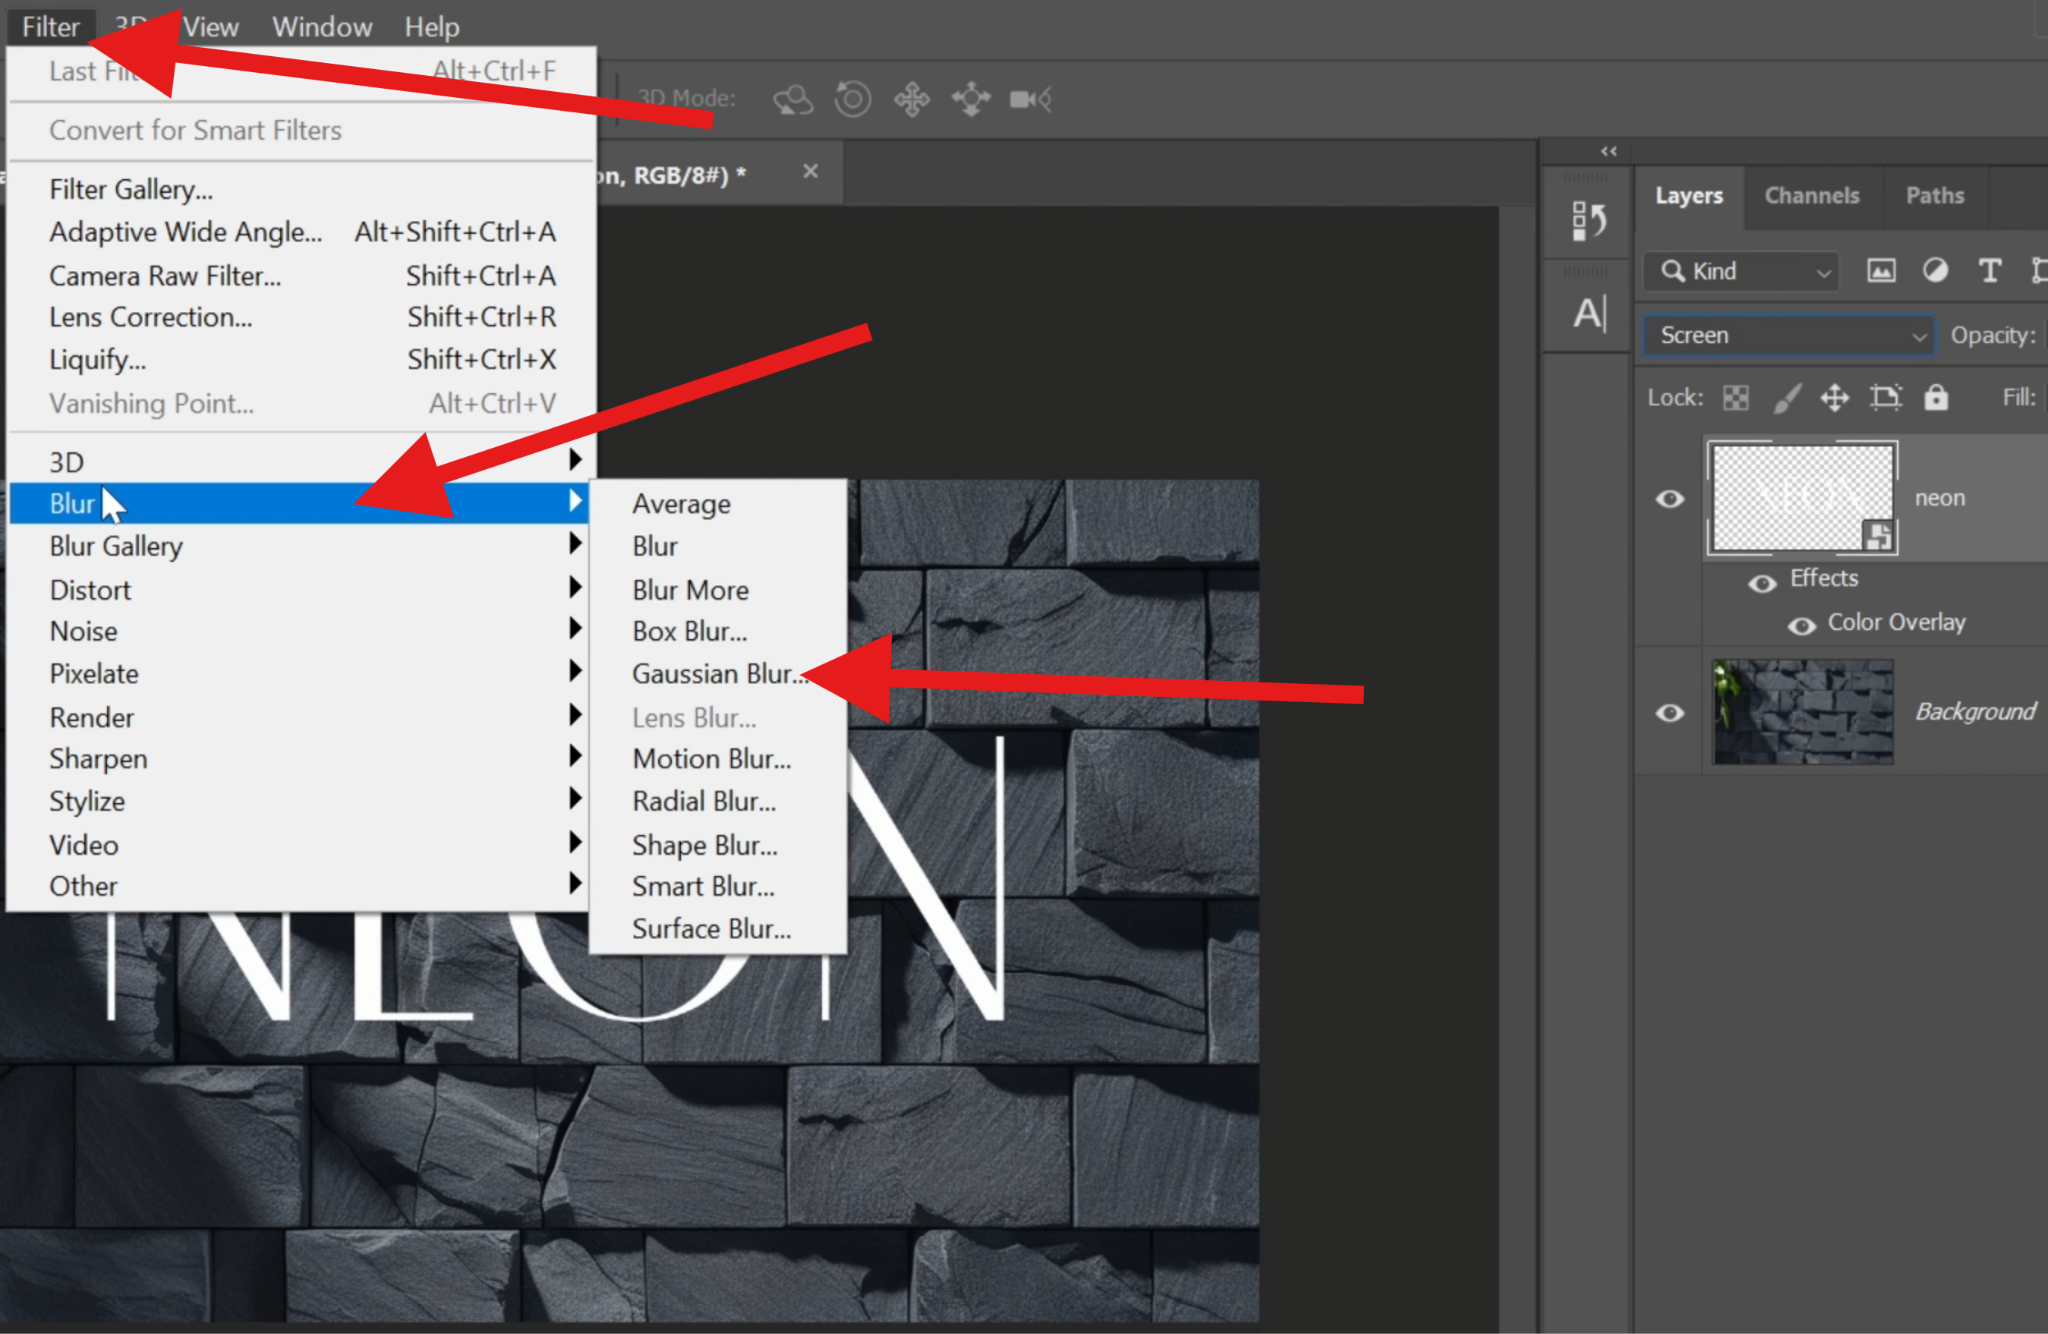
- Now, from the upper menu, go to Filter > Blur > Gaussian Blur.
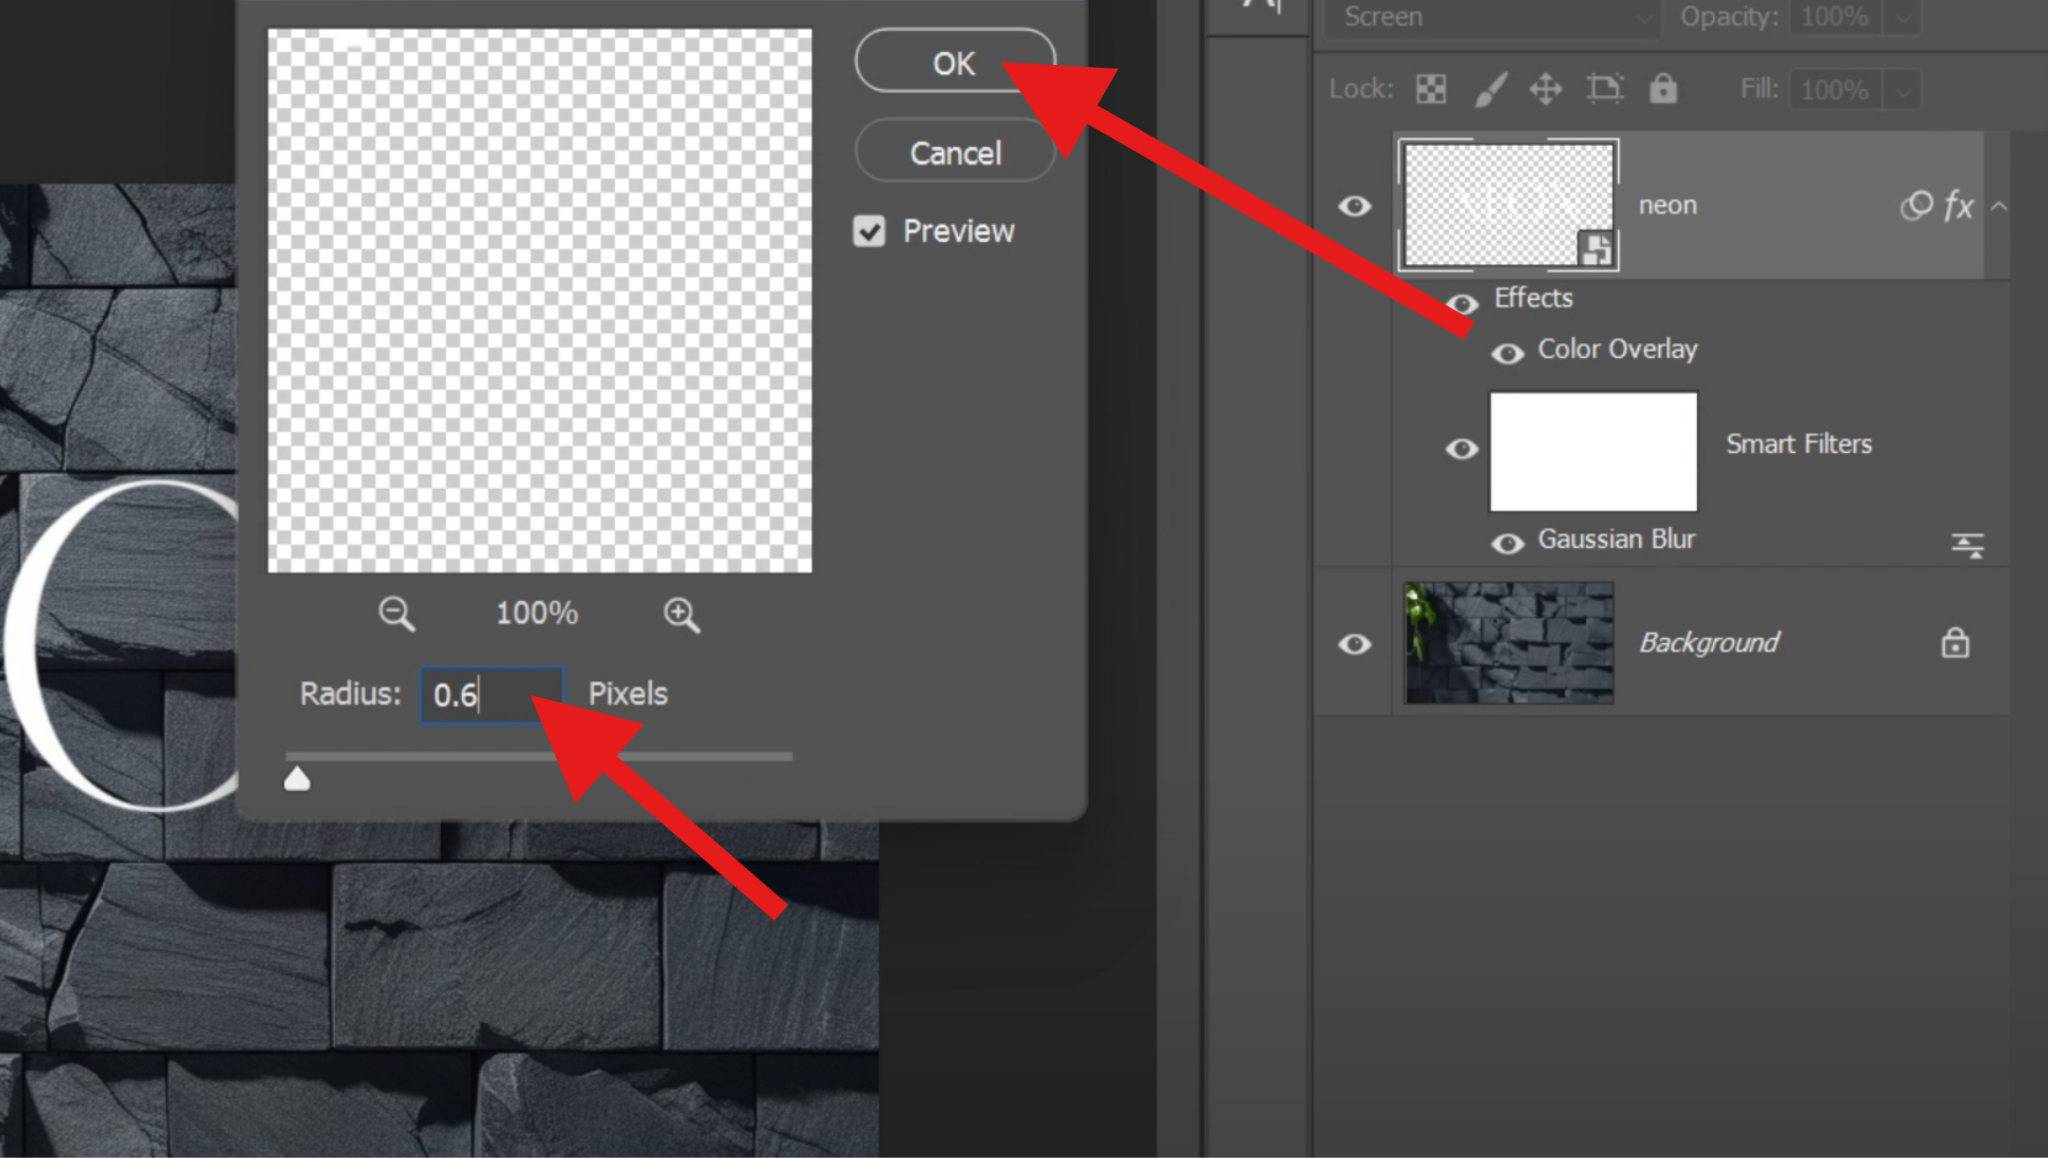
- Set the radius to 0.6 pixels and click on OK.
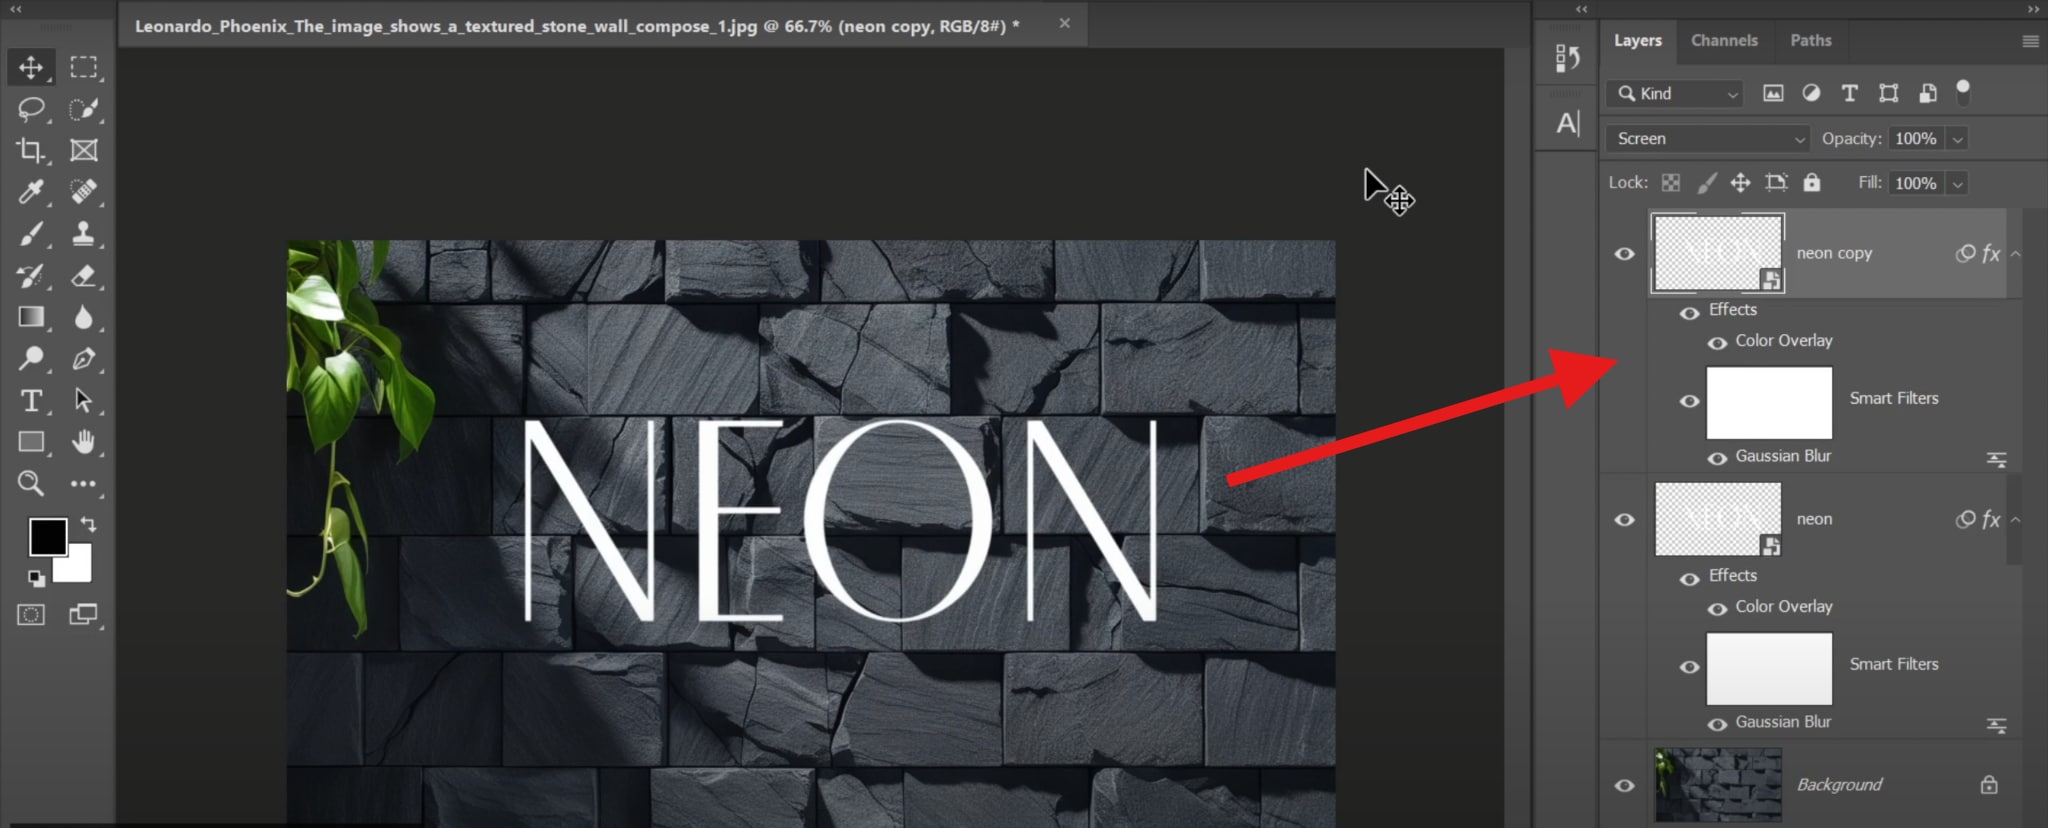
- Now, you need to duplicate the layer by selecting it and typing Ctrl + J (Windows) or Cmd + J (Mac) on your keyboard. The interface should look like this.
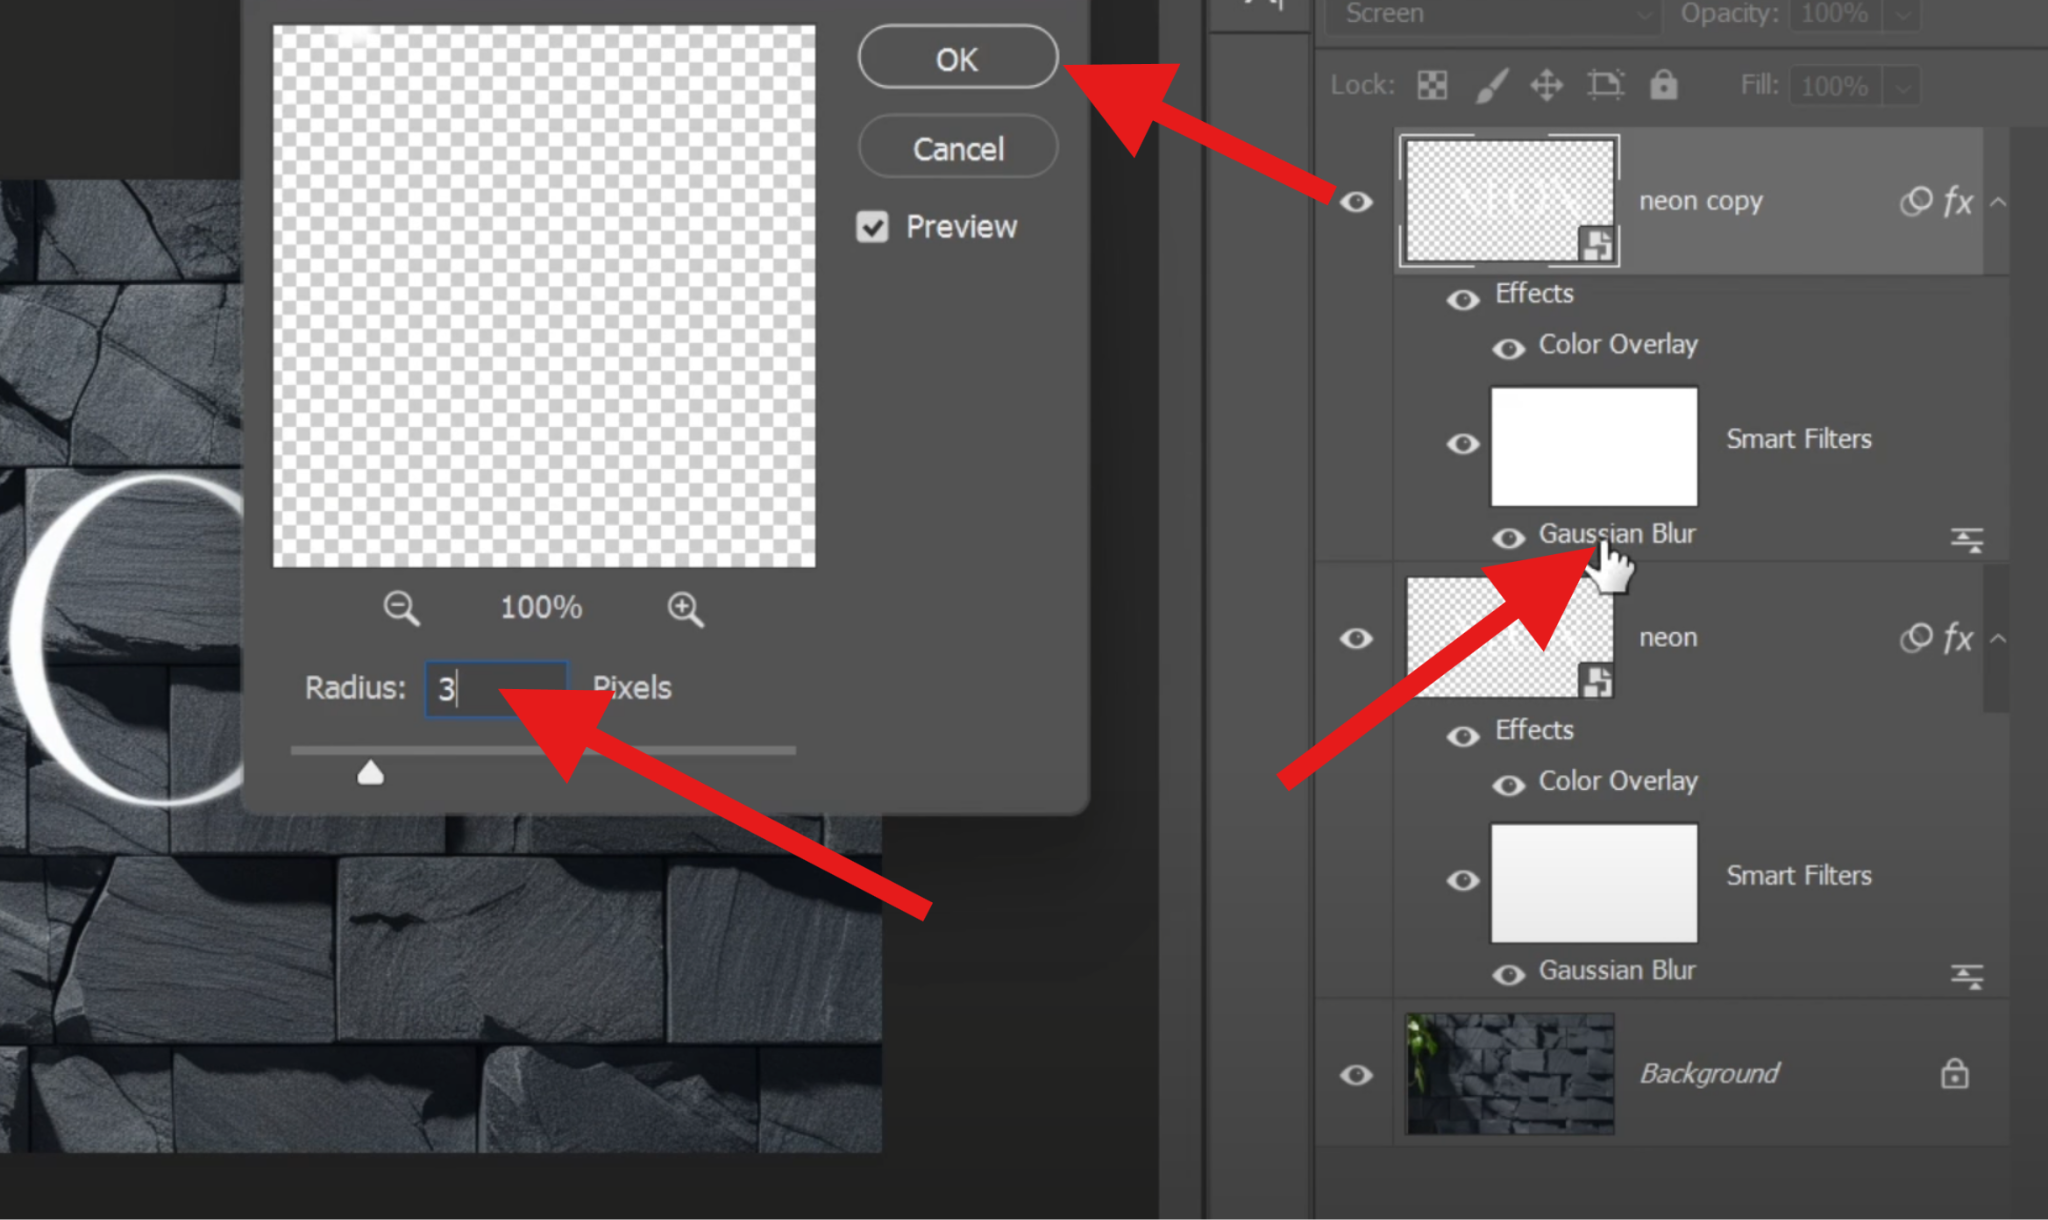
- Double-click on the Gaussian Blur effect in the new layer, but now, set the radius to 3 and click OK.
- Duplicate the layer again, double-click on the Gaussian Blur feature, and set the radius value to 15 pixels this time.
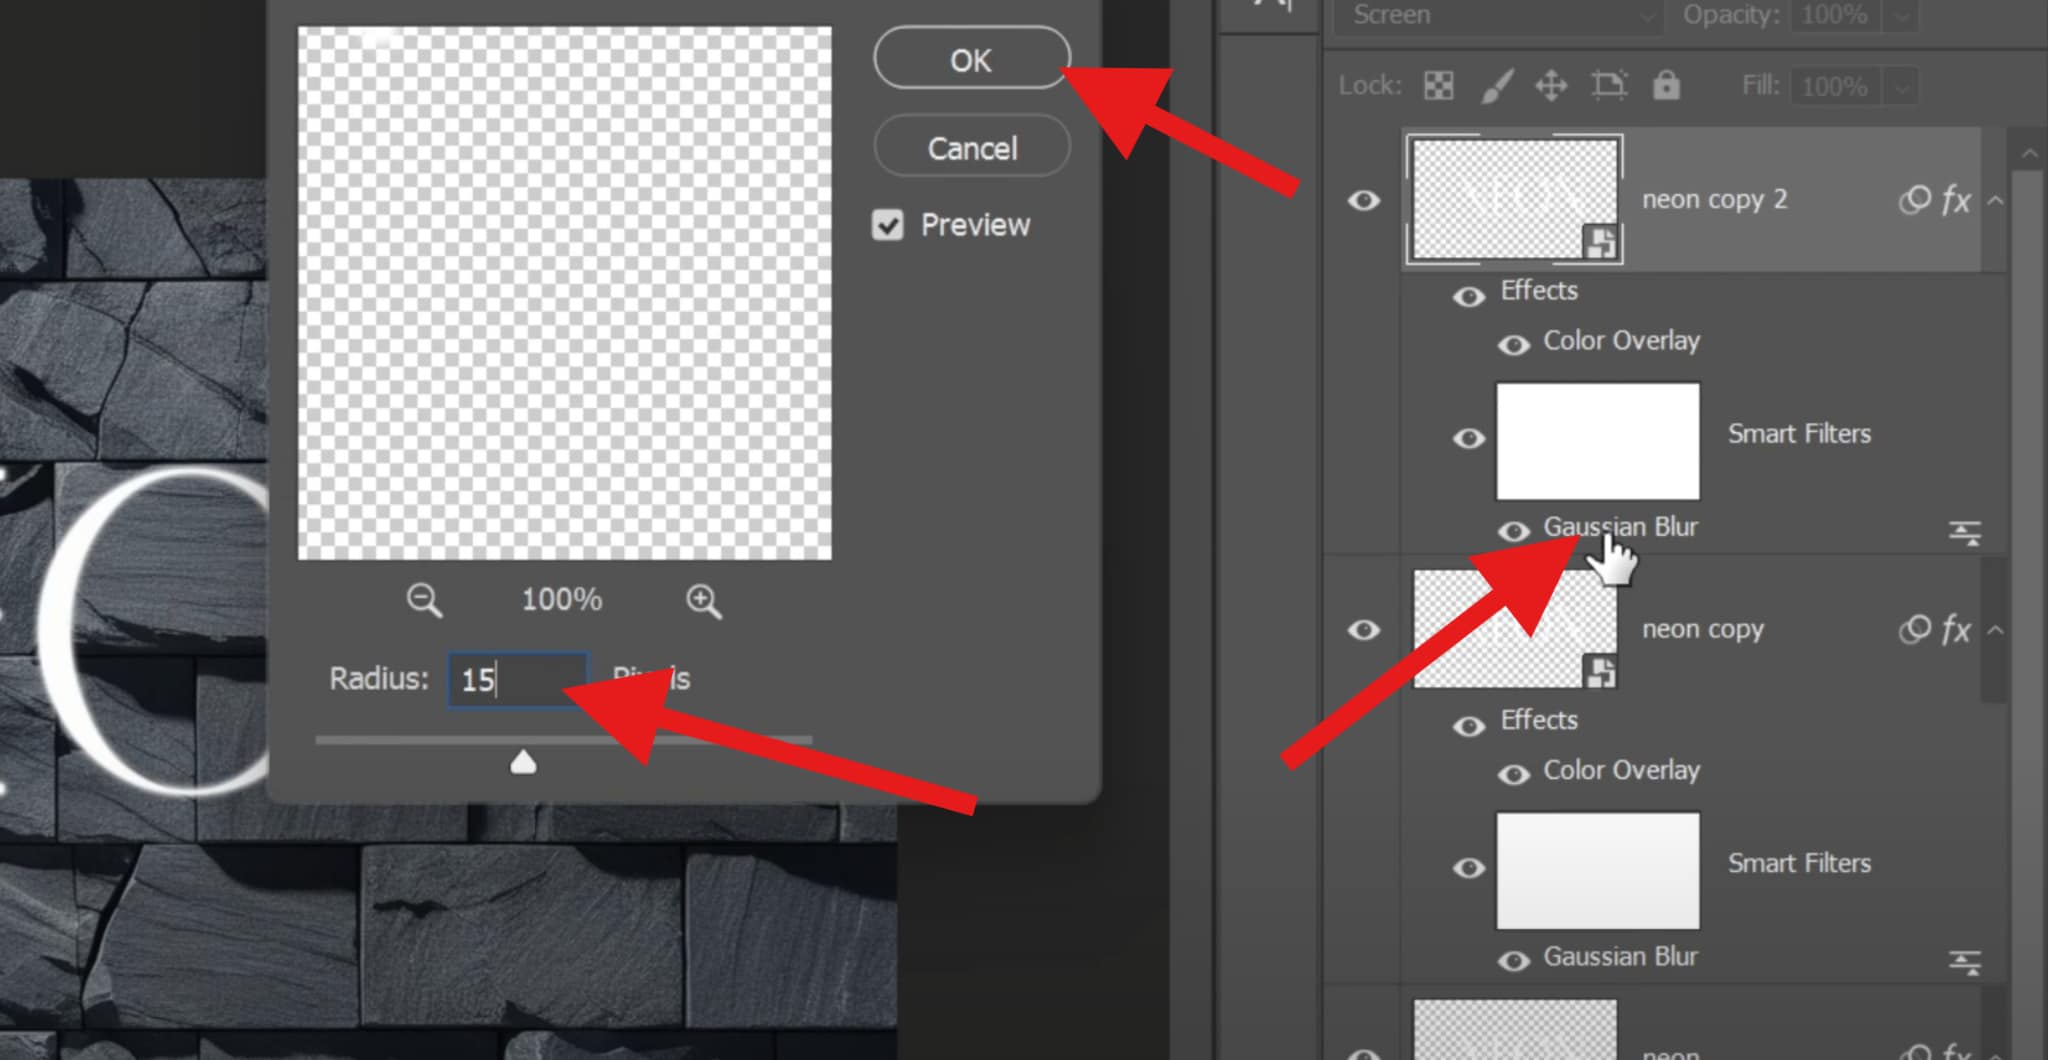
- Repeat the process as many times as you want. Duplicate the layer, double-click on the Gaussian Blur effect, and keep increasing the values to 30, 60, 120, etc. The final result should look like this.

Now that you've successfully crafted that eye-catching glowing text in Photoshop, it may require some knowledge of photo editing, which is not newbie-friendly. If you also want to add glowing text to videos and edit them, you may want to look for an easier alternative.
An Easier Alternative for the Shine Text Effect in Photoshop
Filmora is not only a video editing tool, but it also comes packed with all the photo editing tools you will ever need, including color wheels, HSL sliders, filters, stickers, and several cool image transformation AI tools. Additionally, in Filmora, apart from being able to add glowing text to photos, you can also add glowing text to videos, and it provides various text animation effects to match the movement of the videos.
Filmora's glow text effect also offers an extensive palette of customization options. You can adjust the intensity of the glow, making it subtle and understated for a more elegant look, or crank it up to create a bold, in-your-face effect that demands attention.
The software also allows you to play around with the color of the glow. Perhaps you want to match the glow color to the overall color scheme of your video, or maybe you'd like to create a contrast for a more dramatic effect. Let's see how to use Filmora as a glow text effect maker below.
 secure download

Create a Glow Text Effect in Filmora
Follow the steps below to make your text glow in photos and videos.
- Download and install the PC version of Filmora on your Windows or Mac device.
- Open Filmora and click on New Project.

- Click on Import and pick a photo (or video) from your device.

- Now, you need to drag the image to the timeline.

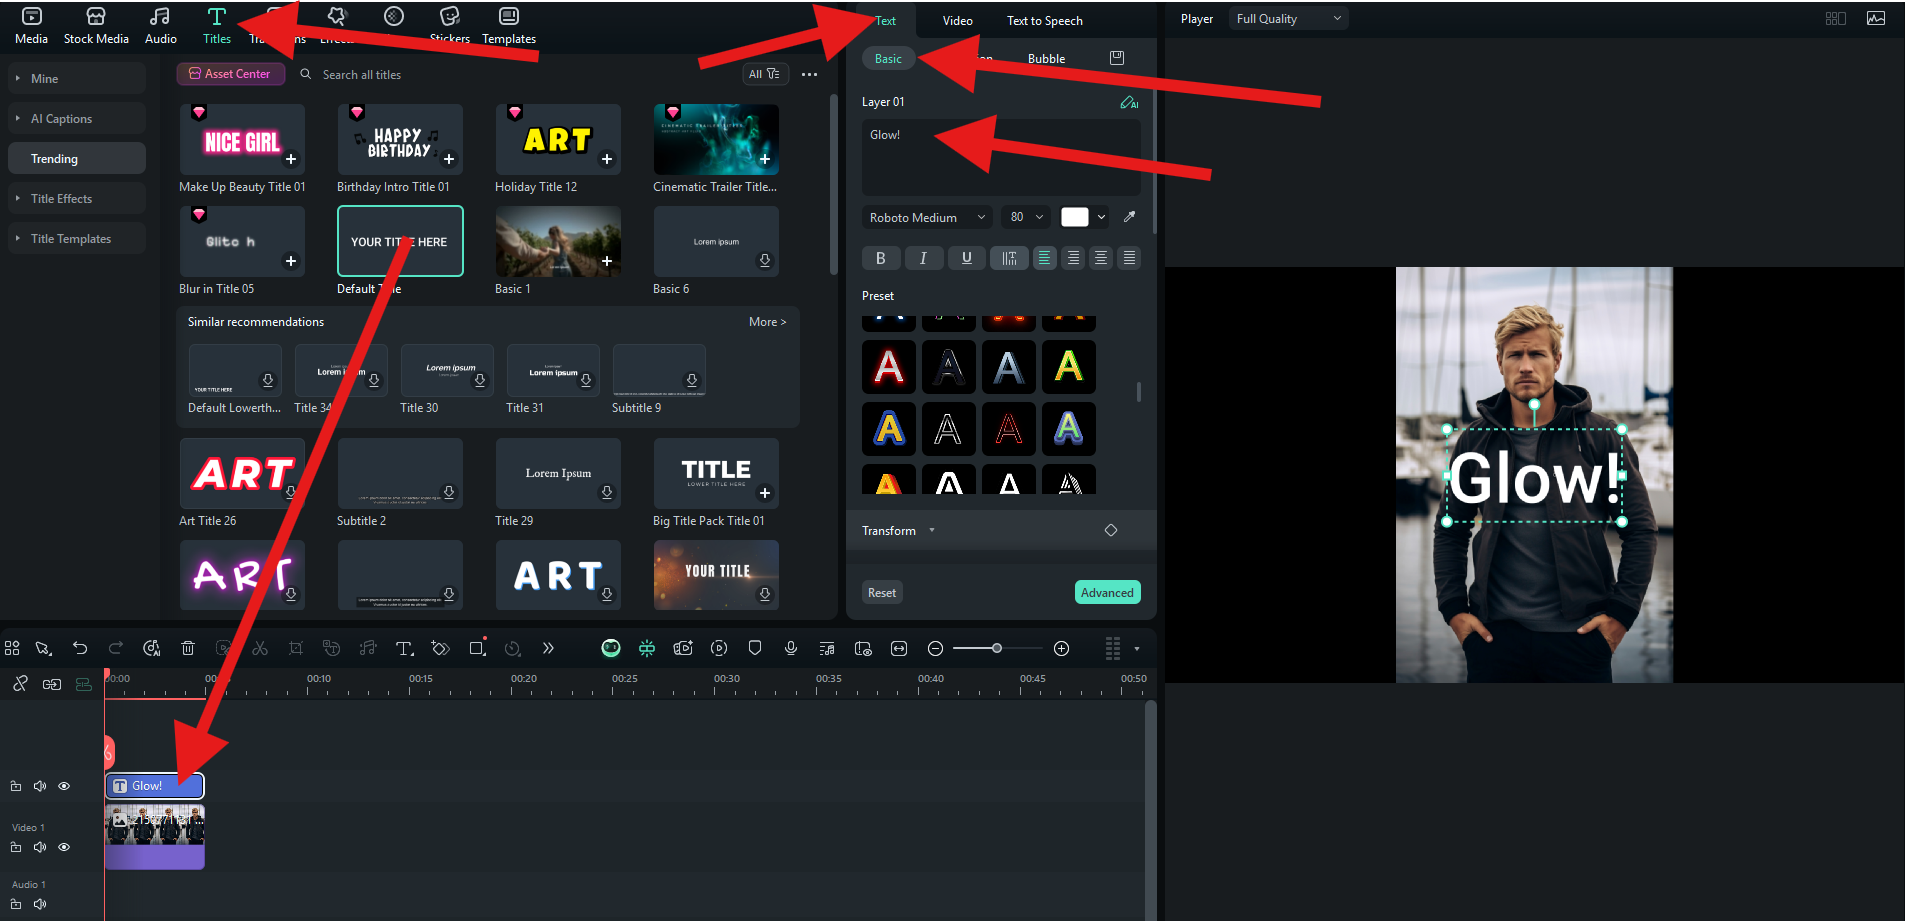
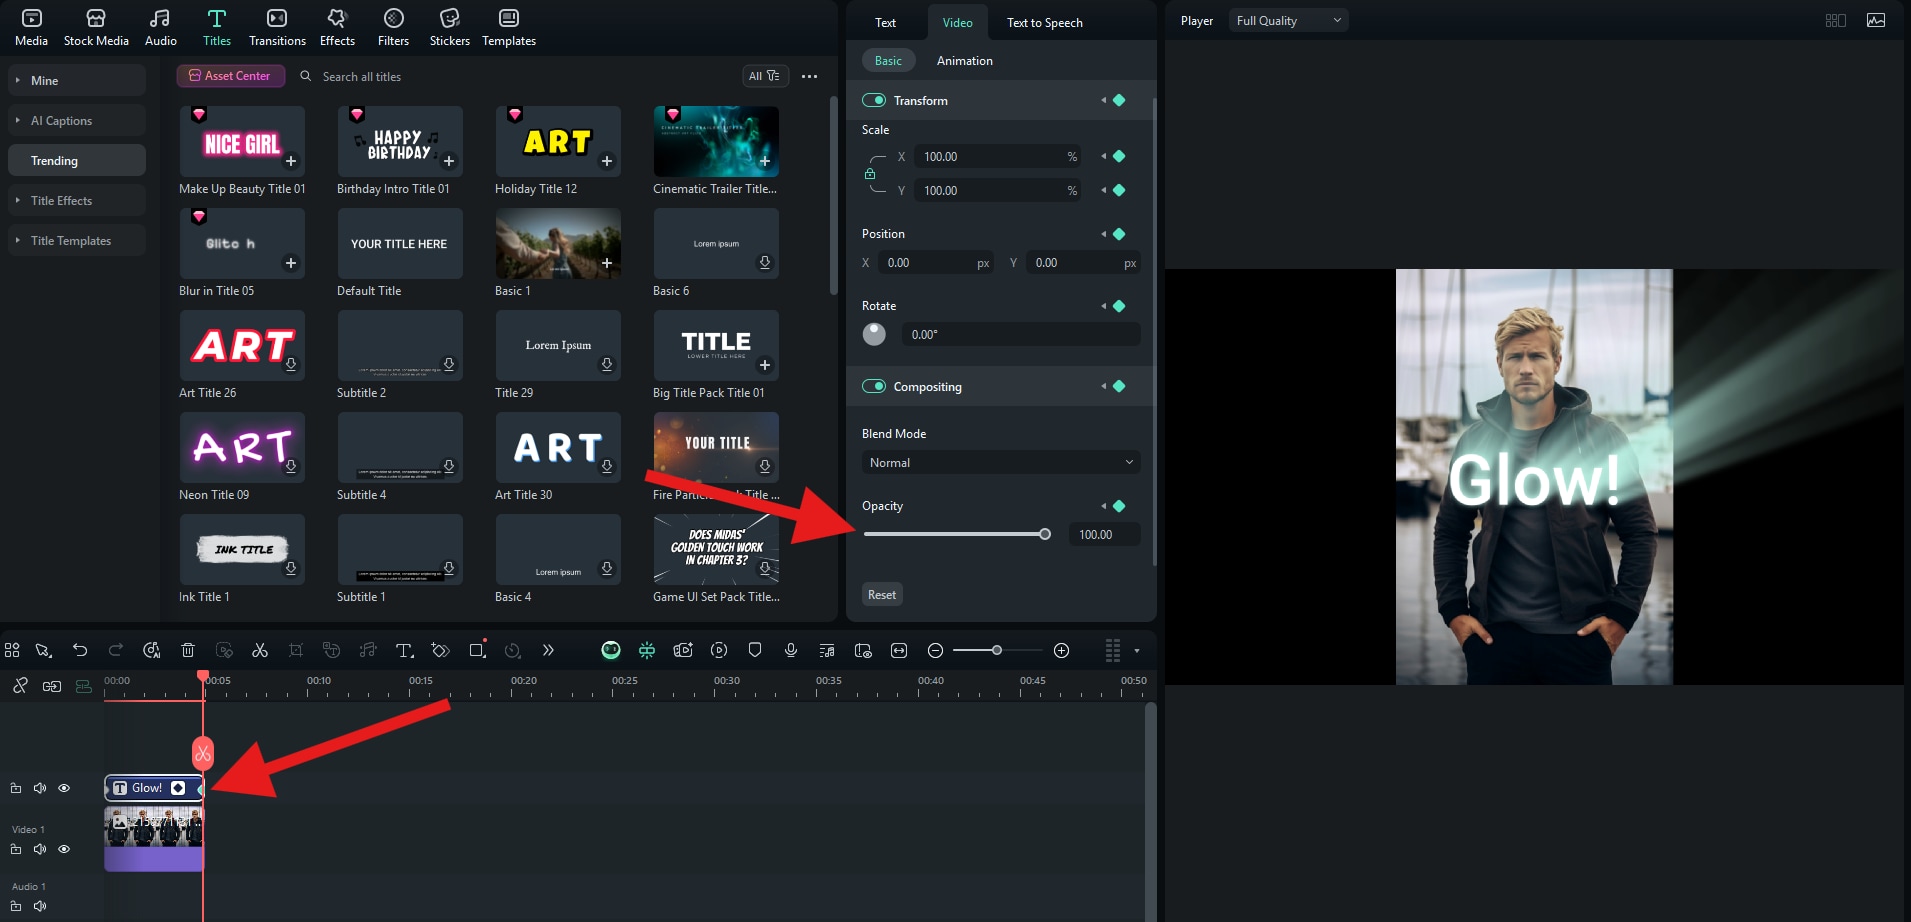
- When the image is selected in the timeline, go to Titles, pick a text that you like, drag it to the timeline, and then go to Text > Basic and edit the text to your liking.
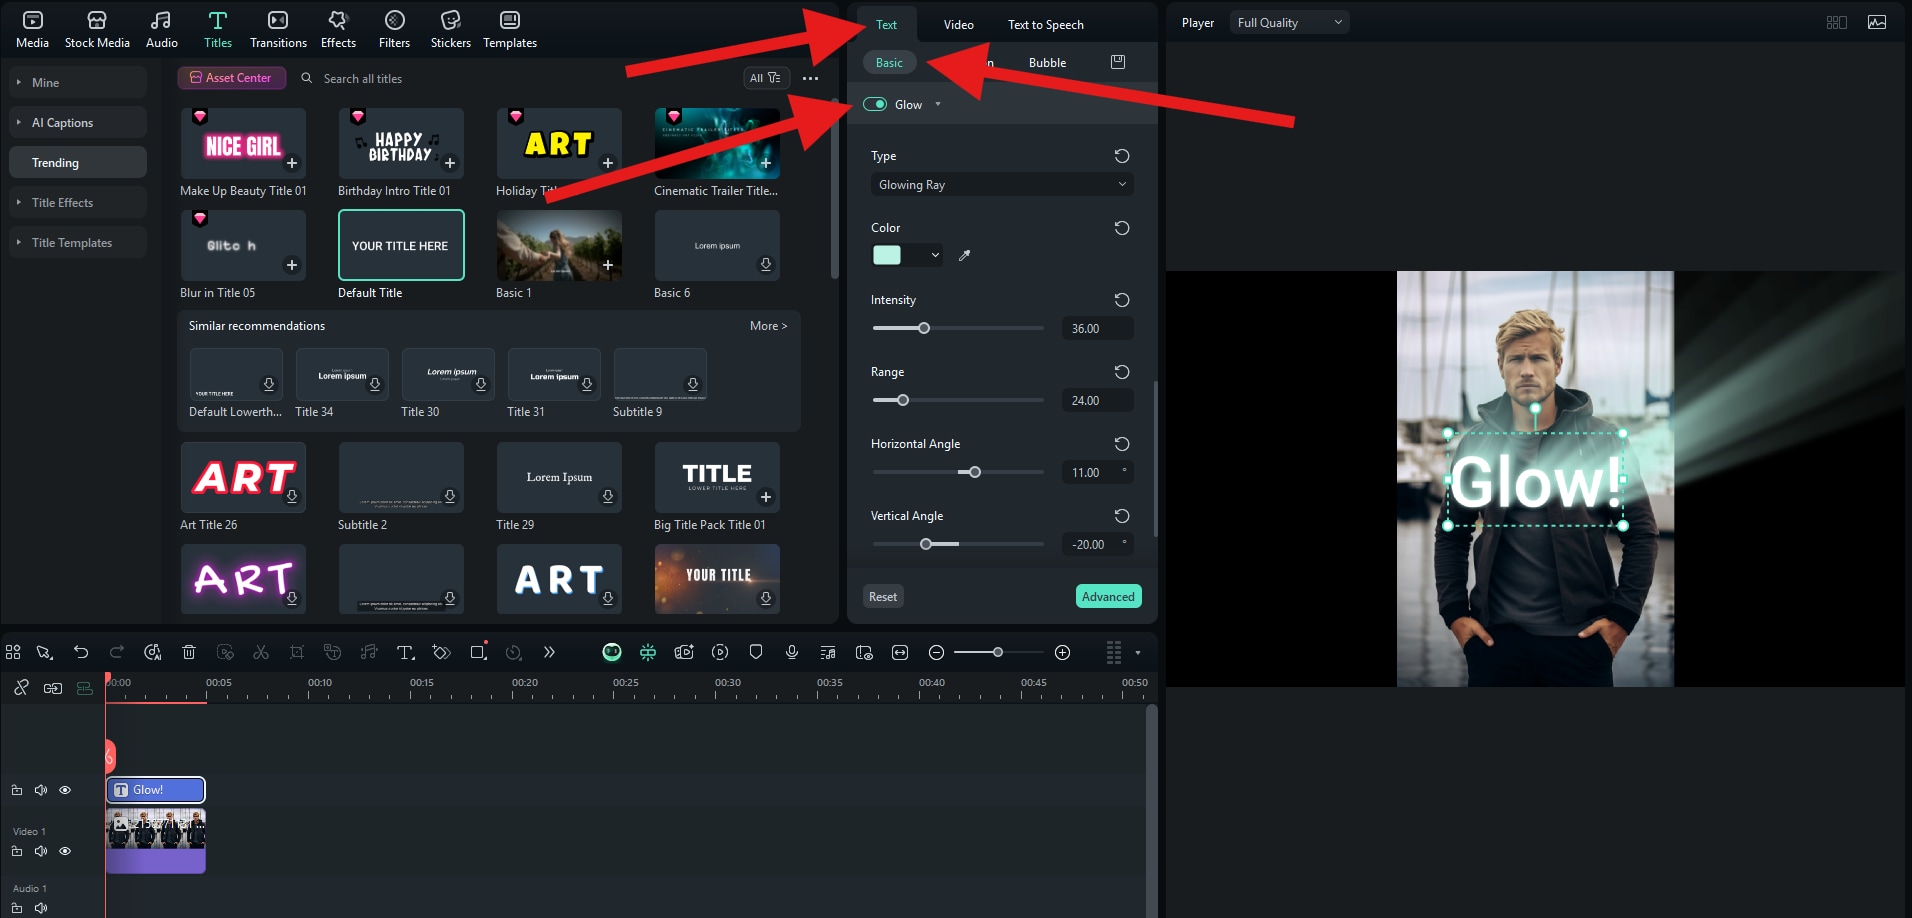
- Now, in the same Text > Basic category, scroll down until you find the Glow feature.
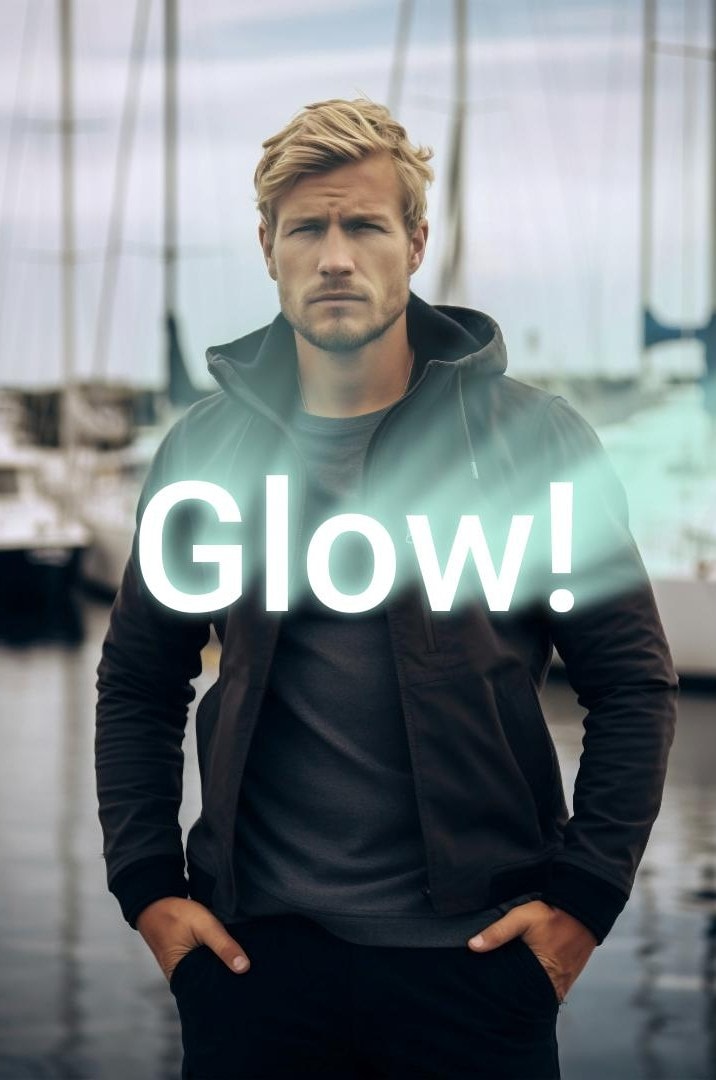
- Take a look at this stunning result.
Animate the Glowing Text and Create Text Fade-in Effect
In addition to creating a glowing text effect, Filmora can also animate the glowing text and make a text fade-in effect at the same time.
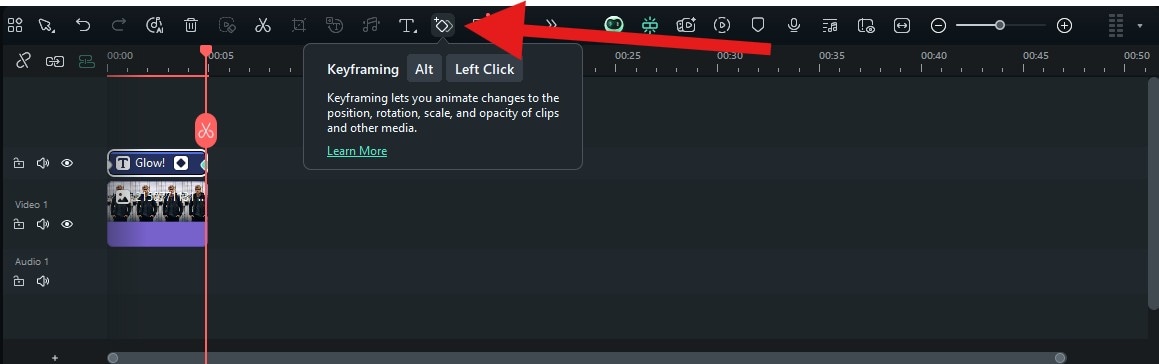
For this tutorial, we will show you how to do it using keyframes. Follow the steps below to create a gradual glowing text appearance effect.
secure download - Hover over the beginning and end points of the clip and add two keyframes. Add one at the beginning and one at the end of the clip.
- Select the first keyframe, and go to Video > Basic. Activate the Compositing feature and set the Opacity slider to zero.

- Select the second keyframe, repeat the process, but this time, set the Opacity slider to 100.
- Take a look at the result. Not only was it much easier to add the glow text effect in Filmora than in Photoshop, but we were also able to create a cool fade-in effect with the easy keyframe function.

Conclusion
As we have learned, creating the glowing text effect in Photoshop is not that challenging, but it will be much easier if you choose to do it in Filmora, especially if you want to add glowing text to videos or experiment with animations. Its intuitive interface, built-in glow effects, and keyframe animation tools make it easy to create stunning glowing text (and even fade-in transitions) without needing to dive into complex filters or layer adjustments.
secure download 