
 100% Security Verified | No Subscription Required | No Malware

"How do I add grain to a photo in Photoshop?" As a popular photo editing software, Photoshop is not unfamiliar to us. There are various methods to add grain effects in Photoshop; if you want to know the details, let's dive in.
In this article
Understanding Grain and Its Role in Image Editing
Images gain artistic appeal from film grain as an alternative to digital noise, which occurs when ISO values are increased.
By using film grains, you can produce a vintage retro appearance equivalent to traditional black-and-white film pictures. It will add a movie-like quality to photographs and give portraits real and untamed appeal.
How to Add Grain Effect in Photoshop?
The toolbox inside Photoshop extends two different methods to bring grain into images. You can access the film grain filter through the menu option, then go to Filter> Noise > Add Noise, or use the Grain filter (Filter > Texture > Grain).
In addition to that, you can use film grain overlays by importing textures to control the effect more precisely. The best editing approach in nondestructive mode uses adjustment layers with Smart Objects because this method delivers flexible control for refining results.
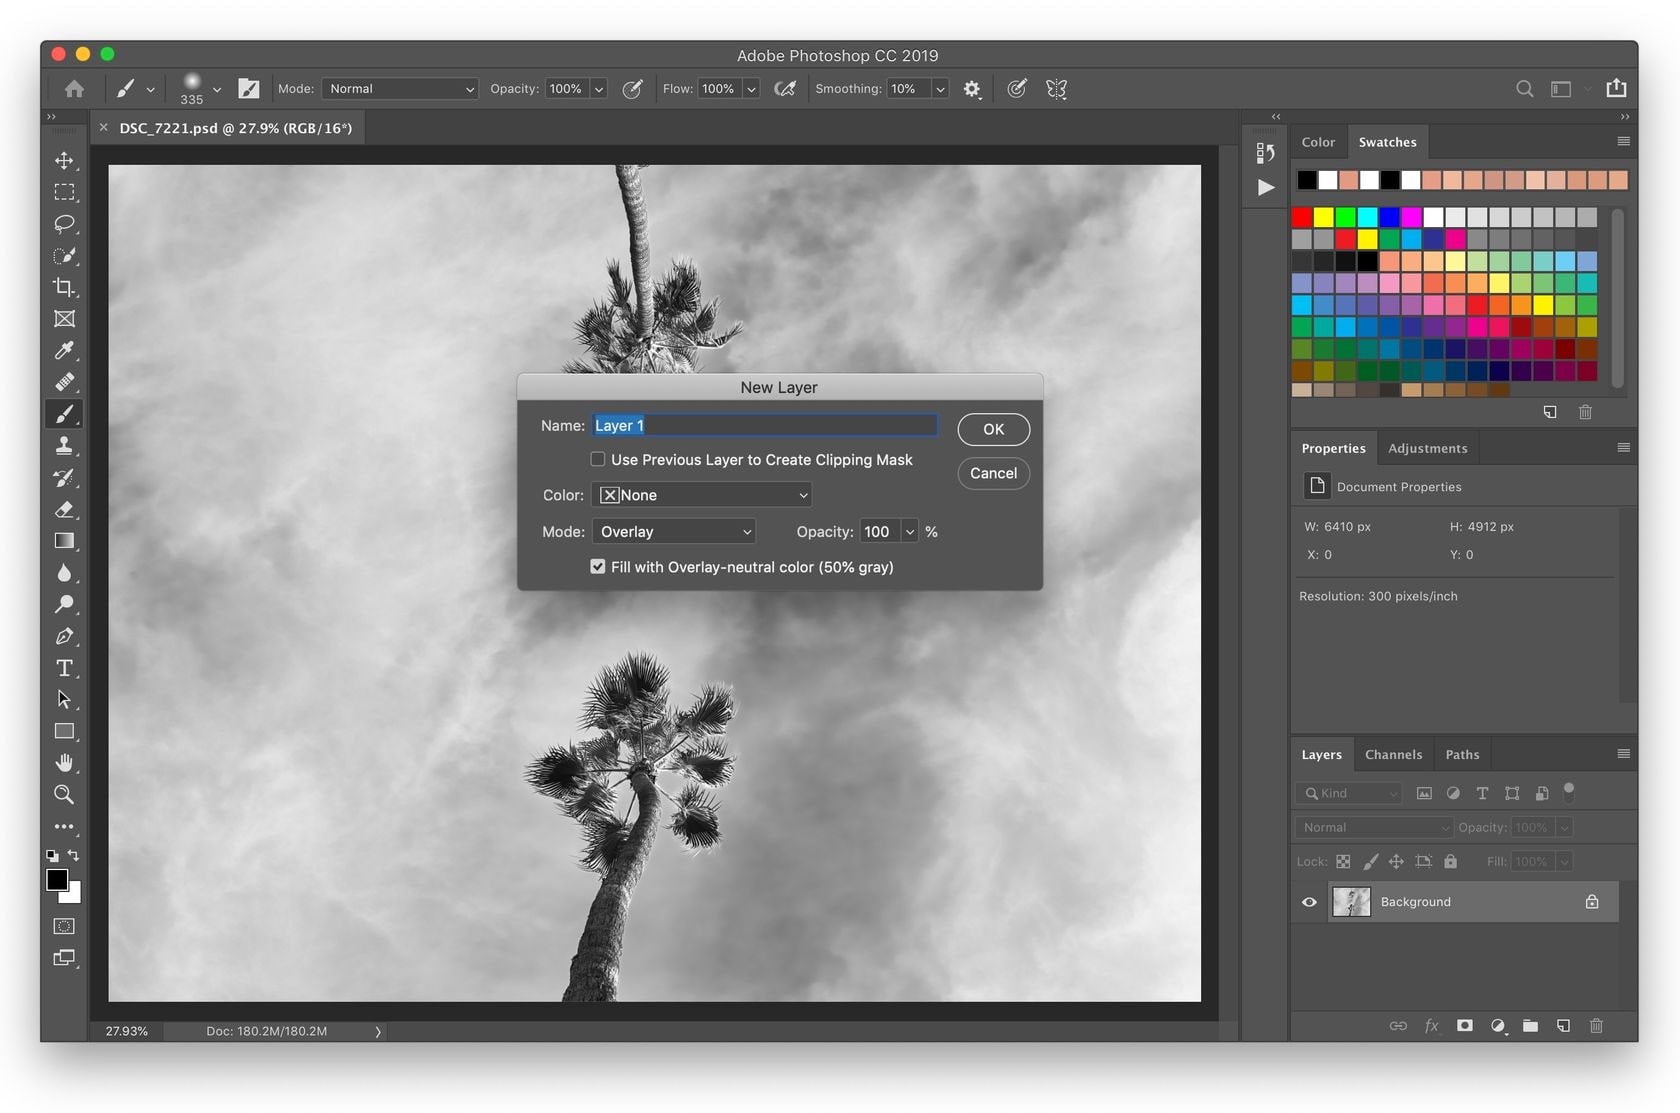
Method 1: Using the Add Noise Filter
The Add Noise filter is a quick and effective way to add grain in Photoshop.
- Open your image in Photoshop.
- Nondestructive (Ctrl: Shift + N) without destructive editing.
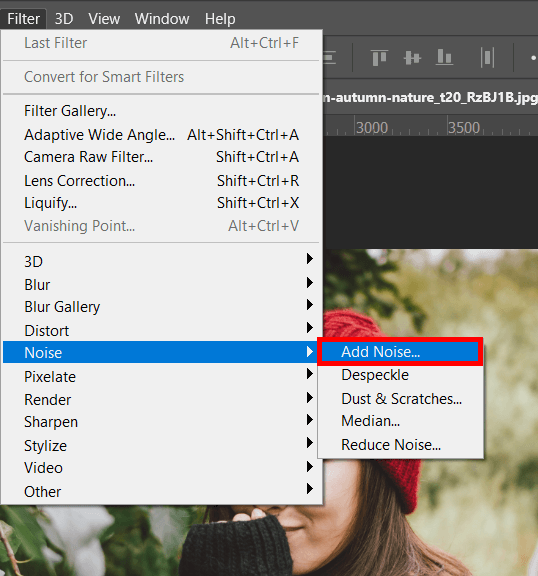
- Click on Filter and then Noise Add Noise.
- The Amount slider can adjust grain intensity.
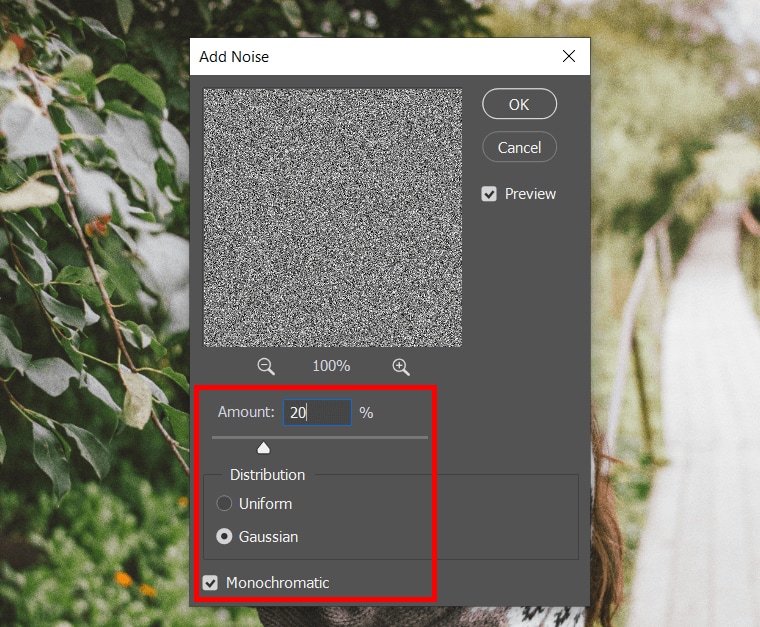
- A Gaussian or Uniform distribution by choice (Gaussian adds a more natural look).

- Make sure that the grain is black and white with Check Monochromatic.
- To make it seamlessly blend with the other parts of the images, replace the Layer blending mode with Overlay, Soft Light, or Multiply.
- Change the opacity to refine the effect.
Method 2: Using the Grain Filter
The Grain Filter provides more control over the texture and is ideal for a finer grain effect.
- Go to the filter gallery of Photoshop
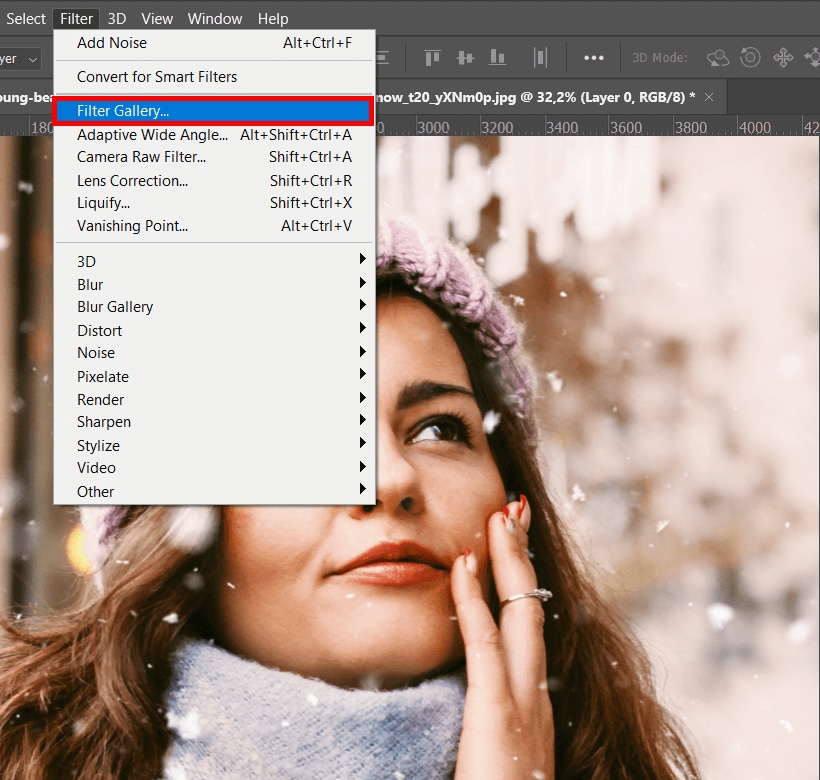
- Click on Filter> Texture > Grain.
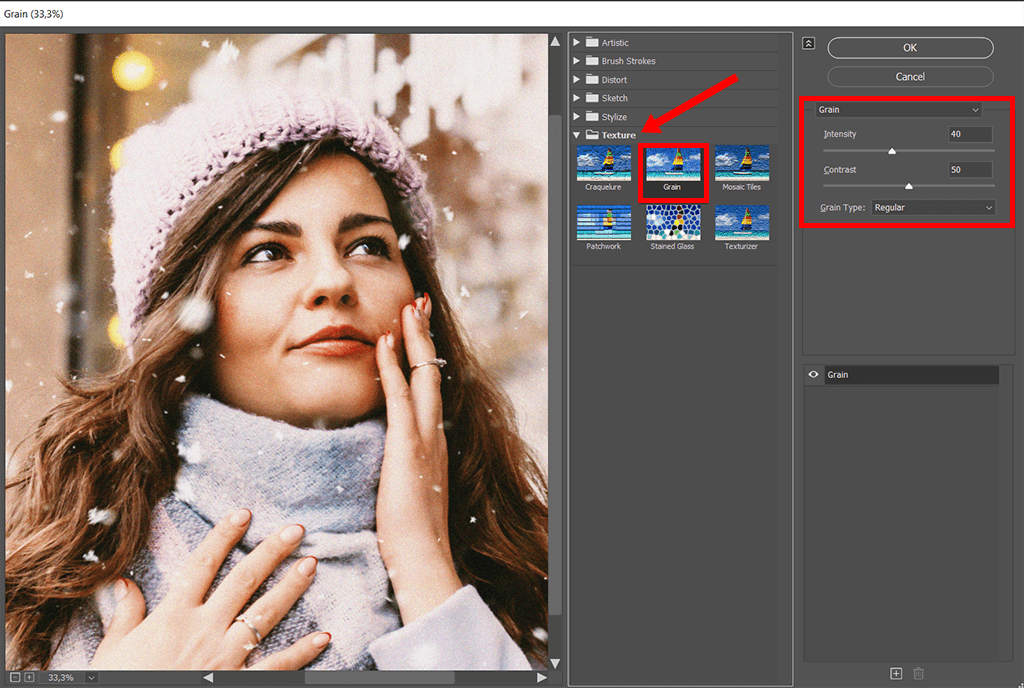
- For the desired grainy effect, increase or decrease Intensity and Contrast.
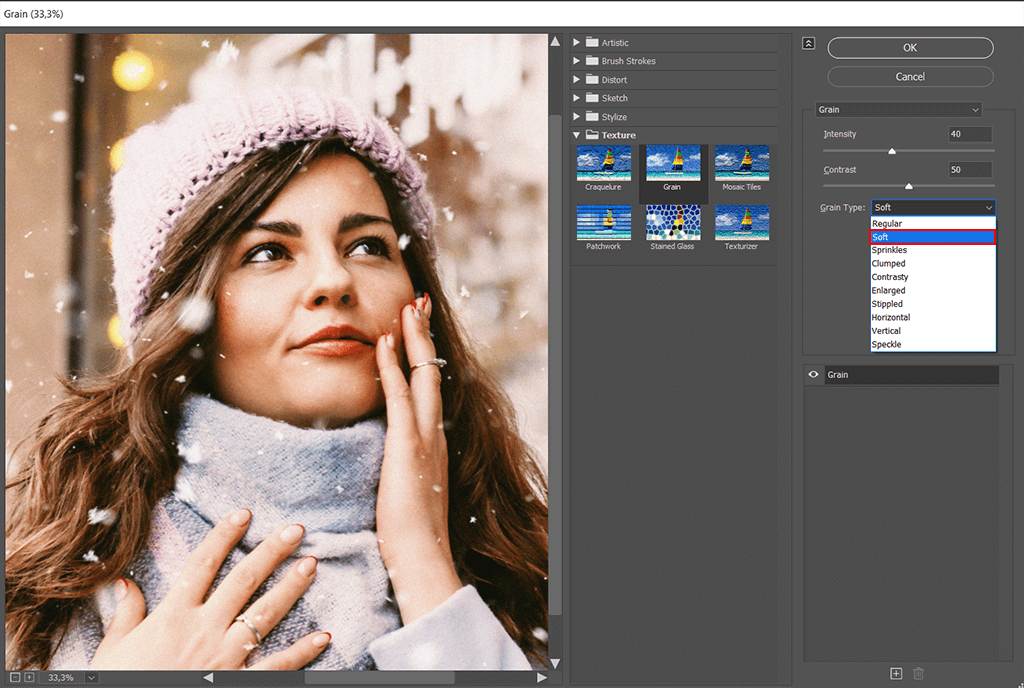
- Change the blending mode to Overlay or Soft Light and enable blending pixels.
- Adjust opacity as needed.
Method 3: Using a Film Grain Overlay
A pre-made film grain overlay is a great way to achieve a realistic, organic effect.
- There are many free options for downloading a film with grain texture.
- Place your image over the texture and import the texture into Photoshop.
- Make the grain layer blending mode to Overlay or Soft Light.
- Adjust opacity to control intensity.
Limitations of Photoshop for Adding Grain
While Photoshograin-related tools are practical, they have some drawbacks.
- It is unable to see an accurate preview when adjusting grain settings.
- It forces you to manually adjust for the type of results you want to achieve.
- It is not intuitive for users unfamiliar with layers and layers blending modes.
- No automatic AI-powered grain effects to match against the image's texture.
A More Efficient Alternative: Filmora
Photoshop is a good method for those professionals who are involved in photo editing. If you are a newbie and want a faster and simpler way to add film grain, Filmora is a good alternative.
 secure download

Why Choose Filmora for Adding Grain?
- 2.9M+ visual assets, including film grain effects, filters, stickers, and more.
- 100+ advanced editing features for both videos and photos.
- User-friendly interface for quick edits.
- Real-time preview to see grain effects instantly.
- Pre-made grain filters for cinematic, vintage, or textured styles.
- Better control over intensity and blending without complex layer adjustments.
- Compatible with Android, iOS, Windows, and Mac.
Step-by-Step Guide to Adding Grain in Filmora
There are different ways to add grain to photos and videos in Filmora. You can either apply the grain effect and Filter or manually adjust the sharpness, contrast, and shadow to make the photos look like grain pictures.
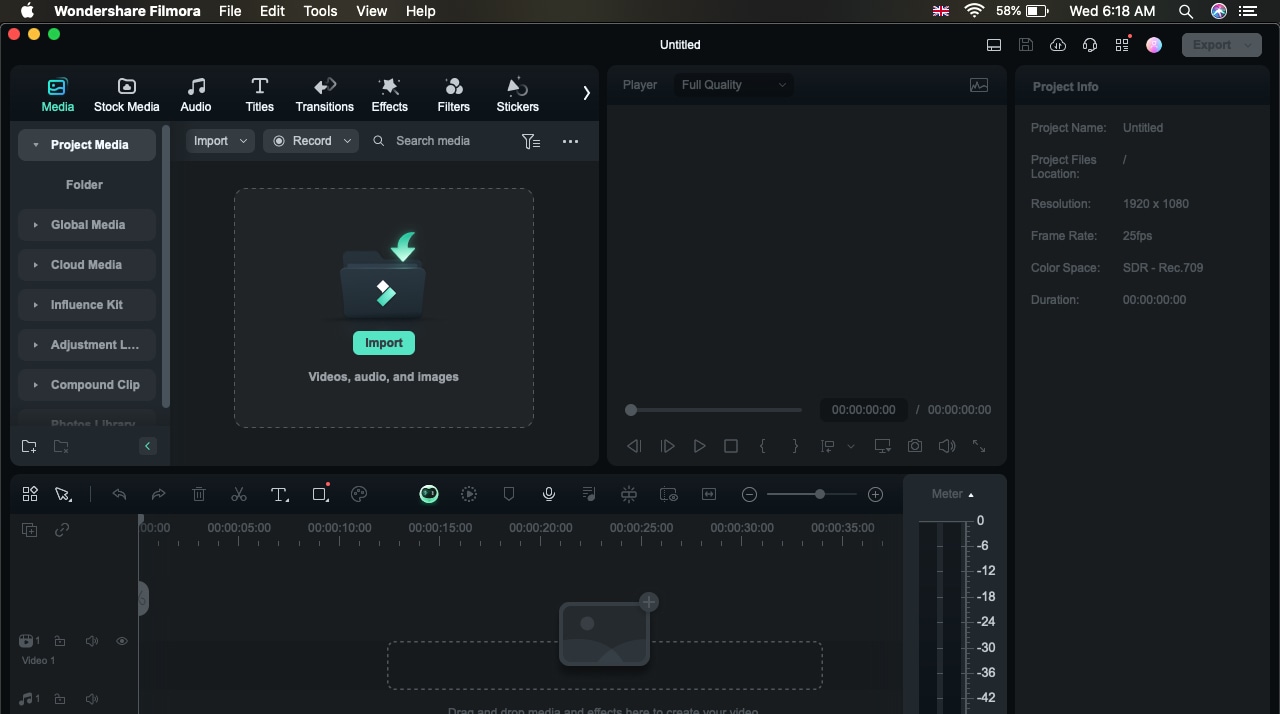
secure download Method 1: Use Filters That Produce Grain Looks
- Import Your Photo – Open Filmora and drag your photo to the timeline.
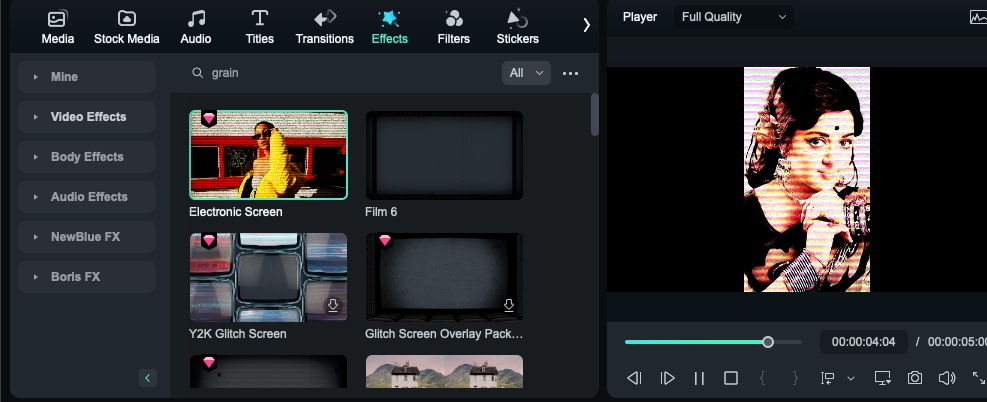
- Click on the "Effects" tab at the top.
- Type "Grain" in the search bar to find Filmora's grain effects like Electronic Screen, Film 6, Glitche Screen Overlay, etc.
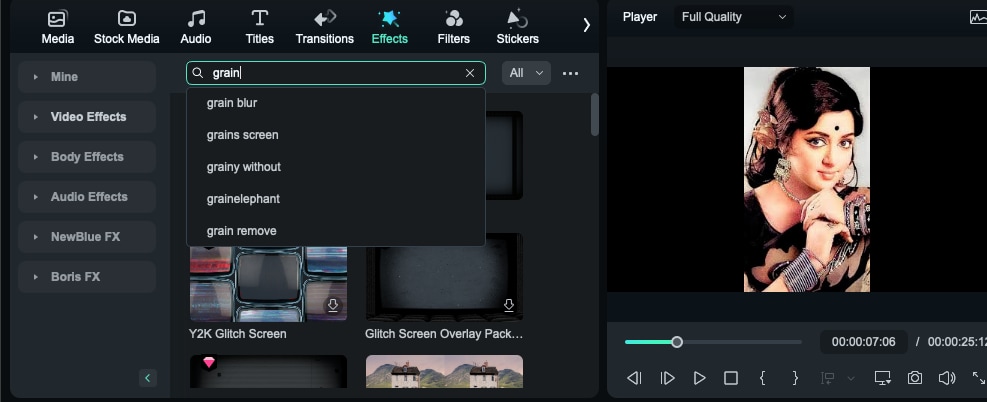
- Drag and drop the grain effect onto your photo in the timeline.
- Click on the effect in the timeline and tweak the intensity as needed.
- Play the preview, then export once you're satisfied.
Method 2: Using Manual Techniques to Add grain to a photo
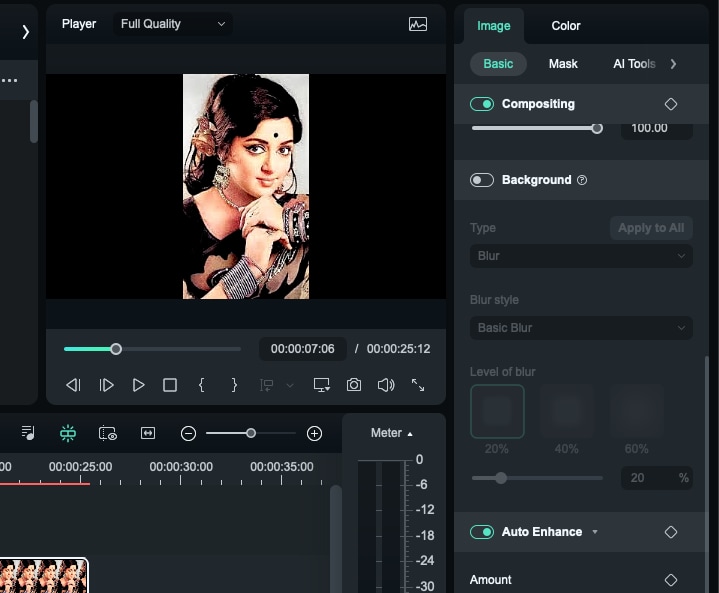
- After dragging the image to the timeline, select the image > then go to basic > navigate the image editing options.
- Auto Enhance - In the basic image settings, you will see the auto-enhance option. Click on it before sharpening it, and your grain effect will be more clear and fantastic.
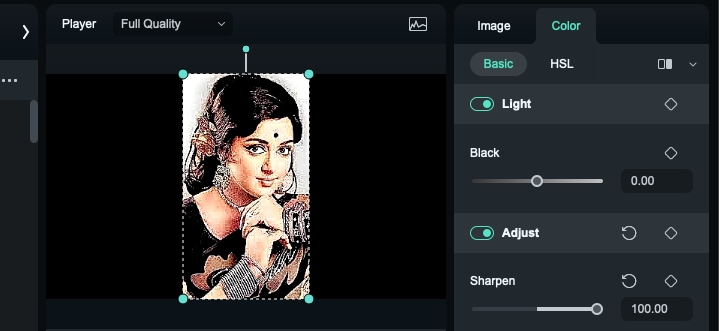
- Increase Sharpening – Locate the "Sharpen" or "Texture" settings and slightly increase the noise to create a grainy effect.
- Adjust Contrast and Shadows – Slightly raise contrast and lower shadows for a more natural film grain look.
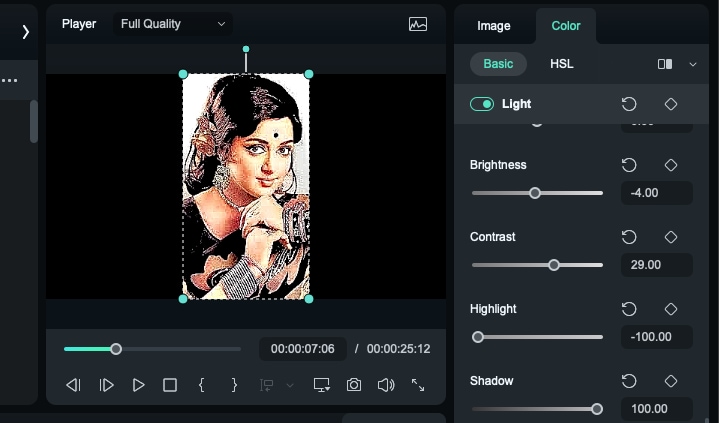
- Preview and Export – Check the effect in playback, then export your photo once satisfied.
Conclusion
Adding grain in Photoshop can be done through the Add Noise filter, the Grain filter, and a variety of film grain overlays. Although Photoshop has very powerful tools, it can be a time-consuming process and must be manually adjusted.
Suppose you seek a quicker and less daunting process to apply grain impacts (even in real-time); Filmora makes an unbelievable alternative (real-time previews and ready-to-use grain effects for pictures and videos). If you are a professional editor, you can still find Filmora an easier yet equally advanced option.
secure download FAQs
-
What is the best method of adding film grain in Photoshop?
Noise and grain filters are fine choices, but film grain overlays give the most viable results for customizing your requirements. -
Can I remove or reduce grain after adding it?
Yes. You can reduce the opacity, modify the blending mode, or use a layer mask to remove grain from specific areas. -
Can Filmora adjust the grain effect like Photoshop?
Yes. Filmora has added built-in film grain filters (adjustable intensity, blending options), which makes it a simpler alternative to Photoshop. -
Can grain be added in Photoshop for free?
Yes. You can use the Add Noise filter or download free film grain overlays from online sources to use in Photoshop. Filmora is also free to use grain using manual techniques and free filters, along with premium options to enjoy more customization and more powerful effects.
