
 100% Security Verified | No Subscription Required | No Malware

Visual noise happens often and can cause grain in videos. By default, a grainy video is lower quality and unsuitable for use. That's especially true if you want to use your videos for promotion or marketing.
Luckily, there are ways to polish and restore those grainy videos to their original quality. The development of AI and software technologies has introduced various tools that allow you to remove grain from videos online.
The best thing about this is that many of these tools are free. Today, we'll introduce the four best options for removing grain from videos online for free.
In this article
How We Picked the Best Options for Removing Grain From Videos Online?

When selecting the best methods and tools for removing grain from videos, we've considered some essential factors to get good results. Here are the criteria:
- Result quality: We took the time to find tools with powerful denoising algorithms and tested them to ensure they effectively remove any grain from videos without disrupting video quality.
- Configurations & settings: We found tools that let you configure and adjust the denoising effectively and give you more control over the process. Furthermore, we've also looked at tools that offer presets for the most common needs.
- Speed and performance: Processing speed is an essential factor, especially if you work with larger files or want to denoise videos in a batch. Furthermore, finding a tool that offers hardware utilization to speed up the process is generally a good idea.
- Ease of use: During our research, we tested all the tools and paid close attention to their ease of use. The tool should be simple and have an intuitive user interface. Furthermore, it should have various integrations and simple controls to simplify your workflow.
4 Best Online Video Grain Removal Options
Here are the best methods you can use to remove grain from videos with specific steps:
1. Fotor
Fotor is a capable AI video denoiser that can fix videos with grain caused by compression artifacts or bad lighting. Fotor handles all issues and is used by many vloggers and other content creators. Apart from denoising videos, Fotor can also fix brightness and color, and make your videos clearer.
However, you must get the paid version to unlock its full potential. Even though removing grain is free, you must register to download your videos.
How to Remove Grain from Videos Online with Fotor?
- Go to the official Fotor website and click Denoise Video Now.

- Click Upload Video.

- Once the video has been uploaded, enable the Upscaler feature and click Generate Preview.

- Click Download and save the video to your device.

2. HitPaw

HitPaw lets you fix grainy videos online for free with little effort. It relies on "advanced multi-AI models" to deliver smooth results while utilizing GPU acceleration to speed up the process.
HitPaw mainly depends on the video-enhancing capability to fix grainy videos. It brings old films back to life with AI, restoring video quality and bringing back the original color.
There are no watermarks or ads that disrupt your experience. It delivers results quickly and effectively and can handle all simpler needs.
How to Remove Grain from Videos Online with HitPaw?
- Go to the official website of HitPaw and click Enhance Now.

- Click Choose Video and select a video from your device.

- Select General Denoise Model and click Preview.

- Wait until processing is complete, preview the video on the right side, and click Download to save it to your device.
3. Clideo Video Clearer

Clideo Video Clearer is one of the simple, free online tools you can use to remove grain from videos. You simply upload the video, and it automatically removes grain while giving you some additional customizations.
The free trial provides limited features, but you can upgrade to unlock more video editing features. This tool aims to quickly and simply denoise or degrain videos.
How to Remove Grain from Videos Online Free with Clideo?
- Go to the official website, click Choose file, and select your video.

- The noise will be automatically removed. Adjust some basic configurations and click Export.

- Preview the video and click Download to save it to your computer.

4. Veed.io

Veed.io is a full-blown video editing suite that allows you to polish and change your videos. Unlike some other online free video grain removals, you need to manually adjust lighting and contrast. By using veed.io, you can reduce visual noise in your video to make it brighter and crisper.
However, like other basic video editing tools, it offers templates and transitions to meet editing needs. You can make additional adjustments with simple sliders to change parameters, adjust colors, and make your videos stand out. But you need to upgrade to unlock additional AI capabilities with the paid version.
How to Remove Grain from Video Online with Veed.io?
- Go to the official web page and click Reduce visual noise on video.

- Click Upload a File and select the video you want to fix.

- Click Adjust and change parameters like Noise, Sharpen, Blur, and Vignette to polish your video.

- Click Done in the upper-right corner when ready, and click Export Video.

Limitations of Using Online Video Grain Removers
Even though free online video grain removers are accessible and convenient, they have some limitations. Here are the common issues you can encounter:
- Lack of features: You simply can't expect to get advanced features like batch processing, fine-tuning, customizations, and effects for free.
- Quality limitations: These tools have limited performance because they rely on online servers to process videos. They also have simpler algorithms and have limited resolution support.
- Long loading and processing time: Online grain removal tools for videos always take a longer time to upload and process files. Some of them are not stable enough and break off abruptly, which may be annoying and time-wasting.
- No updates or support: Users of free tools can't expect reliable customer support or regular updates that help them with their overall user experience.
Best Alternative to Remove Visual Noise Offline: Wondershare Filmora
If you don't want to deal with these limitations and want a robust tool to handle grainy videos, you should consider getting desktop software like Wondershare Filmora. It's a full-blown video editing and recording software that generates professional results.
Filmora is reasonably priced, has many effects, AI capabilities, and a pleasant interface. Despite its many customizations and advanced features, it is easy to use. Filmora has a comprehensive denoise feature that removes any irregularities or disruptions in videos.
Compared to those tools that can remove grain videos online for free, Filmora's video denoiser stands out because it has a three-level AI algorithm that can implement heavy, medium, or mild processing on your video. It also has amazingly fast rendering speed and lets you edit videos without limits while delivering impressive AI capabilities like translation – vocal removal, auto masking, copilot editing, etc.
How to Use Filmora to Remove Visual Noise?
Here are two direct ways by Filmora to remove grain from videos. One is to use the AI-powered Video Denoiser, and the other is to use the smart noise effect. If you don't mind adjusting manually for precise results, you can also try the color editing features.
Method 1: Remove Grain from Videos in Filmora with AI Video Denoiser
- Download and install Wondershare Filmora on your computer.


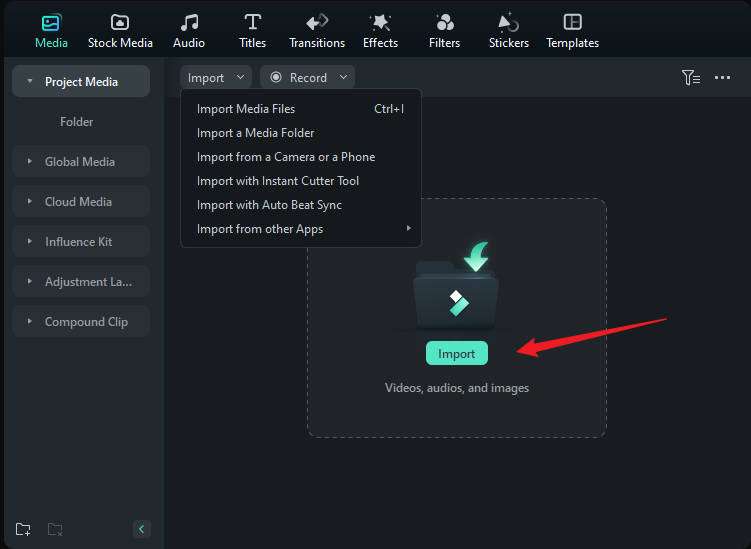
- Launch the software, then go to Media > and click Import to upload videos.
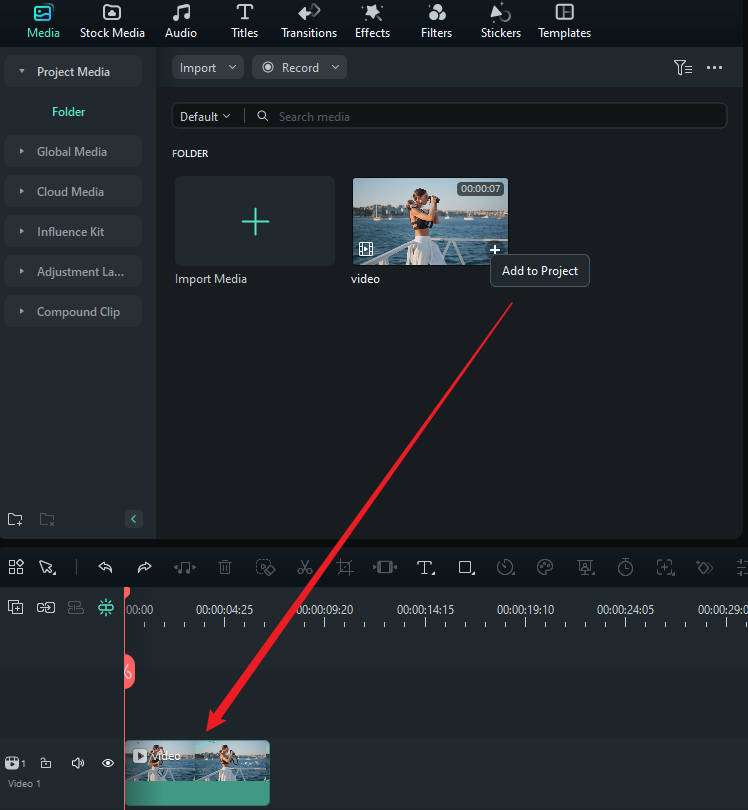
- Drag and drop the video to the timeline.
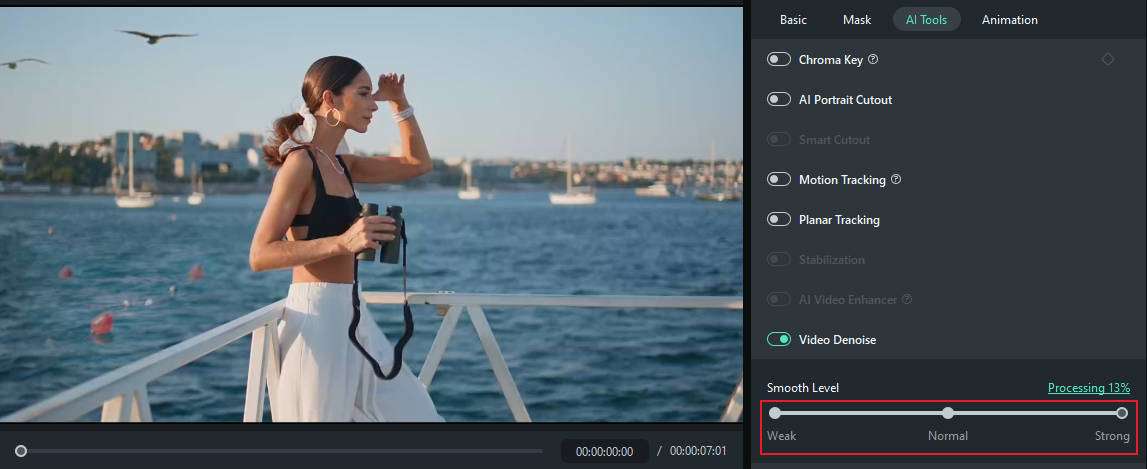
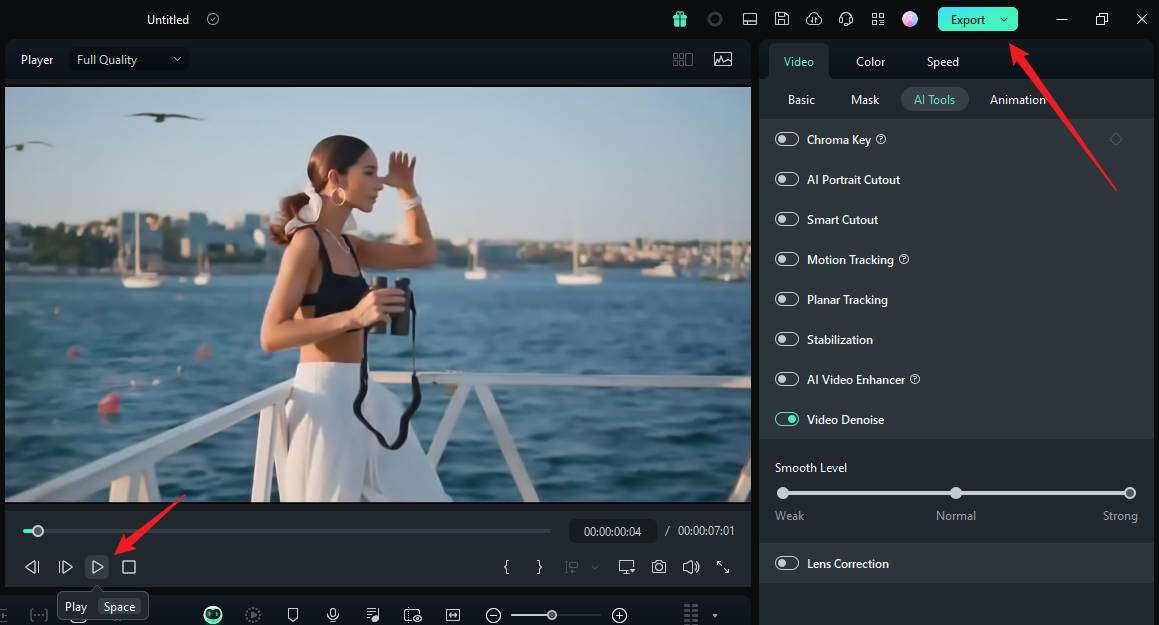
- Select the video clip on the timeline, go to Video > AI Tools > Video Denoise, and switch on the option.

- Move the slider to adjust the smooth level. You can move from weak and normal to strong.
- Wait until the process finishes, and export the video if you are satisfied.
Method 2: Remove Grain from Videos in Filmora with the Smart Denoise Effect
- After dragging the video to the timeline, go to the Effect panel > search Smart Denoise > apply it to the video.

- Adjust the parameters such as opacity, threshold, and radius accordingly.

- Preview the results and export the denoised video if you are satisfied.
If you want to upgrade the video resolution to 4k or fix the blurry videos, you can also try another powerful feature - AI video enhancer! Here is a video for your reference.
- 100+ advanced video editing features.
- Vast video/audio effects and creative assets.
- Powerful AI for effortless content creation.
- Intuitive, professional yet beginner-friendly.
- Works on Mac, Windows, iOS, and Android.

Looking for more free AI video enhancers?
Conclusion
You can use any of these tools to remove grain from videos online for free. They are simple but effective tools that can handle simple requirements. However, you will have to edit videos on another platform if you want to make additional changes.
If you're a professional or simply want a comprehensive tool that can handle all your video editing needs while giving you extensive AI capabilities that make your workflows easier, it's better to go with desktop editing software.
