

 ChatGPT
 Perplexity
 Gemini
 Claude
 Grok
Grok
Ever watched a movie where two scenes unfold side by side? That's the art of split-screen editing. It's a technique that grabs attention and enhances the storytelling by showing multiple perspectives at once.
Final Cut Pro is one of the industry's leading video editing software that supports this split-screen technique. This software is a favorite among filmmakers, editors, and content creators worldwide due to its extensive tools that can turn your raw footage into a polished masterpiece.
In this guide, we'll walk you through a step-by-step guide to mastering split screen techniques in Final Cut Pro. From basic setups to advanced tricks, you'll learn how to harness the full potential of this editing style.
In this article
Part 1. Getting Started with Split Screen
Before we get into the process of using Final Cut Pro to make split-screen videos, let's familiarize ourselves with split-screen videos. A split screen is a visual effect that displays two or more separate video streams within a single frame.
When used effectively, split screens can add a unique visual element that breaks the monotony of traditional single-frame editing. They can make your video more engaging and visually appealing.

There are some common types of split-screen effects:
Side-by-side split screen: A side-by-side split screen consists of two video clips being placed next to each other, either horizontally or vertically. This type is often used to compare and contrast scenes or show simultaneous actions.
Grid split screen: It's a split screen type that combines multiple video clips in a grid layout, such as a 2x2 or 3x3 matrix. This format is ideal for showcasing multiple perspectives or creating a collage effect.
Diagonal split screen: The diagonal split screen has one video clip on each side. This unconventional layout can introduce dynamic angles and interesting visual contrasts.
Since split screens allow you to present different viewpoints simultaneously, it's particularly useful in interviews, debates, or scenes where characters in different locations are interacting. Furthermore, by placing scenes side by side, you can highlight contrasts or similarities, such as the differences between past and present, reality and imagination, or parallel storylines.
Part 2. How to Make a Split Screen with Final Cut Pro
As we have mentioned before, one of the ways to make split-screen videos is using Final Cut Pro. Final Cut Pro is a video editing software developed by Apple and it's compatible with Mac. You can check their website to download and install it on your device. It costs $299.99 on the Mac App Store.

Using Final Cut Pro for making split-screen videos is easier than you might think if you know how to do it correctly. Here is a straightforward guide to get you started.
Step1Adding Video Tracks
Launch Final Cut Pro and get your video tracks ready. Simply click New Project on the timeline, then drag your chosen video clips onto the timeline's video track.

Step2Arranging Your Clips
Once your clips are in place on the timeline, arrange them in the order you want them to appear. Remember, the top clip takes precedence visually, so place your clips accordingly.

Step3Applying the Split Screen Effect
Select your background video clip and head to the “Video Inspector” panel at the top of the timeline. Use the Transform controls to adjust its position, and the Crop slider to refine its cropping.
Once your background clip is set, repeat the process for your overlay clip. Adjust its position and cropping in the same way to overlay it onto the background clip.

For this tutorial, we are making a side-by-side layout with two clips vertically. If want to make a 4 split screen on Final Cut Pro, you can adjust it for 4 clips, so each clip should occupy 25% of the frame.
Step4Export Video
Add any final touches like color grading to enhance the visual impact. When you're satisfied, save your project and export it to share with your audience.
Part 3. Alternate Way to Create Split Screen: Wondershare Filmora
After learning how to split screen with Final Cut Pro, some of you might look for an alternative, whether it's for cost reasons or accessibility. If you're looking for a user-friendly option that still delivers impressive editing capabilities, Wondershare Filmora is worth considering.


How to create split-screen videos with Wondershare Filmora
Step1Import Your Clips
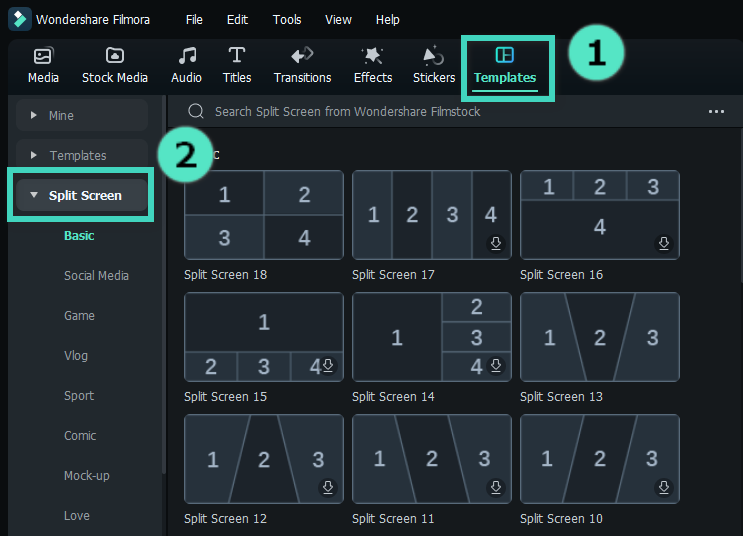
Launch Wondershare Filmora and import the video clips you want to use for your split-screen project. Then, open Templates > Split Screen to select a split-screen template that suits your project. Drag it to the timeline.
Step2Drag and Drop Video
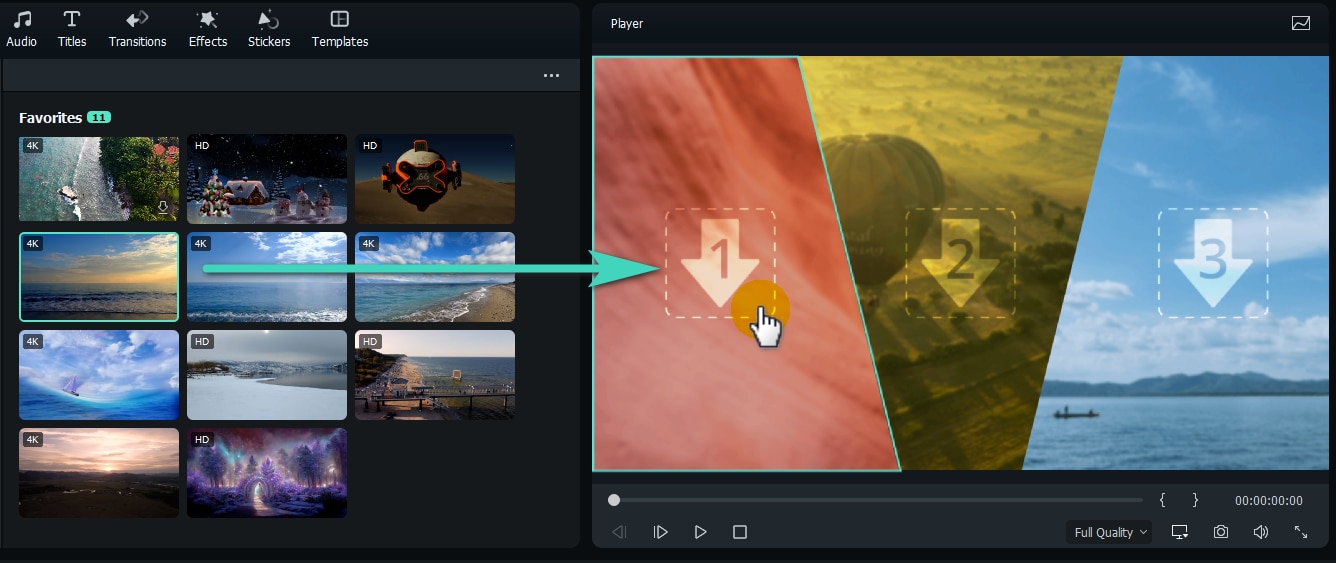
Drag each of your video clip onto the split-screen layout on the player screen.
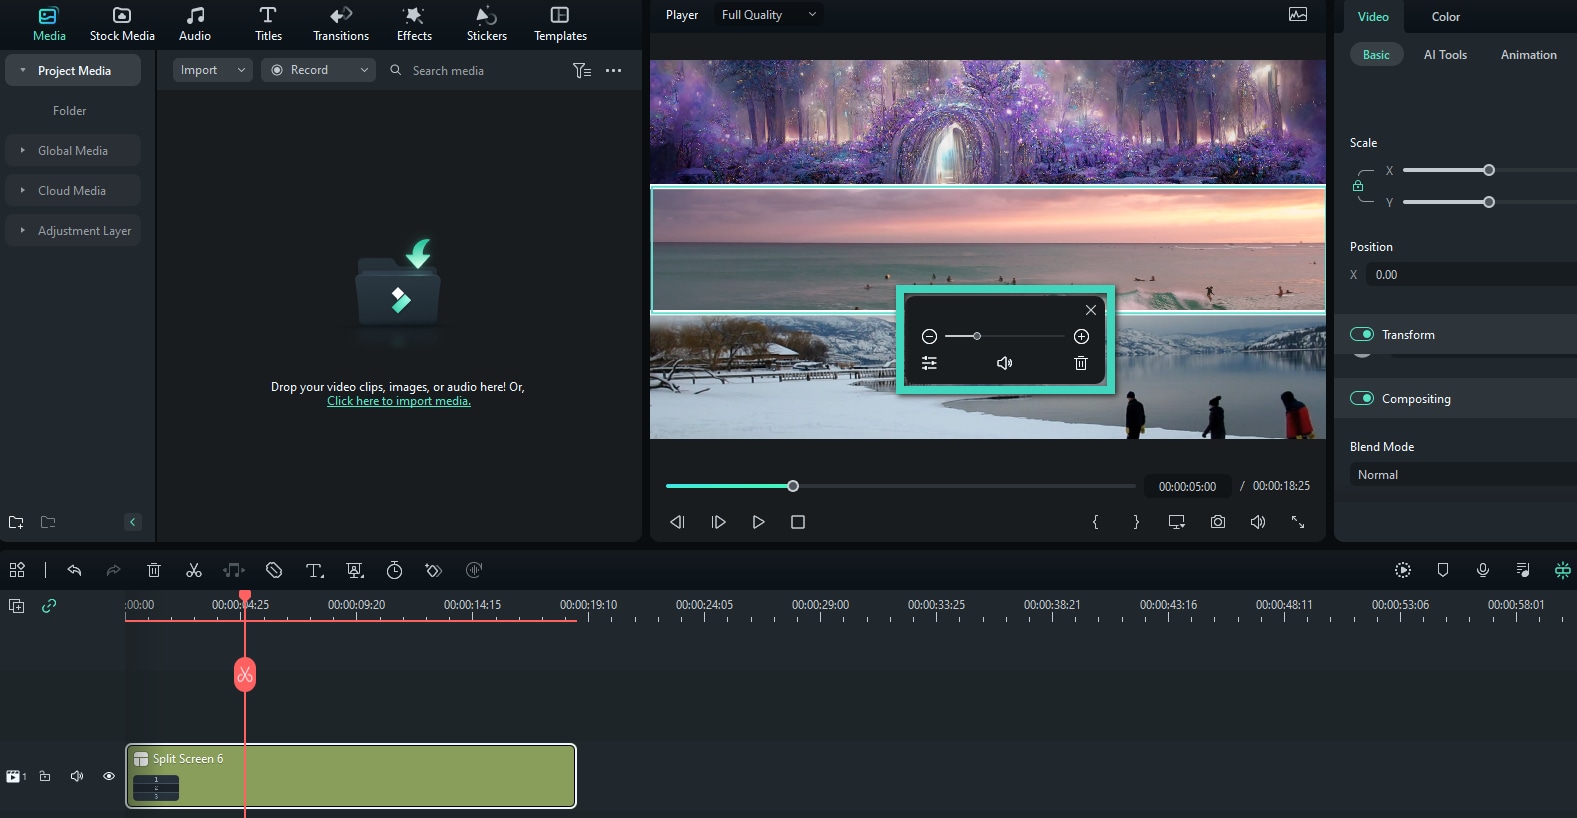
Step3Adjust and Customize
After applying a split screen template, you can further customize it by adjusting the size and position of each video clip within the template. Use the controls provided to resize, reposition, and crop each video segment to achieve the desired look.
Step4Add Transitions and Effects
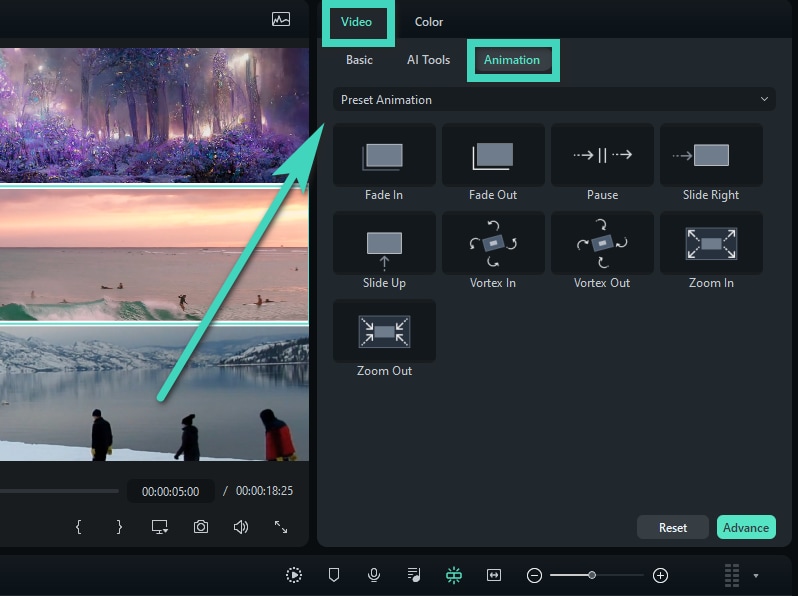
Next, enhance your split-screen presentation by adding animations to each video clip. Just click Video > Animation in the right panel.
There, you'll find a variety of animations such as fade-in, slight right, zoom-in, and more. Choose an animation that complements your video content and apply it to the clip on the timeline.
Step5Preview and Export Video
Once you're satisfied with your split screen composition, preview your video and make any final adjustments. When ready, export your project to your preferred video format and share it with your audience.
Why consider Filmora as an alternative to Final Cut Pro?
While Final Cut Pro is a powerhouse for professional video editing, its capabilities and price may not fit everyone's needs or budget. So, one of the recommended options is Wondershare Filmora, as it offers a more accessible and straightforward approach without compromising on essential editing tools. It's available on Mac and Windows.
Filmora strikes a balance between ease of use and functionality. It's designed for beginners and intermediate users who want to create polished videos without the steep learning curve. It offers a variety of split-screen templates that are easy to use, making it easier to create impressive split-screen videos.
Filmora for Mobile Filmora for Mobile Filmora for Mobile Filmora for Mobile Filmora for Mobile
Edit Videos on Your Mobile Phone with 1-Click!
- • Powerful Brand New AI Features.
- • User-friendly video editing for beginners.
- • Full-featured video editing for professional.


Part 4. Best Practices and Tips
Creating compelling split-screen designs requires attention to detail and a keen eye for composition. Here are some best practices to help you achieve professional results:
- Precision Editing: For precise alignment, you can zoom into your playback window and use the red box for better navigation. To maintain a consistent layout across clips, match their position settings.
- Borders & Background: Enhance visual clarity by adding borders around your clips. A border will leave a gap between clips in your split-screen video. You can do it on Filmora by clicking the Video > Basic tab on the Property Panel, and enabling Border.
- Adding Text Panels: Integrate text panels seamlessly into your split-screen composition to convey information or enhance storytelling. A text will help provide context or emphasize key points within your video.
- Correcting Wrong-Sized Clips: Make sure all the clips are the same size to maintain visual harmony. If a clip's size doesn't match, you can adjust it using the resizing or cropping options available in your editing software.
Conclusion
For today's tutorial, we have explored split-screen editing techniques using Final Cut Pro. From basics to advanced tips, you've learned how to use this tool to make your videos even more stunning.
However, if you need more accessible and easy tools, you can consider using Wondershare Filmora. Filmora is designed for beginners and intermediate users, so you can create your split-screen videos with ease.
