


 100% Security Verified | No Subscription Required | No Malware


 ChatGPT
 Perplexity
 Gemini
 Claude
 Grok
Grok
Adobe Premiere Pro allows you to create slow-motion effects or timelapse videos using its powerful time-remapping feature. Time remapping is a fantastic video editing technique that lets content creators enhance the visual appeal of their footage, giving their videos a professional-grade appearance.
Today, we'll delve deeper into Premiere Pro Time Remapping to help you understand how it works, when to use it, and more. We'll also provide a step-by-step guide to remapping time in Adobe Premiere Pro to help you navigate the process.
In this article
Time Remapping in Premiere Pro Explained
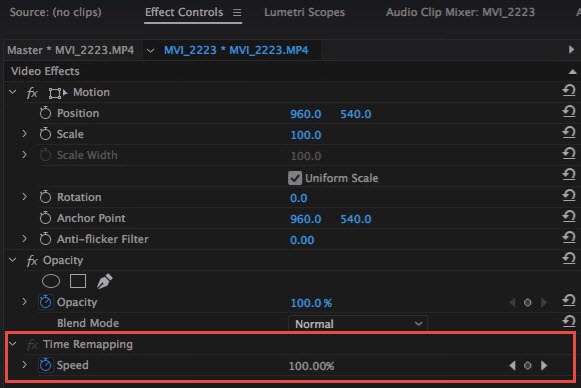
The Adobe Premiere Pro Time Remapping feature lets you change and alter the playback speed of your video footage, enabling you to make your clips run faster or slower. The feature helps you speed up or slow down your videos by creating and inserting time-remapping keyframes in the predefined positions, such as the start and end points of the speed change.
Remapping time in Premiere Pro also helps you create variable speed effects, freeze frames, manipulate footage timing, speed up slow-paced scenes, and create slow-motion videos. Adobe Premiere Pro allows you to remap time using two different modes – the Graph Editor and the Layer panel.
These modes provide a different view of the layer duration for each clip in your timeline:
- The Graph Editor – lets you preview the changes you specify over time by adding keyframes to the specific edits as you make them on the timeline. It also displays all your changes in a graph, along with other layer properties.
- The Layer panel – creates visual references of the frames you change and displays the frame numbers. The panel also showcases the time indicator to let you track and monitor the current time in the timeline using a remap-time marker.
You can use the marker to jump to specific portions of the clip in the timeline to quickly select the exact frame you want to playback at the current time.
Remember that you can view the video time-remapping results in both panels. Remapping a clip in one panel automatically showcases the output in both.
Who and When Can Use Time Remapping in Premiere?
You should use the Premiere Pro Time Remapping feature to create custom-made combinations of reverse, fast, and slow motion effects to diversify the speed of the portion of your video footage. It's perfect for altering the playback speed of your video clips, making them play faster or slower.
Anyone can use Adobe Premiere Pro Time Remapping to create slow-motion or fast-motion effects within a single clip. The feature allows content creators and video editors to apply a time-remapping effect to specific portions of their video footage to play videos backward, slow down, speed up their clips, etc.
Applying time-remapping to video footage with audio also allows you to synchronize the sound and image of your clip. You can time-remap audio tracks to produce scratchy or garbled sound effects, play audio backward, or gradually increase or decrease the audio pitch.
Using Time Remapping, you can perform the following:
- Alter the playback speed of your videos
- Reposition an unsplit speed keyframe according to your requirements;
- Move split-speed keyframes;
- Create slow, fast, or reverse motion;
- Play a video backward, then forward, and vice versa;
- Make swift adjustments to clip timings;
- Increase or decrease clip duration;
- Play videos at different speeds;
- Define time for different tracks and layers across particular playback positions.
How to Do Time Remapping in Premiere Pro
Download and install Premiere Pro on your computer, then follow the steps below to remap time within your footage.
Step 1: Launch Premiere Pro and import your video clip;
Step 2: Drag your video to the timeline;
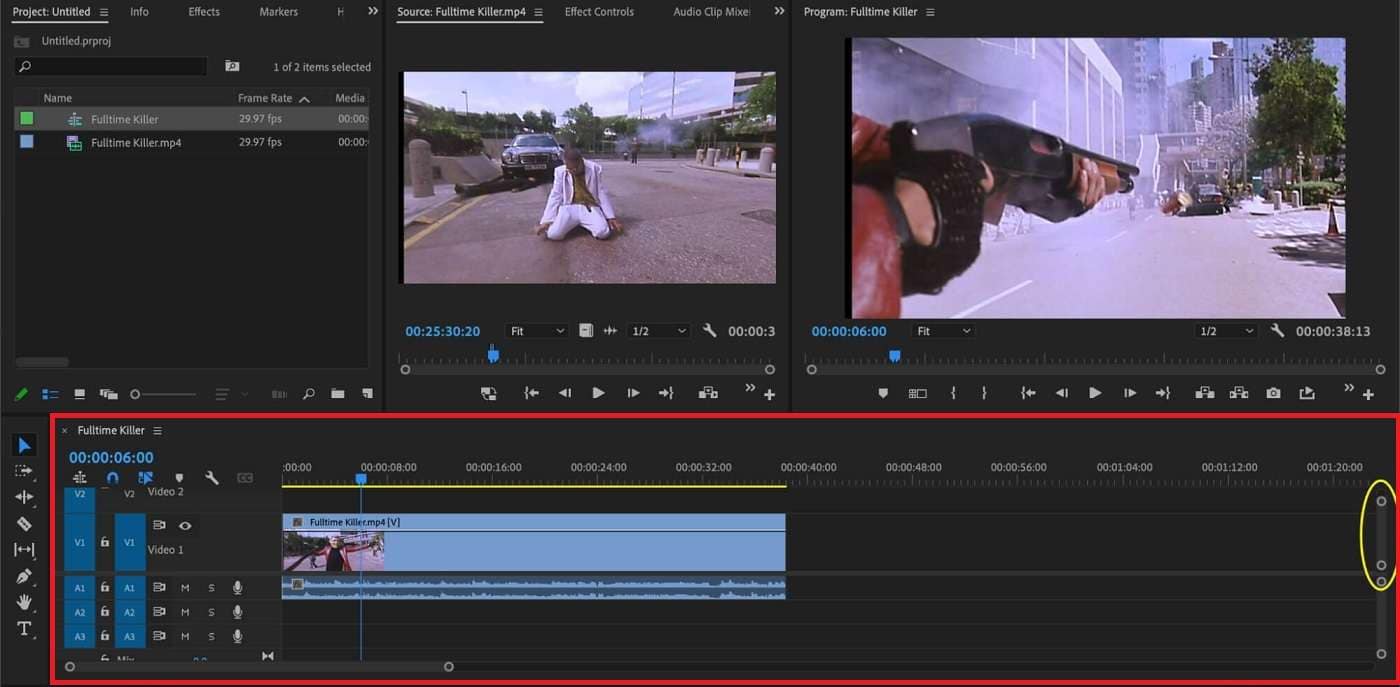
Step 3: Right-click it, and navigate to Show Clip Keyframes > Time Remapping > Speed;

Step 4: Click Speed to add time remapping controls (white lines) to the clip in your timeline;
Step 5: CTRL-click the white line to activate an arrow with a dotted line (speed ramp marker);
Step 6: Move the markers up and down to create different playback speeds for your video clip;
Step 7: Move the markers left or right to create speed transitions.

Alternative to Adobe Premiere Pro for Time Remapping - Wondershare Filmora
Adobe Premiere Pro Time Remapping has many practical applications that can help you enhance your video footage. However, this feature requires a decent amount of tech-savvy knowledge to ensure smooth navigation and execution.
If you've never used Time Remapping in Premiere Pro before, a more user-friendly alternative might come in handy. Wondershare Filmora Speed Ramping is an excellent alternative to Time Remapping in Premiere Pro thanks to its user-friendly, automated interface and streamlined navigation.
Filmora allows you to apply top-grade speed ramping effects to your clips to alter the playback speed of your videos according to your needs. It offers several speed ramping templates and presets to help you get ahead of time mapping within the timeline.
In addition, you can custom-make personalized time remapping templates using Filmora's advanced speed ramping effects while maintaining image and sound synchronization, your audio's pitch, and the desired audio/video quality.
Filmora's AI Frame Interpolation also allows you to optimize your video footage by adding super slow motion effects and ensuring smoother speed transitions. With Filmora, you can simplify time remapping using a built-in speed ramping feature to create enhanced transitions and adjust the playback speed of your videos according to your requirements.
How to Do Time Remapping in Wondershare Filmora
Download and install Filmora on your computer, then follow these steps to alter the playback speed of your video clip.
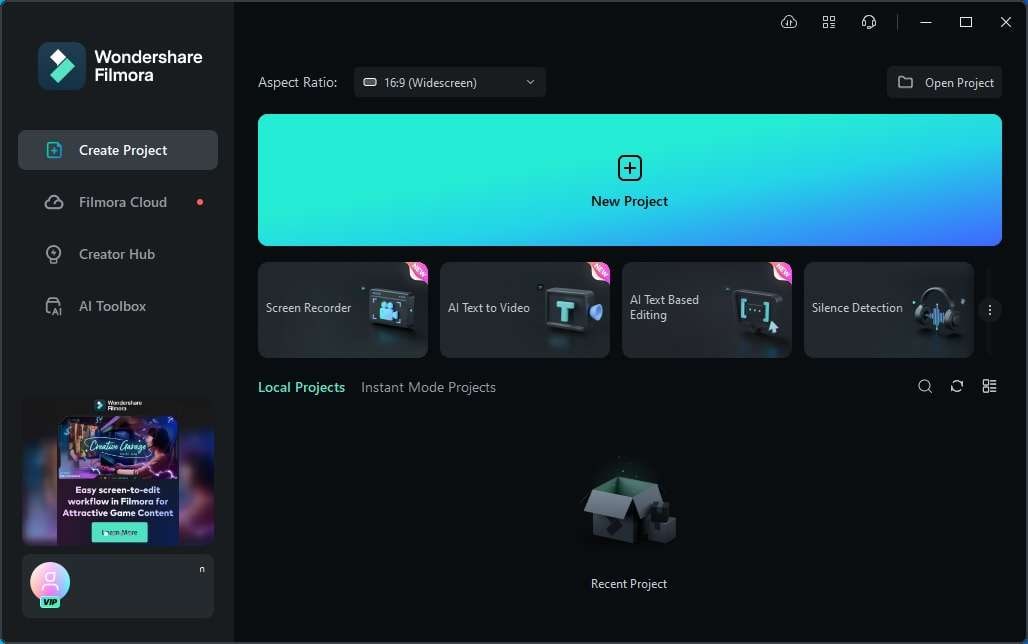
Step 1: Launch Filmora and select Create Project > New Project;
Step 2: Import your video and drag it to the timeline;

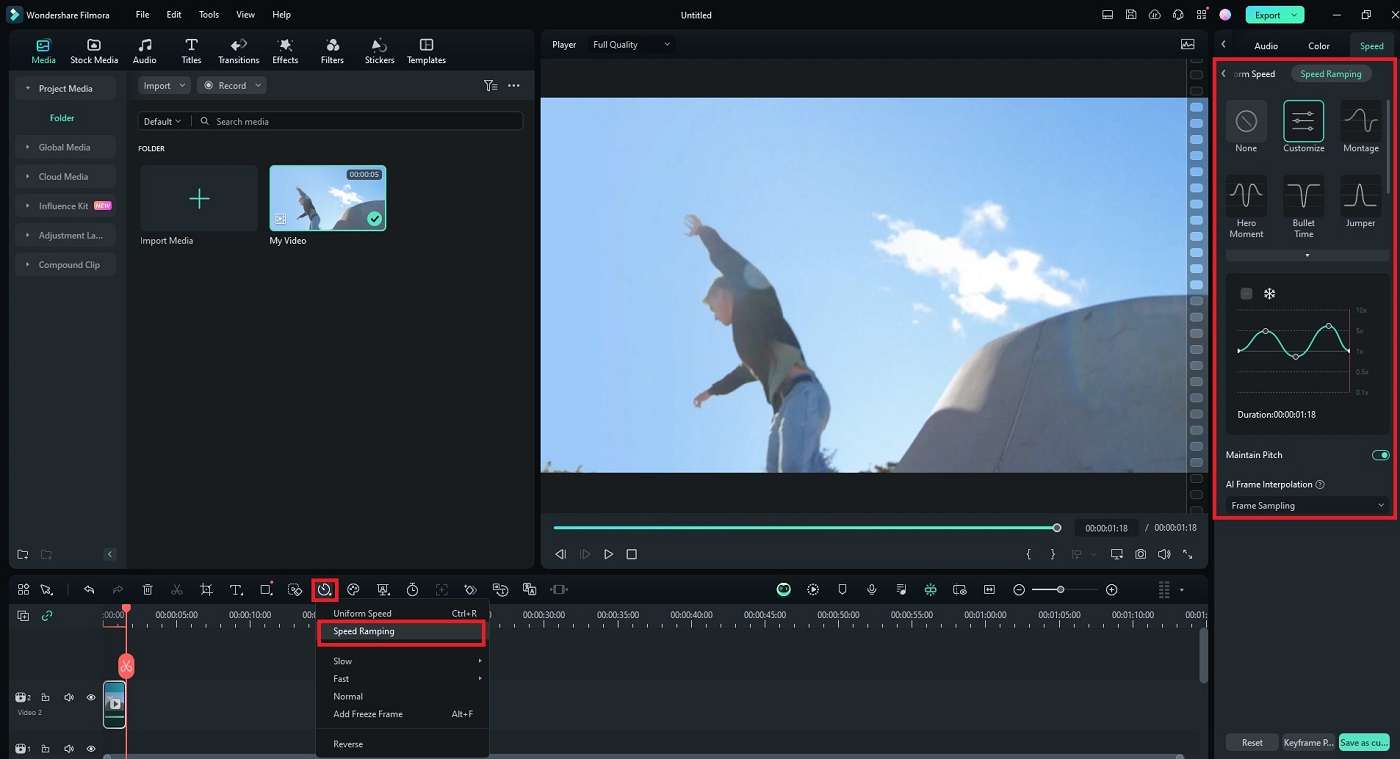
Step 3: Click the video in the timeline to open the Editor panel and click the Speed icon;

Step 4: Navigate the Speed Ramping panel to Speed > Speed Ramping;

Step 5: Move the playhead to the specific positions where you wish to set the start and end points to speed up or slow down the playback speed of your clip;
Step 6: Click Add to set speed keyframes for the start and end points. Filmora will automatically create speed markers on the audio/video clips in the timeline.
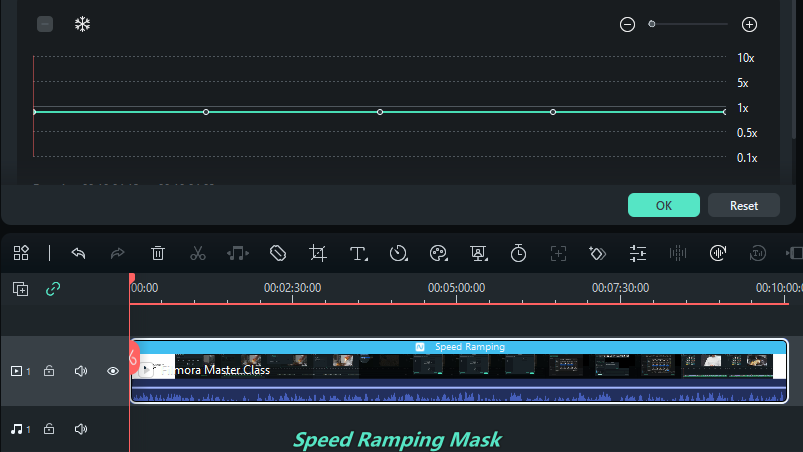
Step 7: Now, adjust the curves between the speed markers to create the time-remapping effects and speed changes by dragging them up or down;
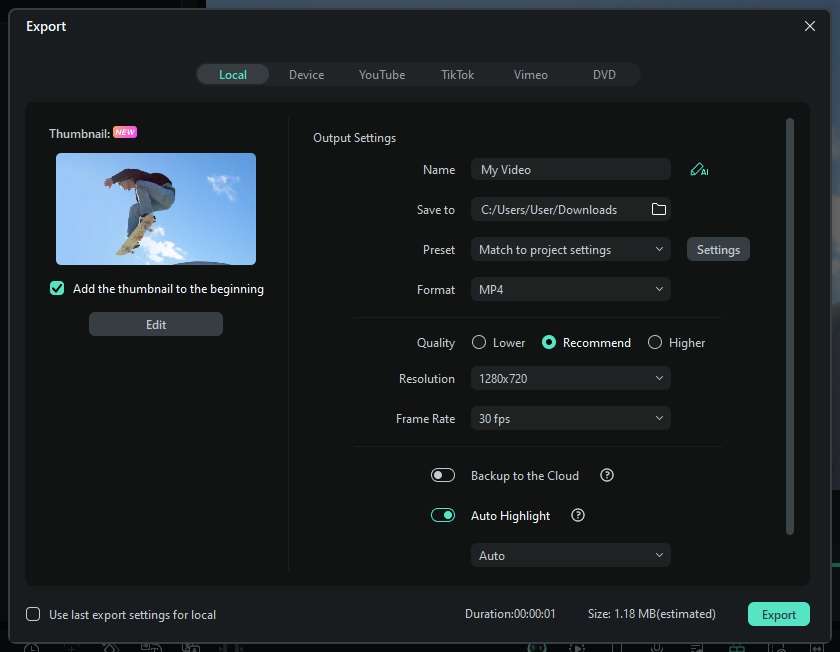
Step 8: Click OK > Export, select the preferred video format, quality, and frame rate, then click Export again to save your time remapping adjustments.
Conclusion
Time Remapping in Premiere Pro lets you manipulate the playback speed and timing of your videos to enhance your content and make it more engaging. The feature also enables you to add a dramatic effect to your video clips for more impact on your viewers.
You can use Time Remapping to create slow or fast motion effects, freeze frames for streamlined frame-by-frame editing, speed up or slow down your videos, create speed ramps, enhance your video editing skills, and transform average content into a more engaging and dynamic video.
However, Premiere Pro time remapping isn't the most suitable option for all content creators, especially those with limited technical skills and Adobe Premiere Pro knowledge. If you have no previous experience with Premiere Pro, use a more user-friendly alternative like Wondershare Filmora.
Filmora's intuitive Speed Ramping and automated and streamlined interface allow you to simplify the time remapping process and get ahead of your footage's timing like a true professional.
FAQ
-
What is the difference between speed settings and time remapping in Premiere Pro?
Speed/duration settings change the clip's playback speed and duration, allowing you to speed up or slow down your footage. On the other hand, Time Remapping lets you remap time to vary the playback speed of specific portions of your footage. In addition, it can create fast or slow-motion effects within a single video. -
How can I enable time remapping in Premiere Pro?
Here are the steps to enable time remapping in Premiere Pro:
-
What are the primary uses of remapping in Premiere Pro?
The main uses of time remapping in Premiere Pro include: - Create speed variations within video footage;
- Create slow and fast motion effects within a single clip
- Move split-speed keyframes to specific positions;
- Create the reverse motion effects;
- Freeze frames;
- Position unsplit speed keyframes.
-
How can I create smooth transitions when performing time remapping in Premiere Pro?
You can create seamless speed transitions by creating and adjusting speed keyframes. You can split them in half to set several keyframes and specify the beginning and ending positions of a speed-change transition.
-
Why is my video not working properly after using time remapping in Premiere Pro?
If time remapping isn't working in Adobe Premiere Pro, check the following things: - Ensure you've followed the correct steps (Effects Control Panel > Show Clip Keyframes > Time Remapping > Speed);
- Try readjusting the clip's speed by dragging the line up or down;
- Make sure your footage is compatible with the Time Remapping feature;
- Check the frame rate (remapping clips with variable frame rates might cause playback issues);
- Update Premiere Pro to remove any software glitches or bugs.
